
Installed headers, 3.42 diff, TC and Tunnel plate (Mega-pics)
 07-09-2007, 11:41 PM
#1
Team Owner


Thread Starter
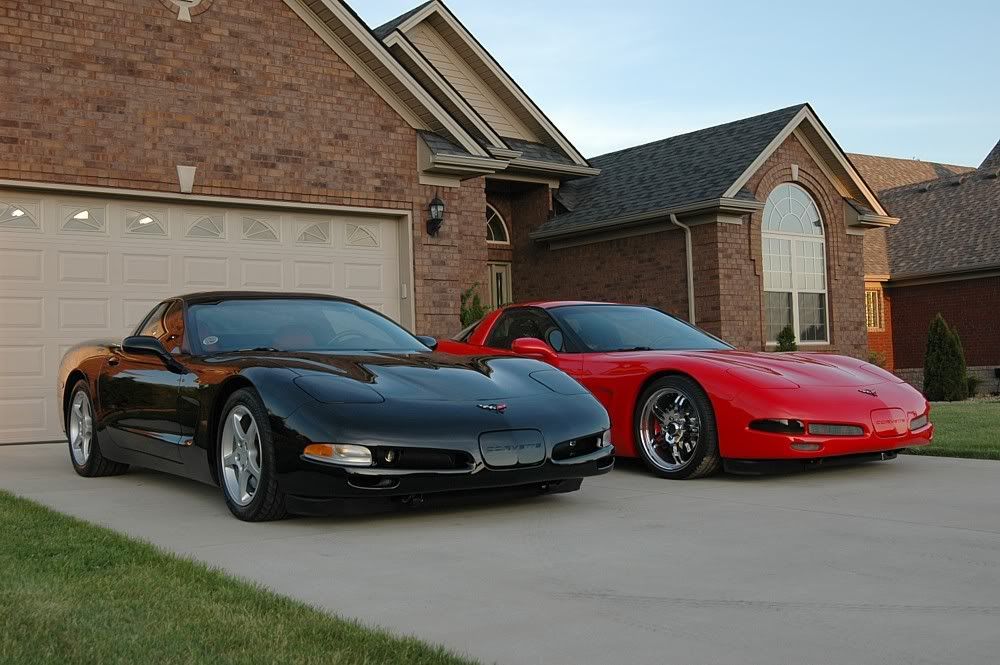
I had mentioned that I felt the A4 C5 I bought for Mrs. Patches was in need of a little massaging but I promised her I wouldn't break into the engine (yet  ). For the past few weeks I have been preparing for the changeover by buying all the parts and taking a few days off of work. My plans included headers, a 3.42 ratio diff, a high stall torque converter, a tranny oil cooler and an insulated tunnel plate. Last week, I started on July 4th and finished off the last couple of details today.
Mrs. Patches, when she wasn't busy, spent a bit of time assisting me and shot a few of the following pics.
The following is a photo-logue of the project.
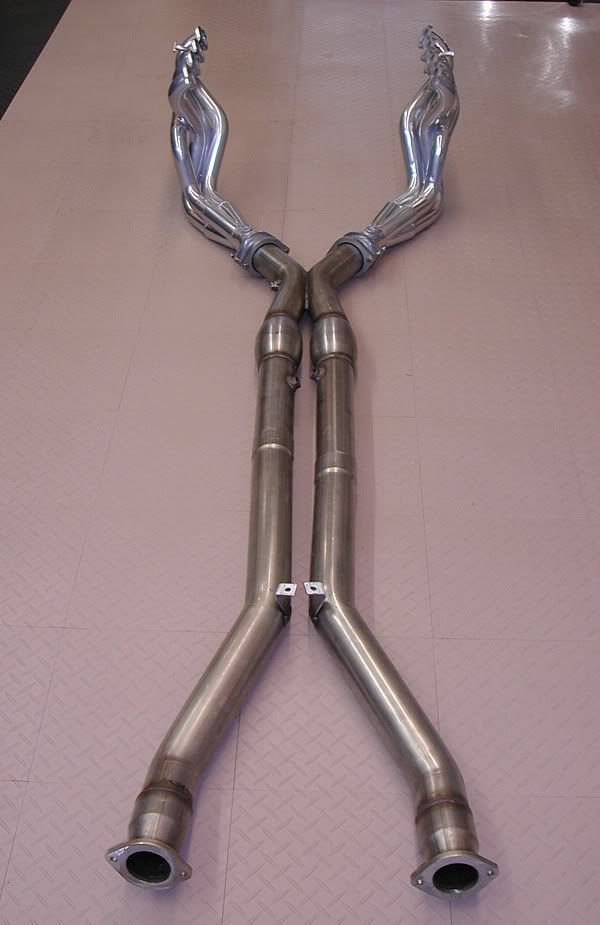
I pre-assembled the American Racing Headers when they arrived to check out the fit.
I had the headers ceramic coated to reduce the under hood heat.
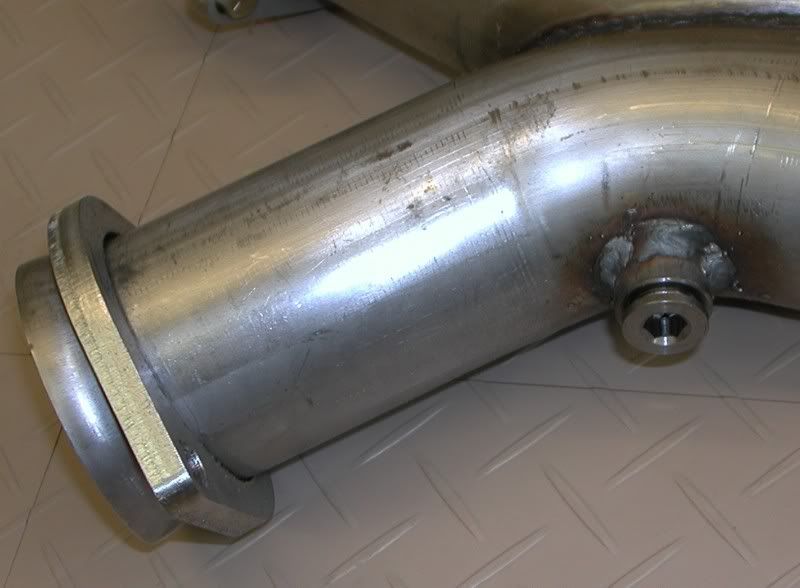
I had an extra bung welded in for future WB use.
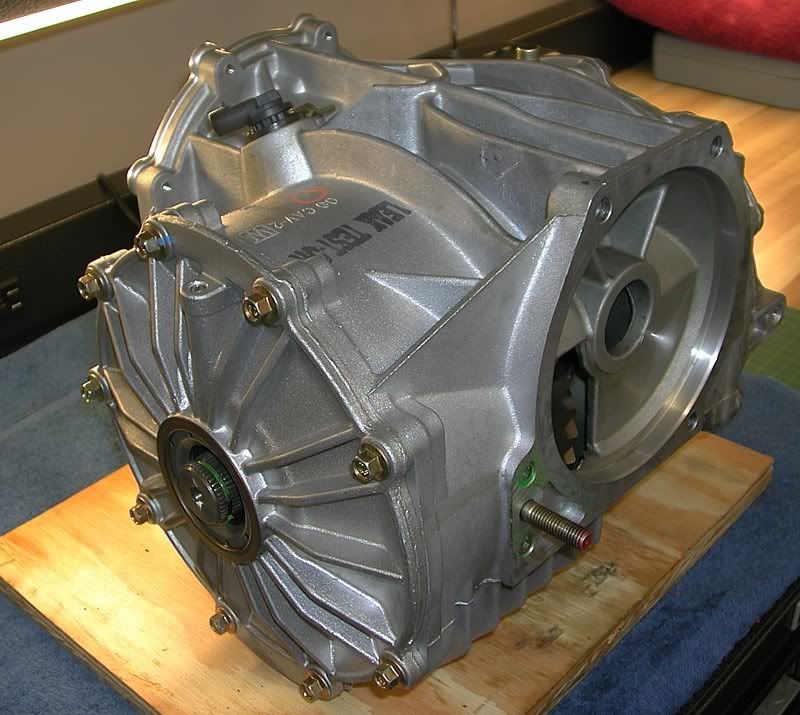
This 3.42 ratio diff is the one out of my M6 C5 that I put 4.10�s in when the car had ~3K miles on it so it�s just broken in.
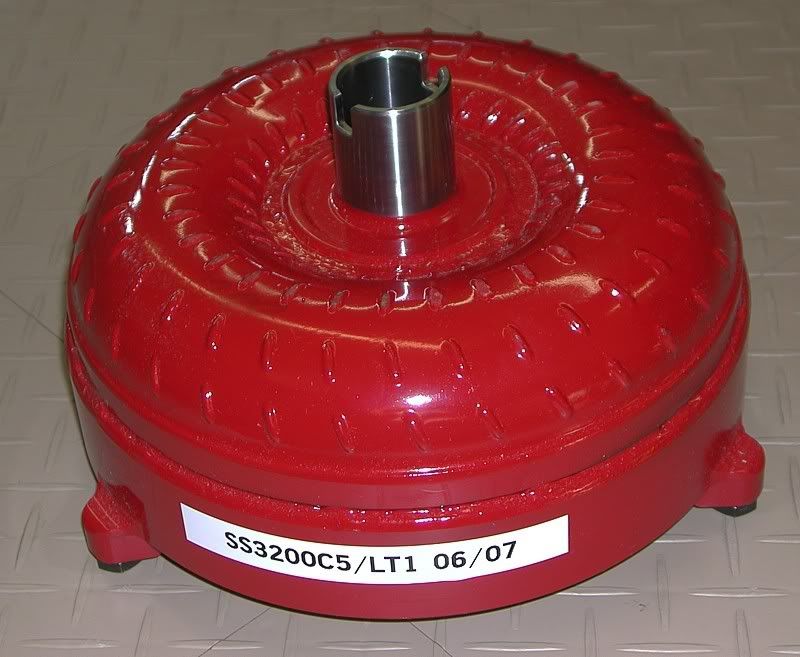
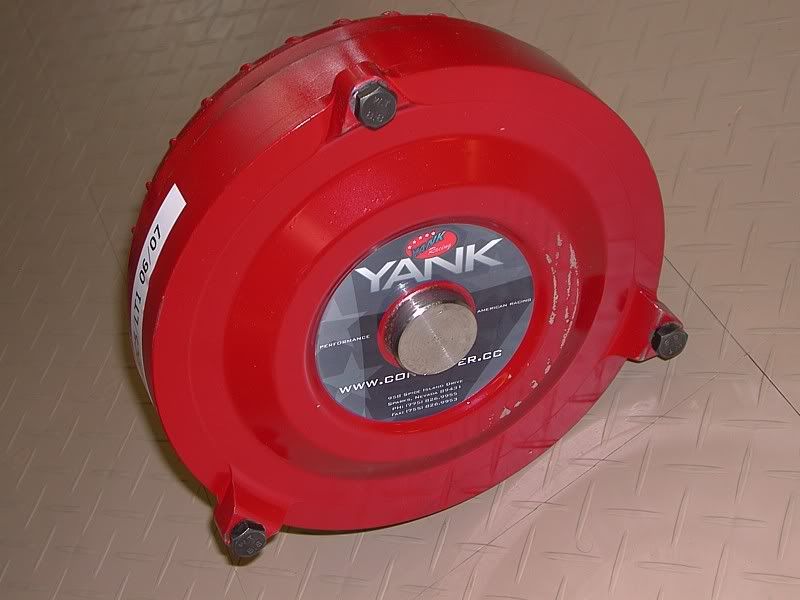
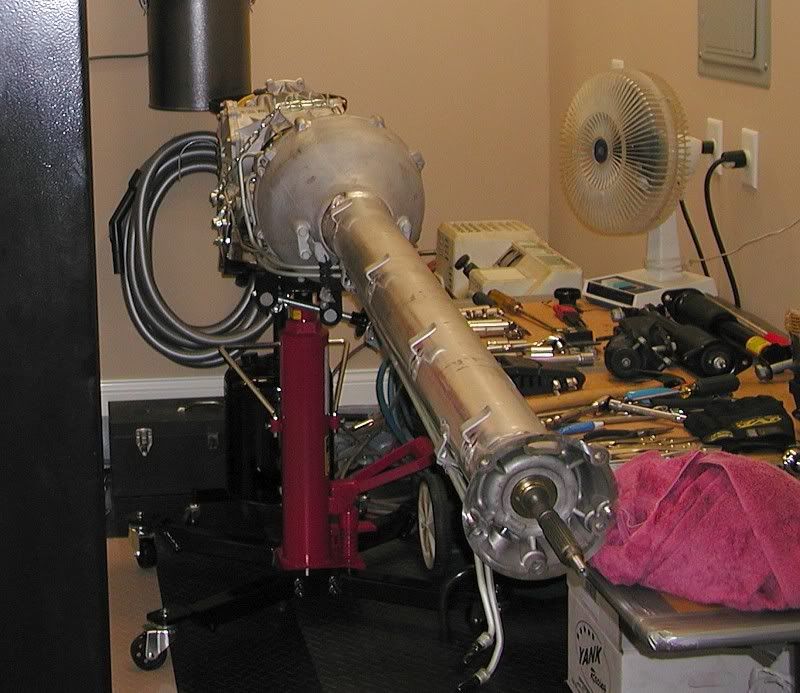
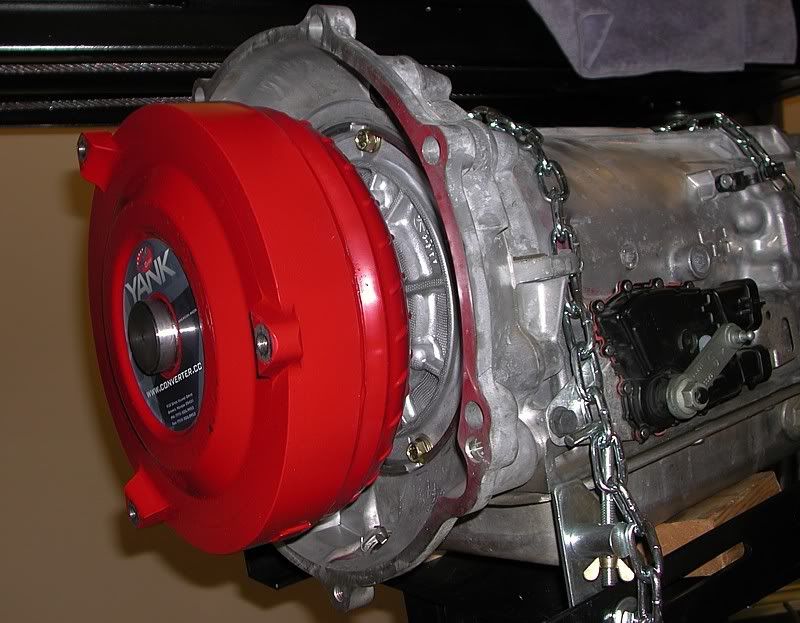
The Yank SS3200 torque converter I ordered. Dave made this and shipped it to me in record time when another vendor dropped the ball in sending me another TC I had ordered earlier. In retrospect, I am very happy about that � but more on that later.
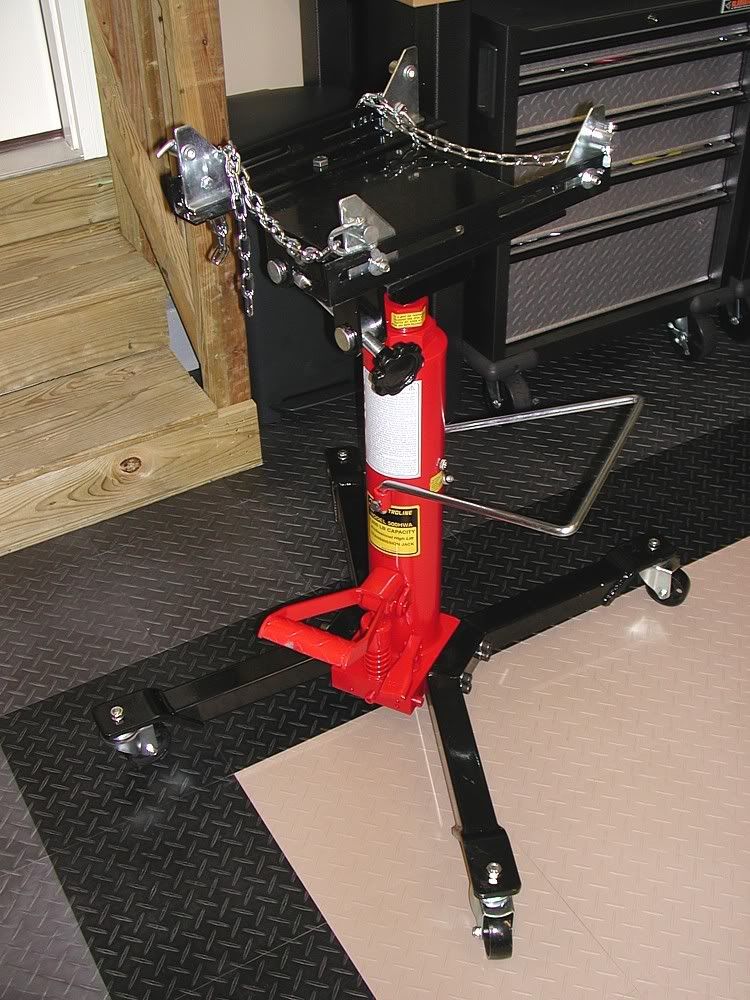
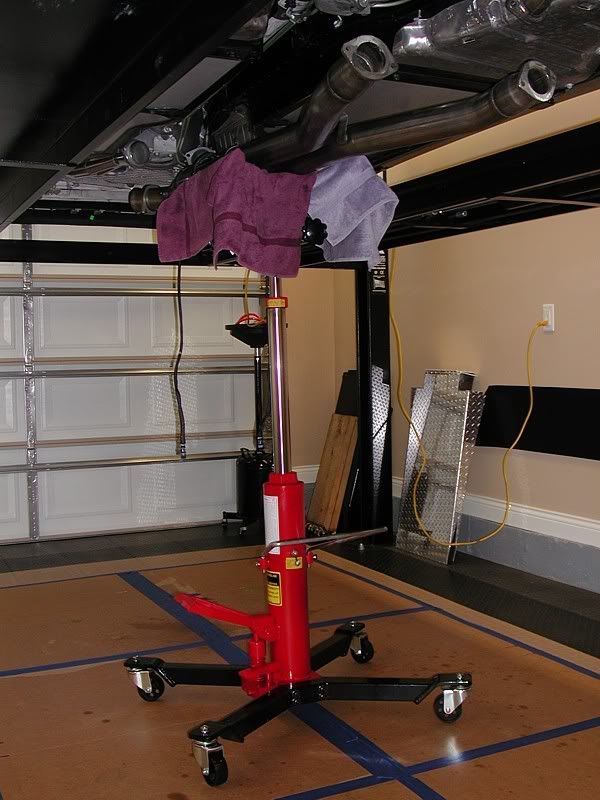
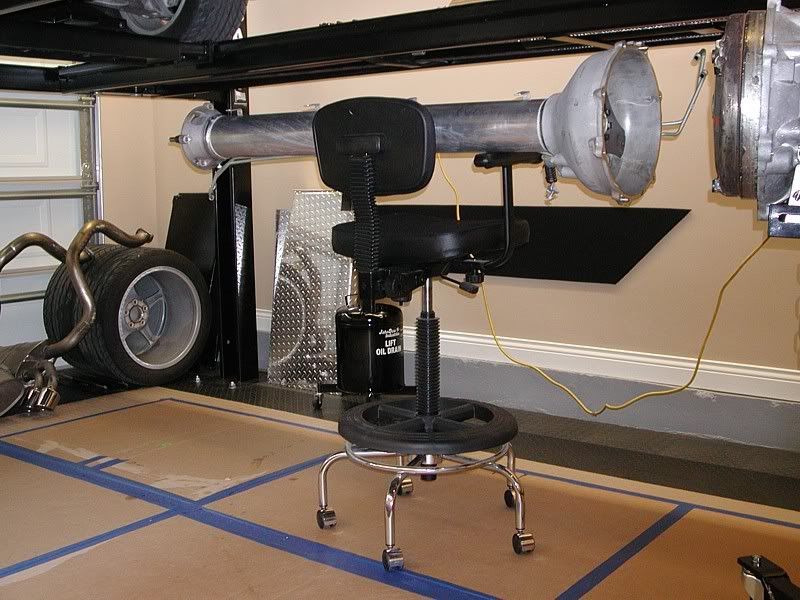
I picked up a 72� tranny jack for a great price. This came in very handy.
In anticipation of a bit of messiness, I laid some cardboard down. I also rearranged some of the rolling cabinets to give better work area efficiency.

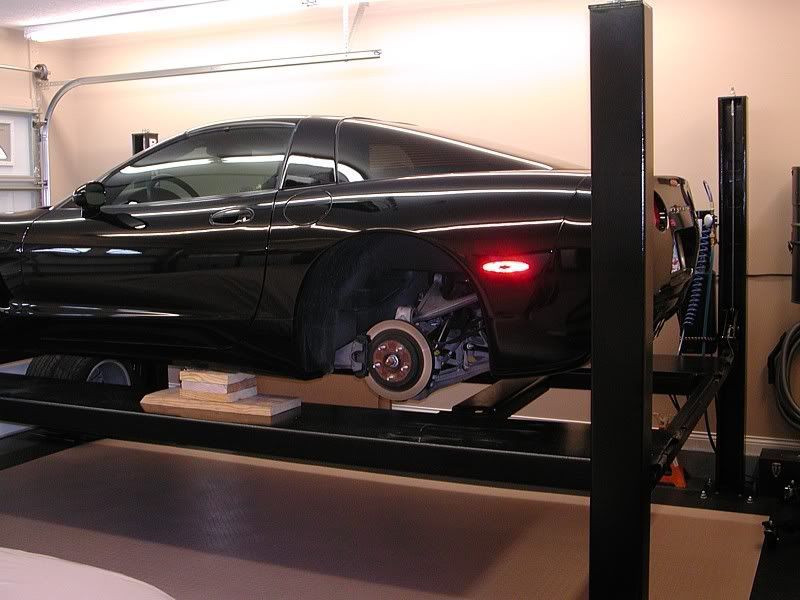
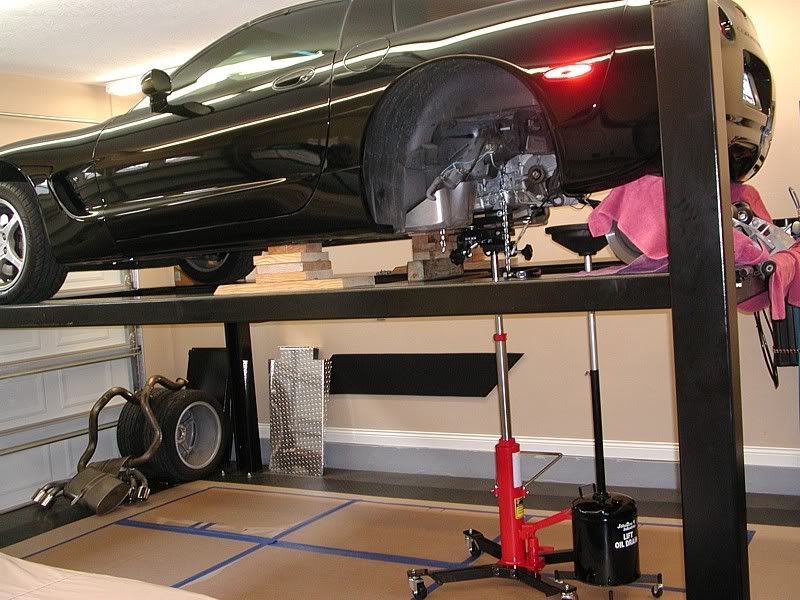
Got the car on the lift and jacked up to pull out the rear cross member.
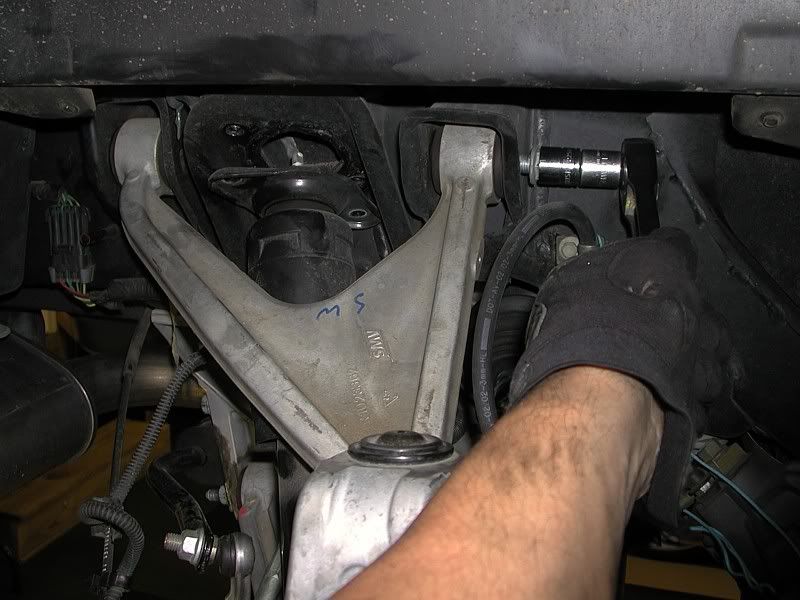
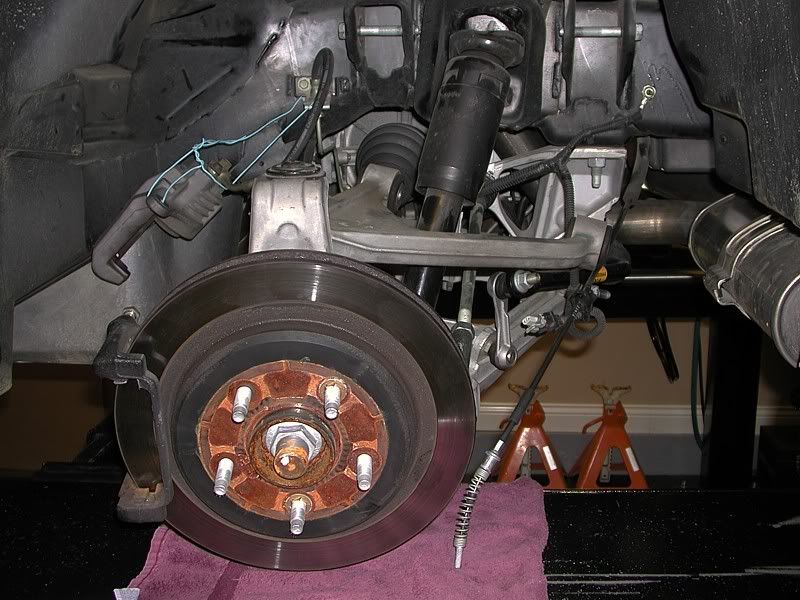
Disconnected the A-arms, shocks, brakes, etc.
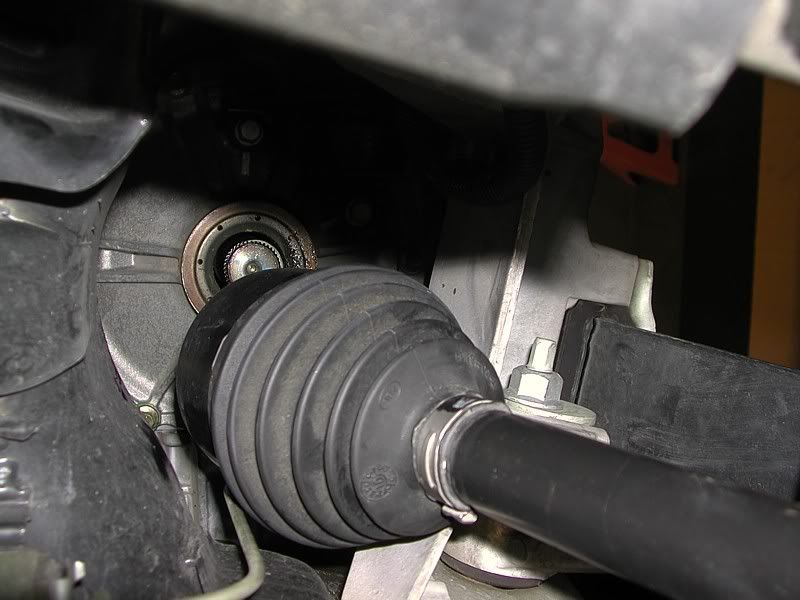
Popped the axles out.
Removed diff mount nuts.
Loosened the exhaust and started pulling it out.
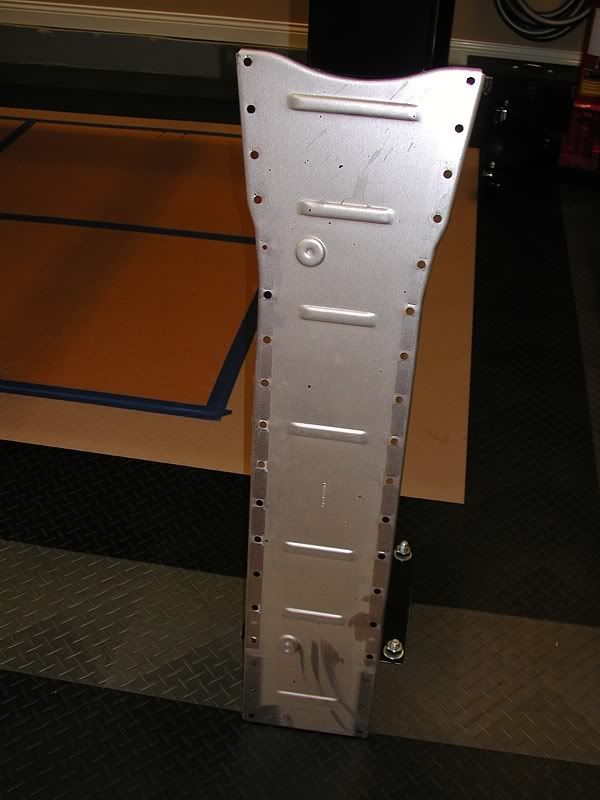
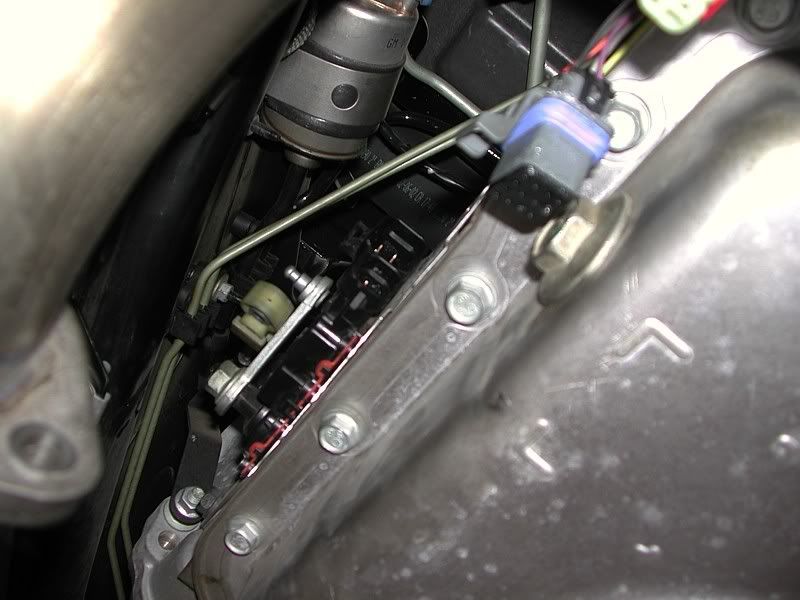
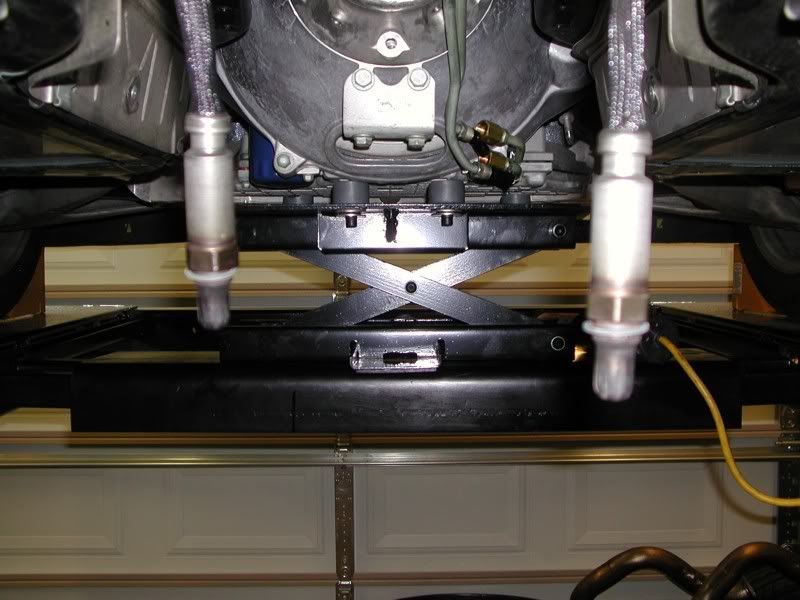
Got the tunnel plate out and exposed the drivetrain.
Placed support under the torque tube in preparing to remove the rear cross member.
Disconnected the electrical connectors on the tranny along with the shifter cable.
). For the past few weeks I have been preparing for the changeover by buying all the parts and taking a few days off of work. My plans included headers, a 3.42 ratio diff, a high stall torque converter, a tranny oil cooler and an insulated tunnel plate. Last week, I started on July 4th and finished off the last couple of details today. Mrs. Patches, when she wasn't busy, spent a bit of time assisting me and shot a few of the following pics.
The following is a photo-logue of the project.
I pre-assembled the American Racing Headers when they arrived to check out the fit.
I had the headers ceramic coated to reduce the under hood heat.
I had an extra bung welded in for future WB use.
This 3.42 ratio diff is the one out of my M6 C5 that I put 4.10�s in when the car had ~3K miles on it so it�s just broken in.
The Yank SS3200 torque converter I ordered. Dave made this and shipped it to me in record time when another vendor dropped the ball in sending me another TC I had ordered earlier. In retrospect, I am very happy about that � but more on that later.
I picked up a 72� tranny jack for a great price. This came in very handy.
In anticipation of a bit of messiness, I laid some cardboard down. I also rearranged some of the rolling cabinets to give better work area efficiency.
Got the car on the lift and jacked up to pull out the rear cross member.
Disconnected the A-arms, shocks, brakes, etc.
Popped the axles out.
Removed diff mount nuts.
Loosened the exhaust and started pulling it out.
Got the tunnel plate out and exposed the drivetrain.
Placed support under the torque tube in preparing to remove the rear cross member.
Disconnected the electrical connectors on the tranny along with the shifter cable.


Popular Reply
07-09-2007, 11:43 PM
Team Owner
Thread Starter
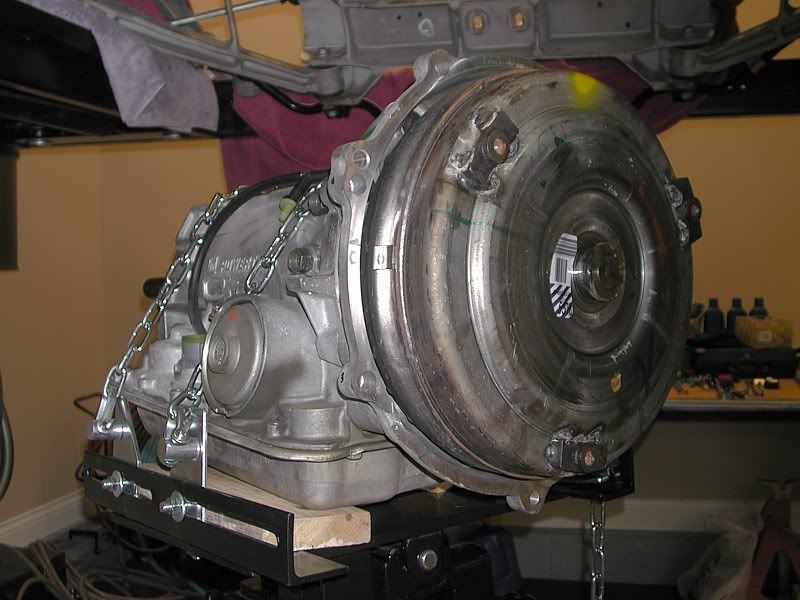
And torqued the three bolts through the flex plate.
Here’s the completed TT sub-assembly ready to be reinstalled.
Mrs. Patches caught me shoving the TT back into place. It actually went in quite smoothly. Once again, the tranny jack was more than worth the selling price when doing this task alone.
The drive train back in place and supported.
I pushed the crossmember back in position and lifted it into place with the jack. Then I jacked the lower A-arms up, reinserted the axles and reconnected the upper A-arms, shocks and brakes. Of course, there were the various lines, connectors and clips that need to be reconnected as well.
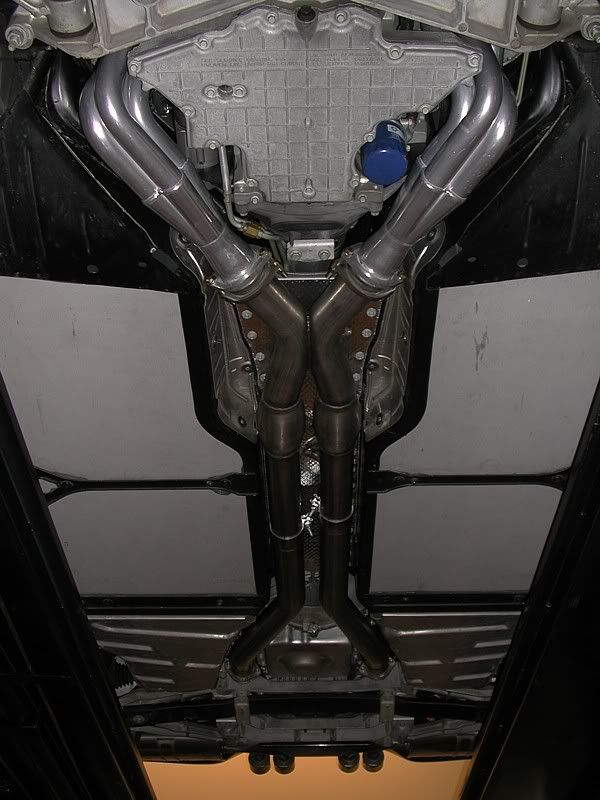
Moving on to the headers, I pulled the stock manifolds off and unbolted the starter.
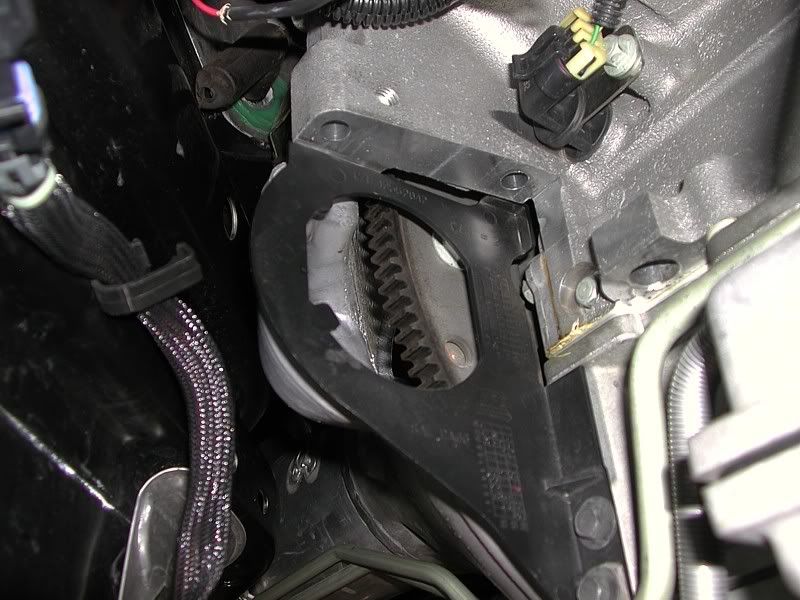
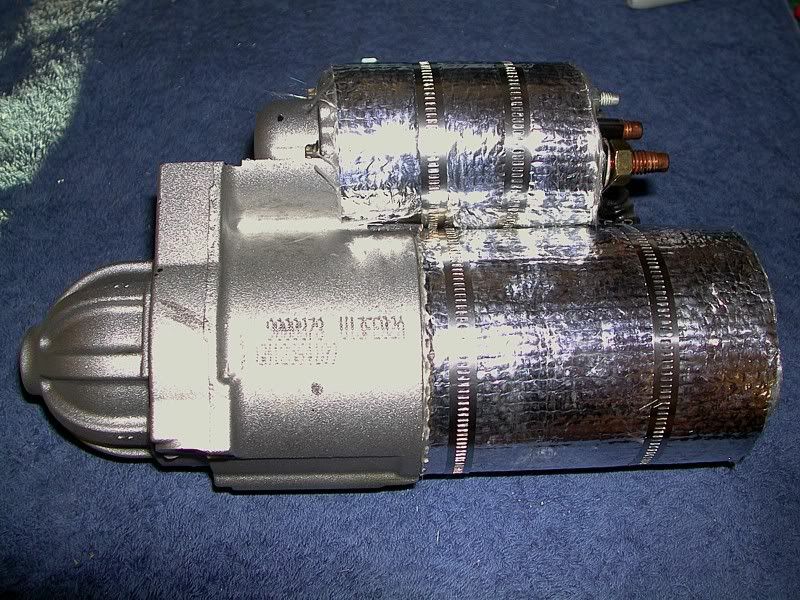
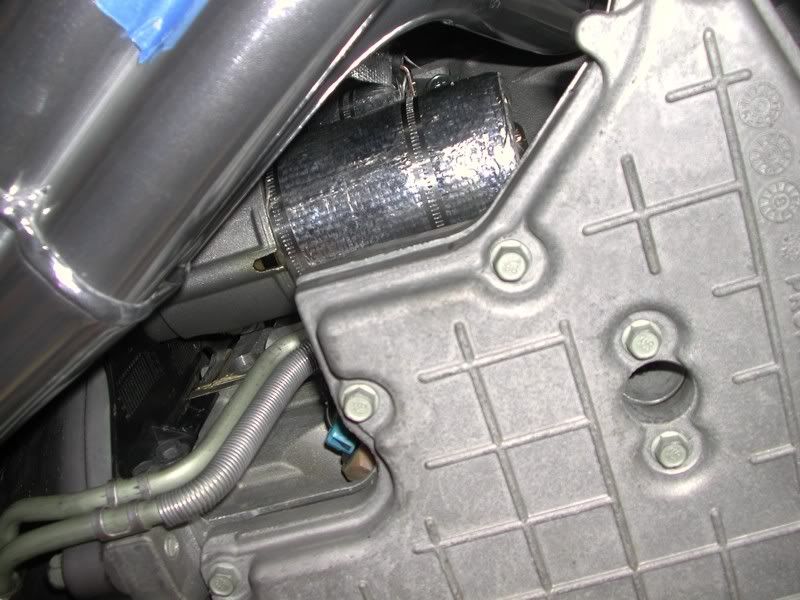
I had heat-shielded the starter on my M6 so I did the same with this one to protect it from any extra heat the headers might radiate.
The AR headers went in very easily but the starter wires weren’t as easy to reconnect as I had hoped. Still, they eventually went in fine.
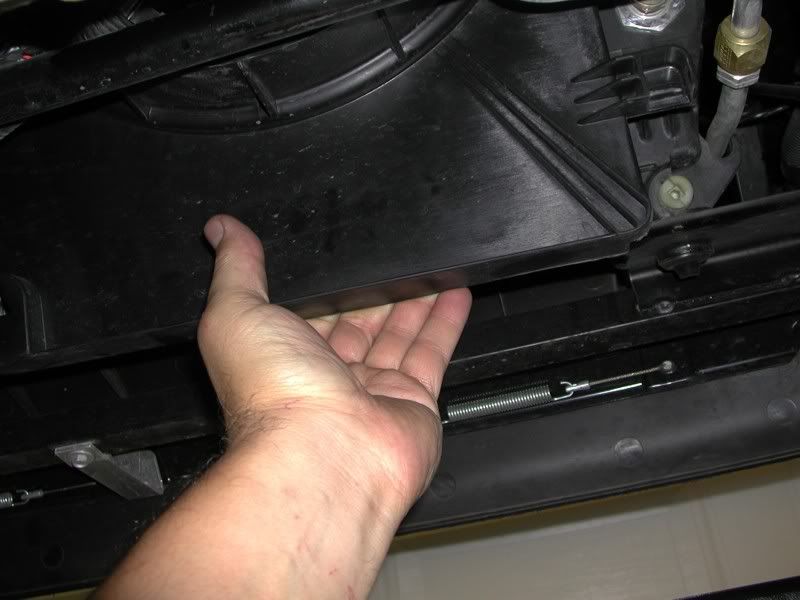
The trusty jack once again was handy in holding the tunnel plate up for installation.
Looked great in place.
I also used the jack to hold the mid-pipe section in place while I assembled the exhaust system.
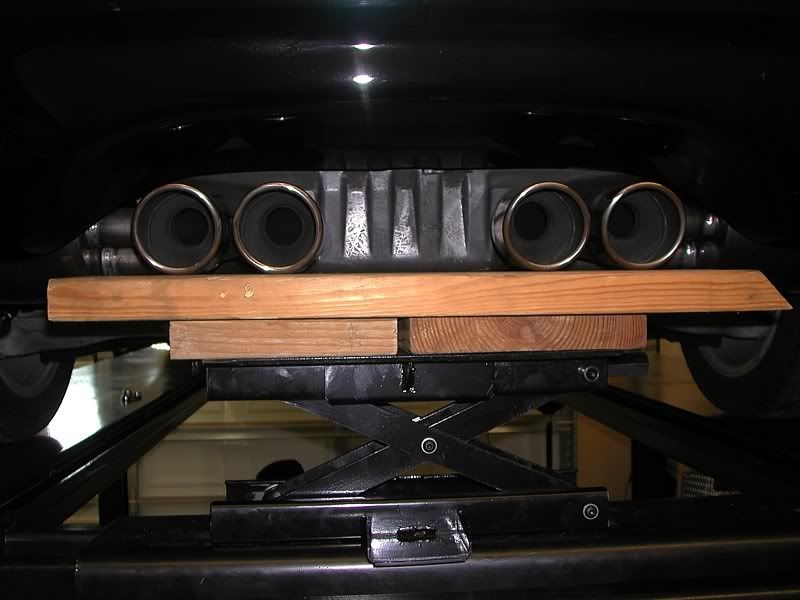
I devised this method to hold the muffler tips even while I tightened the bolts. Worked great.
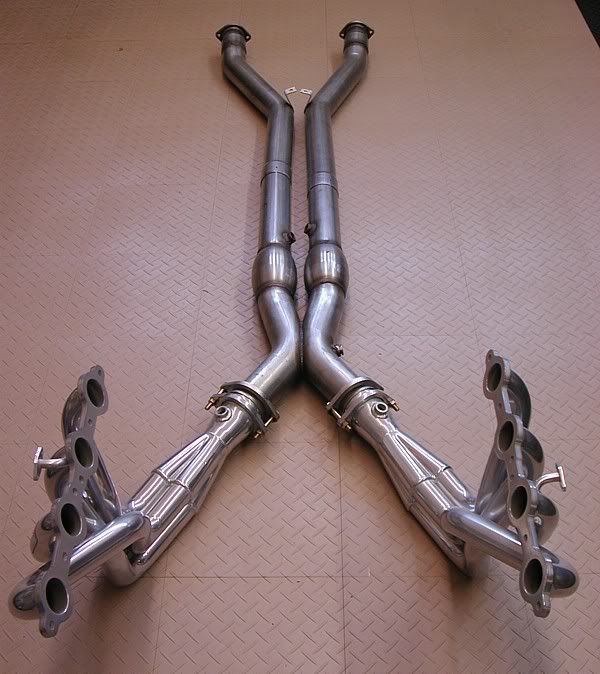
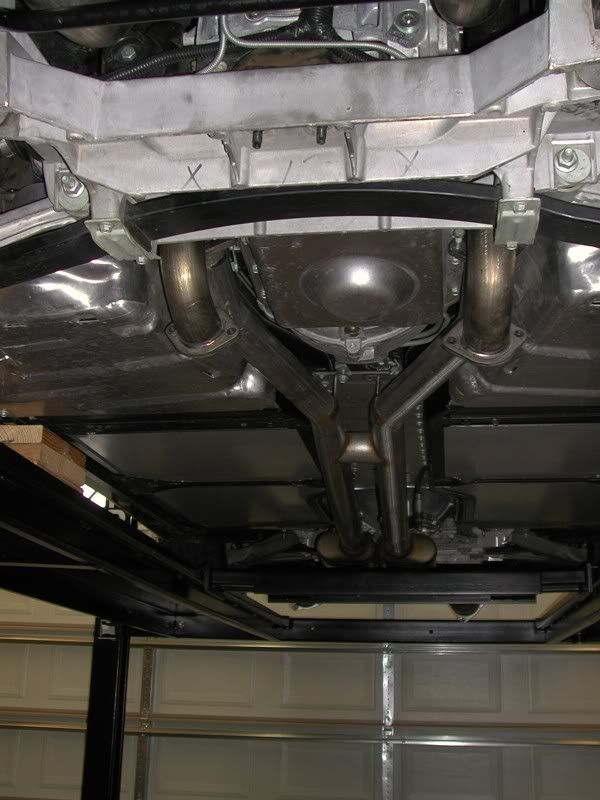
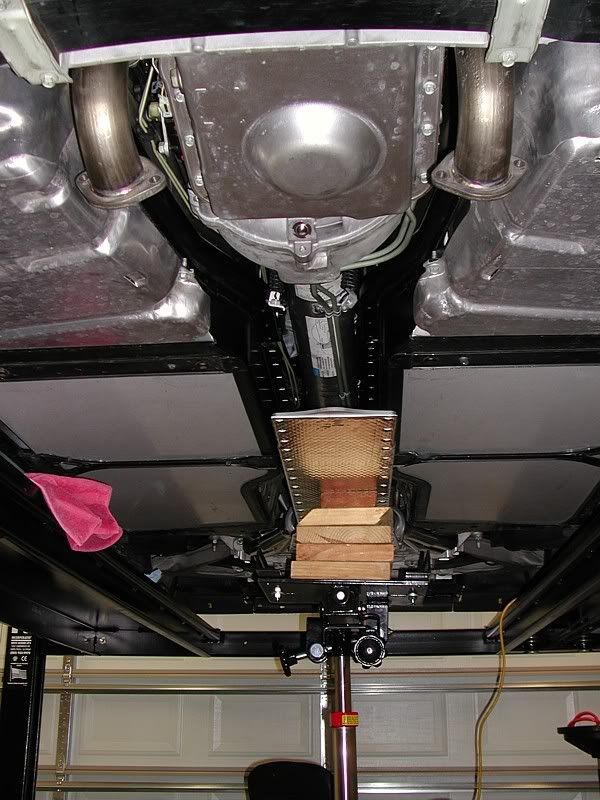
The completed exhaust setup.
To start the tranny cooler installation, I freed up the fan shroud to give me room to get behind the radiator.
I cleaned the radiator/condenser thoroughly.

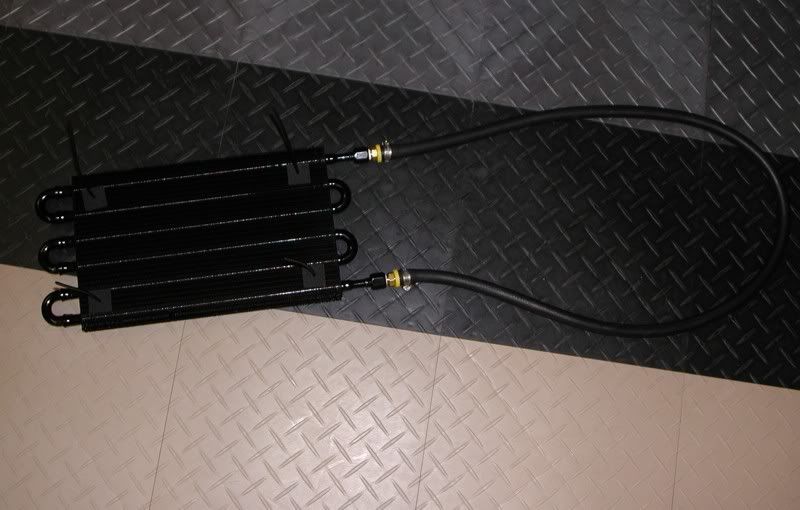
Assembled the cooler components.
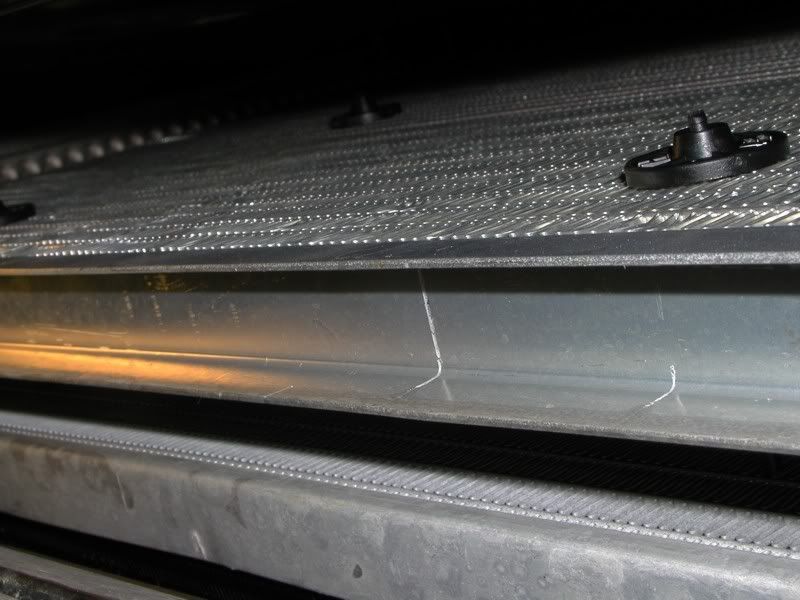
Placed the cooler in front of the condenser.
Here you can see the retainers at the back of the radiator.
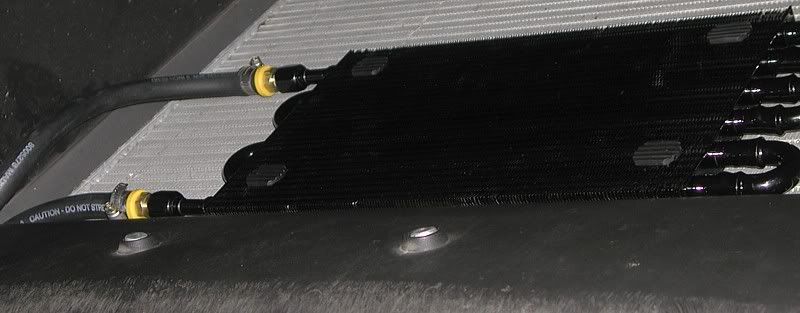
Getting the cooler hooked to the tranny fluid lines took a bit of imagination as there are no adapters for directly attaching a cooler to the lines for later model ‘02’s and later. I had to splice into the return line but it worked well. I also had an issue updating the PCM with the new diff ratio but I believe I now have that squared away as well.
After topping the tranny off with fluid and triple checking all my work. I took the car for a long, relaxing ride (Yank says to break in the TC for 120 miles before any WOT runs.) The A4 is like a whole different car. It accelerates with authority and sounds much better (gears, TC and headers). The car is so much more responsive I was taken by surprise. Small throttle inputs now create significant surges of thrust forward.
NO drivability has been lost – in fact, the car actually feels tighter than when it was stock. Mrs. Patches reminded me about the Elite tunnel plate I installed and the billet-feel I was experiencing made more sense. The response of the car is definitely what I was hoping for – and I have been light-footed so far in deference to the new TC. Can’t wait to see what WOT is like.
I have to rethink my whole attitude towards automatic Corvettes now. I have to say this A4 is very close to the fun factor of my head/cam/headered, etc. M6. Wait ‘til Mrs. Patches drives this thing – she may never let me into the driver’s seat again.
What a fun vacation!
Here’s the completed TT sub-assembly ready to be reinstalled.
Mrs. Patches caught me shoving the TT back into place. It actually went in quite smoothly. Once again, the tranny jack was more than worth the selling price when doing this task alone.
The drive train back in place and supported.
I pushed the crossmember back in position and lifted it into place with the jack. Then I jacked the lower A-arms up, reinserted the axles and reconnected the upper A-arms, shocks and brakes. Of course, there were the various lines, connectors and clips that need to be reconnected as well.
Moving on to the headers, I pulled the stock manifolds off and unbolted the starter.
I had heat-shielded the starter on my M6 so I did the same with this one to protect it from any extra heat the headers might radiate.
The AR headers went in very easily but the starter wires weren’t as easy to reconnect as I had hoped. Still, they eventually went in fine.
The trusty jack once again was handy in holding the tunnel plate up for installation.
Looked great in place.
I also used the jack to hold the mid-pipe section in place while I assembled the exhaust system.
I devised this method to hold the muffler tips even while I tightened the bolts. Worked great.
The completed exhaust setup.
To start the tranny cooler installation, I freed up the fan shroud to give me room to get behind the radiator.
I cleaned the radiator/condenser thoroughly.
Assembled the cooler components.
Placed the cooler in front of the condenser.
Here you can see the retainers at the back of the radiator.
Getting the cooler hooked to the tranny fluid lines took a bit of imagination as there are no adapters for directly attaching a cooler to the lines for later model ‘02’s and later. I had to splice into the return line but it worked well. I also had an issue updating the PCM with the new diff ratio but I believe I now have that squared away as well.
After topping the tranny off with fluid and triple checking all my work. I took the car for a long, relaxing ride (Yank says to break in the TC for 120 miles before any WOT runs.) The A4 is like a whole different car. It accelerates with authority and sounds much better (gears, TC and headers). The car is so much more responsive I was taken by surprise. Small throttle inputs now create significant surges of thrust forward.
NO drivability has been lost – in fact, the car actually feels tighter than when it was stock. Mrs. Patches reminded me about the Elite tunnel plate I installed and the billet-feel I was experiencing made more sense. The response of the car is definitely what I was hoping for – and I have been light-footed so far in deference to the new TC. Can’t wait to see what WOT is like.
I have to rethink my whole attitude towards automatic Corvettes now. I have to say this A4 is very close to the fun factor of my head/cam/headered, etc. M6. Wait ‘til Mrs. Patches drives this thing – she may never let me into the driver’s seat again.
What a fun vacation!
07-09-2007, 11:42 PM
#2
Team Owner
Thread Starter
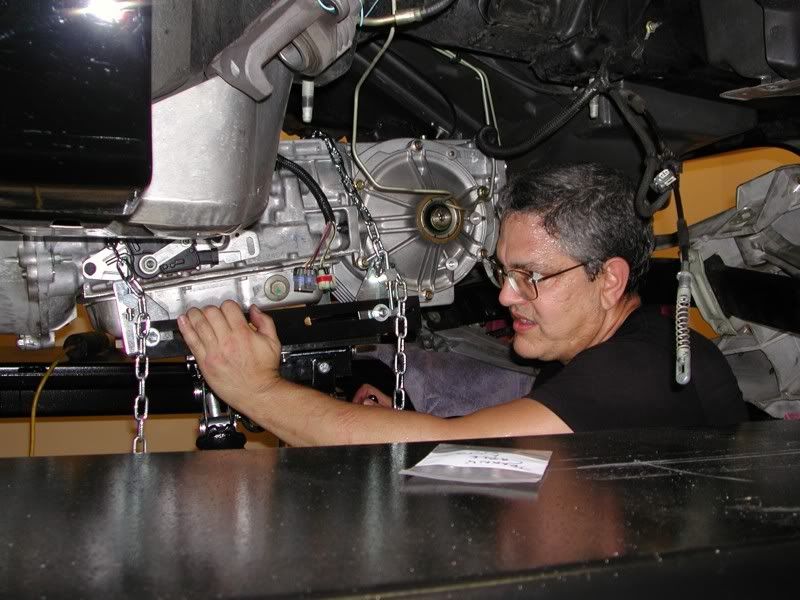
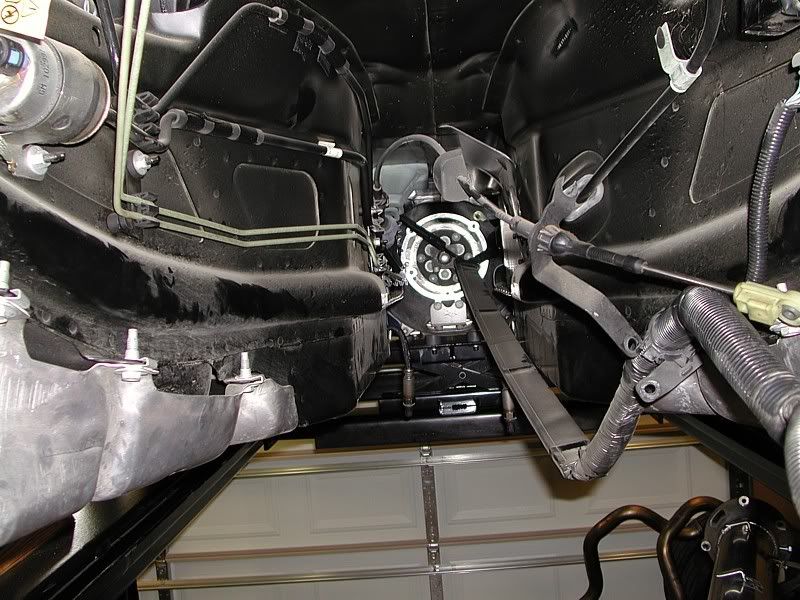
Then I used the tranny jack to lower the rear cross member to the lift runners on top of some towels. I slid the entire assembly rearward out of the way so it was out of the way when I dropped the drive train.

At this point, it was easy to drain the fluid out of the 2.73 diff and place the tranny jack under the tranny.
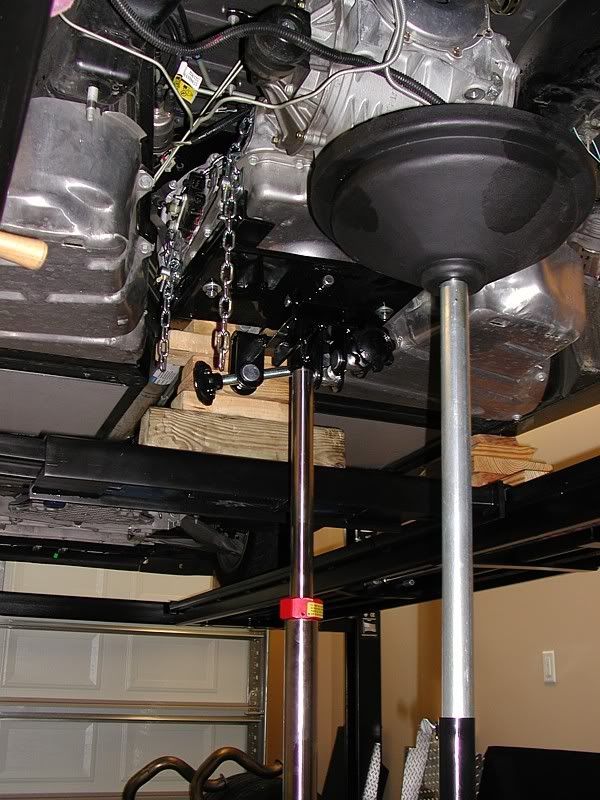
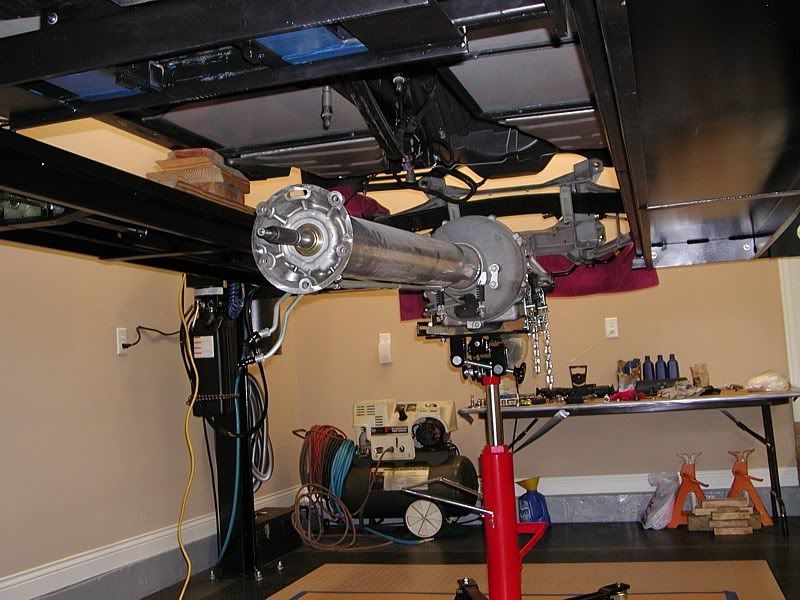
The drive train was ready to come out at this point.
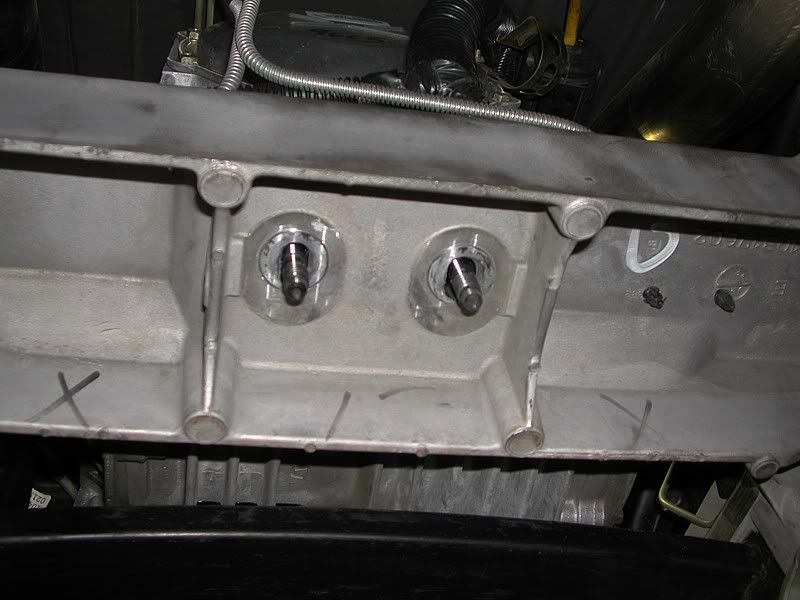
Next step was to pull the five front torque tube (TT) bolts.
I moved the jacking tray to the back of the engine to support it while the TT was off.
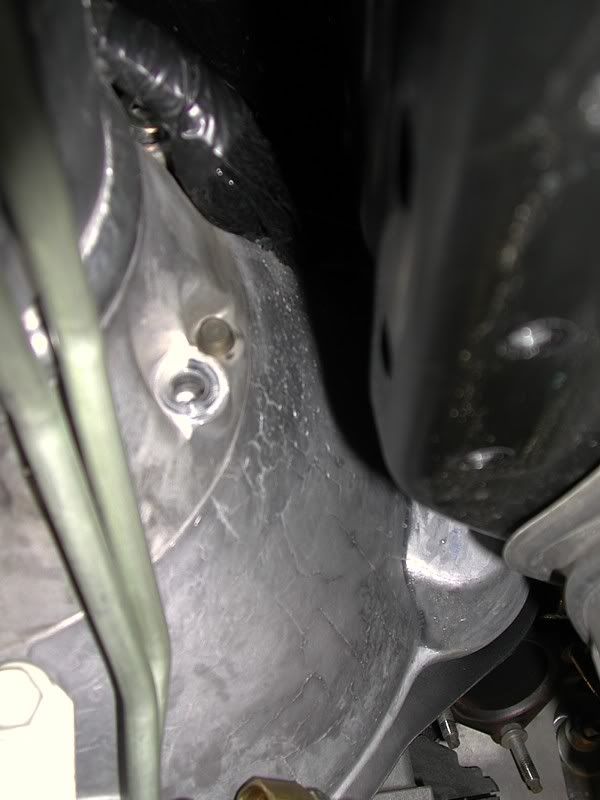
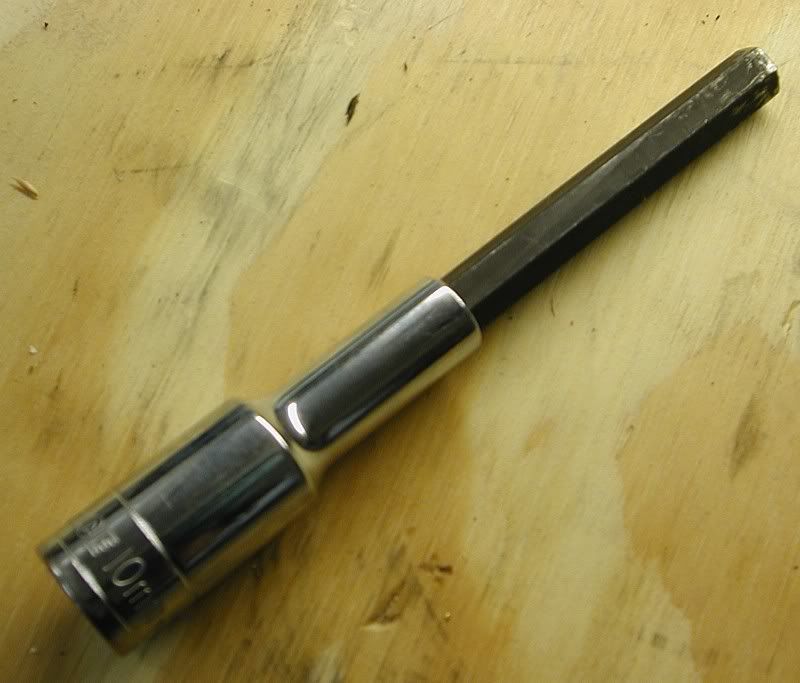
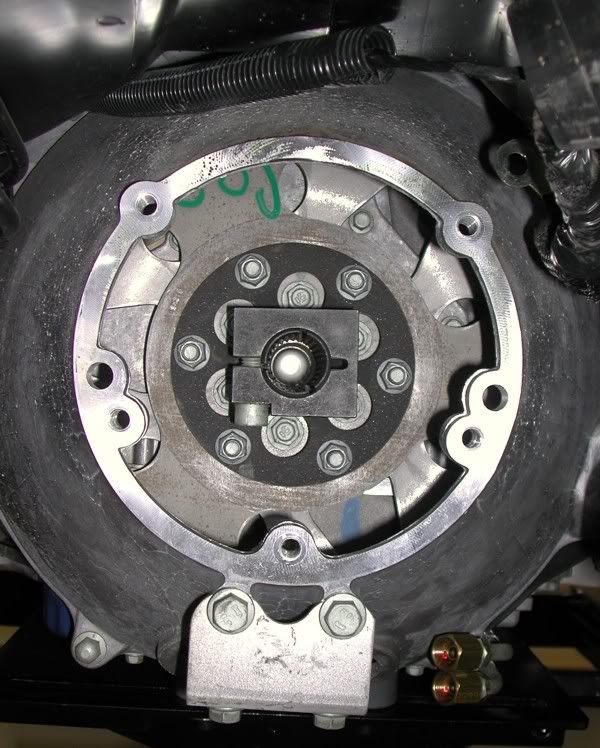
Btw, I cut the short leg off a 10mm allen key and used it with a deep socket to get to the drive shaft clamp screw in the bell housing.
Here’s a shot of the clamp after the TT was removed.
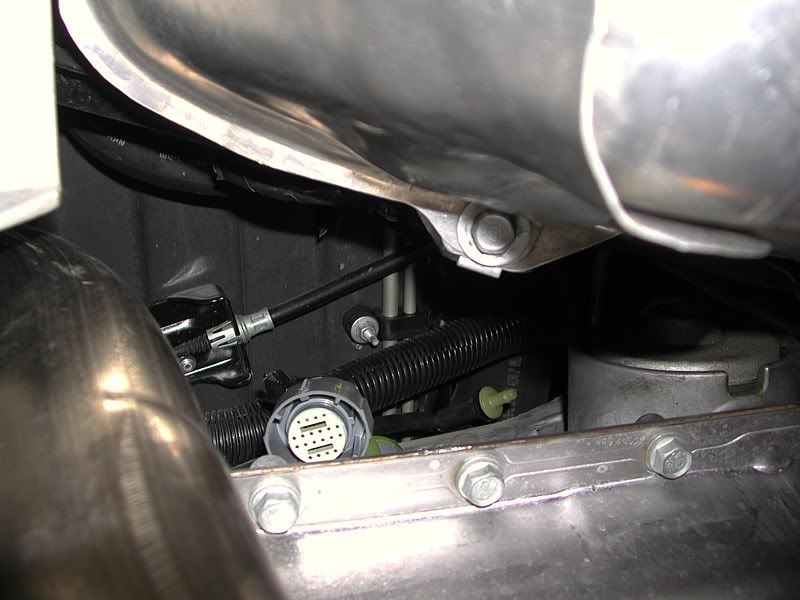
Also, here are a few shots of the empty drive train compartment. This is the underside of the main rear tub.
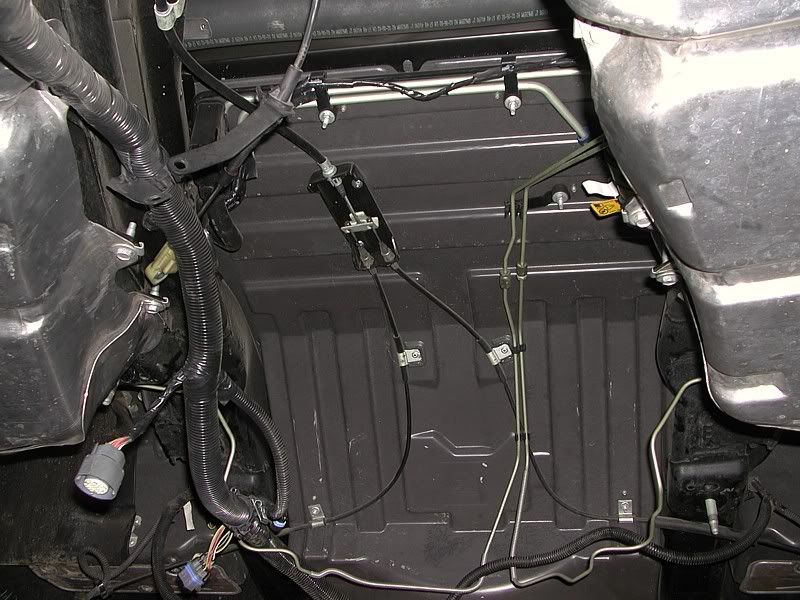
Here you can see the fuel filter, the fuel tank cross tube and the Evap unit.
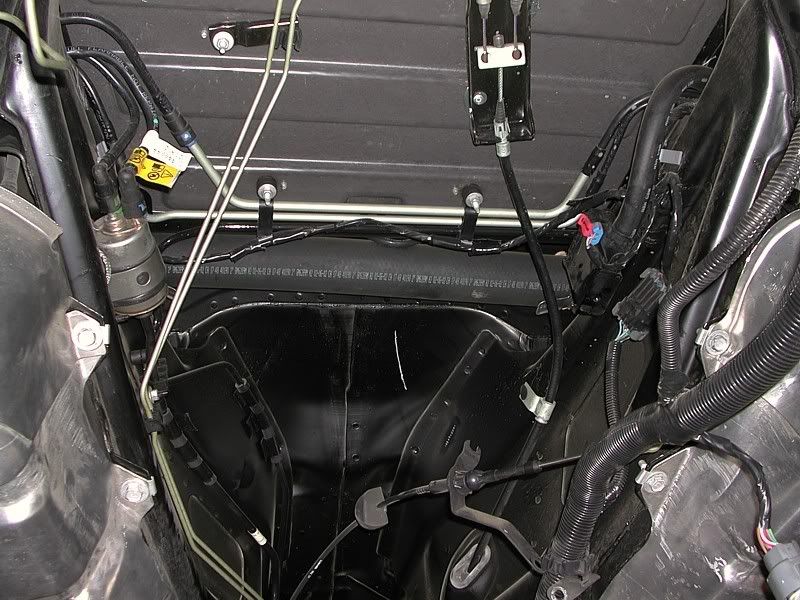
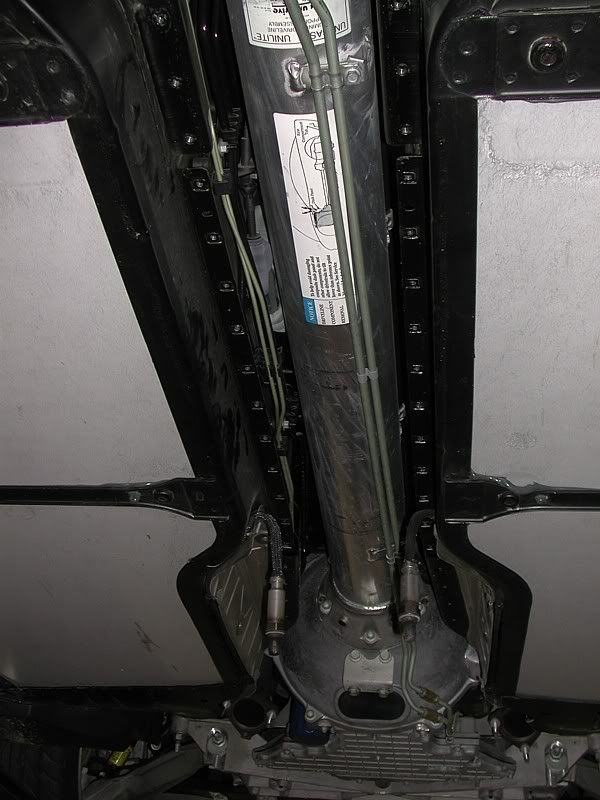
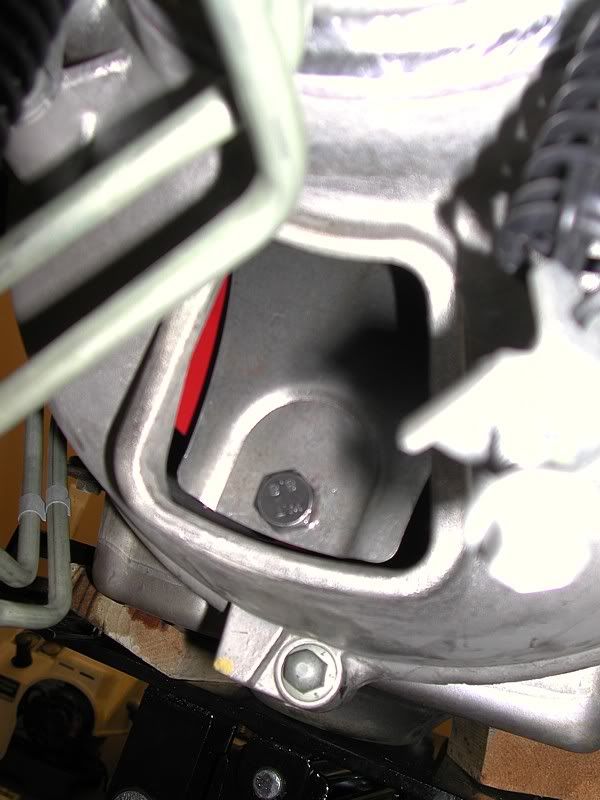
A look down the tunnel from the rear looking forward.
The TT slid back pretty easily. I’ve done it before – but never on an A4 and never alone.
Tranny jack made the job easy.
Ready to pop the diff off.
It came off without any drama.
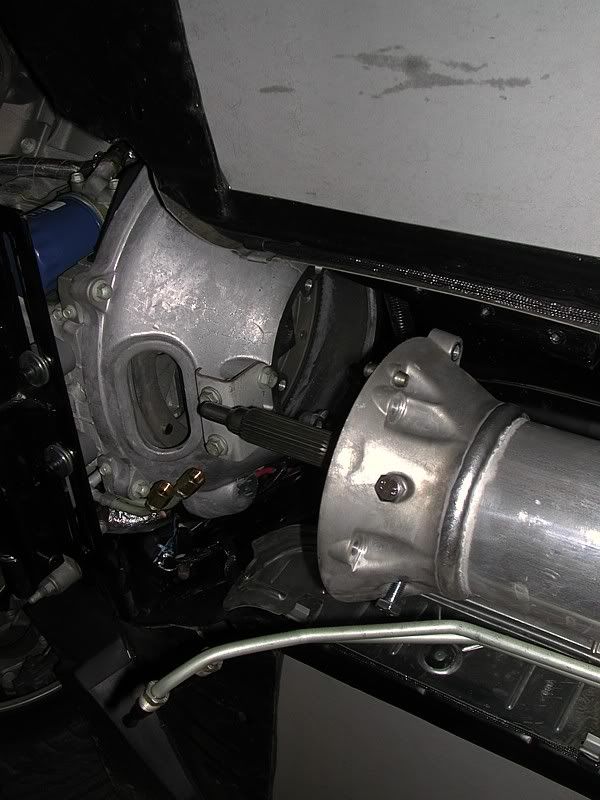
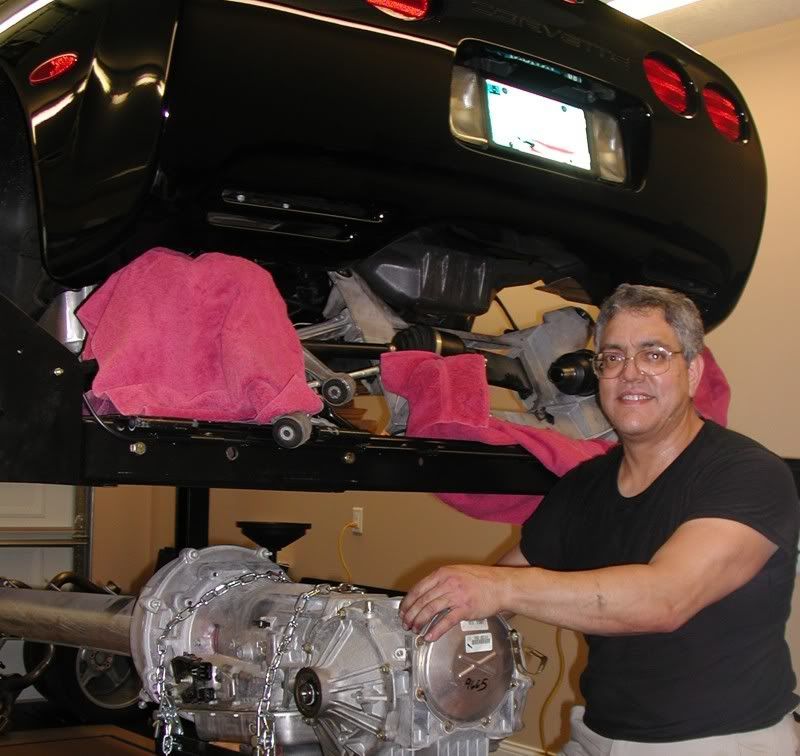
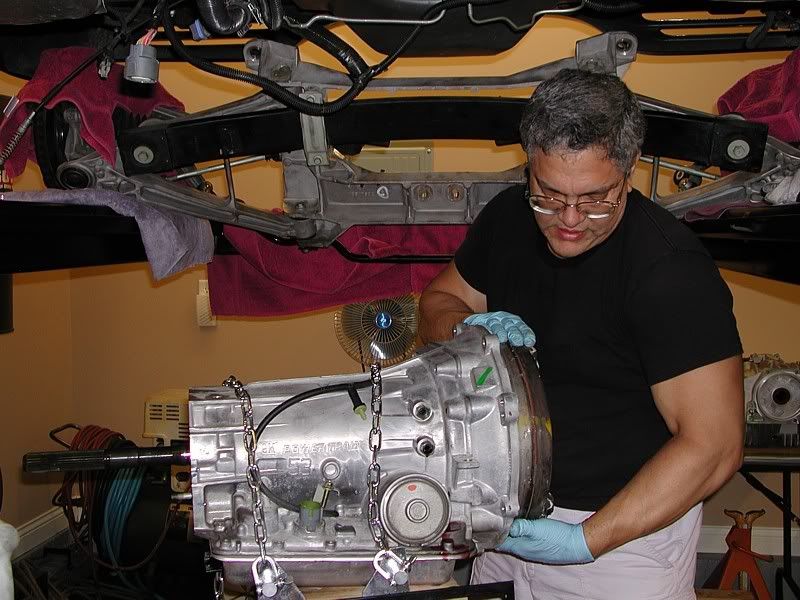
Next, I pulled the TT off the front of the tranny.
The tranny with the stock torque converter.
Pulled that off.
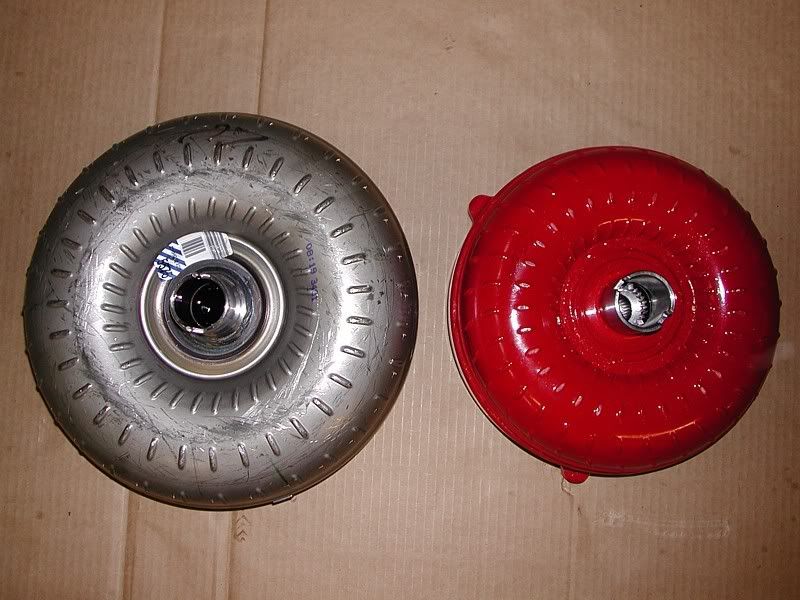
Here are the stock and Yank converters side-by-side. Dramatic difference.
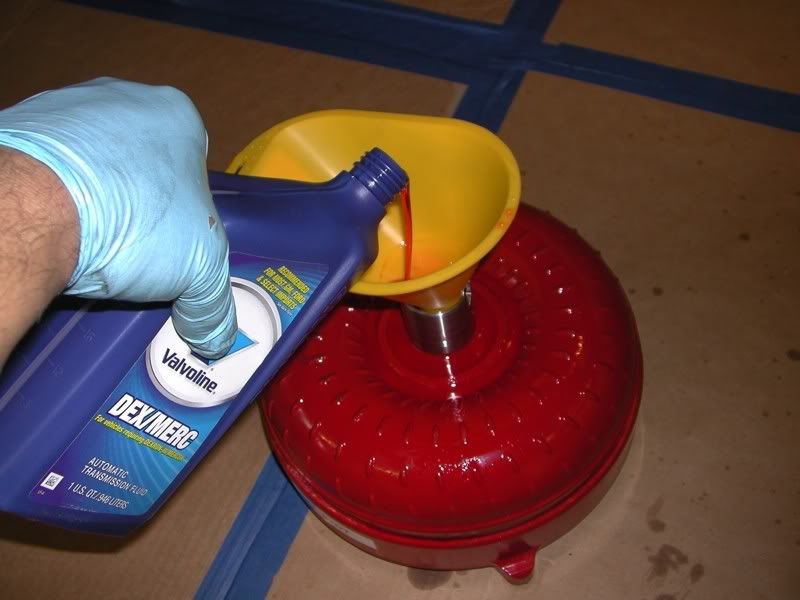
I filled the Yank with a quart of Dexron III – took forever to seep in so I did other things in between pouring bits at a time. Even had time to take this pic.
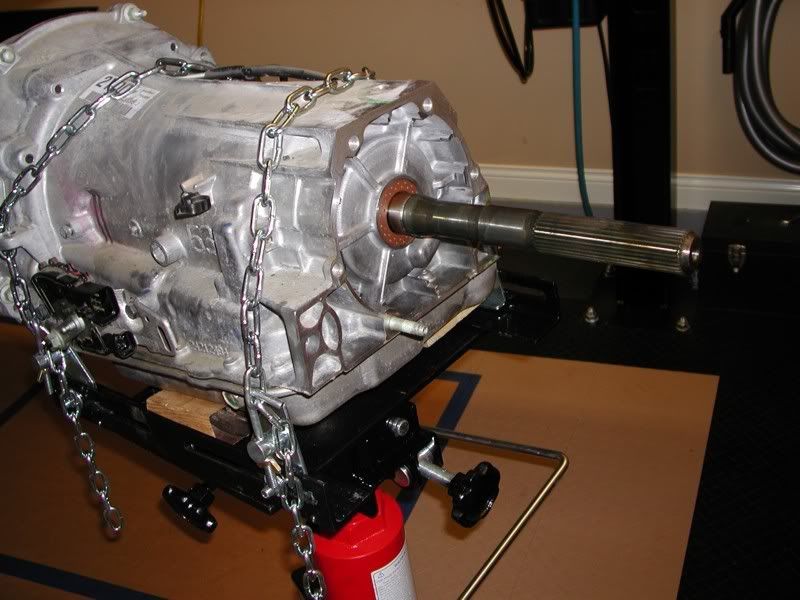
Assembled the 3.42 ratio diff to the tranny and torqued everything down.
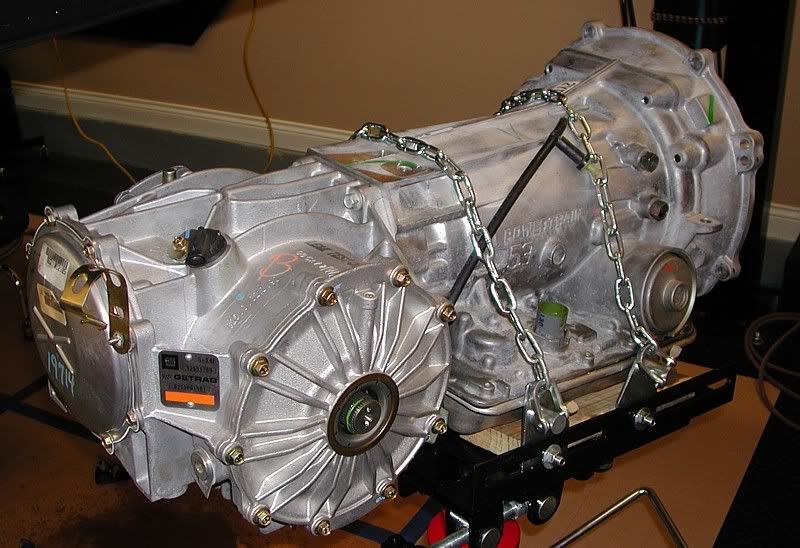
I slid the Yank onto the tranny pump shaft.
At this point, it was easy to drain the fluid out of the 2.73 diff and place the tranny jack under the tranny.
The drive train was ready to come out at this point.
Next step was to pull the five front torque tube (TT) bolts.
I moved the jacking tray to the back of the engine to support it while the TT was off.
Btw, I cut the short leg off a 10mm allen key and used it with a deep socket to get to the drive shaft clamp screw in the bell housing.
Here’s a shot of the clamp after the TT was removed.
Also, here are a few shots of the empty drive train compartment. This is the underside of the main rear tub.
Here you can see the fuel filter, the fuel tank cross tube and the Evap unit.
A look down the tunnel from the rear looking forward.
The TT slid back pretty easily. I’ve done it before – but never on an A4 and never alone.
Tranny jack made the job easy.
Ready to pop the diff off.
It came off without any drama.
Next, I pulled the TT off the front of the tranny.
The tranny with the stock torque converter.
Pulled that off.
Here are the stock and Yank converters side-by-side. Dramatic difference.
I filled the Yank with a quart of Dexron III – took forever to seep in so I did other things in between pouring bits at a time. Even had time to take this pic.
Assembled the 3.42 ratio diff to the tranny and torqued everything down.
I slid the Yank onto the tranny pump shaft.
Last edited by Patches; 08-04-2007 at 06:28 PM.
07-09-2007, 11:43 PM
#3
Team Owner
Thread Starter
And torqued the three bolts through the flex plate.
Here’s the completed TT sub-assembly ready to be reinstalled.
Mrs. Patches caught me shoving the TT back into place. It actually went in quite smoothly. Once again, the tranny jack was more than worth the selling price when doing this task alone.
The drive train back in place and supported.
I pushed the crossmember back in position and lifted it into place with the jack. Then I jacked the lower A-arms up, reinserted the axles and reconnected the upper A-arms, shocks and brakes. Of course, there were the various lines, connectors and clips that need to be reconnected as well.
Moving on to the headers, I pulled the stock manifolds off and unbolted the starter.
I had heat-shielded the starter on my M6 so I did the same with this one to protect it from any extra heat the headers might radiate.
The AR headers went in very easily but the starter wires weren’t as easy to reconnect as I had hoped. Still, they eventually went in fine.
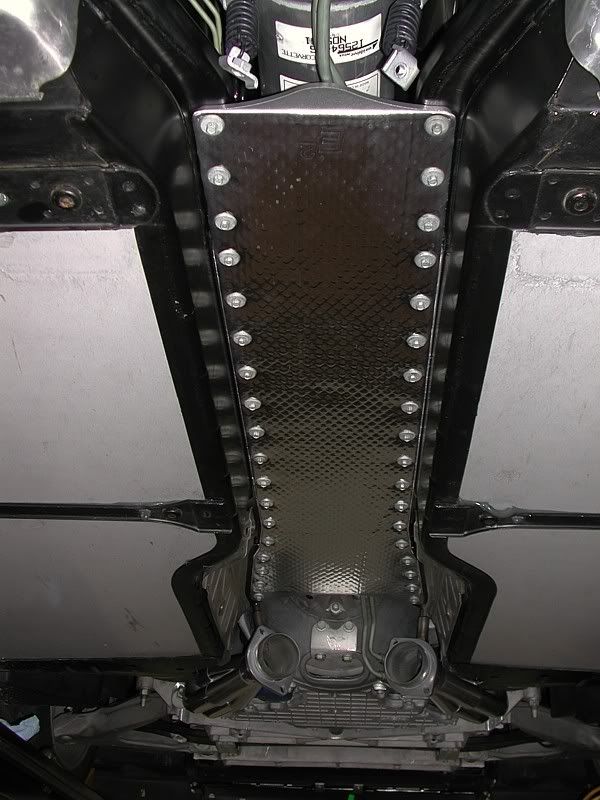
The trusty jack once again was handy in holding the tunnel plate up for installation.
Looked great in place.
I also used the jack to hold the mid-pipe section in place while I assembled the exhaust system.
I devised this method to hold the muffler tips even while I tightened the bolts. Worked great.
The completed exhaust setup.
To start the tranny cooler installation, I freed up the fan shroud to give me room to get behind the radiator.
I cleaned the radiator/condenser thoroughly.
Assembled the cooler components.
Placed the cooler in front of the condenser.
Here you can see the retainers at the back of the radiator.
Getting the cooler hooked to the tranny fluid lines took a bit of imagination as there are no adapters for directly attaching a cooler to the lines for later model ‘02’s and later. I had to splice into the return line but it worked well. I also had an issue updating the PCM with the new diff ratio but I believe I now have that squared away as well.
After topping the tranny off with fluid and triple checking all my work. I took the car for a long, relaxing ride (Yank says to break in the TC for 120 miles before any WOT runs.) The A4 is like a whole different car. It accelerates with authority and sounds much better (gears, TC and headers). The car is so much more responsive I was taken by surprise. Small throttle inputs now create significant surges of thrust forward.
NO drivability has been lost – in fact, the car actually feels tighter than when it was stock. Mrs. Patches reminded me about the Elite tunnel plate I installed and the billet-feel I was experiencing made more sense. The response of the car is definitely what I was hoping for – and I have been light-footed so far in deference to the new TC. Can’t wait to see what WOT is like.
I have to rethink my whole attitude towards automatic Corvettes now. I have to say this A4 is very close to the fun factor of my head/cam/headered, etc. M6. Wait ‘til Mrs. Patches drives this thing – she may never let me into the driver’s seat again.
What a fun vacation!
Here’s the completed TT sub-assembly ready to be reinstalled.
Mrs. Patches caught me shoving the TT back into place. It actually went in quite smoothly. Once again, the tranny jack was more than worth the selling price when doing this task alone.
The drive train back in place and supported.
I pushed the crossmember back in position and lifted it into place with the jack. Then I jacked the lower A-arms up, reinserted the axles and reconnected the upper A-arms, shocks and brakes. Of course, there were the various lines, connectors and clips that need to be reconnected as well.
Moving on to the headers, I pulled the stock manifolds off and unbolted the starter.
I had heat-shielded the starter on my M6 so I did the same with this one to protect it from any extra heat the headers might radiate.
The AR headers went in very easily but the starter wires weren’t as easy to reconnect as I had hoped. Still, they eventually went in fine.
The trusty jack once again was handy in holding the tunnel plate up for installation.
Looked great in place.
I also used the jack to hold the mid-pipe section in place while I assembled the exhaust system.
I devised this method to hold the muffler tips even while I tightened the bolts. Worked great.
The completed exhaust setup.
To start the tranny cooler installation, I freed up the fan shroud to give me room to get behind the radiator.
I cleaned the radiator/condenser thoroughly.
Assembled the cooler components.
Placed the cooler in front of the condenser.
Here you can see the retainers at the back of the radiator.
Getting the cooler hooked to the tranny fluid lines took a bit of imagination as there are no adapters for directly attaching a cooler to the lines for later model ‘02’s and later. I had to splice into the return line but it worked well. I also had an issue updating the PCM with the new diff ratio but I believe I now have that squared away as well.
After topping the tranny off with fluid and triple checking all my work. I took the car for a long, relaxing ride (Yank says to break in the TC for 120 miles before any WOT runs.) The A4 is like a whole different car. It accelerates with authority and sounds much better (gears, TC and headers). The car is so much more responsive I was taken by surprise. Small throttle inputs now create significant surges of thrust forward.
NO drivability has been lost – in fact, the car actually feels tighter than when it was stock. Mrs. Patches reminded me about the Elite tunnel plate I installed and the billet-feel I was experiencing made more sense. The response of the car is definitely what I was hoping for – and I have been light-footed so far in deference to the new TC. Can’t wait to see what WOT is like.
I have to rethink my whole attitude towards automatic Corvettes now. I have to say this A4 is very close to the fun factor of my head/cam/headered, etc. M6. Wait ‘til Mrs. Patches drives this thing – she may never let me into the driver’s seat again.
What a fun vacation!
Last edited by Patches; 07-10-2007 at 05:51 PM.
The following 6 users liked this post by Patches:
jjc508520 (01-12-2018),
Proud Owner (12-16-2015),
Richard Daugird (08-13-2021),
tdf01cycling (01-11-2018),
tombrammer (10-27-2020),
and 1 others liked this post.
07-09-2007, 11:54 PM
#4
Race Director

Member Since: Aug 2006
Location: Are you fat because you're lazy or lazy because you're fat? San Jose, CA
Posts: 13,542
Likes: 0
Received 0 Likes
on
0 Posts
Cruise-In X Veteran
St. Jude Donor '09
Very nice!
Which EE tunnel plate did you go with? I'm about to order one to install with my LG Pros and am leaning toward the 1/4" aluminum piece.
Which EE tunnel plate did you go with? I'm about to order one to install with my LG Pros and am leaning toward the 1/4" aluminum piece.

 07-10-2007, 12:04 AM
#6
Pro

Member Since: Jan 2007
Location: 15 miles south from the Raisin Capitol of the World Caifornia
Posts: 557
Likes: 0
Received 1 Like
on
1 Post
Great job and
and  detailed pics. I will be saving this for when it is time to do mine. I also like that TT lift, is it from Staples or Office Depot ?
and detailed pics. I will be saving this for when it is time to do mine. I also like that TT lift, is it from Staples or Office Depot ?
07-10-2007, 12:37 AM
#9
C5 General

Member Since: Nov 2005
Location: Boosted in Manhattan & Round Rock TX. President of the Non Club Club of Kansas and Round Rock , Not the flat part.
Posts: 3,391
Likes: 0
Received 0 Likes
on
0 Posts
Grate info and pics thanks for taking the time.
Iv told people about a A4 being a good way to go, you are showing them. 
Paul G.
Iv told people about a A4 being a good way to go, you are showing them.
Paul G.
07-10-2007, 12:47 AM
#10
Race Director
Very nicely done. You made the job look easy, but I know it's a PITA job.
I was wondering about the lift you use. Is it bolted to the floor ? Also can you hold up the car just by the jacking points on the rails so that you can drop the entire drive train in one shot.
Thanks
I was wondering about the lift you use. Is it bolted to the floor ? Also can you hold up the car just by the jacking points on the rails so that you can drop the entire drive train in one shot.
Thanks
07-10-2007, 01:34 AM
#11
Team Owner
Member Since: Sep 2002
Location: Bonita Springs, Florida
Posts: 21,886
Received 3,054 Likes
on
2,030 Posts


The following users liked this post:
Yello95 (10-10-2021)
07-10-2007, 01:39 AM
#12
Le Mans Master

07-10-2007, 02:13 AM
#13
Race Director

Member Since: Jul 2005
Location: The Beautiful Greater Bay Area California
Posts: 11,308
Likes: 0
Received 1 Like
on
1 Post

Patches, Geesuzz! What an awesome and very thorough job! Well done, good buddy! And, thank you for always taking the time to fill us in with detailed pics and thoughtful write-ups. It is always a pleasure to read about your C5 mod projects! Enjoy! 
 07-10-2007, 08:04 AM
#15
Team Owner
Hey Patches,
I knew you were going to like that set-up when we talked a few weeks ago. Great job and a good looking install. Mrs. Patches may want to get some stickier tires when she puts the foot down.
Chuck
I knew you were going to like that set-up when we talked a few weeks ago. Great job and a good looking install. Mrs. Patches may want to get some stickier tires when she puts the foot down.
Chuck
07-10-2007, 08:06 AM
#16
Administrator

Member Since: Mar 2001
Location: In a parallel universe. Currently own 2014 Stingray Coupe.
Posts: 342,956
Received 19,296 Likes
on
13,969 Posts
C7 of the Year - Modified Finalist 2021
MO Events Coordinator
St. Jude Co-Organizer
St. Jude Donor '03-'04-'05-'06-'07-'08-'09-'10-'11-'12-'13-'14-'15-'16-'17-'18-'19-
'20-'21-'22-'23-'24
NCM Sinkhole Donor
CI 5, 8 & 11 Veteran

Awesome set of pics showing all the changes. Nice job.
07-10-2007, 08:15 AM
#17
Burning Brakes

Member Since: Mar 2006
Location: Iowa City Iowa
Posts: 826
Likes: 0
Received 0 Likes
on
0 Posts
Great install and awesome pictures!
Did you notice a difference with the tunnel brace though. IE Cabin temperature and handling?
I would like to get one becase my right leg gets hotter than heck after cruising. But I don't want to justify something like that unless there is some sort of performance gain.
Did you notice a difference with the tunnel brace though. IE Cabin temperature and handling?
I would like to get one becase my right leg gets hotter than heck after cruising. But I don't want to justify something like that unless there is some sort of performance gain.

 07-10-2007, 09:16 AM
#19
Drifting


Member Since: Oct 2005
Location: Palmetto FL
Posts: 1,507
Likes: 0
Received 7 Likes
on
6 Posts
St. Jude Donor '07
Awesome job.
07-10-2007, 09:26 AM
#20
Team Owner
Great work!
It's a great thing when one has a lift ones garage
I just had my Yank ss3200 installed in my '98 and 3.42's as well.
i should be getting it back today after the tuning.
Are you going to have yours tuned or are you able to do that also?
If it gets Dyno tuned please share the results of all your hard labor
Thanks,Matt