When you click on links to various merchants on this site and make a purchase, this can result in this site earning a commission. Affiliate programs and affiliations include, but are not limited to, the eBay Partner Network.
Vinyl Wrapping DIY Tutorial... (Lengthy and Major PICS!!!)
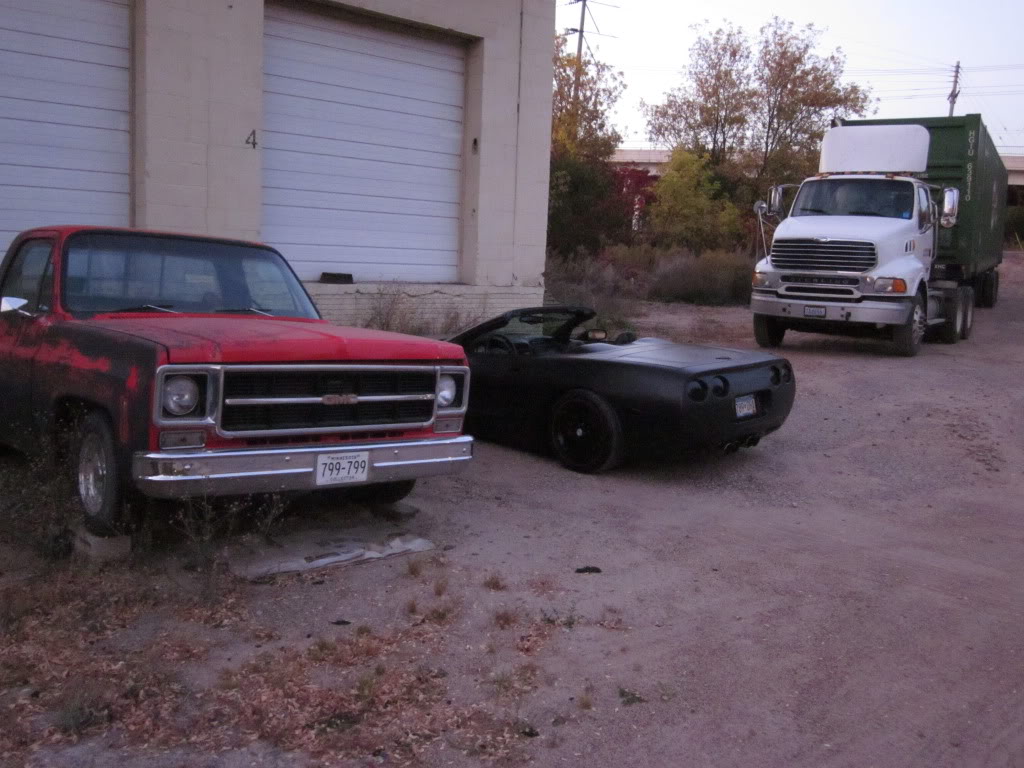
What's up Corvette Forum,
Been getting a lot of questions about how to pull off a sick looking badass vinyl wrap so thought I would do a COMPLETE write up on my process outlining my trials and tribulations with this project. When I say "complete" I mean this thing has everything you need to know to do this yourself. It is long, has lots of reading, some occasional pics(haha LOTS), maybe even boring at times, BUT if you are even considering doing this, READ ALL OF IT. It will save you time and money. I would have killed for a write up like this when I started this project. Couldn't find hardly anything so through LOTS of internet research, youtube, and trial/error I have come up with this method that works well for me. Enjoy:
BACKGROUND:
Matte finishes are an old school style that has been slowly coming back into play over the past few years, ask anyone that has been to SEMA in the last few years. It was seen on old hot rods and such when the car needed to be fast and looks were not as important. A quick prime or spray-can finish allowed the cars to be driveable without the bodies rusting out. The look has been revived by manufacturers of exotics such as Lamborghini and Aston Martin and recently for 2011 Mercedes Benz has offered several Matte colors as optional finishes.
Since it is the "in" thing right now and I am not a huge fan of Mag Red (oem color of my car) I decided to give it a go. The problems with paint that exist right now is that it is permanent, but more importantly to me, it is VERY fragile.
Painting it and getting it to look right requires all panels to be painted at the same time because if you do them individually at different intervals it will look different when you put the car back together due to air temp conditions, spray gun settings, humidity, etc. It is insanely hard to get a nice, even finish with paint too. Not to mention there is no sanding and buffing out imperfections, that would result in glossy spots. Even if you are good enough to lay down a perfect paint job the fun begins when you actually drive the car. Bird droppings will etch the finish and require a repaint of that panel (oh wait you can't just paint one panel, make that a repaint of the car) Water spots (hard water) will do the same thing. Scratches or nicks are there to stay and can't be buffed to make look better. Even the manufacturers that offer matte finished don't have nearly the kind of warranty as they do on base coat/clear coat finishes. BMW actually makes you sign a wavier before you take delivery of a Frozen Gray M3 that outlines the care procedures and what you can/can't do.
Needless to say, paint was not even a consideration for me. Especially since it is a trend thing I know that I won't want to keep it matte forever, my taste seems to vary by month (I think a few others on here know what I mean )
Some other advantages to vinyl vs. paint are the ease of application and consistent look/finish; 100% removeability, cost, no diminished value, and OEM paint protection.
Like I mentioned before this stuff is not permanent at all. It is rated anywhere from 3-8 years for outside use on a car and it varies based on the type of climate you are in. I live in Minnesota and we have a car "season" which is roughly six to eight months long depending on how hardcore you are about driving in inclemate weather. I am hoping to get one season out of it before I peel it off so durability isn't much of a concern for me.
When you paint a car, in almost all cases, you decrease the resale value. Even if it is a factory color it will not be worth as much once a prospective buyer sees it has had work done before. There is a guy on here who had his Z painted matte pearl white and I think it looks INSANELY BADASS and I love the look of that car. But as with any mod, not everyone likes it and with a color like that you significantly decrease the amount of potential buyers that would be interested. The vinyl can be peeled off in a matter of hours with a heatgun and some patience. When done slowly and heated right there is almost no adhesive left behind for cleanup either. My car will be parted out for a GTM project so it really doesn't matter to me but if I had a NICE car I would definitely want to be able to remove this stuff and go back to the paint underneath at some point.
That brings us to paint protection. This stuff is very similar to the 3M invisible stone shields that people put on the "high wear" areas of the car. Now imagine that your whole car is wrapped in a protective coating like that. The vinyl wrap will protect against rock chips, sand blasting, bird crap, acid rain, light scratches, and since it isn't clear: UV light too. There is a slight difference in thickness between a clear bra and a vinyl wrap. The bra/stone shield material is usually around 8 mils thick whereas the vinyl wrap material is 2-4 mils. So there isn't quite as much protection capability BUT it is still a barrier between the OEM paint and the outside world and there will be some preserving qualities about it.
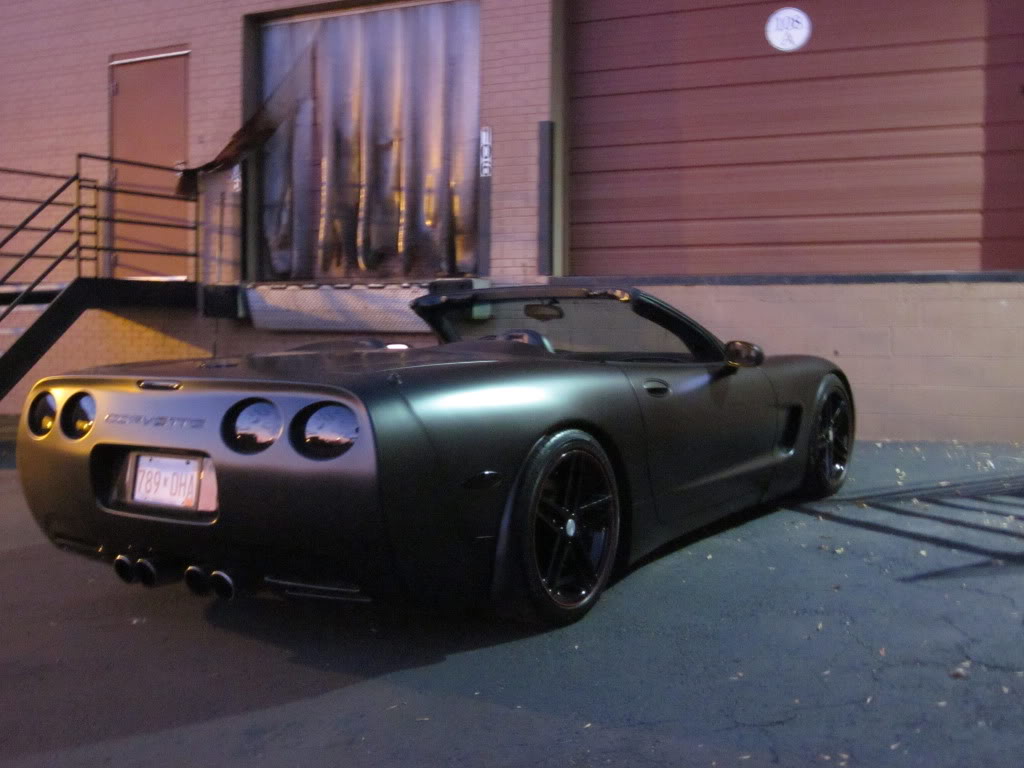
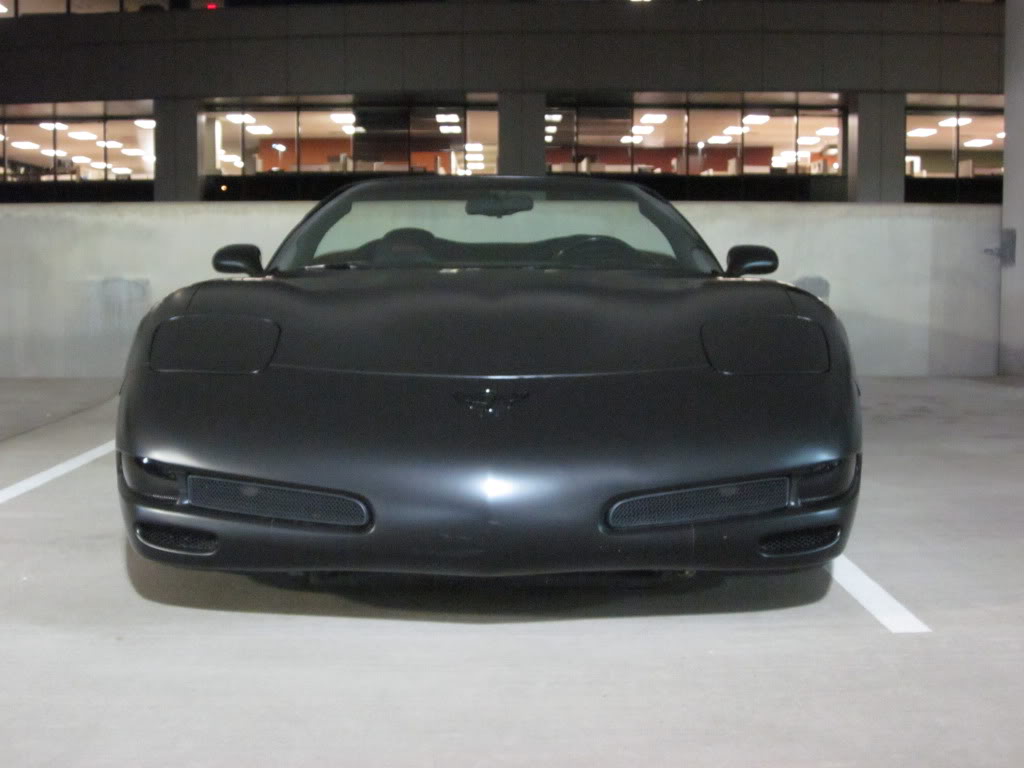
Hopefully that sheds some light on differences and advantages of vinyl over paint, the biggest being looks and the removability. When I am done pretending to be Batman I can simply pull it all off and go back to the stock color.
DISCLAIMER
Before we really get into the "how to" part I would like to ad a disclaimer that this project was STUPID DIFFICULT. I, like many on here, am a DIY guy until the end. I love tampering with stuff and working on my car and getting the satisfaction that goes along with getting your hands dirty and being able to say "i did that". With that being said this project was 1,000 times more involved than I thought it would be. I will say I had no prior experience with vinyl (except black out tape on window trim at work) but after watching countless vids on youtube it looked do-able for anyone with basic competence. I was incorrect. The pros make it look easy, it most definitely is not. I just want to throw this out there for anyone who sees this thread and thinks "i'll order up some vinyl, grab some buddies and beers, should be able to knock this out in a weekend no problem". If you are not a perfectionist, extremely patient, or an anally retentive person then STEP AWAY FROM THIS PROJECT, it is not for you. But if you are like me and are VERY patient and have more time than money, and you like putting in the labor to get something to look right, then by all means have at it.
I would also like to mention that one other user on this forum had a bad experience with the removal of vinyl and damaging his paint. I am not a pro, I do not endorse this method, recommend it, or guarantee it in any way shape or form. I have no worries about removal myself and have faith in what the manufacturer says the product is capable of but that is just me. This tutorial is simply a documented process that I used, nothing more. I am not responsible for anyone that damages their car using methods outlined here.
PREP WORK:
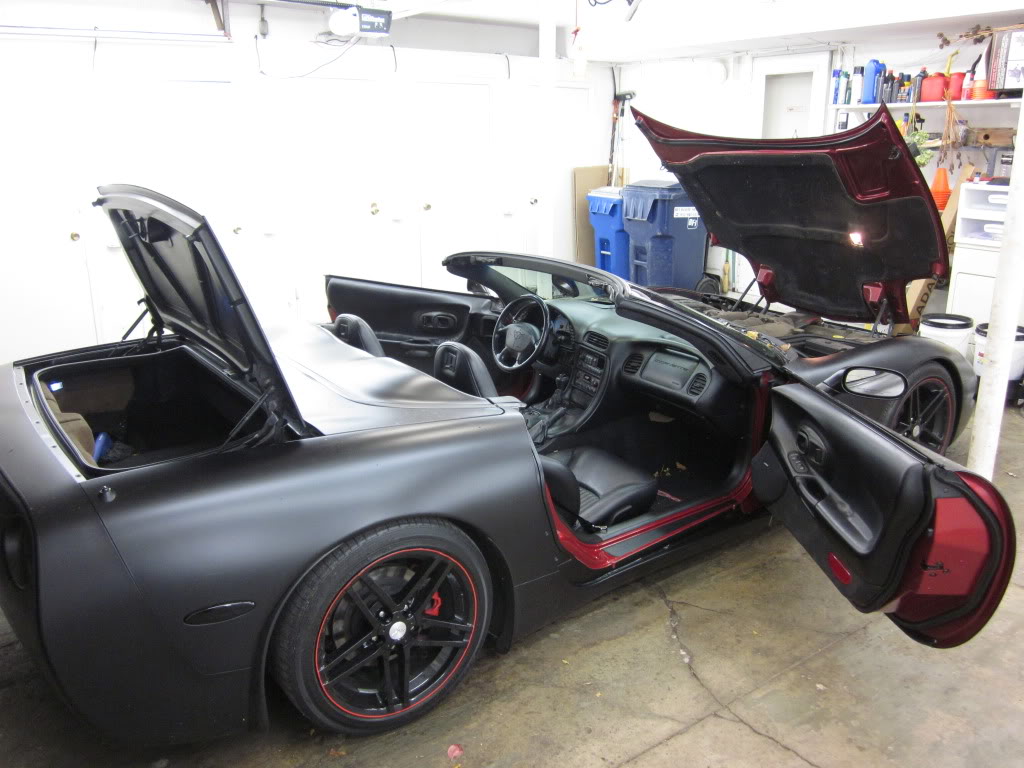
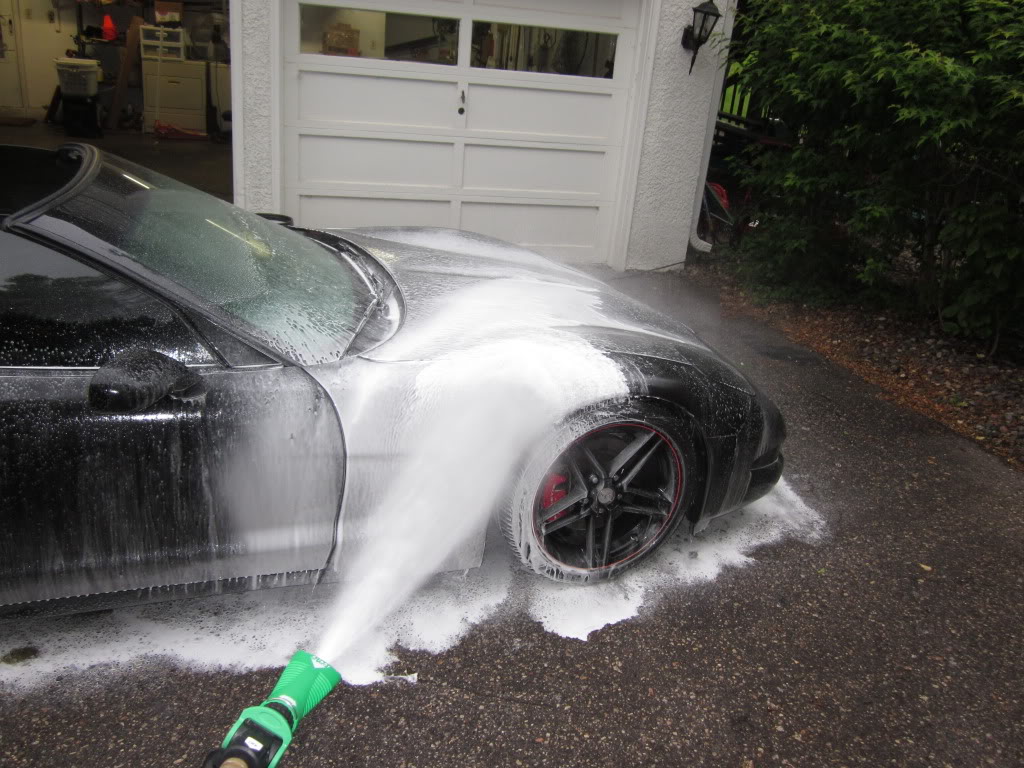
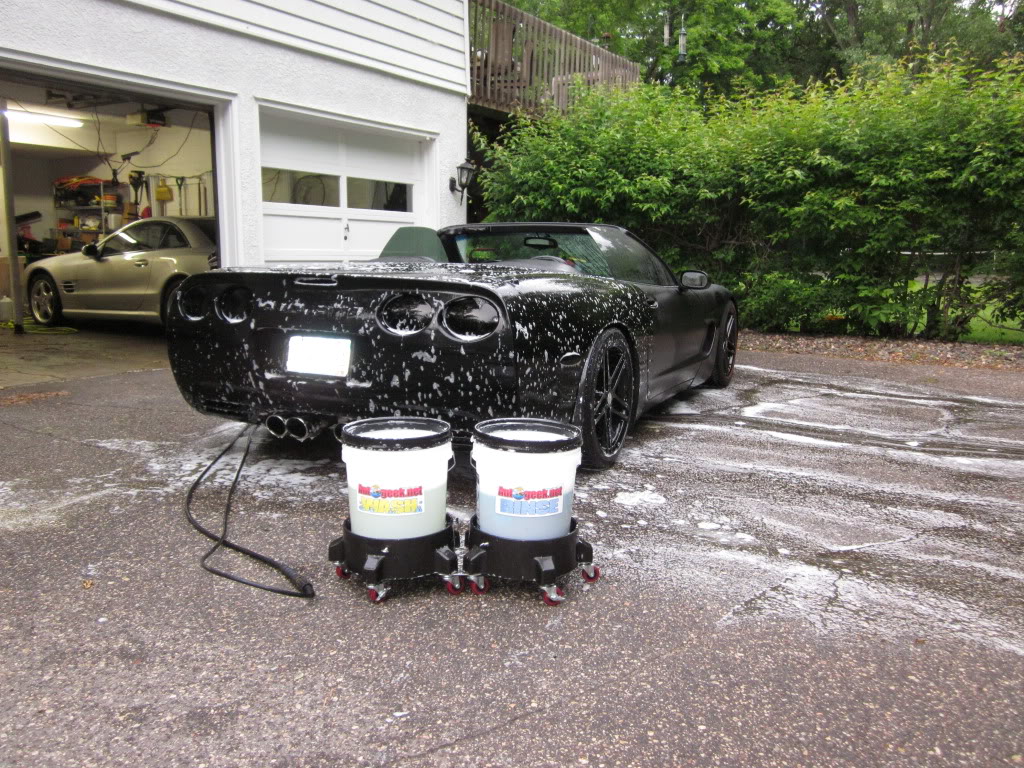
First you should wash the car, wrapping over dirt looks trash. Depending on the finish of your car a might recommend some clay too. Run your hand across the paint and feel if it needs it or not. I clayed every panel to just to be safe. After washing and drying comes disassembly. I won't get into detail here about how to take apart your car, there are plenty of other threads for that. I assumed that wrapping with vinyl was simmilar to painting in that yes, you can leave things like handles, mirrors, bumpers, etc on the car and work around them, but to get a pro level job you should take as much apart as you can. This allows you to wrap edges instead of just trimming around stuff.
Detrimmed body panels+wrapped edges= classy looking job and less chance of peeling edges in the future.
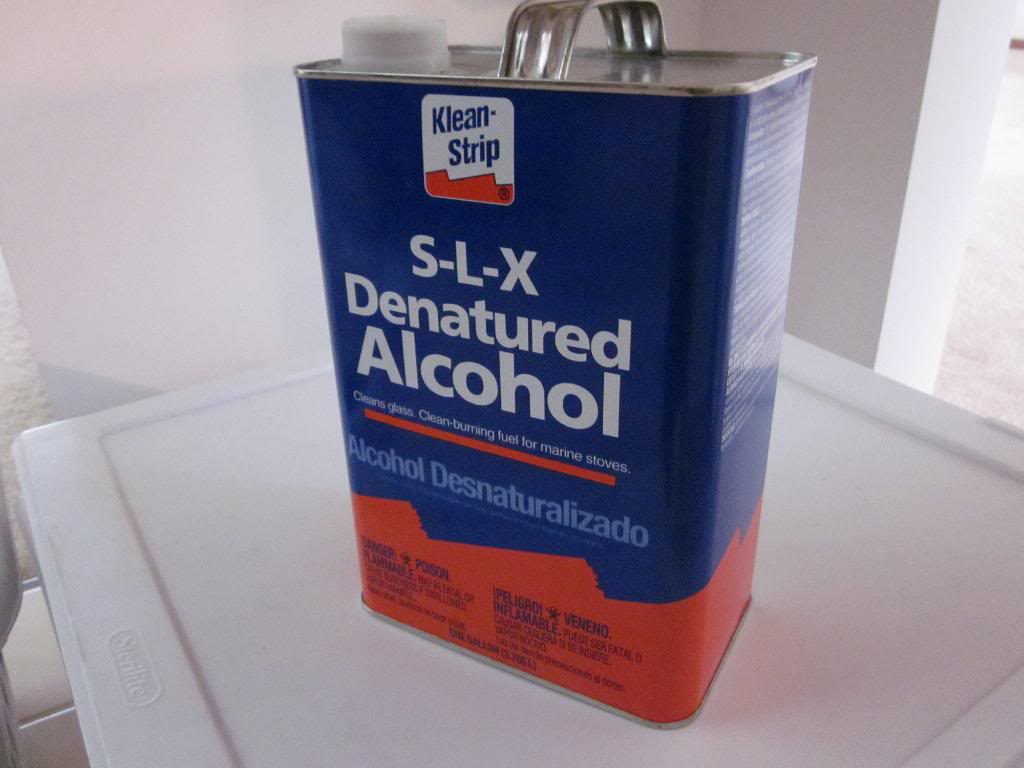
After hours of disassembly are complete (I'm talking bumper covers, doors, handles, mirrors, fenders, headlamp covers, tonneau cover, fender liners, hood, etc) I clayed all panels that would get the vinyl treatment. You don't want foreign crap under your vinyl because you will see it and it looks bad. After all panels are clayed I prepped them with denatured alcohol. This will strip off any grease/wax that may still be present and promote good adhesion of the vinyl. Yes there is a TON of time already into this project and we haven't even really started yet. I warned you didn't I?
Denatured Alcohol(Isopropyl Alcohol): This is used to prep each panel prior to the vinyl install. It will remove any wax and grease and fully prepare the surface for adhesion.
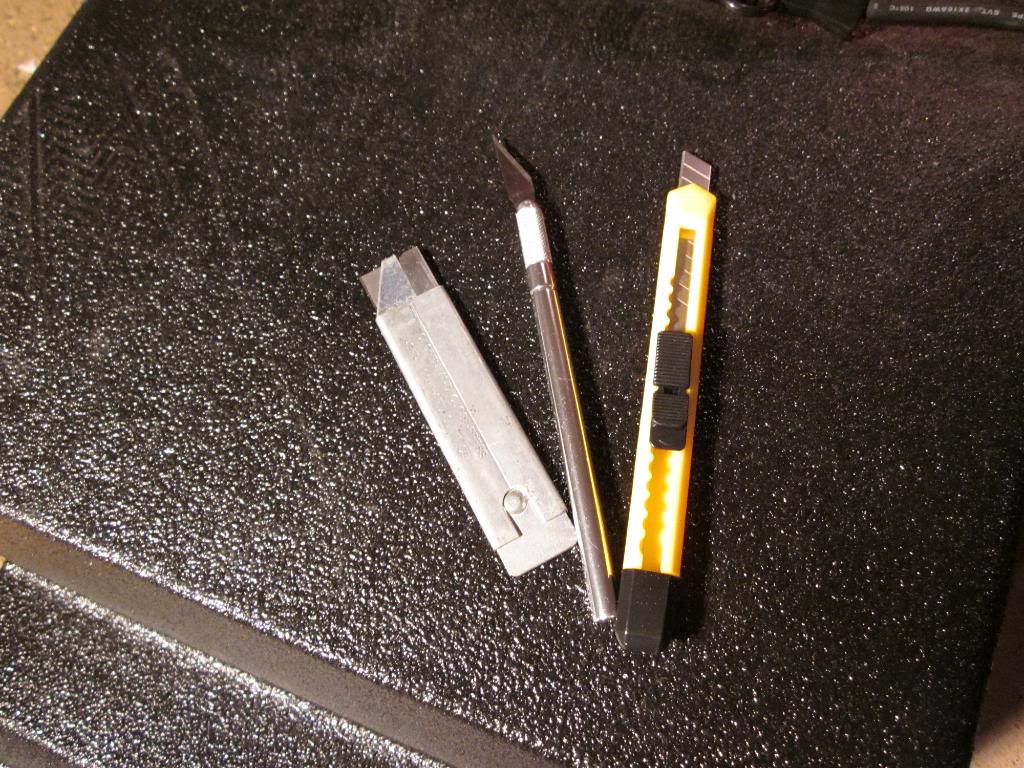
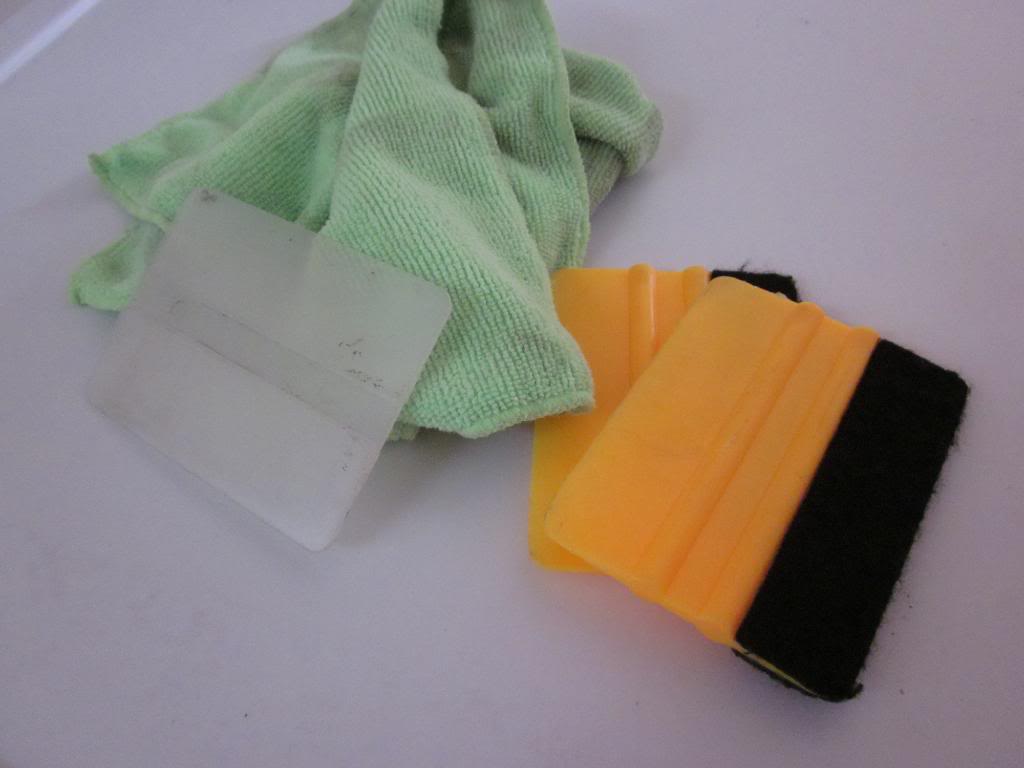
Blades: Used to cut vinyl, obviously. They need to stay sharp so I switch em out frequently. I used the yellow xacto style blade the most.
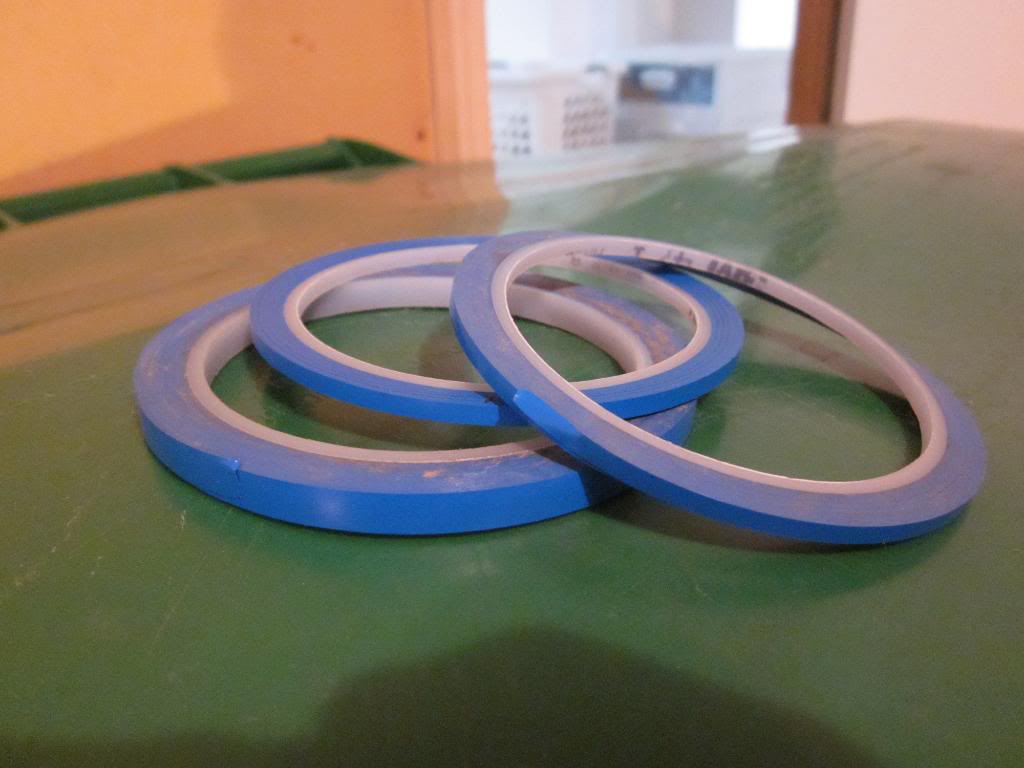
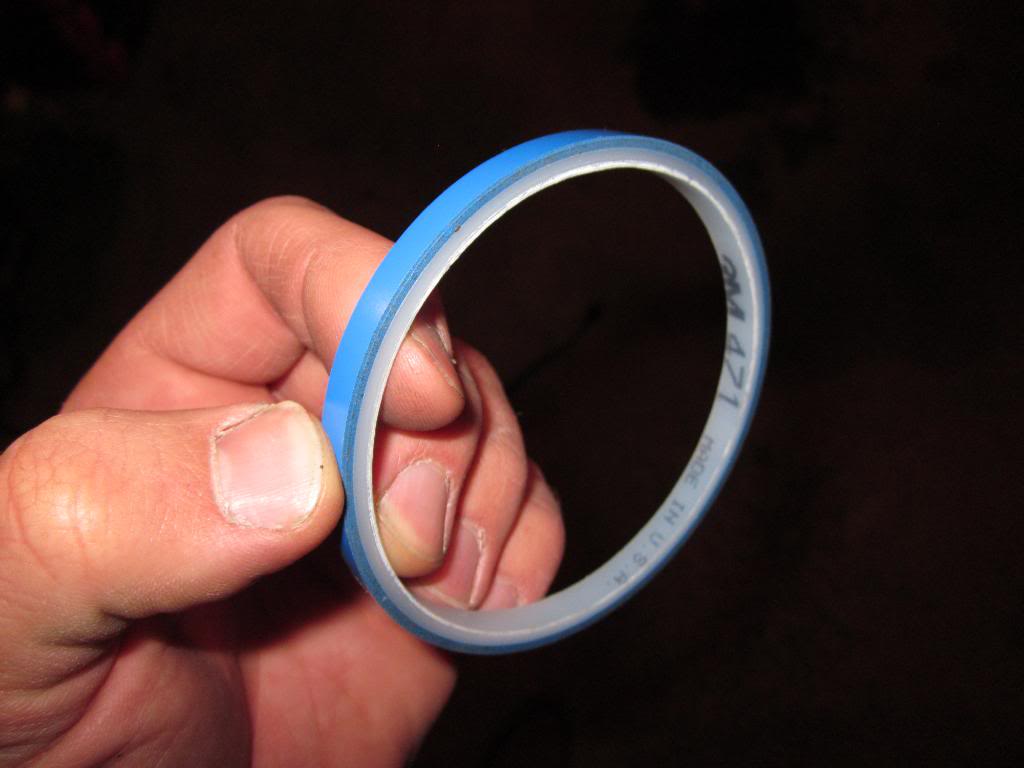
Tape: Fineline tape is used for cutting vinyl on the car. It acts a protective barrier and prevents cuts into the paint, that would be bad. A detailed demonstration of this will be seen later in the write up.
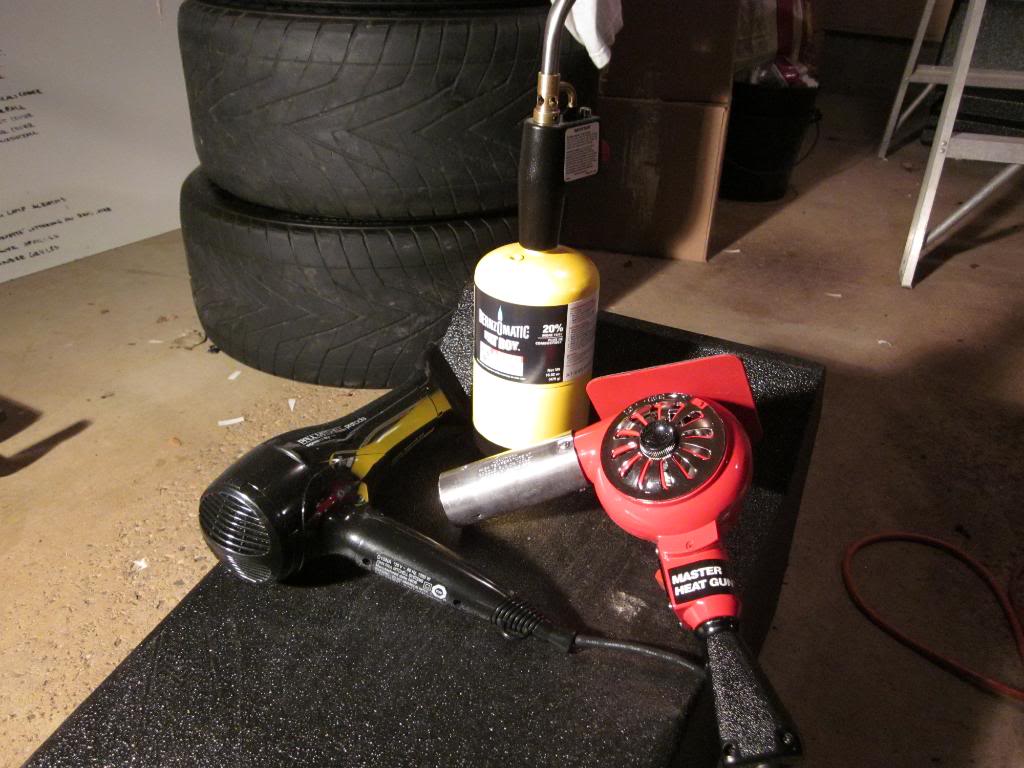
Heat source: You need something to heat up the vinyl to stretch it over contours and stuff. I used a hair dryer exclusively because you can max out the heat without damaging the vinyl. Some like a torch for a quick way to heat the vinyl without heating the substrate (body panel) but the problem I have with that is that if you stay on it for just a half second too long the vinyl burns up and the entire panel you were doing is now junk and needs to be recovered. Again, the hair dryer gets it hot enough but doesn't have the heating ability to ruin it. So go grab the wife's/gf's from the bathroom, I'm sure she will understand.
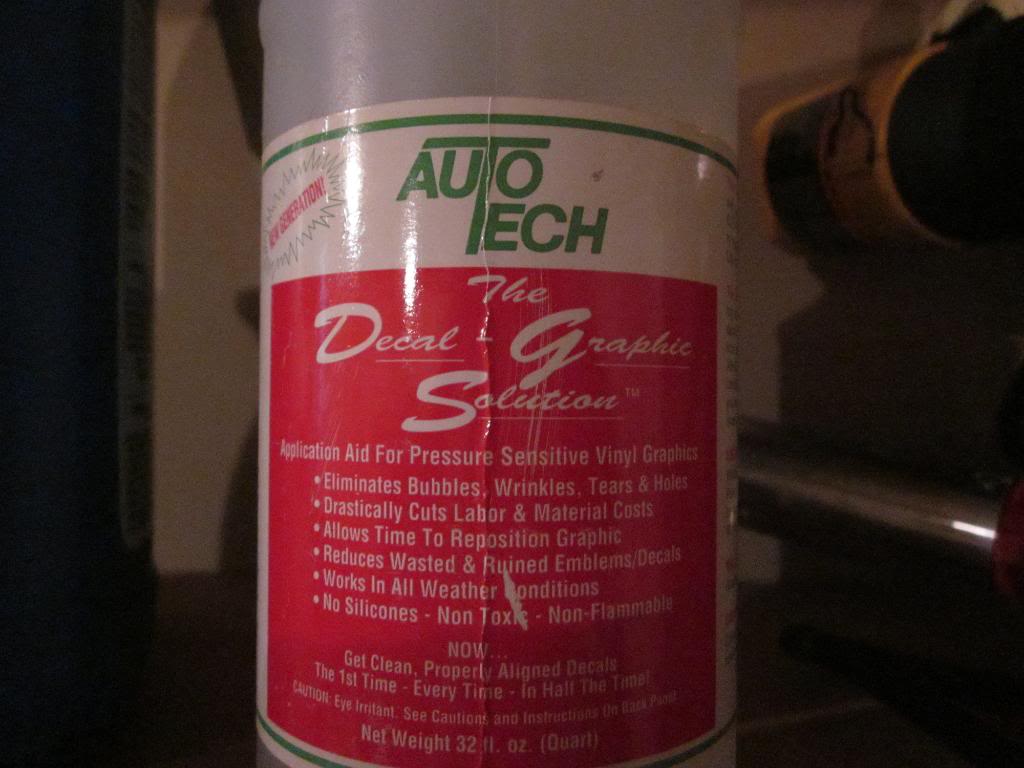
Lubricant: Like most things in life, applying vinyl works better with a little bit of lube. The material is designed to be a "dry application" and if you are a pro and have 4-5 guys helping you then by all means, do it dry. If you are a newb like I was then you will want to put it on wet. It will allow you to reposition easier and it makes the vinyl easier to work with all around. More on the "dry" application later.
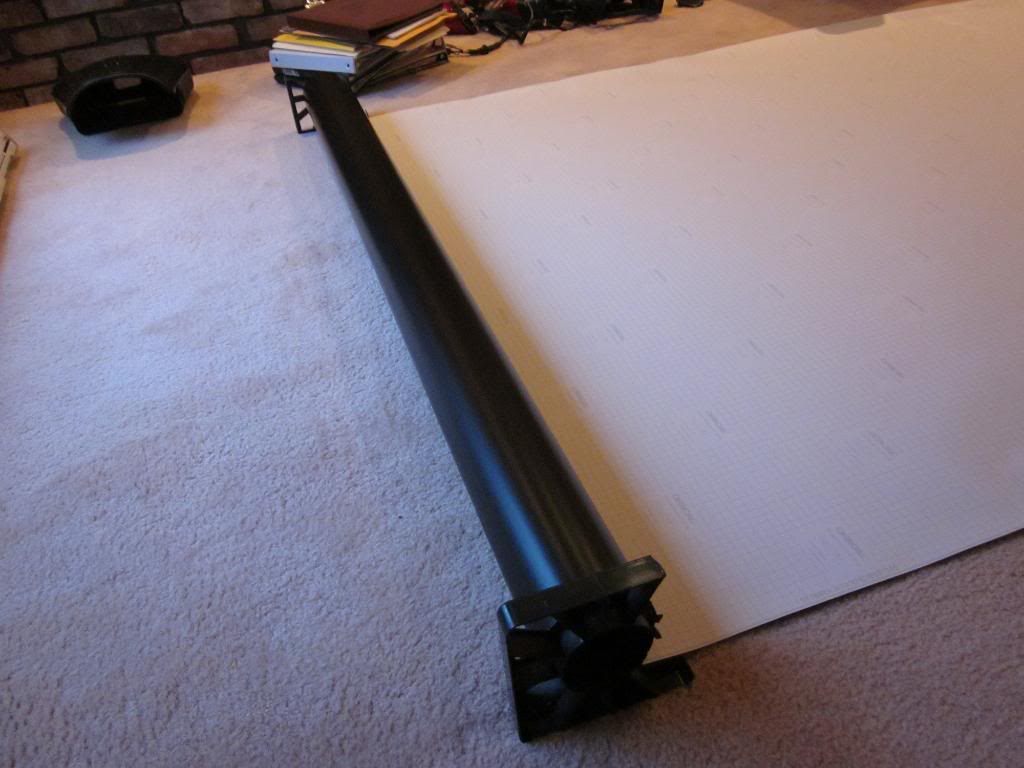
Vinyl: Many different companies make this stuff and I would reccomend doing some good research before starting a project like this. Don't just grab the cheapest stuff you can find because your car will most likely turn out like poop. Buy a vinyl that is designed for wrapping cars and you will not be disappointed. I went with Oracal 970RA because of looks, reviews, and price. 3M 1080 stuff was almost three times as expensive. Vinyl is available in any color under the sun so you don't have to do matte black.
The stuff I used comes with what is called an "overlaminate" which means that there is a clear protective layer already applied over the colored ink. It is ready to go right out of the box. That is what gives it the durability to withstand weather. If you want a custom color you will most likely need to have it overlaminated at a sign shop and that will add cost to the job. Most vinyl designed for complete wraps will come with an overlaminate but some don't so be sure to check it out.
Squeegee: Used to press the vinyl down and release air bubbles and lubricant trapped under the vinyl. Even if you get a felt tipped one I would suggest wrapping the edge with a microfiber towel when you are using it because the vinyl scratches easily.
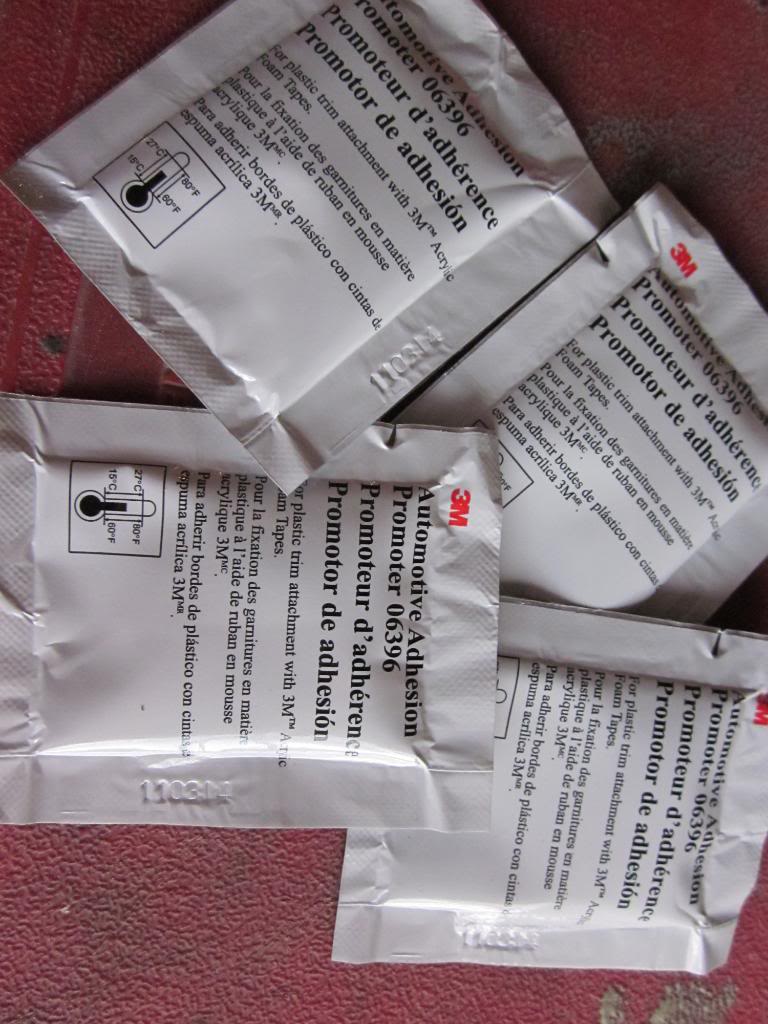
Adhesion Promoter: I used this stuff for edges and other areas that I wanted to insure didn't peel in the future. I really don't go over in detail of when I use this during the tutorial but you can assume edges and tight contours got promoted before wrapping. Just a quick wipe and let dry, then wrap over.
Friends: The more people you can con into helping you the better, faster, easier this project will go. You might have to get a little "Tom Sawyer" on em but I can't tell you how important many sets of hands is for this task. You might have to use beer and free food to lure them in but it will be worth it. I pulled it off with only one other guy helping me but on a number of panels it would have been great to have three of four guys. Remember you need people to hold/stretch the vinyl, someone to hold and work the heat source, and someone to work the squeegee. I ended up trading labor hours with my buddy so it worked out for both of us. Now I have a ton of detailing hours to put into his cars.
Time: I just want to reitterate this point really quick. Don't plan on banging this out in a weekend. I found it works best to spread it out over a few weeks doing a panel or two a night. You will get better and faster with time. The biggest time suck is tucking and wrapping all the edges. It takes many hours for the lubricant underneath to fully dry and you want it dry to finish up the edges. On a typical night I would lay one or two new pieces of vinyl on new body panels, squeegee all the lube I could get out and leave it. I would then go back to the panel(s) I did the night before and tuck all the edges since they were now dry. If you streamline the process like that there is minimal downtime but it still takes time and you shouldn't underestimate that aspect.
Last edited by MarkyMarkGTM; 10-09-2011 at 02:24 AM.
TUTORIAL:
It is somewhat hard to explain step by step how to do this and a lot of it is just learning as you go. I took a lot of detailed pics throughout the whole process so I think the best thing to do is to start with the easy panels (decklid, hood) and work up to some of the trickier areas (handles, mirrors, bumpers) My pics will show a progression with each panel from the time the vinyl is first laid on, to the finished piece. There will be text along with the pics to further illustrate what is being done. Let's get to it:
HOOD:
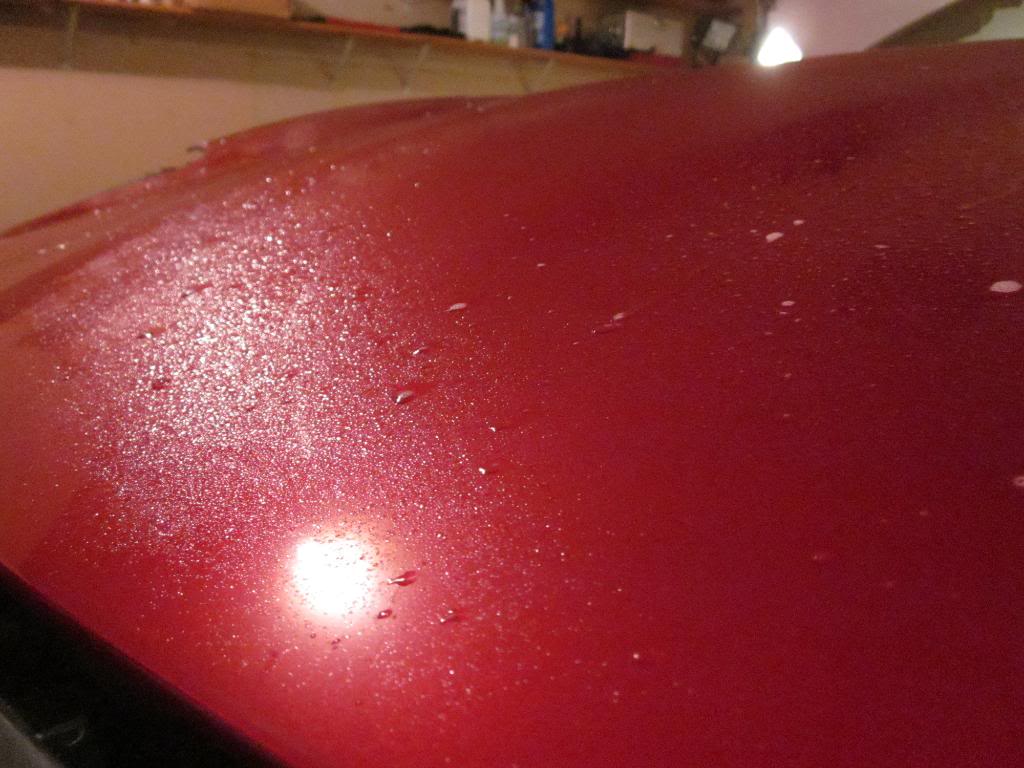
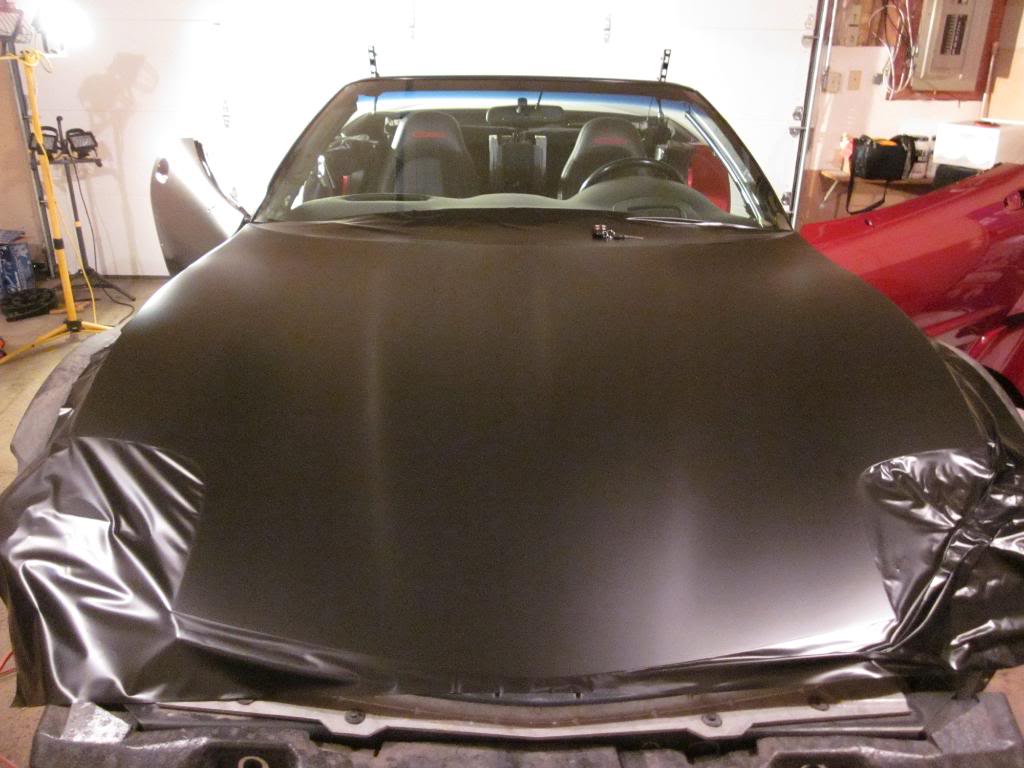
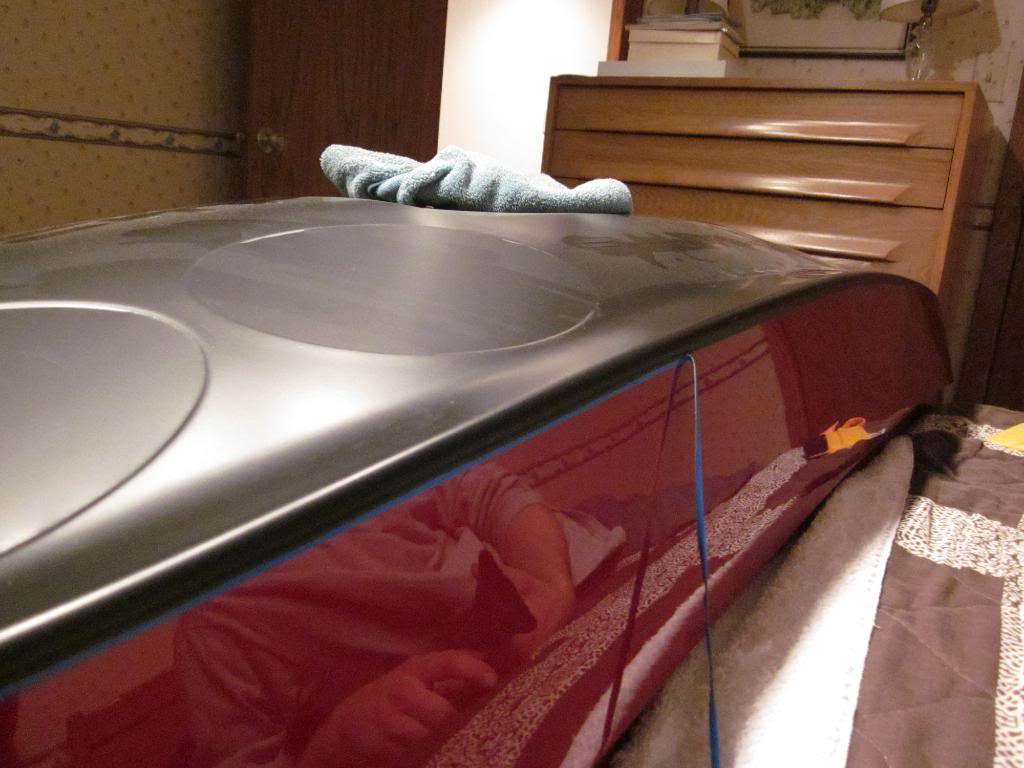
The first piece I did was actually the decklid but I don't have pics of that so here we go with the second easiest piece. Don't let the size of the panel deter you, it is big but it is also fairly flat. I started with the hood still attached to the car because it acts as a natural stand and it is easier to do the surface with it on the car. First I apply the liquid decal spray to the hood AND the vinyl piece being laid over it. You don't need so much that it starts running off the panel, just enough so it starts to bead up on the surface like so:
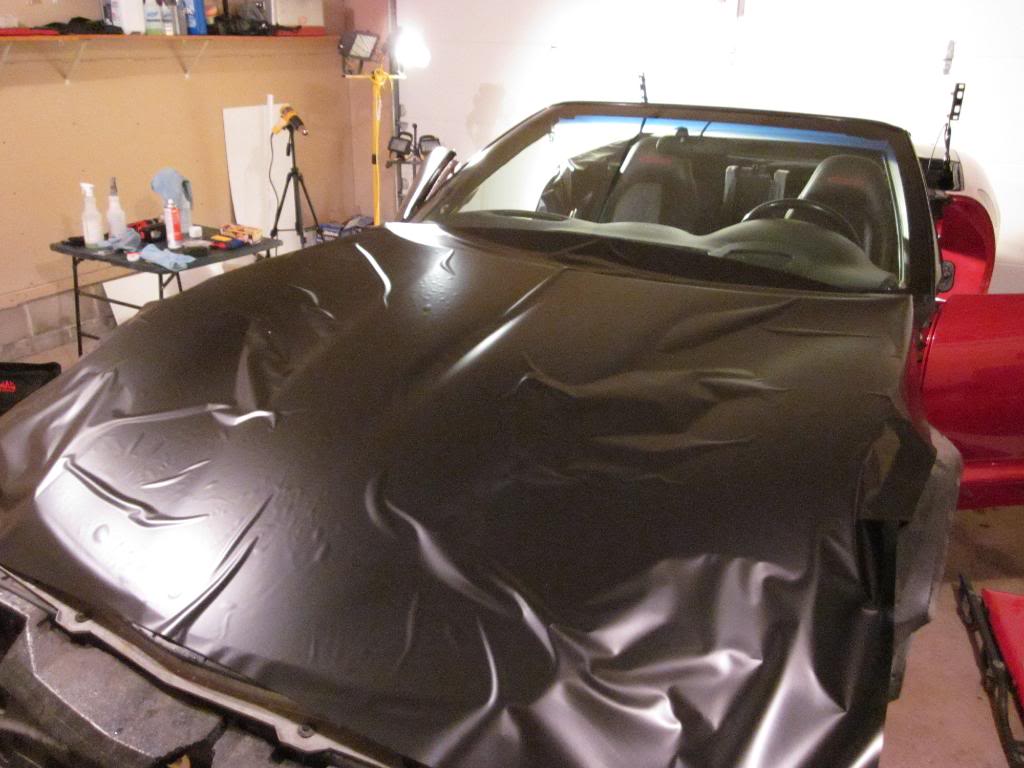
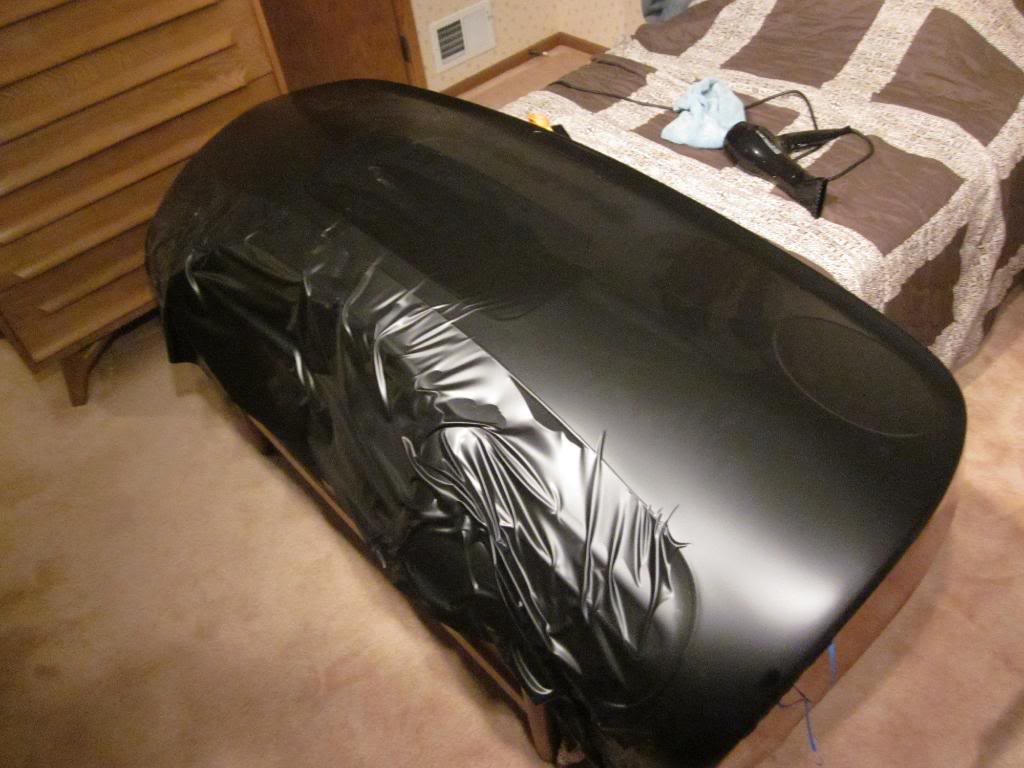
Next I laid the vinyl on the hood and roughly started to pull it to where I needed it. It is important to make sure the surrounding areas are clean (like the fenders and headlamp covers) because the excess vinyl will lay past the hood and onto those surfaces when you smooth it all out. If those surfaces are dirty the crap will stick to the vinyl and will make wrapping the edges not work so good.
Start in the center of the hood on that center style line and work out. It is important to do that on most panels because if you don't attack it with a plan you will end up bunching the material at some point and it will be junk. You need to start at one spot and systematically work your way to the edges (on every panel, not just the hood) You can however start in the center and do one side completely, then come back and do the other.
In the picture you will see I have completed the right side of the hood but the left needs to be done yet. Using your heat source and the squeegee (this is where friends come in) you want to pull and stretch the vinyl and smooth it down onto the surface.
If you look at the pic above you will still see creases on the side that I haven't done yet (left side). Here is a video that does a great job of explaining how to go about clearing up areas like this. Actually here are the two most helpful videos that I found for this project. Granted he is not using Oracal vinyl but the properties are similar. He is applying dry which didn't work out for me, but maybe you can pull it off. Oh and by the way, he makes this look EFFORTLESS. Although the information is good, he almost makes it look too easy. WAY harder in person for an amateur like myself.
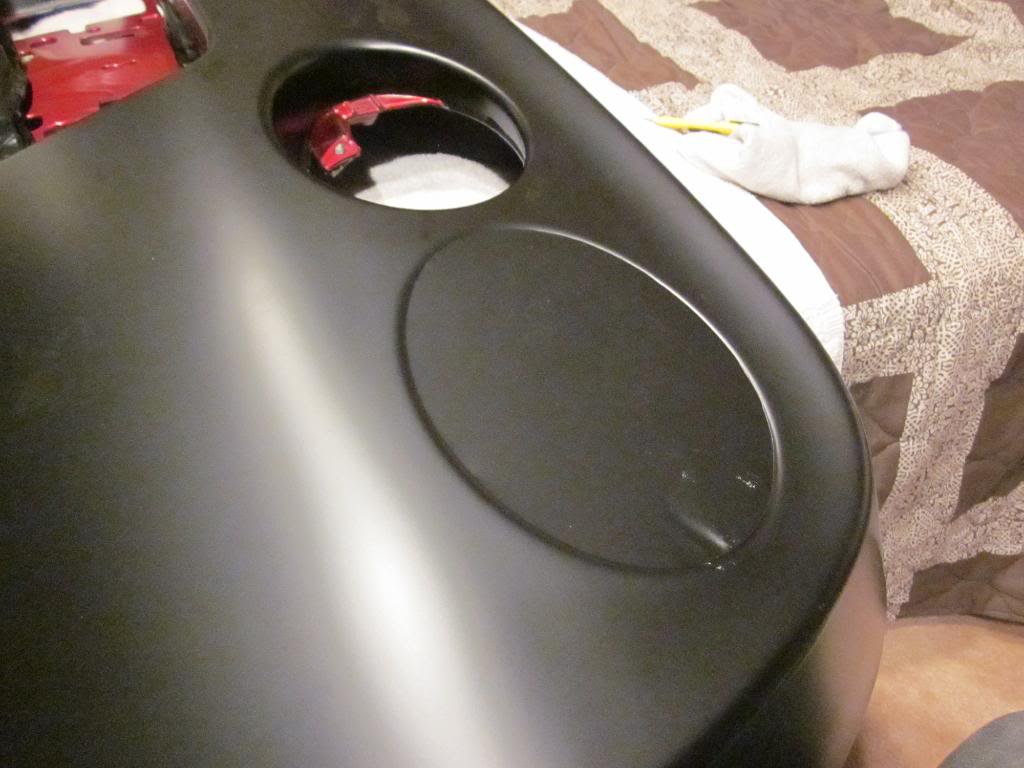
Alright the surface is now done. There may still be some small "bubbles" or "lumps" where there is a tiny bit of lubricant still trapped under the vinyl. The great thing about this product is that it has integrated air release channels that allow you to work out air pockets and other defects like in the second video. It also lets air pass through so if you have lubricant trapped underneath it will dry out and look flawless in a matter of hours. So if this is your first piece and you have it all squeegeed out and it doesn't quite look right just come back in 24 hours and see what happens, should work itself out. Check it:
So at this point I would let the hood dry until the next day and then take it off the car. Once off the car in can be laid upside down on a carpeted floor and then the edges can be trimmed and tucked. After that put it back on and call that panel done.
DOORS:
The next easiest piece is probably the door(s). Don't be an idiot and try to wrap around the mirror/handle and belt molding. Take the 20 minutes and detrim that bad boy, I promise it will go 100 times easier.
I don't have very many good pics of the start of this panel but that is o.k. because every panel starts the same as the hood did. You cut your vinyl to fit and lube the backside of the vinyl and the panel. For the doors I started at the top of the panel and worked my way down. Once all material has been smoothed out it should look a bit like this:
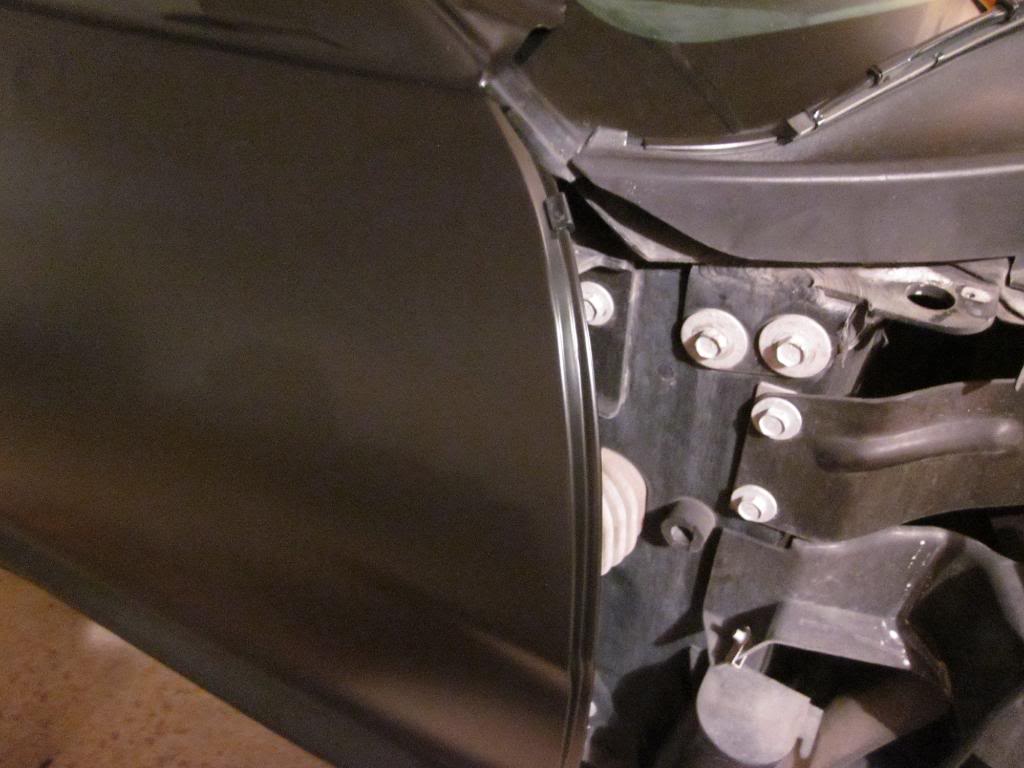
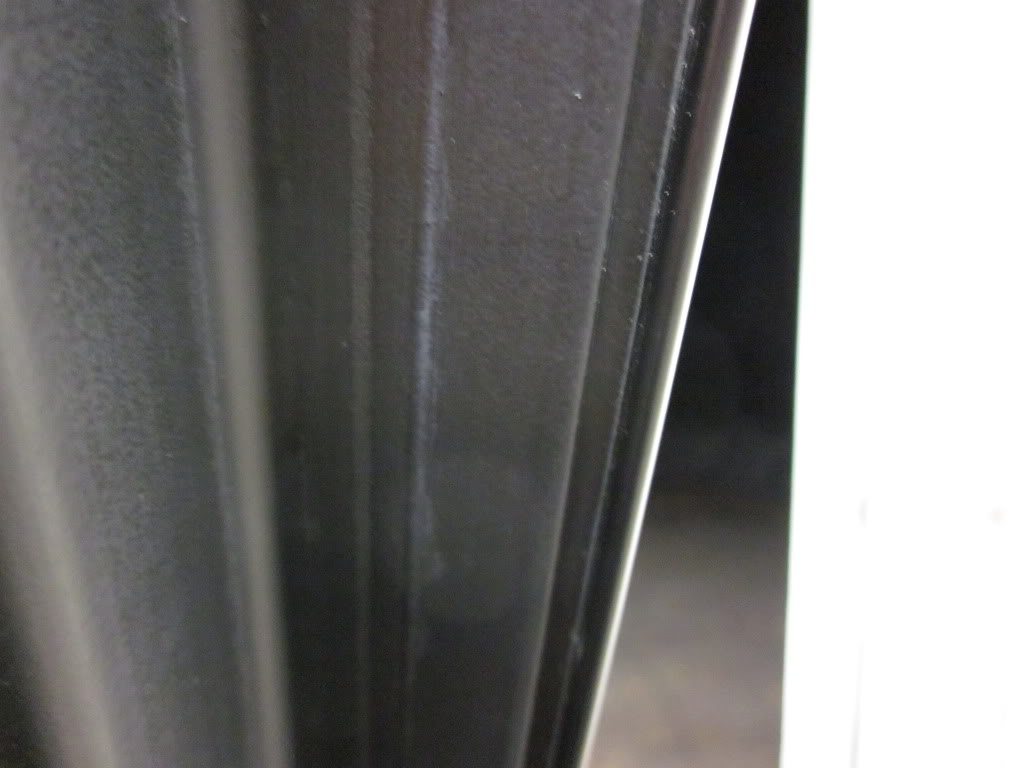
The tricky part of the doors were the edges. Once you have worked the excess material out to the edge it will look something like this:
This is of course the front edge and it almost goes without saying that you want the fenders off for this part to get the access needed to properly finish the edge. This is also an area where I would use adhesion promoter. The tight 90degree bend will have a tendency to pull up and you don't want that. It is also worth mentioning that the least amount of stretching is the best because the vinyl does have a slight memory to it and if you do the "stretch and stick" it will want to pull up more than if you heat it and gently press it into the edge. So with some heat and patience your edge should go from that to this:
And with a bit more trimming and tucking behind, from that to this:
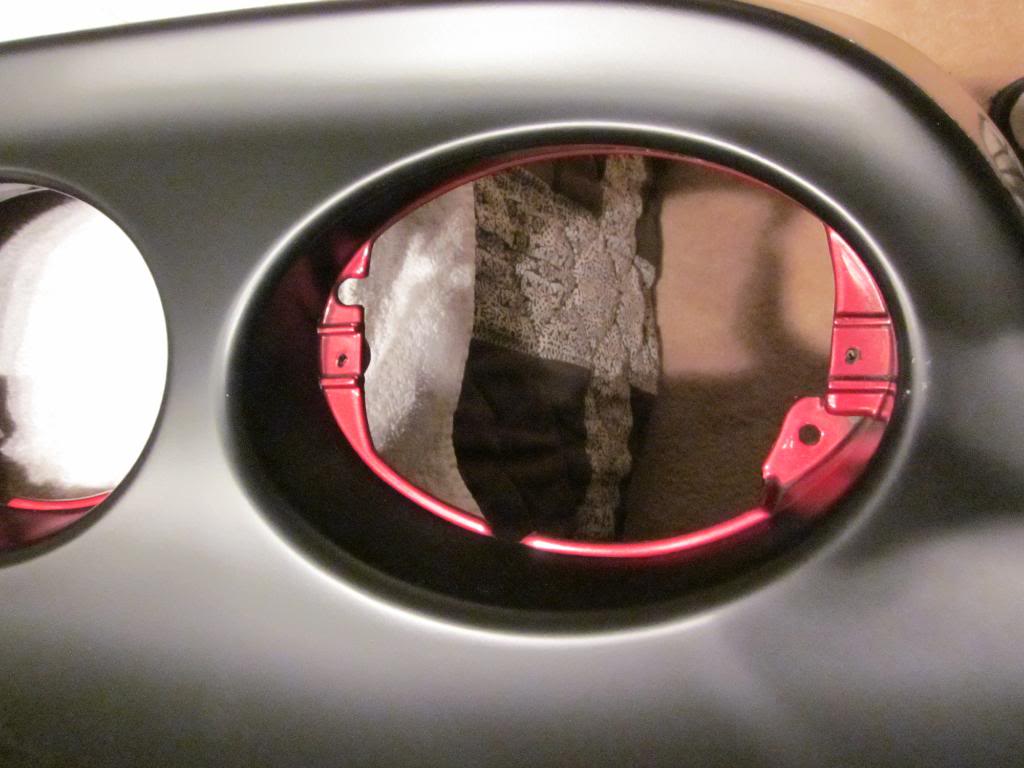
For the mirror it will be apparent where the holes are because you can see the impressions in the vinyl. I just took my blade and cut out around those areas. You can see that they are fairly rough finished from the factory so you don't have to be too careful in this area. Everything is covered by the mirror once it is back on the car anyway. Action shot:
Now for the handle cut out area, this spot has to be a bit nicer. Start with some moderate heat over the whole thing to help relax the vinyl. I started by taking the edge of the squeegee and just running it along the edge of the opening using very light pressure. Two action shots in a row:
Continue working it until the recessed edge is complete:
Next cut out a hole in the middle and wrap the edge. I did not use adhesion promoter in this area because once you install the handle there will be no way for it to pull up.
And a beautifully finished door, repeat for driver's side.
Last edited by MarkyMarkGTM; 10-09-2011 at 03:23 PM.
QUARTER PANELS:
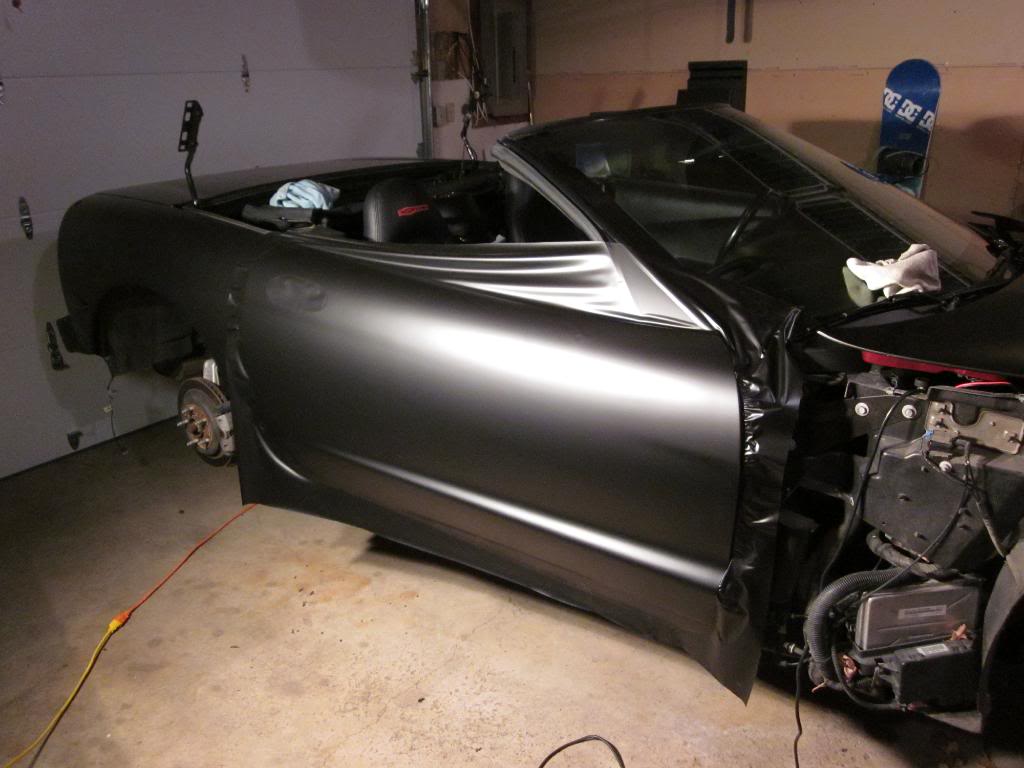
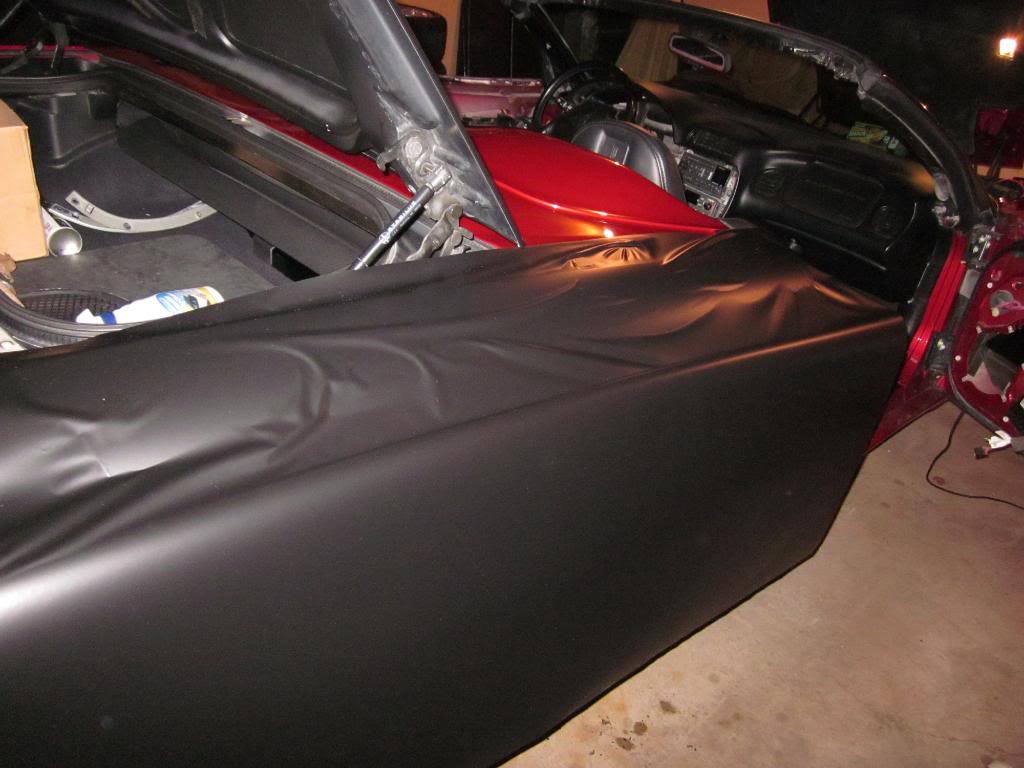
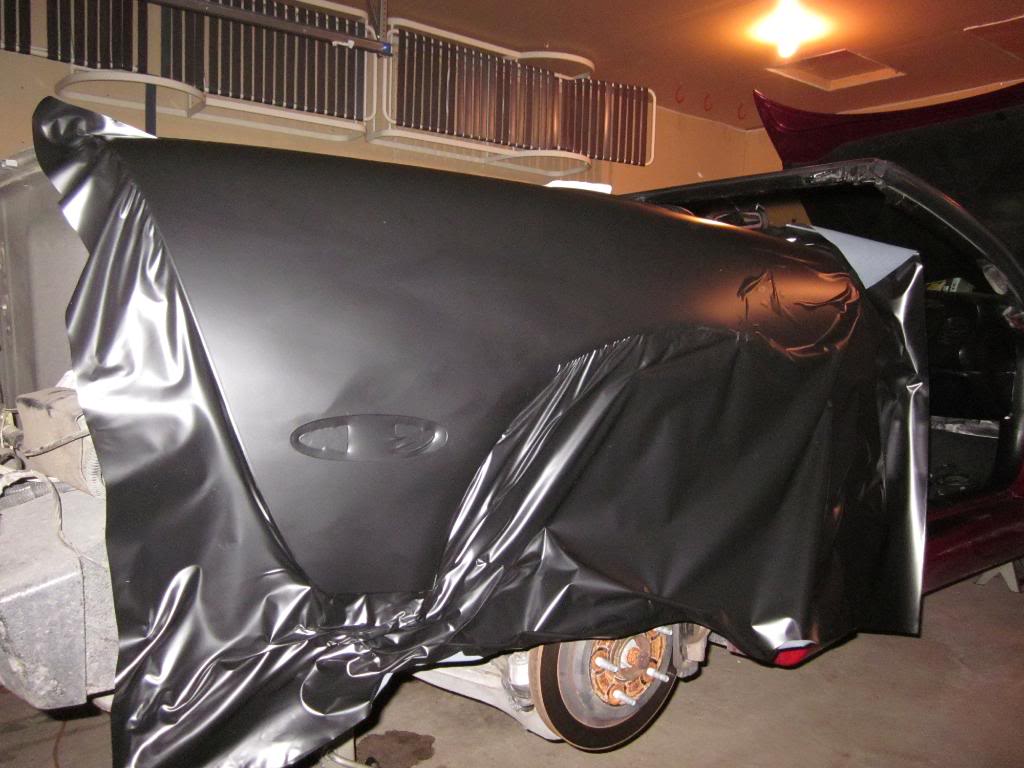
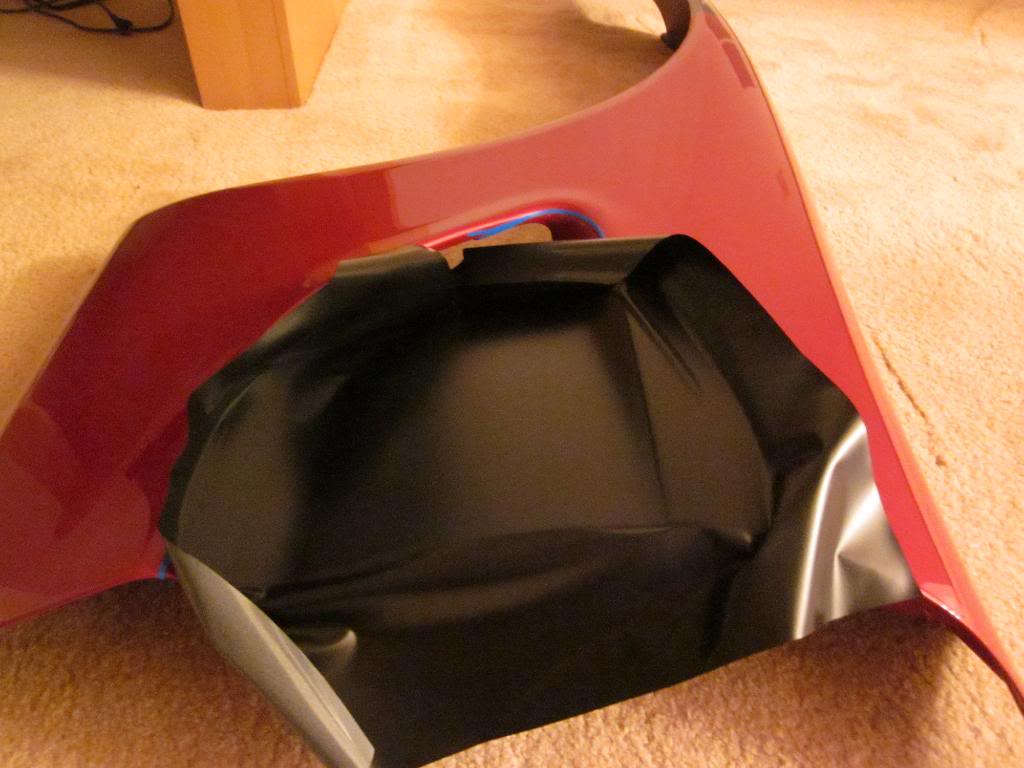
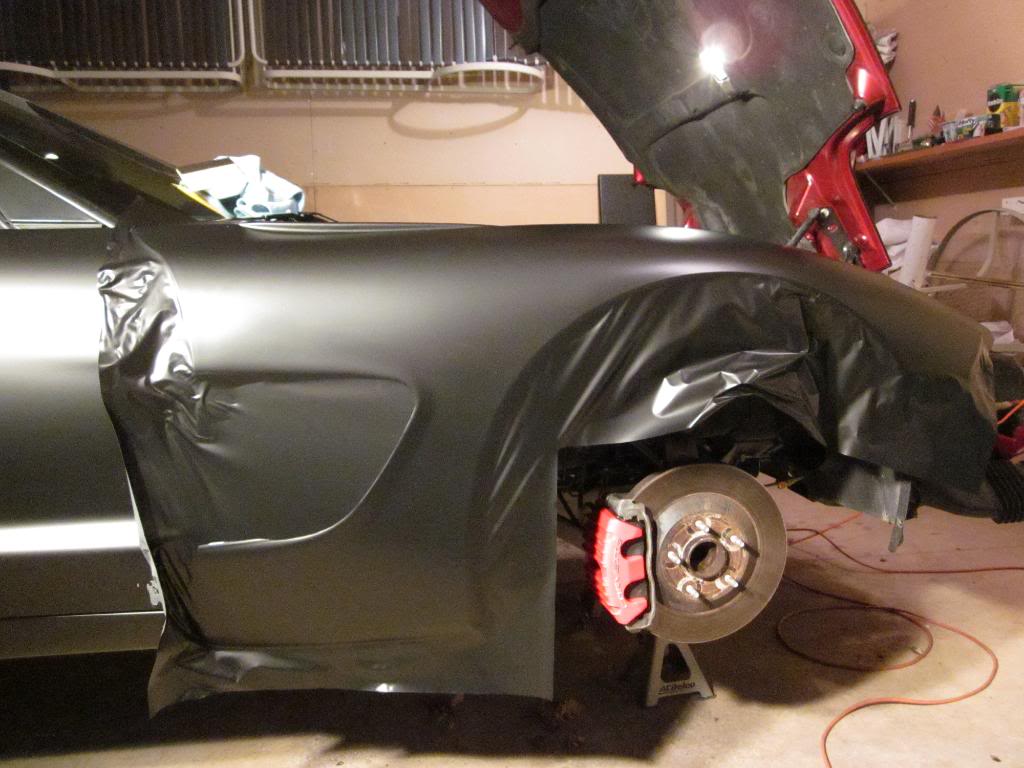
Quarters are a bit tricky because of the flare of the wheel well. They seem basic enough but they are a little challenging. Never the less, they are the next easiest piece. Start off with plenty of material both lengthwise and widthwise. This is the first piece where the shape of the panel will cause the vinyl to "shift" position as you pull and stretch to meet the countours and you want to have plenty of "error" room on each side just in case.
Like the doors, I started at the top of the panel and worked my way down.
Here you can see it starting to take shape. Even though it is wet I tried to not have it touch the panel because you risk messing up the adhesive when you have to reposition it. By reposition I mean get in a jam and have to lift up the material and re apply it. I just found it to work better for me to have a buddy hold the excess away from the panel until it was time to lay it down with the squeegee.
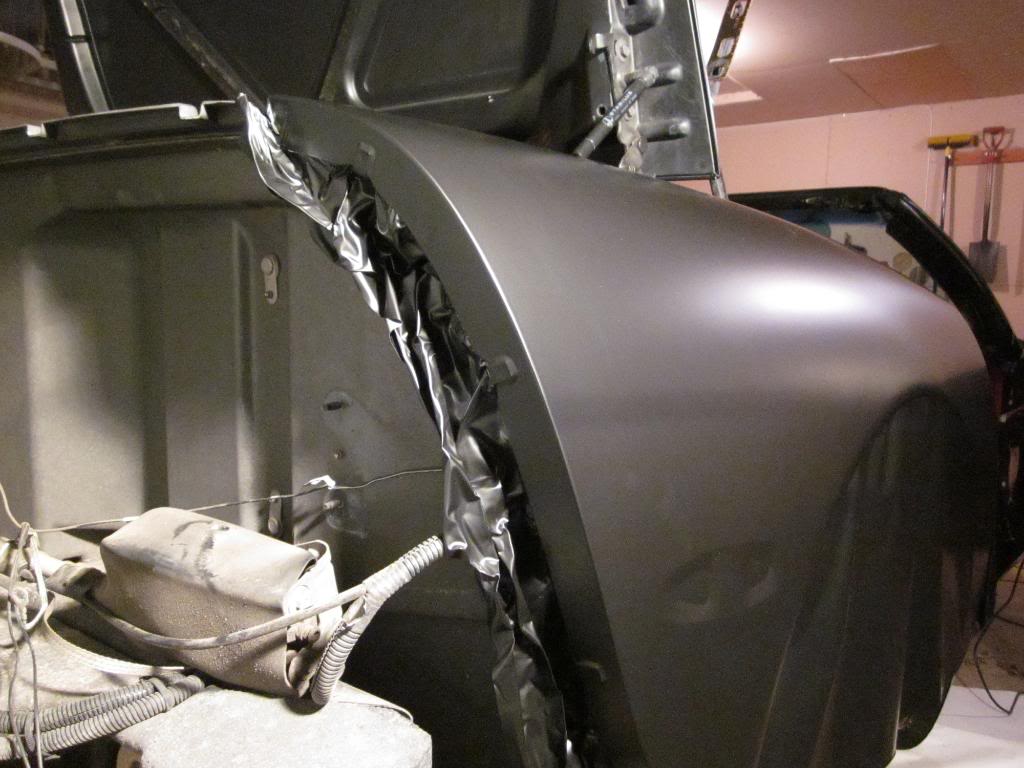
Once I got down to the wheel well I worked the back first and then when that was done, went back to the front and finished up there. Here is a shot with the back done. Oh and don't mind the bad picture quality that makes the vinyl look choppy and not uniform. It is just the pic and it looks mint in person.
This is as close to a finished pic as I have but notice how the edge is wrapped around to the edge of the panel (excess gets trimmed later) This will ensure no peeling up of edges when the cover goes back on. The side marker light uses the same process as the handle area on the door.
TONNEAU COVER:
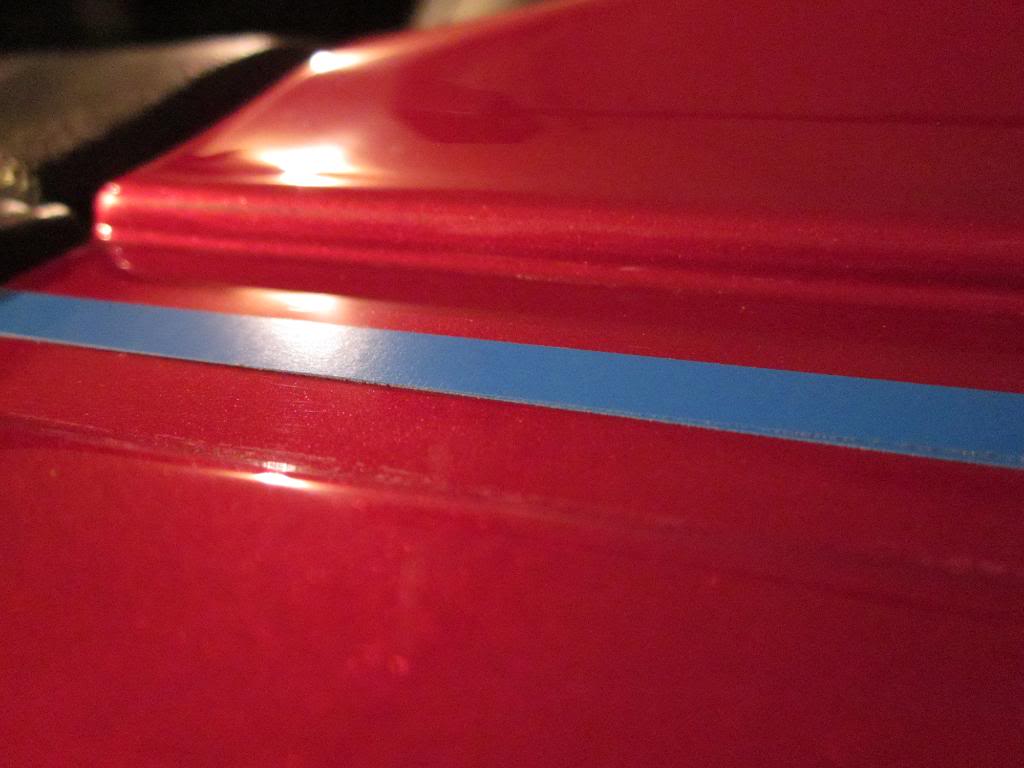
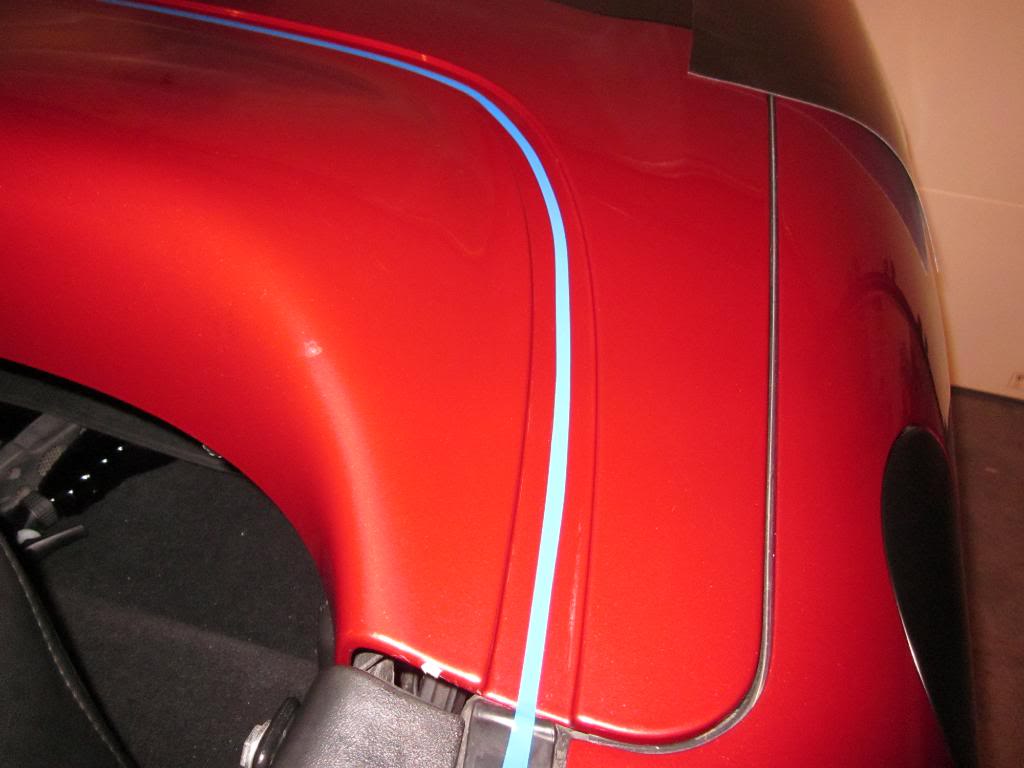
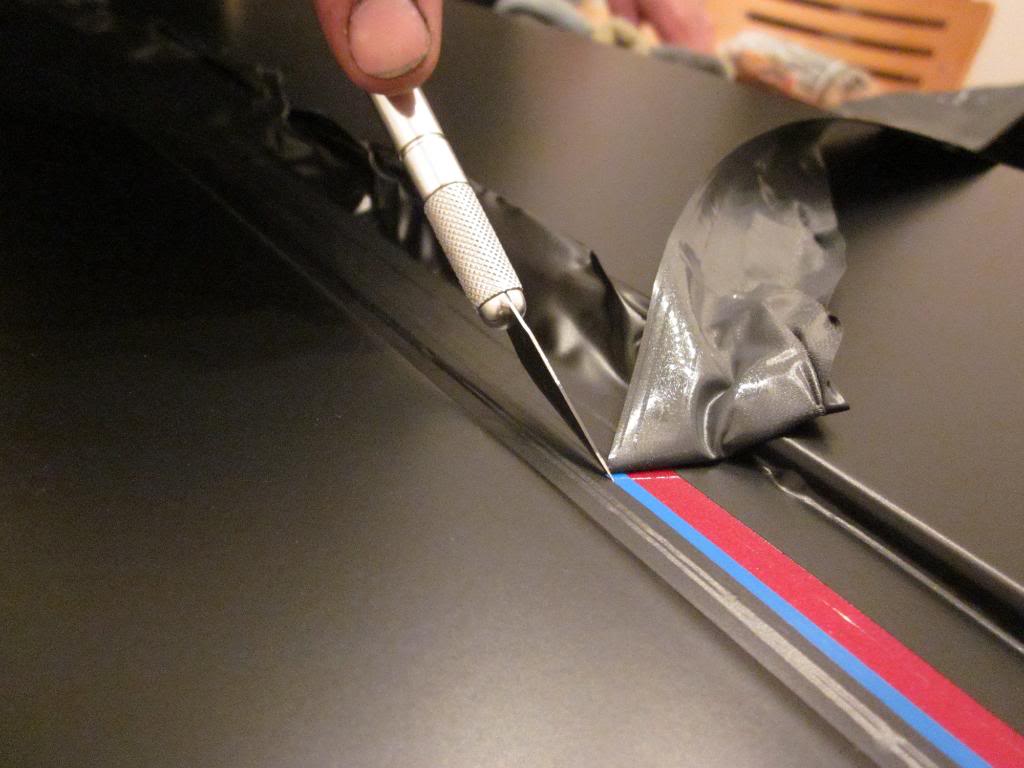
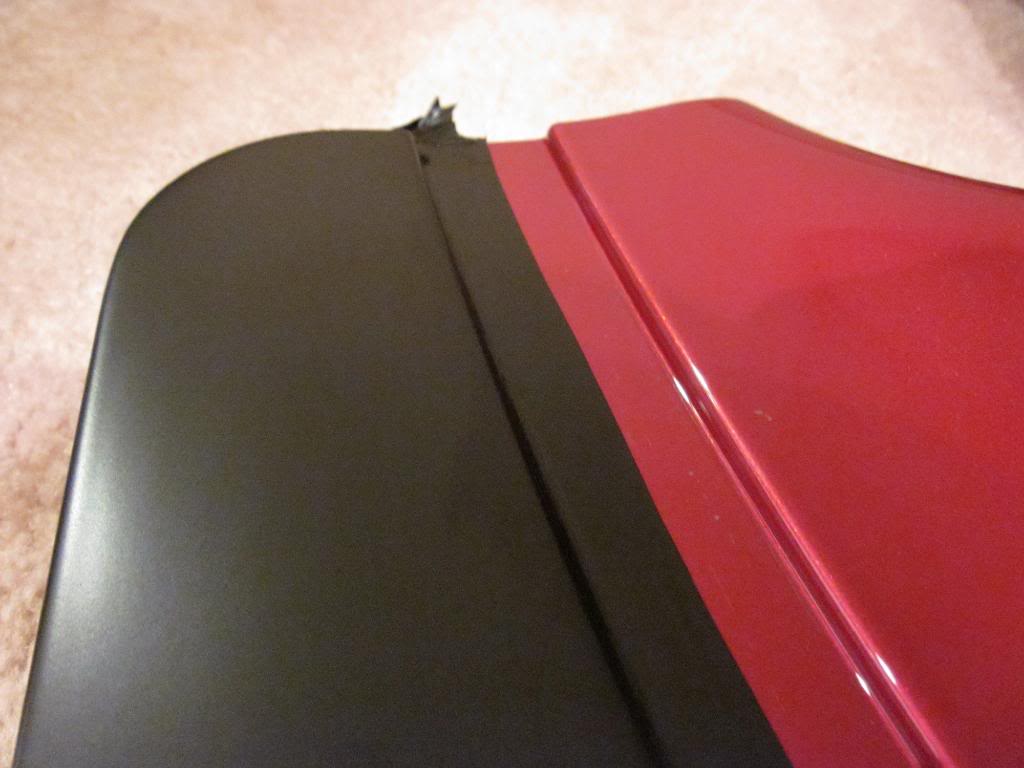
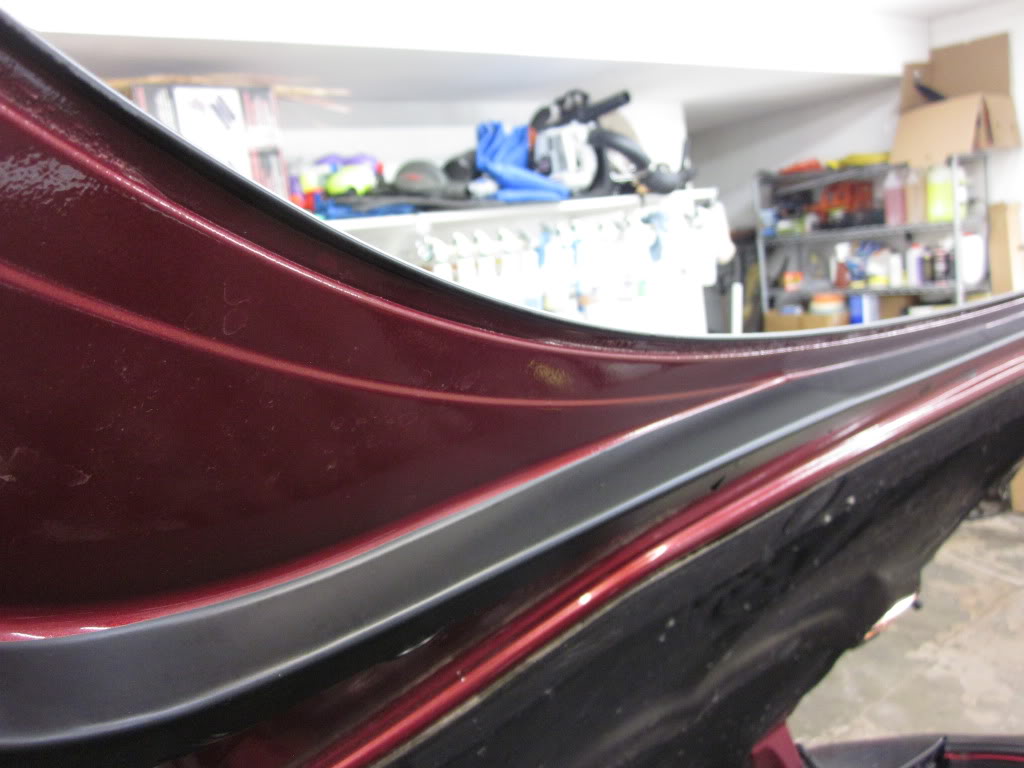
My car is a vert so it has one, some of you won't have to worry about this piece. This piece will also serve as a demonstration on how to cut and trim vinyl safely while it is laying on the paint finish. I wanted to use two separate pieces for this because my thinking was if i used only one it might lift in the middle and then my molding would come off because it would not be stuck to the paint, but only stuck to the vinyl. So the plan was to seam the vinyl in the run channel that the molding sits in.
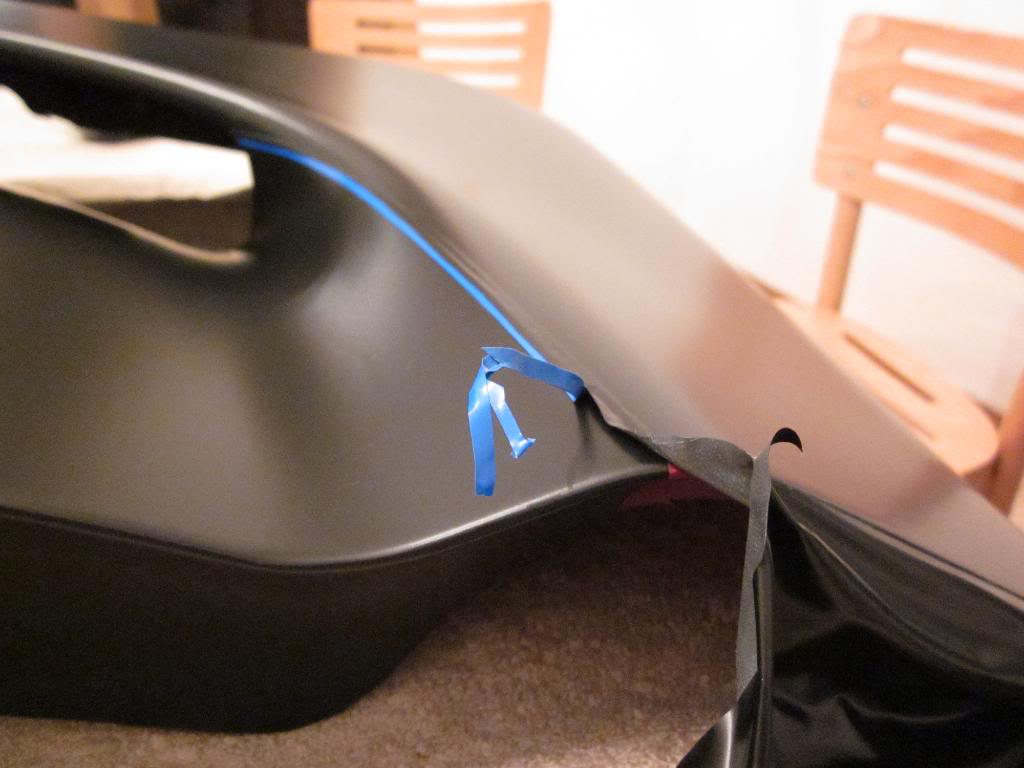
I start with the fineline tape and run a piece along the recessed gutter where I plan on making my cut.
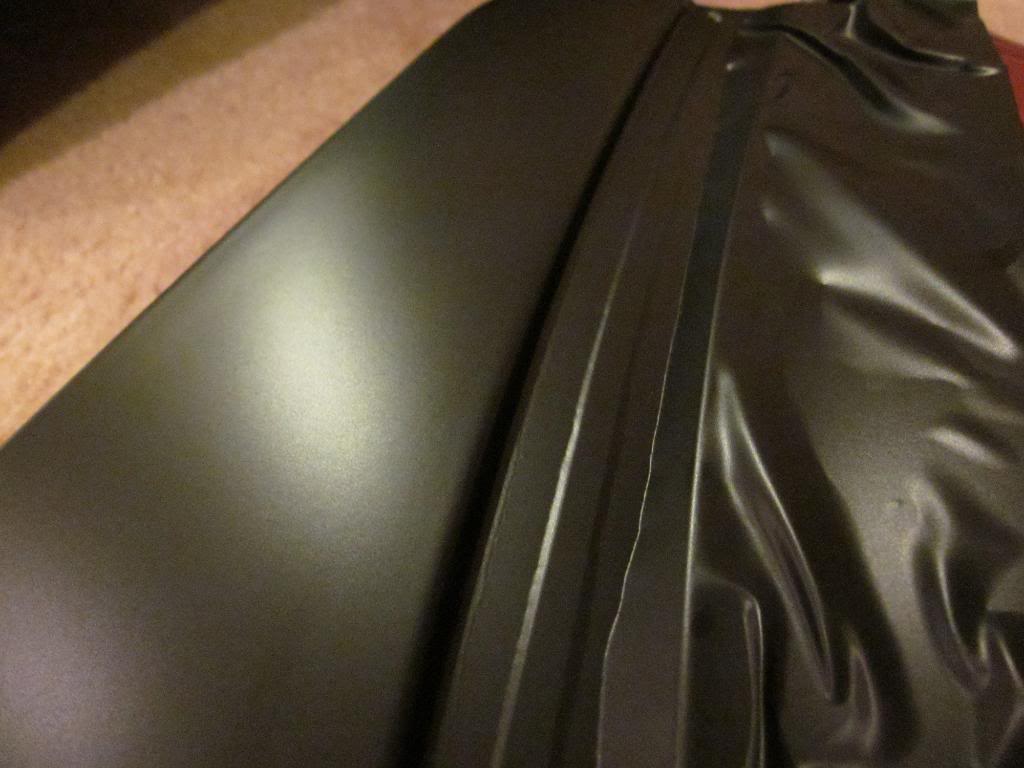
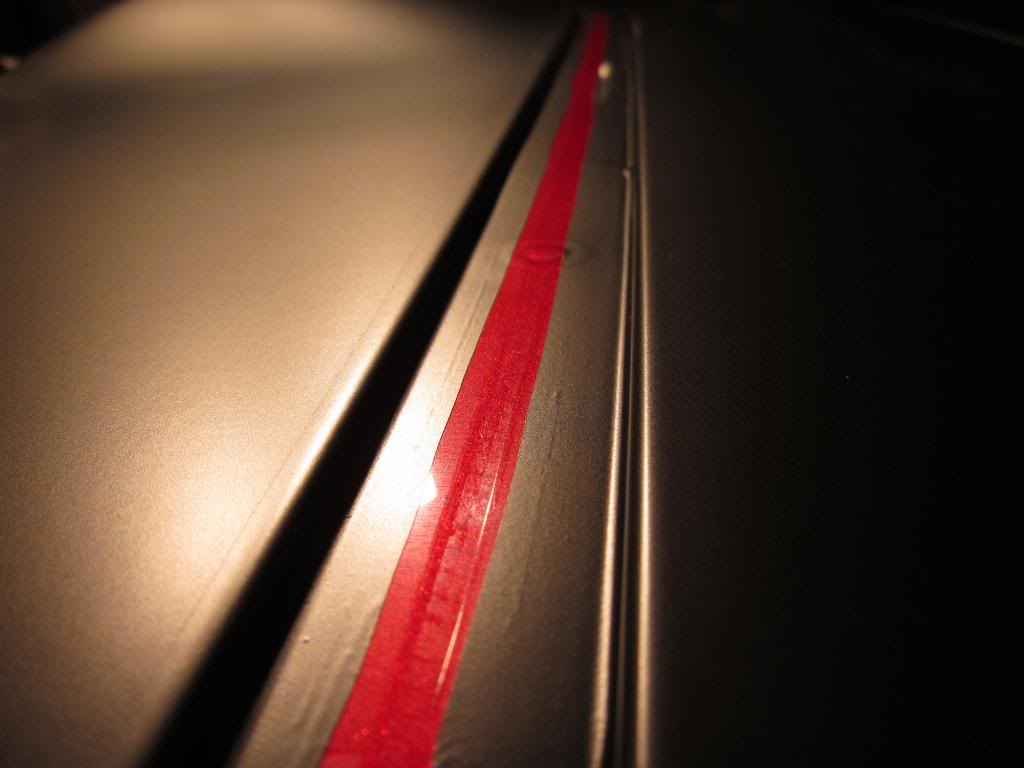
Alright, next I will wrap the back section of the tonneau cover and just lay the vinyl right over the tape line. Oh, on those last few pics I actually have two layers of tape, one on top of the other. When you build them up it is actually easier to see and make the cut. So here is the vinyl laid over the tape and you can clearly see exactly where the tape line is underneath.
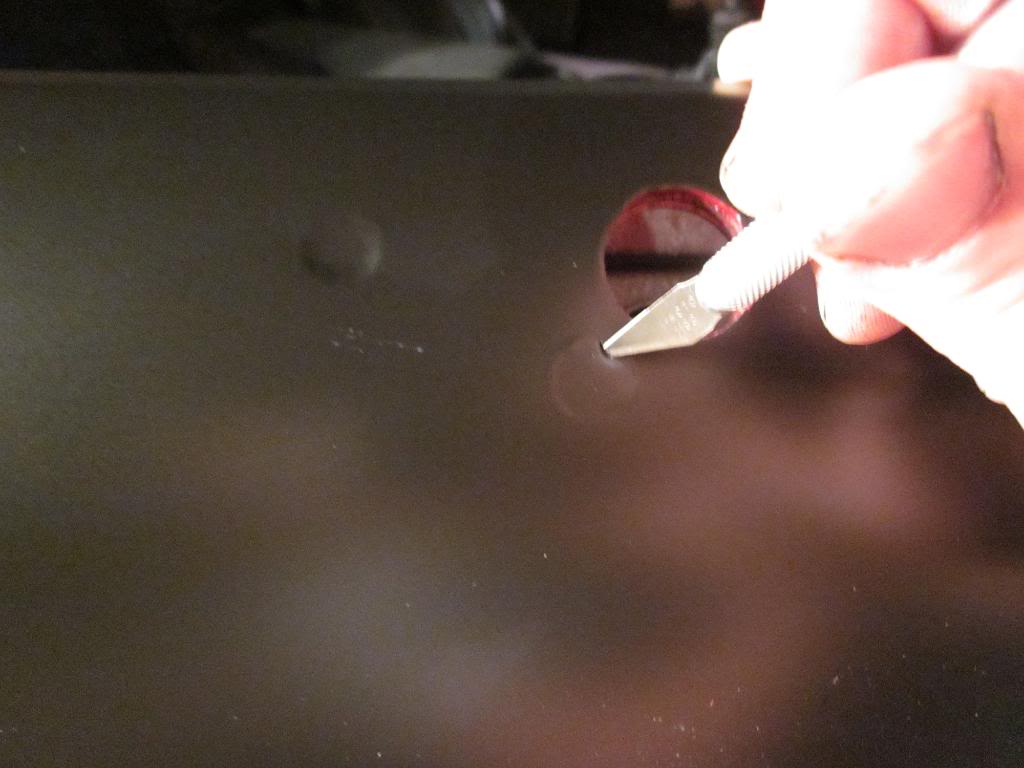
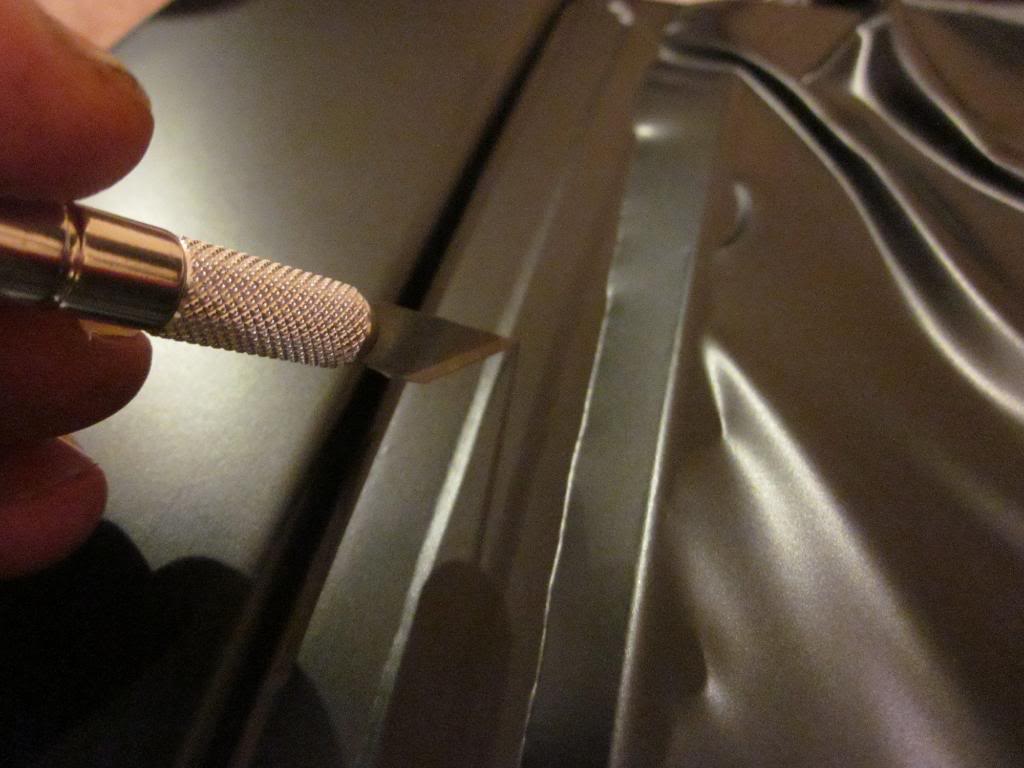
Next I take a blade (always sharp and new) and LIGHTLY score the edge along the tape. You want to aim for the middle of the tape line and stay away from the edge. The tape acts as a buffer between the vinyl and the paint on the car. By using light pressure you can easily cut through the vinyl without damaging the paint. The purpose of the tape is just to allow you an extra safety net and give the blade something to go into if you push too hard. It is very easy to do when done with caution. Even still, these pictures will scare some of you.
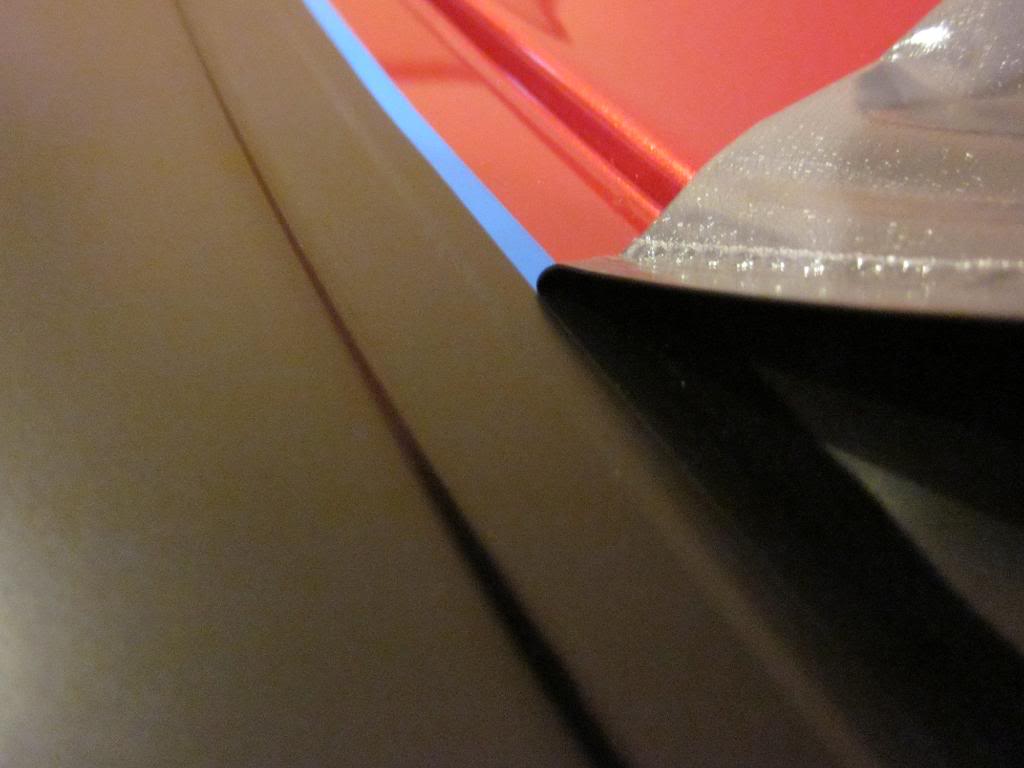
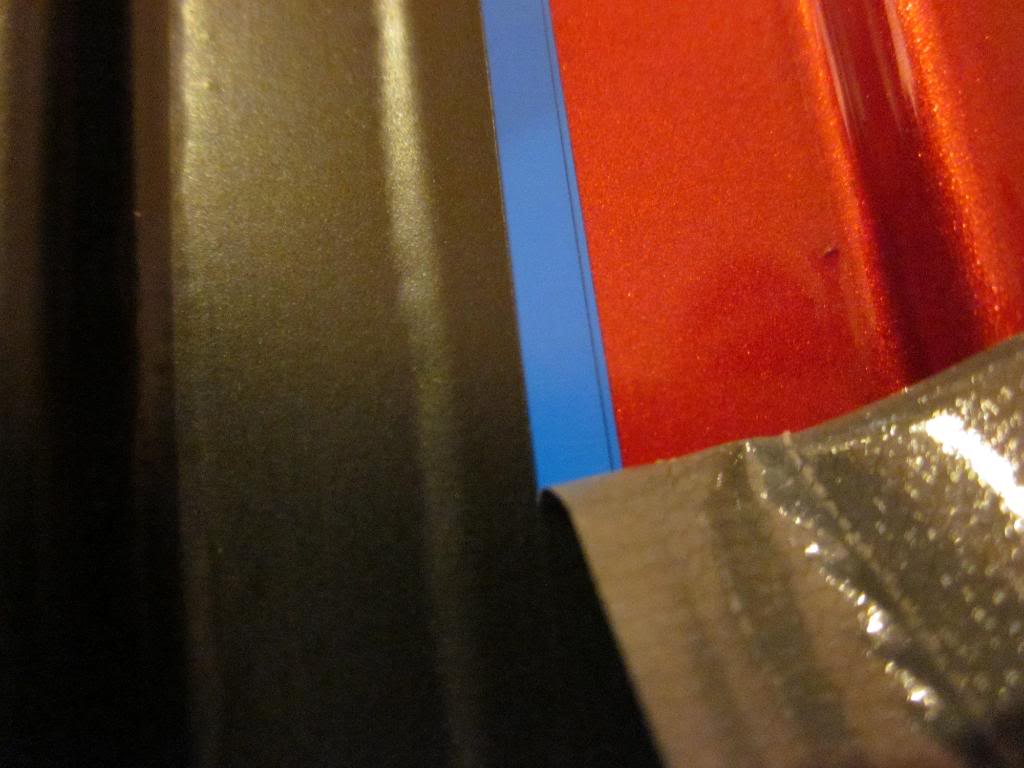
Here I am pulling the excess away and you can see that my cut is in the middle of the tape and you can still see half of the blue tape.
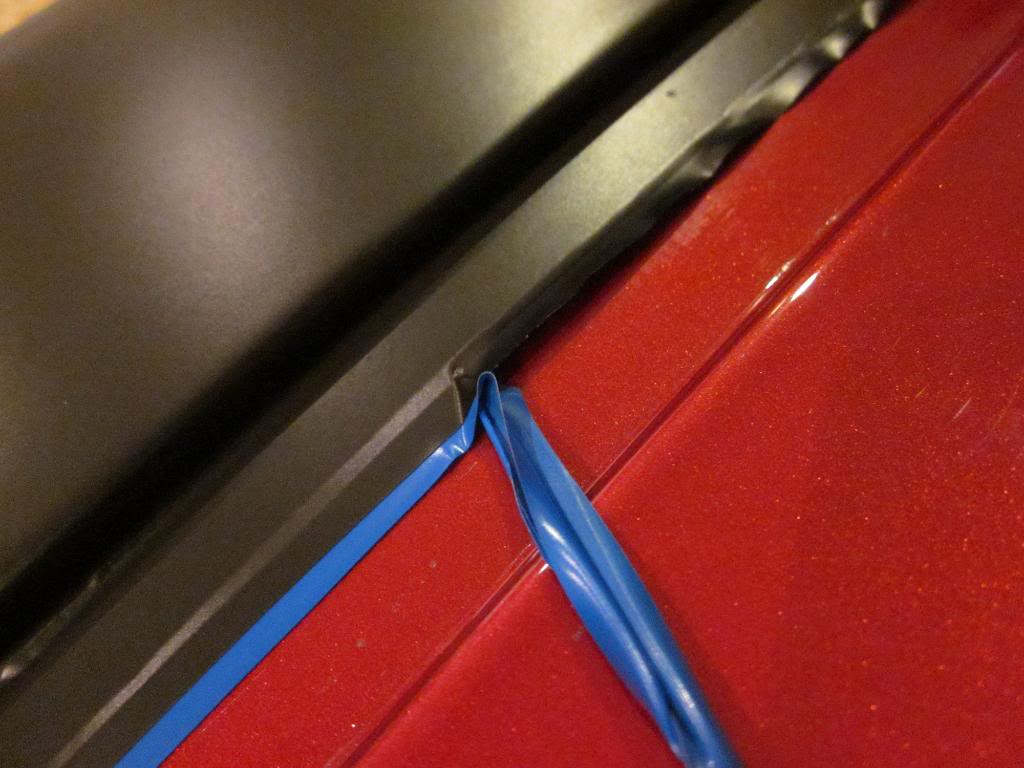
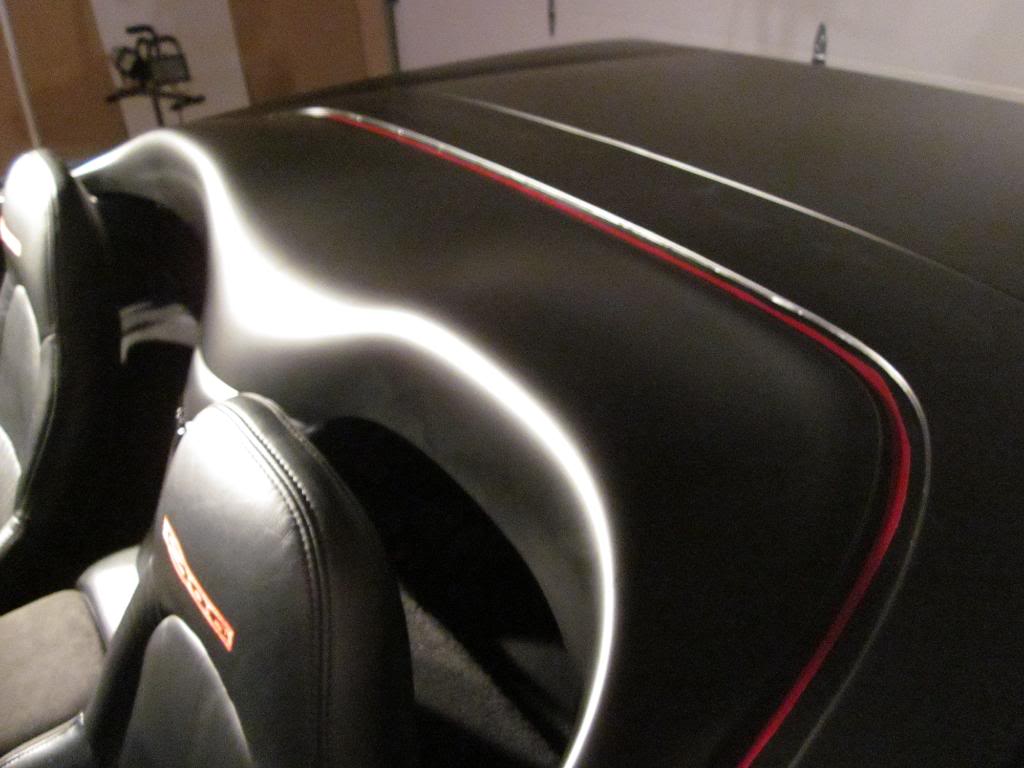
Next I pull the tape out. This will leave a little bit of a loose edge but I simply run some heat over it and press it down to make a clean edge.
Repeat the process on the other side and the panel is done. For what it is worth, I did this panel off the car so that tucking the edge would be way easier. This technique of cutting on the car without damaging the paint is used on the mirrors, handles, bumpers, and door jamb/rocker areas. I won't go into as much detail on those pieces but this panel shows you how it is done. Here is the finished panel waiting for the rub strip to be re installed.
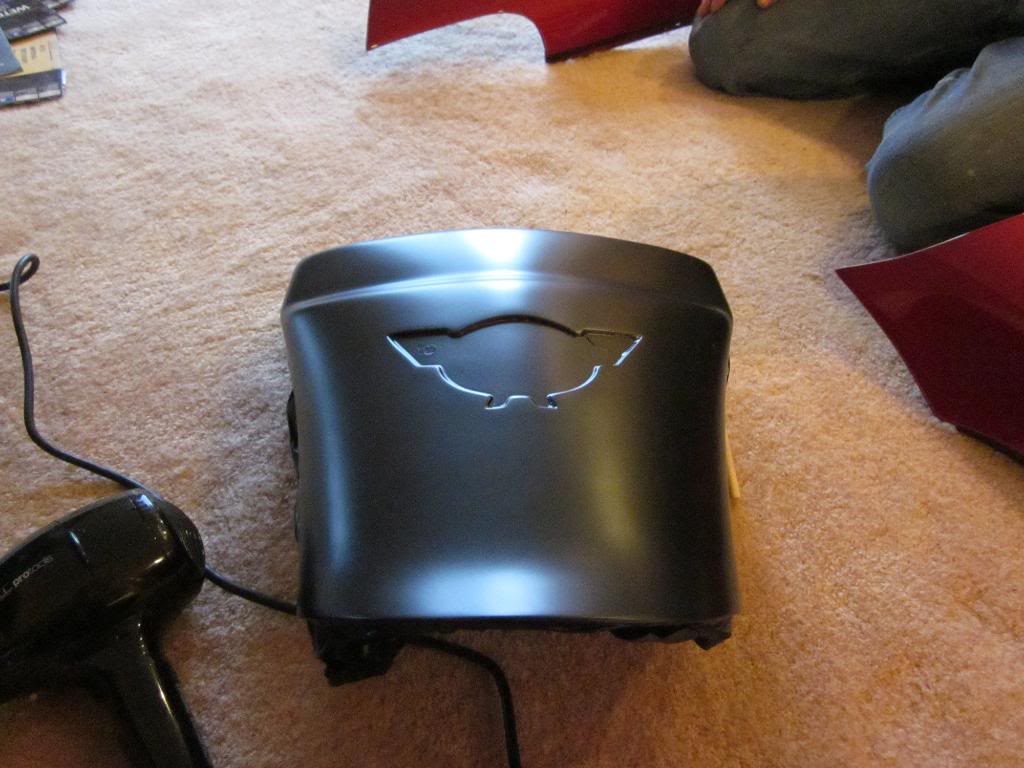
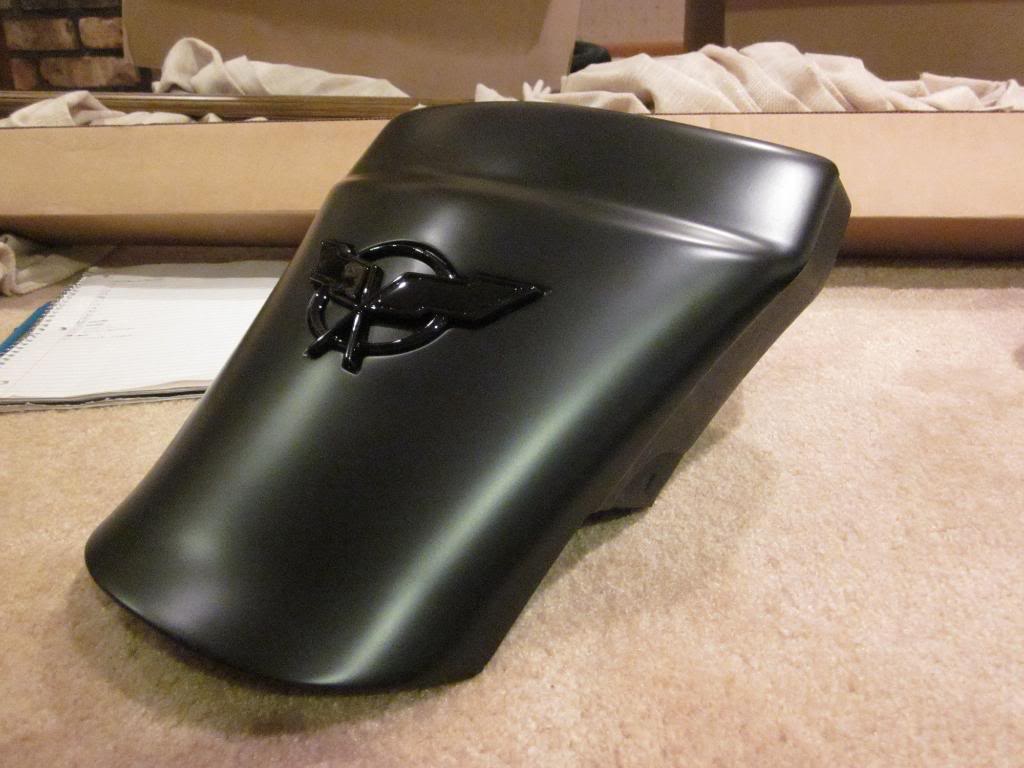
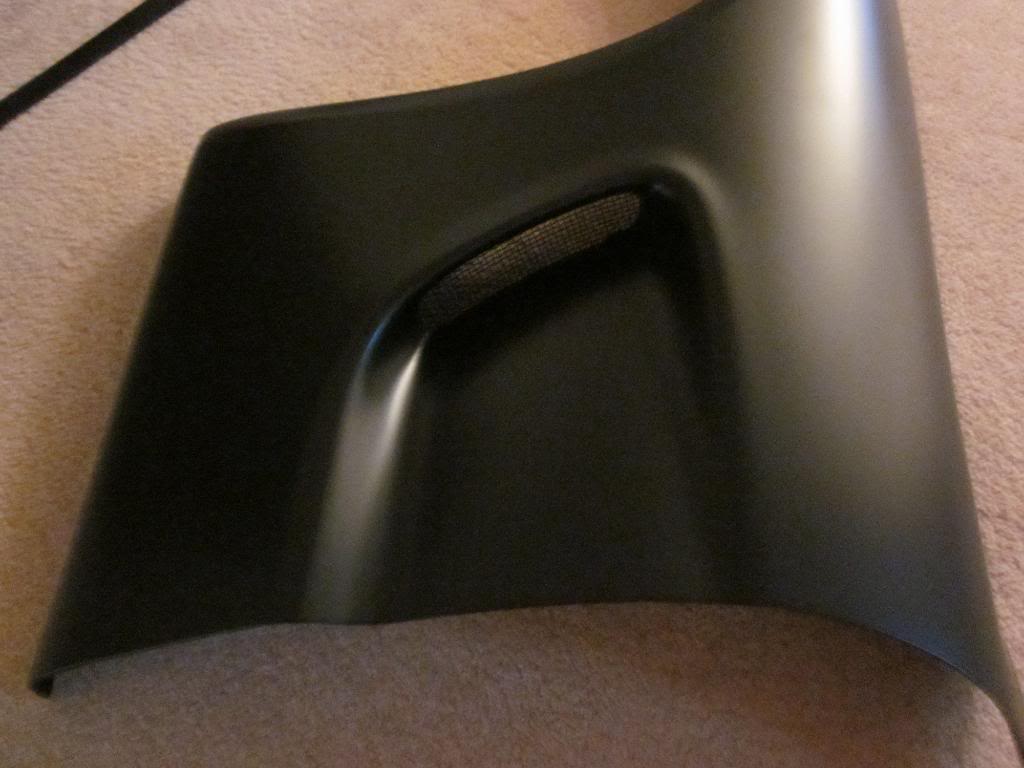
WATERFALL:
Not much to show here, very basic panel. Piece is wrapped right over the emblem area and then I used heat to go back over it and push in the vinyl to conform to the edges of the recessed area. Blacked out emblem was painted off the car and re installed after the piece was wrapped.
Last edited by MarkyMarkGTM; 10-09-2011 at 03:28 AM.
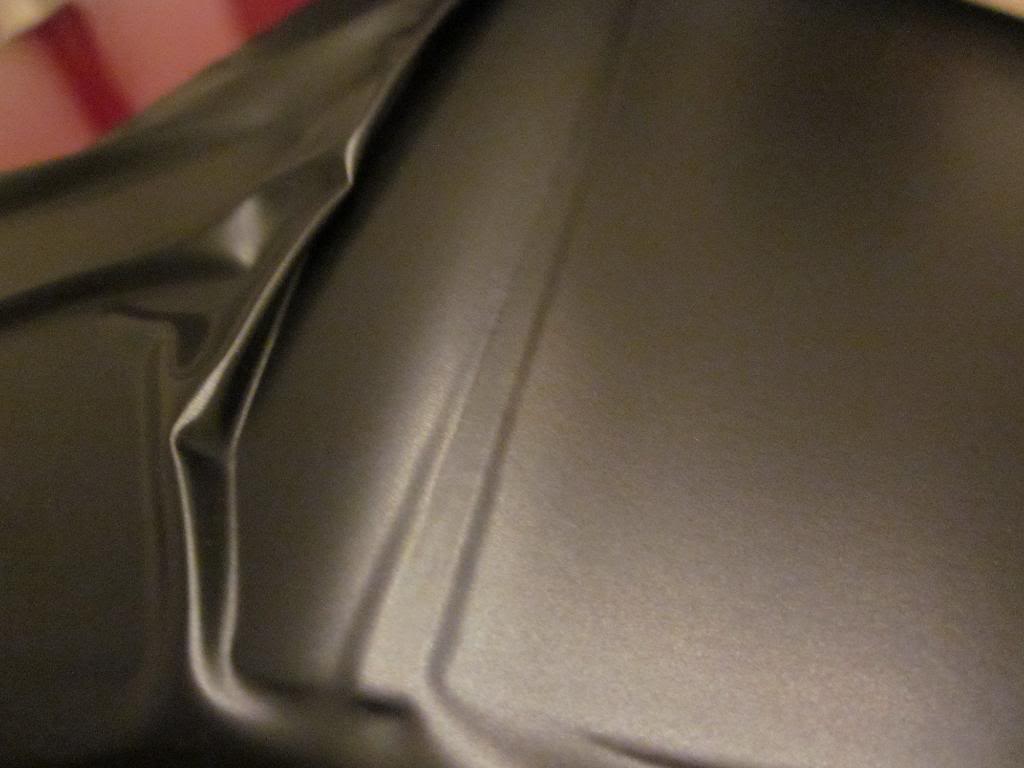
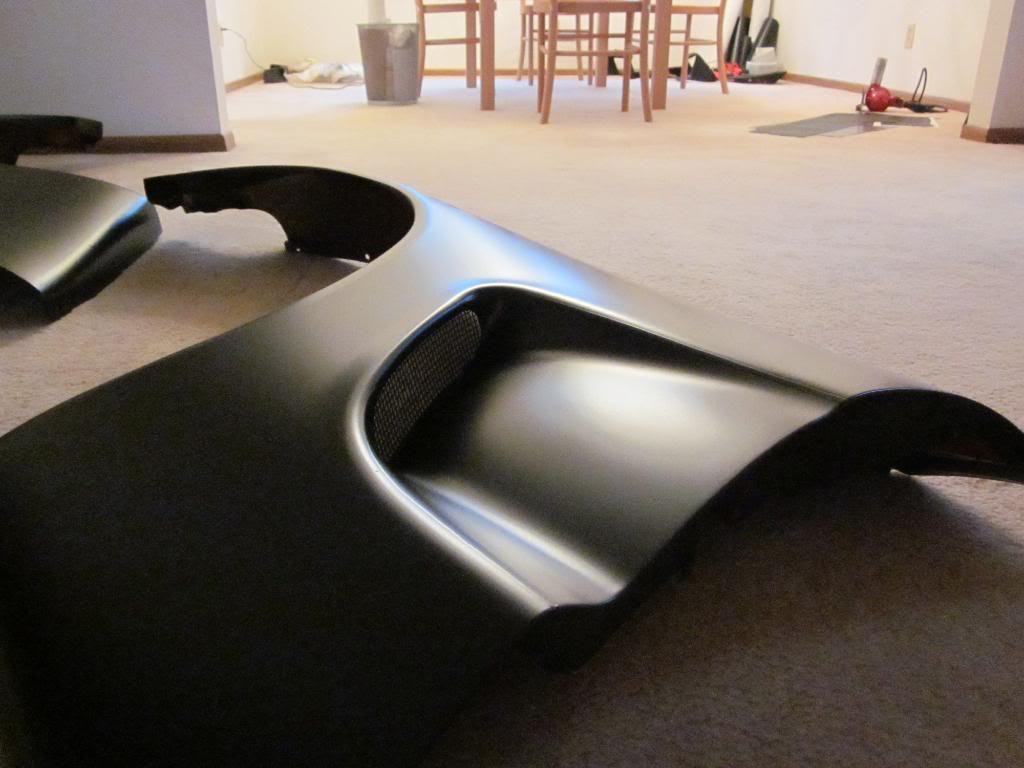
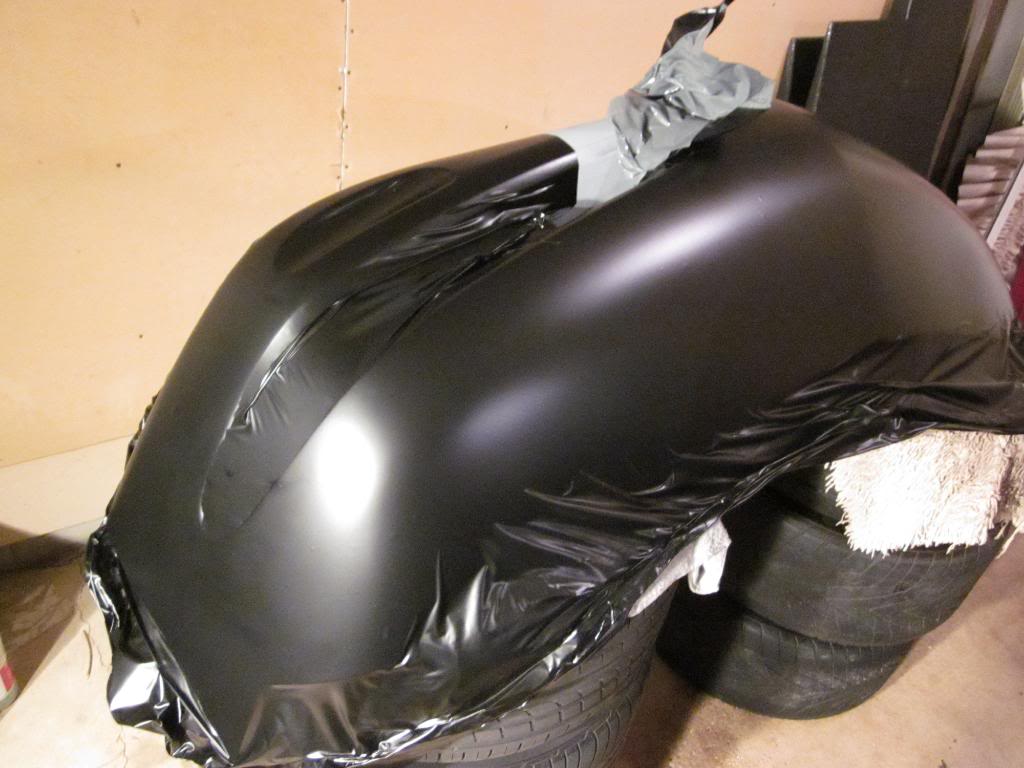
FENDERS:
After that easy waterfall piece it is time to get back into it with the fenders, one of the more difficult areas of the car because of the cove cut away area. I tried several times to wrap it with one piece but it always let loose in the cove and eventually I decided that it would have to take two pieces with a seam. One piece for the cove area, another for the face of the fender.
I must have been getting pissed because my documentation starts to suffer a bit here. In this first pic you can kinda see the edge of the tape line but not really well. The tape runs along the edge of the cove and kinda tapers in around the corners, laying the tape lines is obviously the first step to this panel. This is also hard to see but notice how I didn't just take a big piece and lay it over the top and press it into the shape of the panel. I actually tried to roll the piece of vinyl into a tube like shape and stick it through the cove and then let it naturally unroll to conform to the edges.
The more natural the vinyl sits in there the more chance it has of staying. When I was trying the fenders with only one piece I could get it to work but letting it sit for awhile it always pulled up. By using two pieces and letting the cove piece unroll into position instead of using a ton heat and stretching worked really well. I know it is hard to explain and sorry I don't have better pics.
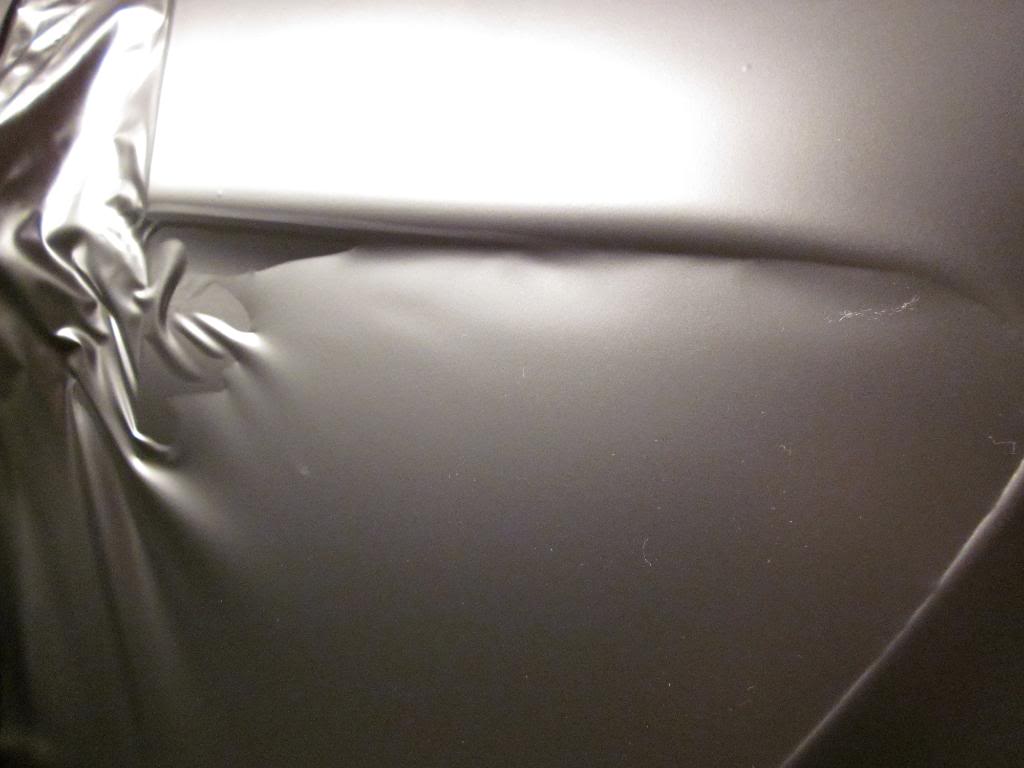
In the last pic you can roughly see the tape line running the edge of the cove. Lightly score the vinyl along that line and remove the excess vinyl and tape. Once that was done the fender went back on the car. The fender goes off, on, off, then back on again because it is easier to work different parts at different angles. The cove was easier to do off the car, the surface or face of the fender was easier to do on the car, and as always the edges are way easier off the car. I got good at putting fenders on c5s. Another tape line is run along the edge of the curve, this will be used for trimming the larger piece of vinyl that goes on next. You have to think about it as a multi layer puzzle that you have to do in reverse.
A fresh razor is used to score the final cut around the cove and the excess vinyl and the tape gets removed.
Once the edges are tucked and the panel is finished the seam is mostly hidden and you have to look very close to even see that it is two pieces, not one. Here it is finished up and waiting to be re installed.
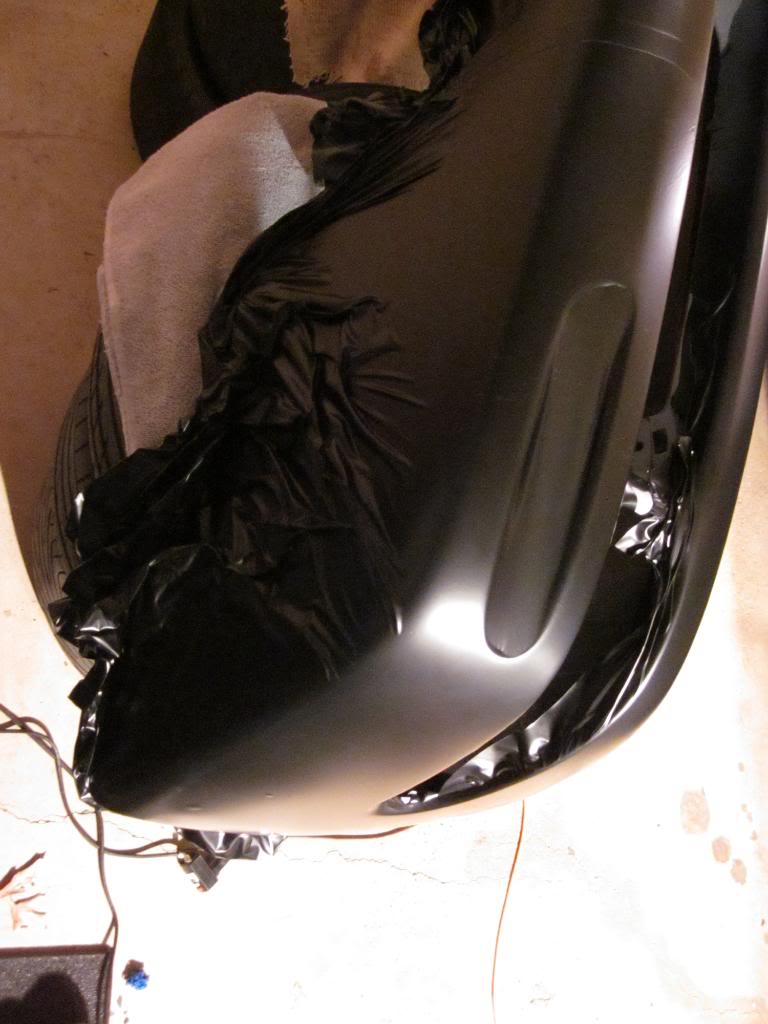
REAR BUMPER COVER:
Now it's time to get serious. The two bumper covers were the most difficult and challenging pieces to wrap. My documentation patience was running low so pics are not the greatest. Basically the rear cover is broken up into two sections, or planes and each one was wrapped with it's own piece of vinyl leaving a seam running along the edge of the bumper. You can't do one piece (well I couldn't anyway) because you have two intersecting surfaces. One being the top and sides, the other being the back. Plus they intersect at a 90 degree angle and vinyl just isn't that flexible. So my pics cover the back section and since that is the harder of the two i guess it works out.
I started by running some tape lines across the top edge and I also have the lower portion painted gloss black and I wanted to keep that as a contrast to the matte so I taped that off too. Here I am removing tape from the top edge after trimming excess away.
And a wide out shot of the whole thing.
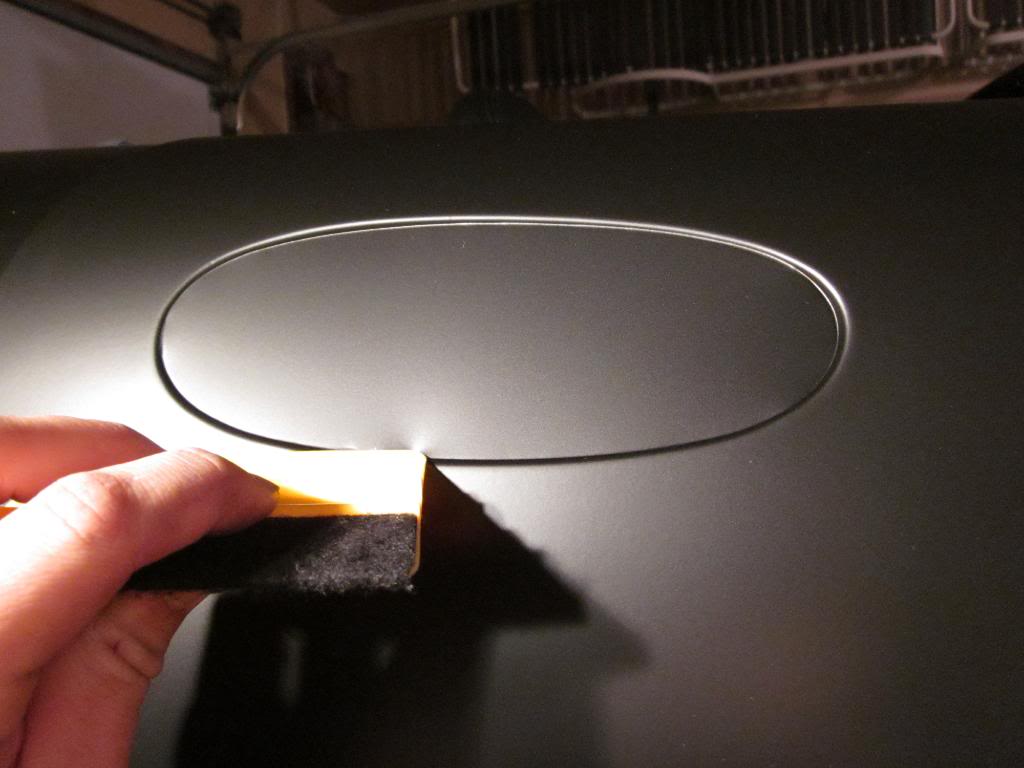
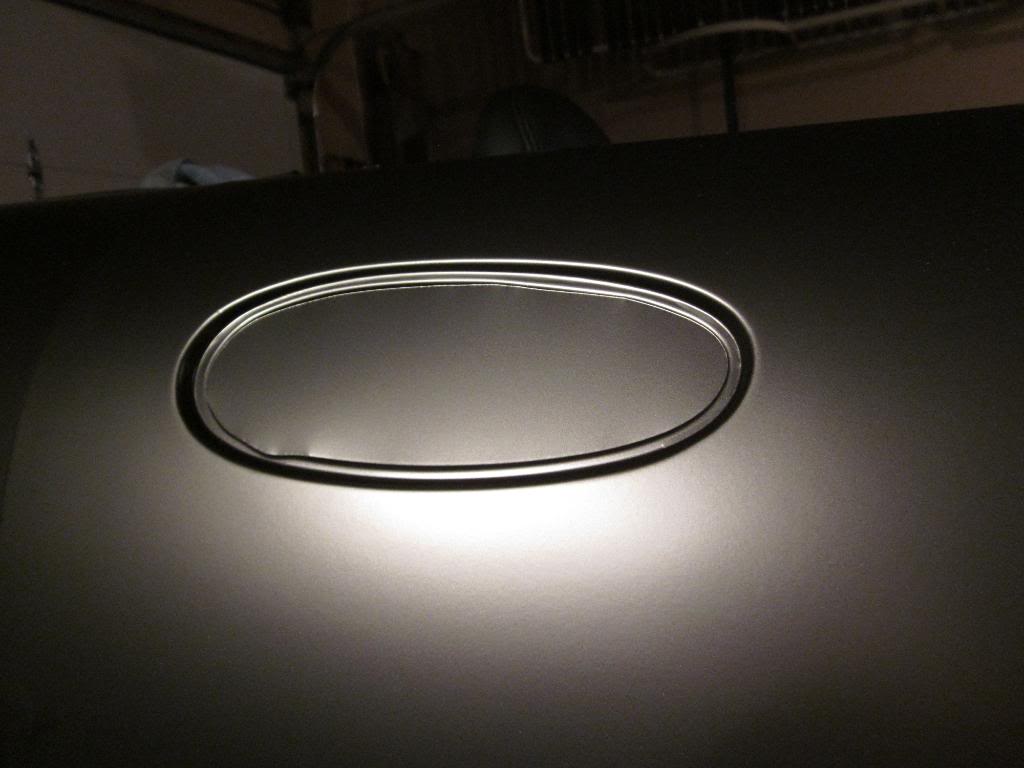
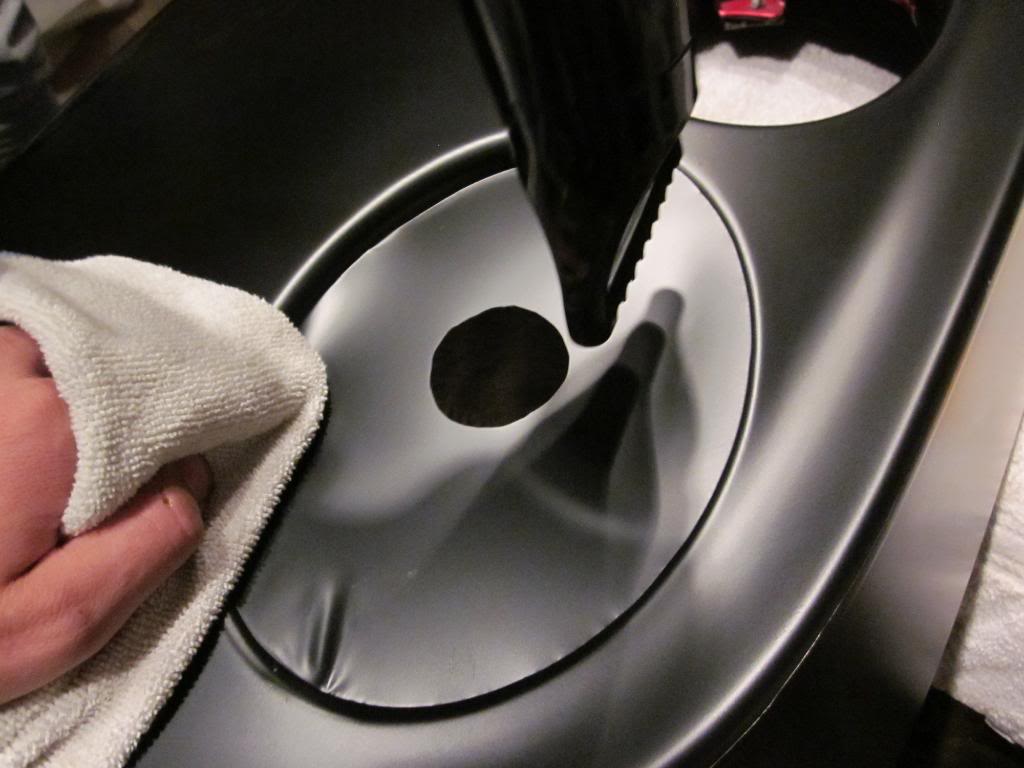
The tail lights are the tough part about the bumper so I will focus on those. Here is a pic of one finished and what they will look like before you start.
I start by cutting a small hole as close to the middle as possible.
Next I use my heat source and heat the surrounding area, nice and hot because it has to stretch. While I heat the area I am also using my hand and a microfiber towel to slowly press down into the hole and begin to stretch the vinyl to fit the sides.
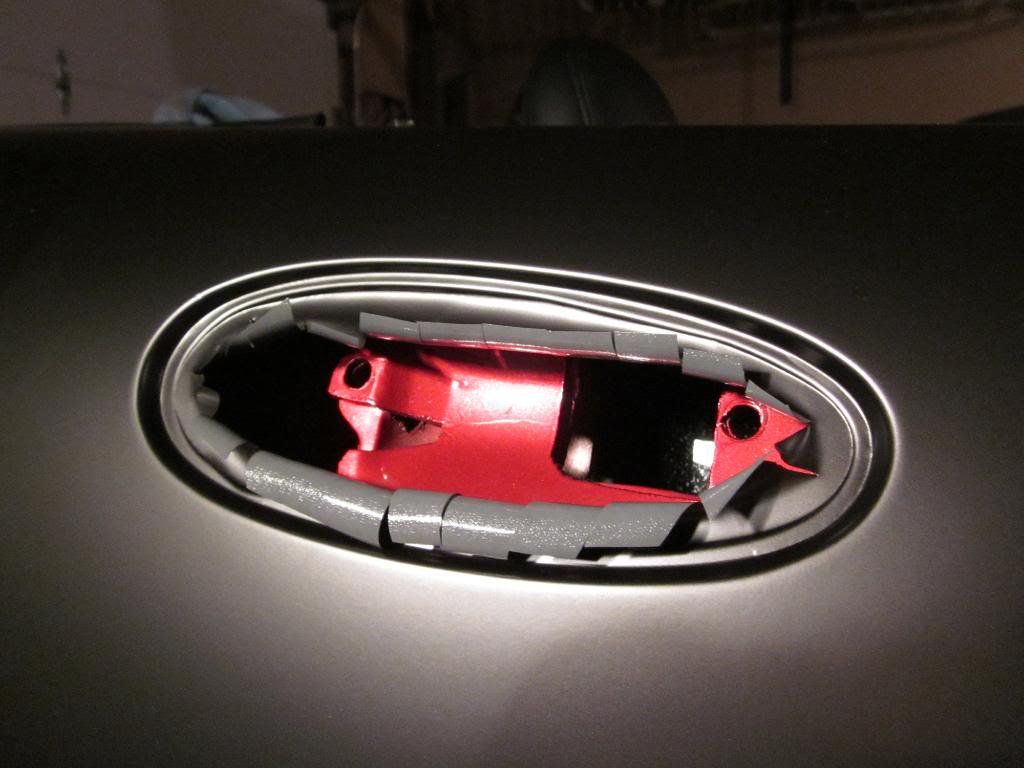
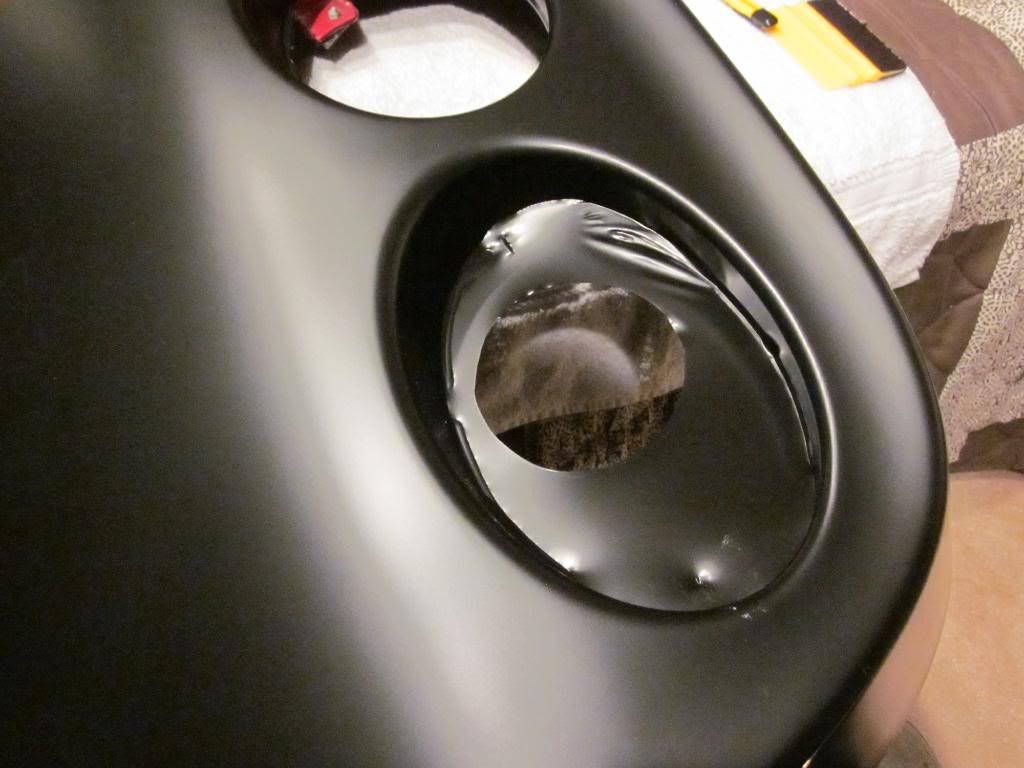
Continue stretching and heating and pushing until you have bottomed out on the lower ring where the tail light mounts.
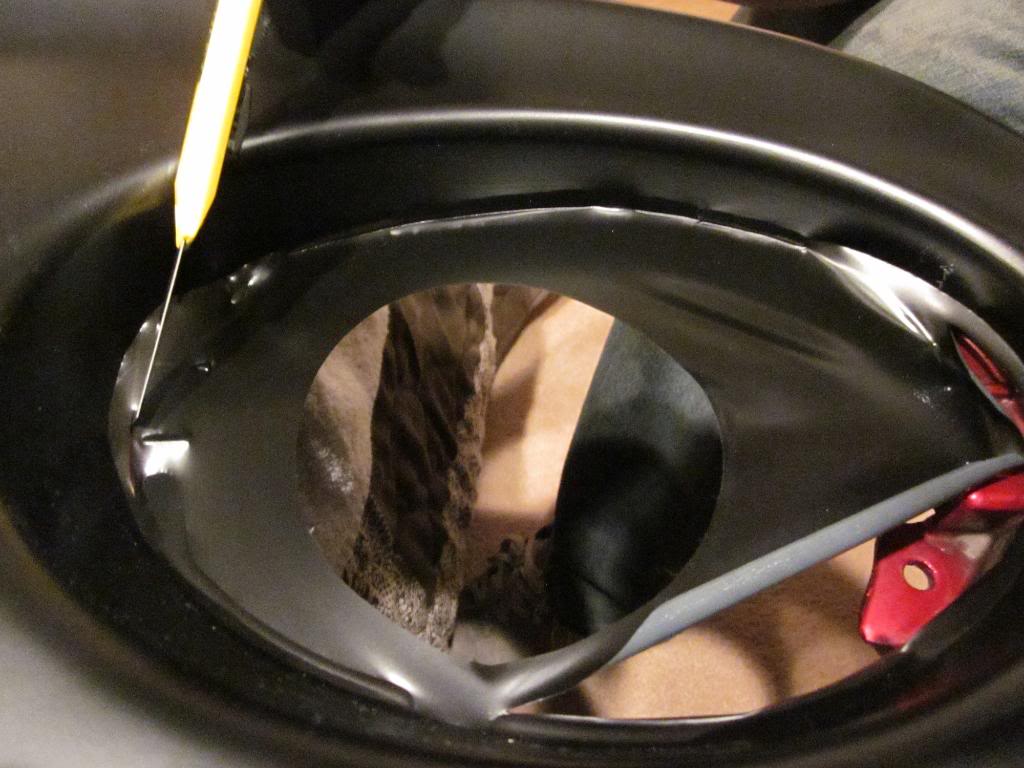
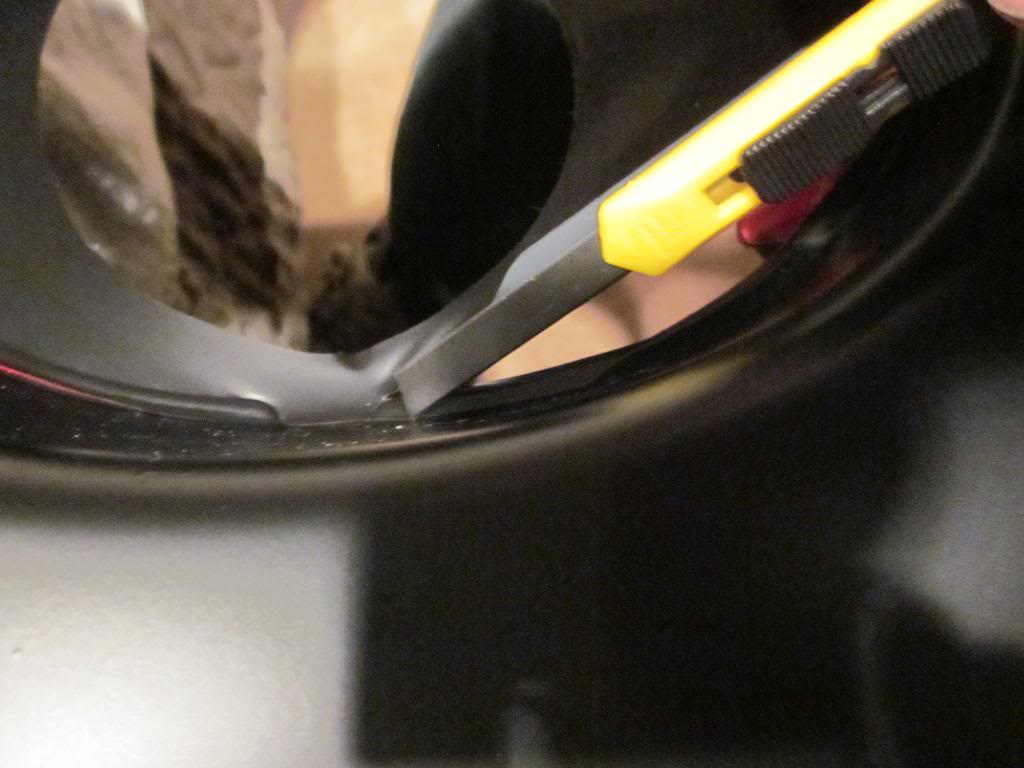
I took my blade and cut around the bottom edge. It is important to note that I didn't use any tape to make a "safe cut" for this part. It is an unimportant area that is never seen and also there is not a lot of paint coverage from the factory that far down anyway. If you are worried about it you could always do it differently.
And the finished tail light pocket
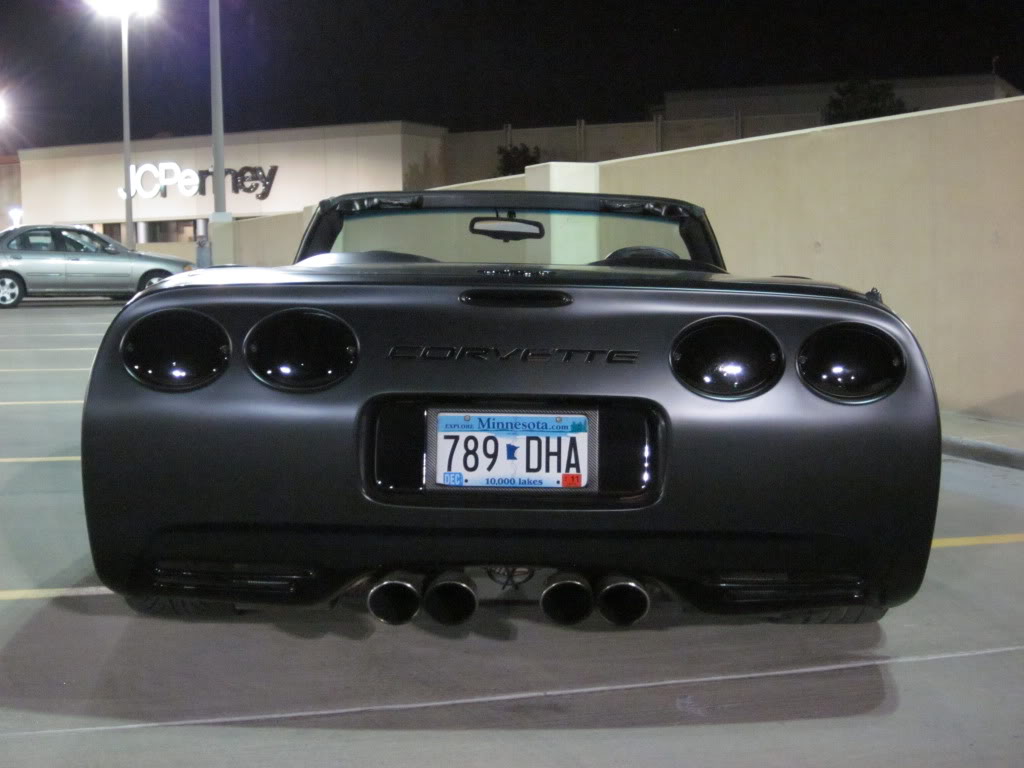
The license plate area is done in the same manner as above. The top surface of the bumper is fairly easy and straight forward. My pics ran a little low but you will see the finished cover at the end of the tutorial.
Last edited by MarkyMarkGTM; 10-09-2011 at 03:43 AM.
FRONT BUMPER COVER
The front cover sucked. By far the most challenging, frustrating piece of the car to wrap. I used lots of material and numerous seams and sectioning. There are a lot of grilles, cutouts, and other crap to work around and it was just plain miserable. I don't have many tips or tricks, and I didn't take a ton of pictures either. My advice: do the rest of the car first, save it until the end, hope for the best.
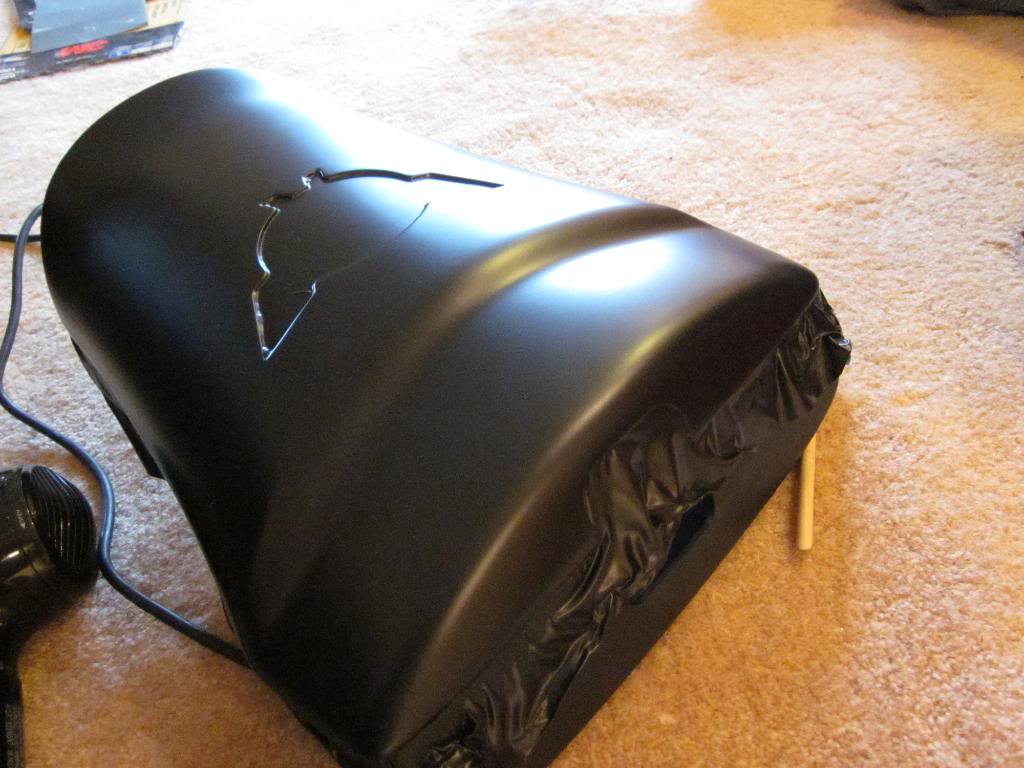
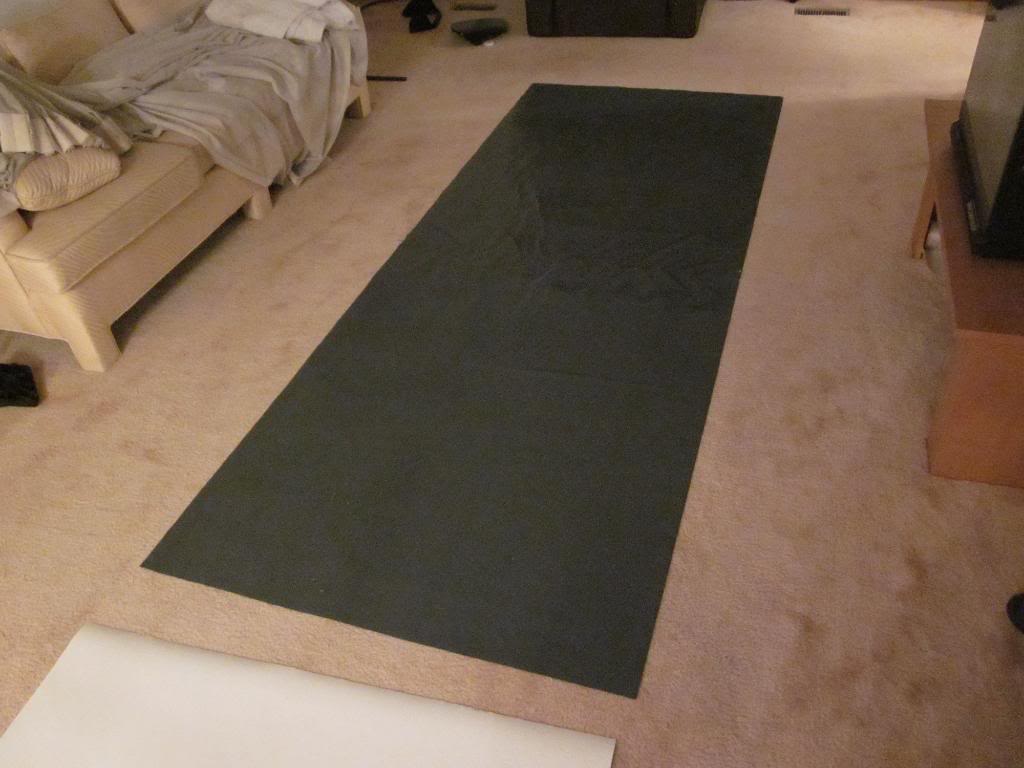
I guess one tip I have is to use a lot of other people. I did the whole car with myself and a buddy and it went fine but for this piece a third of forth would have been clutch. The bumper doesn't seem that big but when measured from side to side it is long and extra people holding excess material would make it much better. This is the piece to be used for the cover, use the 8 foot couch as reference to it's length.
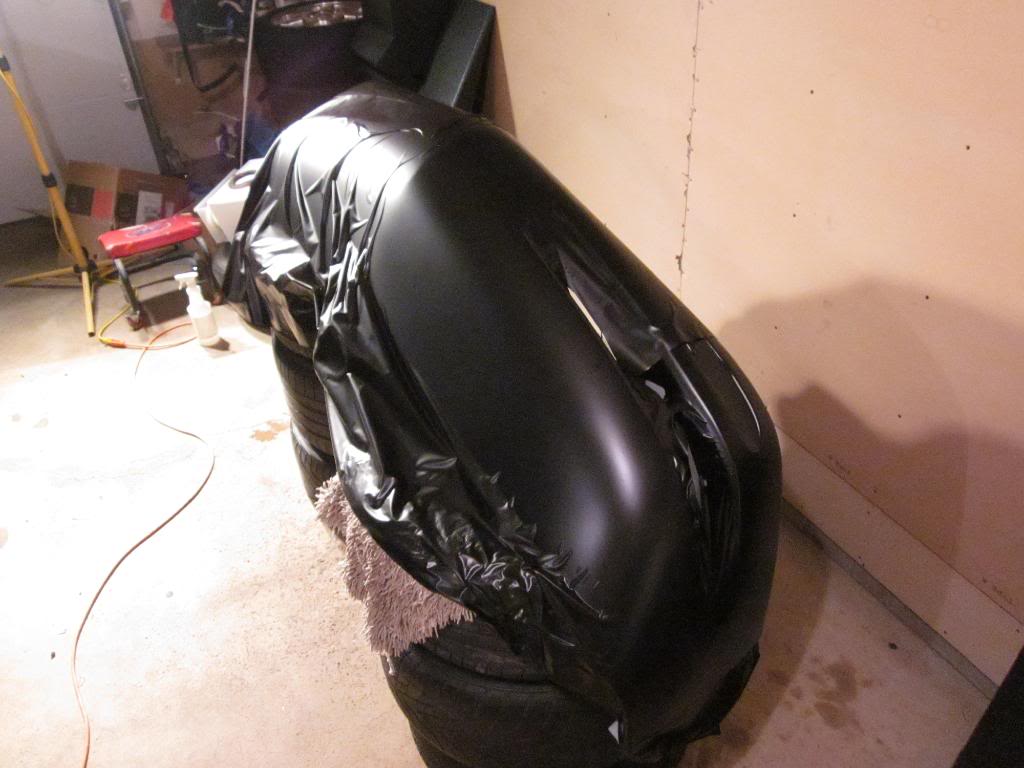
Starting to put the vinyl on
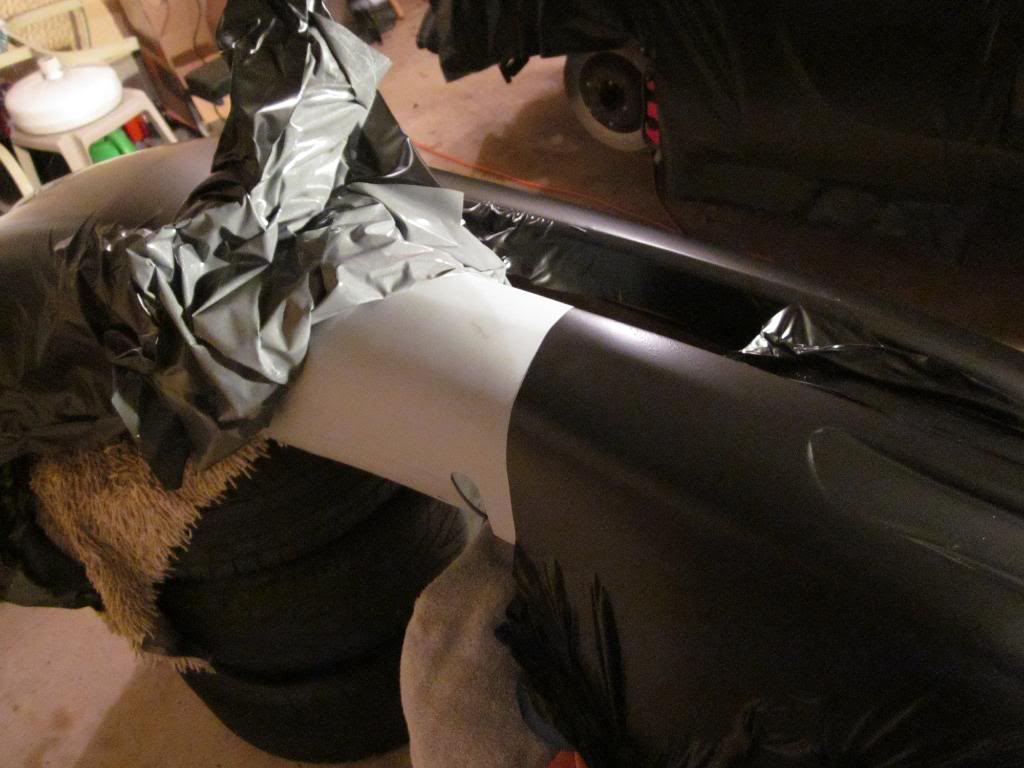
Seams were used directly under the foglight/ ZO6 screen area. Oh, bumper is in primer and that's why it isn't red. (confusing I know)
Bottom got fairly ugly but was sorted out a little later.
Fog light area cut out
Starting to look alright
That's all I have for pics of the process. Like I said it sucked big time and I was not a happy guy during most of it. Finished pics can be seen at the end of the tutorial.
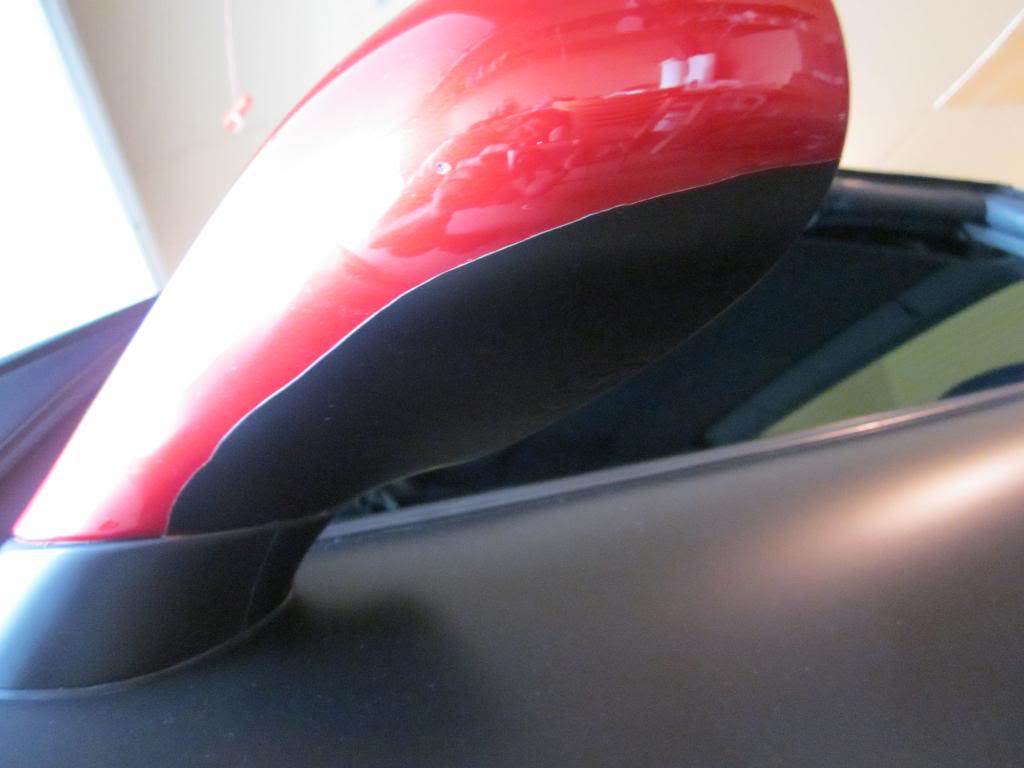
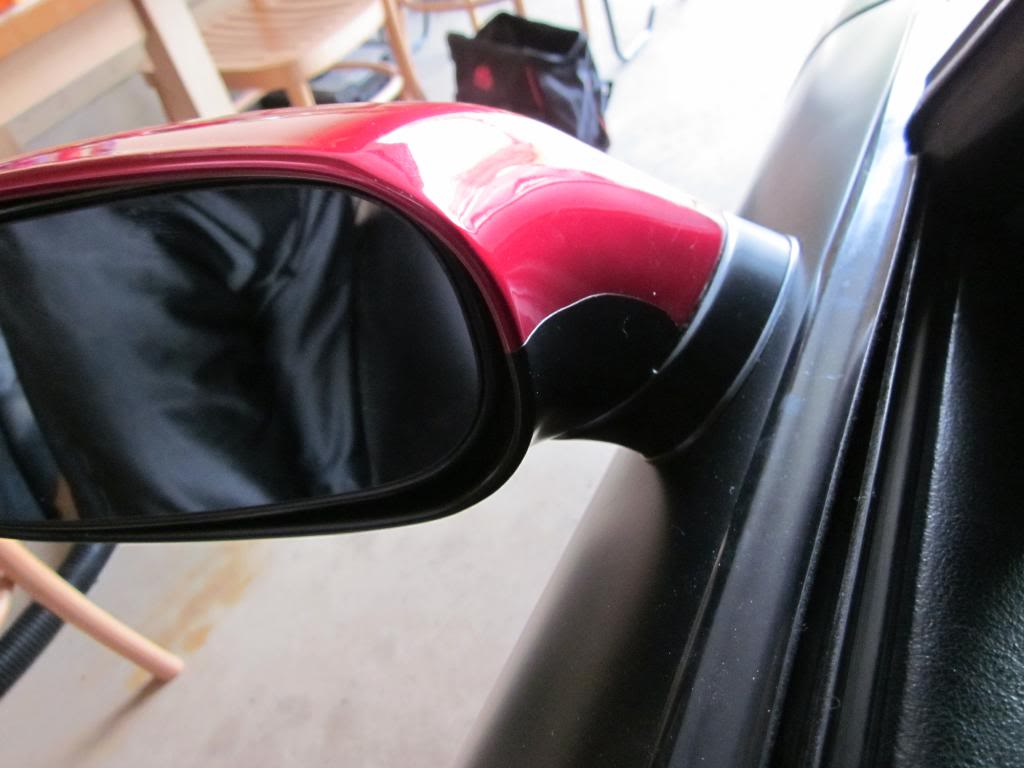
MIRRORS:
Mirrors suck too. Like I said in the begining, I will start with the easy panels and get to the hard stuff. Bumpers suck, mirrors suck, fenders suck but the idea is to start with the easy stuff and build your way up as your skills improve.
I started the mirrors when they were off the car for wrapping the doors. There is a rubber gasket around the bottom that you want to take off and wrap the base first, you can't do that if the mirror is on the car. So I wrapped the base then installed the mirror.
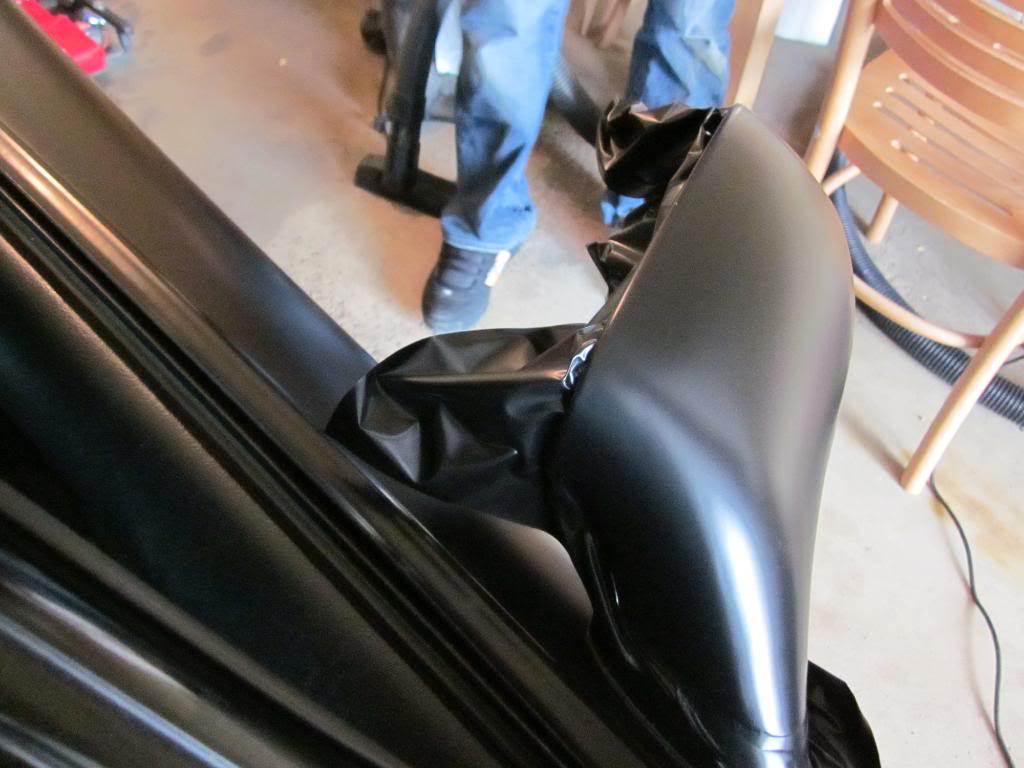
The mirrors required two pieces as well but if you are smart about it you won't see the seam. Here is a pic of the base wrapped AND the bottom piece of the mirror done too.
Here is a different angle where you can see how far up the inside that bottom piece goes
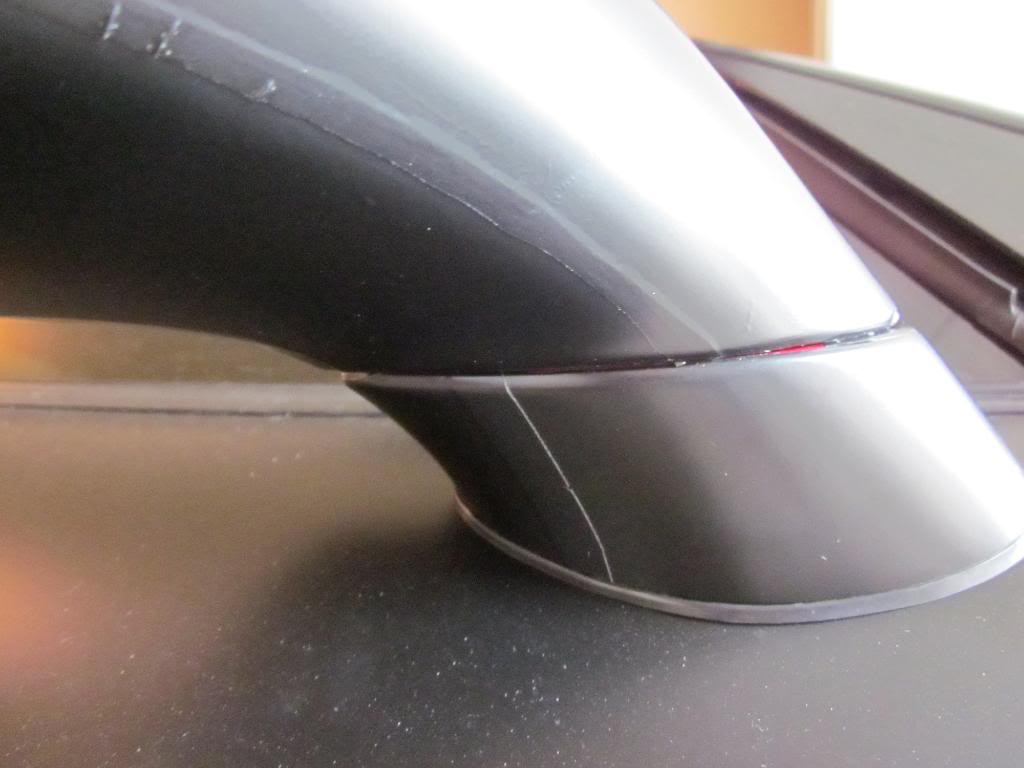
Using fineline tape for cutting I planned out my seams and got started on the top piece, the one that you will see.
The crappy part of the mirrors is the tucking of all the edges around the glass lens. I thought about taking the lens out but read many different threads on the glass cracking during removal that I figured working around it would have to do. Don't have any pics of the lens but it is more time consuming than difficult. Here is a finished shot of the mirror looking from underneath. Notice how the seam of the mirror and the seam of the base are all concealed on the bottom side of the piece.
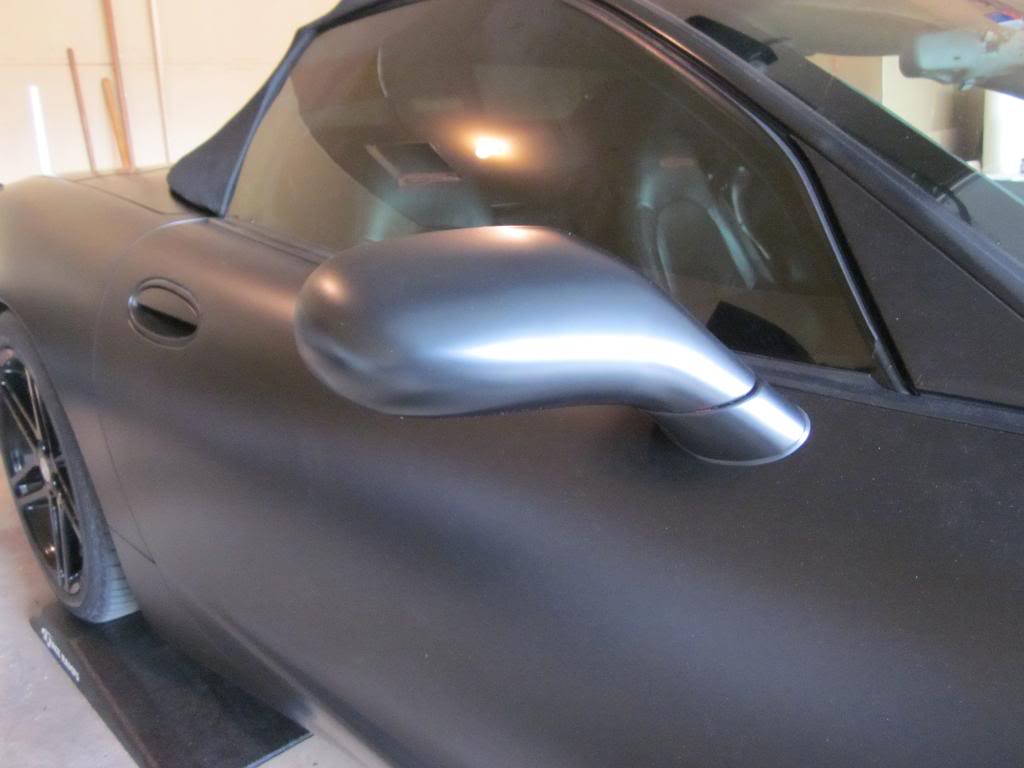
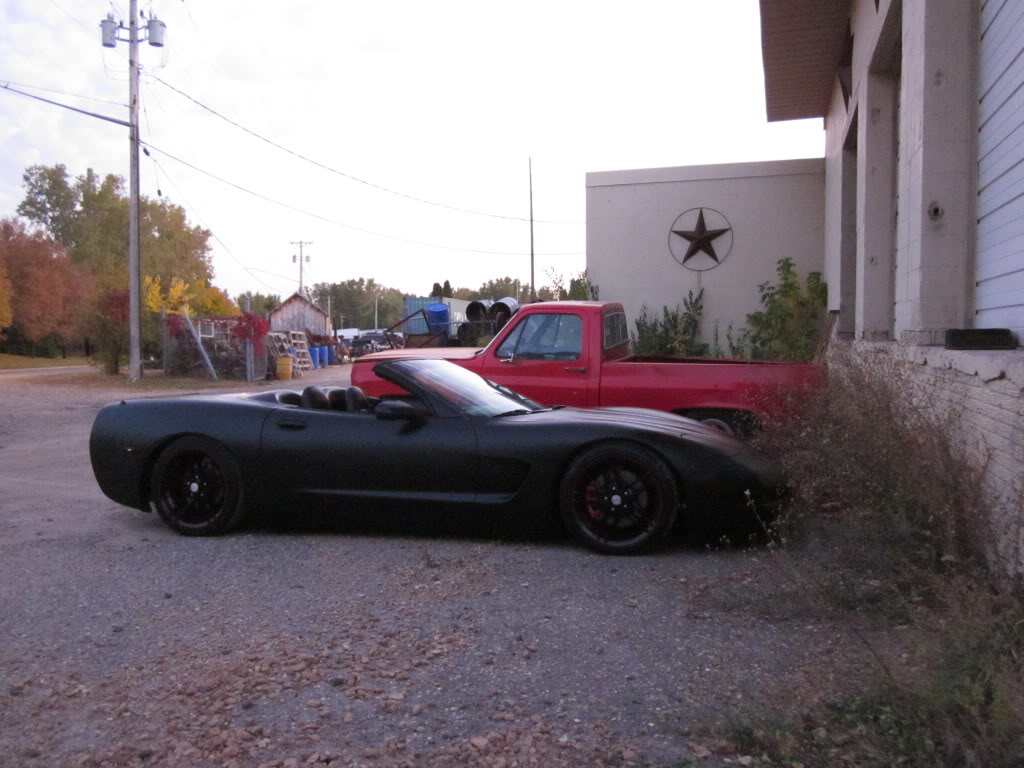
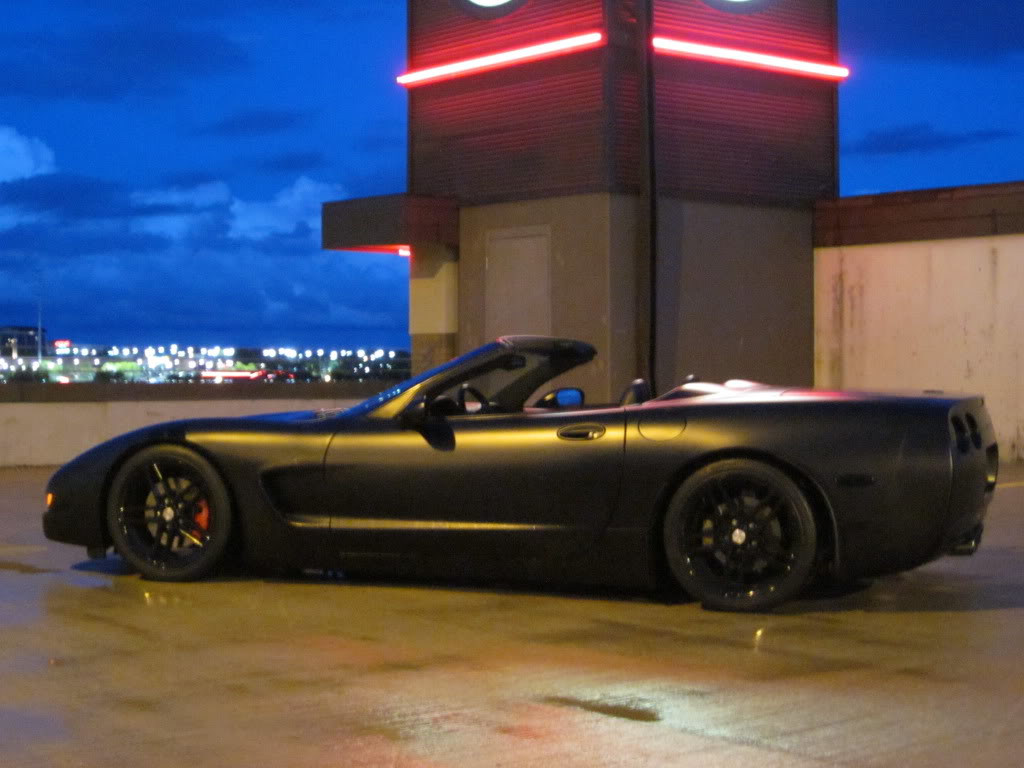
It is important to keep in mind how low the car sits (mine is fairly slammed) and if you hide your seams on the underside they are practically invisible. I have had more than one person ask me how I did the mirrors with one piece and I have to point out the seams and tell them it is multiple pieces. Here is how the mirror looks from normal viewing angle.
Last edited by MarkyMarkGTM; 10-09-2011 at 03:55 AM.
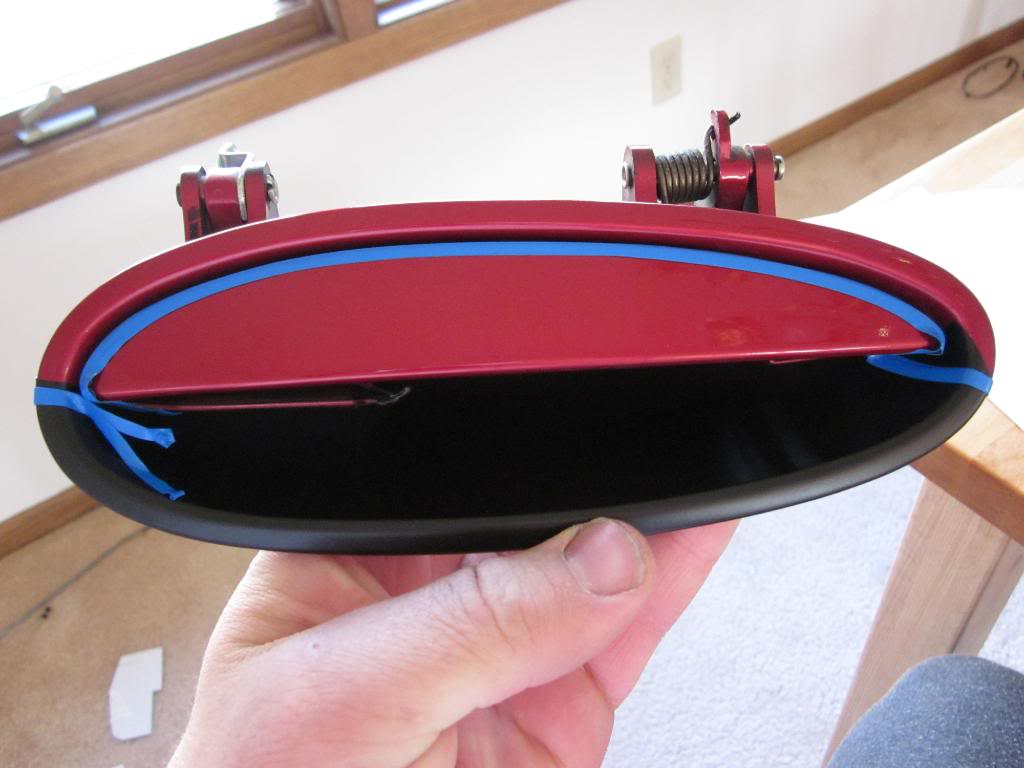
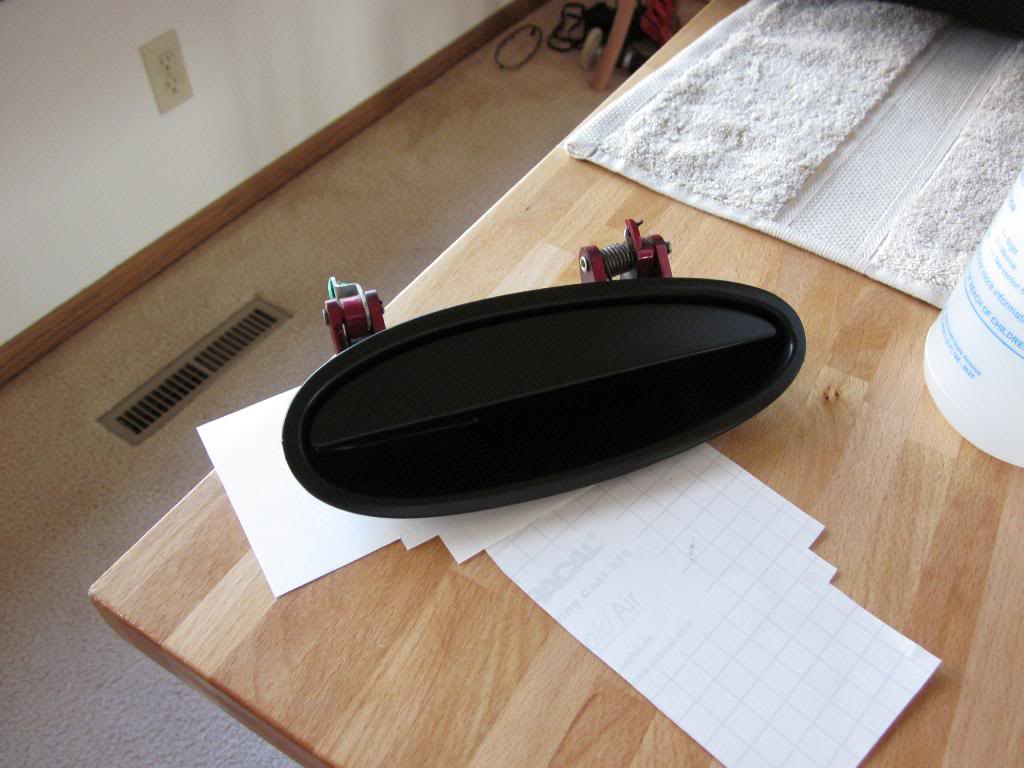
HANDLES:
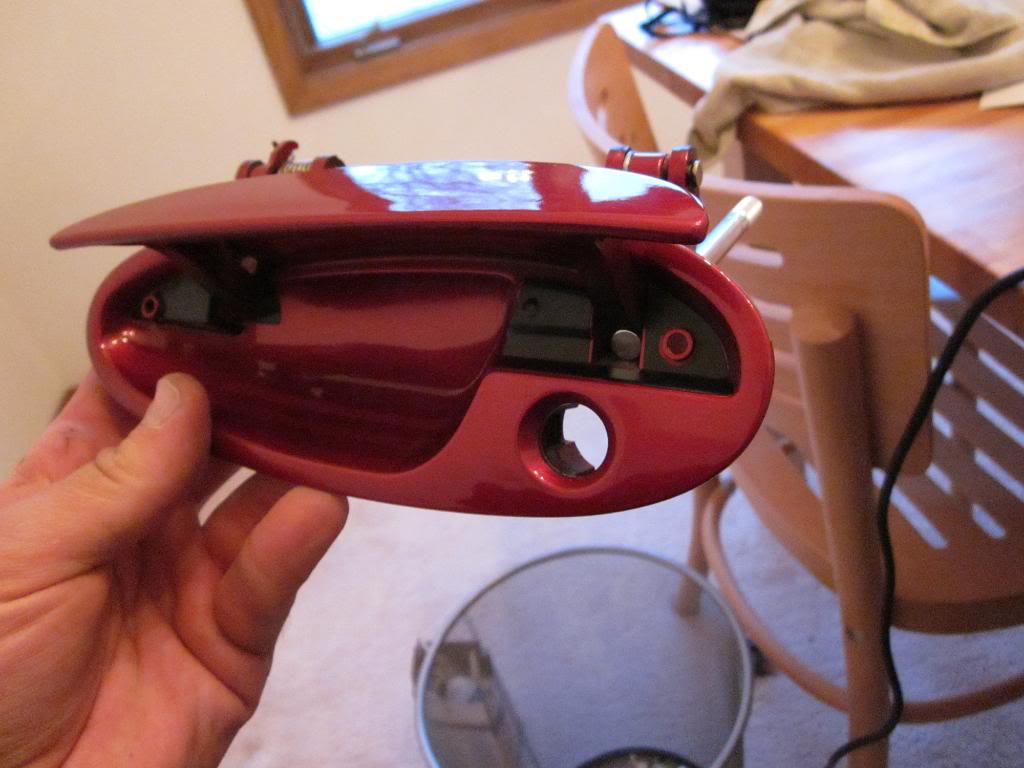
Handles are more time consuming than difficult. I did mine off the car and I would highly recomend it to you as well. Oh, the pics might switch back and forth between left and right handles. Same process just different sides. Driver's side has a key hole but that difference is minor
First I propped the handle open with a pick tool from the back. It is spring loaded so you want to open it up for access to the inner area without having to hold it open all the time. Through cutting and trial and error I made pieces of the small areas on the inside of the handle.
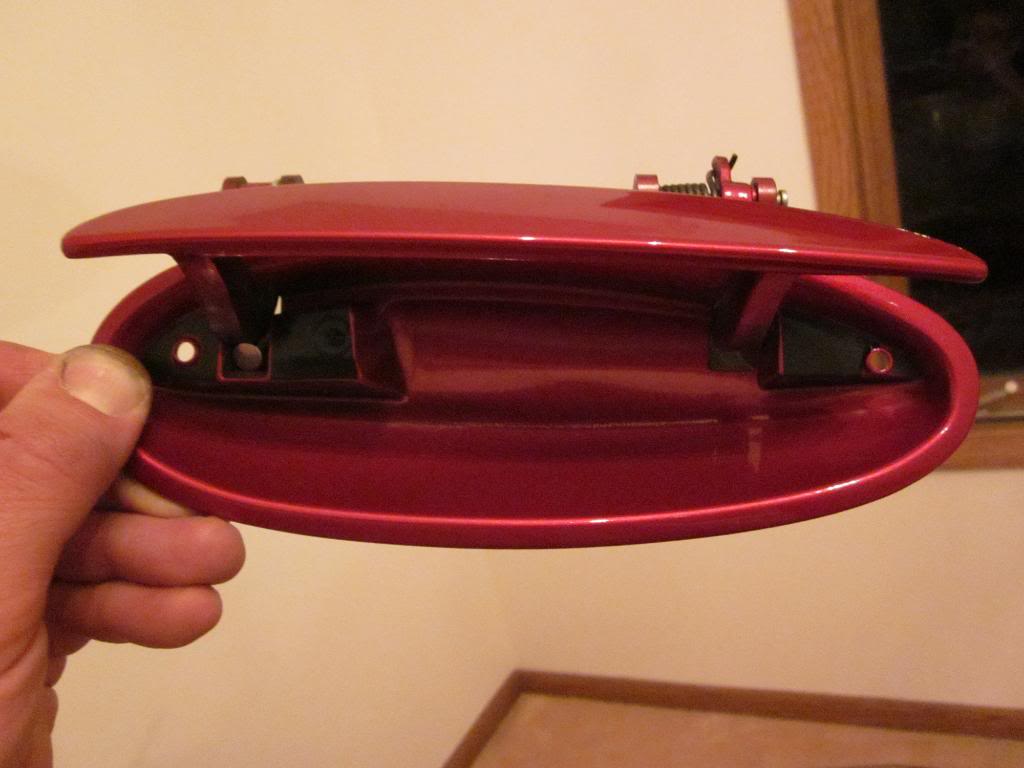
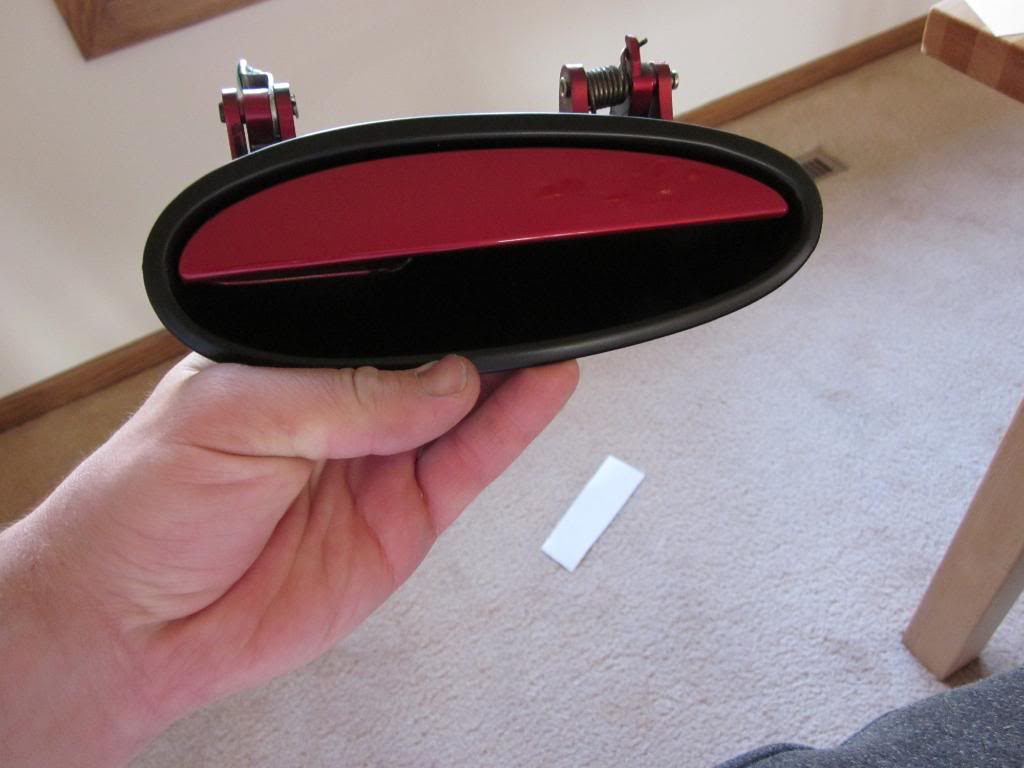
Once those are done I started to line up my next piece which will cover the lower portion of the handle body area.
Application
And inner door handle lower section completed
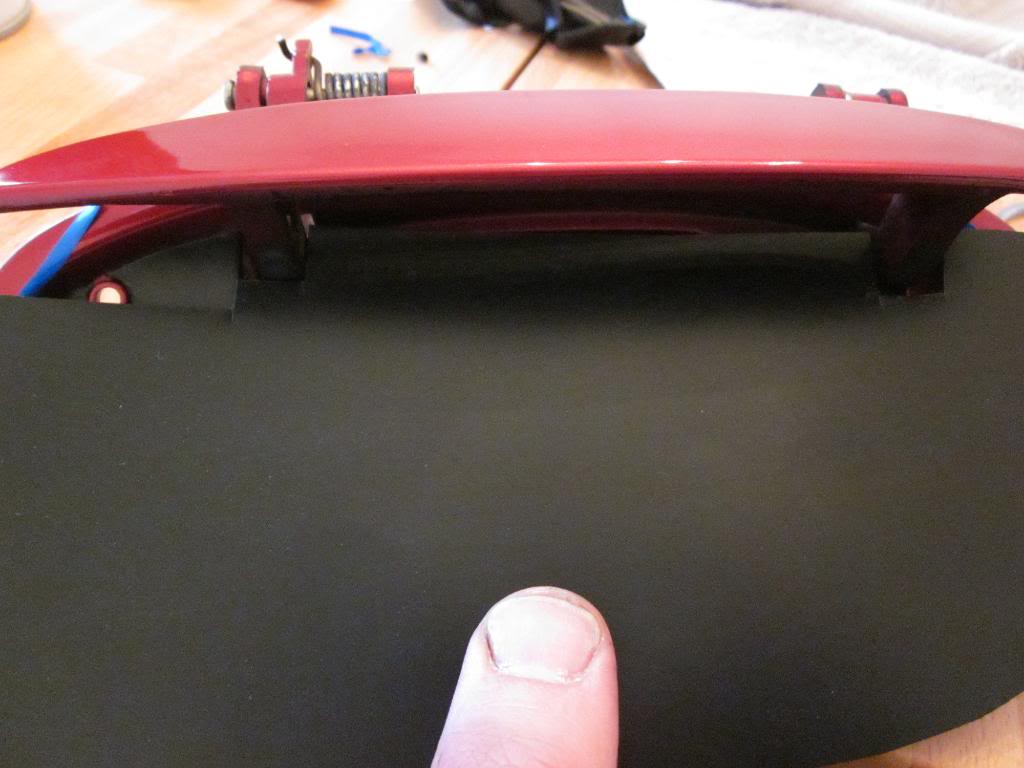
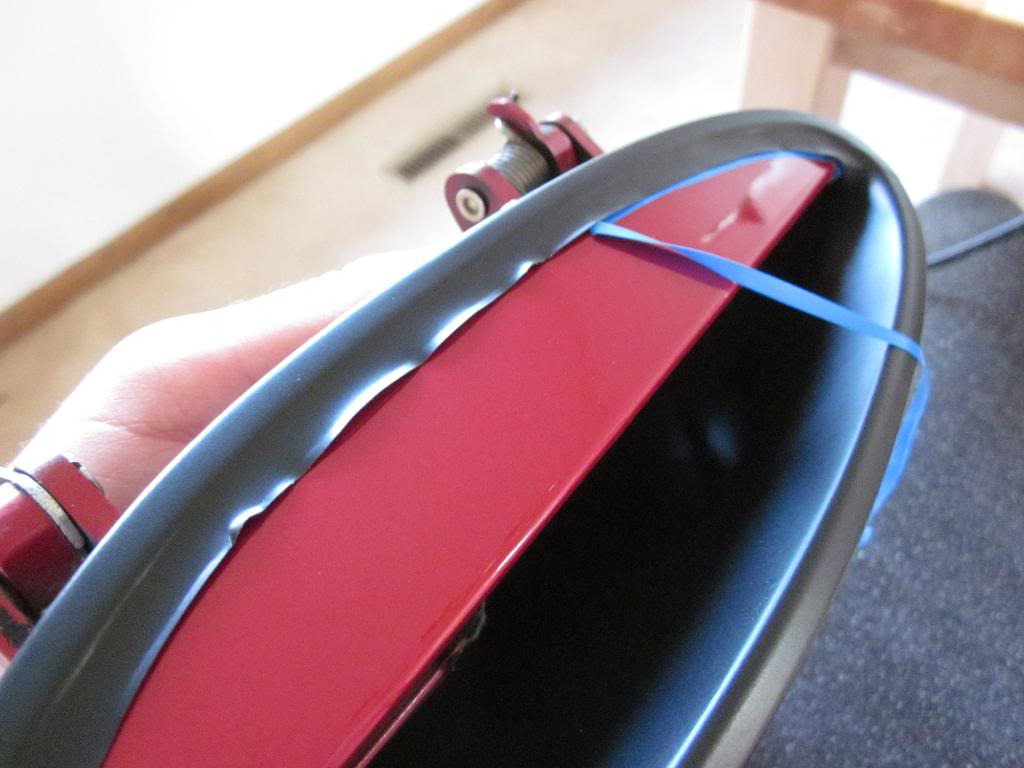
Here is the fineline tape marking my cutting points for the next piece which will cover the upper area.
Vinyl applied on top portion. Notice the tape lines marking the cut area that you can clearly see on the left and also the wrinkle on the handle, that doesn't matter because it will be excess and that piece will be done separately.
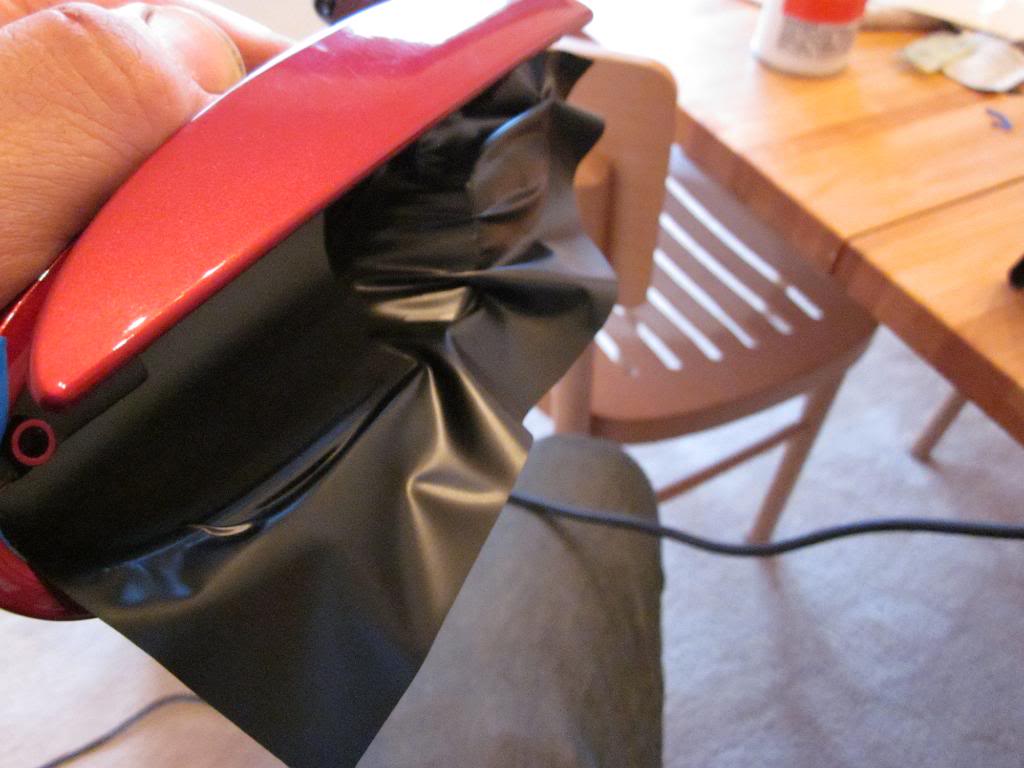
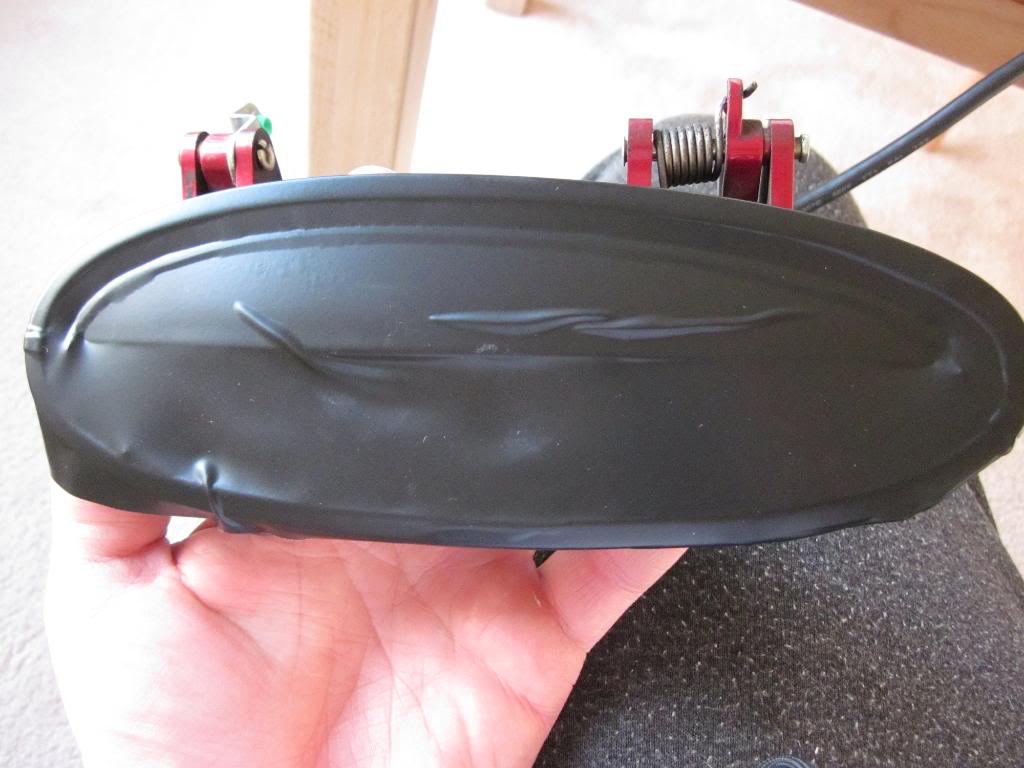
Removing the tape along the top edge of the handle. The loose edge will now be tucked under for a clean look.
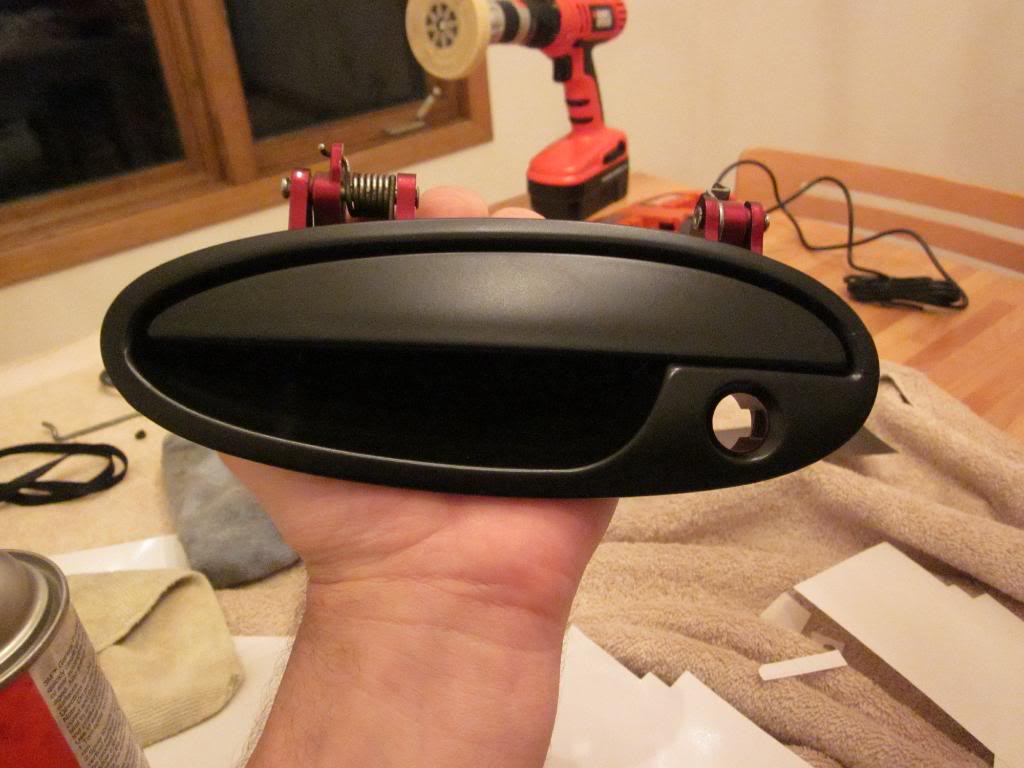
And both handles done. Later I wrapped a dime in vinyl and used that as a key hole cover, didn't like the bright silver contrast of the lock cylinder.
Last edited by MarkyMarkGTM; 10-09-2011 at 04:03 AM.
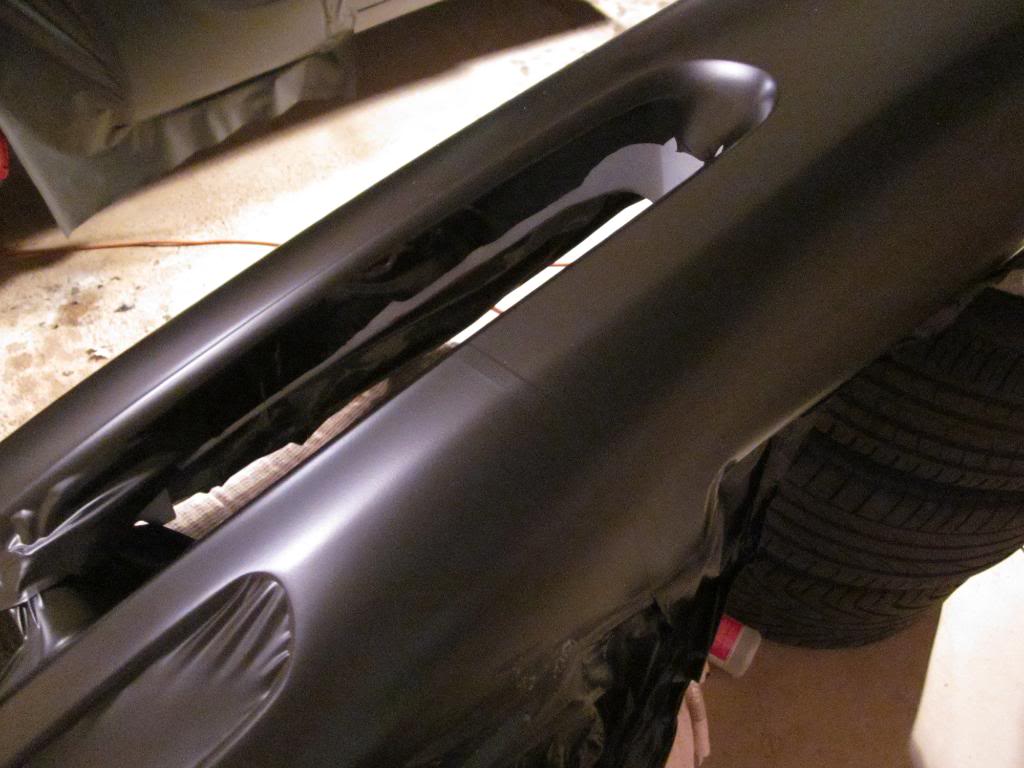
JAMBS:
Got a few people asking me about what I did for the jambs, wanting to see pics and stuff. For the most part I left the jambs alone. My reasoning for this is that my goal for the project was to make it so that you couldn't see red from the outside when everything was closed because that is how the car is viewed 99% of the time. If it bothered me, I would go back and do the jambs but honestly it really hasn't. The subtle red throughout the car (wheel stripes, calipers, interior stitching) actually kinda matches the red door jambs when they are open. If the car was a color like yellow I most likely would have finished them off, but red? Meh, not that big of a deal to me. If you want to do the jambs it is just a lot of time and seaming different pieces together. Not that difficult, just time consuming. Lots of weatherstripping and stickers to tape off and work around. Anyway here's what I did: (oh and car is FILTHY during these pics, don't hold it against me)
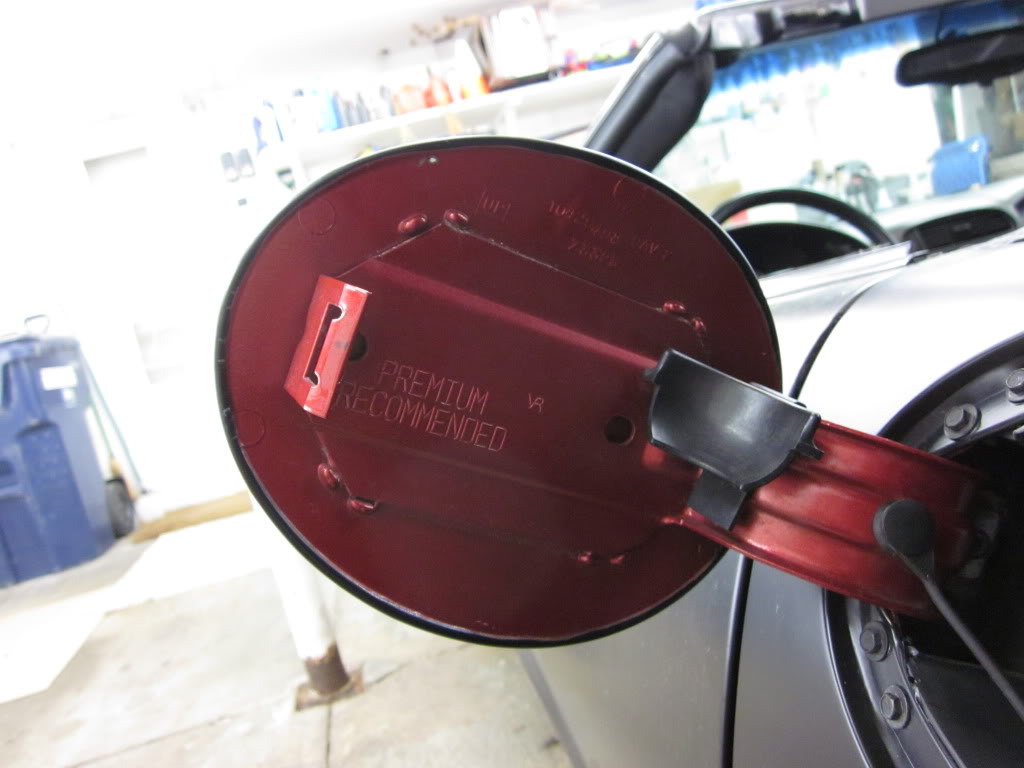
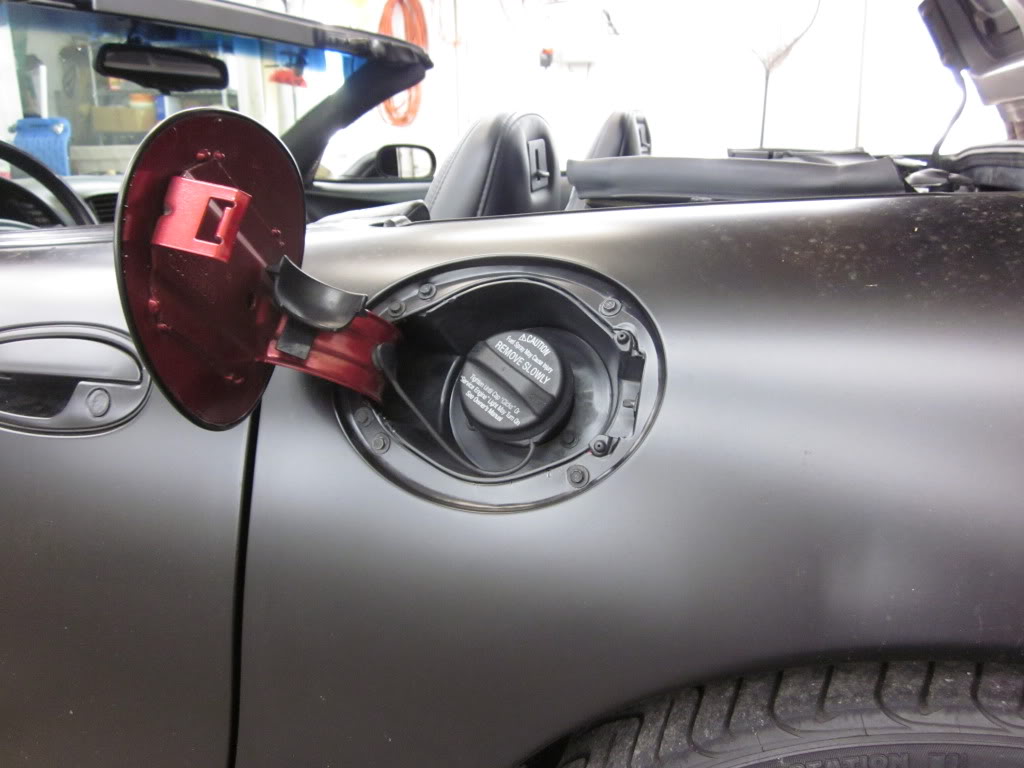
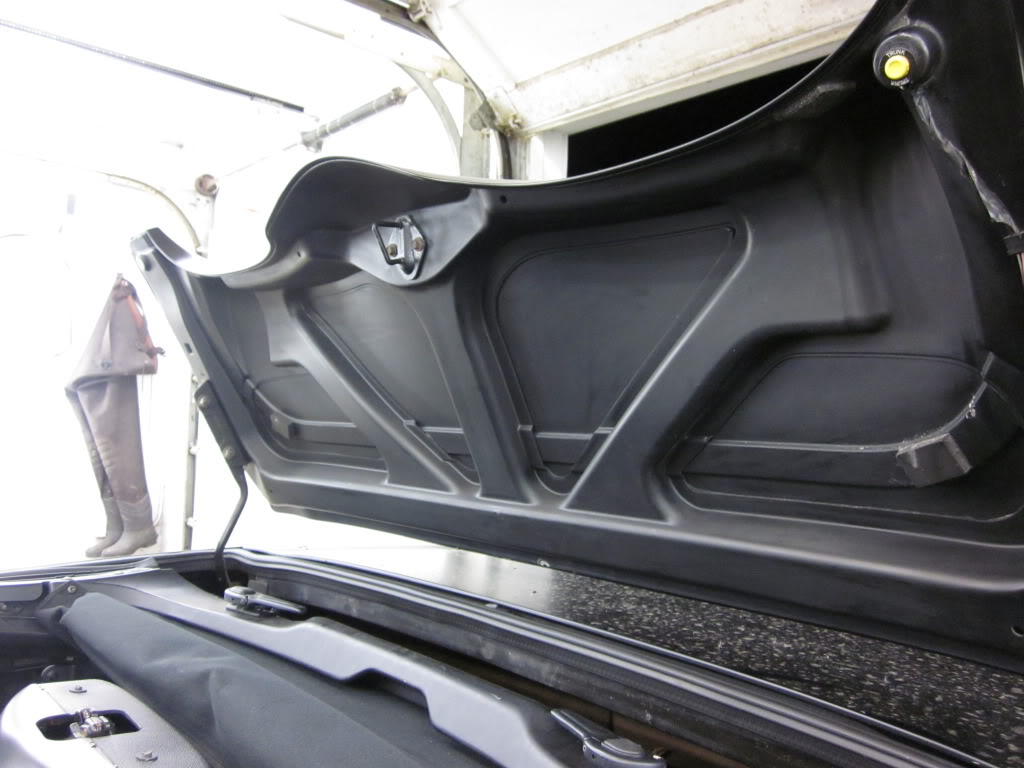
Fuel door gets a basic wrap around of the edge and just tucks over to the backside of the door.
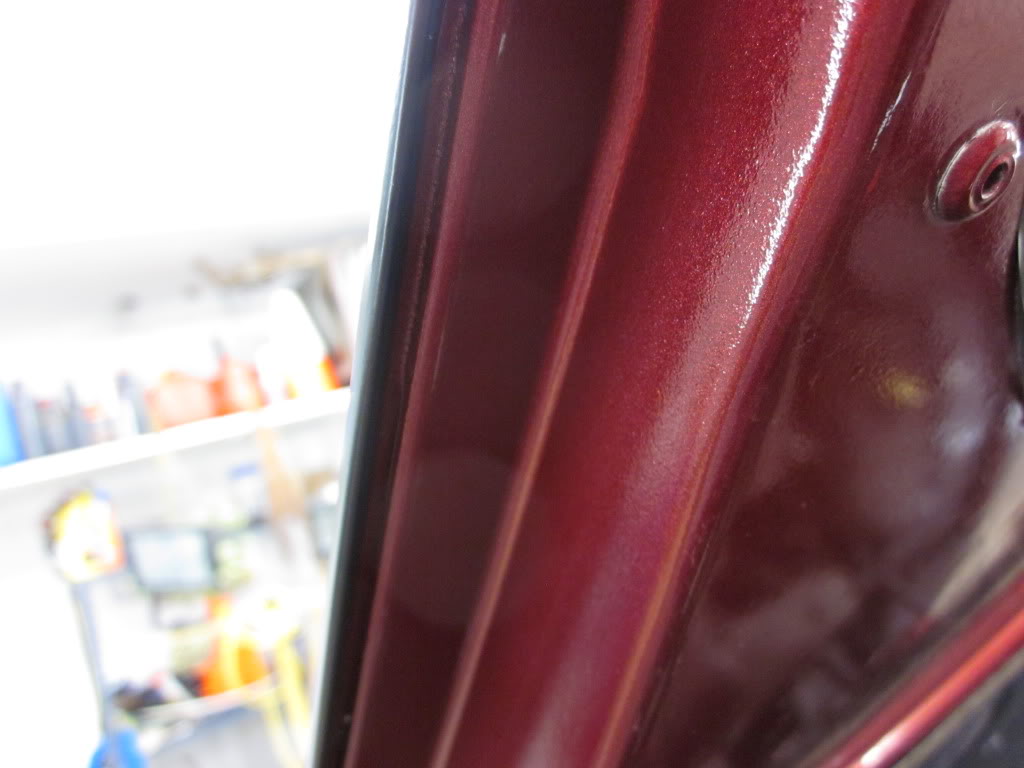
On the quarter panel the vinyl is taken to the inside lip. It is worth mentioning that the entire door/pocket was removed for wrapping and then reinstalled. When the door is closed it is seamless and when it is open it looks something like this:
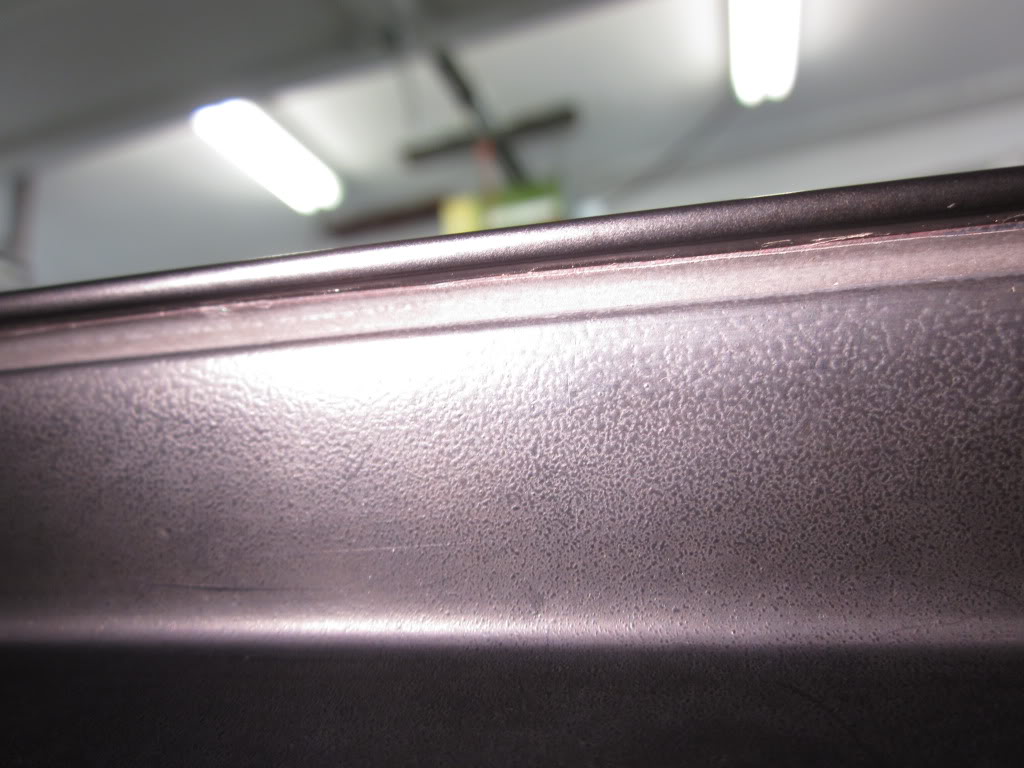
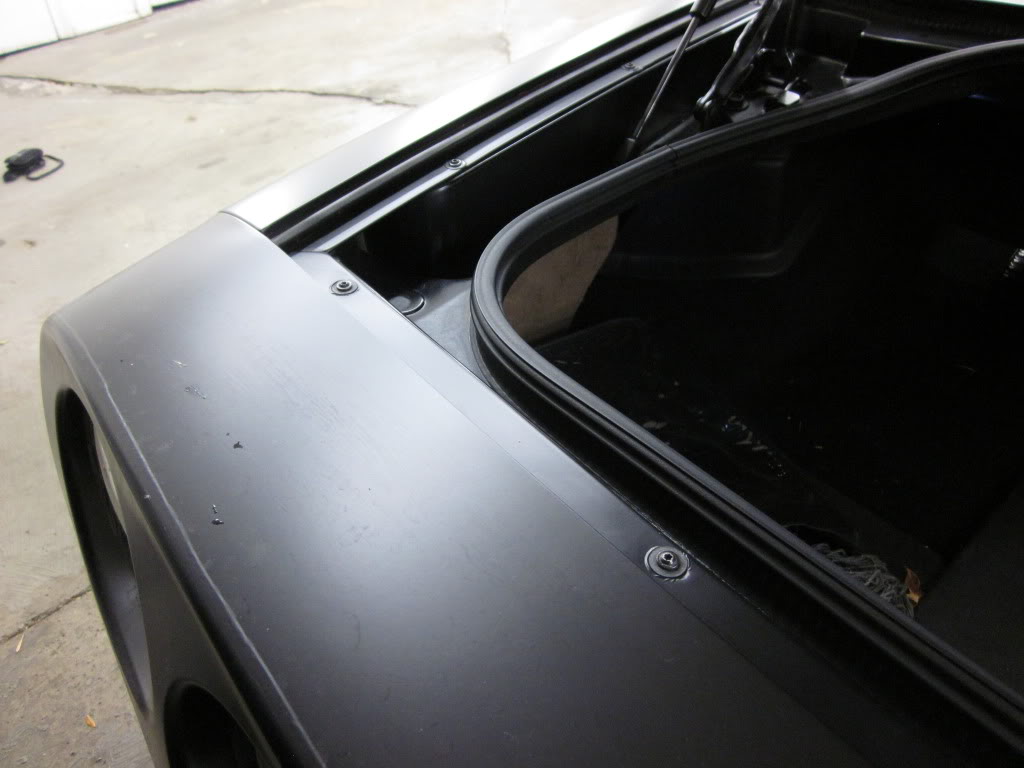
Tonneau cover is wrapped around the edges and since the backside was already matte black it blended in well, here is the edge:
Wide out of the tonneau:
Decklid is the same construction as the tonneau so I just wrapped the vinyl around the edge and cut on the backside for a seamless transition. Here is a close up of the back edge:
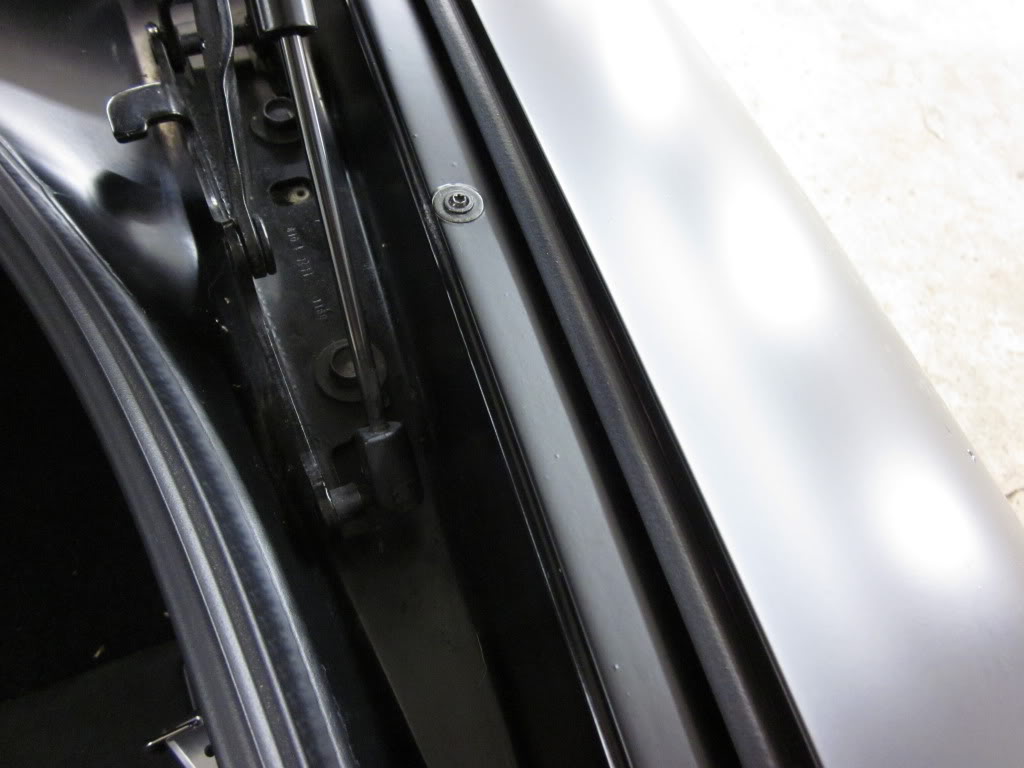
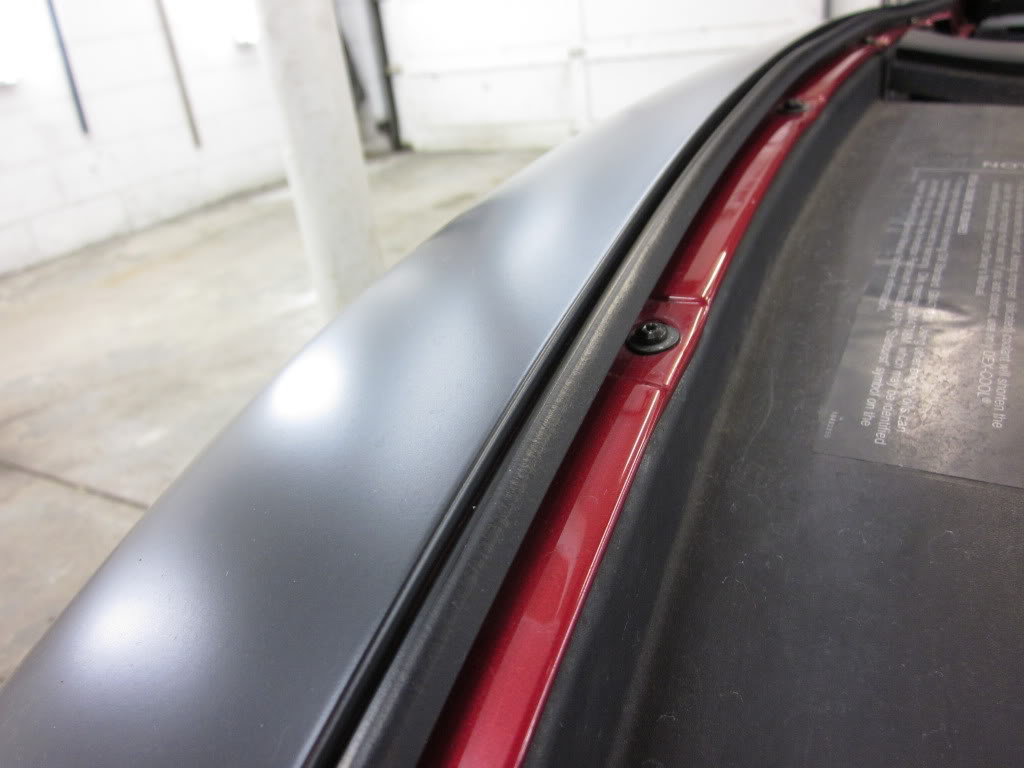
Quarter panels have a rubber weatherstrip that works great as a transition point. The vinyl was wrapped around the edge and cut along the weather seal. Another thin strip of vinyl was added along the gutter where the torx screws attach the panel to the car to give it a smooth seamless feel. It looks like:
Rear bumper edge was wrapped completely and finished off. Here it is with the quarter panel:
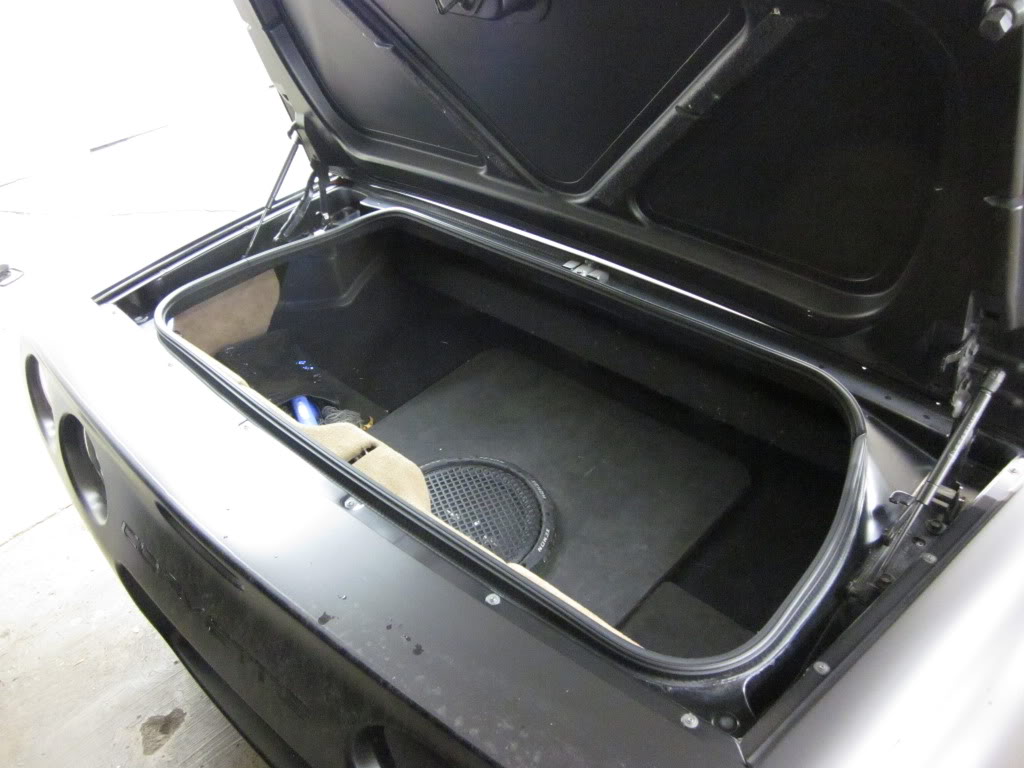
Here is the entire rear trunk area showing the deck lid, quarters, and rear bumper.
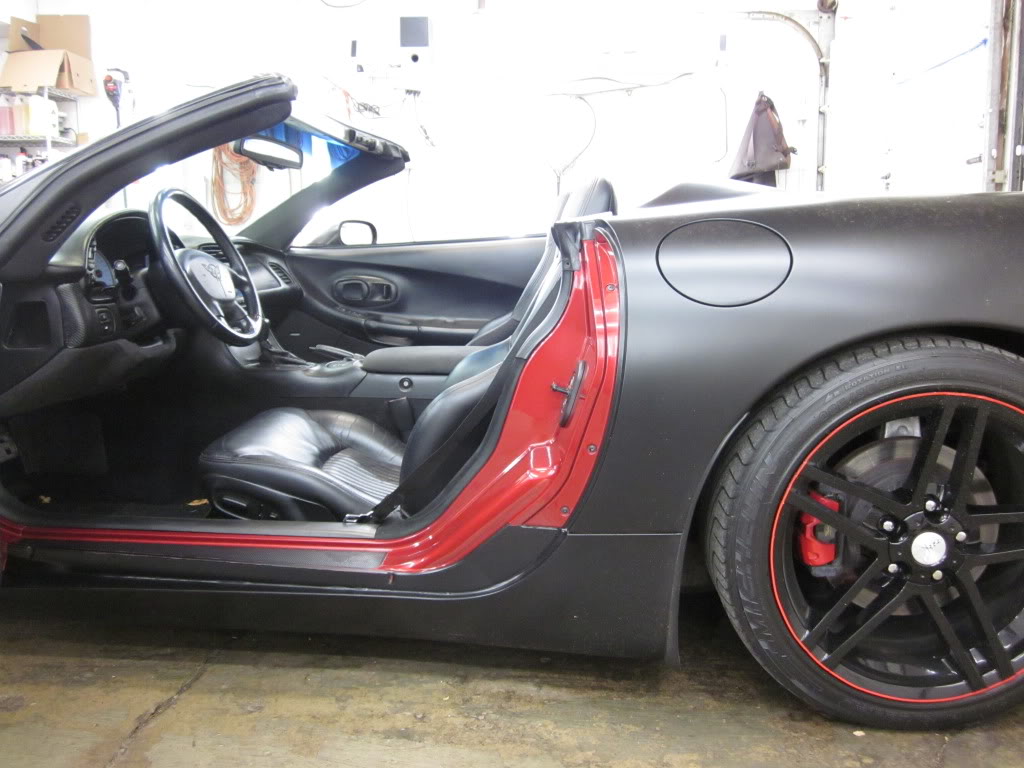
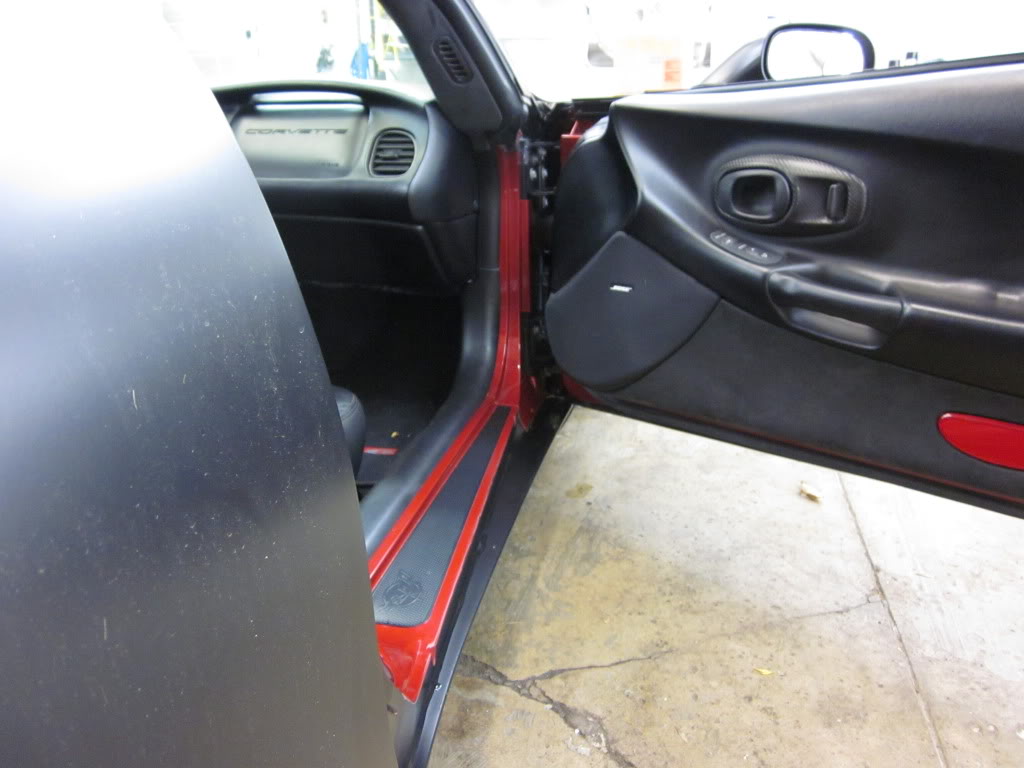
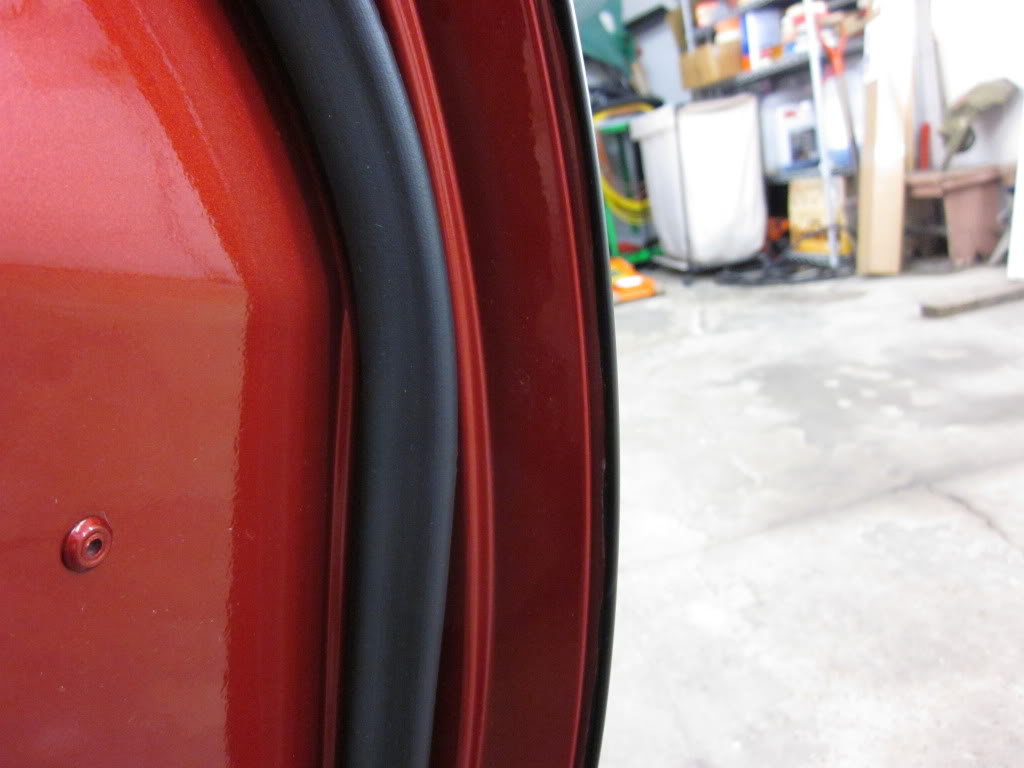
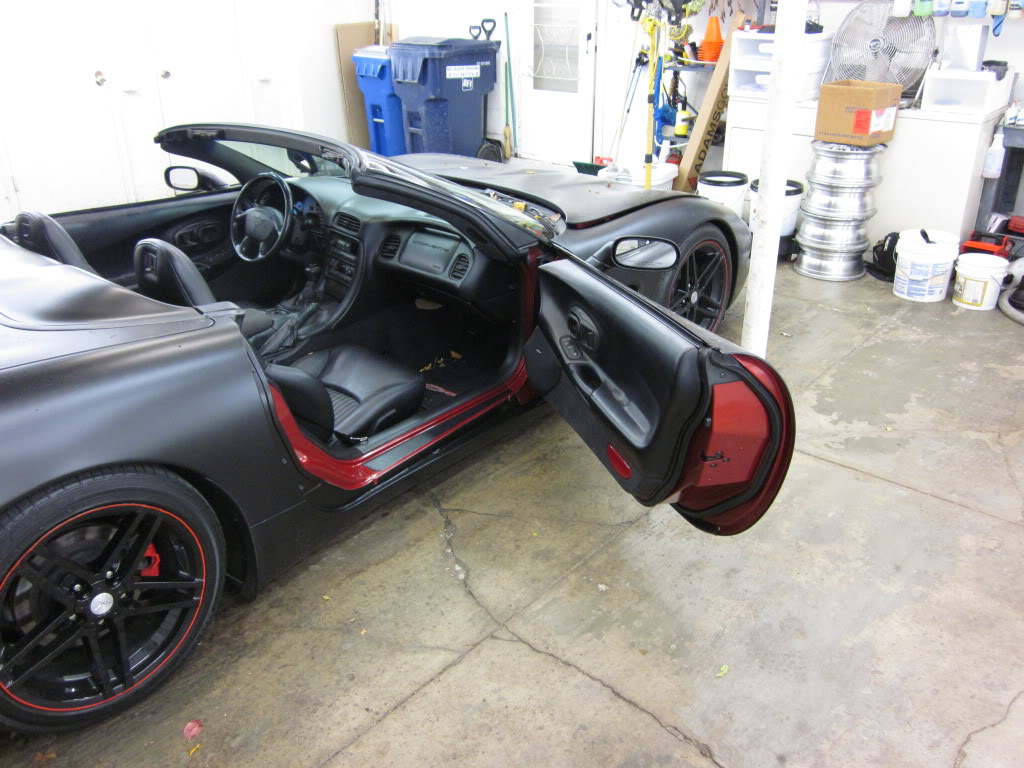
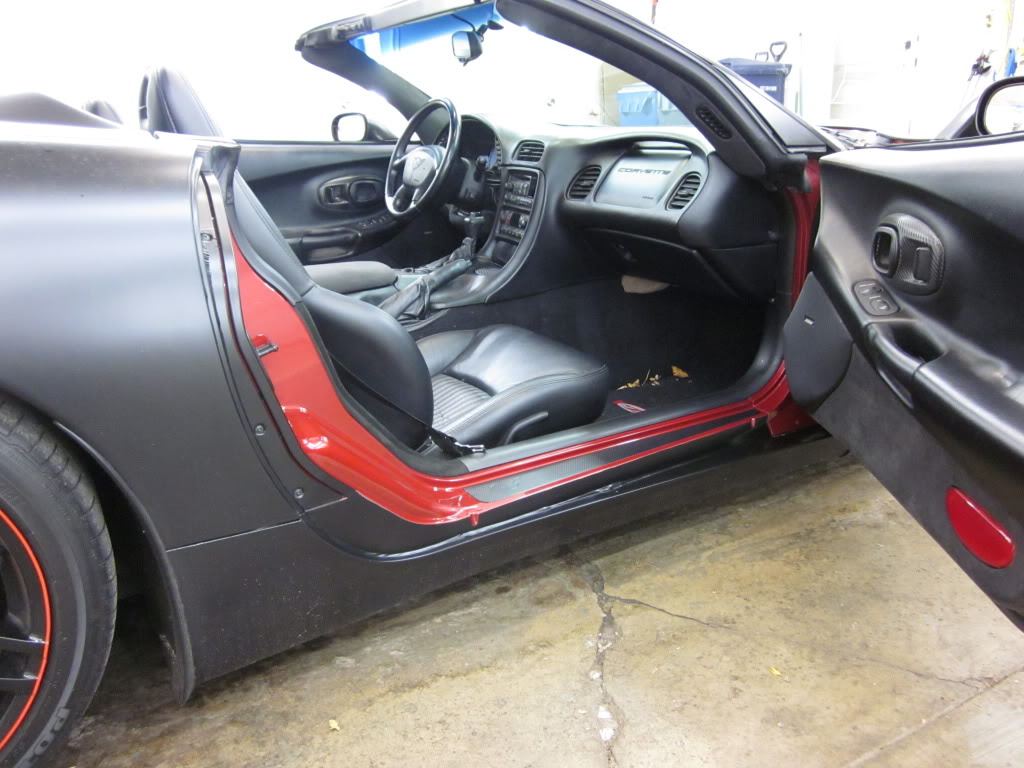
Doors were simply wrapped around to the backside and the jamb area was taken in about an inch or so into the jamb, just enough so that you can't see red through the door gap on the outside. Rockers were wrapped up over the top and into the jamb for the same reason. Here is what the car looks like with each door open.
Hood was wrapped around at the edges just like the rest of these panels.
A thin strip was added to the backside of the hood because this area was visible while looking out over the hood while driving and it pissed me off a bit. Didn't need to see a strip of red every time I got behind the wheel.
Fenders have a similar weatherstrip like the quarter panels do, so tucking and trimming the vinyl was cake, bottom of fenders where they bolt on were left alone and are not visible when hood is closed.
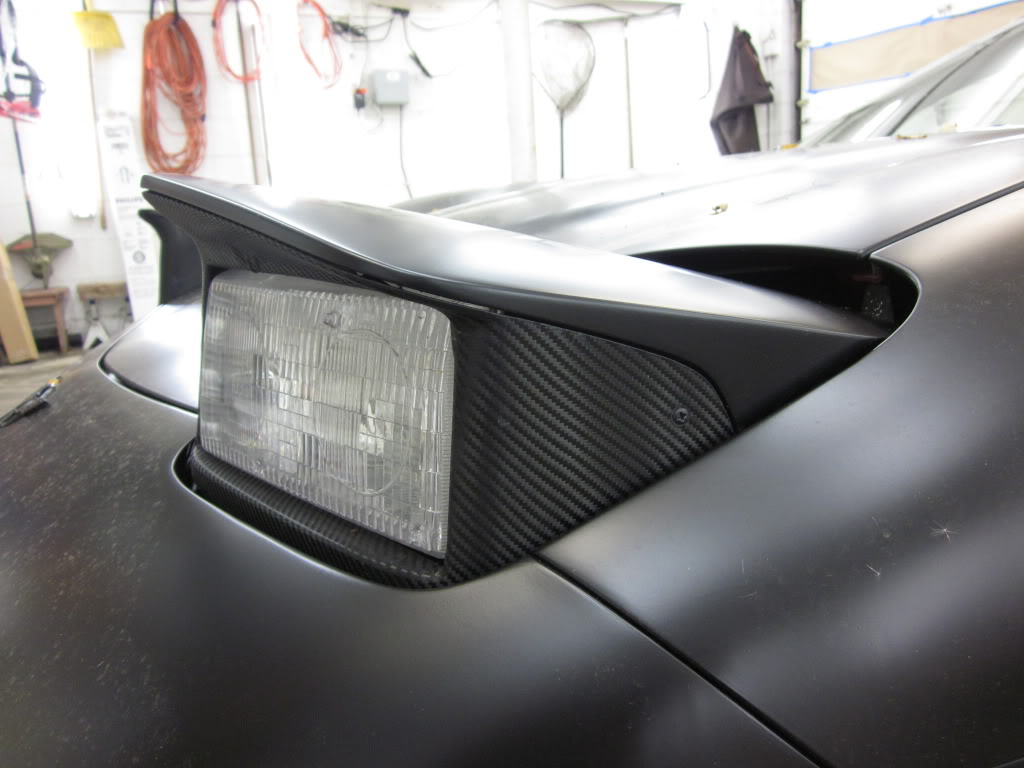
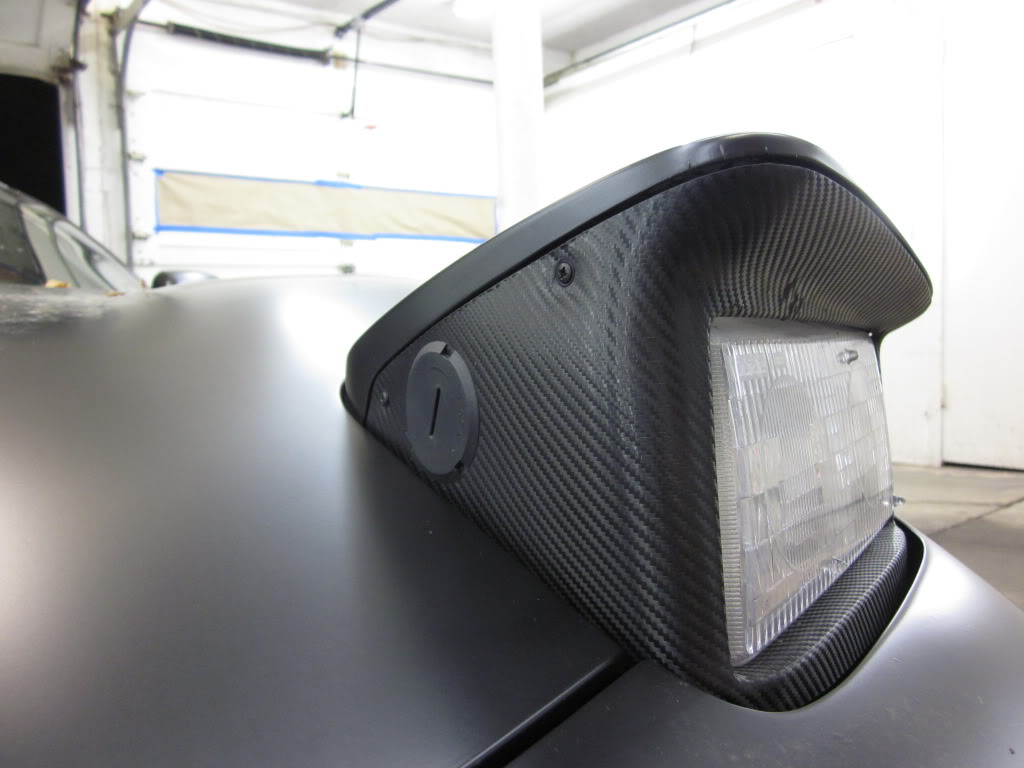
Headlamp covers and bezels were removed for wrapping so no red is visible when they are up or down. Bezels got the carbon fiber vinyl treatment via 3Ms DiNoc.
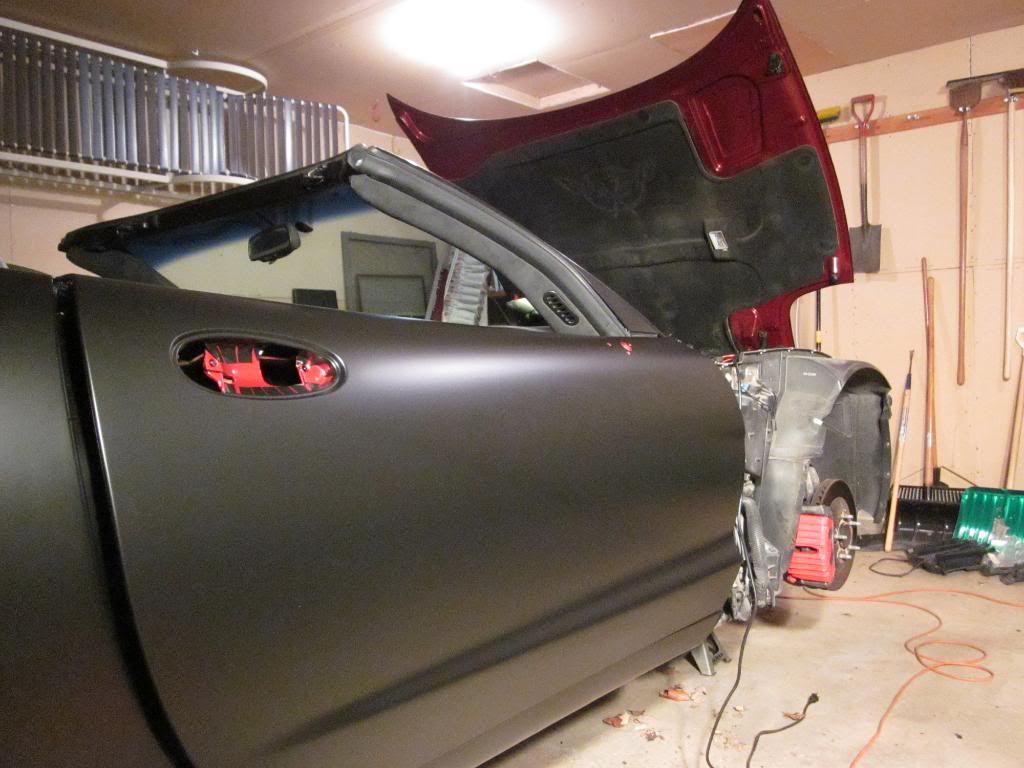
Here is the car all opened up. Again, I think it looks fine but if you are doing this project yourself and want to do the jambs it most certainly is possible. Just time and effort really. Most of the time everything is closed up anyway, so it's all good for me.
Last edited by MarkyMarkGTM; 10-09-2011 at 04:21 AM.
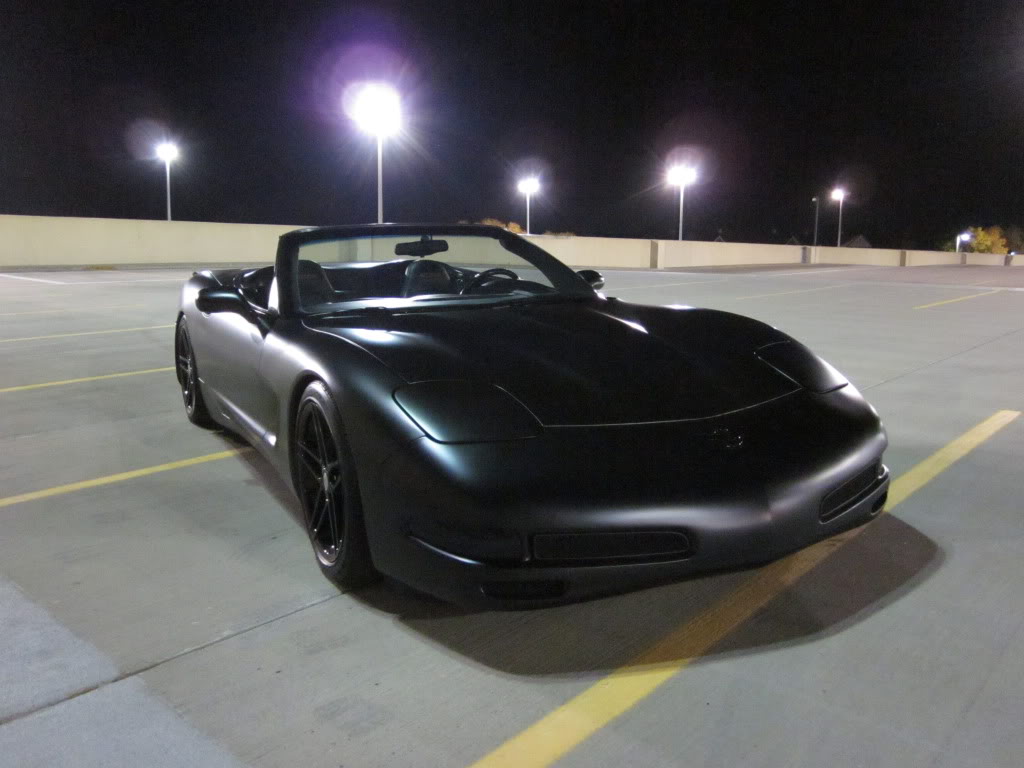
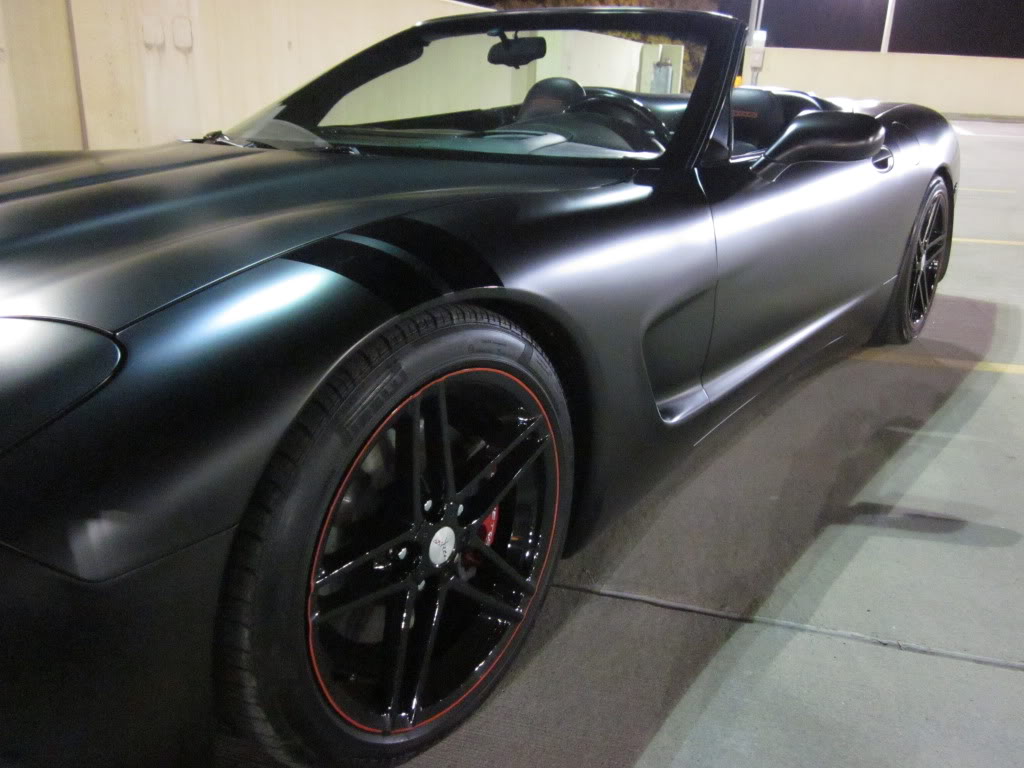
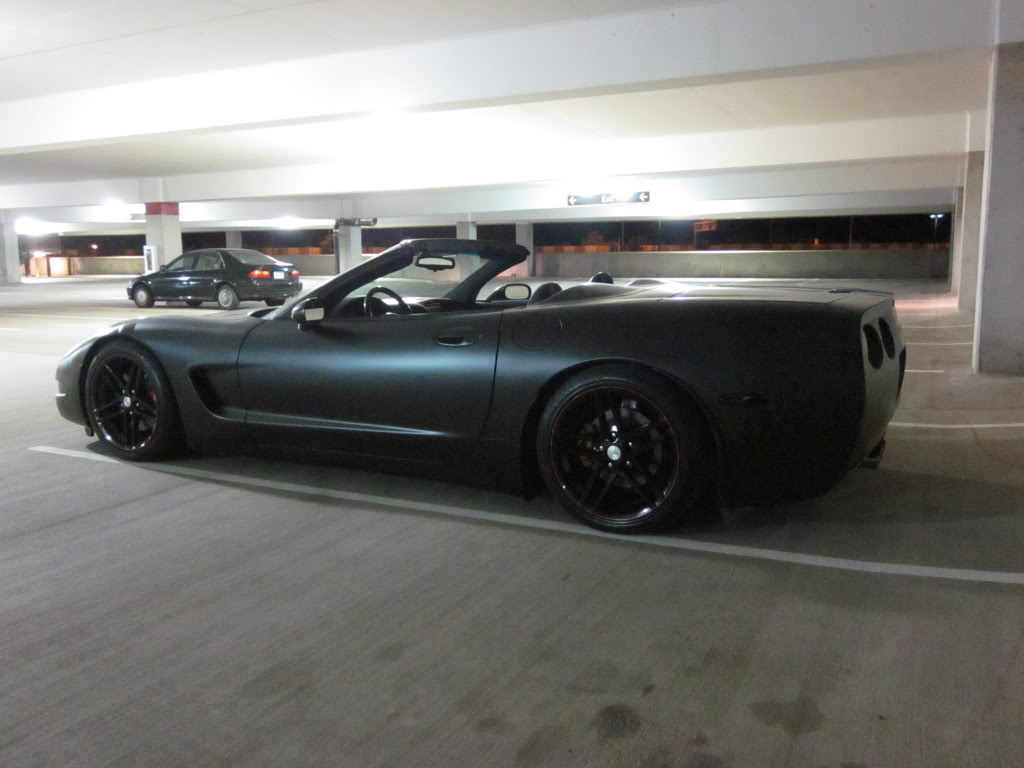
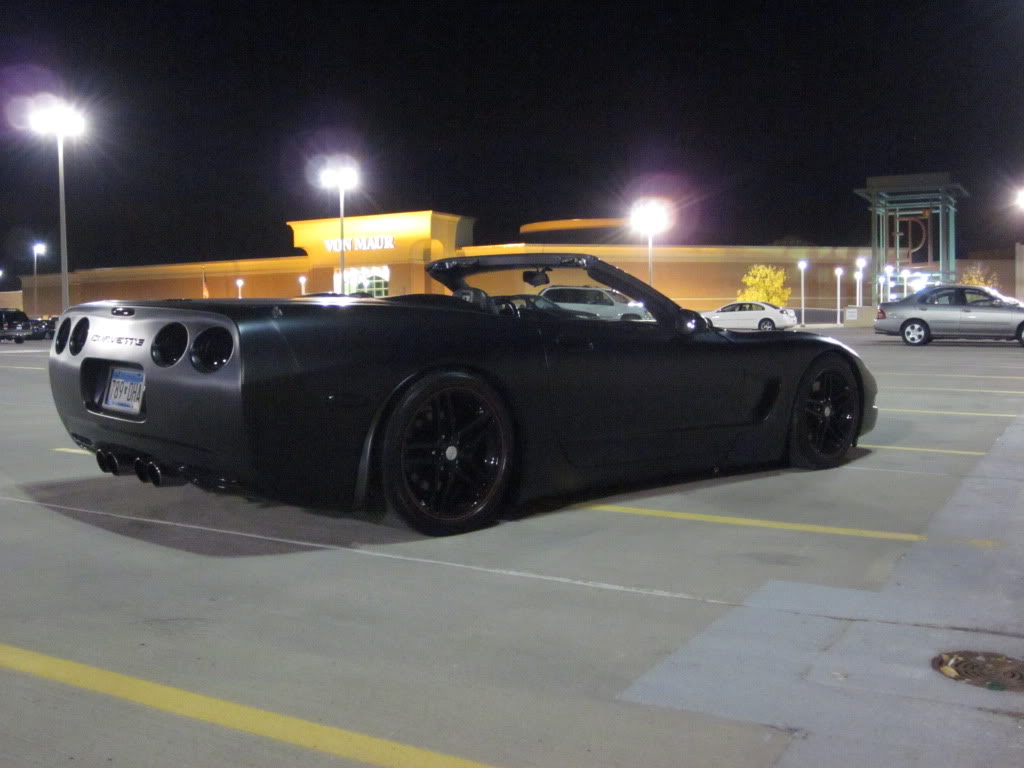
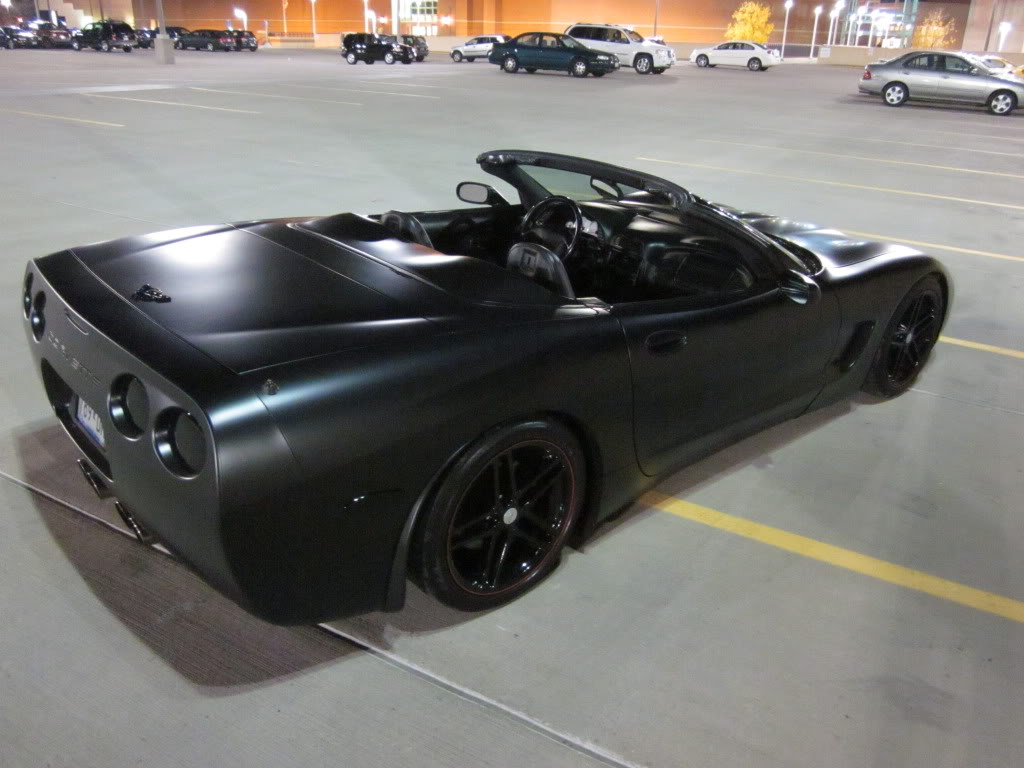
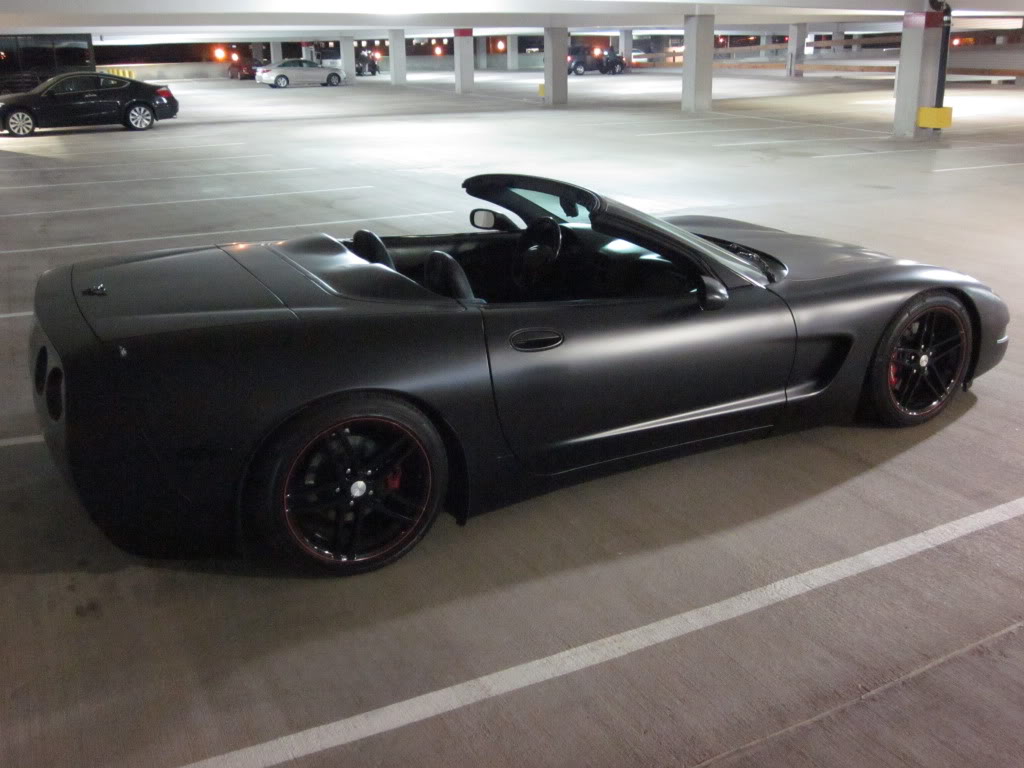
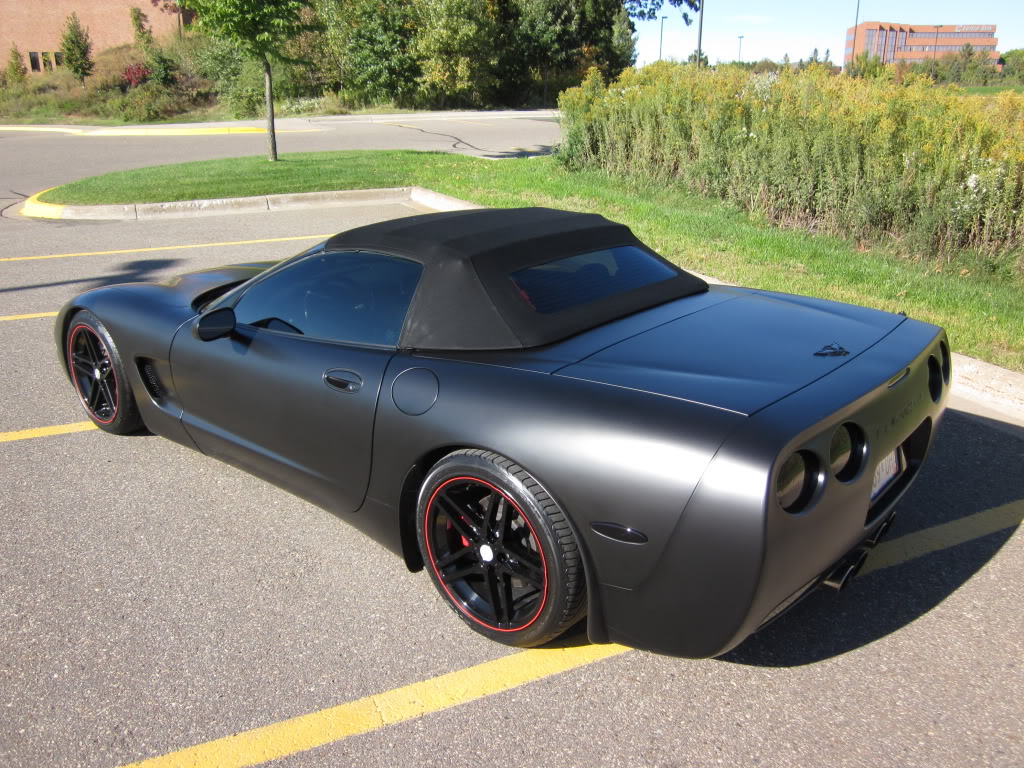
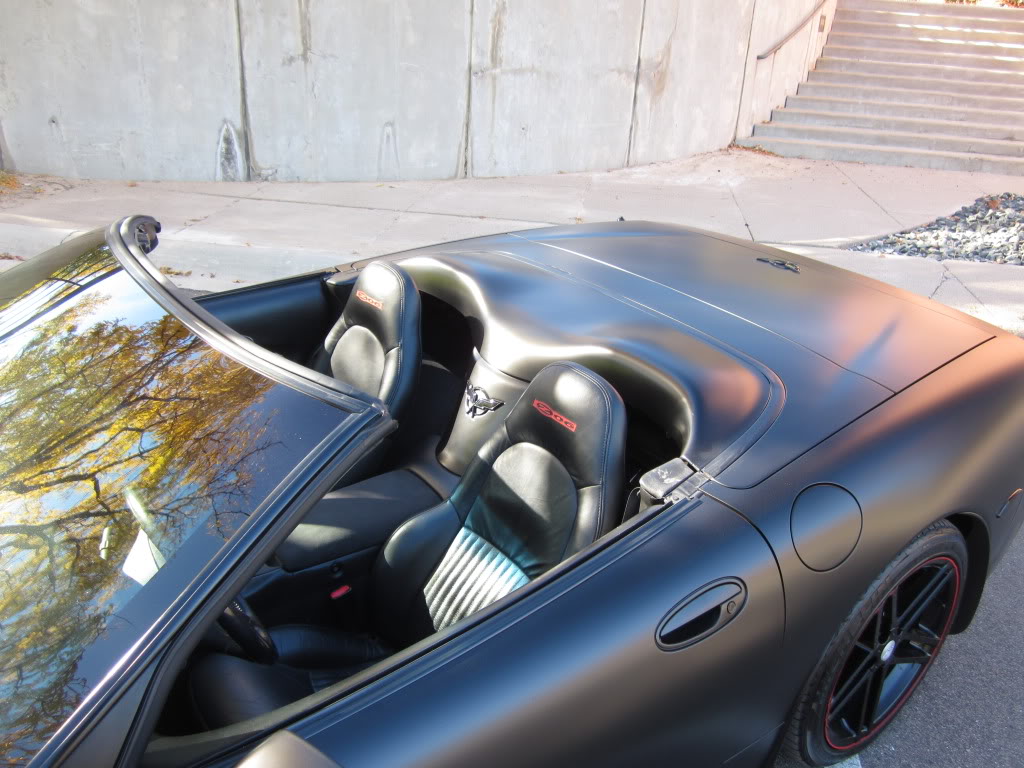
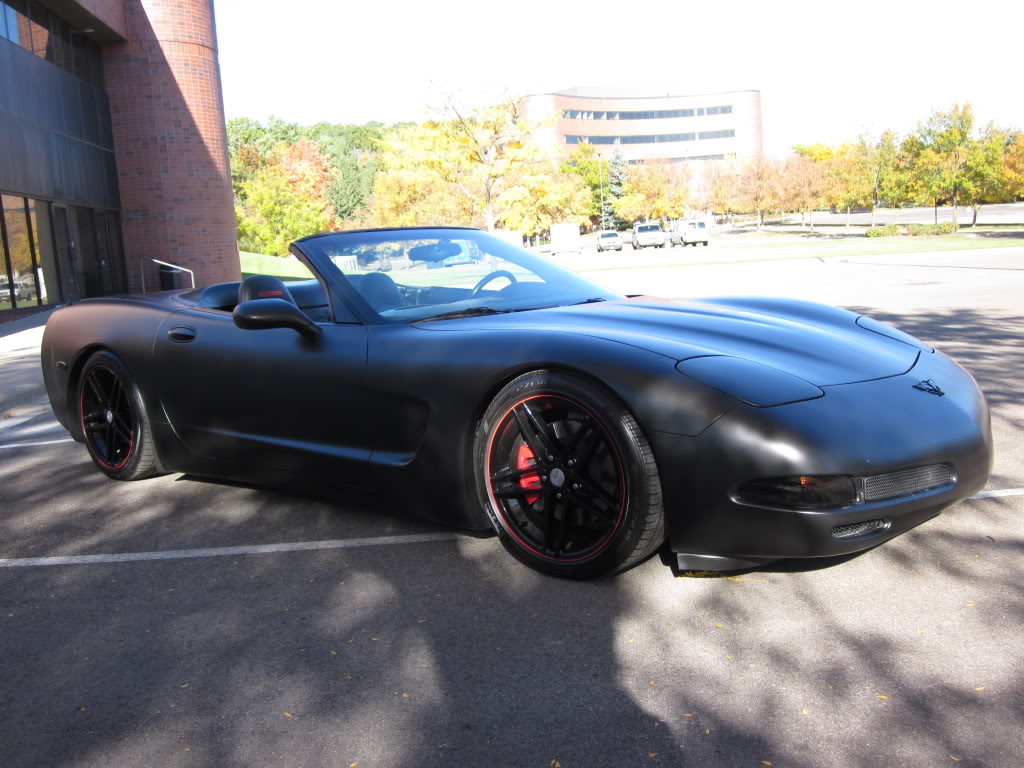
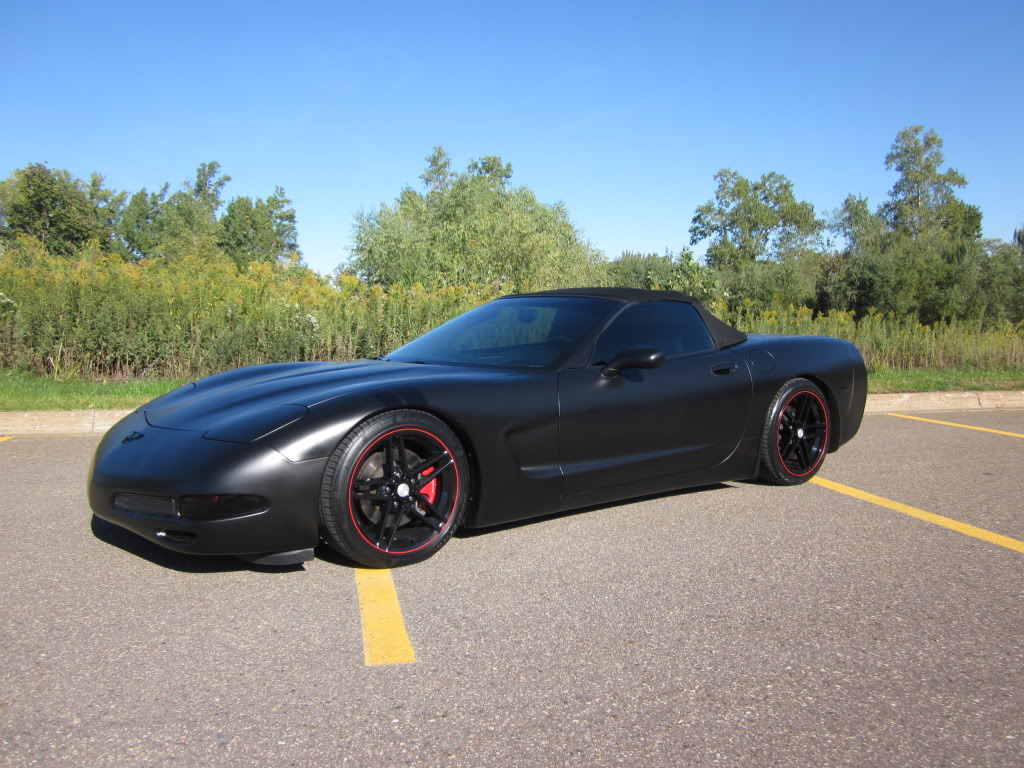
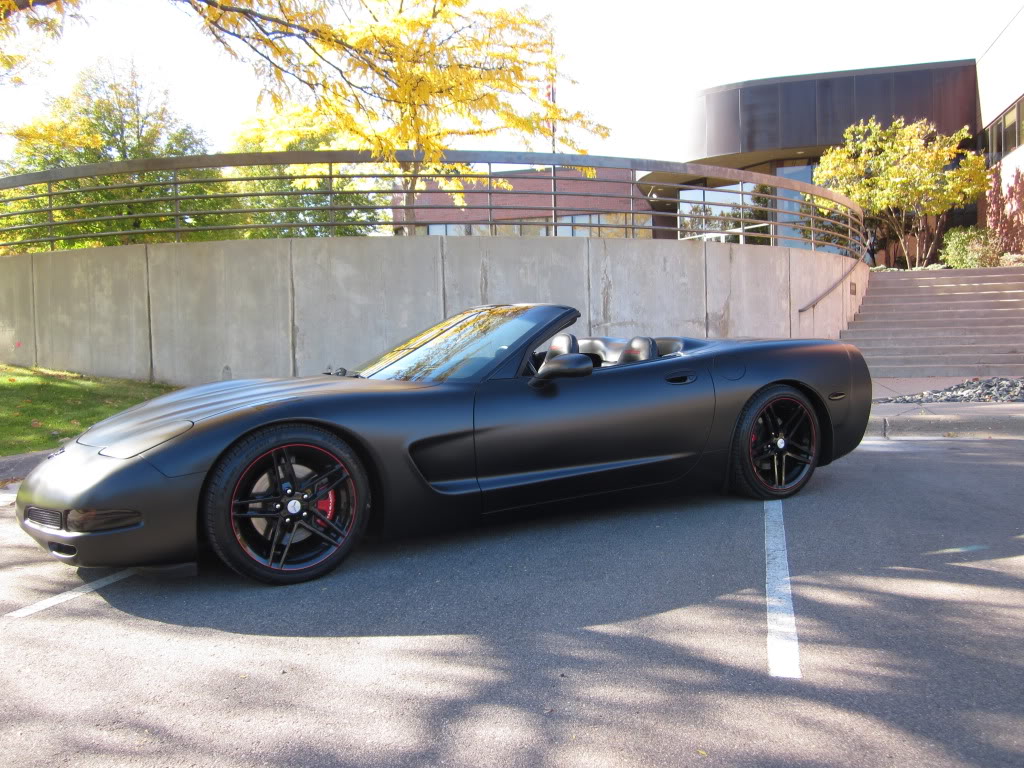
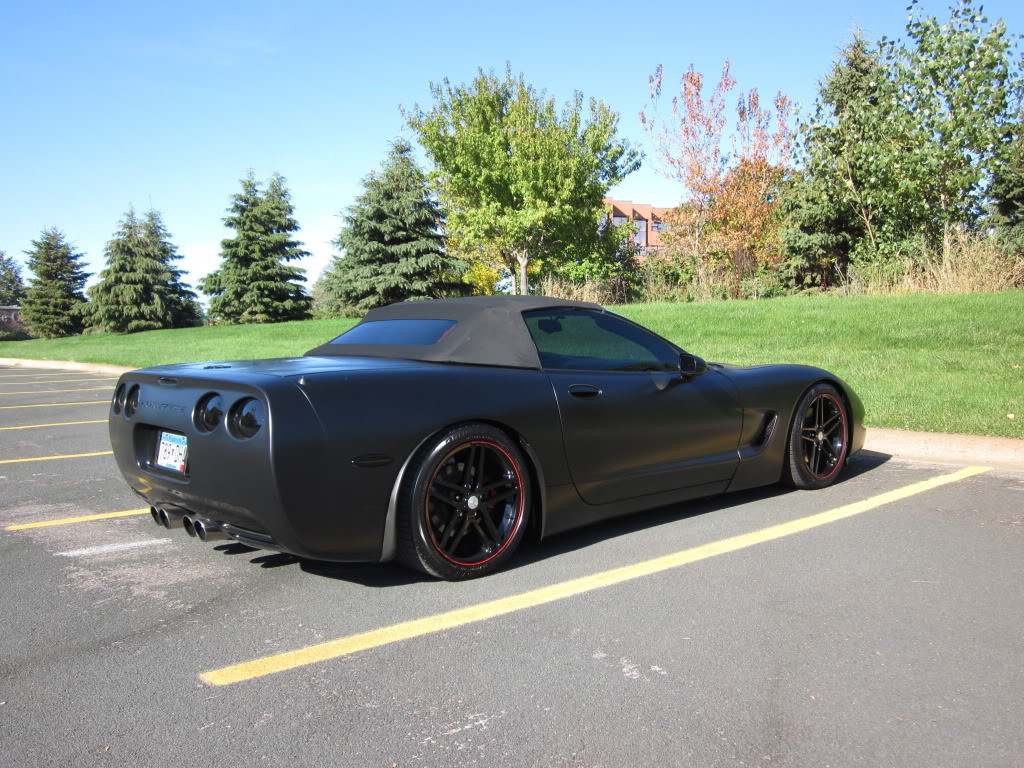
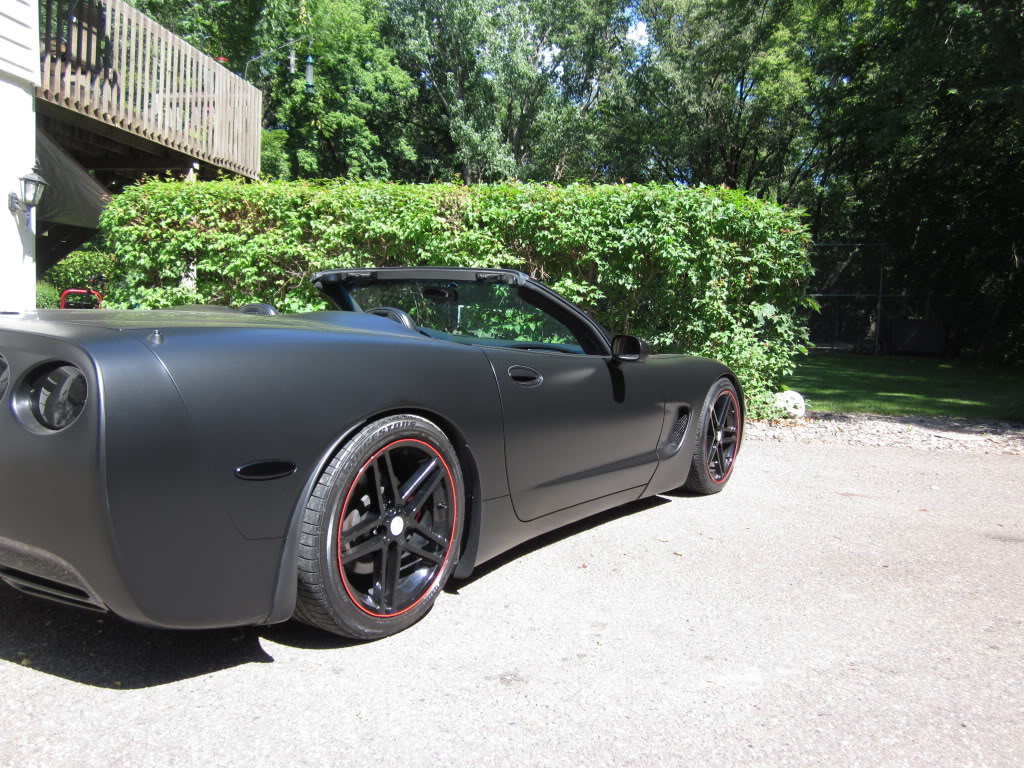
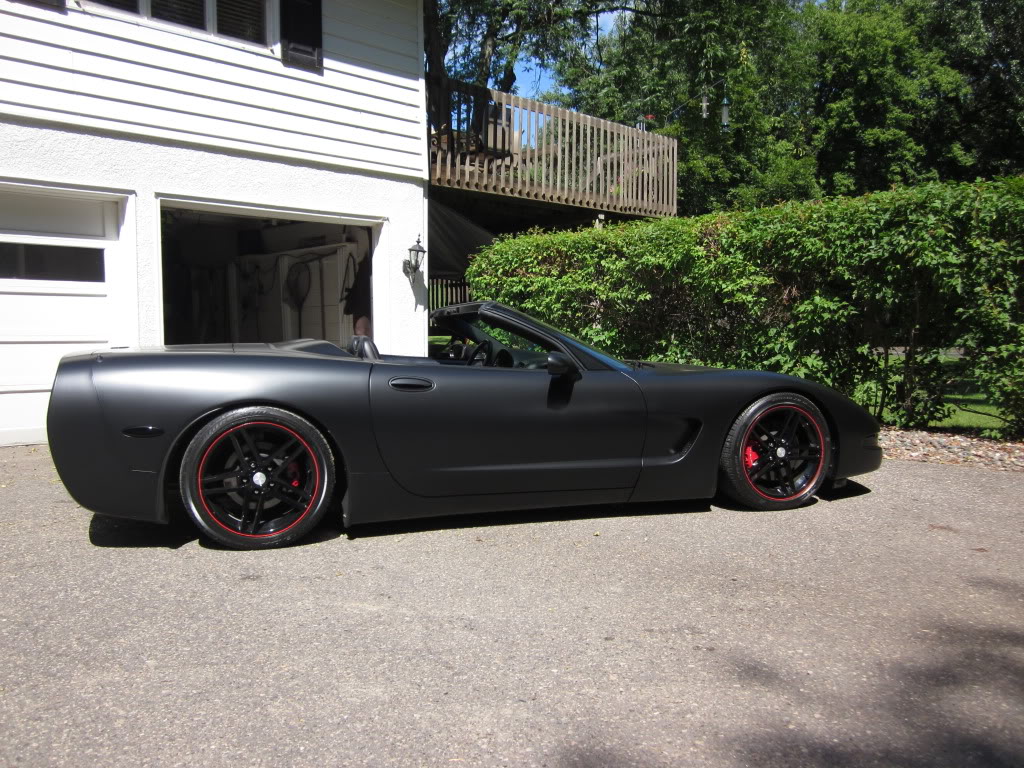
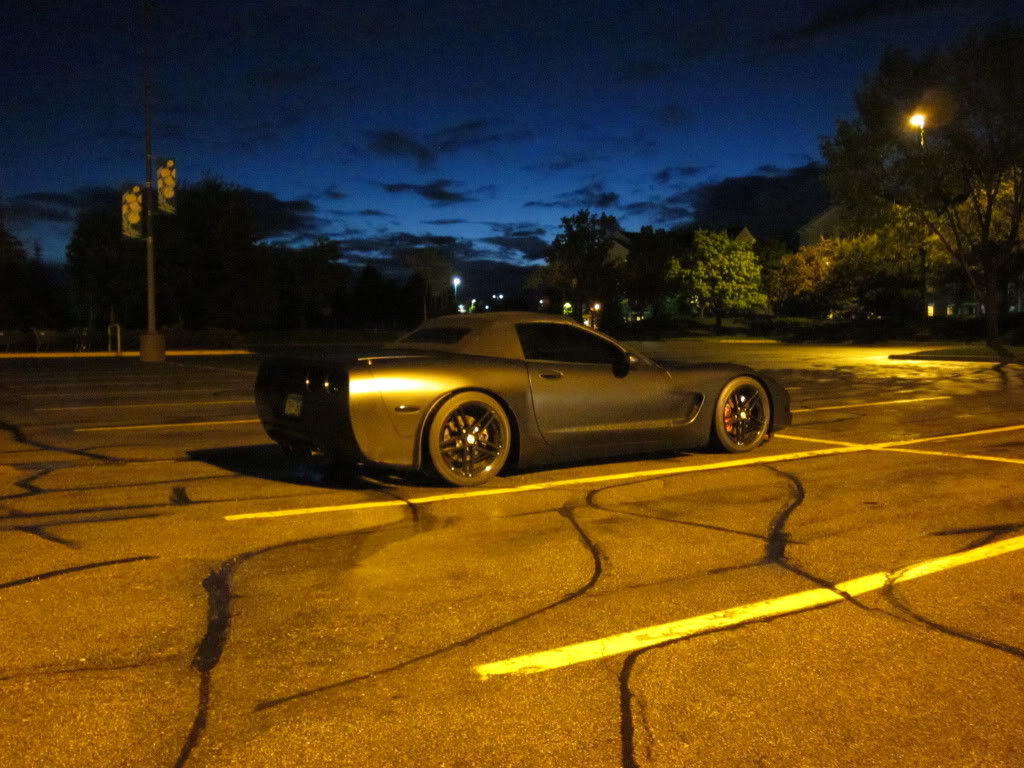
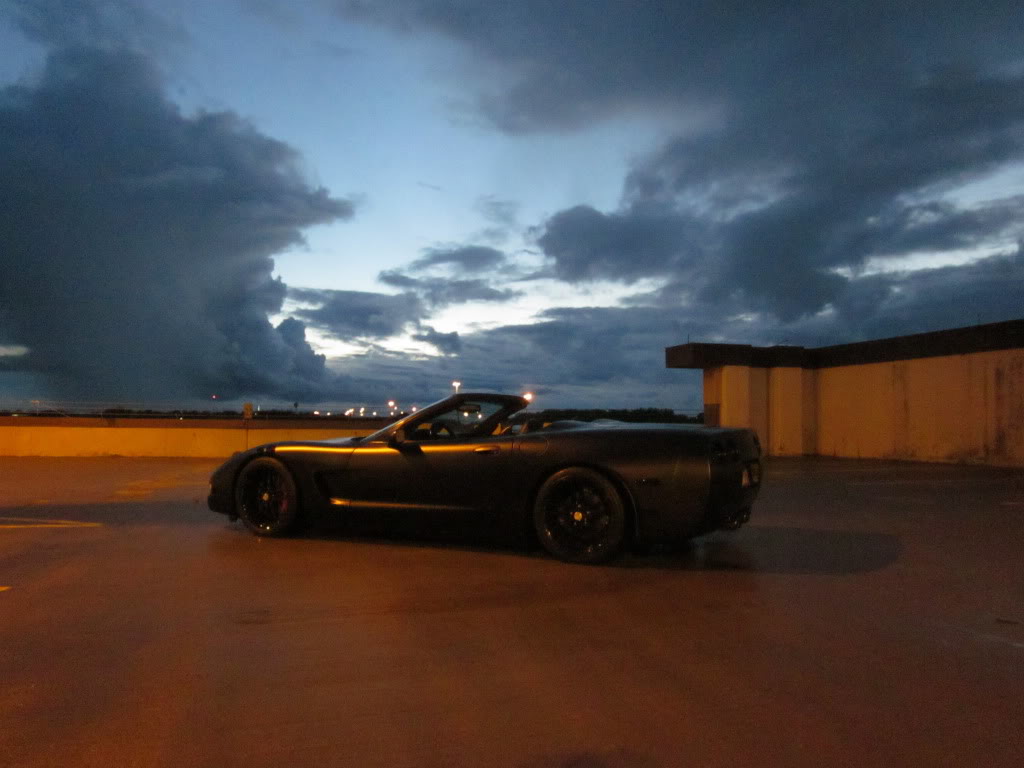
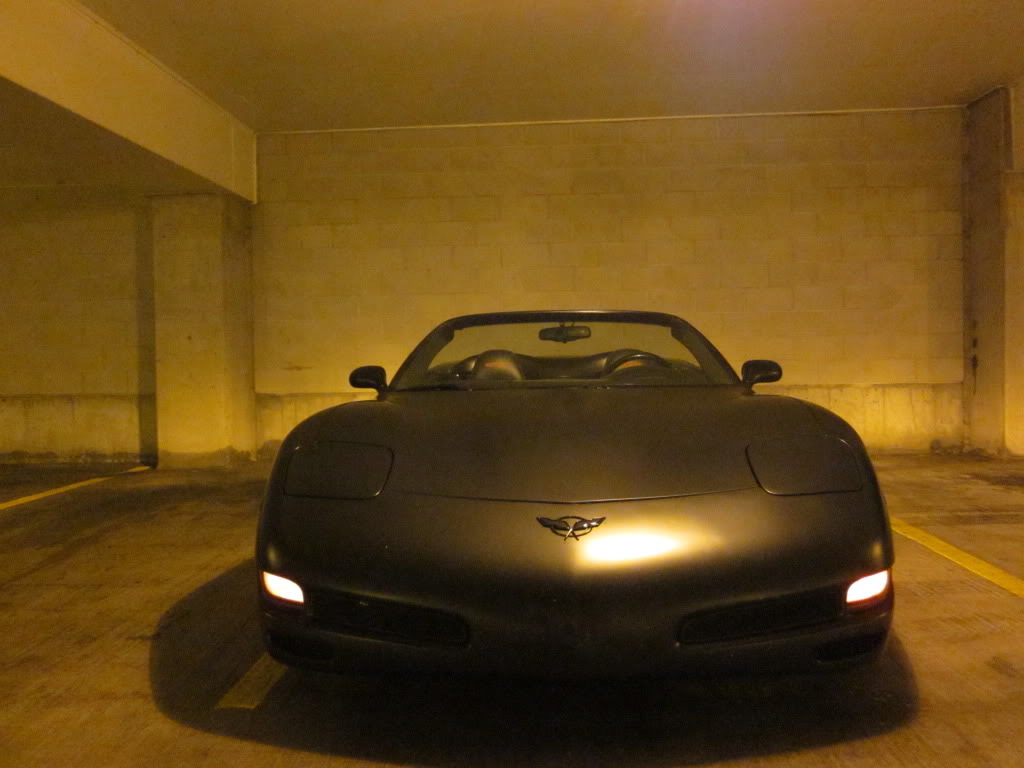
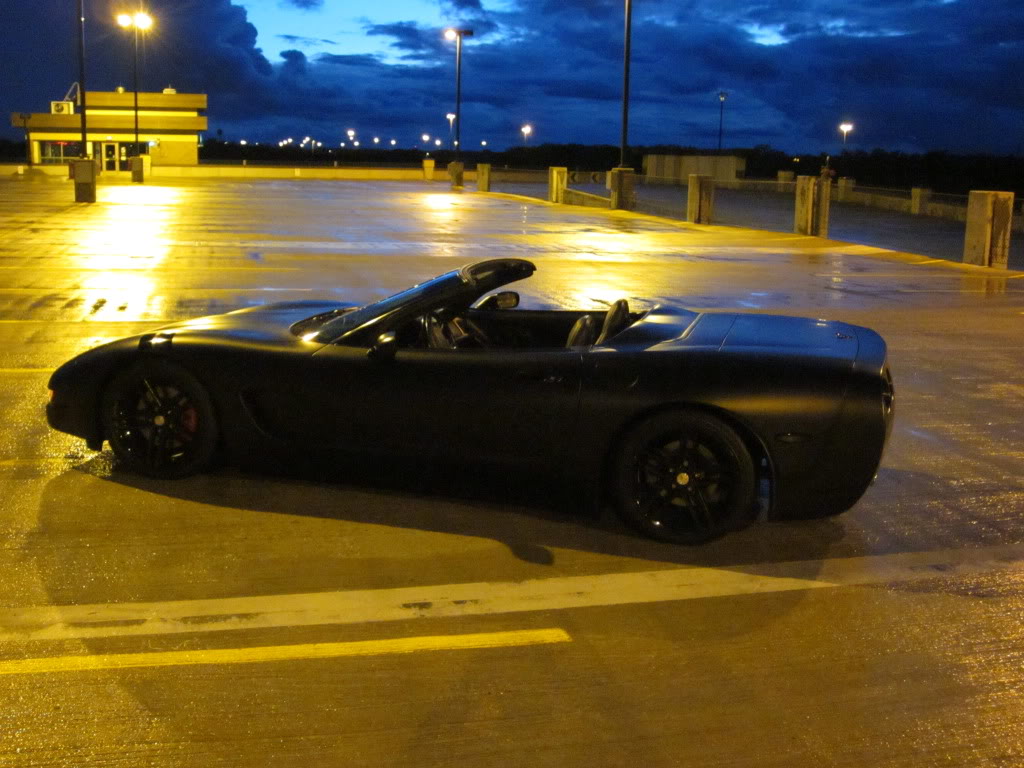
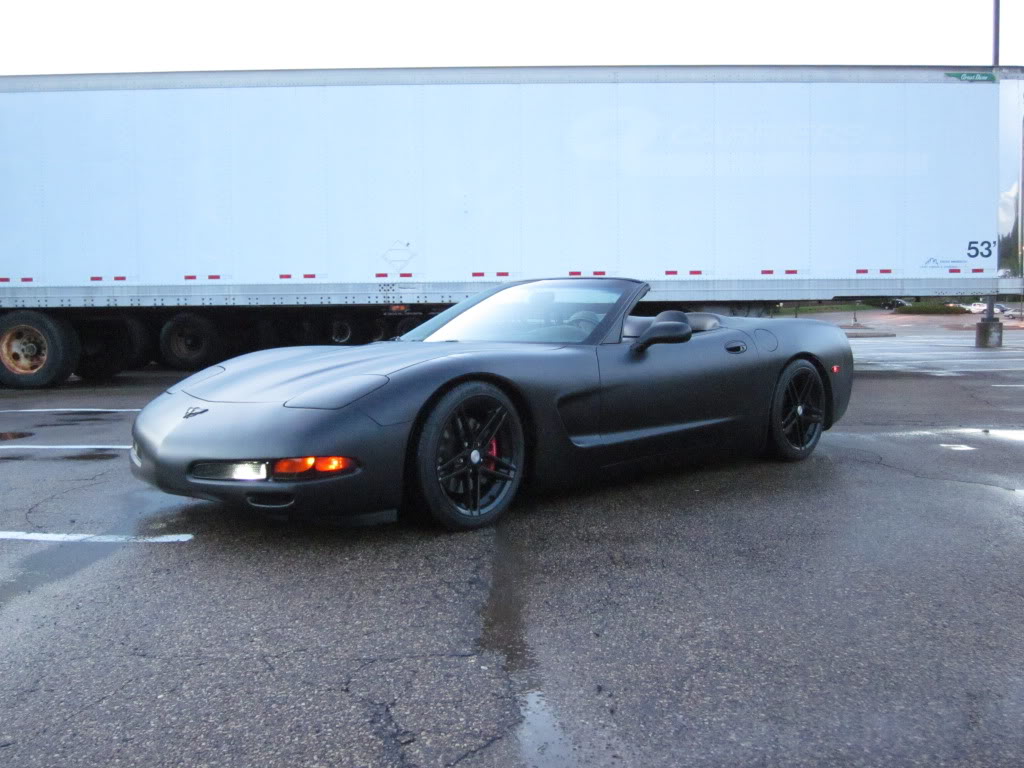
Well congrats on making it through to the end, it got a little bit long but I did warn you in the beginning. I guess it is time for a whole gang of finished shots. This page is going to take forever to load, oh well...
Last edited by MarkyMarkGTM; 10-09-2011 at 04:29 AM.
COST:
Almost the first question I get from everybody that talks to me about the car is cost (after I explain it is vinyl). This is a tricky question to answer because there really is no straight answer to give. The closest I can say is that the vinyl was about $550 and various supplies pushed me into the $600 neighborhood. There are a few caveats though. First and foremost is that I wasted a ton of material trying to teach myself how to do this. I had no prior experience and did several panels two or three times trying to get it right. I like to think of the added expense as paying for lessons except i'm the student and the teacher.
So my original plan was to buy way more than I needed at the bulk price and sell off what I didn't use. Well I used the whole roll instead so that didn't pan out well. So the first time around it cost me about $600 BUT if I were to do it again I could use half the material and sell the rest as "enough to wrap a car with" and recoup a few hundred dollars. My advice would be to get a friend to go halfsies with you on it and you help him and he helps you. Then you would have two murdered out cars for $300 apiece, not bad at all.
If you want to get your car wrapped by a "professional" it is going to cost you g's, not hundreds. A cheap job starts around $1500. Remember all that dissasembly I did though? Ya think they are going to do that much work, ah no. I have seen these wrap jobs is person and they look good but compared to mine they aren't as nice. They don't wrap edges as much and that is where mine looks a bit more seamless in certain places. A high end wrap job where they do take apart more things is probably going to be closer to $4,000.
TIME INVESTMENT:
After people find out I did the wrap myself the next question they ask is how long it took. Unfortunately I don't have a straight answer for this either. See I did this in the spring (in MN that is) so I wasn't driving the car and it was just kind of a winter mod that I worked on a little bit at a time. My buddy would come over and we would spend a few hours here and there. It wasn't like we did the whole car in a weekend, we spread it out over the course of several weeks. So my answer to how many hours did it take is "a lot". I will say, just like materials, a lot of time was spent learning how to do it and if I were to do another one I am confident I could do it in half the time.
MAINTENANCE AND CLEANING:
Everyone assumes that a matte finish cleans itself and joke about how easy it must be to take care of... wrong. While I will admit that swirls and other fine scratches that plague a clear coat finish are not a big deal, it is certainly no walk in the park. First off, it attracts dust. A lot of dust. If you thought your car gets dusty fast you haven't seen anything. I'm not sure if it is the color and that I just see the dust that much easier or if there is some kind of static with the vinyl where it actually attracts it. Whatever the case that is the hardest part of keeping the car clean now. The california duster gets used almost every time I drive it.
The third question people usually ask me about the car after the whole vinyl/cost explanation is how I care for the finish. I'm not sure if they are looking for a super technical answer or special new age products but there are no real big differences in cleaning the car with the vinyl vs. paint. I wash it, wax it, even buff it (yes buff it) just like a standard paint job. The biggest difference in matte vinyl vs. matte paint is that you cannot add gloss to the vinyl. Try as you might it just won't happen. I can take my buffer and some heavy cut compound (Megs 105) and have at it and it won't do anything to add gloss. I can buff out light scratches, which I do from time to time, but the surface doesn't change in consistency. If you do that with a matte paint job you will have glossy spots and you will have ruined your finish. After buffing, the area is a little bit more glossy due to the carrier oils and lubricants in the polish but a quick swipe with some denatured alcohol and the surface quickly goes back to that uniform, consistent matte sheen.
I have gotten the car very dirty by leaving it outside for extended periods of time, left it sit in the rain, and driven it around in the rain quite a bit and I am happy to report that it cleans up great. My standard procedure is wash like normal, dry with air source of some kind, then wipe down with denatured alcohol and follow that up with a quick detailer. Fairly simple and works great.
FINAL THOUGHTS:
I think with every project that you do you learn things and perhaps if you were to do it again you might do somethings a little differently. For this project once I figured some things out it was fairly smooth sailing. At first I was trying to apply it dry because that is supposedly what it is made for but that was a major fail for me and I ended up using a lubricant and squeegee. Other than that, if I were to do this again I would use the same method of application. I might use adhesion promoter more around the edges and tight angles because a few of those have started to lift a tad. Nothing major and I am seriously impressed that it has held up this good so far.
At the end of the year, before the car gets stored, I will post an update with a basic evaluation of the vinyl after being on the car for 9 months. Any peeling edges, damage, stains, scratches, and whatever else could happen will be documented so you guys have an idea of durability. It has gotten VERY dirty and driven in the rain all the time plus left outside for weeks at a time in 100 degree heat in order to kinda give the wrap a good beating to see what it can handle.
Knowing me I will grow tired of matte black and switch the color for next year. If that happens there will also be an update about the removal process and any damage that the vinyl may have caused. I doubt there will be any and I most likely will do another wrap instead of going back to paint so it won't matter for me, but I will keep you guys updated on anything that makes this project not a good idea.
CLOSING:
Thanks for reading/looking at my tutorial. It was a really fun, challenging, and rewarding project. I get comments all the time on it (most of them positive, some not) and it is fun to talk to people about how I did it, the best part is being able to say I did it myself. If you have any questions or comments PLEASE post them and I promise I will get to them all as soon as I can. Also if you feel that I have left out anything or skimped on some details or you just want to see a pic from a different angle or ANYTHING... just let me know and I will add/edit this thread to include the information you want. This thread is here to help people so if it needs something more I will be sure to keep it up to date. Please help bump the thread and keep it up top for awhile so people have a chance to see it and bookmark it if they want to.
Mark
Last edited by MarkyMarkGTM; 10-09-2011 at 01:14 PM.
After seeing your write up i think i may try my own hood stripes on my tigershark hood!! I have not atempted due to not thinking i could get the cuts nice clean and staight but after seeing your tape trick i think i can pull it off
Thanks for your write up sir
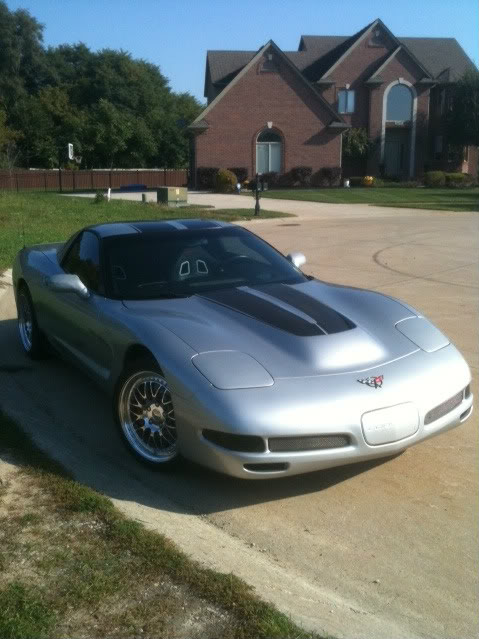
heres a pic of it done with the plati-dip method, the roof ,trunk and original hood are done w/ oracal from vette stripes .com, i installed but all was pre-cut
Steve
Last edited by machz800ps; 10-09-2011 at 09:53 AM.

 10-09-2011, 02:11 AM


 )
) 


 and bookmarked