

 03-06-2015, 02:50 PM
Last edit by: IB Advertising
See related guides and technical advice from our community experts:
Browse all: General How-Tos
- How to Build a Budget Track Corvette?
Step by step instructions for do-it-yourselfers.
Browse all: General How-Tos

Budget C5 Track Build


 02-17-2014, 10:51 AM
#22


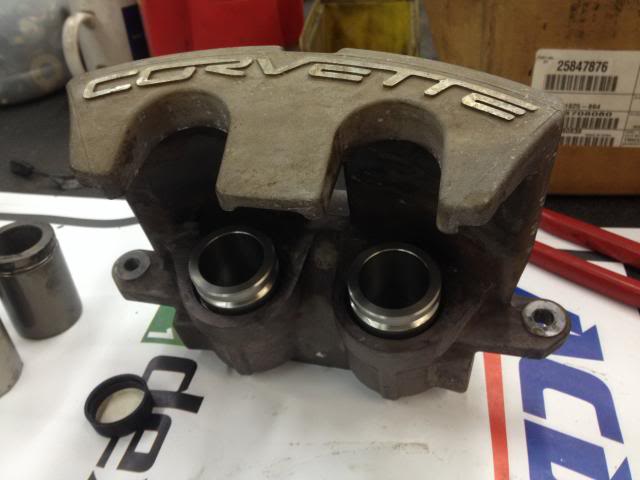
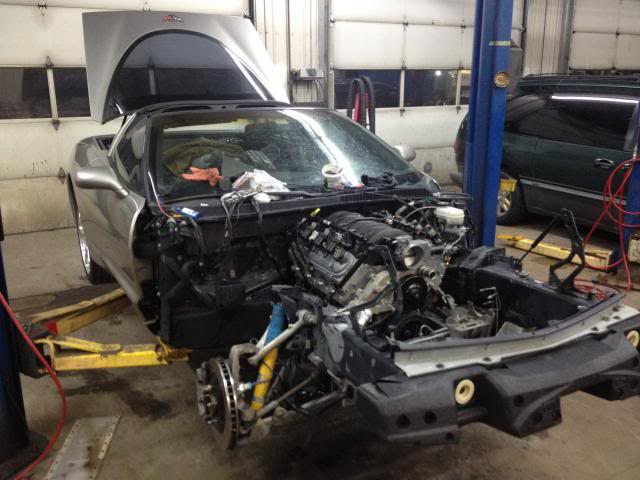
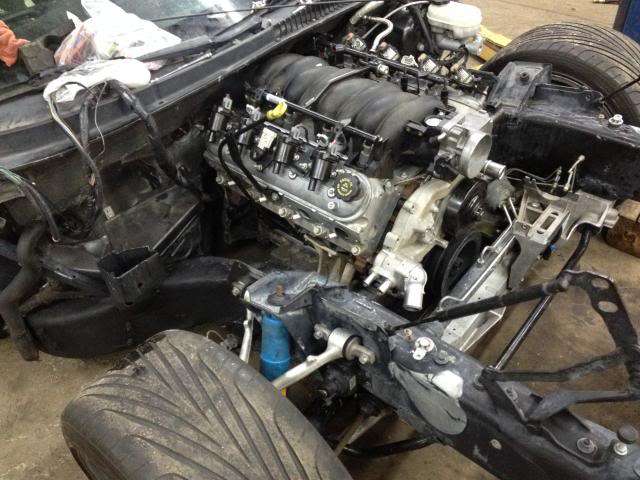
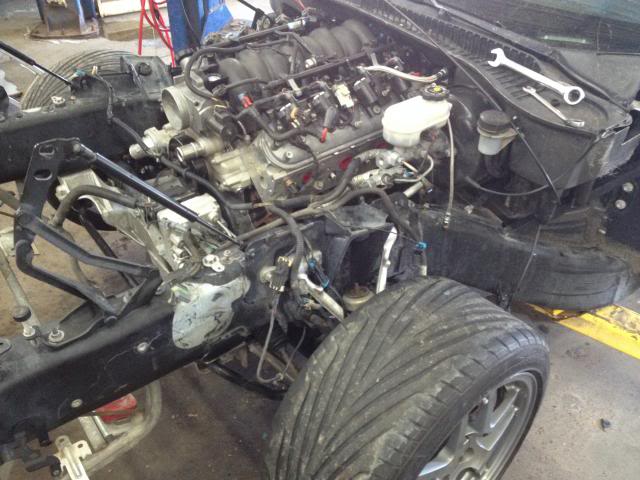
Lots of progress this weekend! Picked up a 4.8 on Friday afternoon, got it cleaned up and dropped in the car this weekend. I had a box of DRM goodness waiting on my doorstep Friday as well, so I managed to get the SS brake pistons installed before I got the calipers on. I also have a solid rack bushing, brake ducts, SS lines, and an oil cooler adapter that will go on as things progress, the parts all look top-notch and Randy got them here in a hurry so that I can get everything installed while it's still easy to get at 
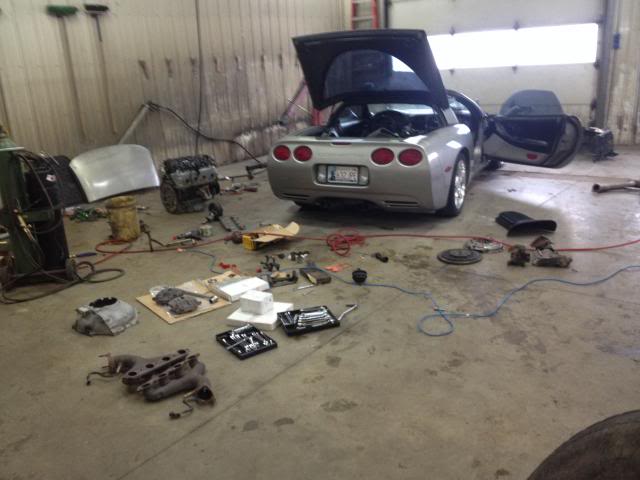
Anyway, I don't have time to caption all of these right at the moment but here are a bunch of pictures showing what we accomplished this weekend, I'll edit in captions sometime this week. Saturday I had other plans so all of the work you see here was done on Sunday-funday 9am-10pm. Hope you enjoy!
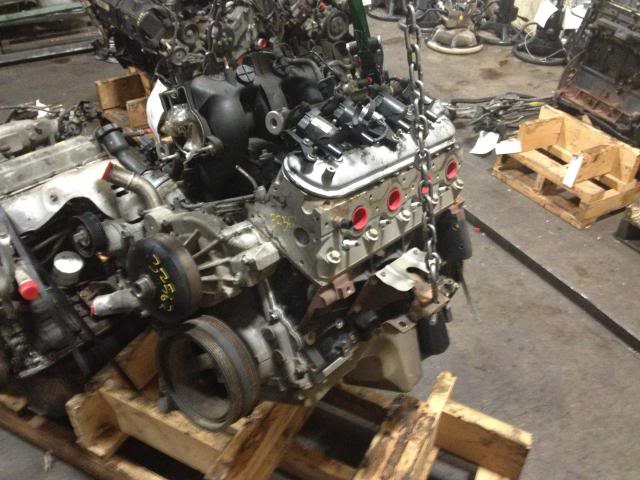
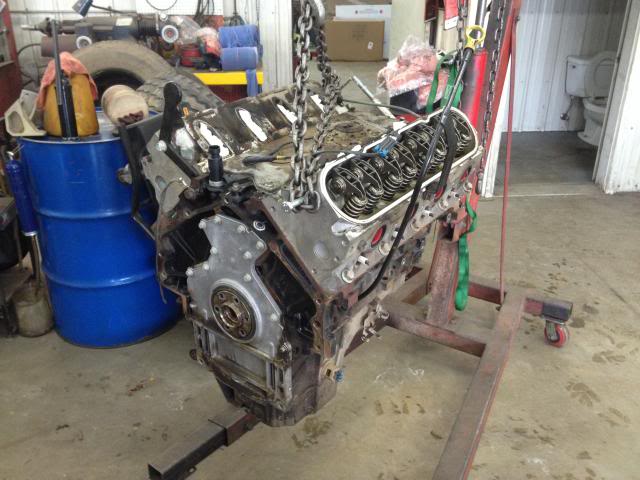
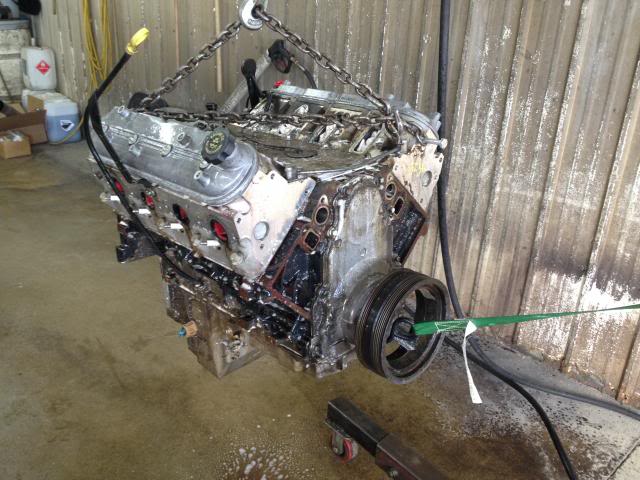
Here's the 4.8 before I got it loaded up at the junkyard
New wheel painted and installed with NRG release
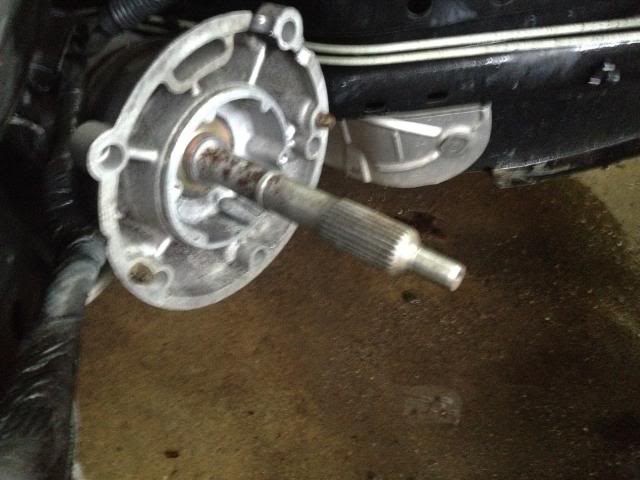
Crappy pic, but here's the input shaft all cleaned up:
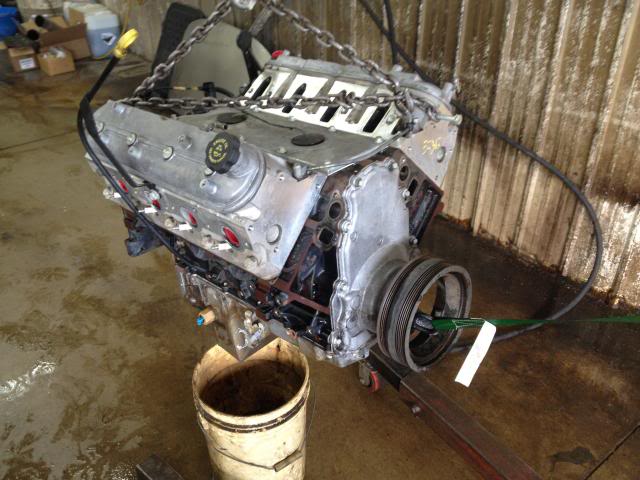
All dried up after washing:
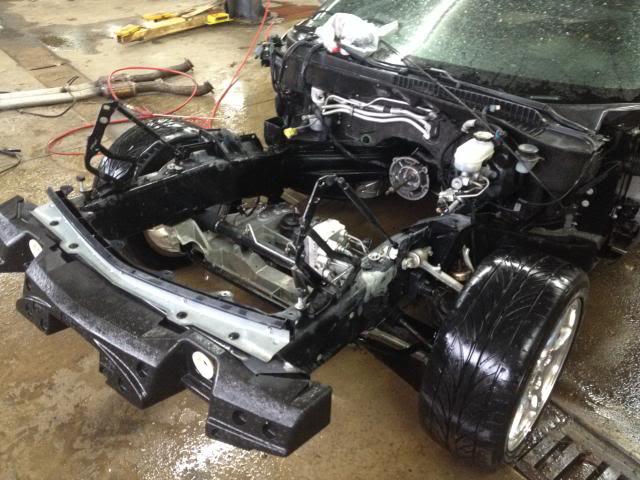
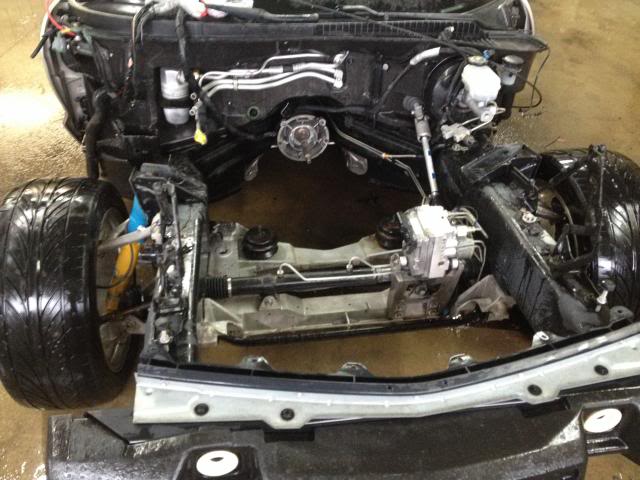
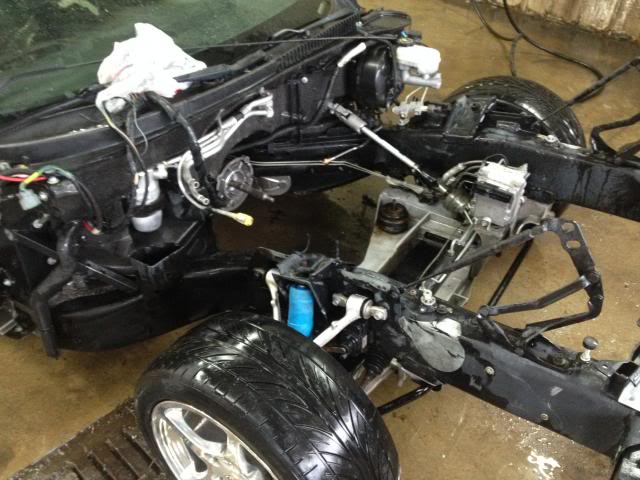
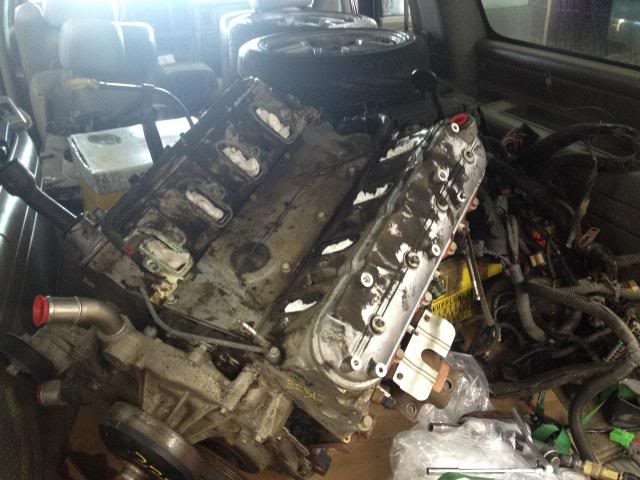
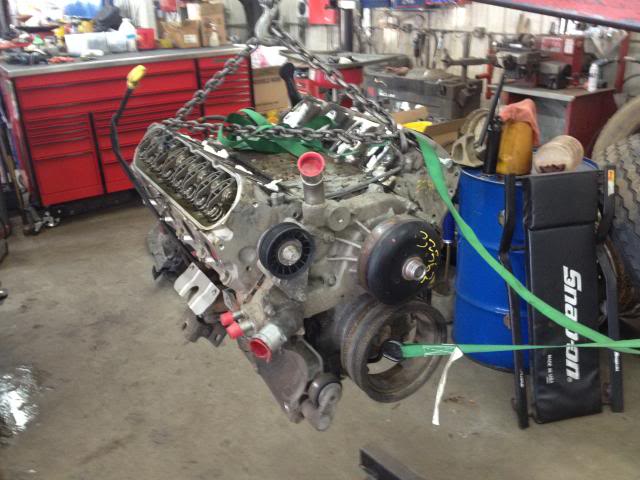
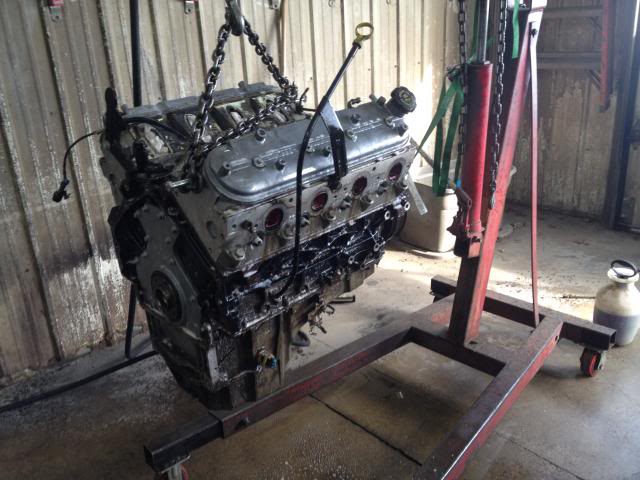
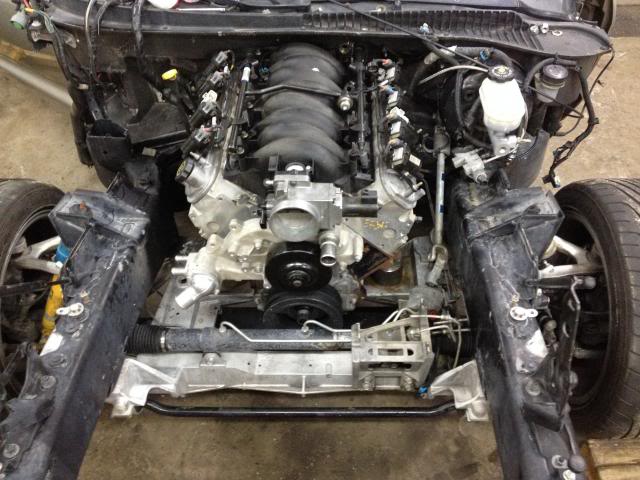
Hauled the motor home in my Denali, here it is after pulling the intake and coil packs...
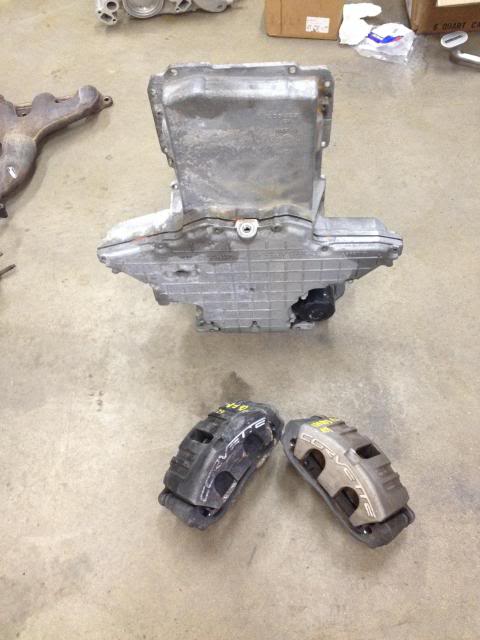
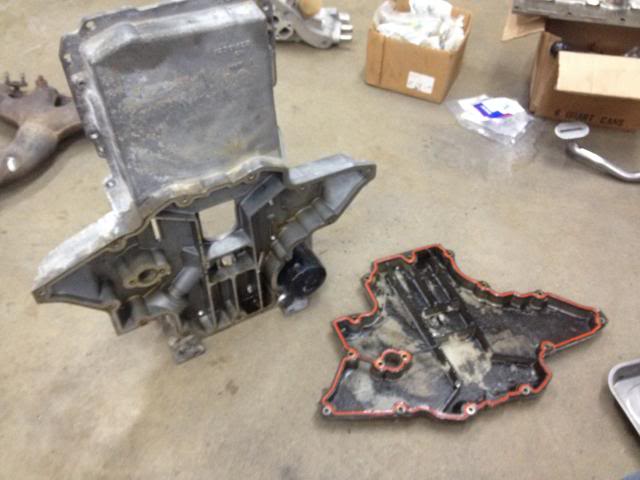
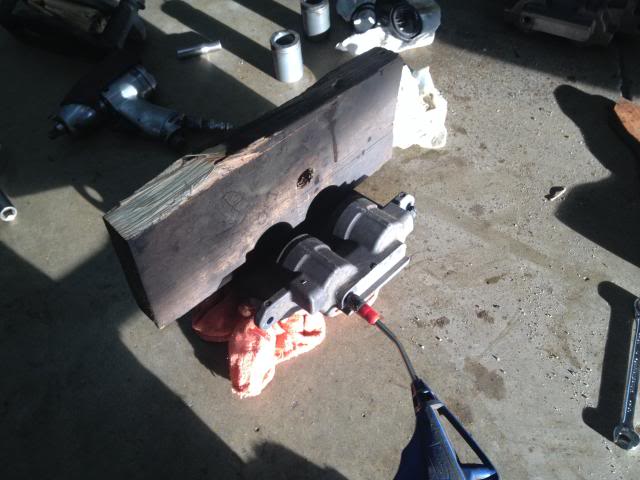
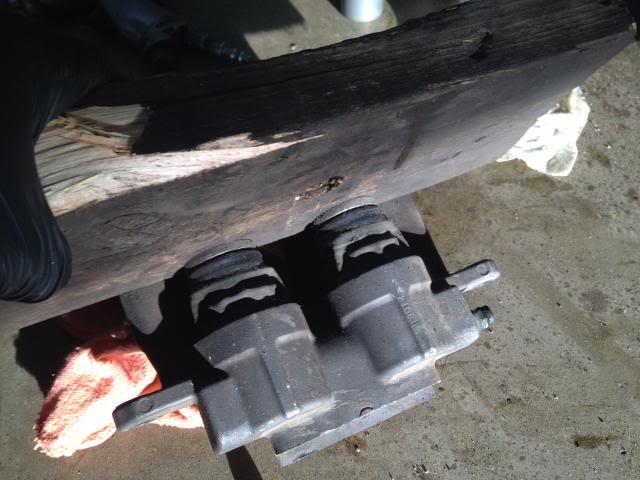
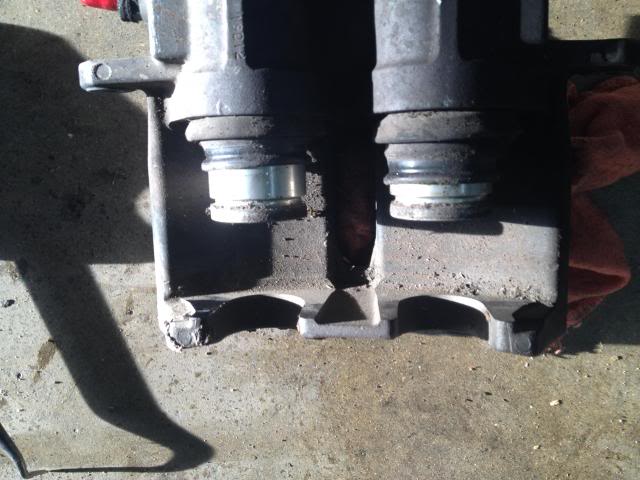
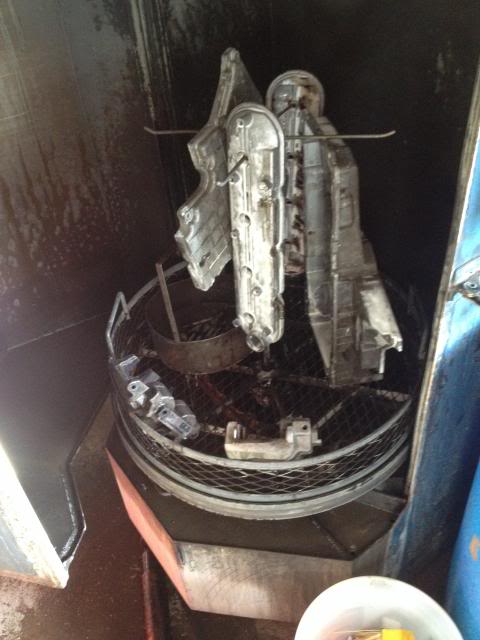
Parts washer: oil pan, valve covers, front caliper bodies:
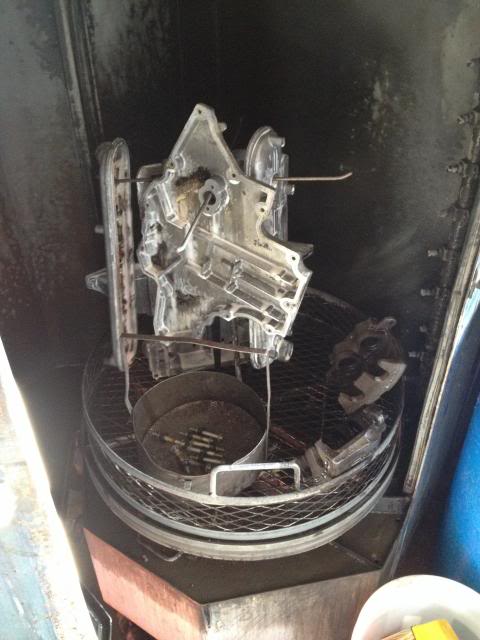
Mmmm clean
Dirty!
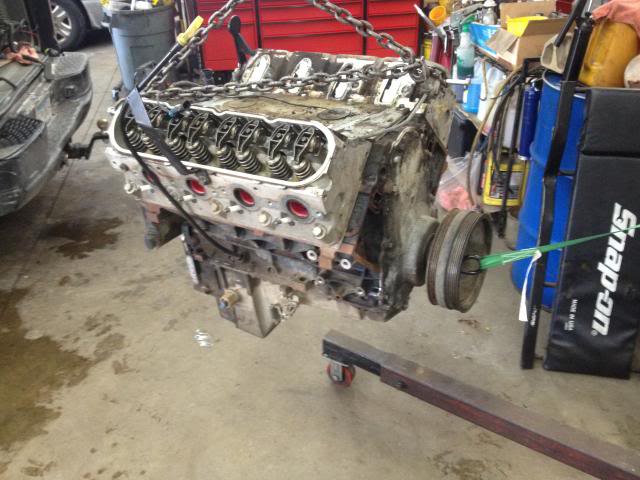
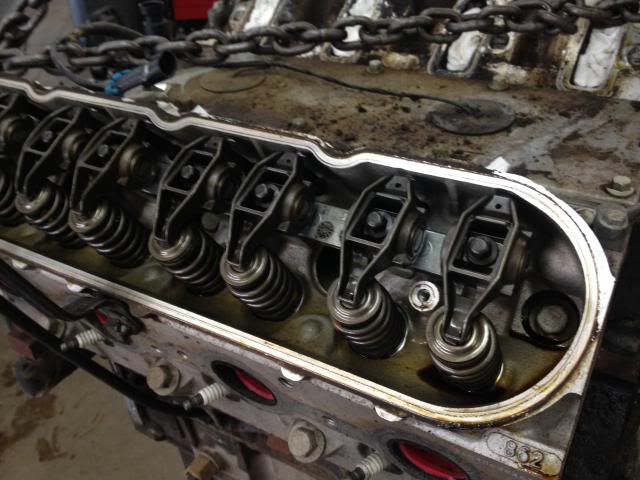
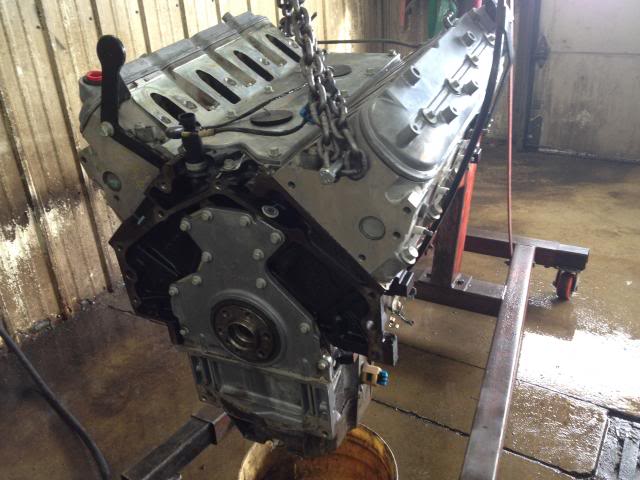
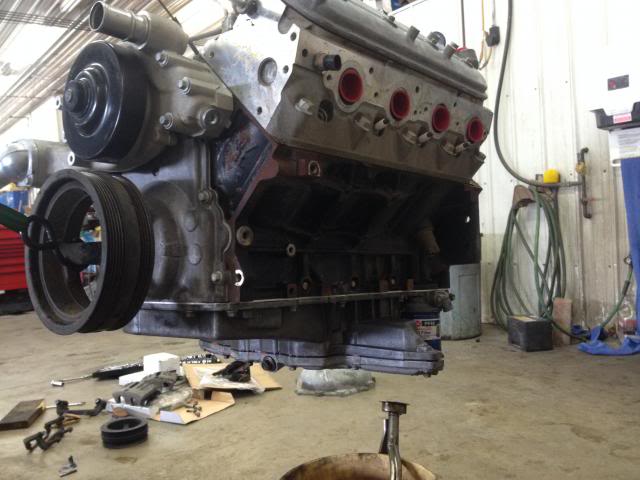
Valvetrain looks good, I'll revisit this to rebuild trunions and valvesprings after we get it fired up.
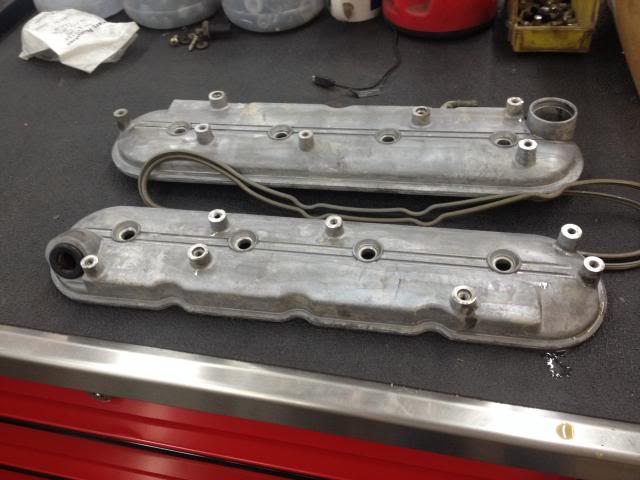
Valve Covers: Clean

Soaping down with diluted Purple Power
Much better:
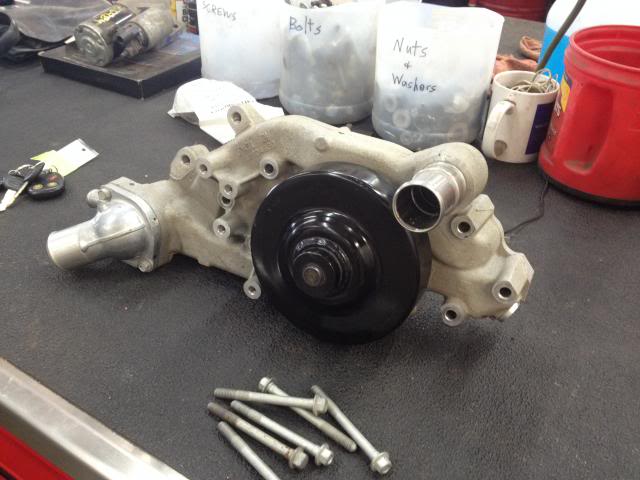
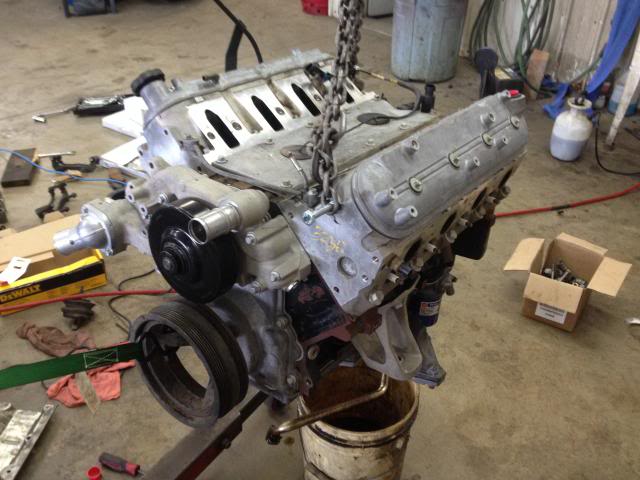
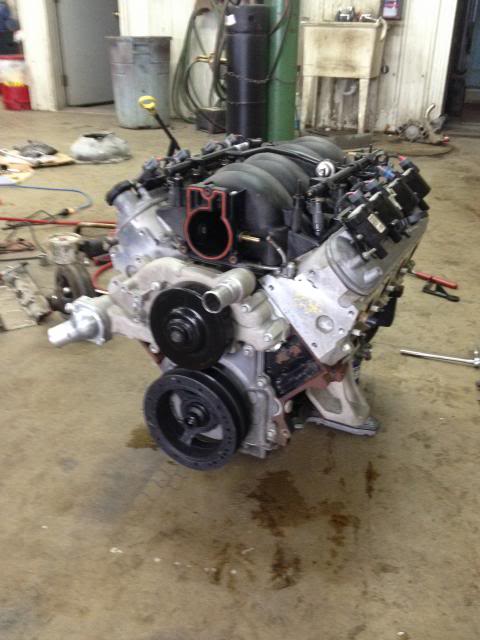
LS3 Crate engine takeoff water pump from the 'bay
Installed:
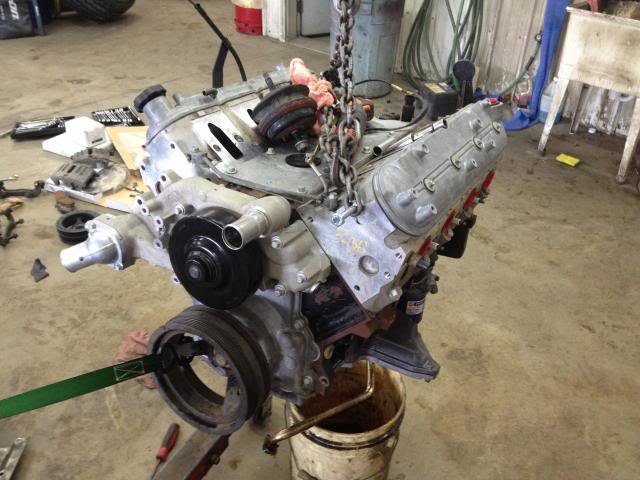
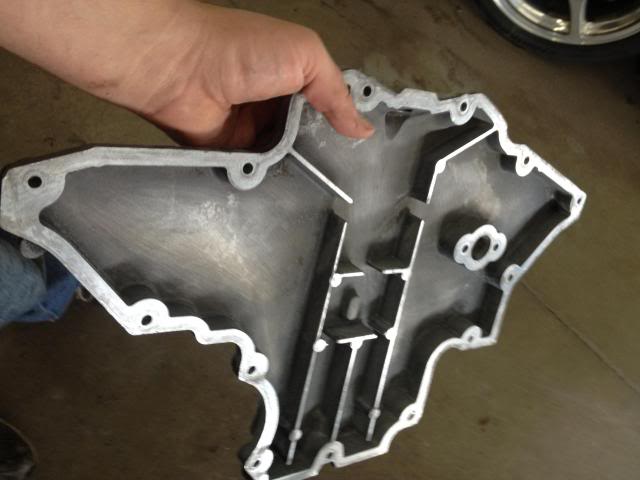
Batwing pan installed with new gasket and pickup tube
Truck balancer pulled
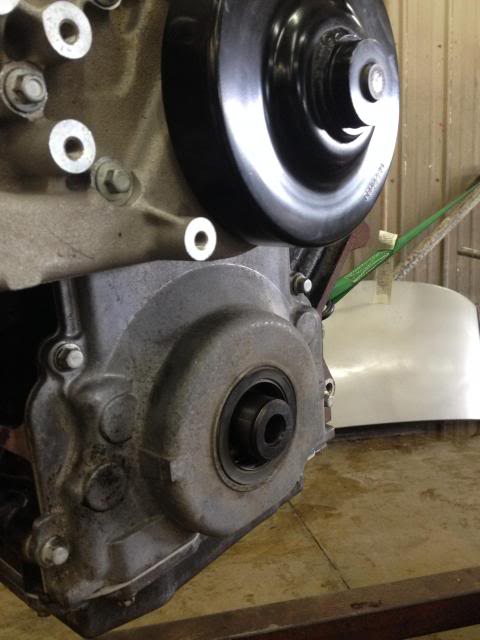
LS3 Corvette takeoff balancer installed with ARP bolt, it's reusable so that I don't have to buy one if I blow this motor.

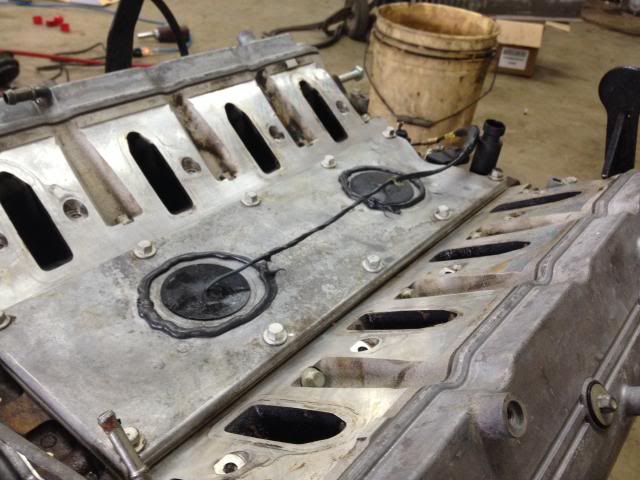
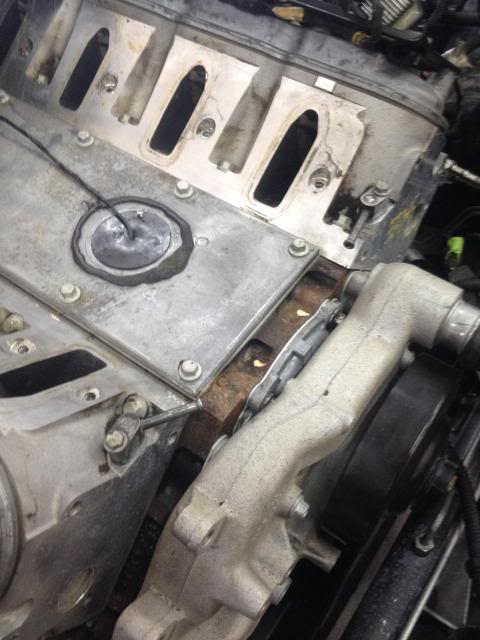
Blew the water out from the knock sensor holes and checked for corrosion, everything looked good so I made silicone dams around them before setting on the LS1 intake.
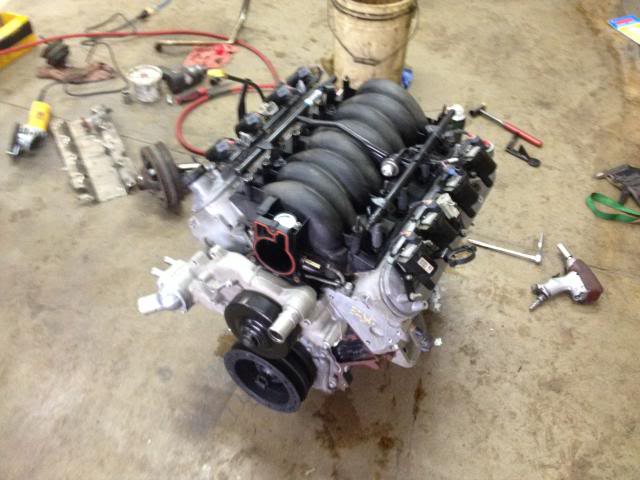
Coil packs from the truck are on as well
Throttle body steam lines need to go
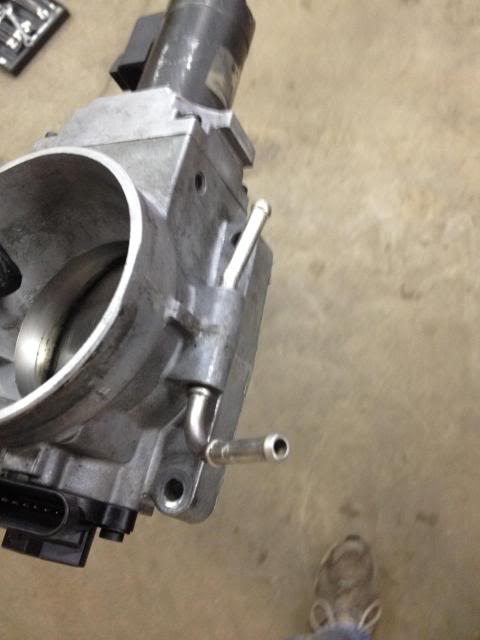
Gone
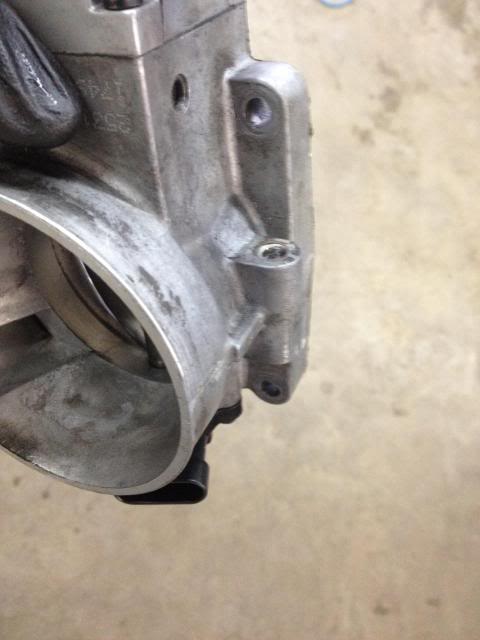
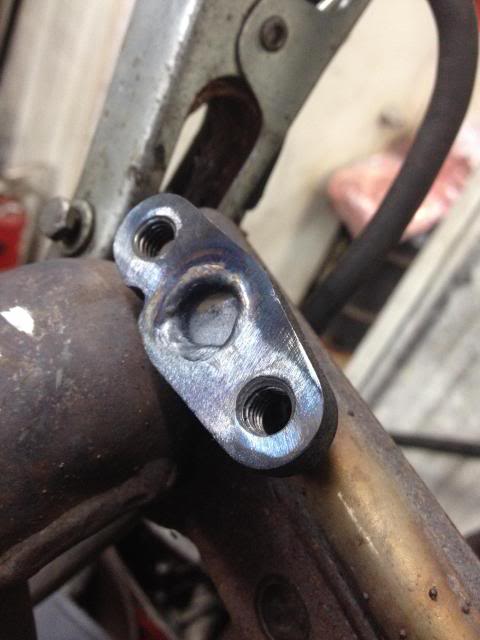
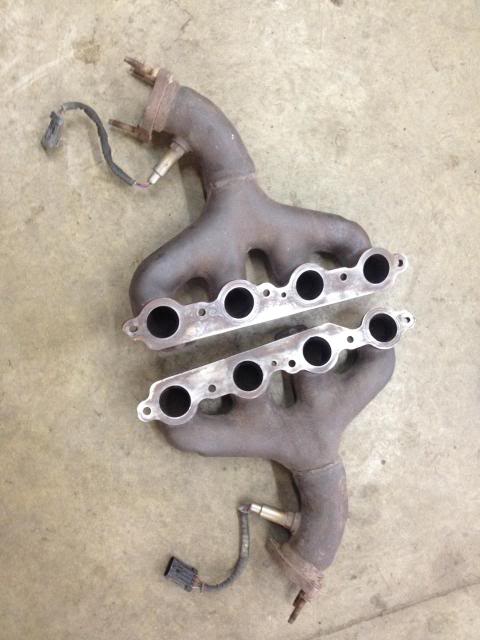
Manifold EGR ports, need to plug these for EGR delete. Could use a block-off plate, but I wanted something more permanent.
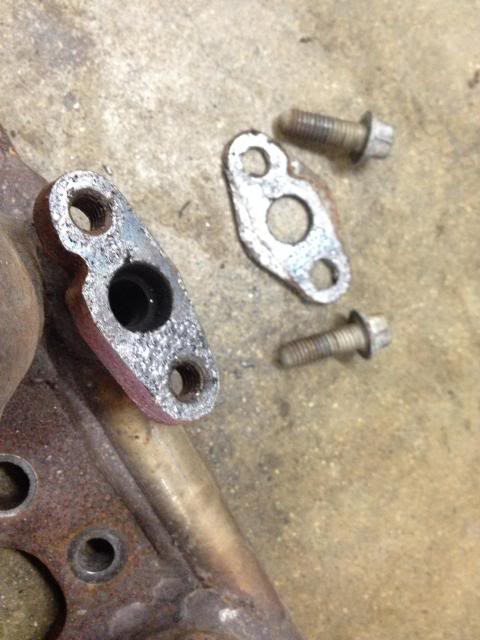
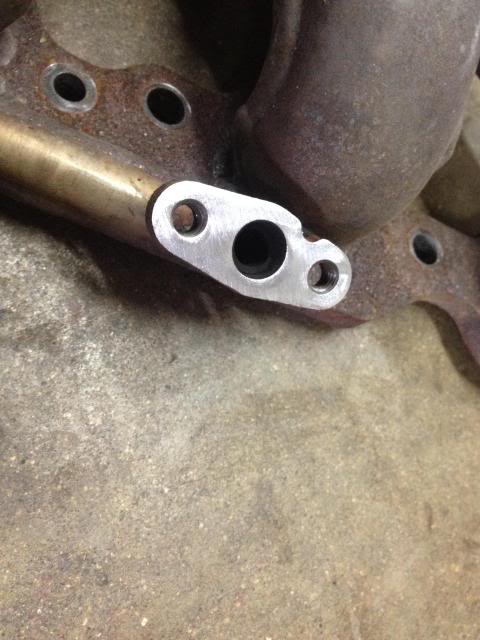
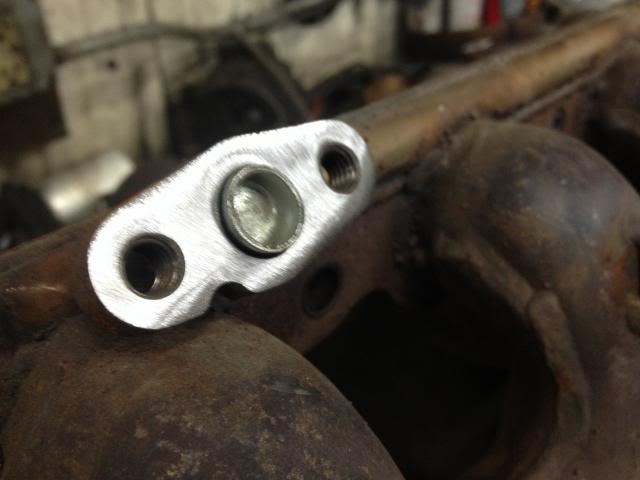
Welded
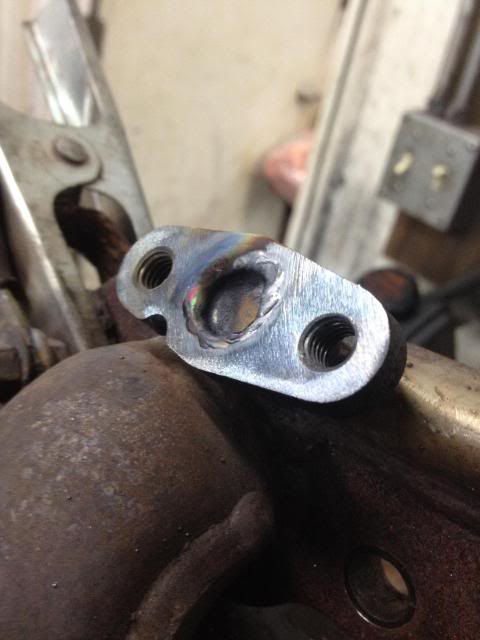
Flanges cleaned up
This is to keep you from getting the impression that I keep my work area tidy
DRM SS Piston Goodness...
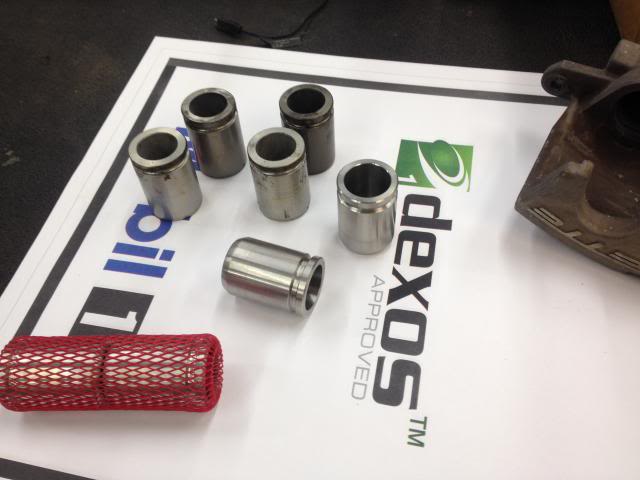
Installed
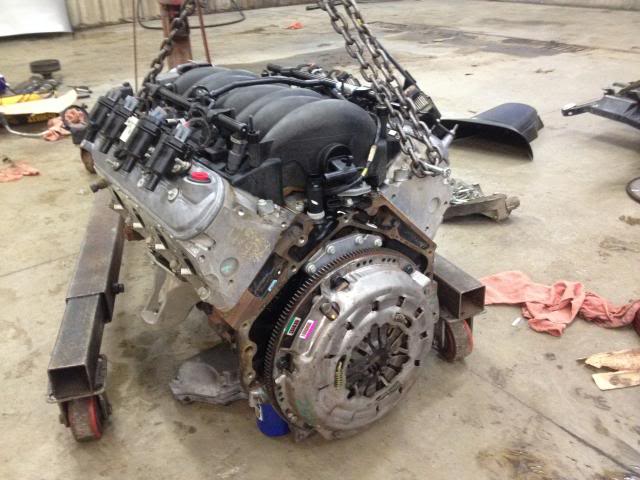
New GM TOB/Slave installed in preparation for the motor
Throttle Body on

LS6 Flywheel, 8k mile takeoff
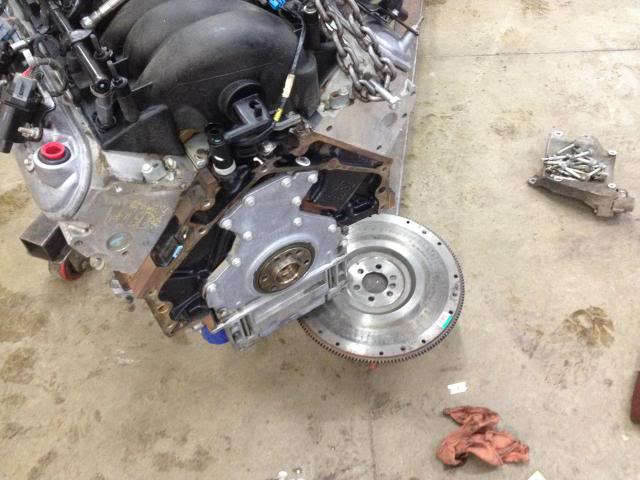
Installed with ARP Bolts for safety
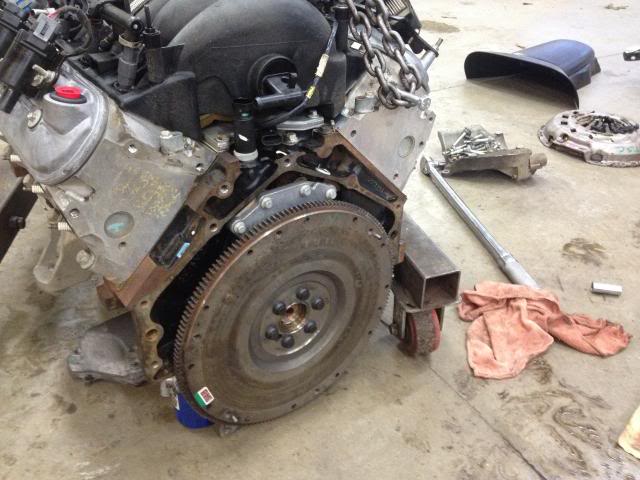
Clutch installed
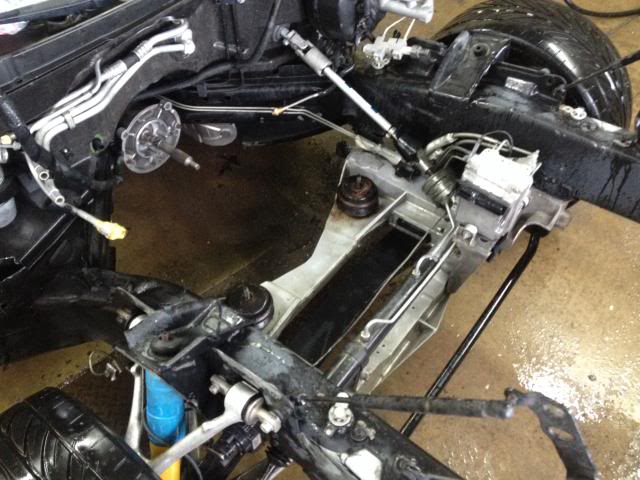
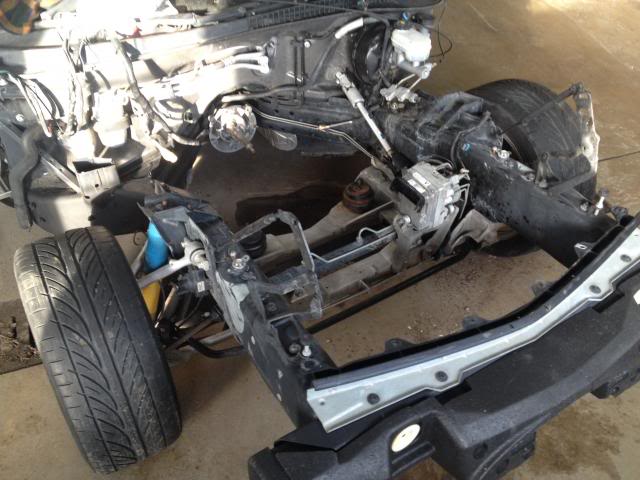
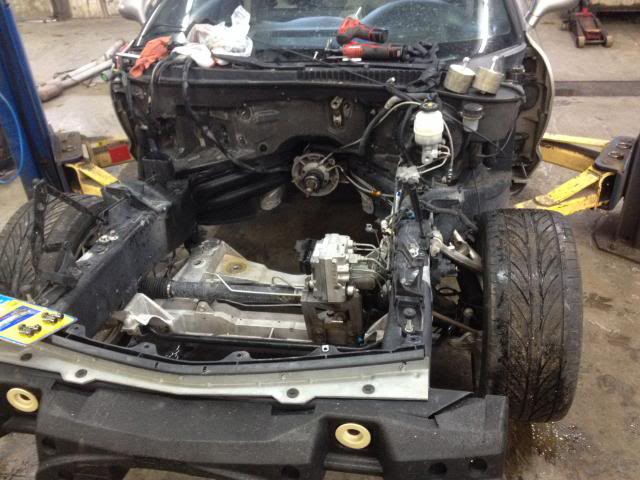
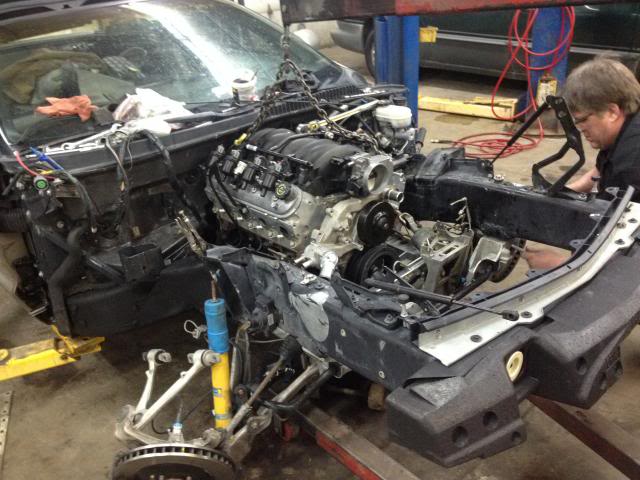
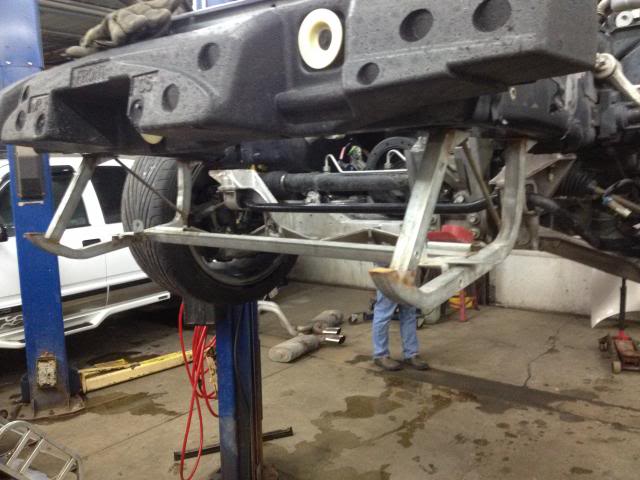
Aaand I skipped a bunch here, but there was cursing, bleeding, more cursing, a little more bleeding, some wrenching, and then bam, it's in place. There's dad reattaching the driver's side Upper Control Arm
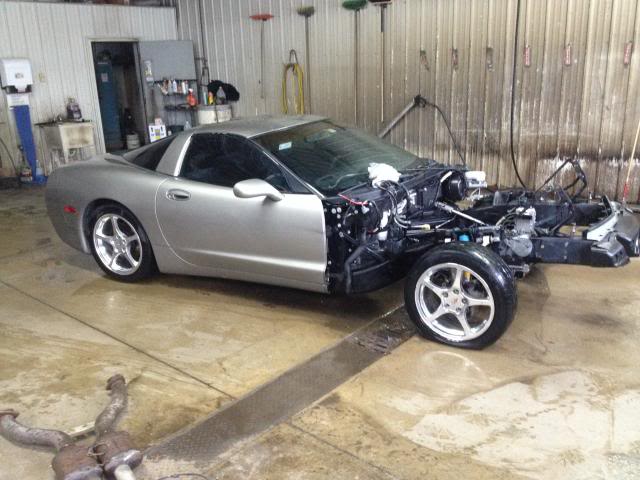
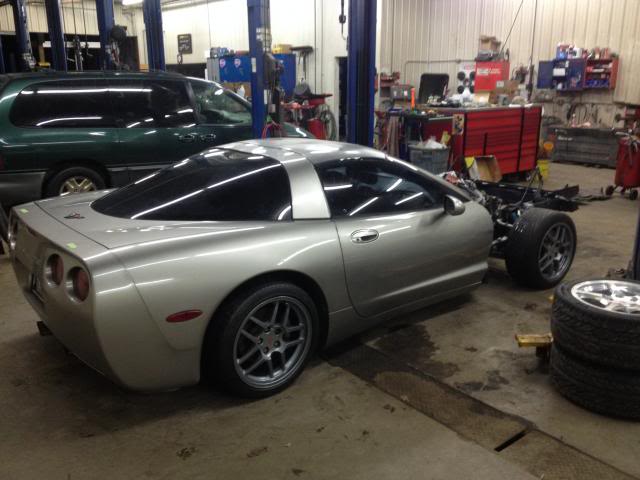
Some Z06 wheels thrown on so that I can sell the thinspokes
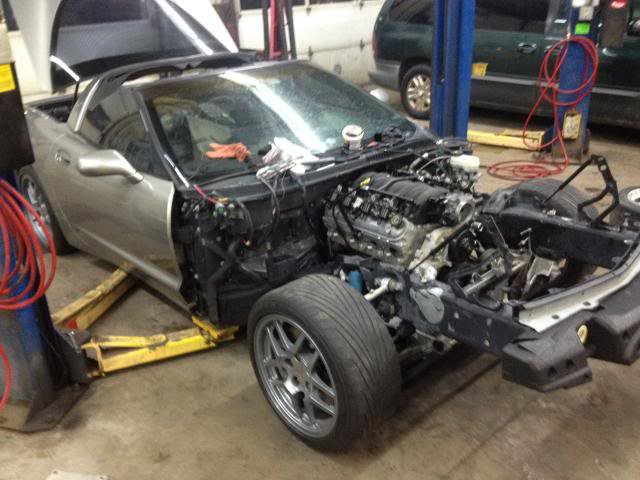
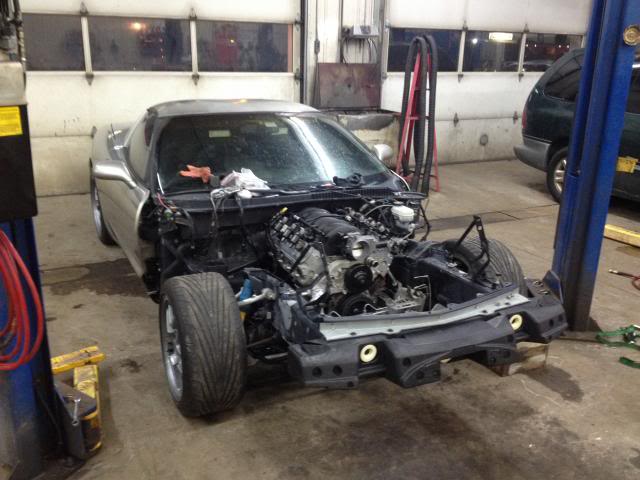
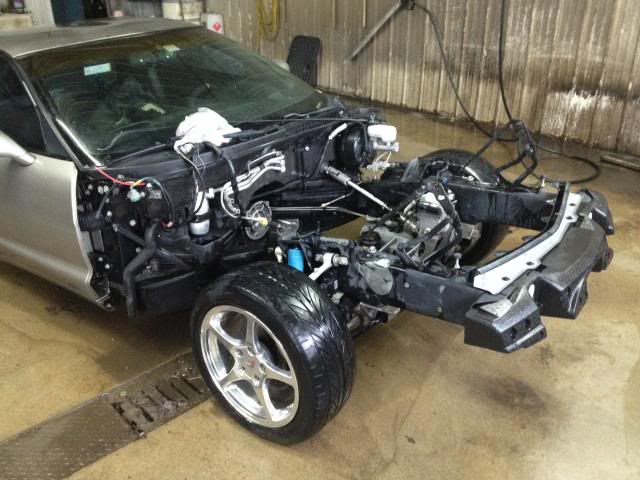
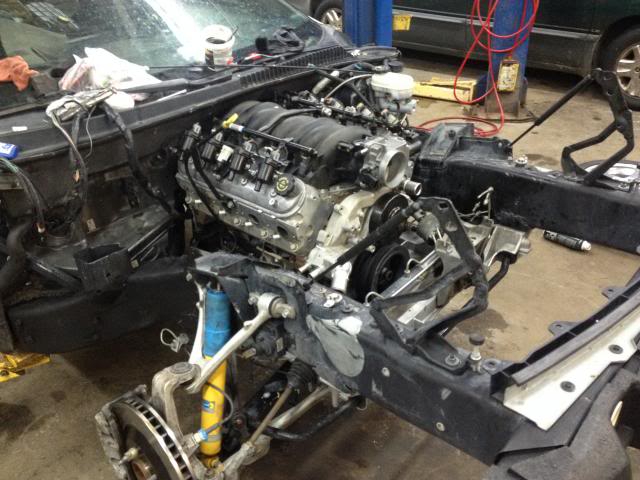
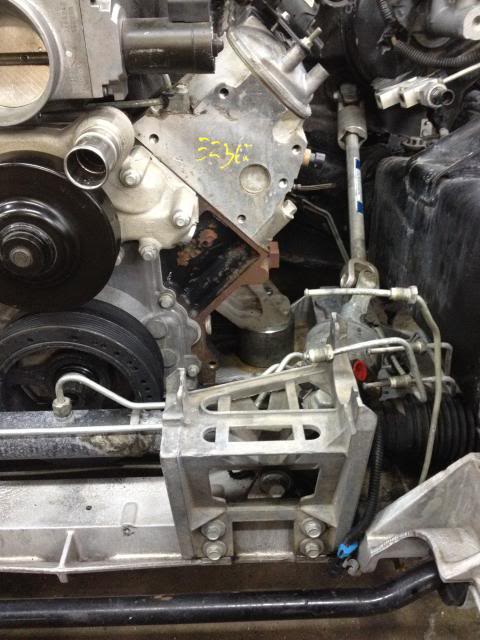
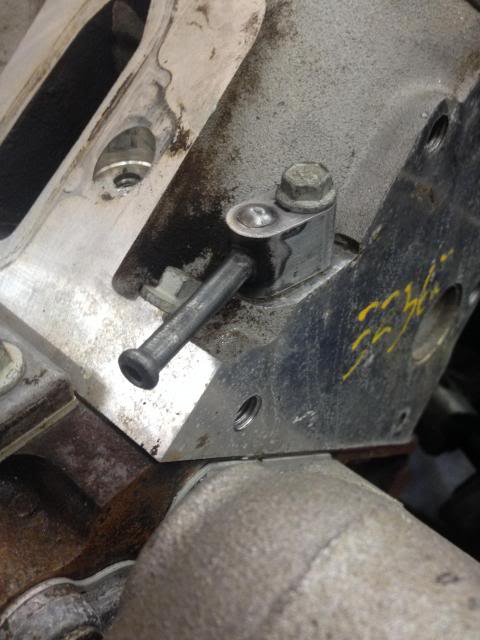
We made solid aluminum motor mounts, you can see a bit of them here
That's all for now, more to come next weekend, hopefully be able to start it by then so stay tuned

Anyway, I don't have time to caption all of these right at the moment but here are a bunch of pictures showing what we accomplished this weekend, I'll edit in captions sometime this week. Saturday I had other plans so all of the work you see here was done on Sunday-funday 9am-10pm. Hope you enjoy!
Here's the 4.8 before I got it loaded up at the junkyard

New wheel painted and installed with NRG release


Crappy pic, but here's the input shaft all cleaned up:


All dried up after washing:

Hauled the motor home in my Denali, here it is after pulling the intake and coil packs...

Parts washer: oil pan, valve covers, front caliper bodies:


Mmmm clean

Dirty!


Valvetrain looks good, I'll revisit this to rebuild trunions and valvesprings after we get it fired up.

Valve Covers: Clean


Soaping down with diluted Purple Power


Much better:


LS3 Crate engine takeoff water pump from the 'bay

Installed:

Batwing pan installed with new gasket and pickup tube


Truck balancer pulled

LS3 Corvette takeoff balancer installed with ARP bolt, it's reusable so that I don't have to buy one if I blow this motor.

Blew the water out from the knock sensor holes and checked for corrosion, everything looked good so I made silicone dams around them before setting on the LS1 intake.


Coil packs from the truck are on as well

Throttle body steam lines need to go

Gone

Manifold EGR ports, need to plug these for EGR delete. Could use a block-off plate, but I wanted something more permanent.


Welded


Flanges cleaned up

This is to keep you from getting the impression that I keep my work area tidy

DRM SS Piston Goodness...

Installed

New GM TOB/Slave installed in preparation for the motor

Throttle Body on

LS6 Flywheel, 8k mile takeoff

Installed with ARP Bolts for safety

Clutch installed

Aaand I skipped a bunch here, but there was cursing, bleeding, more cursing, a little more bleeding, some wrenching, and then bam, it's in place. There's dad reattaching the driver's side Upper Control Arm


Some Z06 wheels thrown on so that I can sell the thinspokes


We made solid aluminum motor mounts, you can see a bit of them here


That's all for now, more to come next weekend, hopefully be able to start it by then so stay tuned
Last edited by LateBreak; 02-17-2014 at 10:56 AM.


 02-17-2014, 01:17 PM
#26
Le Mans Master


 02-18-2014, 11:19 AM
#30
Best of luck! They can be a bit intimidating at first but the crew here is a big help and knowledge pool. The Z06's are phenomenal cars, the stock performance still blows me away.
02-21-2014, 05:41 PM
#32
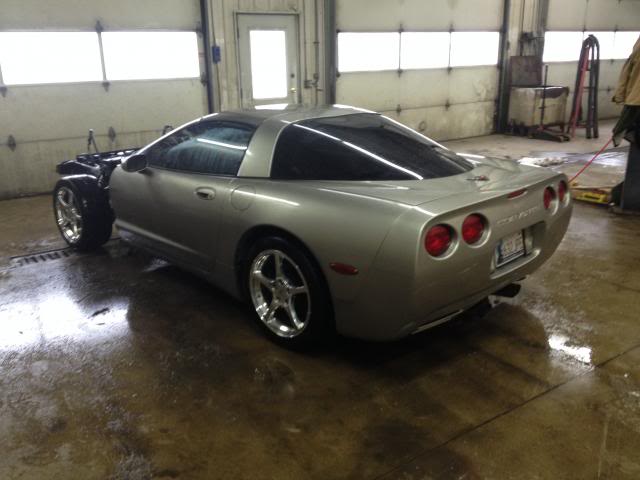
We just got 12 inches of snow here so the roads are terrible, unfortunately the car is currently in a shop 70 miles from my home so this weekend probably won't see any progress on the car 
03-17-2014, 12:44 PM
#34
Sorry for the hiatus, been working on the car but haven't kept the thread updated.
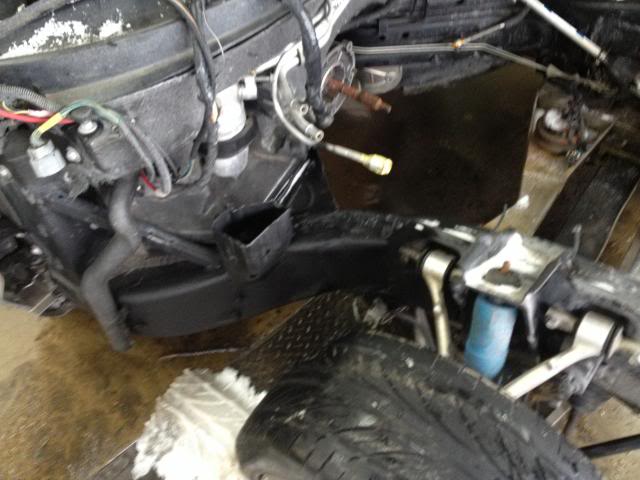
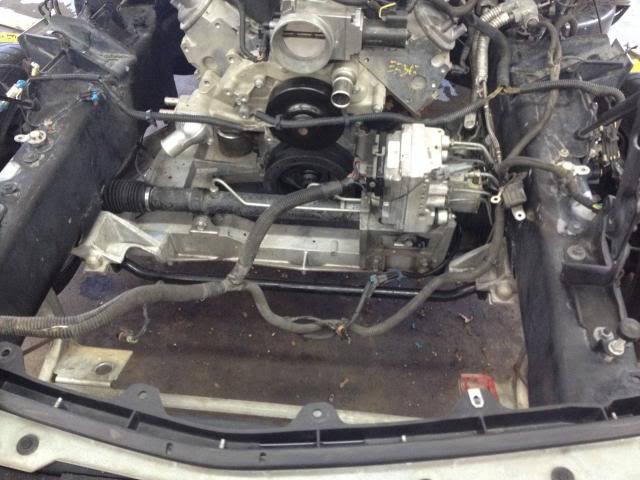
The truck steam line interfered with the LS1 intake, so I cut it apart and created hose ribs with a flaring tool, then cut off and welded the original outlet closed. Having these divorced, I'll just run a rubber hose to each side and combine them before running to the tank. Cheap and easy but still fairly clean.
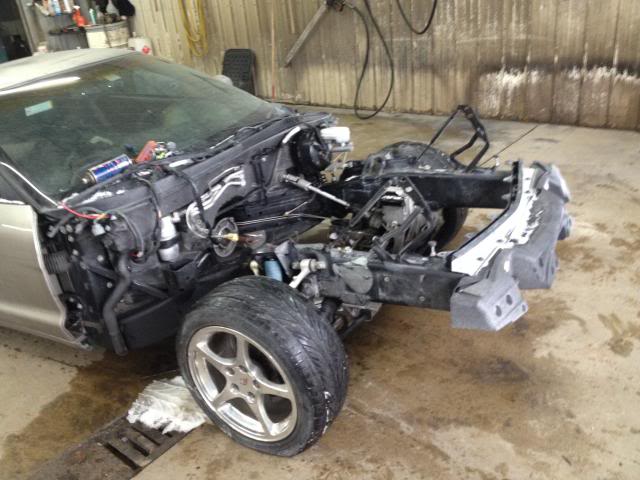
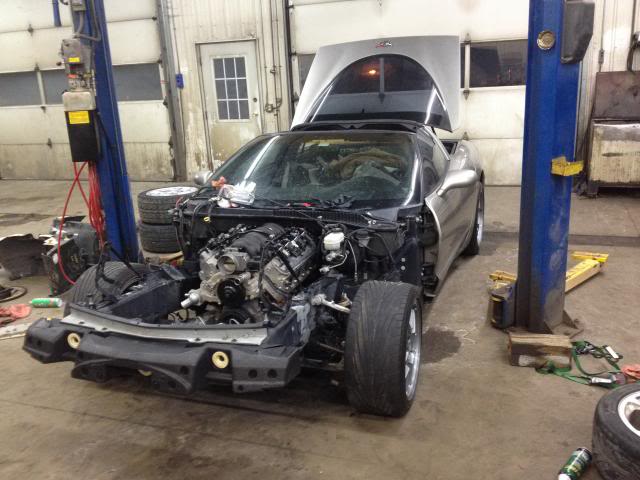
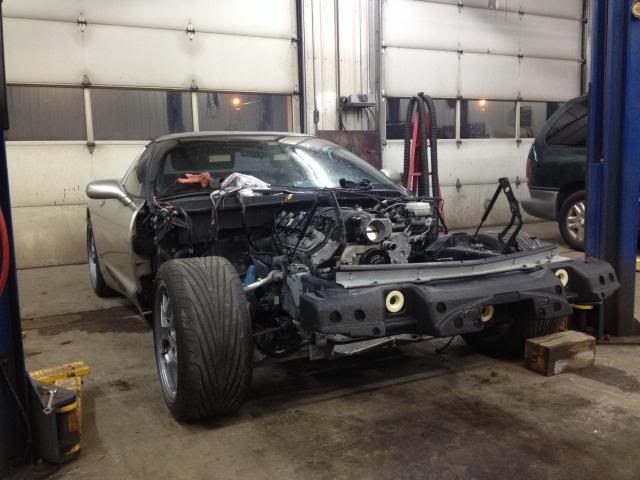
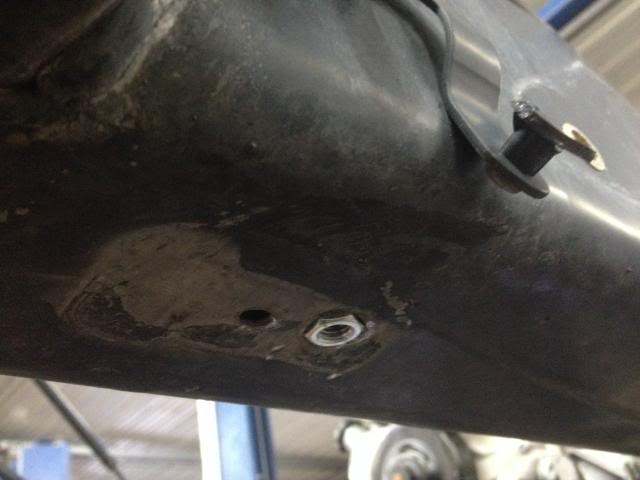
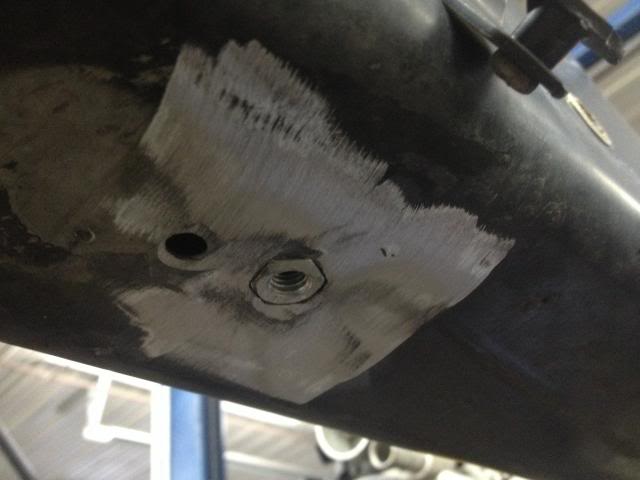
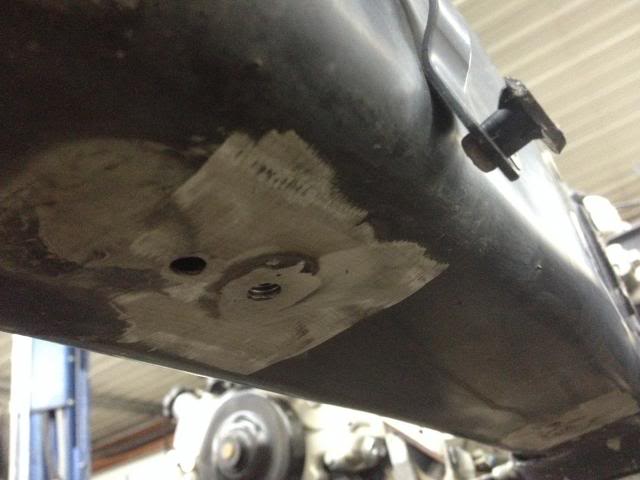
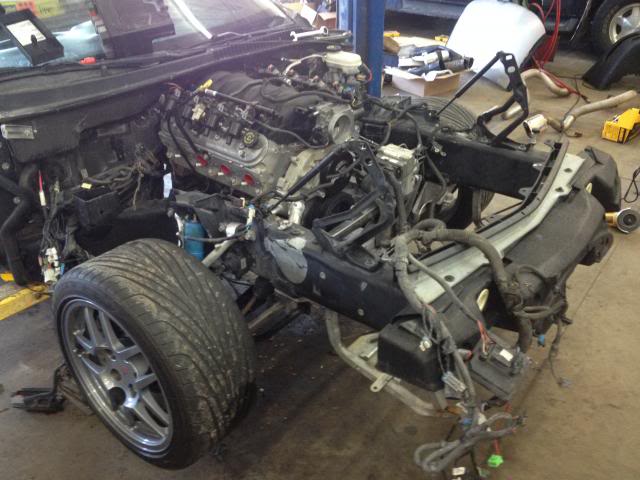
Stuck storing it outside until I get it back to my garage, the MN weather hit it with some snow The radiator cage was pulled from the frame in the wreck, which ripped out 3 of the 4 riv-nuts and tweaked the holes. My solution was to straighten the holes and weld regular nuts into the holes, then grind flush and paint.
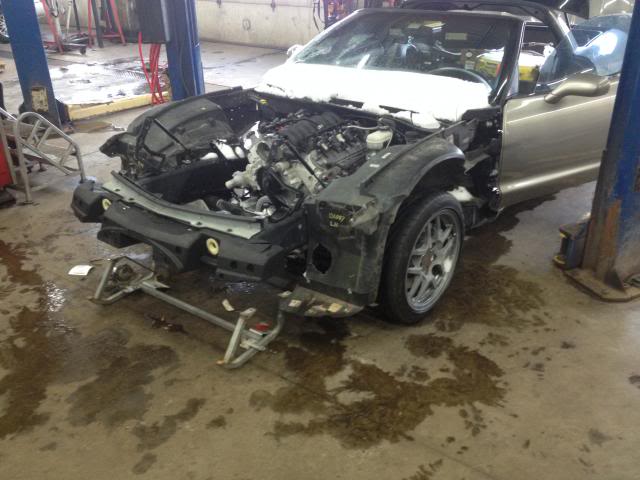

I'll paint this cage later, it's going to be modified a bit so I'm just using it to assemble the car in stock form at this point.
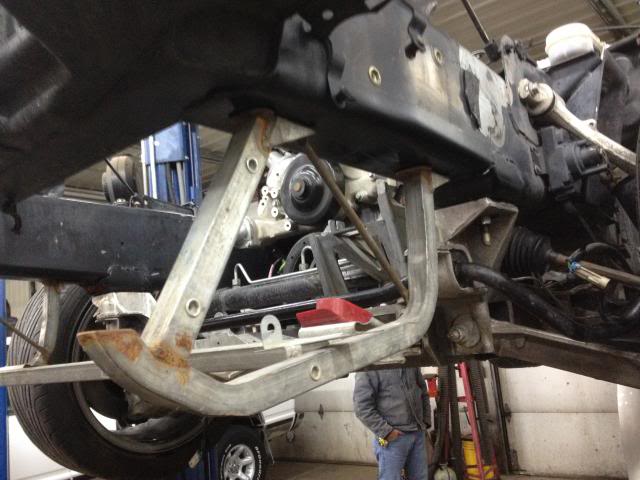
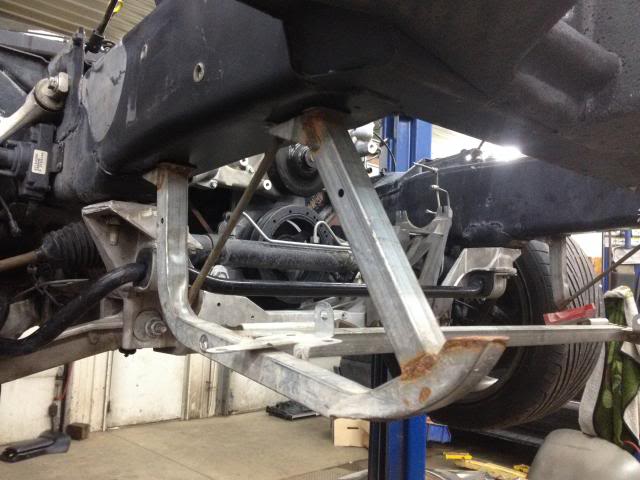
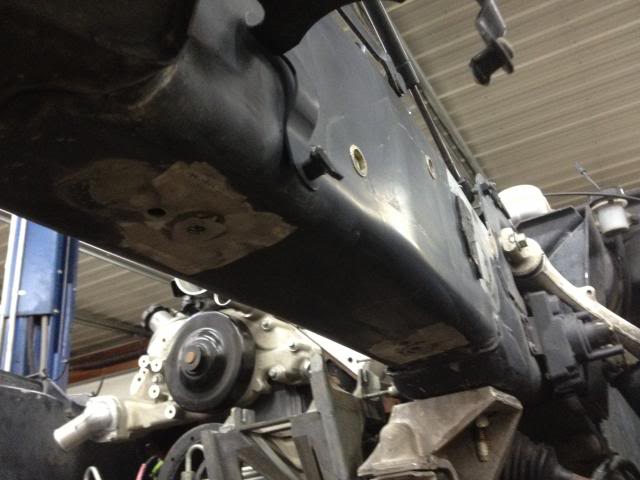
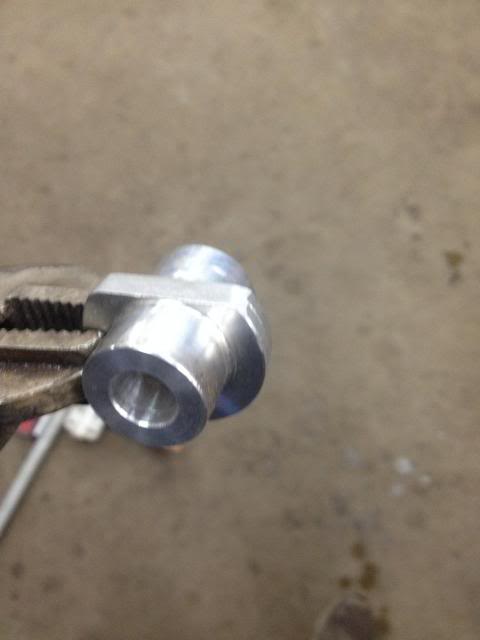
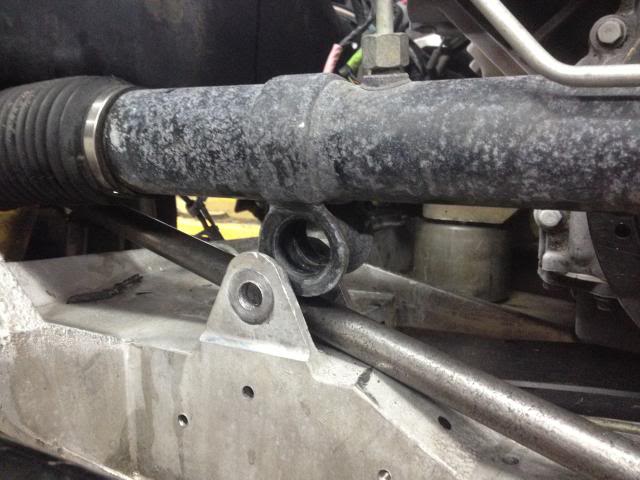
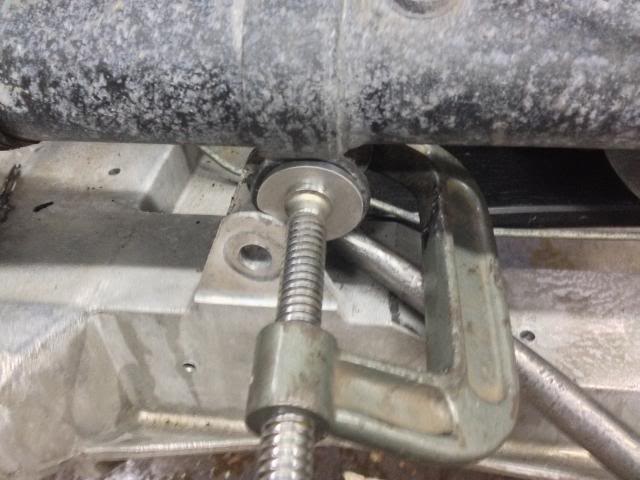
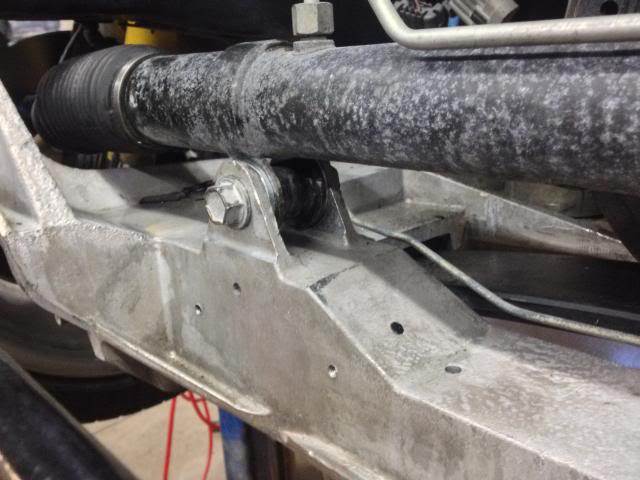
Replaced the stock rubber rack bushing with a solid aluminum one from DRM. It fit perfectly, I just nipped off one side of the flange to make the install easier with the rack still in the car.
Stock:
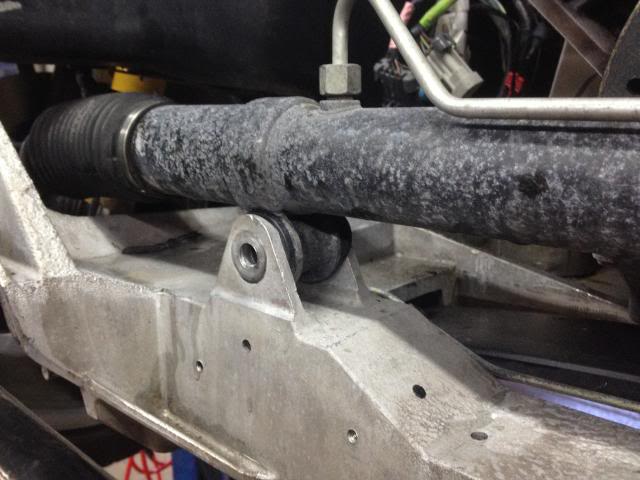
Old vs. New

Ground flange for clearance
Stock piece removed
High-tech bushing press tool
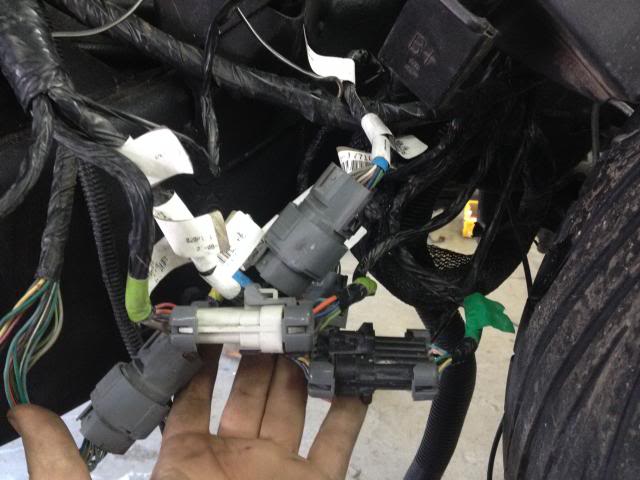
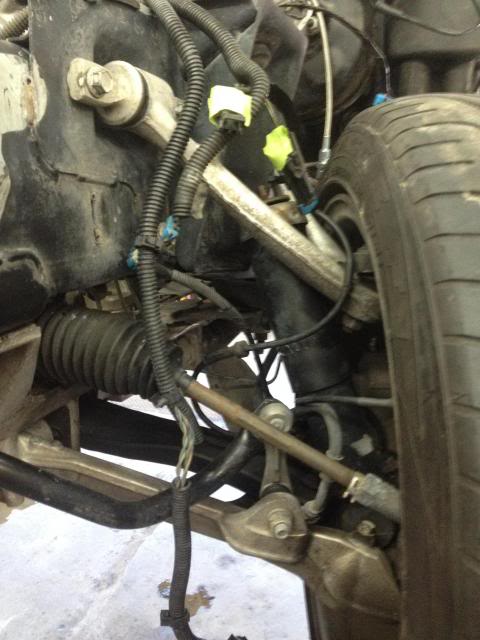
I had to lay out the wiring in order to determine where everything is supposed to run. I've never had one of these cars apart before so this has been a bit of a learning experience but it's really not bad at all.
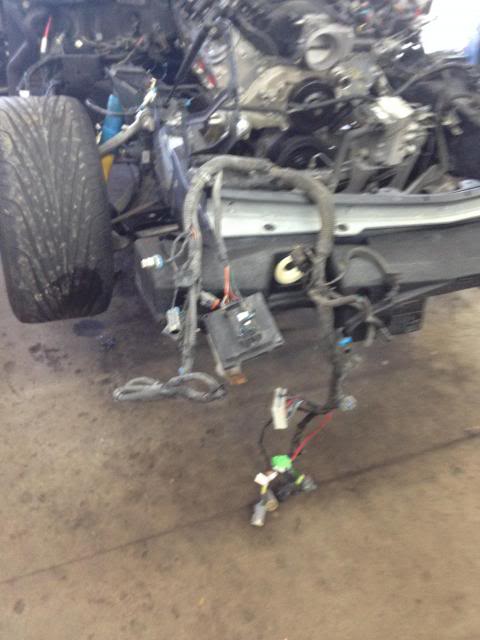
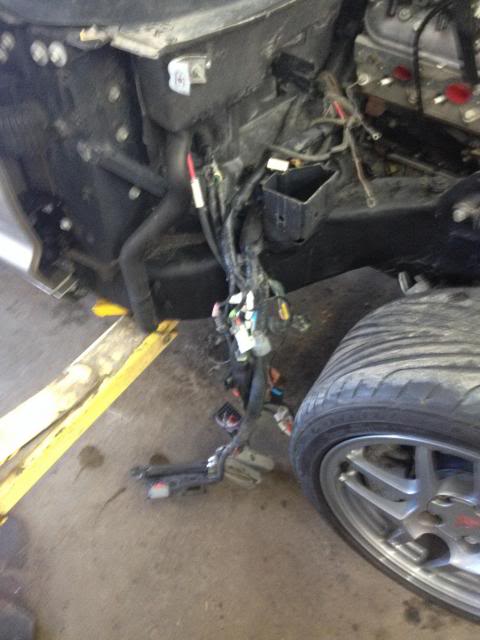
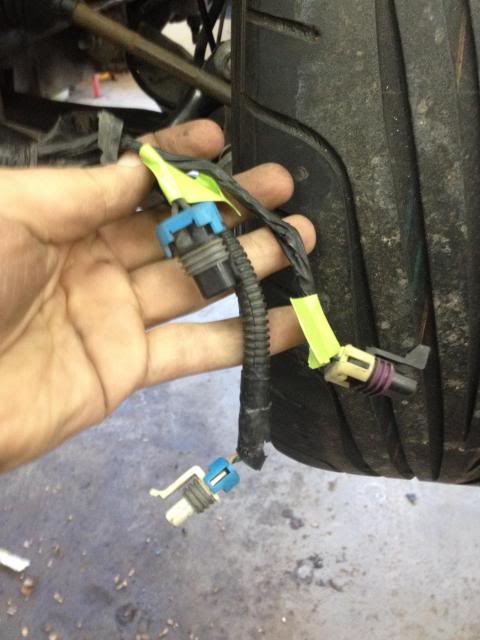
Headlight wiring, this will get tidied up later.
F45 Electronic Shock wiring and ABS speed sensor wiring, the taped up plugs are for the F45 and will be removed as they'll never be used again.
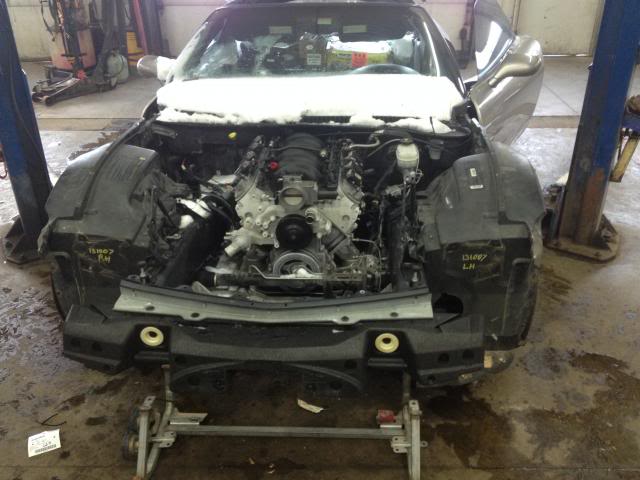
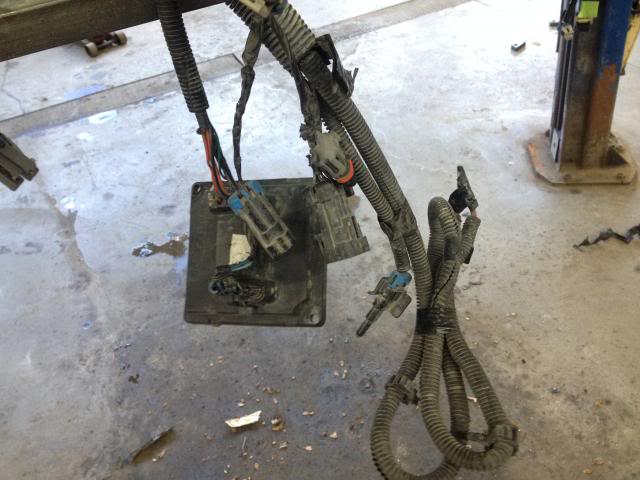
Apparently I missed a bunch of progress pictures so I'll have to take some next weekend. The motor is still missing accessories that I need to order, but it's otherwise ready to run. I fought with NO COMM issues all weekend before realizing that my PCM had been bricked. The wiring is now all in place and I'm almost ready to put the front end back on. I'll be out of town next weekend but I'm hoping to have a productive weekend at the end of March with a lot of new goodies to bolt on.
Thanks for watching!
The truck steam line interfered with the LS1 intake, so I cut it apart and created hose ribs with a flaring tool, then cut off and welded the original outlet closed. Having these divorced, I'll just run a rubber hose to each side and combine them before running to the tank. Cheap and easy but still fairly clean.


Stuck storing it outside until I get it back to my garage, the MN weather hit it with some snow
The radiator cage was pulled from the frame in the wreck, which ripped out 3 of the 4 riv-nuts and tweaked the holes. My solution was to straighten the holes and weld regular nuts into the holes, then grind flush and paint.


I'll paint this cage later, it's going to be modified a bit so I'm just using it to assemble the car in stock form at this point.


Replaced the stock rubber rack bushing with a solid aluminum one from DRM. It fit perfectly, I just nipped off one side of the flange to make the install easier with the rack still in the car.
Stock:

Old vs. New

Ground flange for clearance

Stock piece removed

High-tech bushing press tool


I had to lay out the wiring in order to determine where everything is supposed to run. I've never had one of these cars apart before so this has been a bit of a learning experience but it's really not bad at all.


Headlight wiring, this will get tidied up later.

F45 Electronic Shock wiring and ABS speed sensor wiring, the taped up plugs are for the F45 and will be removed as they'll never be used again.


Apparently I missed a bunch of progress pictures so I'll have to take some next weekend. The motor is still missing accessories that I need to order, but it's otherwise ready to run. I fought with NO COMM issues all weekend before realizing that my PCM had been bricked. The wiring is now all in place and I'm almost ready to put the front end back on. I'll be out of town next weekend but I'm hoping to have a productive weekend at the end of March with a lot of new goodies to bolt on.
Thanks for watching!

 03-17-2014, 01:59 PM
#36
Drifting

Dude that's an awesome project! I've been wanting to drop a 4.8 in my little ol Starion and you've given me the itch again I know exactly how you feel about wanting to work on the car while at work
I know exactly how you feel about wanting to work on the car while at work
03-19-2014, 12:43 PM
#38
03-24-2014, 03:45 PM
#39
Oy Vey. This weekend was humbling, we still have not be able to make the car run. When it still wouldn't talk to the replacement PCM, we started checking power and grounds, only to realize that one of the harness grounds had been connected to power when the starter was wired up In dad's defense, it comes out of the same wire bundle, fit perfectly, and the truck block didn't have the same threaded ground point as the car block. Anywho, relocating that ground allowed us to use the PCM that we thought was junked.
We flashed a stock tune into the computer with the Tech 2 and did a Theft Relearn, the car will communicate with the PCM with the ignition on, but only until you try to crank the engine, at which point it instantly goes to NO COMM. Beyond that, the engine will not crank continuous, it will just bump over slightly and then cut out unless I unplug the Blue connector from the PCM, then it will crank continuous but obviously not fire.
I've got the Serial Data isolated to just the BCM/PCM/DATA lines so nothing else can interfere, but all of these test out fine so I'm at a loss. I've had the ignition apart and cleaned the contacts even though they looked great, I even depinned the original data wire from the PCM and ran a new one outside the car to the STAR connector, no change. Tried a new battery, checked every ground and cleaned them even though they looked great, added an additional engine ground cable just in case. I even tried unhooking the solenoid wire (purple) and using a remote start button to bypass it in case it was shorted somewhere in the harness, no change I've never had any other car act so weird, and we've diagnosed some real oddballs over the years....
Oh well. I'll play with it some more next weekend when I have more time to trace wires and try isolating potential trouble areas. We'll get it figured out eventually, my only real concern is that it will take so much time to sort out that I'll be in a pinch to get it done for testing before the first race. Tick tock....
In dad's defense, it comes out of the same wire bundle, fit perfectly, and the truck block didn't have the same threaded ground point as the car block. Anywho, relocating that ground allowed us to use the PCM that we thought was junked.We flashed a stock tune into the computer with the Tech 2 and did a Theft Relearn, the car will communicate with the PCM with the ignition on, but only until you try to crank the engine, at which point it instantly goes to NO COMM. Beyond that, the engine will not crank continuous, it will just bump over slightly and then cut out unless I unplug the Blue connector from the PCM, then it will crank continuous but obviously not fire.
I've got the Serial Data isolated to just the BCM/PCM/DATA lines so nothing else can interfere, but all of these test out fine so I'm at a loss. I've had the ignition apart and cleaned the contacts even though they looked great, I even depinned the original data wire from the PCM and ran a new one outside the car to the STAR connector, no change. Tried a new battery, checked every ground and cleaned them even though they looked great, added an additional engine ground cable just in case. I even tried unhooking the solenoid wire (purple) and using a remote start button to bypass it in case it was shorted somewhere in the harness, no change
I've never had any other car act so weird, and we've diagnosed some real oddballs over the years....Oh well. I'll play with it some more next weekend when I have more time to trace wires and try isolating potential trouble areas. We'll get it figured out eventually, my only real concern is that it will take so much time to sort out that I'll be in a pinch to get it done for testing before the first race. Tick tock....
03-25-2014, 01:05 AM
#40
Former Vendor
Transplant rejection theory. You put a truck motor in your vette Not saying if you put a "vette" engine it will start. Just a good time to give you a bit of hell.
Dinner with the GF parents > working on this electrical crap=every time.
Randy
Not saying if you put a "vette" engine it will start. Just a good time to give you a bit of hell. Dinner with the GF parents > working on this electrical crap=every time.
Randy