
C5 Rear diffuser making progress

 02-09-2015, 03:59 PM
#22
Le Mans Master


Member Since: Feb 2007
Location: Oviedo Florida
Posts: 8,816
Received 1,254 Likes
on
817 Posts
2023 C2 of the Year Finalist - Modified
2021 C2 of the Year Finalist - Modified
2016 C5 of Year Finalist

Looks good so far....
From what I can see you don't have a pan under the car. A real
diffuser is not only the bumper but the attached pan that will go
to the rear axle.
What are you going to do with your catback??? I ran straight pipe
and a small muffler attached to the X-pipe.
There is a lot to a diffuser and what you can't see is as important
as what you can see.
Good luck.
02-09-2015, 05:33 PM
#23
Drifting

Thread Starter
Looks good so far....
From what I can see you don't have a pan under the car. A real
diffuser is not only the bumper but the attached pan that will go
to the rear axle.
What are you going to do with your catback??? I ran straight pipe
and a small muffler attached to the X-pipe.
There is a lot to a diffuser and what you can't see is as important
as what you can see.
Good luck.
From what I can see you don't have a pan under the car. A real
diffuser is not only the bumper but the attached pan that will go
to the rear axle.
What are you going to do with your catback??? I ran straight pipe
and a small muffler attached to the X-pipe.
There is a lot to a diffuser and what you can't see is as important
as what you can see.
Good luck.


 02-09-2015, 08:41 PM
#25
Drifting
Maybe not having the whole red area filled to the sides but having it taper starting from that edge and meet the current side wing. Still excited to seeing what you come up with when its all finished just throwing out some ideas . I've been waiting years for this

Please don't let the racecar purist distract you from your progress. All the past threads have been steered in that direction which is why there is little progress. Most want people something to complete the rear of the car and give it a more modern look. A giant diffuser and 20ft wing would look silly on a street car.
02-09-2015, 10:55 PM
#27
Melting Slicks

Member Since: Sep 2012
Location: LaGrange Park, IL IL
Posts: 2,308
Received 158 Likes
on
131 Posts
St. Jude Donor '13, '15

Last edited by imgn tht; 02-09-2015 at 10:58 PM.
02-10-2015, 07:28 AM
#28
Drifting
Thread Starter
Not too simple but I will look at the adjustment you are suggesting. I can make the adjustment without interference to the mounting points. Thanks for your input.
02-10-2015, 07:57 PM
#29
Drifting
Wouldn't it be as simple as cutting the diffuser in the flat spots between the fins and adding some material to push the existing radius and fin further to the outside, then massage the curvature from there? It may force you to redo the mounting areas to accommodate this, but making it fit properly to the OEM fascia area first seems a missed opportunity. As much as I like the idea of this piece and no holes in my rear fascia, I would not purchase based on the material in the red. Just looks unfinished to me, body colored or not.
 02-10-2015, 08:14 PM
#30
Race Director

Kudos to the OP for taking this on! It amazes me that some of the forum sponsors (with access to body shop materials and talent) who have promised they were "working on a diffuser" several months ago (or years ago) haven't developed jack squat, but an individual owner can make huge progress with his own stuff. Go figure. 
It amazes me that some of the forum sponsors (with access to body shop materials and talent) who have promised they were "working on a diffuser" several months ago (or years ago) haven't developed jack squat, but an individual owner can make huge progress with his own stuff. Go figure.  one day I am going to combine all the threads of the vendors that said it's in the works I wont let you guys down then poof gone..
02-10-2015, 08:36 PM
one day I am going to combine all the threads of the vendors that said it's in the works I wont let you guys down then poof gone..
02-10-2015, 08:36 PM
#31
Drifting
Thread Starter
Ok looled at it this evening and decided to move the side fins out to cover the flanged area so no color match required. Did the necessary cuts and will be bonding it back together. Will post pics later this week and review the comments.
 02-19-2015, 11:26 AM
#35
Instructor


Member Since: Jan 2015
Location: williamstown nj
Posts: 103
Likes: 0
Received 0 Likes
on
0 Posts
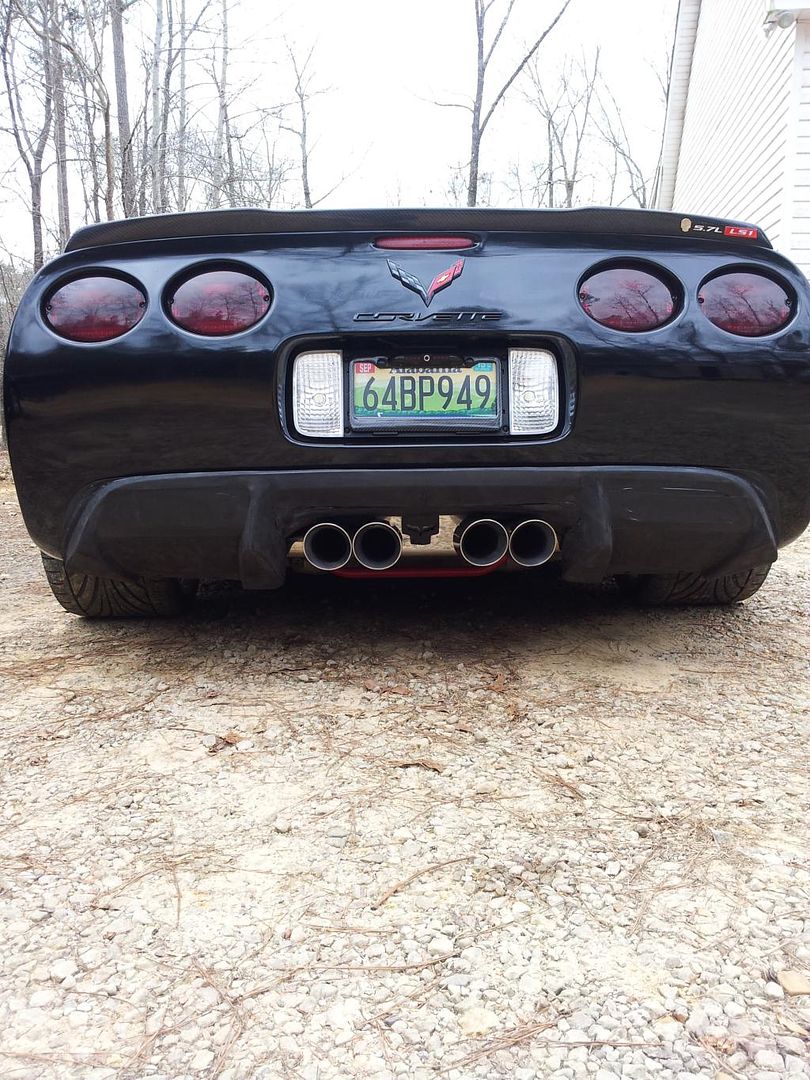
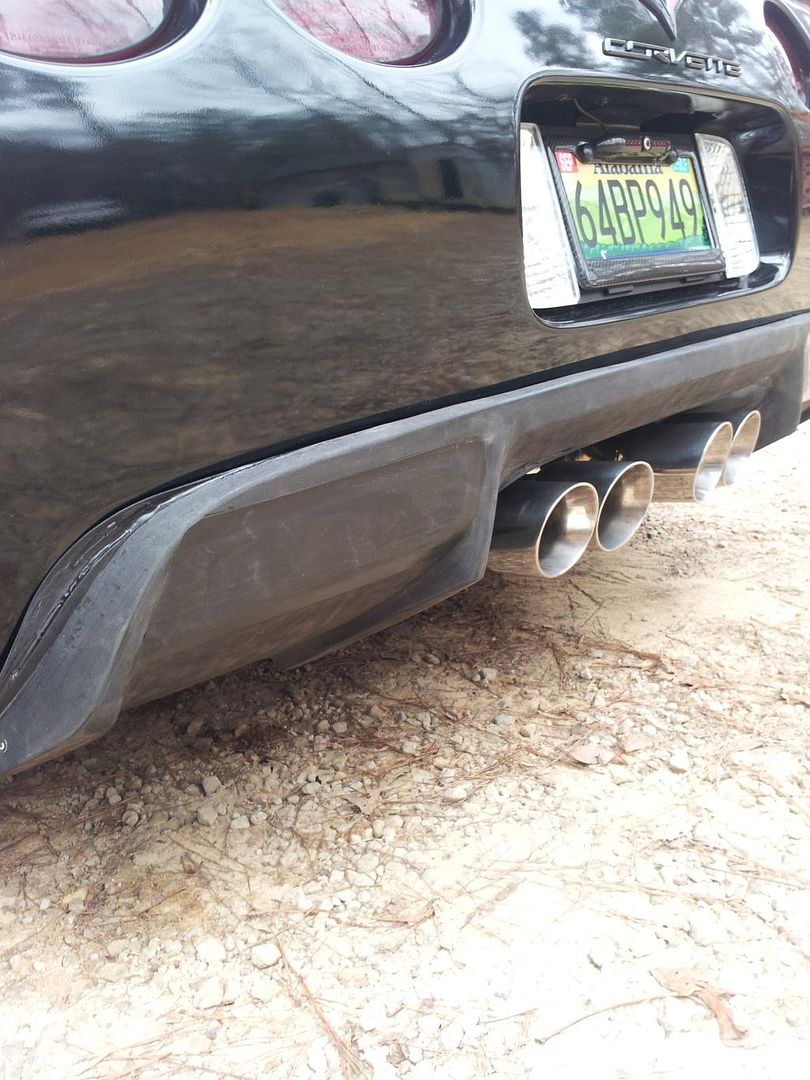
I started this venture last year. Have invested a small fortune in parts and materials. But things are progressing. I have the diffuser roughed in and fitted to the car. I've read a lot of comments and suggestions of what everyone would like to see done with a rear diffuser for the C5. The main issue was to make one that would fit up to the stock bumper without drilling or cutting. I found a way to do this. I have backing plates behind the vent openings with four bolts on each side that screw into the diffuser. I will also use 3m doublesided body tape around the edges as well. I am working on two different styles of diffuser. One being more suttle like the stock C6 diffuser and a more aggresive style like ARP's diffuser with an under pan. I can mount this diffuser in about 15 minutes. It slides right into place and is held very secourely with the mounting plates. I am looking for a distributor to make these when complete. Here are some pics of progress so far.


 02-19-2015, 02:11 PM
#37
Drifting
Thread Starter
waxman1 the rear spoiler is the ZR spoiler from C7 Carbon. The 5.7 LS1 emblem I ordered off of ebay. Rear diffuser is ready to bond back together and do all of the finish epoxy filling and sanding. Just waiting on the cold spell to pass.
03-27-2015, 11:42 AM
#38
Le Mans Master
Updates?
03-27-2015, 01:51 PM
#39
Drifting
Thread Starter
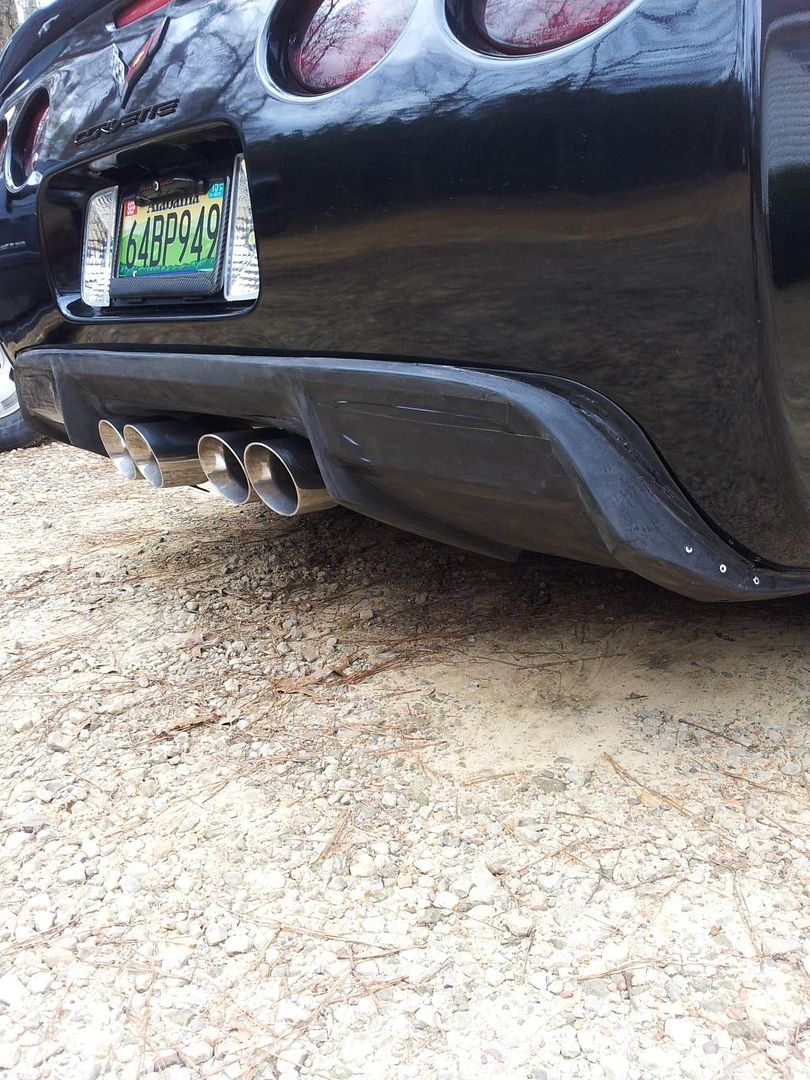
Glad you posted. Been steadily working on it. A lot of cutting, sanding, molding and shaping had to be done. A bit more to go. I have 90% completion so far. Can almost see the light at the end of the tunnel. I have a weeks vacation starting this weekend. I will be finishing up the final body work smoothing everything out. All of my mounting points are done. This piece really fits up nice to the rear fascia. I have one vendor very interested in this and will be taking it to him next week to get the ball rolling on possible molds. I will post pics of the finished primered diffuser on and off the car this coming week. Mounting is a snap. No cutting the rear bumper fascia or drilling holes needed. Uses the four mounting tabs above the exhaust tips for an anchor point plus four screw inserts in the vent area with a backing plate. Also uses some 3M double sided body tape .
Last edited by Stealth02; 03-27-2015 at 02:04 PM.
03-27-2015, 01:57 PM
#40
Race Director
Member Since: Dec 2010
Location: Atlanta, GA
Posts: 10,426
Received 1,261 Likes
on
1,056 Posts
2020 Corvette of the Year Finalist (performance mods)
C5 of Year Winner (performance mods) 2019

from what I see so far I like it and might be interested in one once the final product is revealed and if they go into production... I sure hope the vendor you have been working with is not the one I'm thinking of though