
Fed up with C5 seats. S2000 Seat Install begins today!
 06-07-2016, 09:48 PM
#1
Drifting

Thread Starter

quick preface - this is just a pictorial story - i take no responsibility for what you decide to bolt into your car, so follow at your own risk. I'm just a mechanical engineer who loves to tinker at home and drink beer while doing so 

The C5 seats are garbage, I don't care how much you refinish or replace foam, they have poor control and really make the aggressive driving experience terrible. I have not yet autocrossed or road raced my 2000 FRC, only street driven so far. And yet on every highway on/off ramp that I take, I slide either into the center tunnel or smash against the door panel hanging onto the steering wheel for dear life. The C5 chassis is capable of far more - it's an absolute shame the stock seats hold it back so much.
The C5 chassis is supported by a huge aftermarket following, with no lack of gorgeous seating options with bolt-in brackets available. However, I decided not to go with the typical aftermarket options for the following reasons:
-I'm not a millionaire and don't want to spend thousands of dollars on seats and brackets
-I know my way around a wrench and enjoy fabrication projects
-All the aftermarket options I found looked very "boy racer" to me.
- I wanted to keep the "OEM+" look that only factory seats can achieve.
-Had to keep the leather theme - no cheesy aftermarket black foamy cloth with gaudy embroidered lettering for me
As part of the planning phase of the project, I had no intention of keeping the heavy C5 power seat adjustments and adapting the S2000 seat to the C5 rails, so I decided to keep the S2000 seat attached to the Honda rails and adapt them to a bracket, which would be bolted to the stock C5 floor studs. I also did not want to modify the C5 seats or floor mounting points in any way as it would devalue the originality of the chassis.
I did not get any pics of this process, but I simply removed the 4x nuts holding the C5 seat in place and immediately realized that the floor is recessed around the mounting studs. As such I wasn't able to bolt a flat ]rail directly to the floor; it needed to come up at least an inch or more. I bought some hex couplers, washers, and bolts that all matched the factory C5 M10x1.5 studs. The hex couplers threaded onto the studs and provided a raised platform to which I could bolt the new adapter bracket.
In the fall of '14 I installed a unit heater in my garage and mounted it to the joists in the ceiling using a long stick of zinc-plated Unistrut.
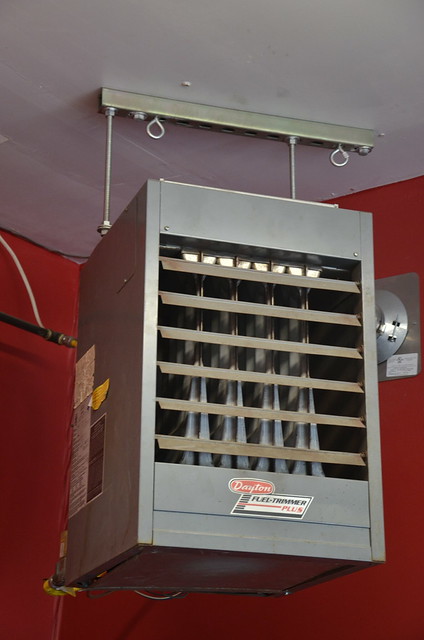 _DSC5115 by Norbert Ogiba, on Flickr
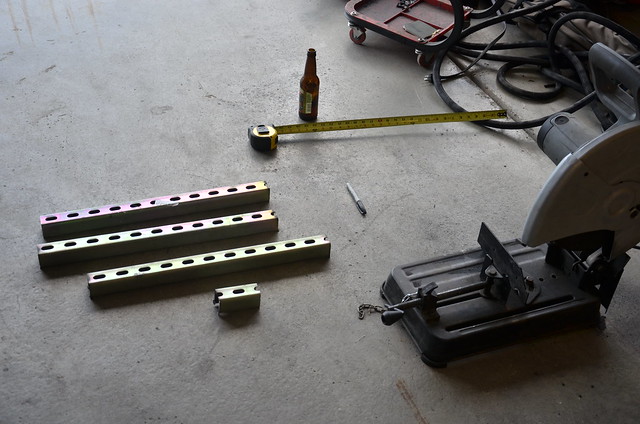
I think the stick was at least 12' long, I only used about 20" of it for the heater install. The remainer collected dust in the corner of the garage for a couple of years until today.
 _DSC5118 by Norbert Ogiba, on Flickr
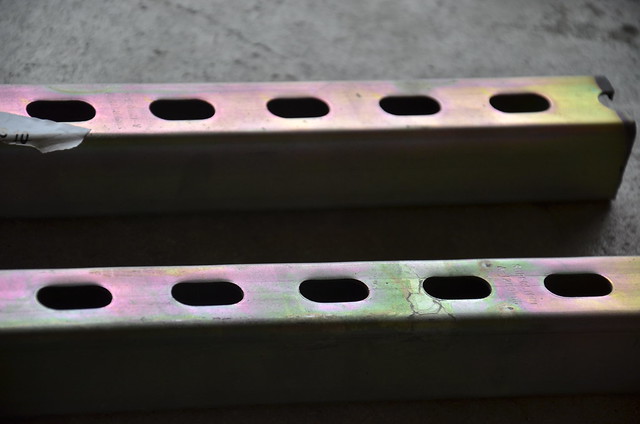
I chopped them to 23" lengths and mounted to the tops of the hex adapters lengthwise in the car. One end of each rail needed to have the slot slightly enlarged to allow it to fit. No pics, will get them next time I take the seat out of the car.
These will get a coat of black paint before final installation and should blend in with the floor nicely.
 _DSC5119 by Norbert Ogiba, on Flickr
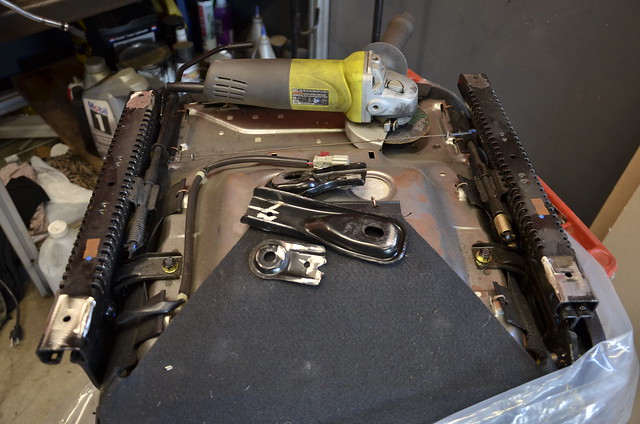
The S2000 floor mounting points are NOTHING like the C5 so I cut the mounting tabs off the S2000 rails right away. They are riveted AND spot welded to the rails, so some quality time with the cutoff wheel needs to be spent. I tend to enjoy grinding as I can throw in headphones, turn up the tunes, and go to town.
Note 4 shiny corners where brackets are gone.
 _DSC5120 by Norbert Ogiba, on Flickr
S2000 mounting tabs cut off.
_DSC5120 by Norbert Ogiba, on Flickr
So now that the unistrut rails were firmly bolted in place, and the S2000 seat had a nice flat bottom to work with, it was time to put the seat in the car and see where I had fitment issues.
These things looks awesome.
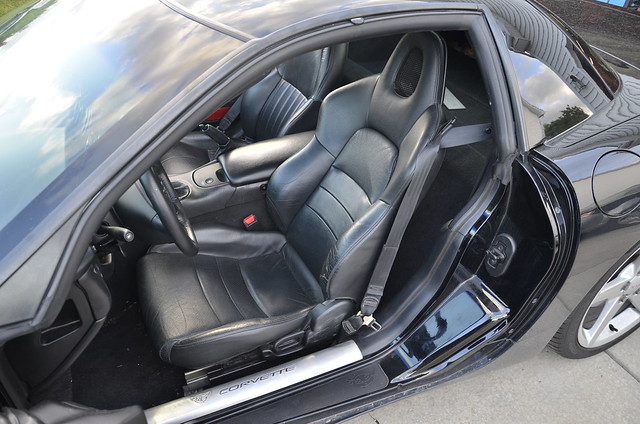 _DSC5123 by Norbert Ogiba, on Flickr
 _DSC5124 by Norbert Ogiba, on Flickr
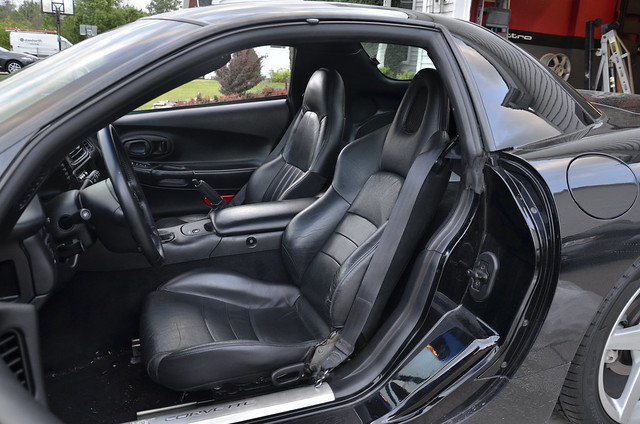
However, note how far forward the seat sits in relation to the C5 passenger seat - there is a lot of contact between the S2000 reclining handle cover and the lower C5 seatbelt cover - as well as between the the S2000 seat belt buckle and the center tunnel. To be continued in next post...


The C5 seats are garbage, I don't care how much you refinish or replace foam, they have poor control and really make the aggressive driving experience terrible. I have not yet autocrossed or road raced my 2000 FRC, only street driven so far. And yet on every highway on/off ramp that I take, I slide either into the center tunnel or smash against the door panel hanging onto the steering wheel for dear life. The C5 chassis is capable of far more - it's an absolute shame the stock seats hold it back so much.
The C5 chassis is supported by a huge aftermarket following, with no lack of gorgeous seating options with bolt-in brackets available. However, I decided not to go with the typical aftermarket options for the following reasons:
-I'm not a millionaire and don't want to spend thousands of dollars on seats and brackets
-I know my way around a wrench and enjoy fabrication projects
-All the aftermarket options I found looked very "boy racer" to me.
- I wanted to keep the "OEM+" look that only factory seats can achieve.
-Had to keep the leather theme - no cheesy aftermarket black foamy cloth with gaudy embroidered lettering for me
As part of the planning phase of the project, I had no intention of keeping the heavy C5 power seat adjustments and adapting the S2000 seat to the C5 rails, so I decided to keep the S2000 seat attached to the Honda rails and adapt them to a bracket, which would be bolted to the stock C5 floor studs. I also did not want to modify the C5 seats or floor mounting points in any way as it would devalue the originality of the chassis.
I did not get any pics of this process, but I simply removed the 4x nuts holding the C5 seat in place and immediately realized that the floor is recessed around the mounting studs. As such I wasn't able to bolt a flat ]rail directly to the floor; it needed to come up at least an inch or more. I bought some hex couplers, washers, and bolts that all matched the factory C5 M10x1.5 studs. The hex couplers threaded onto the studs and provided a raised platform to which I could bolt the new adapter bracket.
In the fall of '14 I installed a unit heater in my garage and mounted it to the joists in the ceiling using a long stick of zinc-plated Unistrut.
_DSC5115 by Norbert Ogiba, on FlickrI think the stick was at least 12' long, I only used about 20" of it for the heater install. The remainer collected dust in the corner of the garage for a couple of years until today.
_DSC5118 by Norbert Ogiba, on FlickrI chopped them to 23" lengths and mounted to the tops of the hex adapters lengthwise in the car. One end of each rail needed to have the slot slightly enlarged to allow it to fit. No pics, will get them next time I take the seat out of the car.
These will get a coat of black paint before final installation and should blend in with the floor nicely.
_DSC5119 by Norbert Ogiba, on FlickrThe S2000 floor mounting points are NOTHING like the C5 so I cut the mounting tabs off the S2000 rails right away. They are riveted AND spot welded to the rails, so some quality time with the cutoff wheel needs to be spent. I tend to enjoy grinding as I can throw in headphones, turn up the tunes, and go to town.
Note 4 shiny corners where brackets are gone.
_DSC5120 by Norbert Ogiba, on FlickrS2000 mounting tabs cut off.
_DSC5120 by Norbert Ogiba, on FlickrSo now that the unistrut rails were firmly bolted in place, and the S2000 seat had a nice flat bottom to work with, it was time to put the seat in the car and see where I had fitment issues.
These things looks awesome.
_DSC5123 by Norbert Ogiba, on Flickr_DSC5124 by Norbert Ogiba, on FlickrHowever, note how far forward the seat sits in relation to the C5 passenger seat - there is a lot of contact between the S2000 reclining handle cover and the lower C5 seatbelt cover - as well as between the the S2000 seat belt buckle and the center tunnel. To be continued in next post...
 06-07-2016, 10:09 PM
#2
Drifting
Thread Starter
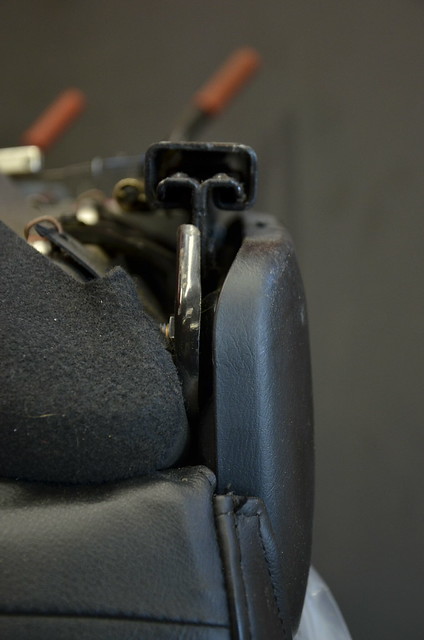
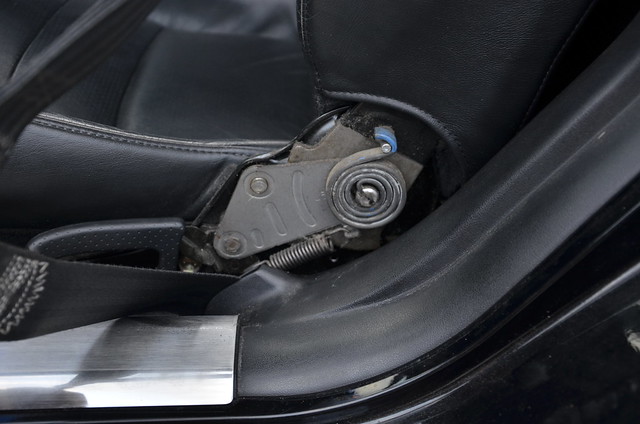
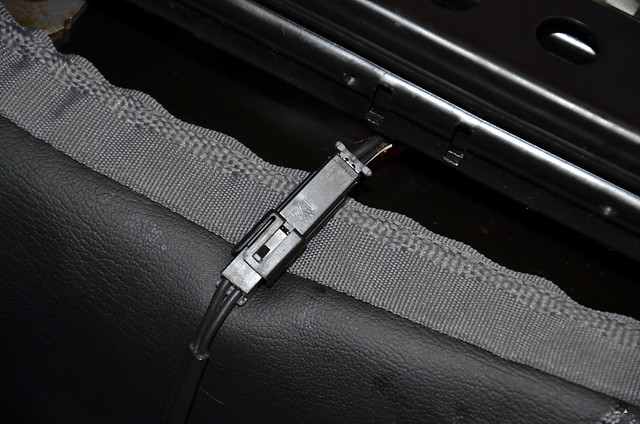
The S2000 reclining mechanism and handle cover have serious contact with the C5 lower seatbelt reel cover.
 _DSC5125 by Norbert Ogiba, on Flickr
and the S2000 seat belt receptacle is pushed up against the tunnel.
 _DSC5126 by Norbert Ogiba, on Flickr
In this position the seat is WAY too far forward (I'm 5'8") and needs to come back.
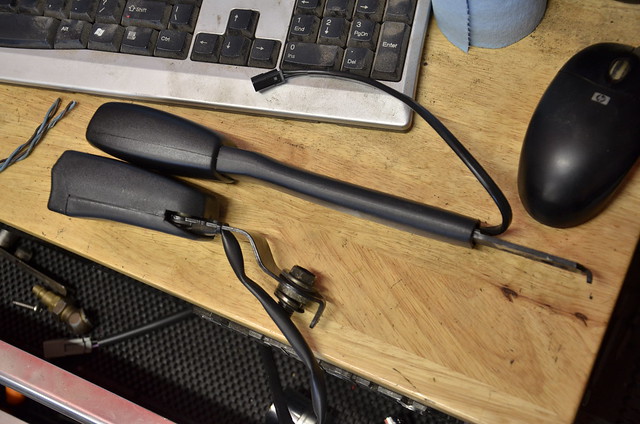
The S2000 seat came out of the car and onto the bench to have some stuff taken off it. First came the seatbelt buckle
 _DSC5128 by Norbert Ogiba, on Flickr
...along with the related Z-shaped harness. I won't need this as it doesn't interface with the C5 seatbelt OR the C5 electrical seat harness.
 _DSC5129 by Norbert Ogiba, on Flickr
You're now looking at the rear of the S2000 seat, driver's side, reclining mechanism plastic cover. It sticks out WAY past the rail, which is already far wide than the C5 bolt spacing. It will have to go.
 _DSC5130 by Norbert Ogiba, on Flickr
Firmly pull on the cool looking reclining handle to remove it
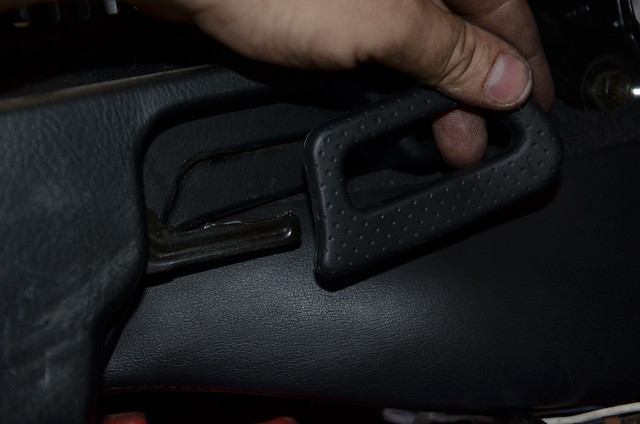 _DSC5131 by Norbert Ogiba, on Flickr
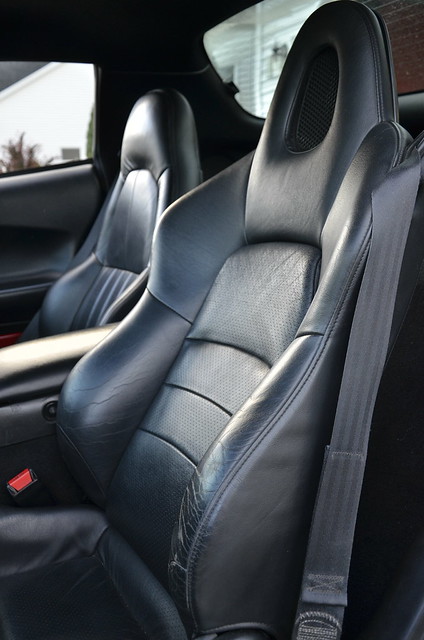
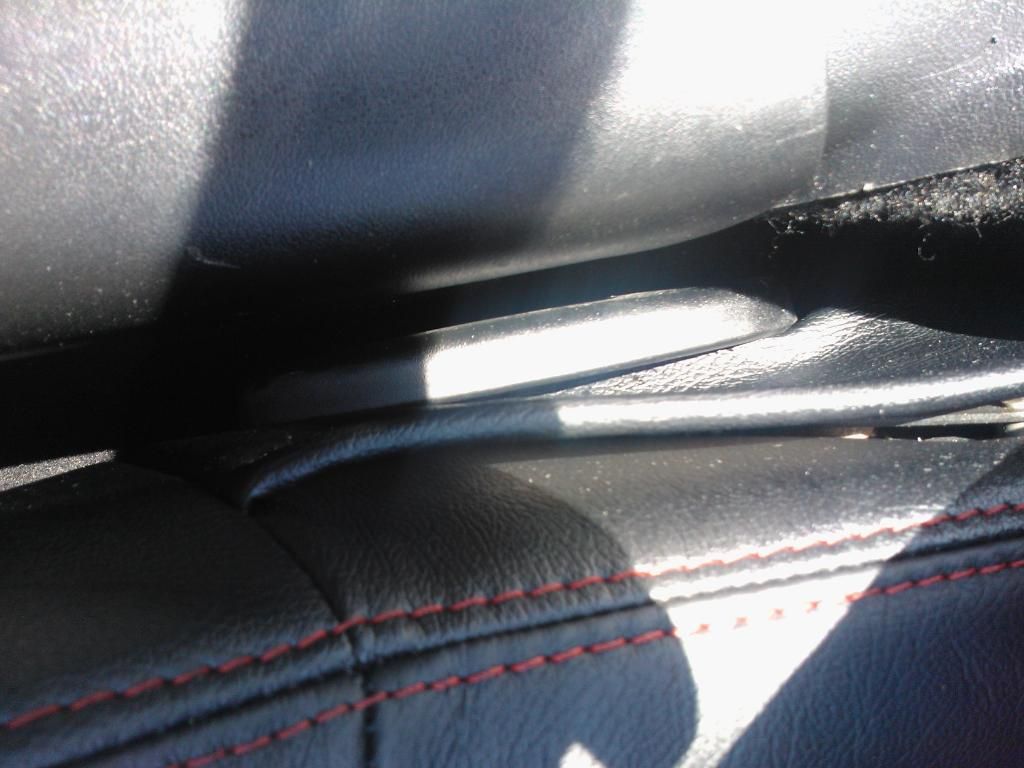
now that the 2 items that were in the way are now gone, I stuck the seat back in the car to see what it looked like. The good news is that the seat can now slide all the way back. This keeps with the OEM+ theme, keeping full functionality of adjustment. Note the absolute lack of shoulder bolsters on the C5 seat, compared to the S2000. I still can't get over how much better these seats look than the stockers.
 _DSC5132 by Norbert Ogiba, on Flickr
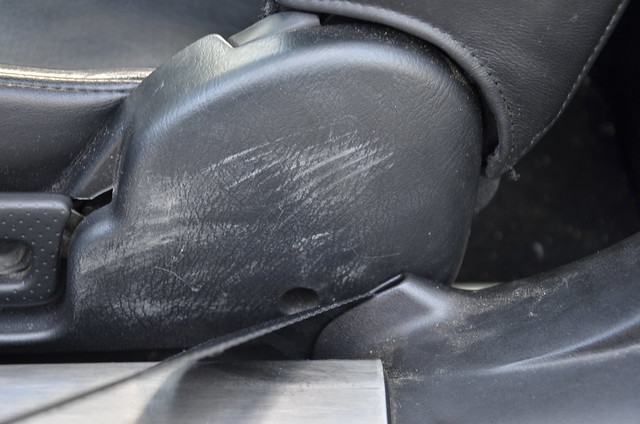
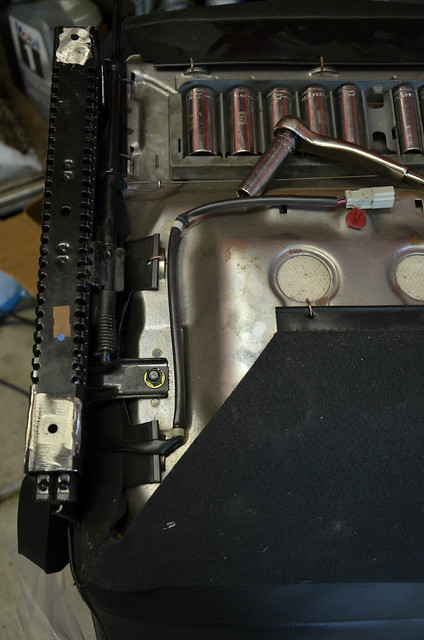
The bad news is that the reclining mechanism is now exposed and sticks out like a sore thumb. I'll have to come up with something to fix this.
 _DSC5133 by Norbert Ogiba, on Flickr
Now we can see just how close that mechanism is to the C5 seatbelt retractor
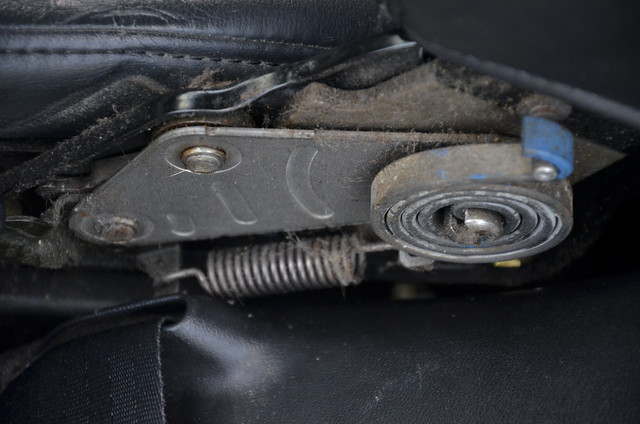 _DSC5134 by Norbert Ogiba, on Flickr
on the right side the seatbelt buckle area is tight as well but this will be easier to fix.
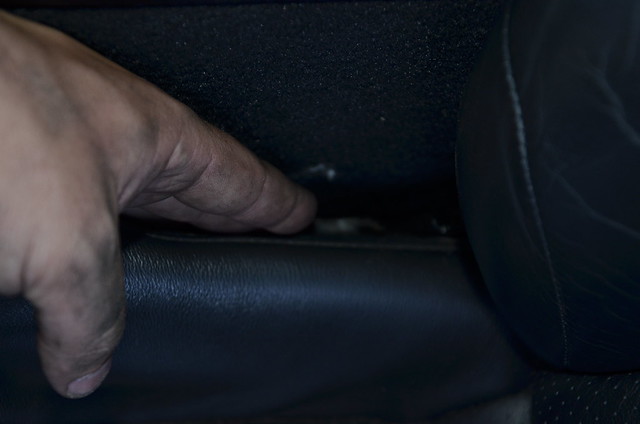 _DSC5135 by Norbert Ogiba, on Flickr
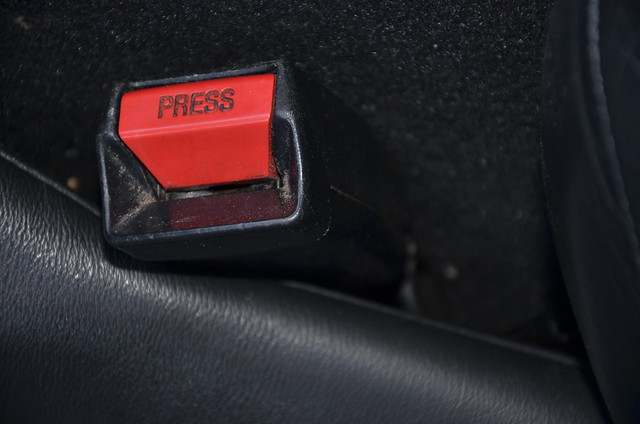
Back to the C5 seat - need to see how the buckle does, bolted to the S2000 seat.
 _DSC5136 by Norbert Ogiba, on Flickr
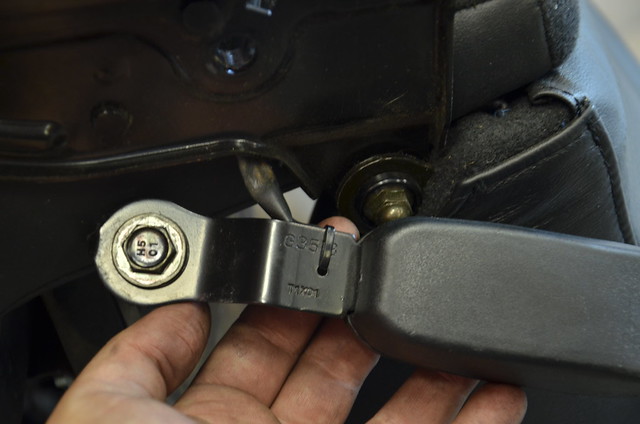
18mm thin nut and a connector, and the buckle comes out
 _DSC5138 by Norbert Ogiba, on Flickr
Here's where I left off for the night. S2000 buckle on bottom with goofy Z offset, C5 on top with straight shot
 _DSC5140 by Norbert Ogiba, on Flickr
Til Tomorrow
_DSC5125 by Norbert Ogiba, on Flickrand the S2000 seat belt receptacle is pushed up against the tunnel.
_DSC5126 by Norbert Ogiba, on FlickrIn this position the seat is WAY too far forward (I'm 5'8") and needs to come back.
The S2000 seat came out of the car and onto the bench to have some stuff taken off it. First came the seatbelt buckle
_DSC5128 by Norbert Ogiba, on Flickr...along with the related Z-shaped harness. I won't need this as it doesn't interface with the C5 seatbelt OR the C5 electrical seat harness.
_DSC5129 by Norbert Ogiba, on FlickrYou're now looking at the rear of the S2000 seat, driver's side, reclining mechanism plastic cover. It sticks out WAY past the rail, which is already far wide than the C5 bolt spacing. It will have to go.
_DSC5130 by Norbert Ogiba, on FlickrFirmly pull on the cool looking reclining handle to remove it
_DSC5131 by Norbert Ogiba, on Flickrnow that the 2 items that were in the way are now gone, I stuck the seat back in the car to see what it looked like. The good news is that the seat can now slide all the way back. This keeps with the OEM+ theme, keeping full functionality of adjustment. Note the absolute lack of shoulder bolsters on the C5 seat, compared to the S2000. I still can't get over how much better these seats look than the stockers.
_DSC5132 by Norbert Ogiba, on FlickrThe bad news is that the reclining mechanism is now exposed and sticks out like a sore thumb. I'll have to come up with something to fix this.
_DSC5133 by Norbert Ogiba, on FlickrNow we can see just how close that mechanism is to the C5 seatbelt retractor
_DSC5134 by Norbert Ogiba, on Flickron the right side the seatbelt buckle area is tight as well but this will be easier to fix.
_DSC5135 by Norbert Ogiba, on FlickrBack to the C5 seat - need to see how the buckle does, bolted to the S2000 seat.
_DSC5136 by Norbert Ogiba, on Flickr18mm thin nut and a connector, and the buckle comes out
_DSC5138 by Norbert Ogiba, on FlickrHere's where I left off for the night. S2000 buckle on bottom with goofy Z offset, C5 on top with straight shot
_DSC5140 by Norbert Ogiba, on FlickrTil Tomorrow
Last edited by nsogiba; 06-07-2016 at 10:12 PM.
The following 4 users liked this post by nsogiba:
06-07-2016, 10:27 PM
#3
Drifting

I have posted a few times about converting to the c6 seatbelts which removes the big reel mounted the floor. Would solve the issue of the recliner having space. (photobucket seems to be down or I would post pics of the extra space)
Last edited by SuperTom; 06-07-2016 at 10:28 PM.
The following users liked this post:
nsogiba (06-08-2016)
 06-07-2016, 10:39 PM
#5
Pro


So cool, nice work man can't wait to see end result.
06-07-2016, 10:49 PM
#6
1/4 mile/AutoX

you know all you had to do was eat more pie, ice cream and cookies ???


 06-08-2016, 01:21 AM
#8
Administrator

Member Since: Mar 2001
Location: In a parallel universe. Currently own 2014 Stingray Coupe.
Posts: 342,668
Received 19,215 Likes
on
13,926 Posts
C7 of the Year - Modified Finalist 2021
MO Events Coordinator
St. Jude Co-Organizer
St. Jude Donor '03-'04-'05-'06-'07-'08-'09-'10-'11-'12-'13-'14-'15-'16-'17-'18-'19-
'20-'21-'22-'23-'24
NCM Sinkhole Donor
CI 5, 8 & 11 Veteran


Well done so far - looking forward to seeing it complete.
06-08-2016, 07:24 AM
#9
Drifting
pics of space gained with c6 seatbelts a good 2-3" width, 4-5" length in the rear mounting area. Then covered with a small piece of black carpet


Last edited by SuperTom; 06-08-2016 at 07:29 AM.
The following users liked this post:
nsogiba (06-08-2016)

 06-08-2016, 10:26 AM
#11
Drifting
Thread Starter
Thanks for the kind words folks, more to come tonight!
I agree - the S2000 seats are big motivation for me to lose a few pounds!
06-08-2016, 10:39 AM
#12

I'm digging this so far. Keep up the good work.
For the C6 seat belt option, so you get a new trim panel? I may be remembering something wrong here, but a empty trim panel still takes up as much room as one with parts inside.
For the C6 seat belt option, so you get a new trim panel? I may be remembering something wrong here, but a empty trim panel still takes up as much room as one with parts inside.
06-08-2016, 10:40 AM
#13
Drifting
Thread Starter
Looking at the above posts, it looks like that trim panel gets shaved down so that it doesn't stick out as much.
 06-08-2016, 11:47 AM
#16
Drifting
nsogiba feel free to pm me if any issues. In my situation I know I had to switch driver and passenger belts to get it to retract properly. Also the receiving end of the seatbelt is different as well. Thankfully in my setup the c6 belts plugged directly into the viper seatbelt receivers. I think some shaving of the c6 belt end will allow it to fit in the c5 receiver.
Last edited by SuperTom; 06-08-2016 at 11:50 AM.
The following users liked this post:
nsogiba (06-08-2016)
06-08-2016, 11:56 AM
#17

This is a very interesting project. Looks great so far.
06-08-2016, 12:45 PM
#18
Drifting
Thread Starter
Correct a little trimming with a dremel is all it takes. If you can see the curve area in the second pic is all the extra space gained. A little square of carpet will cover the newly exposed metal underneath. The other pics show the seats pushed all the way back with the extra room for the recline mechanism and it covers up the newly exposed area to the naked eye. Im not sure why others with haven't done this with corbeau's and other seats instead of switching brackets and having the recline levers up against the center tunnel. Basically any seat that can fit in a c6 would now fit easier into the c5.
nsogiba feel free to pm me if any issues. In my situation I know I had to switch driver and passenger belts to get it to retract properly. Also the receiving end of the seatbelt is different as well. Thankfully in my setup the c6 belts plugged directly into the viper seatbelt receivers. I think some shaving of the c6 belt end will allow it to fit in the c5 receiver.
nsogiba feel free to pm me if any issues. In my situation I know I had to switch driver and passenger belts to get it to retract properly. Also the receiving end of the seatbelt is different as well. Thankfully in my setup the c6 belts plugged directly into the viper seatbelt receivers. I think some shaving of the c6 belt end will allow it to fit in the c5 receiver.
I have those C6 belts on the way. Unfortunately they did not include receivers so I will have to hunt down some that work at the junkyard, maybe out of another GM or a Chrysler product (if you say the Viper ones work).
06-08-2016, 02:25 PM
#19
Drifting
Thanks for all your posts. You have been a ton of help so far...
I have those C6 belts on the way. Unfortunately they did not include receivers so I will have to hunt down some that work at the junkyard, maybe out of another GM or a Chrysler product (if you say the Viper ones work).
I have those C6 belts on the way. Unfortunately they did not include receivers so I will have to hunt down some that work at the junkyard, maybe out of another GM or a Chrysler product (if you say the Viper ones work).

The c5 receiver can work if you shave the sides of the c6 male part slightly if I remember correctly. Im sure it was close you can compare when you get them in.
Last edited by SuperTom; 06-08-2016 at 02:27 PM.


