
Axle Rebuild Finally Done... And I survived.. Pictoral inside..
 12-02-2006, 08:13 PM
#1
Race Director

Thread Starter

Recently I somehow got a tiny cut in the outer boot of my passenger CV joint and spewed grease all over..
I first want to say a special thanks to Patches who sent me the procedures and gave me the encouragement to tackle the COMPLETE Job.... I was only planning on pulling the Axle and taking to a place to have it rebuilt.. He convinced me to do it all..
Honorary mention for assistance goes to..
steve@ctcorvette
ericdwong
dpd
Here is the complete Axle Rebuild Pictoral procedure for those interested. I am not going over details of every step..Mostly a pictoral to let you know what you are in for�
First
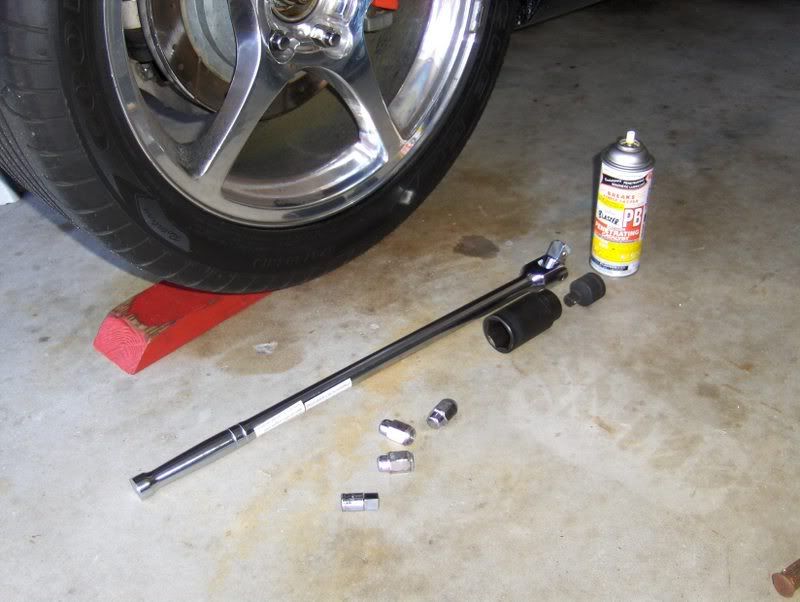
Loosen the Axle nut.. Trust me.. this requires a lot of force. Leave the car on the ground with the wheel on when you break it loose.
So get some PB Blaster and spray the nut real good. I used a 24� � Breaker bar from Harbor Freight. I needed to get some � to � adapters to use my
socket.

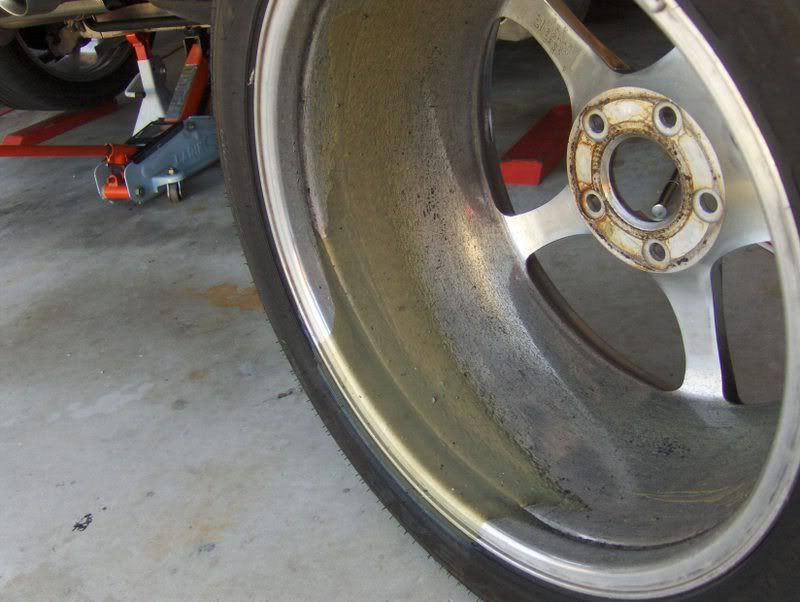
Now you can see the havoc created by a torn boot..
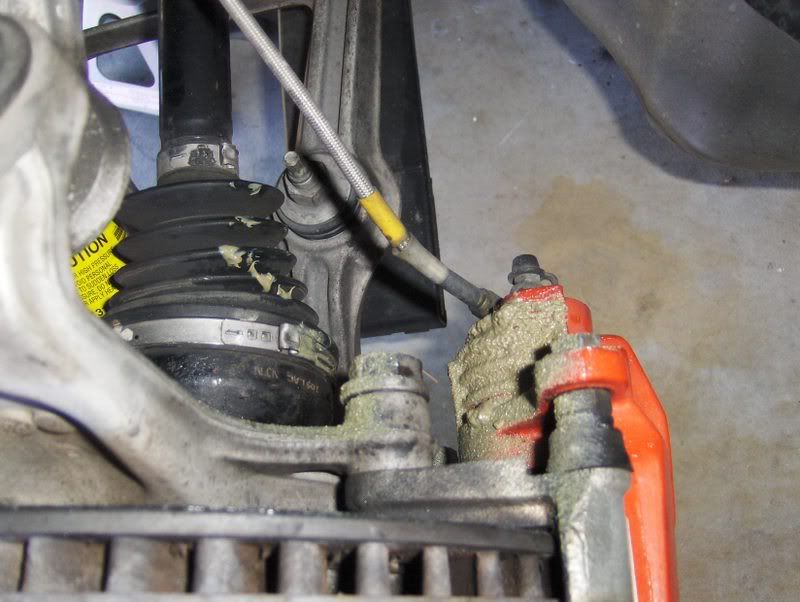
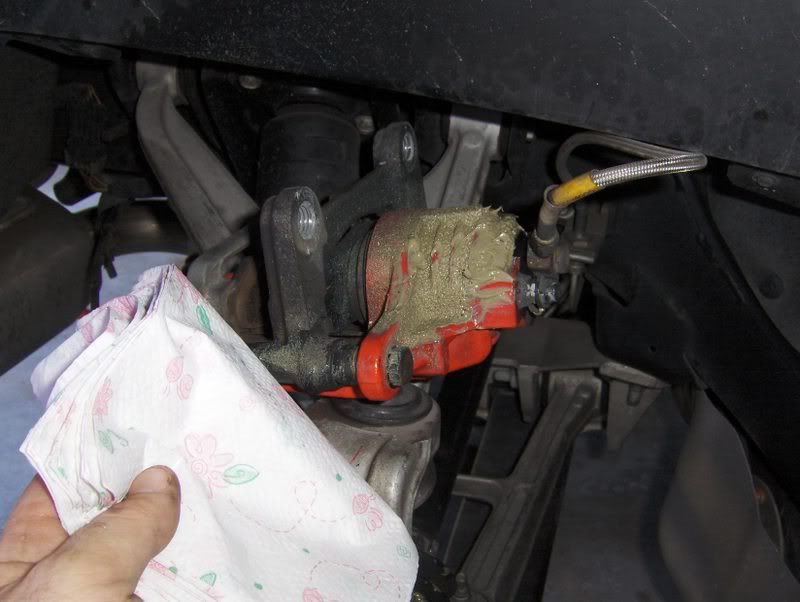
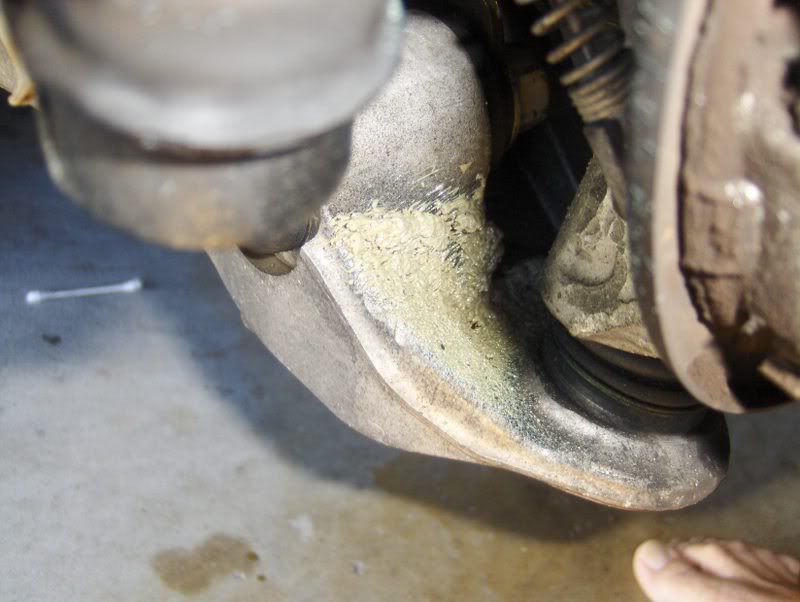
I had to clean everything before I could do anything.. I went through a 6� stack of napkins, a dozen q-tips and an old t-shirt. I even took the strain reliefs off the speed sensor wires and cleaned the grease out of them. Washed em in the sink with dawn and a tooth brush..
Here is everything all cleaned up..
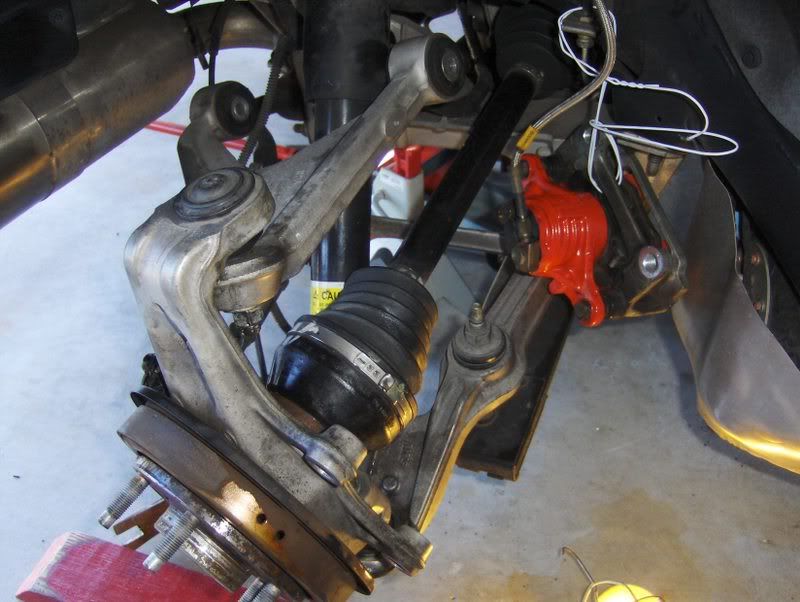
Now we are ready to pull the axle.. Here is a shot just before pulling it out of the hub
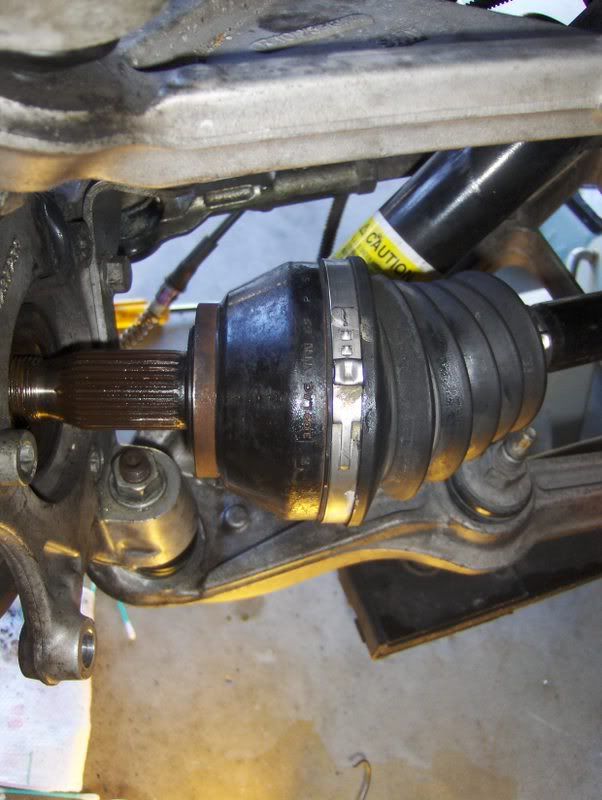
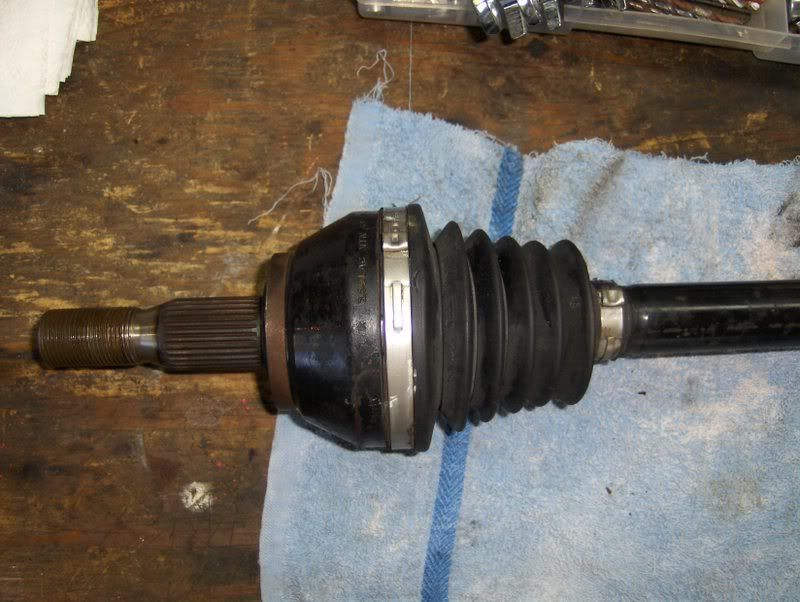
Finally out..
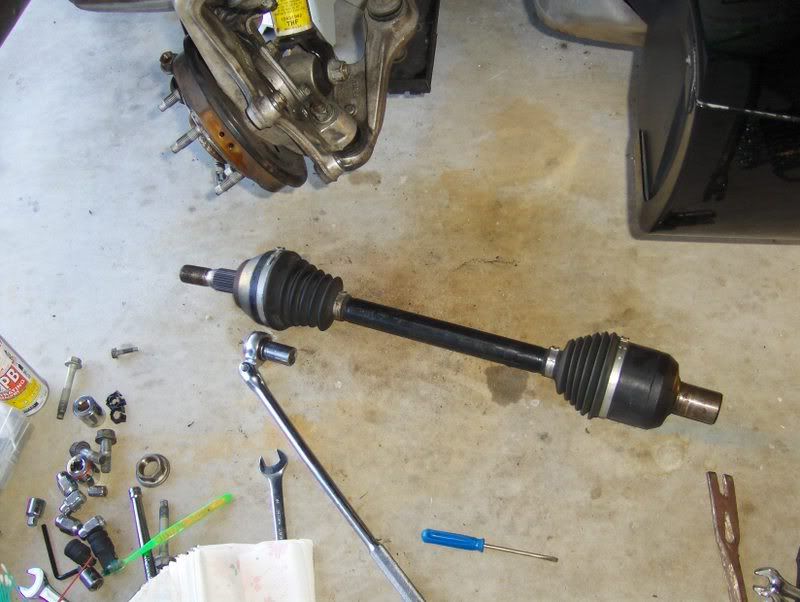
Now to get the boot off.. My problem was with the OUTER boot..
First cut the clamps off both sides. I used a Dremel with cutoff wheel
Then slide back the boot in order to separate the CV joint from the axle shaft
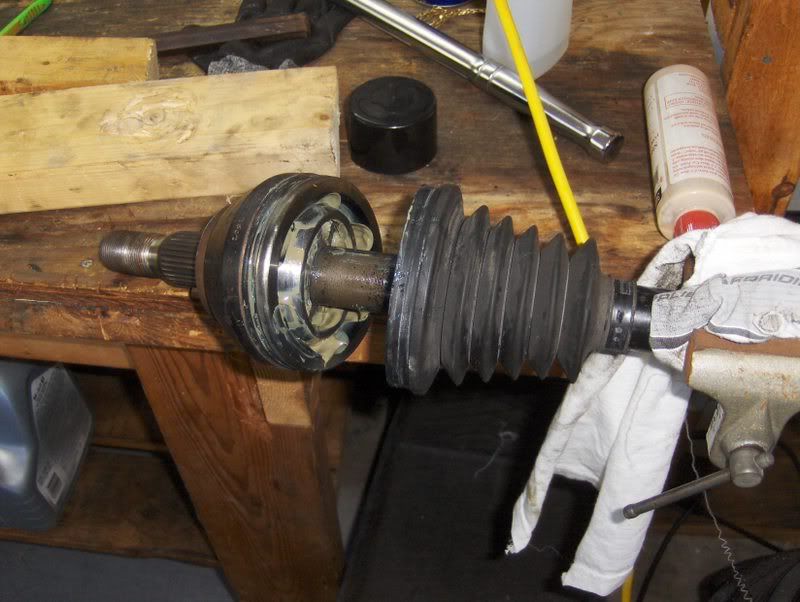
To separate the 2 pieces you need to put the axle in a vise. Then take a heavy �BLUNT� Chisel and place it right at the point shown in the picture. You will need a give this some very hard whacks with a heavy hammer.. It will eventually slide off. What you are doing is compressing the snap ring on the inside. The next pictures will clearly show this..

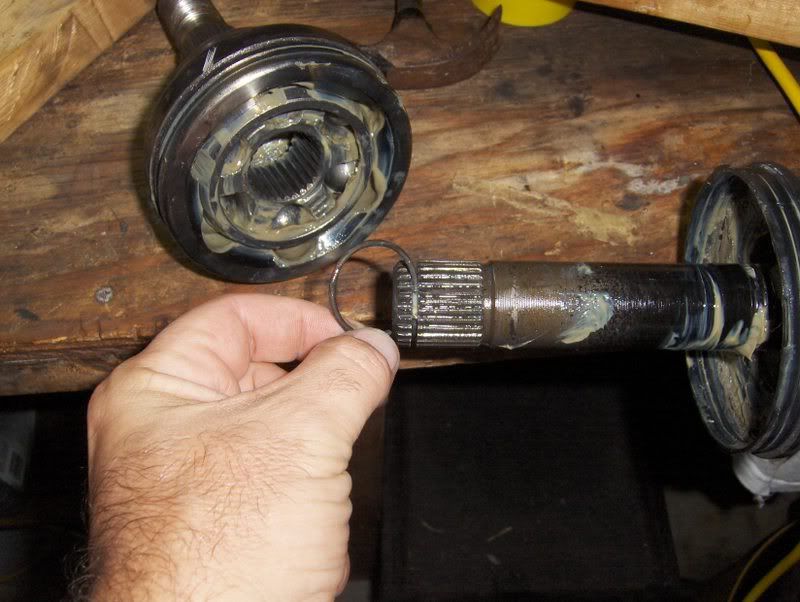
If you look inside the bearing race.. you can see where it opens back up and the snap ring expands again on the other side to ensure a solid connection.
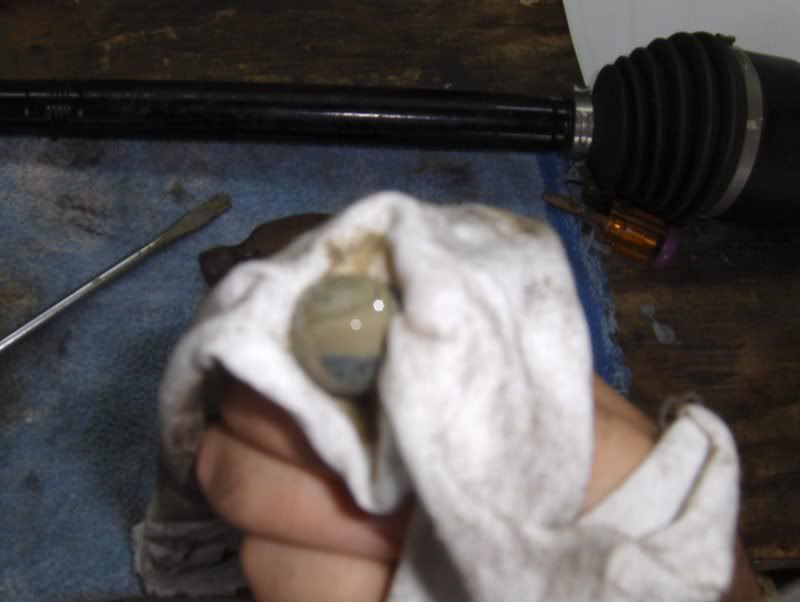
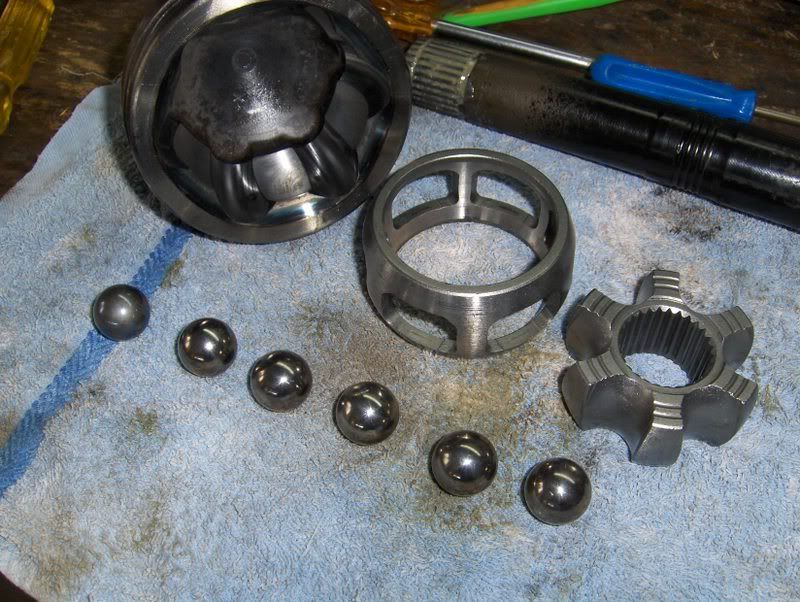
Here is where you need to take the bearings out and clean them..
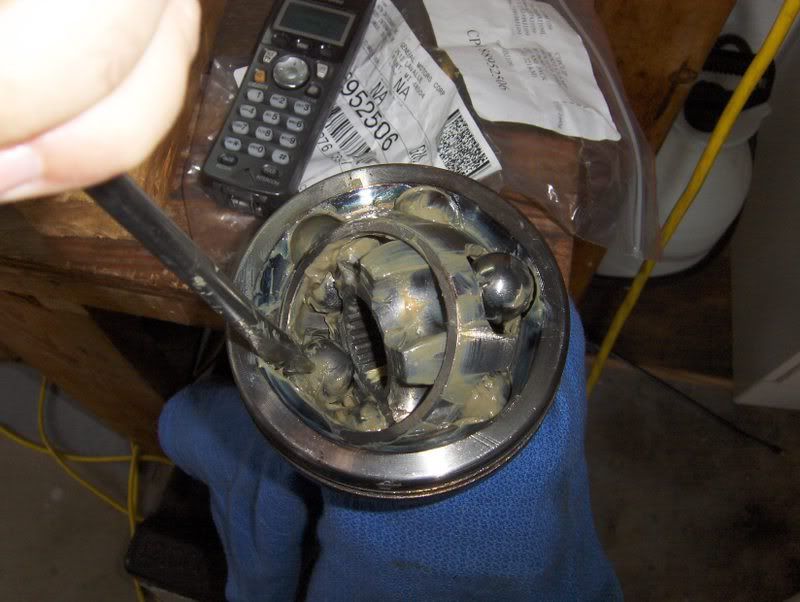
You need to take the ball bearings out in sequence. You must clean your ***** very carefully� After that clean the whole race�
All Cleaned up Ready to be put back together..
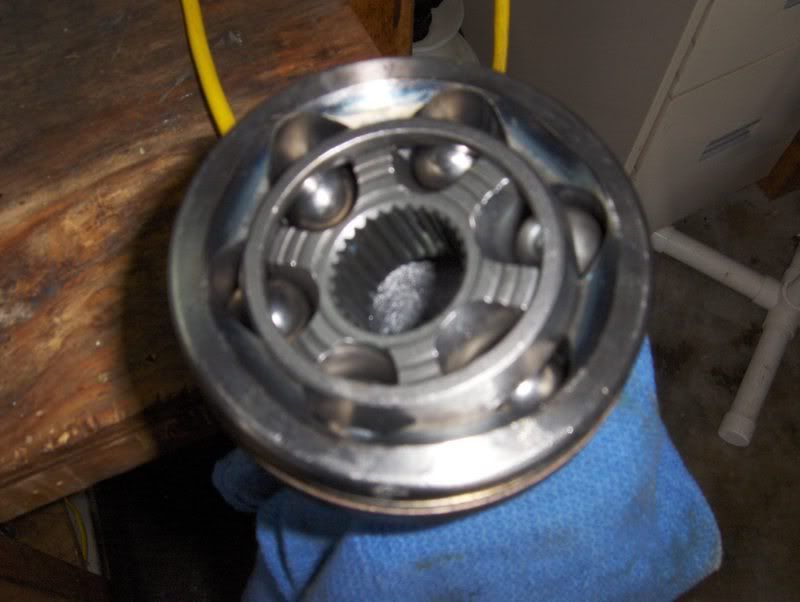
Here the Bearing Race is all back together.
I forgot to show the part where you fill the Bearing Race with Grease.. because I was fighting with the C Clip
My Boot Kit came with 2 different clamp types.. So I went to Autozone and they loaned me the 2 types of clamp tools I needed.. I almost destroyed one in the process.
Here I am tightening the smaller Clamp
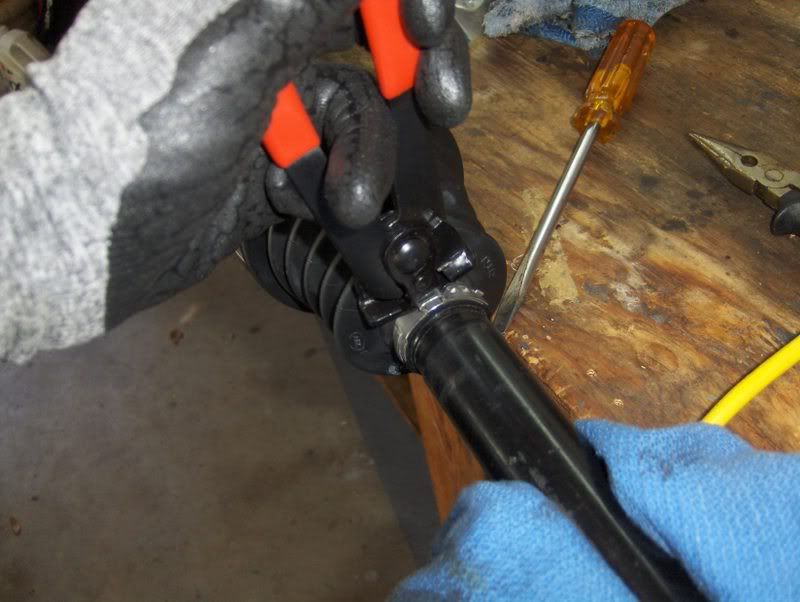
This is the bigger clamp.. This single clamp gave me the most fits.. The tool did NOTHING! It could not pull the clamp tight enough to latch.. I seriously considered using a dryer hose clamp�
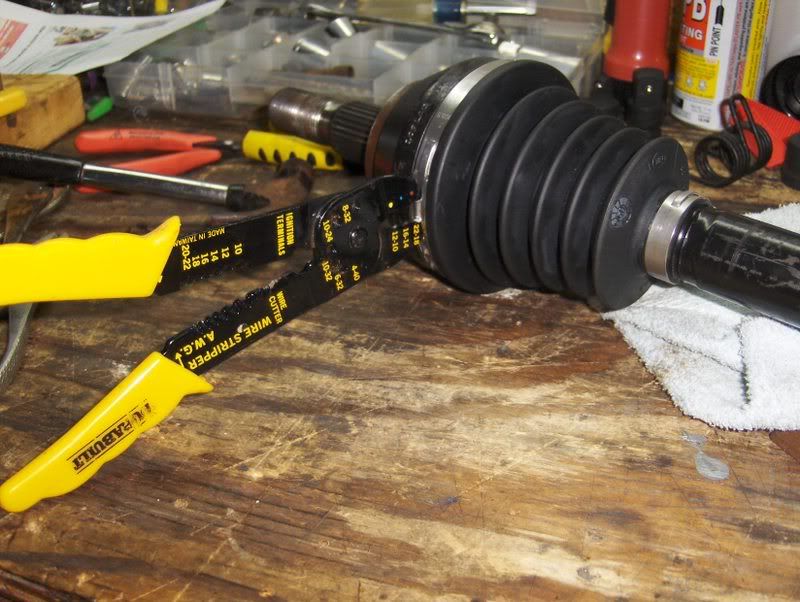
I ended up doing something drastic after driving around town looking for a different type of clamp and failing.. I redesigned my Wire Strippers to act as a Clamp Tool.. While holding everything together I put the handles in my Vise It pulled it together but would not latch.. A small tap of my hammer and Click.. Yes!! Finally..
The rest is just put it all back together�.
I first want to say a special thanks to Patches who sent me the procedures and gave me the encouragement to tackle the COMPLETE Job.... I was only planning on pulling the Axle and taking to a place to have it rebuilt.. He convinced me to do it all..
Honorary mention for assistance goes to..
steve@ctcorvette
ericdwong
dpd
Here is the complete Axle Rebuild Pictoral procedure for those interested. I am not going over details of every step..Mostly a pictoral to let you know what you are in for�
First
Loosen the Axle nut.. Trust me.. this requires a lot of force. Leave the car on the ground with the wheel on when you break it loose.
So get some PB Blaster and spray the nut real good. I used a 24� � Breaker bar from Harbor Freight. I needed to get some � to � adapters to use my
socket.
Now you can see the havoc created by a torn boot..
I had to clean everything before I could do anything.. I went through a 6� stack of napkins, a dozen q-tips and an old t-shirt.
I even took the strain reliefs off the speed sensor wires and cleaned the grease out of them. Washed em in the sink with dawn and a tooth brush.. Here is everything all cleaned up..
Now we are ready to pull the axle.. Here is a shot just before pulling it out of the hub
Finally out..
Now to get the boot off.. My problem was with the OUTER boot..
First cut the clamps off both sides. I used a Dremel with cutoff wheel
Then slide back the boot in order to separate the CV joint from the axle shaft
To separate the 2 pieces you need to put the axle in a vise. Then take a heavy �BLUNT� Chisel and place it right at the point shown in the picture. You will need a give this some very hard whacks with a heavy hammer.. It will eventually slide off. What you are doing is compressing the snap ring on the inside. The next pictures will clearly show this..
If you look inside the bearing race.. you can see where it opens back up and the snap ring expands again on the other side to ensure a solid connection.
Here is where you need to take the bearings out and clean them..
You need to take the ball bearings out in sequence. You must clean your ***** very carefully�
After that clean the whole race�All Cleaned up Ready to be put back together..
Here the Bearing Race is all back together.
I forgot to show the part where you fill the Bearing Race with Grease.. because I was fighting with the C Clip
My Boot Kit came with 2 different clamp types.. So I went to Autozone and they loaned me the 2 types of clamp tools I needed.. I almost destroyed one in the process.
Here I am tightening the smaller Clamp
This is the bigger clamp.. This single clamp gave me the most fits.. The tool did NOTHING! It could not pull the clamp tight enough to latch.. I seriously considered using a dryer hose clamp�
I ended up doing something drastic after driving around town looking for a different type of clamp and failing.. I redesigned my Wire Strippers to act as a Clamp Tool.. While holding everything together I put the handles in my Vise
It pulled it together but would not latch.. A small tap of my hammer and Click.. Yes!! Finally..The rest is just put it all back together�.


 12-02-2006, 08:37 PM
#3
Le Mans Master


CONGRATS, I had the same issue last year. i couldnt get the large clamp back on. i brought it down the local garage and they have special big clamping tool for that.


 12-02-2006, 08:44 PM
#5
Race Director
Thread Starter
Originally Posted by Patches
Congrats, chuckster! Well done! 
Now 'bout that next project - told the SO yet?
Well done! Now 'bout that next project - told the SO yet?
Needed to warm her up to that one.... I think the big hood would be the tip off...
 12-02-2006, 08:58 PM
#7
Melting Slicks

Wow thats alot of pictures! Job well done! Looks like you know your stuff and thats a huge advantage~It's like paying yourself when working on your own car
12-02-2006, 09:08 PM
#8
Race Director
Thread Starter
Originally Posted by 528rwhp02Zo6
Wow thats alot of pictures! Job well done! Looks like you know your stuff and thats a huge advantage~It's like paying yourself when working on your own car
Thanks... Yeah the way I figure it.. If I went to someone.. They'd just replace the Axle and Charge me the labor..
Say $250 to $300 for the Axle and a maybe an hour of labor.. I am certain I'd be looking northward of $400 out the door..
Boot kit cost $44 and prolly less than $30 in Misc tools I needed to buy.. That 33mm socket!! I should have kept the receipt and returned it..
 12-03-2006, 11:25 AM
#12
Le Mans Master
Nice write up.
I had to do that once and did the same drive all over town to find a tool to tighten the clamps. Ended up at local garage and they hooked me up.
I had to do that once and did the same drive all over town to find a tool to tighten the clamps. Ended up at local garage and they hooked me up.


 12-03-2006, 05:29 PM
#16
Melting Slicks
Member Since: Jul 2005
Location: Rehoboth MA . . . NRA Life Member
Posts: 2,572
Likes: 0
Received 3 Likes
on
1 Post
St. Jude Donor '06-'07
Chuck, great post together with photos and explanation's, this ones a keeper just in case I go through the same thing, thanks..
12-03-2006, 06:21 PM
#17
Race Director
Thread Starter
Originally Posted by BobbyG
Chuck, great post together with photos and explanation's, this ones a keeper just in case I go through the same thing, thanks..
Thanks.. What I should have done was to use the actual GM directions and just substitute my photos in place of their Crappy drawings..
I hope someone saves this.. Just in case my Photobucket goes away..
