
Horn Membrane Fix!!
 06-23-2007, 07:32 PM
#1
Instructor

Thread Starter
Well, i got tired of not having a horn here in houston..there's plenty of A-holes that needed honking at for doing stupid stuff...
so i figured what the hell! i'll try and fix it since i'm on downtime (middle of head/cam/headers install in a '98)
for starters i knew that the RH side membrane was bad, wasnt sure about the left.
So, if you decide to try this..try it at your own risk!!! Airbag deployment velocity is probably >300 ft/sec!!!
i didn't get pictures of actually removing from the steering wheel, but it's pretty staight forward when you get it loose from the wheel.
1. there are 2 torx T-30 screws that are on fairly tight from the back of the steering wheel. be patient, it takes some time to get them out!.
2. The horn positive lead is held in the steering wheel by a plastic twist lock. just push & turn about a 1/4 turn to remove. unbolt the negative lead from the grounding eye.
3. I didn't bother with the SIR disassembly instructions in the service manuals where they tell you disconnect fuses & connectors & blah blah since i've had my battery disconnected for some time now. The airbag plug just pulls straight away after unplugging the plastic lock retainer.
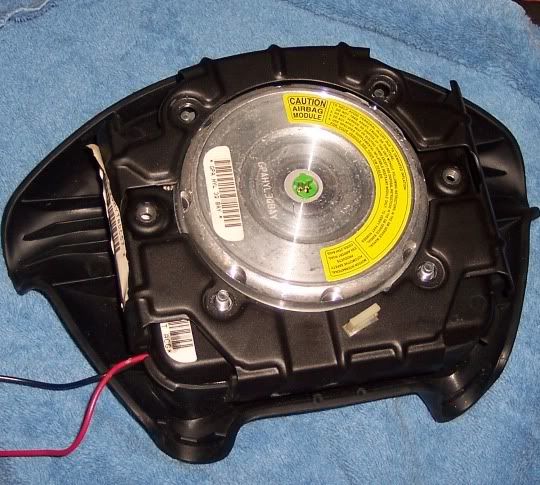
4.Now that we have the horn/airbag module out, here's what we do next. remove the 4 nuts on back.

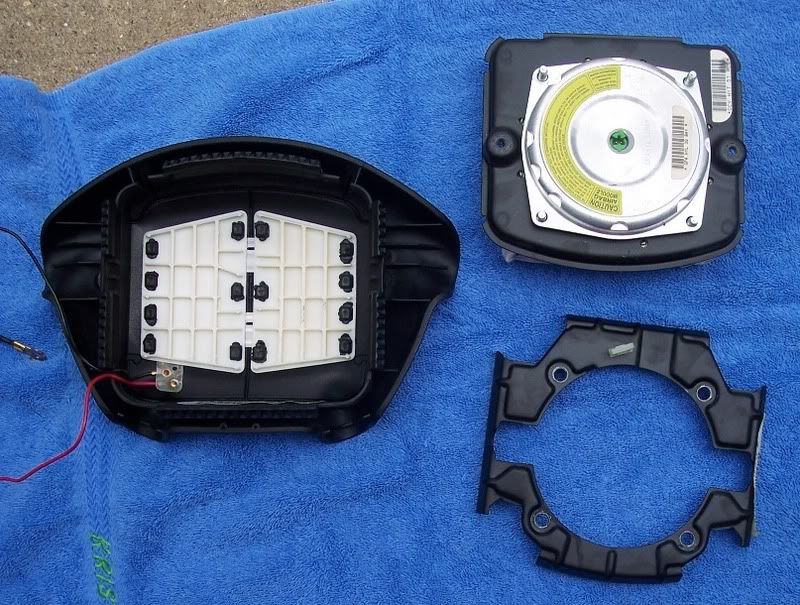
5. Remove the metal retainer.
6. Now carefully pry the rubber apart on all 4 sides while lifting the airbag assembly out.
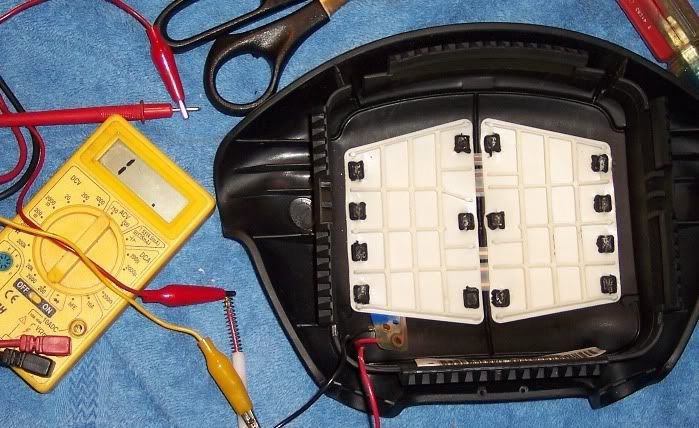
7. Now get a razor blade and with just a little pressure cut through the center of the molded rubber holding the nylon plates on. Don't cut the outboard ones like i did in this picture!!! All you need to cut are the 6 in the inner 2 columns!!
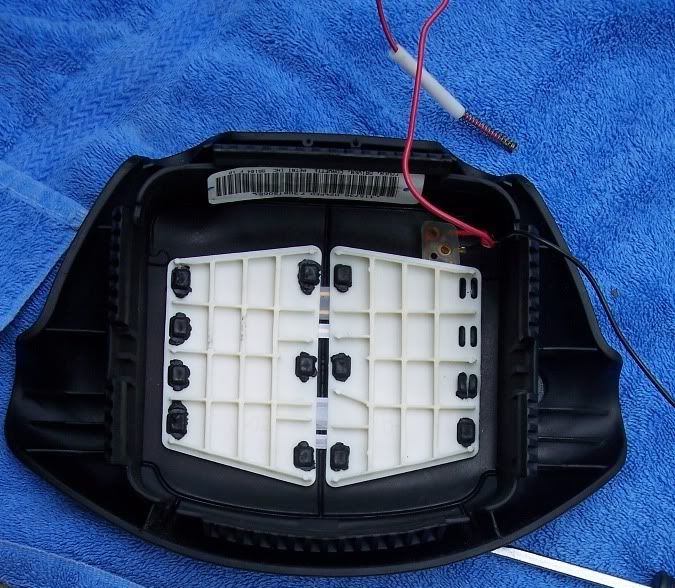
8. you should be able to separate the molded rubber and pull the nylon plates though the slit you previously made. (from the center & not the outside like i have shown!)
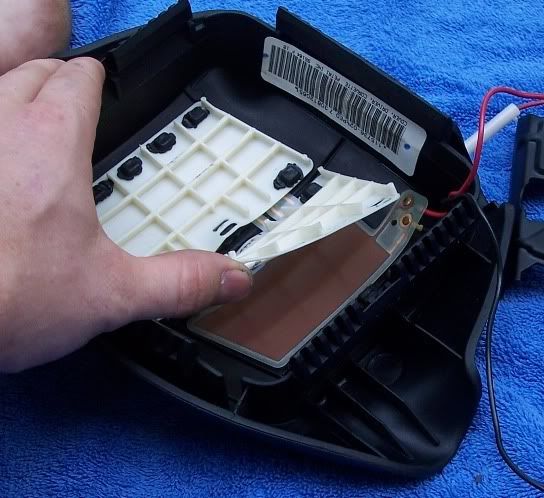
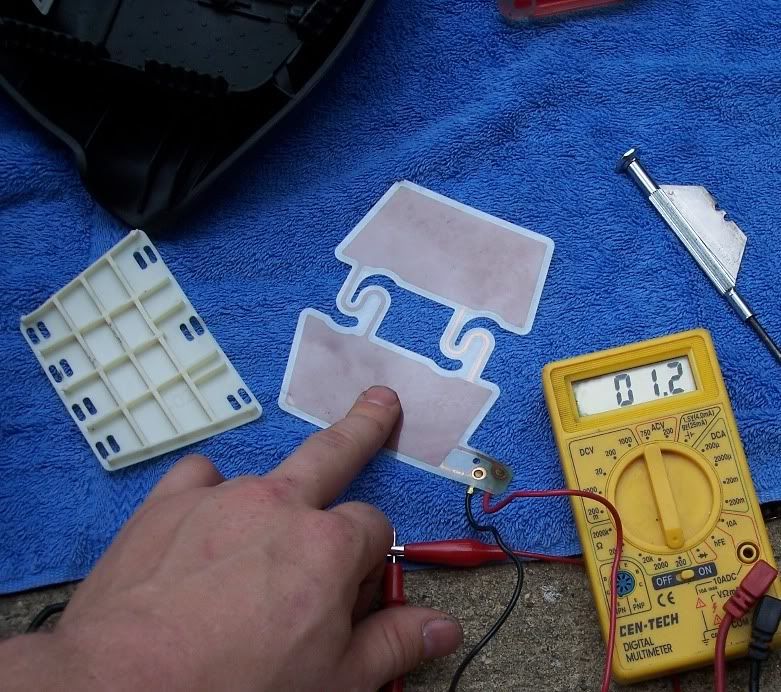
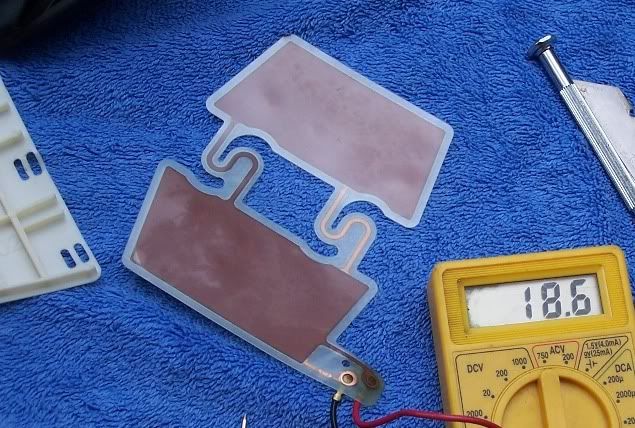
9. Ok with the horn membranes out, i checked both sides..Sure enough it was the rh side. Notice it's not an open circuit after removing finger.
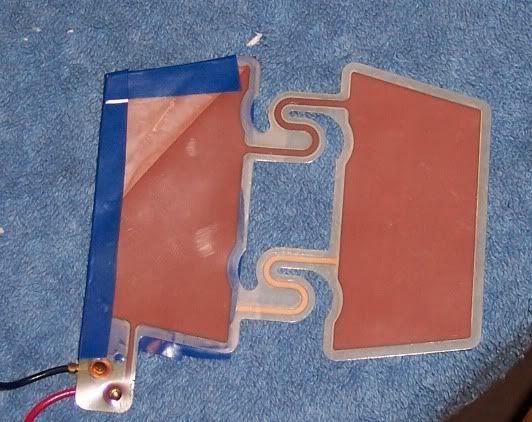
10. I forgot to get a picture of the next step, but there's nothing to it...I separated the plastic from the bad membrane side and put 2 layers of electrical tape on the whole copper conducter for that side. effectively isolating it. this was easier than cutting & soldering. now the piece taped back together.
11. Its a pain in the *** to get the nylon plates back into the cover, but it's not impossible..just use a nice big bladed flathead screwdriver to push it into the cut rubber where it used to be..
check it after putting back into cover & super glueing the rubber
together.
Success!!! (for now until this one fails also!!)
12. Reward yourself (if you already haven't been doing that) before assembling the reverse steps...Just make sure the glue is completely dry before putting the airbag assy back into the horn cover!!!!

so i figured what the hell! i'll try and fix it since i'm on downtime (middle of head/cam/headers install in a '98)
for starters i knew that the RH side membrane was bad, wasnt sure about the left.
So, if you decide to try this..try it at your own risk!!! Airbag deployment velocity is probably >300 ft/sec!!!
i didn't get pictures of actually removing from the steering wheel, but it's pretty staight forward when you get it loose from the wheel.
1. there are 2 torx T-30 screws that are on fairly tight from the back of the steering wheel. be patient, it takes some time to get them out!.
2. The horn positive lead is held in the steering wheel by a plastic twist lock. just push & turn about a 1/4 turn to remove. unbolt the negative lead from the grounding eye.
3. I didn't bother with the SIR disassembly instructions in the service manuals where they tell you disconnect fuses & connectors & blah blah since i've had my battery disconnected for some time now. The airbag plug just pulls straight away after unplugging the plastic lock retainer.
4.Now that we have the horn/airbag module out, here's what we do next. remove the 4 nuts on back.
5. Remove the metal retainer.
6. Now carefully pry the rubber apart on all 4 sides while lifting the airbag assembly out.
7. Now get a razor blade and with just a little pressure cut through the center of the molded rubber holding the nylon plates on. Don't cut the outboard ones like i did in this picture!!! All you need to cut are the 6 in the inner 2 columns!!
8. you should be able to separate the molded rubber and pull the nylon plates though the slit you previously made. (from the center & not the outside like i have shown!)
9. Ok with the horn membranes out, i checked both sides..Sure enough it was the rh side. Notice it's not an open circuit after removing finger.
10. I forgot to get a picture of the next step, but there's nothing to it...I separated the plastic from the bad membrane side and put 2 layers of electrical tape on the whole copper conducter for that side. effectively isolating it. this was easier than cutting & soldering. now the piece taped back together.
11. Its a pain in the *** to get the nylon plates back into the cover, but it's not impossible..just use a nice big bladed flathead screwdriver to push it into the cut rubber where it used to be..
check it after putting back into cover & super glueing the rubber
together.
Success!!! (for now until this one fails also!!)
12. Reward yourself (if you already haven't been doing that) before assembling the reverse steps...Just make sure the glue is completely dry before putting the airbag assy back into the horn cover!!!!

The following users liked this post:
sjhanc (07-21-2017)
06-23-2007, 08:24 PM
#2
Tech Contributor


Member Since: Dec 1999
Location: Anthony TX
Posts: 32,736
Received 2,180 Likes
on
1,583 Posts
CI 6,7,8,9,11 Vet
St. Jude Donor '08

Eric
FANTASTIC write up!!! Well done!! Thank you for taking the time and documenting the procedure. I wonder if it were possible to inject air into the bladder on the damaged side with a sirunge and then seal it back up with silicone RTV if it would keep the two sides apart. If mine goes bad, I think Ill try that.
Thank you for your time and valuable info!!

Bill C
FANTASTIC write up!!! Well done!!
Thank you for taking the time and documenting the procedure. I wonder if it were possible to inject air into the bladder on the damaged side with a sirunge and then seal it back up with silicone RTV if it would keep the two sides apart. If mine goes bad, I think Ill try that.Thank you for your time and valuable info!!
Bill C


 06-24-2007, 01:39 AM
#5
Melting Slicks

on mine the horn is stuck on but it looks like the airbag cover itself is messed up. One side is pushed in and the other side looks like it's pulled out some. I wonder if mine could be fixed?

 How about a Schlitz?
06-24-2007, 03:07 AM
How about a Schlitz?
06-24-2007, 03:07 AM
#7
Instructor
Thread Starter
Thanks guys!!
Yah, i was at the beer store actually eyeballing some schlitz this evening...but decided to get some mickey's big mouths instead...mmmm
I'm sure this membrane will eventually go bad also, so by that time i might have to look into another type of contact switch...not sure what is all out there with a low thickness profile, but one thing that does come to mind is something like what video game controllers use on their pcb boards..the buttons are silicone with with conductive pads underneath...not sure about the current carrying capacity of those though...
i bet digikey or mouser might have something good...!!


 01-03-2008, 09:14 PM
#13
Melting Slicks
By totally covering the membrane on the one side, does this mean you can only blow the horn from one side of the bag cover once all is reinstalled?
Charlie
Charlie

 11-20-2008, 05:16 PM
#16
Melting Slicks
Member Since: Nov 2004
Location: Lake Oswego, Near Portland Oregon
Posts: 2,275
Likes: 0
Received 5 Likes
on
5 Posts

Here is how I fixed the horn switch problem....
http://i54.photobucket.com/albums/g8...nt_momo-1r.jpg

http://i54.photobucket.com/albums/g8...nt_momo-1r.jpg
12-13-2008, 09:19 PM
#17
Awesome! Thanks! On my 97 my horn hasn't worked the whole time I've owned it and I've always thought the membrane was the culprit. I finally took it apart and tested it -- and it had a short in it. Thanks to this easy to follow thread I got it going again.

12-13-2008, 09:42 PM
#18
Racer
Member Since: Mar 2007
Location: Pace/ Pensacola FL
Posts: 316
Likes: 0
Received 0 Likes
on
0 Posts
12-22-2008, 08:01 PM
#19
Team Owner

Member Since: Sep 2001
Location: Denison, TX
Posts: 22,551
Received 232 Likes
on
119 Posts
2022 C8 of the Year Finalist - Unmodified
CI 3-4-5-6-7-8-9-10 Veteran
St. Jude '03-'04-'05-'06-'07-'08-'09-'10-'16
I'm old enough to buy both those...how many would it take to talk you into helping me out?

http://forums.corvetteforum.com/c5-g...oonnnnnnk.html
04-10-2009, 05:43 PM
#20
2nd Gear

Member Since: Feb 2009
Location: Hialeah Gardens FL
Posts: 2
Likes: 0
Received 0 Likes
on
0 Posts
Thank You so much.
I used a thin strip of double sided tape on the edges of the plates to keep them seperated.
In my case the horn was stuck.
Thanks again.
I used a thin strip of double sided tape on the edges of the plates to keep them seperated.
In my case the horn was stuck.
Thanks again.