

 02-23-2015, 05:53 PM
Last edit by: IB Advertising
See related guides and technical advice from our community experts:
Browse all: Brake How-Tos
- How to Replace Parking Brake Shoe and Electronic Parking Brake Module
Step by step instructions for do-it-yourselfers.
Browse all: Brake How-Tos

New product - Parking brake spring install tool only $49.95
03-01-2008, 02:03 PM
#1
Team Owner


Thread Starter
Member Since: May 1999
Location: Columbus Ohio
Posts: 22,830
Likes: 0
Received 10 Likes
on
9 Posts
CI 3-4, 8-9-10 Veteran
St. Jude Donor '06-'08-'10


Just did the dreaded parking brake adjustment and had the spring on the right side pop off. Played around with getting the spring back on the hard way for about 20 minutes.

So I came up with this this revolutionary new tool to solve this problem forever.

OK, I admit I am adding a small Corvette tax to the actual product cost.
What I did:
Take three wire ties (6" to 8" long ) and loop them back on themselves so you have three ties with a loop on the end. I did them bass ackwards so they didn't lock. (I'm a cheap SOB)

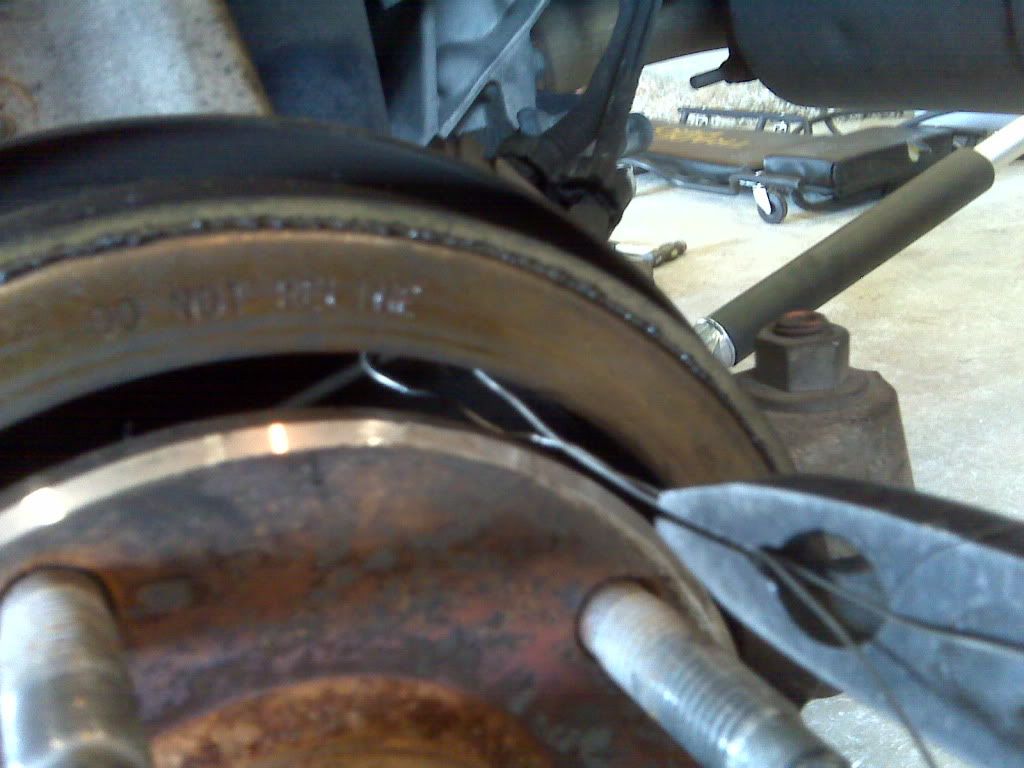
Pull the parking brake shoe out from the backing plate as far as possible. Thread one wire tie so it is in the center of the spring on the flat spot. Place the other two on the ends of the spring outside where the spring clips to the backing plate. Slide these on with the 'eye' portion of the loop toward the hub. Otherwise they may get hung up.
Install the spring on the backing plate by clipping the ends in place.
Slowly push the shoe back into place while threading the ends of the three wire ties between the shoe and the hub.
Then while holding the shoe in toward the backing plate use the end wire ties to pull the ends of the spring inside the shoe one at a time.
These ties will slip right off the end of the spring for reuse.

I then pulled the center portion of the spring down toward the hub and inside the shoe using the last wire tie.
The last one cannot slide off since it's locked in by the two backing plate clips. I slipped an Exacto knife between the shoe and hub and cut the 'eye' of the tie. One good tug removed it.
Took much longer to type this than actually do it.
Did I mention the $49.95 includes shipping?

Hope this helps someone down the road.


The following users liked this post:
Heyspike (09-29-2018)
06-05-2009, 11:57 AM
#2
Le Mans Master

that's a graet idea... just wish there was a pic or two to explain it a bit better
I'm in my garage NOW trying to remedy this...
I'm in my garage NOW trying to remedy this...
06-05-2009, 12:06 PM
#3
Safety Car

Are you adjusting the parking brake without removing the rotor? If you remove the rotor, you can slide the shoes off and access the adjustment wheel with a flat head screwdriver.
06-05-2009, 01:48 PM
#4
Le Mans Master
I'm not adjusting the rotor...
I forgot about how the parking brake was on the car, and when I took the rotor off, the clip came out with it... can't get it back in...
I forgot about how the parking brake was on the car, and when I took the rotor off, the clip came out with it... can't get it back in...
06-05-2009, 04:13 PM
#5
Safety Car
Which clip? There is a metal piece that keeps the parking brake shoe vertical. Is that what you're talking about?
A picture might help (if you're stuck).
06-05-2009, 05:45 PM
#6
Le Mans Master
What I'm talking about is the big 'spring' that clips to the dust shield and the 2 edges and center section actually fit into the parking brake shoe ring.
The passenger side was a breeze... now I'm working on the driver's side front... just trying to get one bracket bolt broke free.
That can wait... PB Blaster is my good friend.
06-05-2009, 11:57 PM
#8
Team Owner
Thread Starter
Member Since: May 1999
Location: Columbus Ohio
Posts: 22,830
Likes: 0
Received 10 Likes
on
9 Posts
CI 3-4, 8-9-10 Veteran
St. Jude Donor '06-'08-'10
THere's a pic on the DIY Thread ( where I found THIS thread linked ) that shows about adjustment...
What I'm talking about is the big 'spring' that clips to the dust shield and the 2 edges and center section actually fit into the parking brake shoe ring.
The passenger side was a breeze... now I'm working on the driver's side front... just trying to get one bracket bolt broke free.
That can wait... PB Blaster is my good friend.
It seems most people insert the clip into the parking brake shoe then fight to clip them onto the backing plate. I installed the clip onto the backing plate then used the zip ties to pull them into the shoe.
It actually worked very nicely and only took a few minutes.
If I can find a diagram of the backing plate, clip and shoe assembly I'll add more detail. I just recovered from trashing my hard drive so I haven't reinstalled the GM service DVD yet.
 06-06-2009, 01:48 AM
#9
Team Owner
Thread Starter
Member Since: May 1999
Location: Columbus Ohio
Posts: 22,830
Likes: 0
Received 10 Likes
on
9 Posts
CI 3-4, 8-9-10 Veteran
St. Jude Donor '06-'08-'10
Kinda ugly but...

Keep in mind the center section of the brake shoe is filled with the hub. The GM manual says to pull the hub to replace the parking brake shoes.
Pull the brake shoe away from the rear plate an inch or so.
Slip three looped zip ties onto the spring where shown with the green arrows.
Install the spring clip onto the backing plate
Feed the free ends of the zip ties between the hub and the parking shoe
Slowly push the brake shoe into place while pulling one of the end zip ties to pull the end of the spring clip inside the shoe. Do the other end of the clip the same way with the second zip tie. The zip ties can then be slipped off the end of the spring clip.
Use the last zip tie to pull the center of the clip inside the shoe. Cut the loop on the last zip tie, pull out and pitch.
Adjust shoe, re-install rotor.
All done.
03-14-2010, 05:15 PM
#10
Intermediate


Member Since: Dec 2006
Posts: 26
Likes: 0
Received 0 Likes
on
0 Posts
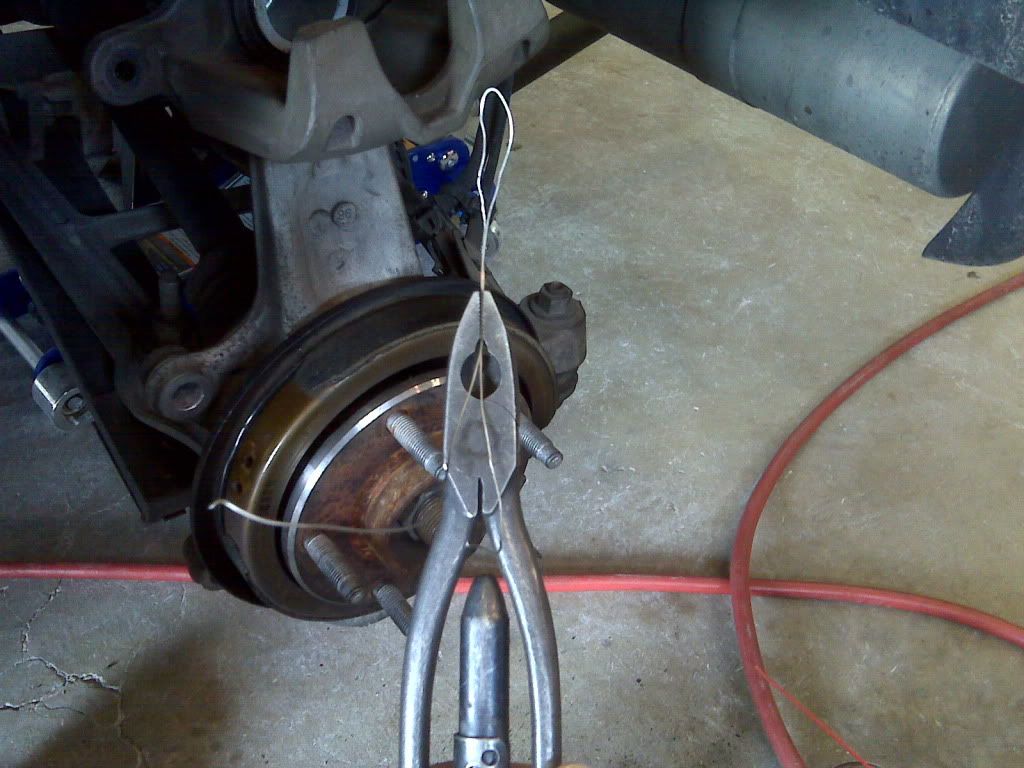
I didn't have too much success with using the zip tie method so I found another method that I thought others would find helpful. I used safety wire to pull the ends I needed in and it seemed to work out great.
1. Place spring into retaining clips on the back plate (Brake shoes will need to be pulled slightly towards you to get access). I had difficulty with the spring staying in place so I just took a screw driver and hammer and slightly tapped the clips over so the spring would stay in as I was messing around with it.
2. As the brake shoes are pulled away, by an inch or so, use a screw driver and pliers to pull the U shaped portion of the spring (The middle of the spring) inside the shoes. I pulled the spring in partly from the back and finished by putting it into the shoes by using a screw driver on the outside to pry it in the rest of the way.
3. Create a U-shape piece using safety wire and hook it to the one of the edge springs. I pushed the brake shoe up slightly to get better access. Using pliers or locking pliers or anything that will hold the wire together, I pulled the clip inward until the spring snapped back into the brake shoe.
4. Repeat the last step for the other side. Again create a U-shape wire to hook onto and pull it towards the other end so that the spring will snap back inside the brake shoe.
I struggled with trying to get the spring into place for a least an hour until I tried this method. This method took about less than 5 minutes to get the spring back in. Good Luck.
Last edited by 99BlkVette; 03-14-2010 at 05:49 PM. Reason: Uploaded photos to post.
07-30-2010, 11:23 AM
#11
Heel & Toe
Member Since: Jul 2010
Location: Charlotte NC
Posts: 18
Likes: 0
Received 0 Likes
on
0 Posts
Wow this helped out big time. The rotor was stuck on one side and after some beating and pulling the rotor came off with the shoes and the spring. I worked for a couple hours trying to reset the spring before I found this little trick with some zip ties. After using the zip ties I had everything back together in 15 min.
08-15-2011, 09:34 PM
#12
1st Gear

Member Since: Aug 2011
Location: Bellingham Ma
Posts: 1
Likes: 0
Received 0 Likes
on
0 Posts
Hello, I am a new comer to the forum and I happened here because 0f this problem. I do not feel quite as stupid now as I did when it first happened. Thanks for the tips and I will post something if I get it to work, or not.
03-17-2013, 12:09 AM
#13
Team Owner


Member Since: Mar 2001
Location: small town in S.E Pa. PA
Posts: 21,325
Received 3,812 Likes
on
1,925 Posts
St. Jude Donor '03-'04

I can add a few tips here as well, sorry no pictures..
I took three wire ties and made them into a 4 in. circle ( meaning : I took an 8 inch zip tie and put the end into the eye, leaving it a circle.
I took the M shaped.. the wire spring
and put one zip tie on the center section, then placed the spring into the backing plat clips. ( at this point , I push the clips in a bit to the backing plate to keep the spring from popping off. With the spring tight to the backing plate, I slipped a zip tie at each end of the M clip.. I fed the three zips between the hub and the Shoe, so I had three loops to grab.
The easiest way I found was to pull each end out and get them onto the shoe... ( BTW is important to close the star adjuster down as low as possible)
I cleaned off the threads of the star and then re-greased the threads .
the trick I found was, once both open ends where in place, I took a screw driver and at the same time pulled on the center zip tie pulling it away from the backing plate. I put the screw driver between the hub and the shoe and placed it on top of the spring right next to the zip tie, I then used the screw driver and a lever the pushed the spring Down and under the shoe lip and your done.. It took me 1 hour and 45 minutes to do both sides. including a complete cleaning and re-greasing and adjustment. also be careful if the bottom shoe guide falls out of the adjuster housing, there is a metal dowel known as the push rod. " Don't loose that pin. its about 1/16 dia. by about 1 inch. it sits in a pocket filled with grease. once you have the shoe tight to the backing plate you can just Cut the three loops and pull them out.
Last edited by Evil-Twin; 03-17-2013 at 11:53 AM.
03-17-2013, 01:28 AM
#14
Tech Contributor


Member Since: Dec 1999
Location: Anthony TX
Posts: 32,736
Received 2,180 Likes
on
1,583 Posts
CI 6,7,8,9,11 Vet
St. Jude Donor '08
I remembered doing this way back in 2000. I too used wire and long screwdrivers.
It reminded me of the Gynecology Doctor that changed professions and became an engine mechanic On his finial exam from UTI He did an engine rebuild thru the exhaust pipe..
The TIE WRAPS are a great idea.. EXCELLENT POST!!
BC
It reminded me of the Gynecology Doctor that changed professions and became an engine mechanic On his finial exam from UTI He did an engine rebuild thru the exhaust pipe..
The TIE WRAPS are a great idea..
EXCELLENT POST!!BC
Last edited by Bill Curlee; 03-17-2013 at 01:36 AM.

 Bill
Bill
 01-05-2014, 01:40 PM
#18
Intermediate

Member Since: Oct 2008
Location: Corona CA
Posts: 35
Likes: 0
Received 0 Likes
on
0 Posts
Thank you for posting this info!! Just want to add one thing as mentioned above that really helped me(after an hour or so of bad words out load) bend the tabs that hold the clip to the plate, this helps keep the clip in place while pulling it thru.
07-06-2014, 04:46 AM
#19
Safety Car
The above was what did the trick for me. The zip ties were a great idea, but the spring kept popping out of the tab. Bending the retainer tabs solved the problem and allowed me to assemble it. To the tab, simply tap on it lightly with a screwdriver & hammer.
07-06-2014, 07:21 AM
#20
Safety Car
Member Since: Sep 2007
Location: Sunniest city on Earth
Posts: 4,169
Likes: 0
Received 21 Likes
on
20 Posts

This is all Greek to me right now, but it will probably all make sense when I bolt the rear suspension (and drivetrain) back into my Corvette in a week or three...