
When Air Comes Out of All AC Vents - A How To Fix Write Up with Pics!
 07-13-2008, 09:56 PM
#1
Team Owner


Thread Starter

For all who need the photos:
My photo's are public, here is the link: everything is pretty much shot in order -
http://s83.photobucket.com/user/madm...?sort=3&page=1
Thanks,Matt
661-406-7516 (call or text if needed)
Thanks,Matt
661-406-7516 (call or text if needed)
I had air coming out of all vents on the Ac or Heat.
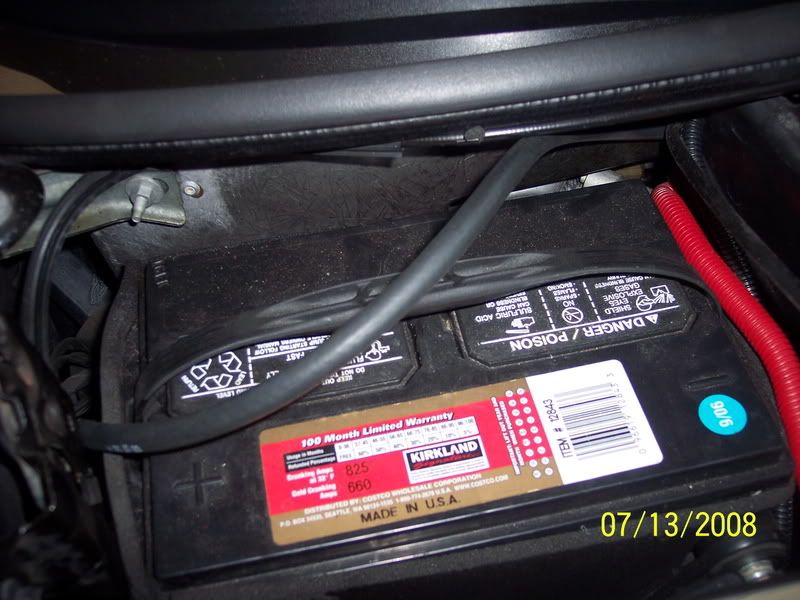
It was suggested that it is the vacumm supply line coming from the back of the manifold that is the culprit - Because Battery Acid Leaks on it and it burns through.
Well this is what happened or perhaps just it was rubbing and rubbed through thus allowing "NO" vacumm to get to the HVAC Vacumm manifold. (It did not have any Acid residue on it at all).
This vacumm line is "HARD" plastic and not easy to locate WHY? because it is within the wire loom going down to the area behind the passenger front wheel that goes to the PCM.
To Begin:
I had to jack up the front end of the Vette and turn the wheel all the way to the left, so I could remove the panel to access the area by the PCM and Vacumm junction One Way Check Valve.
You "WILL" need to take all the 7mm nuts off the panel (The ones underneath too) AND the last one for the fender on the bottom furthest toward the rear of the Vette right next to the door! This is because you will need to pull a little on the fender panel there to help see and work on the vacumm junction.
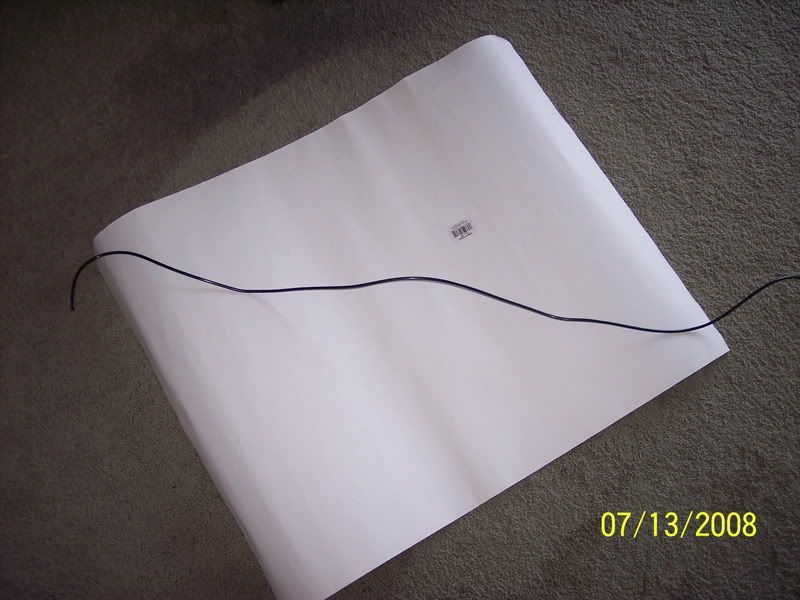
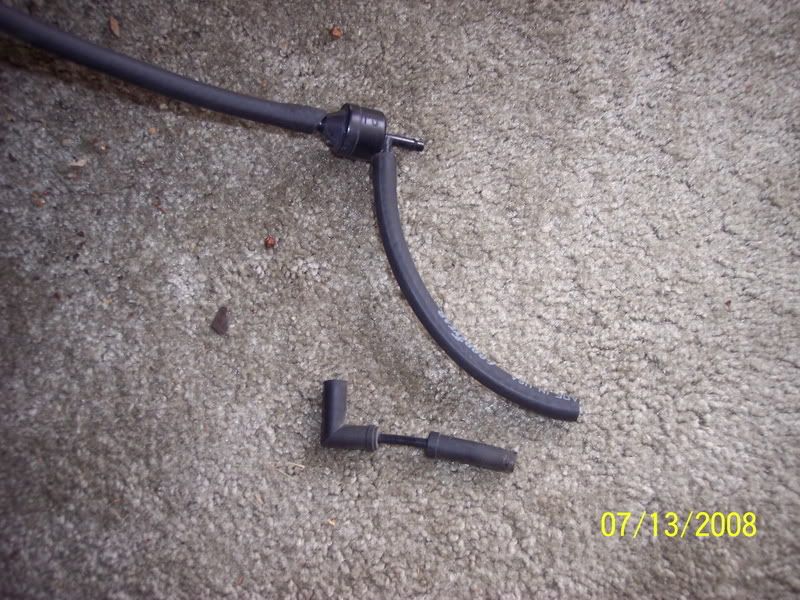
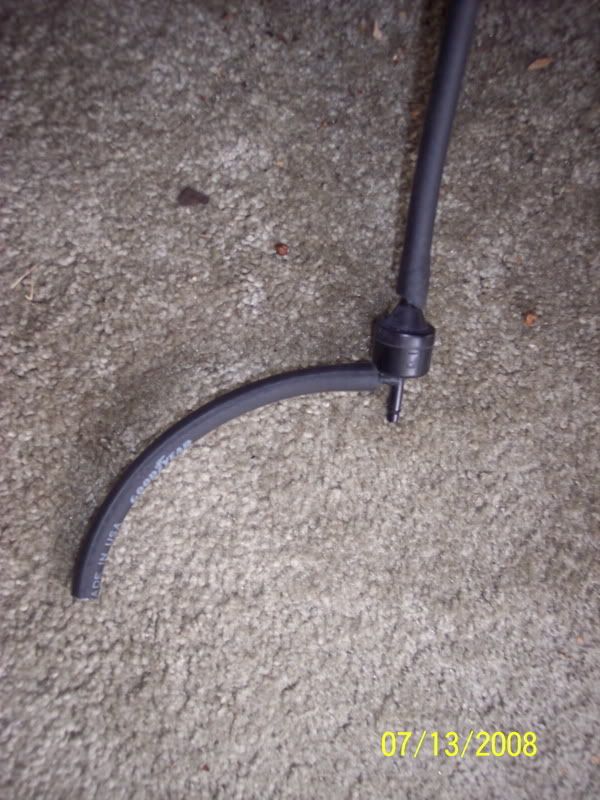
Here is the culprit fully pulled out: I tested it by capping the end after I removed it from the back of the manifold, it held "NO" vacumm at all- I mean I could blow through it and inhale through the line even though it was capped off on one end!
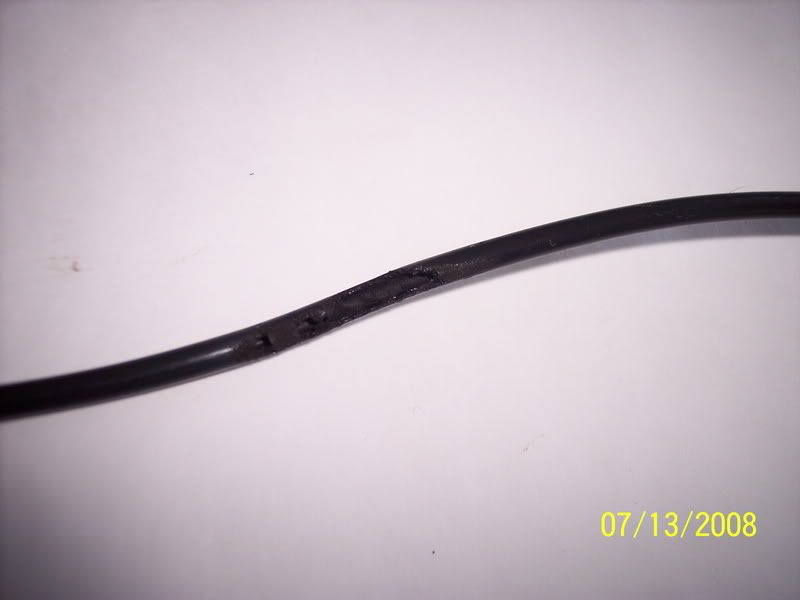
Damaged area:
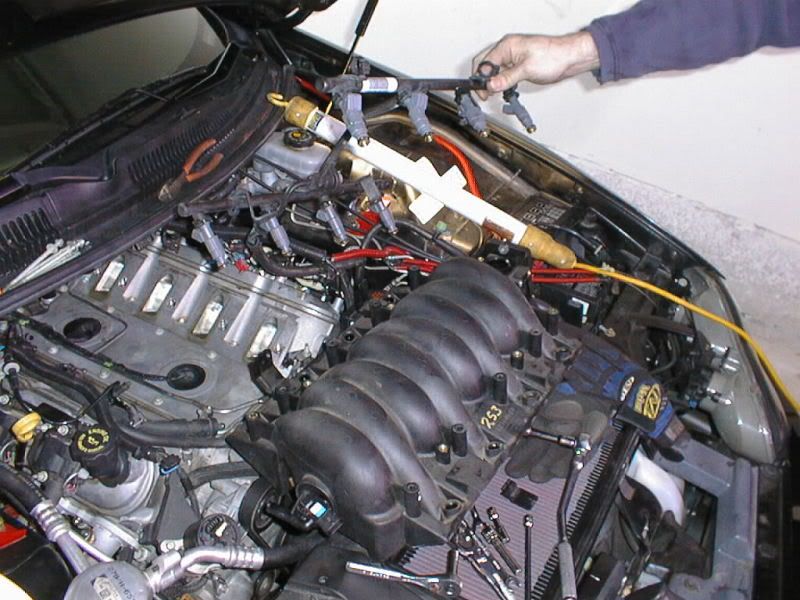
It is not hard to get your hand behind the manifold with the Valve cover/coil covers off , plus make sure you unclip the MAP sensor it makes it a little easier too get your hand on the vacumm line- I pulled the rubber end of the line off the fitting in the back (there are only two fittings on the back for vacumm) One for the Brake BOOSTER and one for the HVAC Unit
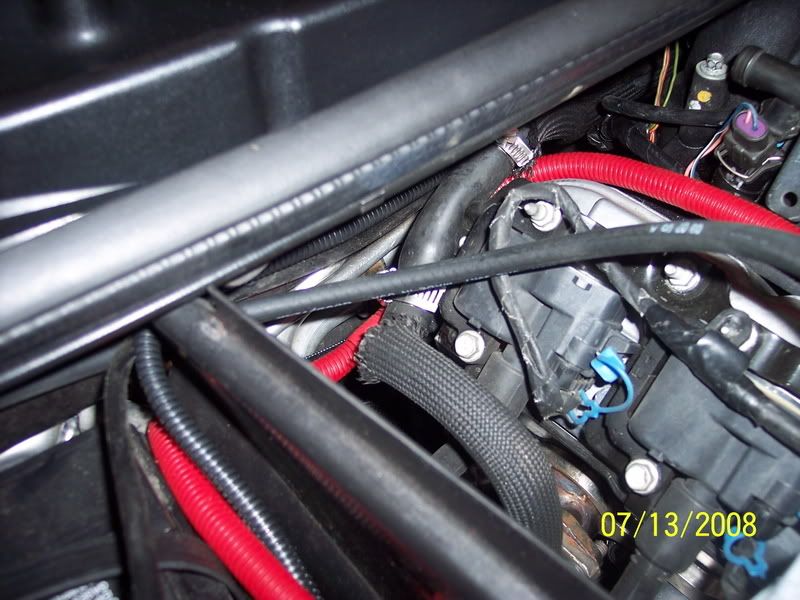
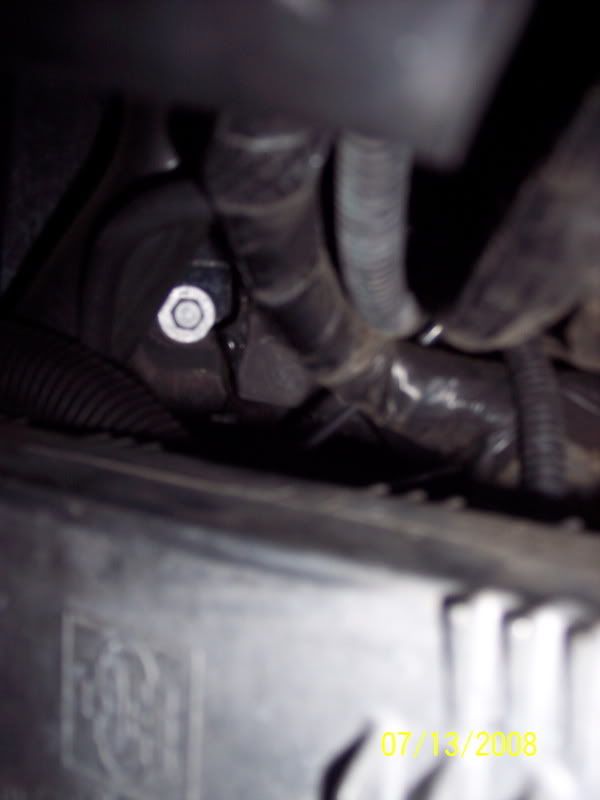
Here is a couple os shots of the back of the manifold and what you will be looking and feeling for:
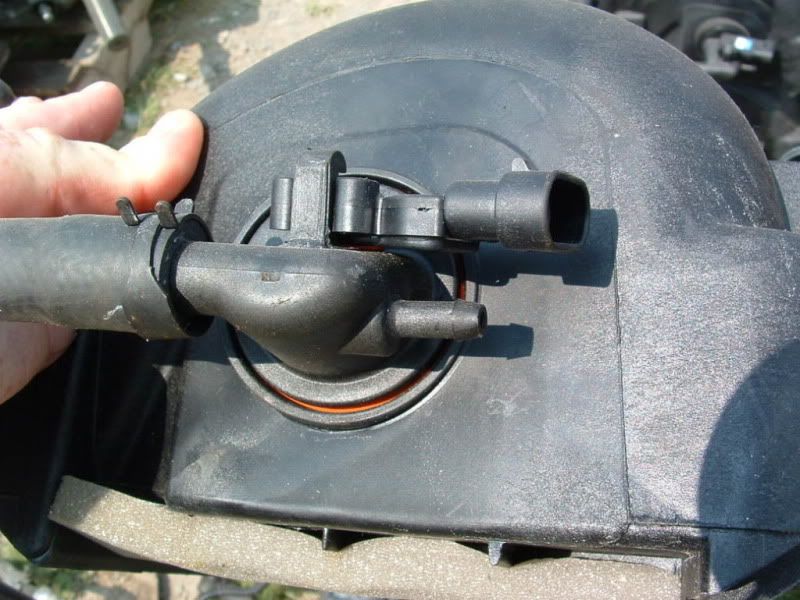
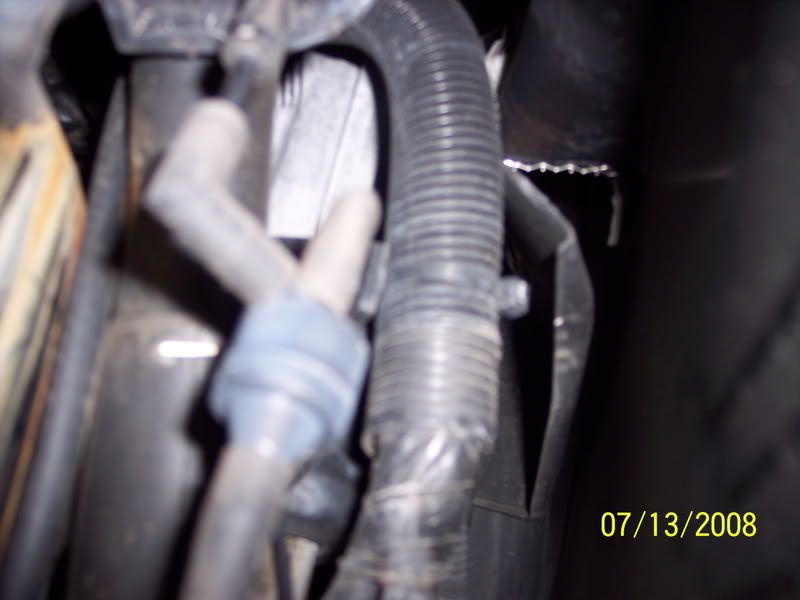
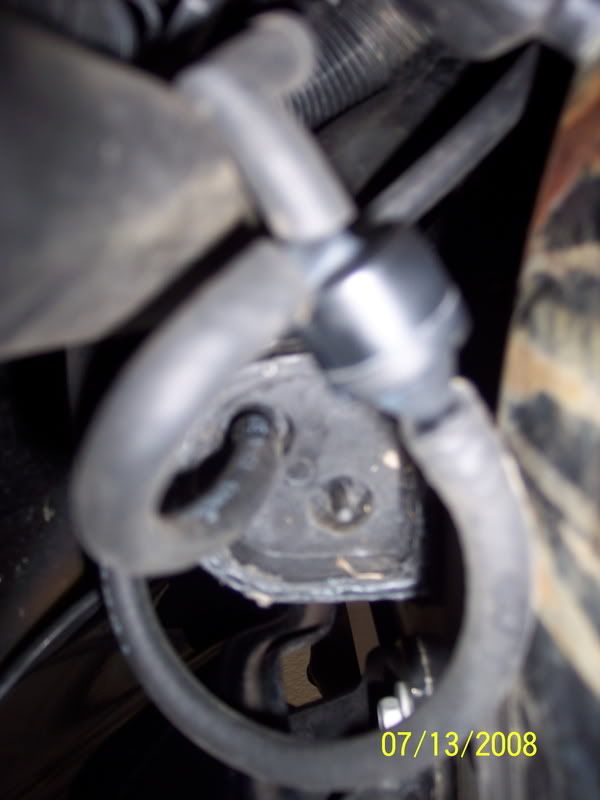
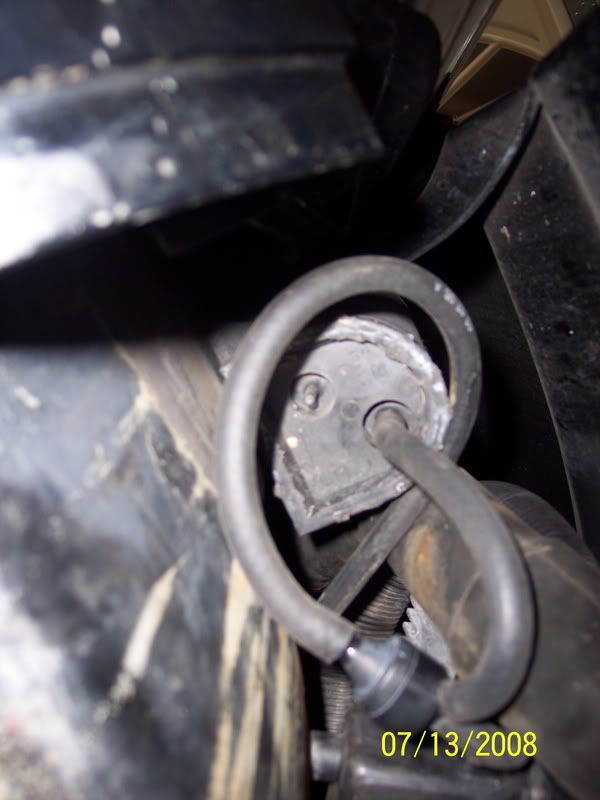
After it was all traced out and I found the end in the fender well - It ran into a oneway check valve: (Pic) The line on the bottom comes from the manifold and the other two - One goes to the canister right above and the other goes into the Vette's Cabin to the HVAC vacumm block.
With it pulled off:
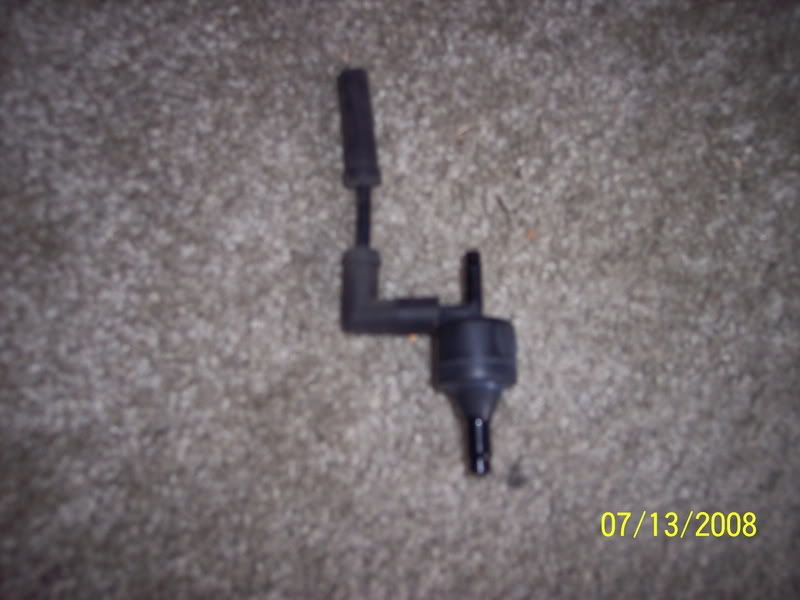
The bottom goes to the manifold (vacumm supply) the one off the side goes to the Canister above and the one in the middle (top) goes into the cabin area.
Next I re-routed the new vacumm line to the unit using 3/16" fuel/vacumm line: Plugged it into the Manifold and routed it behind the battery down to the canister area-
All tucked in:
Remember to re-plug in the MAP sensor
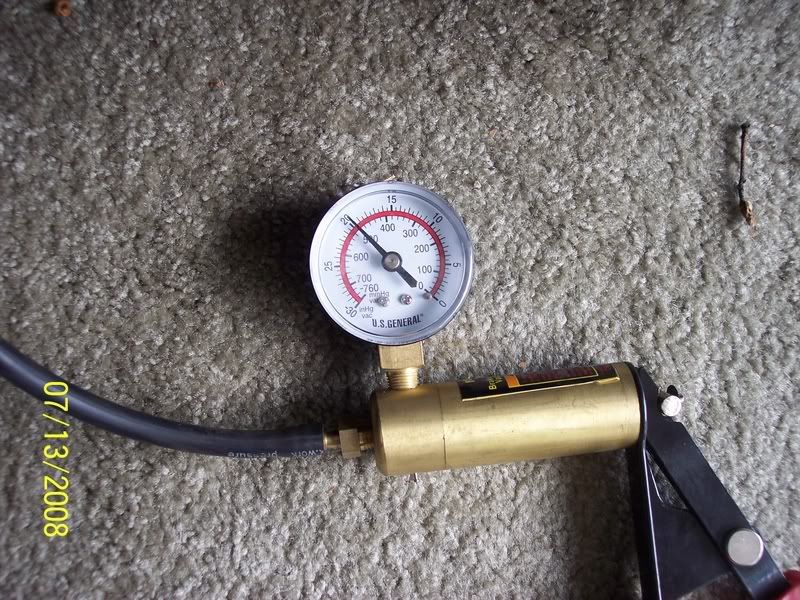
Next I went to the fender area and tested "ALL" the lines off the One-Way Vacumm Check Valve (Using my mighty Vac): Tested to 20 PSI, the only one that did not hold was the direct line to the manifold:
I went ahead and replaced the small 90* vacumm line to the canister for a just in case since it was easy enough(You never know) :
Now After that was done I went into the Vette and removed the floor mat, the panel covering the BCM (Computer) and the upper kick panel - now make sure you pop the foot well light out of the upper panel so you can remove the whole thing and have a free open area to work (YEAH! Like there is a lot of room anyway - all twisted on my back crunched in that little area- Stinking crazy! )
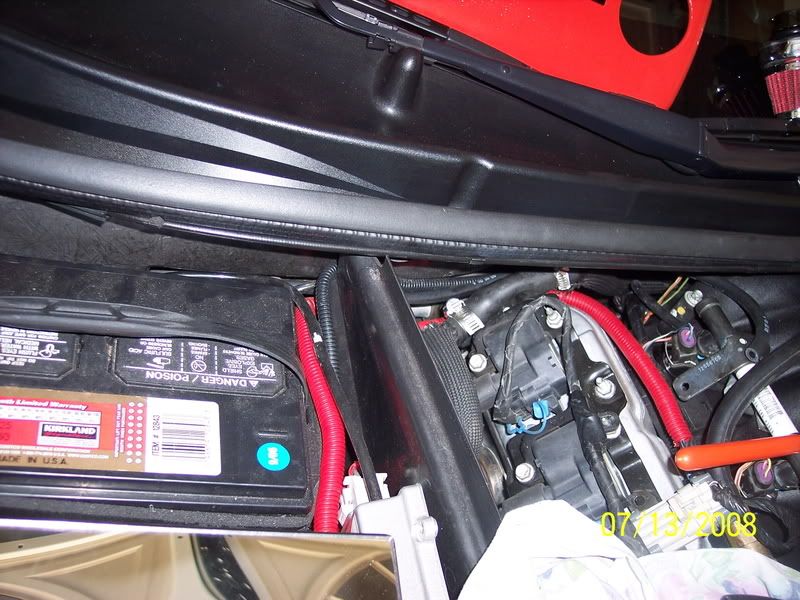
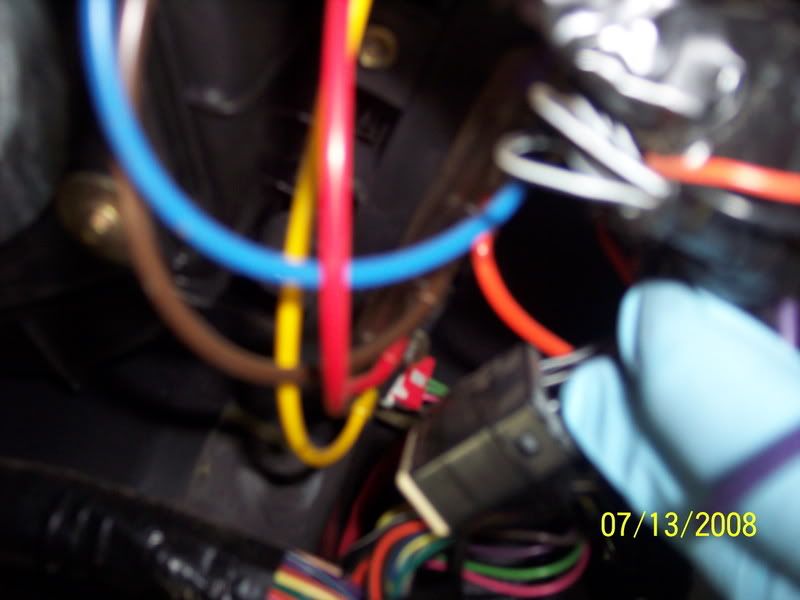
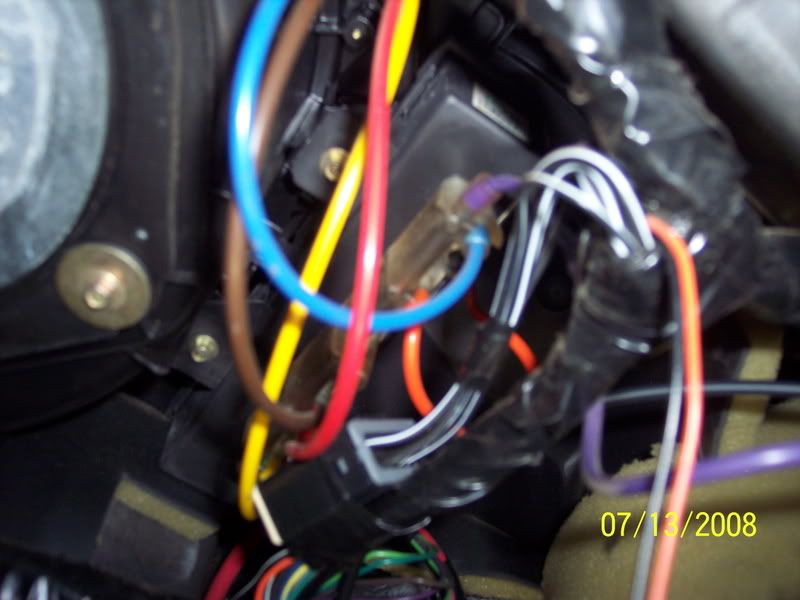
Here is a shot of the line coming into the cabin area from the fender:
They are kinda hard to see but they are the two (One from the manifold and one from the check valve to the cabin) there in the back ground right above the PCM:
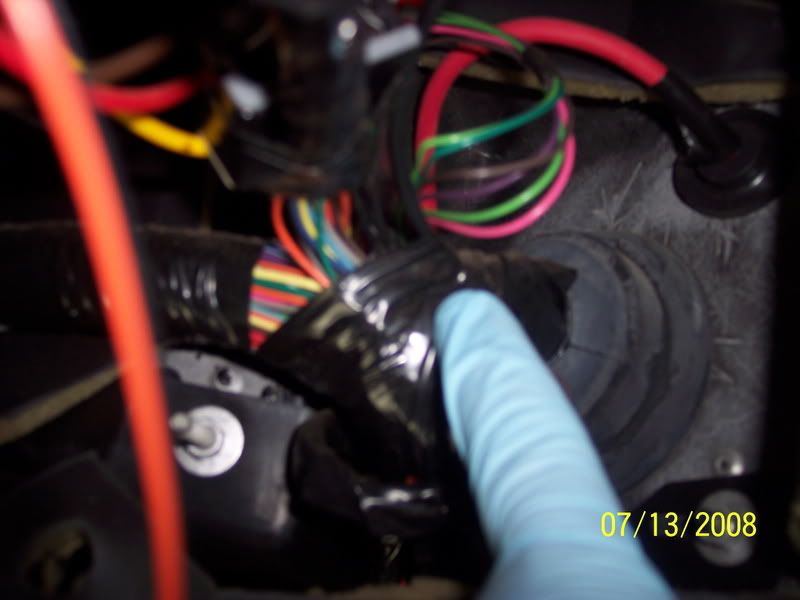
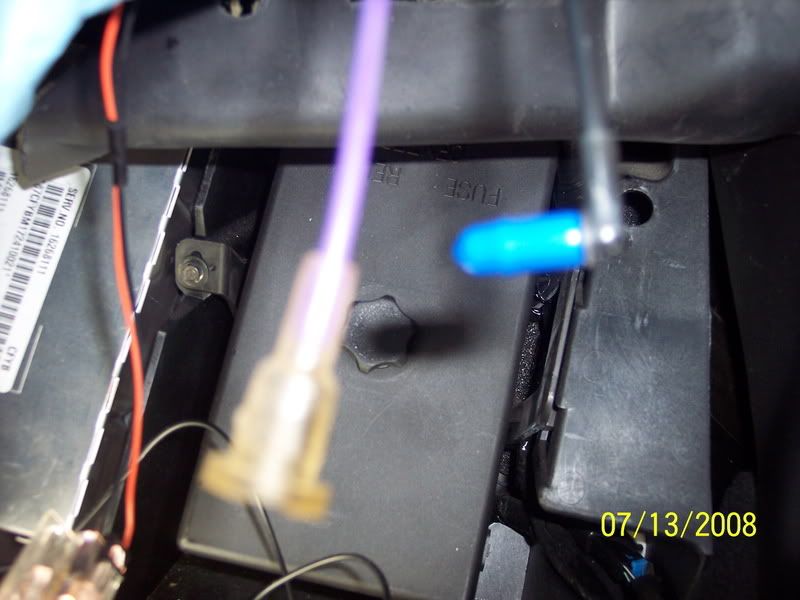
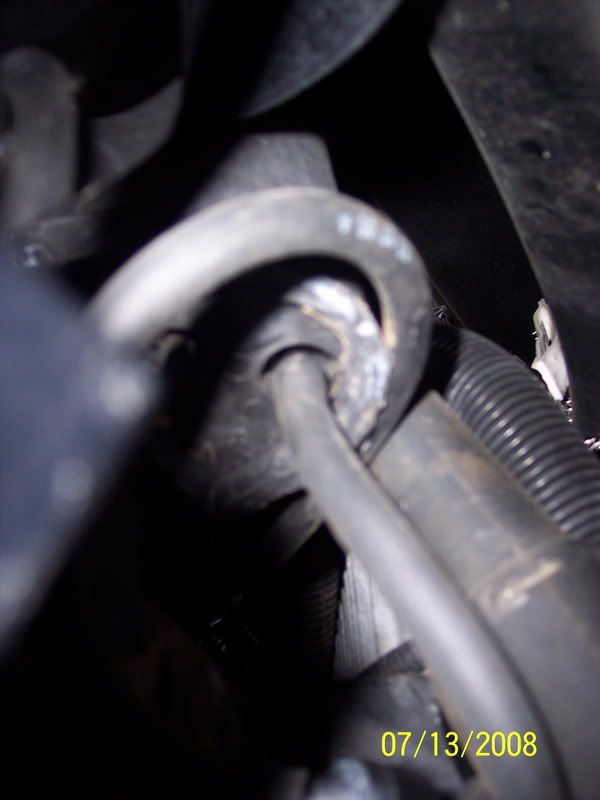
Now I tested the line from the fender to the cabin, here is a shot inside the Vette - The Black plastic line from the One-Way Check Valve couples into a "PURPLE" Line : As seen in pics
Black plastic supply line: Seen at finger point
Pulled down a little to see the coupler: Black into Purple
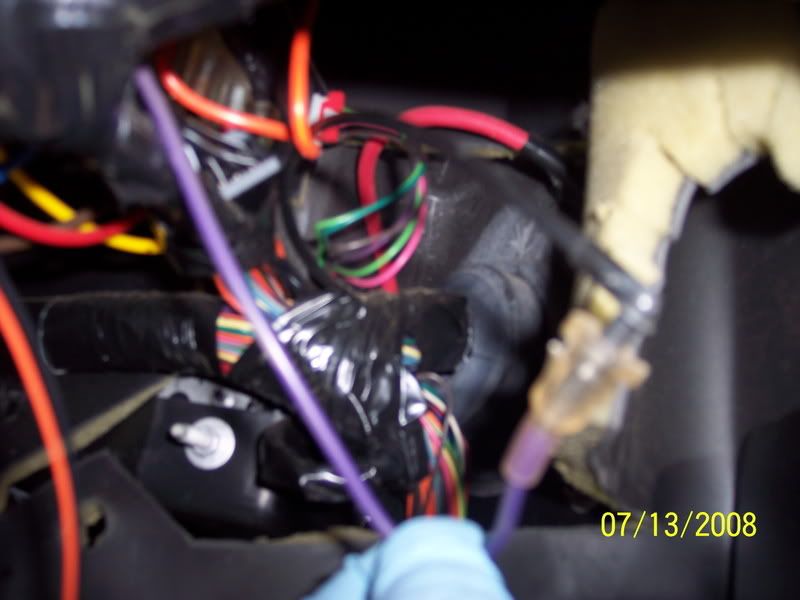
A few pics of all the pretty colored vacumm lines from the vacumm block: (And to think I was getting no vacumm to this bad boy )
)
Next I pulled the Black to Purple Couple apart for testing and capped it off: Held very good at 20 PSI of vacuum for a sustained period of time:
I also tested the vacumm block and it held too
I was glad the supply line was good because I did not want to punch a hole in the firewall to install a 3/16" vacumm line, So I was able to use the factory one.
Since it was good at this point I buttoned up the inside and put it all back together - even the floor mat - no really I did!
Now back outside to the fender area where I re-assembled the One-Way Check Valve: Here are a few pics installed
At this point you can put everything back to factory - the fender screw and the panel screws and snug them all down - Lower the Vette back on the ground and make sure nothing was left off and no extra parts!
AGAIN: Make sure you clipped the MAP sensor wire back in - because you needed to pull it off for easy access to the vacumm fitting on the back of the manifold - You did put it back on right!
Well now it is time for the test:
Fire up - Turn on AC - Try different Modes - ALL WORKS GREAT - It's a cold party in here
This is awesome I can actually feel it on my face (Well after all the dust blast hit me in the face)
Now for the test drive - got to take my daughter to the bowling alley -OKAY let's go ! (I'll just test it out Right?)
Dude! I used to have to put it on FULL blast because it would come out of all the vents and now I had it on the third bar and had to actually turn it down to the first on the way back!
It's fixed - SWEEEEEEEEEEEEEET!
I hope all can benefit by this and if anyone ever has any questions feel free to call me 661-406-7516 (Cell also listed in my sig )
Sorry if it is a long post - But I'm happy and now I can drive a 639 RWHP Vette freezing inside when it is 112* outside all the way to the sunset!
Thanks,Matt
My photo's are public, here is the link: everything is pretty much shot in order -
http://s83.photobucket.com/user/madm...?sort=3&page=1
Thanks,Matt
661-406-7516 (call or text if needed)
Thanks,Matt
661-406-7516 (call or text if needed)
I had air coming out of all vents on the Ac or Heat.
It was suggested that it is the vacumm supply line coming from the back of the manifold that is the culprit - Because Battery Acid Leaks on it and it burns through.
Well this is what happened or perhaps just it was rubbing and rubbed through thus allowing "NO" vacumm to get to the HVAC Vacumm manifold. (It did not have any Acid residue on it at all).
This vacumm line is "HARD" plastic and not easy to locate WHY? because it is within the wire loom going down to the area behind the passenger front wheel that goes to the PCM.
To Begin:
I had to jack up the front end of the Vette and turn the wheel all the way to the left, so I could remove the panel to access the area by the PCM and Vacumm junction One Way Check Valve.
You "WILL" need to take all the 7mm nuts off the panel (The ones underneath too) AND the last one for the fender on the bottom furthest toward the rear of the Vette right next to the door!
This is because you will need to pull a little on the fender panel there to help see and work on the vacumm junction. Here is the culprit fully pulled out: I tested it by capping the end after I removed it from the back of the manifold, it held "NO" vacumm at all- I mean I could blow through it and inhale through the line even though it was capped off on one end!
Damaged area:
It is not hard to get your hand behind the manifold with the Valve cover/coil covers off , plus make sure you unclip the MAP sensor it makes it a little easier too get your hand on the vacumm line- I pulled the rubber end of the line off the fitting in the back (there are only two fittings on the back for vacumm) One for the Brake BOOSTER and one for the HVAC Unit
Here is a couple os shots of the back of the manifold and what you will be looking and feeling for:
After it was all traced out and I found the end in the fender well - It ran into a oneway check valve: (Pic) The line on the bottom comes from the manifold and the other two - One goes to the canister right above and the other goes into the Vette's Cabin to the HVAC vacumm block.
With it pulled off:
The bottom goes to the manifold (vacumm supply) the one off the side goes to the Canister above and the one in the middle (top) goes into the cabin area.
Next I re-routed the new vacumm line to the unit using 3/16" fuel/vacumm line: Plugged it into the Manifold and routed it behind the battery down to the canister area-
All tucked in:
Remember to re-plug in the MAP sensor
Next I went to the fender area and tested "ALL" the lines off the One-Way Vacumm Check Valve (Using my mighty Vac): Tested to 20 PSI, the only one that did not hold was the direct line to the manifold:
I went ahead and replaced the small 90* vacumm line to the canister for a just in case since it was easy enough(You never know) :
Now After that was done I went into the Vette and removed the floor mat, the panel covering the BCM (Computer) and the upper kick panel - now make sure you pop the foot well light out of the upper panel so you can remove the whole thing and have a free open area to work (YEAH! Like there is a lot of room anyway - all twisted on my back crunched in that little area- Stinking crazy! )
Here is a shot of the line coming into the cabin area from the fender:
They are kinda hard to see but they are the two (One from the manifold and one from the check valve to the cabin) there in the back ground right above the PCM:
Now I tested the line from the fender to the cabin, here is a shot inside the Vette - The Black plastic line from the One-Way Check Valve couples into a "PURPLE" Line : As seen in pics
Black plastic supply line: Seen at finger point
Pulled down a little to see the coupler: Black into Purple
A few pics of all the pretty colored vacumm lines from the vacumm block: (And to think I was getting no vacumm to this bad boy
)Next I pulled the Black to Purple Couple apart for testing and capped it off: Held very good at 20 PSI of vacuum for a sustained period of time:
I also tested the vacumm block and it held too
I was glad the supply line was good because I did not want to punch a hole in the firewall to install a 3/16" vacumm line, So I was able to use the factory one.
Since it was good at this point I buttoned up the inside and put it all back together - even the floor mat - no really I did!
Now back outside to the fender area where I re-assembled the One-Way Check Valve: Here are a few pics installed
At this point you can put everything back to factory - the fender screw and the panel screws and snug them all down - Lower the Vette back on the ground and make sure nothing was left off and no extra parts!
AGAIN: Make sure you clipped the MAP sensor wire back in - because you needed to pull it off for easy access to the vacumm fitting on the back of the manifold - You did put it back on right!
Well now it is time for the test:
Fire up - Turn on AC - Try different Modes - ALL WORKS GREAT - It's a cold party in here
This is awesome I can actually feel it on my face (Well after all the dust blast hit me in the face)
Now for the test drive - got to take my daughter to the bowling alley -OKAY let's go ! (I'll just test it out Right?)
Dude! I used to have to put it on FULL blast because it would come out of all the vents and now I had it on the third bar and had to actually turn it down to the first on the way back!
It's fixed - SWEEEEEEEEEEEEEET!
I hope all can benefit by this and if anyone ever has any questions feel free to call me 661-406-7516 (Cell also listed in my sig )
Sorry if it is a long post - But I'm happy and now I can drive a 639 RWHP Vette freezing inside when it is 112* outside
all the way to the sunset!Thanks,Matt
Last edited by madmatt9471; 08-01-2017 at 11:15 PM. Reason: Add Manifold Picture / Back/ MAP Sensor

The following 4 users liked this post by madmatt9471:
07-14-2008, 09:32 PM
#2
Team Owner
Thread Starter
TTT for ones who might encounter this problem
Others have responded on my initial question thread with the link to here
So thanks for the reply's
Thanks,Matt
Others have responded on my initial question thread with the link to here
So thanks for the reply's
Thanks,Matt
07-15-2008, 08:23 PM
#5
Team Owner
Thread Starter
03-09-2009, 11:30 PM
#6
Team Owner
Thread Starter
TTT for others and the fella who needed it!
Thanks,Matt
Thanks,Matt
 04-13-2009, 10:25 PM
#8
Intermediate


Thanks very much. My problem turned out to be a bad check valve (cracked) and the line going from the check valve into the cabin. Thanks to your clear write up I was able to diagnose and fix pretty easily.
Greg
Greg
The following users liked this post:
03z06u (07-08-2018)
04-13-2009, 10:42 PM
#9
Team Owner
Thread Starter
Anyway I can help I will as the rest of us do
Thanks,Matt


 04-15-2009, 03:44 PM
#13
Tech Contributor

 04-15-2009, 11:52 PM
#15
Team Owner
Thread Starter

I don't even know, but it might of been around the time of my H/C swap which was @ 83,000 miles

Anyone can call if they need to
Thanks,matt
04-16-2009, 12:42 AM
#16
Team Owner
I had air coming out of all vents on the Ac or Heat.
It was suggested that it is the vacumm supply line coming from the back of the manifold that is the culprit - Because Battery Acid Leaks on it and it burns through.
Well this is what happened or perhaps just it was rubbing and rubbed through thus allowing "NO" vacumm to get to the HVAC Vacumm manifold. (It did not have any Acid residue on it at all).
This vacumm line is "HARD" plastic and not easy to locate WHY? because it is within the wire loom going down to the area behind the passenger front wheel that goes to the PCM............
Damaged area:
............
It was suggested that it is the vacumm supply line coming from the back of the manifold that is the culprit - Because Battery Acid Leaks on it and it burns through.
Well this is what happened or perhaps just it was rubbing and rubbed through thus allowing "NO" vacumm to get to the HVAC Vacumm manifold. (It did not have any Acid residue on it at all).
This vacumm line is "HARD" plastic and not easy to locate WHY? because it is within the wire loom going down to the area behind the passenger front wheel that goes to the PCM............
Damaged area:
............ From the looks of the hole in that nylon line I would say it was either caused by acid or maybe a burn through of some sort.I thought of another way to replace the line. Buy some new black nylon line (in the Vacu-Tite packages at the parts store), tape one end securely to the old line and using the old line, pull the new line through the wire loom. I would think pulling from underneath from "top to bottom" so-to-speak, would be best since the old line damage is usually at or near that area underneath the battery and you wouldn't want the old line to snap from tugging on it. Worst case scenario would be to go with the all rubber hose like you. Either way, you got her fixed.

Oh, and btw it vacuum not "vacumm".
04-16-2009, 06:35 AM
#17
Team Owner
Thread Starter
Nice job Matt. From the looks of the hole in that nylon line I would say it was either caused by acid or maybe a burn through of some sort.
I thought of another way to replace the line. Buy some new black nylon line (in the Vacu-Tite packages at the parts store), tape one end securely to the old line and using the old line, pull the new line through the wire loom. I would think pulling from underneath from "top to bottom" so-to-speak, would be best since the old line damage is usually at or near that area underneath the battery and you wouldn't want the old line to snap from tugging on it. Worst case scenario would be to go with the all rubber hose like you. Either way, you got her fixed.
Oh, and btw it vacuum not "vacumm".
From the looks of the hole in that nylon line I would say it was either caused by acid or maybe a burn through of some sort.I thought of another way to replace the line. Buy some new black nylon line (in the Vacu-Tite packages at the parts store), tape one end securely to the old line and using the old line, pull the new line through the wire loom. I would think pulling from underneath from "top to bottom" so-to-speak, would be best since the old line damage is usually at or near that area underneath the battery and you wouldn't want the old line to snap from tugging on it. Worst case scenario would be to go with the all rubber hose like you. Either way, you got her fixed.
Oh, and btw it vacuum not "vacumm".
That certainly would be the good old college try
Let us know how it works out
Thanks,Matt
04-16-2009, 07:18 AM
#18
Team Owner
09-25-2009, 07:23 AM
#19
Instructor
Member Since: Sep 2009
Location: Richmond Virginia
Posts: 127
Likes: 0
Received 0 Likes
on
0 Posts
09-25-2009, 07:49 AM
#20


This is great ...going to rip into this this weekend !! Thanks for sharring your knowledge and time to post this !!!! Like I said before I'm a brand new owner and also a first time vette owner ,I have lots to learn ... http://cgi.ebay.com/ebaymotors/ws/eB...NA:MOTORS:1123 that is a link to my new found baby ...... I think I did well and expect to work through a few problems ... with the help from this great site I won't feel alone ....Thanks again !!!
Welcome! There will be some issues to work out now and some will come up. You will learn more about the car as you fix things. I don't think there is anything that could happen that you couldn't find out about here and get help with. This fix costs $6.00 for a piece of rubber vacuum hose.
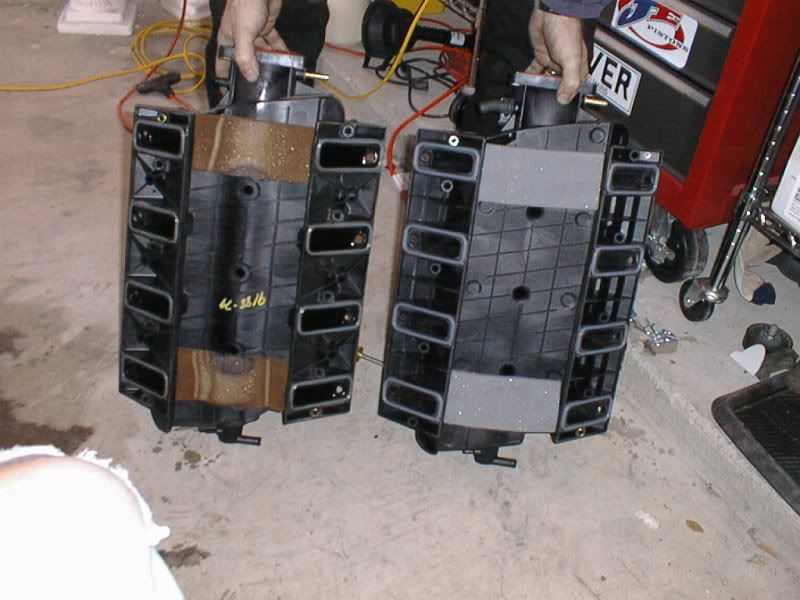
My tip for the vacuum line fix would be this. You need to replace the line from the back of the intake manifold to the bottom of the vacuum manifold in the passenger front fender. I would do a couple things to conceptualize and visualize the issue then just change the tube. Remove the battery. Remove the right front tire after putting the car securely on blocks. Remove the panel on the passenger inside fender. Look behind the intake manifold for a small 1/8 inch hard tube going toward the wiring harness in back. You can splice this into a 1/8 inside diameter rubber tube. (Clip off a piece of the hard small tube from the car and bring that to the store and buy 6 feet of the tubing you need for replacement.) Clip off the tube coming from the manifold with 6 inches or so left and the connector left in the manifold. You will slide the new rubber vacuum hose over this end and put a zip tie on it to hold it on. Run the rubber hose behind where the battery was down into the bottom of the passenger fender. From the bottom inside look for a vacuum hose, the other end of the stiff 1/8 inch hose you spliced. It is the one on the bottom of all the ones going into the manifold. I posted a picture of this in the past so you can see the tube that needs to be spliced, search.. You need to push aside the rubber passenger side udder to see it. Clip the stiff tube with an inch or so still in the manifold. Push the other end of the rubber vacuum line over it (It is tight in there, may need to push it on with two needle nose pliers.) Before putting the line on cut it to size with a little slack but not too much left. Be sure to put a zip tie around the rubber hose on this side too to hold it on for sure, the fit should be snug but need to be sure it is on for good. With both ends spliced with the rubber vacuum line over the cut ends of the stiff 1/8 inch lines you are done. Just put the panel on, etc.. Don't for get to clean that passenger side udder while you have it open and right in front of you.

Here is that pic of the manifold and the tube to splice.
Wow longer than I thought to write up.
Always search first then feel free to ask questions. Looks like a nice car!