
Extremely Long with Pics: 00 FRC Corvette Clutch & Shock Replacement
 06-23-2009, 12:33 PM
#1
Race Director


Thread Starter

There have been a lot of questions about replacing the clutch in an MN6 equipped Vette. There have been some good suggestions and tips posted here but I thought I would post my experience with lots of pictures and let all know what went well and what didn�t. The best write up I found here was by Dope and I used that as a guide for my project. I did run into a few things that weren�t covered by his document so I hope my experience will help others.
Many people have asked how long it takes to do the job. For the type A folks my method may not be for you. This car is my daily driver but I do have the option of another vehicle to drive while this project was on going. Therefore I was taking my time and planned on the car to be down for several weeks. You will see steps taken and some backtracking because I over planned or didn�t follow Dope�s advice to the letter. Also I am incorporating several other jobs into this one so it is a bit more than just a clutch replacement. So here we go.
First step is the planning and defining the scope of the job. After the dealer quoted me a very high price for the job I decided to tackle it myself and save some bucks. The car has around 130K miles and I thought as a preventative measure it would be a good time to change the clutch. It wasn�t slipping but there was an occasional chatter when shifting hard and it just didn�t feel right to me. I don�t race it so I didn�t expect anything unusual. I had planned that with the clutch job to replace the shocks, check parking brake (never really worked), CAGS eliminator, ground connections, error code for ABS/Traction control, tires, spark plugs and wires, and a few other things that have been nagging me. With that decided, it was time to order parts.
There are many great vendors here and some have specials from time to time that will help with the cost of the job. For no particular reason I ordered the clutch kit, slave cylinder, and shocks from Corvette Central. At the time of ordering their price was about even with other venders but their price on the Bilstien shocks was a tad lower and shipping wasn�t bad to the left coast. LAPD got the honors for the remote bleeder for the slave because they are close by and I could get it fast. There was another forum vendor that had one but he was back east somewhere and had no web page or where to find him if something went wrong with shipping, sorry buddy. At least LAPD is right up the freeway from me so that was my reasoning. With the parts now in hand it was time to get dirty.
Step 1. Getting the car up in the air.
We used Rhino ramps to raise front of the car.
Once it was up on the ramps it was time to disconnect the battery and the intake to the throttle body.
Next was to raise the rear. Placing the floor jack under the center of the rear cross member, carefully raise the rear until it clears the jack stands. This was done in several steps. First with shorter jacks.
Then blocking the floor jack raised it higher for taller jacks.
Note! This is one of those steps I had taken because of the front shock replacement but wasn�t necessary at this point. Oh well live and learn.
We then blocked the floor jack and raised the front and support on stands.
With the car now stable on jacks it was time to remove the wheels.
Step 2. Disassembly begins.
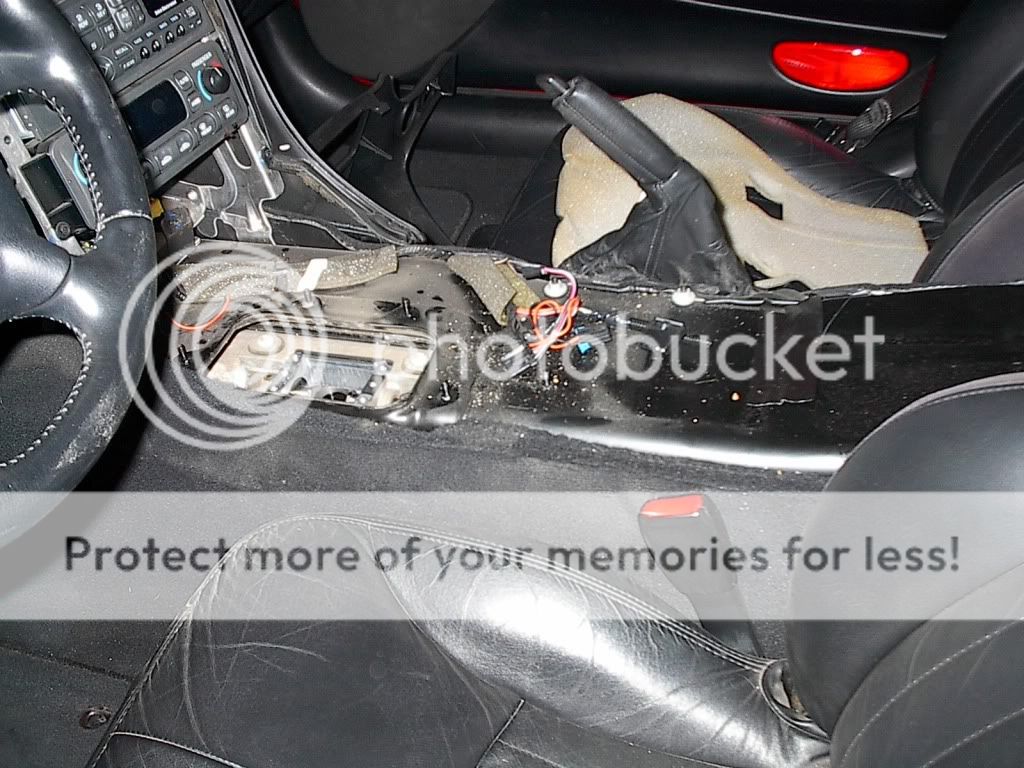
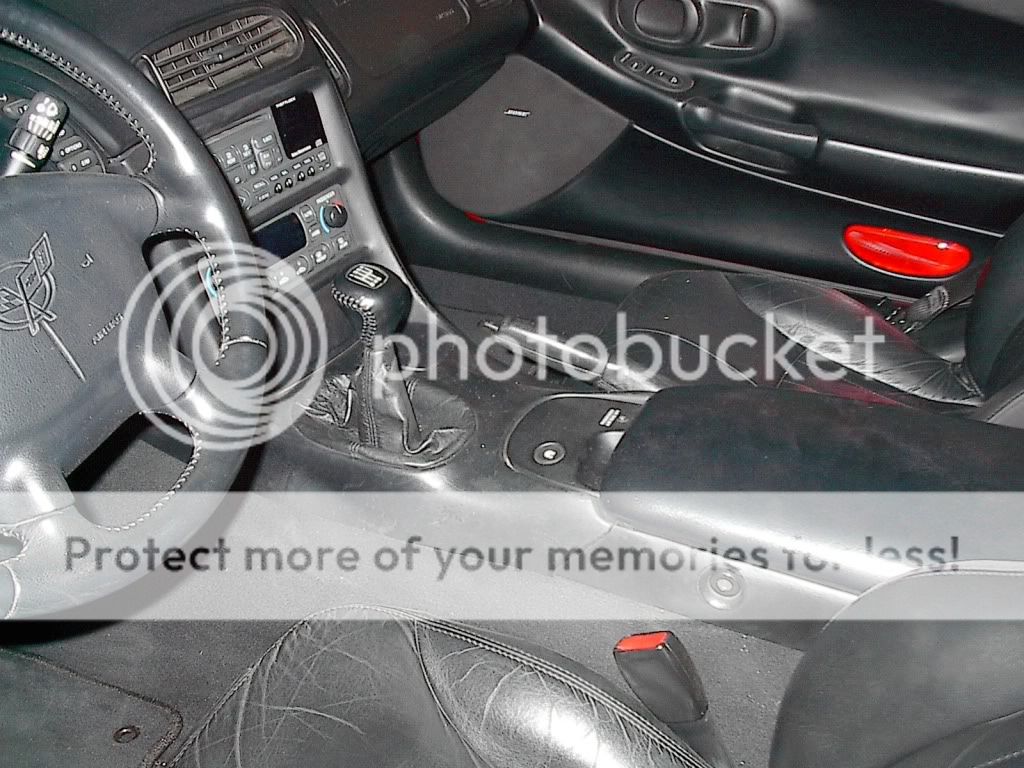
The shifter needs to be removed before anything else can be done. Corvette Fever magazine had a great article on shifter replacement with lots of pictures that show all the hidden screws to remove the console. There are two 10mm nuts located at the rear inside the console compartment under little covers. Using a small screwdriver pop the covers off and remove bolts. Now as a suggestion that will really help in reassembly, use lots of baggies and place all related fasteners in the bags. Then use a sharpie to label the bags and set aside. Now carefully pry up the traction control panel and disconnect the wires and set aside. There will be 2 more 10mm nuts located under there. Next will be to remove the ashtray and remove 2 torx T15 screws located behind it. Last there will be one more torx T15 screw located behind the AC sensor cover that is located next to the ignition switch.
Now the shifter **** can be removed. NOTE: At this point make sure the shifter is in neutral! Carefully pry up the gear indicator plate on top of the **** with two small screw drivers. Using two screwdrivers carefully pry up on the **** retaining pin and remove. Now unscrew the ****. The �leather� boot is held in with plastic clips and come loose fairly easily so remove it and get it out of the way. Now carefully lift up the rear of the console and move backward while carefully removing the front part around AC/Radio. Make sure you disconnect the connector to the fuel door release button. Also make sure the accessory power plug is disconnected and the lighter plug disconnected from next to the ashtray. Once it is clear move it out of the way.
Now you can remove the sub boot from the shifter by removing the four 10mm nuts. Next remove the four shifter bolts and remove the shifter. Be careful and do not lose the plastic thingy on the end of the shifter! Now bag and tag all the parts and set aside.
Now we can move to the back of the car and start the �real� disassembly.
First thing here is to remove the rear calipers. Remove the two 15mm bolts that hold the caliper to the bracket. Remove caliper and as Dope suggests hang them on the heat shield for the fuel tank. Now he suggest leaving the brake pads in and zip tying them but mine fell out so I labeled them on the back with sharpie and bagged and tagged them.
Remove the caliper on the other side as well or you can complete one side of the car then move to the other side as I did. Less moving around.
Next remove the upper shock 13mm �hat� bolts. A long extension and an air ratchet make this a lot easier.
Repeat for the other side of the car.
This is where I decided to take a break, have a smoke, and then remove the exhaust H-pipe. Here is a tip: the day before disassembly get under the car and spray the exhaust bolts with WD-40. This will make them come apart easier. There are two 15mm bolts that hold the flange of the h-pipe to the rear exhaust on each side. Remove them and carefully separate the flanges. Now Dope suggest using bailing wire to tie the over axel pipes to a body screw located above them. Don�t be stupid like I was and skip this. TIE THE DARN THINGS OUT OF THE WAY! Trust me! Next move to the front and remove the after cat O2 sensor wires from their retaining clips on the side of the tunnel. Very important! Also follow the wires back to the sub-frame next to the engine and disconnect them if you can reach them. Next remove the 3 nuts holding the h-pipe to the manifold on each side. There are 2 hanger bolts near the front of the h-pipe to remove and 2 more near the rear that are suspended by springs. Remove those and slide the h-pipe out from under the car.
Now that the torque tunnel cover was exposed I decided it was a good time to remove it so I could see what was under there. Using my trusted Makida with a �� 8mm socket we removed the 36 tunnel cover bolts and bagged and tagged them. Now with the tunnel cover out of the way you should see this.
Note: you can see at this point the rear exhaust pipes are not tied up. DOH!
Being as how we are not in any big hurry to get this done we decided it was a good stopping point to call it a day and get cleaned up and have a brew.
Now it was time to return out attention to the rear suspension. Disconnect the anti-lock sensor wire on the back of the hub.
Next disconnect the parking brake cable from the lever going in to the brakes. There are three tabs that need to be pushed in to remove it from the bracket. They are a booger but I used needle nose pliers and was able to get them loose.
Next is the 15mm upper A-frame bolts.
Now is the time to yank on the upper ball joint and pull the half shafts out of the differential.
I wondered why this was necessary until I got into this. There are two brake lines (one on each side) that run under the half-shaft that remain with the car when the rear is removed. Be sure and watch those suckers during a later step.
Now is a good time to disconnect any sensor connectors on the transmission and differential. Don�t forget the one that is on top of the differential and the reverse lock out one on top of the trans. I missed the trans one and had to do a repair on reassembly. Remove the push pins holding the harness to the cross member. I used a door panel removal tool to ease them out. As it was I ended up breaking a couple. Do another look around and make sure everything is disconnected and you are ready to move on to positioning the transmission jack.
I bought a transmission jack adaptor from Harbor Freight for a floor jack.
Because it wasn�t an exact fit for my jack and I had to modify it a bit. The J bolts that clamp the adaptor to the floor jack were in the wrong place so I had to drill new holes in the plate to move them.
Also the bend of the J bolts had the wrong radius to fit the bar of my jack so I had to widen them. Using a handle from a bottle jack and a vice I was able to make them the right size. Worked like a charm.
Here is where I screwed up again and it took more time to do the job than necessary. Follow along and you will see why.
Next we positioned the jack under the transmission and secured it.
Setback Number 1: Now we could measure the height of the jack and the top of the differential and compare with the trunk well to see if we had enough clearance to remove the drive train. Well we didn�t. The back of the car had to go higher. Not liking where the front stands were placed and concerned about the balance of the car we decided it would be a good idea to put the front wheels back on the car and set them on the Rhino ramps as a safety measure. Then we raised the rear of the car an additional 4� to give us the clearance we needed.
Setback Number 2: We then re-secured the jack to the transmission and proceeded to remove the rear suspension carriage nuts. TIP: Spray the crap out of the bolts with WD-40 the day before and it will make your life easier. As I was unbolting the carriage I noticed that it was tipping to the rear of the car. Not good. So I tightened the bolts down and lowered the jack and placed it under the cross member. This is the correct balance point. Now we were faced with the additional issue of how to secure the unit to the jack. The easiest way was to wrap a chain around the cross member and the jack adaptor making sure we didn�t pinch any harness or anything in the process. We tightened the chain with a couple of heavy duty turnbuckles. It was nice and solid.
Also note that in this picture you can see the left side brake line that must clear the half shafts.
Now we could unbolt the carriage nuts and lower away. Using a �� breaker bar, 10� extension, and a 21mm deep socket I loosened the carriage bolts. Then using a standard �� ratchet removed the bolts. DO NOT USE AN IMPACT WRENCH ON THESE OR DAMAGE WILL RESULD TO THE BOLT ANCHORS INSIDE THE CAR. I started to use the air ratchet but decided it may have too much torque also. At this point you cannot have enough eyes on everything!!!! Watch the brake lines, wiring harness, shocks, and further forward watch the torque tube and shifter as the drive train is lowered. Make sure the shifter clears the brake and fuel lines that line the tunnel. Note: mine did hit and bent them a little but no serious damage. I did have to use a large screwdriver to push them out of the way.
Once the top of the differential has been lowered just below the lowest point of the trunk well, STOP and hold that position. I used and old RV trailer stabilizing jack to hold the position and prevent any bleed down of the floor jack. Now is a great time to get out from under the car and breathe a sigh of relief that nothing major went wrong.
Now snub out the smoke and crawl back under the car and unhook the main harness from the holders on top of the torque tube. There is a push pin on the front most one and the rest just push off to the left side. Another Suggestion from Dope: Now is a good time to measure the distance from the bottom of the cross member to the floor and note the measurement. Likewise pick a spot on the front of the torque tube mark a line and measure from that line to the floor. I used a sharpie to draw a line and write the measurement on the side of the tube. This will help when putting the drive train back in to get the correct angle for alignment purposes.
Now here comes the real pain in the neck. The hydraulic line that goes from the clutch master to the slave has a quick disconnect. Actually �quick disconnect� is a misnomer because there is nothing quick or disconnecting about it. Someone said this was a Ford design AC connector and I believe it. The clutch kit came with a funky but useless plastic tool that is supposed to be used to push the white plastic collar into the female part of the connector to release the little springs that hold the halves together. RIGHT! That didn�t work. Tried the 2 screwdriver method and that didn�t work either. After 2 hours of messing with this sucker we decided to call it a day and go to the NAPA and buy their tool for this.
That didn�t work either! Another 2 hours the following morning we decided take action and get the project moving again. I took bolt cutters to the line on the slave side. I�ll deal with that piece of crap later if I have to pull the master and put it on the bench to work with it.
With that done it was time to address the torque tube bolts. I used another trailer stand with a �� piece of plywood under the oil pan to support the rear of the engine. I then took an old creeper and a car stand and some blocks to catch the torque tube once we began to move the drive train back. Using an air ratchet, several extensions, universal joint with a 13mm socket remove the 5 torque tube bolts. The one on the top left has a tab on it that holds the main wire harness and it is a booger to get to. Using a large screwdriver, gently separate the tube from the bell housing. Have your helpers start pulling the carriage to the rear of the car WHILE WATCHING EVERYTHING AGAIN! This is where we found that last sensor connection on top of the differential (still missed the one on the trans). Ease the torque tube back until the input shaft clears the clutch assembly and bell housing and let it rest on the car jack. Now have your helpers lower the transmission jack the rest of the way while you lower the torque tube down the rest of the way. It is not that heavy and now with everything balanced it was easy to do. I used a large block of wood and the creeper so the whole unit can be moved around.
Now you can either remove the drive train from under the car, if you are going to do additional work or do a cleanup, or you can just move it back enough to get it out of the way enough to work on the clutch.
Now the 10mm and 13mm bolts from the clutch inspection cover can be removed. When that is done you will be rewarded with this view.
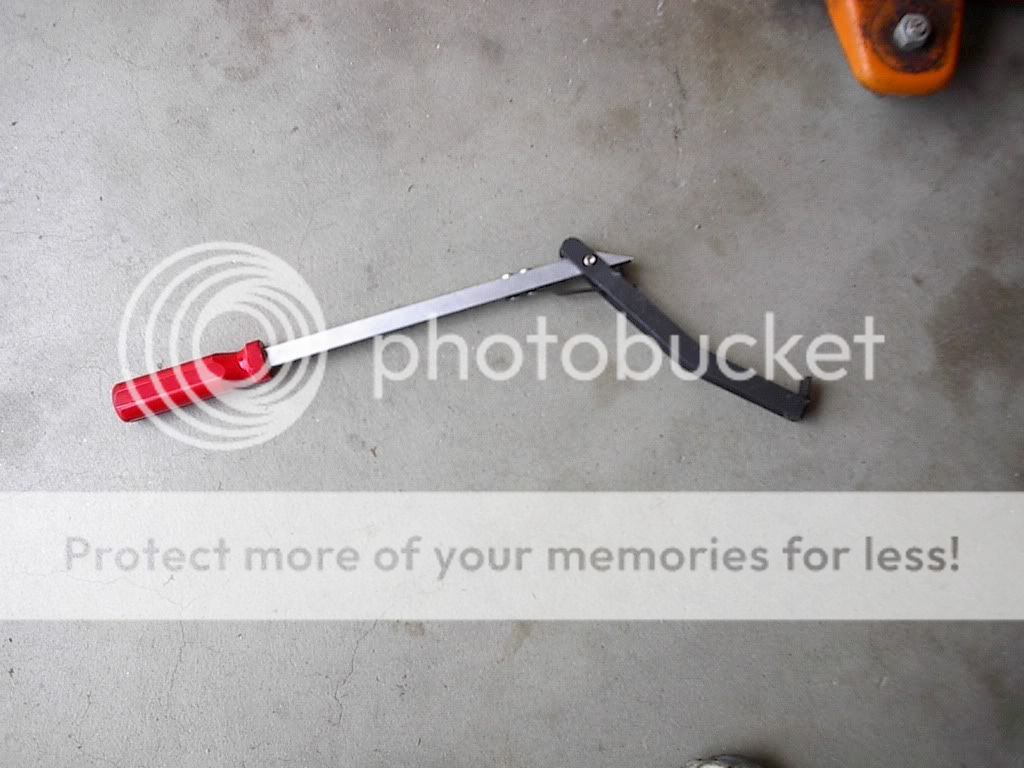
Now some suggest removing the bell housing but we opted not to. There is plenty of room to work if you have the right tools. One tool that we got from NAPA was a fly wheel holder/turner. My advice is to GET IT! It will make it easier to turn over the engine as you are removing/installing the bolts.
Next is to remove the 6 13mm pressure plate bolts. Tip: put the clutch alignment tool in to keep everything from dropping on your head when the bolts are removed. Now I loosened them in stages while turning the flywheel. This is where a helper will be handy to turn the flywheel. Have you helper hang on to the pressure plate while you remove the last bolt. Now remove the alignment tool and slide the disk out then the pressure plate. NOTE: you kind of have to maneuver it around the starter housing nose to get it out.
Here is the Clutch disk:
Doesn�t look too bad after 130K miles.
Here is the pressure plate.
I can see why there was an occasional chatter.
And the Fly Wheel.
Some signs of scoring here also.
Mark the fly wheel�s position in relation to the crank so the new one will go in the same way. Also note that there is an additional hole in the flywheel and crank that doesn�t have a bolt. If you are going to use a stock type of flywheel, this will be the alignment point. Now you can remove the 6 15mm bolts holding the fly wheel. Again having your helper hold it with the special tool makes it easy. Now the fly wheel can be removed.
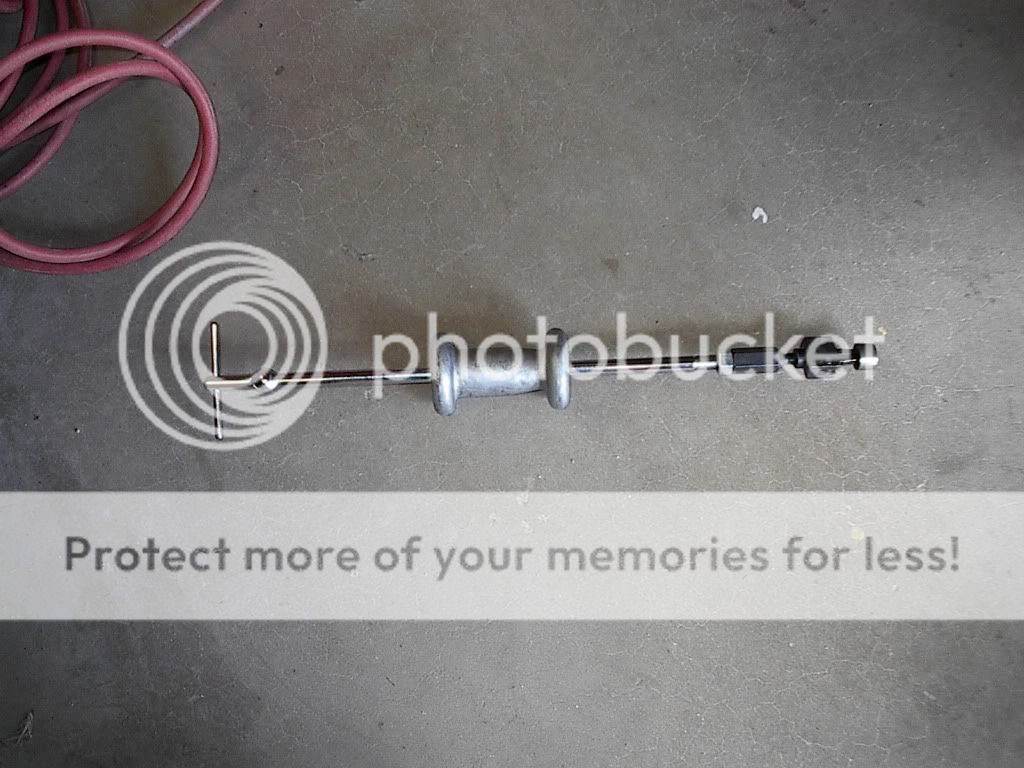
The next step is removing the pilot bearing. I bought a nifty puller from Harbor Freight that had 3 jaws but it didn�t fit the pilot bearing. So it was off to Auto Zone to �rent� a puller and slide hammer. They charged a $48 deposit fully refundable with the return of the tool. In other words it cost nothing but the gas to drive there and get the tool and then return it.
Here are the tool numbers: Slide hammer OEM#27033 and puller 27059.
Using a couple of large crescent wrenches I tightened the puller to the bearing as tight as I could get it.
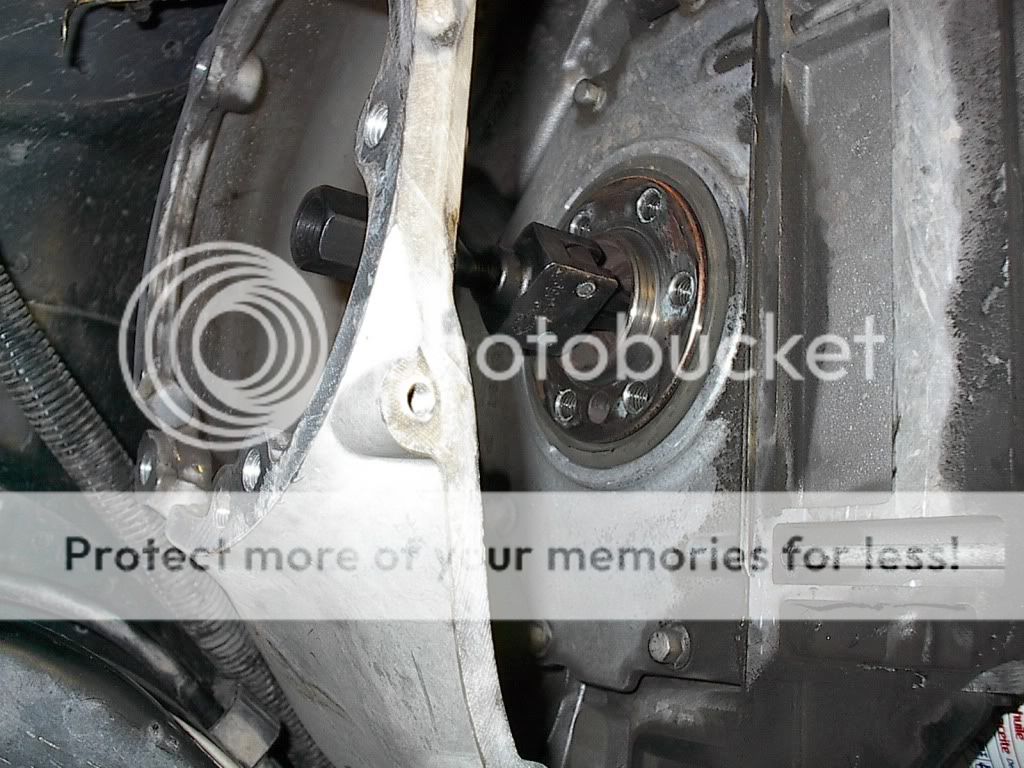
Then screwed in the slide hammer and four good whacks and the bearing came out, much easier than I expected.
Step 3 Clutch Installation:
Now take the new bearing and lightly coat it with lithium grease and using a socket the size of the bearing drive it in to the crank until it is flush. The shop manual says to put the flat side in but mine was flat side out so I put the new one in the same way. Once it is in place put some more grease on your little finger and work it into the bearing.
Now is the time to put in the new flywheel. Unless you are going to a non stock replacement clutch, I wouldn�t worry so much about balancing. The drilled balance holes should match up with the holes in the old flywheel. I had no additional weights. When I started the car it was running smooth.
Line it up on the crankshaft the same way the old one was and using blue Locktight on the threads and start the bolts. Here is where we recommend to RTFM (read the freakin� manual) and follow the torque pattern and specs or you will have trouble.
Do this in several stages. Have the helper hold the flywheel with the tool while you torque it down. Make the first pass at 15 FT lbs, Second pass at 37 ft lbs and the last pass at 74 ft lbs.
There are a couple of locator pins on the fly wheel. Look at the bolt holes on the pressure plate and note that the pinhole next to one bolt hole is to the right and on the opposite side it is on the left. Line up the pressure plate with the pins in the flywheel, place the clutch disk (noting flywheel side, its marked in fine print on the disk) into the pressure plate and position on the flywheel. Place the alignment tool through the clutch disk spines and into the pilot bearing to help hold stuff together. Install the bolts again reading the manual and torque them to specs. You will torque in stages again making sure the alignment tool is still centered and you can move it while applying torque. It is important to make sure the alignment is correct! Once it is torque down remove the alignment tool.
If you are replacing the slave and the throw-out bearing now is the time. I installed the remote bleeder on the slave. Next I removed the two bolts holding the old slave in the torque tube and removed slave. Place the new slave in the torque tube and tighten the bolts. The throw-out bearing was already installed on the new slave so I didn�t have to mess with it.
New clutch assembly in.
Now sit back and admire your work, have a brew, a smoke, and clean up calling it a day. I ain�t as young or a flexible as I used to be so I need my rest.
Step 4 Re-assembly:
Now would be a good time to clean off all of the road dirt and grime from the from the rear assembly. Roll the drive train out from under the car.
Cover the half shafts ends, the place on the differential where they go, and any other place that you don�t want to get contaminated with solvent or water. You can use Simple Green or I used a water based solvent to soak the greasy mess and let it sit for about a half an hour.
Using my pressure washer I rinsed the whole mess off. Now it is nice and clean. Using compressed air I dried it off.
If you are going to install new shocks, now is the time to put the rears in position. Previously I loosened the lower shock bolts so removing the old shocks is easy. Remove the �hats� from the old shocks and bolt them on to the new shocks using the new bushings and nuts provided.
Torque them to specs. Now place the shocks in position on the lower A-arm and for now finger tighten the bolts. We will torque them later after the drive train is back in the car.
http://i563.photobucket.com/albums/s...9/IM003375.jpg
Maneuver the drive train back under the car. Raise the front of the torque tube to the measurement we noted earlier. Now have your helper raise the transmission jack to the rear measurement. Have your helper push the drive train while you guide the input shaft into the clutch. Use patience here and it will go in. Also keep the flywheel tool handy in case any minor adjustments are needed. Once the splines are engaged, keep pushing the drive train in until its seated. Now here is a tip. Make sure the rear cross member is fairly level. This will help align the pins in the torque tube to engage in the bell housing. Also use a large C-clamp to help pull everything together. I did have a problem getting the pins lined up so I used a large screwdriver to rotate the torque tune while the helpers were lifting the �low side� of the cross member. With a pop the pins slid in to the holes. Using the C-clamp pull the torque tube forward until it is seated against the bell housing. Now start the bolts and torque them down to specs.
Don�t forget the upper left one will hold the tab on the harness. Whew! Reach up and make sure the main harness is back in the clips on top of the torque tube.
Setback Number 3: Now is a good time to reconnect all the sensors and stuff connected to the transmission and differential. As I was connecting I saw a pink and green wire coming out of the harness with no connector. DOH! After about an hour of looking through the shop manual it was discovered that this goes to the reverse lock out on top of the transmission. Found the connector still connected. Removed it and using a nifty McIntosh tool (a bent paperclip) was able to dissemble the connector and solder the wires back on. Re-assembled the connector and hope it works.
Now we can raise the drive assembly back into position. Again make sure you watch everything, brake lines, wire harness, fuel and brake lines in the tunnel, etc. The half shafts have to be moved around the brake lines so extra hands are good to have too. Once the carriage is back on the bolts put the 4 21mm nuts back on and torque to specs.
Now unchain the transmission jack and lower away. Remember to fasten all the harness holder clips and brake line clips to the carriage. Crawl out from under the car, get cleaned up, have a brew, and prepare for the final assembly.
Setback Number 4: If you could not get the �quick disconnect� disconnected and had to cut the line, you need to remove the clutch master cylinder. The manual says to remove the lower dash panel but I sent the wife under the dash to remove the clip holding the linkage to the pedal.

Next remove the two bolts holding the windshield washer reservoir and move it out of the way. Then remove the two plastic push pins holding the clutch fluid reservoir to the cowl. Now reach under the cowl and turn the master 1/4 turn counter clockwise and remove it from the car. Now you can place that �quick disconnect� in a vice and separate it. I know at this point it is tempting to throw that piece of crap as far as you can but the neighbors may not appreciate the broken window so refrain from doing this. Now replace the master back to the firewall secure the reservoir then send the wife back under the dash to reconnect the linkage. Feed the hydraulic line back down making sure to avoid the steering column and exhaust. Connect the quick disconnect. I used a large pair of channel lock pliers to snap it together. Leave the washer reservoir loose if you are replacing the front shocks. If not tighten the two bolts securing the reservoir to the fender.
Now rummage through the baggies and find the ones that are marked left rear suspension, shock, and caliper bolts. Place your floor jack under the real suspension lower ball joint and while guiding the half shafts back into the differential, raise the suspension so the upper A-frame bolts are aligned. Put in bolts and torque to specs. Secure the upper shock �hat� and then tighten the lower shock bolts to specs. Replace the caliper. You may have to push the piston back a bit to get it to clear the brake pads. I have a large C-clamp I use for this. Now secure the caliper to the brackets and torque to specs.
Connect the Anti-lock sensor and the parking brake cable.
Repeat for the other side.
Now is a great time to bleed the clutch. Fill the reservoir with new dot 3 brake fluid from a new sealed container then open the valve on the remote bleeder. You can let gravity do its job or you can use the vacuum pump or you can have someone press the pedal while you operate the valve. Now I was having issues getting the valve to close so I got a socket to fit the bleeder valve and cranked that sucker down. With that done have the assistant pump the clutch pedal a few more times until you feel resistance. Bleed again. NOTE: during the bleed process, keep checking the fluid level in the master so you don�t suck air. Check the clutch to make sure it is releasing. With the pedal pressed you should be able to rotate the clutch disk. With the pedal released it should be tight.
Route the remote bleeder line up under the hood somewhere and secure it with black zip ties making sure it is clear of exhaust and steering column.
Install the clutch inspection cover and torque to specs and replace the tunnel cover with the 36 bolts. The torque setting on those is in in/lbs so beware.
Now you can replace the H-pipe, route and reconnect the rear O2 sensors and you are done under the car.
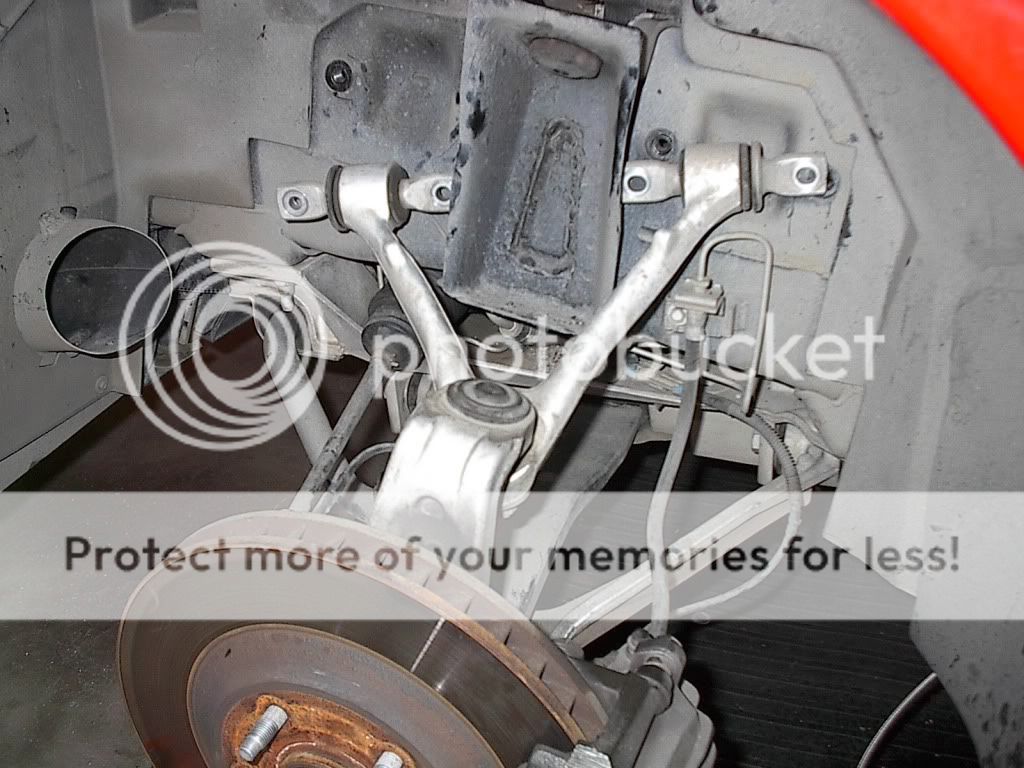
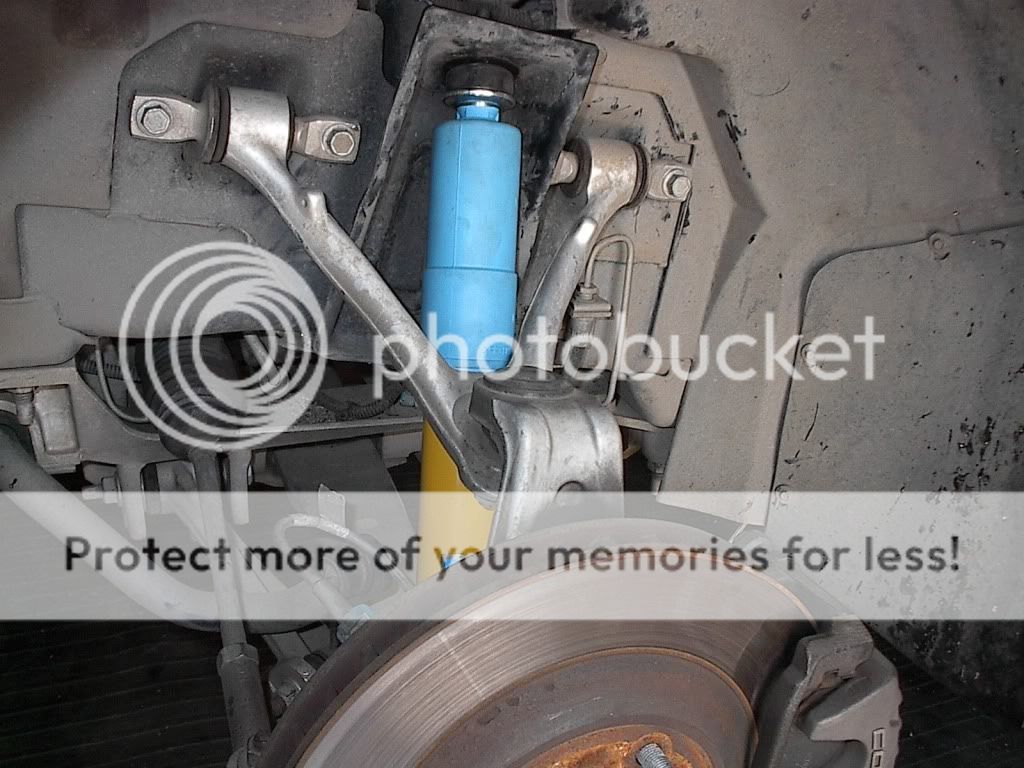
I went on to replace the front shocks also. A tip here is to support the lower ball joint with a jack, remove the shock bolts, then remove the four bolts holding the upper A-frame and lower the jack. The shocks will lift right out.
Put in the new front shock and reverse the procedure.
Reversing the steps taken to remove the shifter, replace shifter, radio trim, and center console. Make sure you reconnect everything you disconnected during removal.
Now you can replace the wheels and lower the car back down.

NOTE: One last thing to note that while bolting the pressure plate to the flywheel you had to turn the engine over to reach all the bolts. Because there is no oil pressure you may collapse a lifter. Don�t be surprised, like I was, when you have a lifter knock when the engine is started. Just give it a couple of minutes and that stubborn sucker will quiet down.
Now for the test drive. Be sure to pump the brakes a couple of times to seat the rear brakes. Put the car in reverse (I guess we hooked the lockout connector up correctly) and ease the clutch out and back out of the garage. Now I have driven sticks all my life and the old clutch never really felt right since I bought the car. The first time I let the new clutch out it felt linear and just right. Took the car around a long block and this car never shifted this good. All that�s left now is to take it to the tire dealer for a full alignment.

Conclusion: I stretched this project out over 3 weekends so I could take it slow and hopefully not make too many mistakes. After all this is my first and only Corvette! Those mistakes that were made were easily fixed although some delay was incurred. But mostly I�m not as young as I used to be and I can only spend so much time crawling around on a concrete floor.
I want to thank Dope for the excellent write up he did on the forum which gave me the inspiration to do the job. I also want to thank Wayne King, my neighbor�s son who is visiting from Oregon. He is not much of a car guy but his help was invaluable.
I want to thank my local Chevy dealer for quoting such a ridiculous amount convincing me that I should do this myself. Lastly I want to thank my wife of 32 years for all the pictures, bagging and tagging, and getting under the car and getting dirty. Also her small hands were able to reach parts and bolts that I had trouble reaching.

In know this is long but I wanted others to know what I experienced, what worked and what didn�t, and what I messed up so others know what to watch out for.
More Pics here!
Many people have asked how long it takes to do the job. For the type A folks my method may not be for you. This car is my daily driver but I do have the option of another vehicle to drive while this project was on going. Therefore I was taking my time and planned on the car to be down for several weeks. You will see steps taken and some backtracking because I over planned or didn�t follow Dope�s advice to the letter. Also I am incorporating several other jobs into this one so it is a bit more than just a clutch replacement. So here we go.
First step is the planning and defining the scope of the job. After the dealer quoted me a very high price for the job I decided to tackle it myself and save some bucks. The car has around 130K miles and I thought as a preventative measure it would be a good time to change the clutch. It wasn�t slipping but there was an occasional chatter when shifting hard and it just didn�t feel right to me. I don�t race it so I didn�t expect anything unusual. I had planned that with the clutch job to replace the shocks, check parking brake (never really worked), CAGS eliminator, ground connections, error code for ABS/Traction control, tires, spark plugs and wires, and a few other things that have been nagging me. With that decided, it was time to order parts.
There are many great vendors here and some have specials from time to time that will help with the cost of the job. For no particular reason I ordered the clutch kit, slave cylinder, and shocks from Corvette Central. At the time of ordering their price was about even with other venders but their price on the Bilstien shocks was a tad lower and shipping wasn�t bad to the left coast. LAPD got the honors for the remote bleeder for the slave because they are close by and I could get it fast. There was another forum vendor that had one but he was back east somewhere and had no web page or where to find him if something went wrong with shipping, sorry buddy. At least LAPD is right up the freeway from me so that was my reasoning. With the parts now in hand it was time to get dirty.
Step 1. Getting the car up in the air.
We used Rhino ramps to raise front of the car.
Once it was up on the ramps it was time to disconnect the battery and the intake to the throttle body.
Next was to raise the rear. Placing the floor jack under the center of the rear cross member, carefully raise the rear until it clears the jack stands. This was done in several steps. First with shorter jacks.
Then blocking the floor jack raised it higher for taller jacks.
Note! This is one of those steps I had taken because of the front shock replacement but wasn�t necessary at this point. Oh well live and learn.
We then blocked the floor jack and raised the front and support on stands.
With the car now stable on jacks it was time to remove the wheels.
Step 2. Disassembly begins.
The shifter needs to be removed before anything else can be done. Corvette Fever magazine had a great article on shifter replacement with lots of pictures that show all the hidden screws to remove the console. There are two 10mm nuts located at the rear inside the console compartment under little covers. Using a small screwdriver pop the covers off and remove bolts. Now as a suggestion that will really help in reassembly, use lots of baggies and place all related fasteners in the bags. Then use a sharpie to label the bags and set aside. Now carefully pry up the traction control panel and disconnect the wires and set aside. There will be 2 more 10mm nuts located under there. Next will be to remove the ashtray and remove 2 torx T15 screws located behind it. Last there will be one more torx T15 screw located behind the AC sensor cover that is located next to the ignition switch.
Now the shifter **** can be removed. NOTE: At this point make sure the shifter is in neutral! Carefully pry up the gear indicator plate on top of the **** with two small screw drivers. Using two screwdrivers carefully pry up on the **** retaining pin and remove. Now unscrew the ****. The �leather� boot is held in with plastic clips and come loose fairly easily so remove it and get it out of the way. Now carefully lift up the rear of the console and move backward while carefully removing the front part around AC/Radio. Make sure you disconnect the connector to the fuel door release button. Also make sure the accessory power plug is disconnected and the lighter plug disconnected from next to the ashtray. Once it is clear move it out of the way.
Now you can remove the sub boot from the shifter by removing the four 10mm nuts. Next remove the four shifter bolts and remove the shifter. Be careful and do not lose the plastic thingy on the end of the shifter! Now bag and tag all the parts and set aside.
Now we can move to the back of the car and start the �real� disassembly.
First thing here is to remove the rear calipers. Remove the two 15mm bolts that hold the caliper to the bracket. Remove caliper and as Dope suggests hang them on the heat shield for the fuel tank. Now he suggest leaving the brake pads in and zip tying them but mine fell out so I labeled them on the back with sharpie and bagged and tagged them.
Remove the caliper on the other side as well or you can complete one side of the car then move to the other side as I did. Less moving around.
Next remove the upper shock 13mm �hat� bolts. A long extension and an air ratchet make this a lot easier.
Repeat for the other side of the car.
This is where I decided to take a break, have a smoke, and then remove the exhaust H-pipe. Here is a tip: the day before disassembly get under the car and spray the exhaust bolts with WD-40. This will make them come apart easier. There are two 15mm bolts that hold the flange of the h-pipe to the rear exhaust on each side. Remove them and carefully separate the flanges. Now Dope suggest using bailing wire to tie the over axel pipes to a body screw located above them. Don�t be stupid like I was and skip this. TIE THE DARN THINGS OUT OF THE WAY! Trust me! Next move to the front and remove the after cat O2 sensor wires from their retaining clips on the side of the tunnel. Very important! Also follow the wires back to the sub-frame next to the engine and disconnect them if you can reach them. Next remove the 3 nuts holding the h-pipe to the manifold on each side. There are 2 hanger bolts near the front of the h-pipe to remove and 2 more near the rear that are suspended by springs. Remove those and slide the h-pipe out from under the car.
Now that the torque tunnel cover was exposed I decided it was a good time to remove it so I could see what was under there. Using my trusted Makida with a �� 8mm socket we removed the 36 tunnel cover bolts and bagged and tagged them. Now with the tunnel cover out of the way you should see this.
Note: you can see at this point the rear exhaust pipes are not tied up. DOH!
Being as how we are not in any big hurry to get this done we decided it was a good stopping point to call it a day and get cleaned up and have a brew.
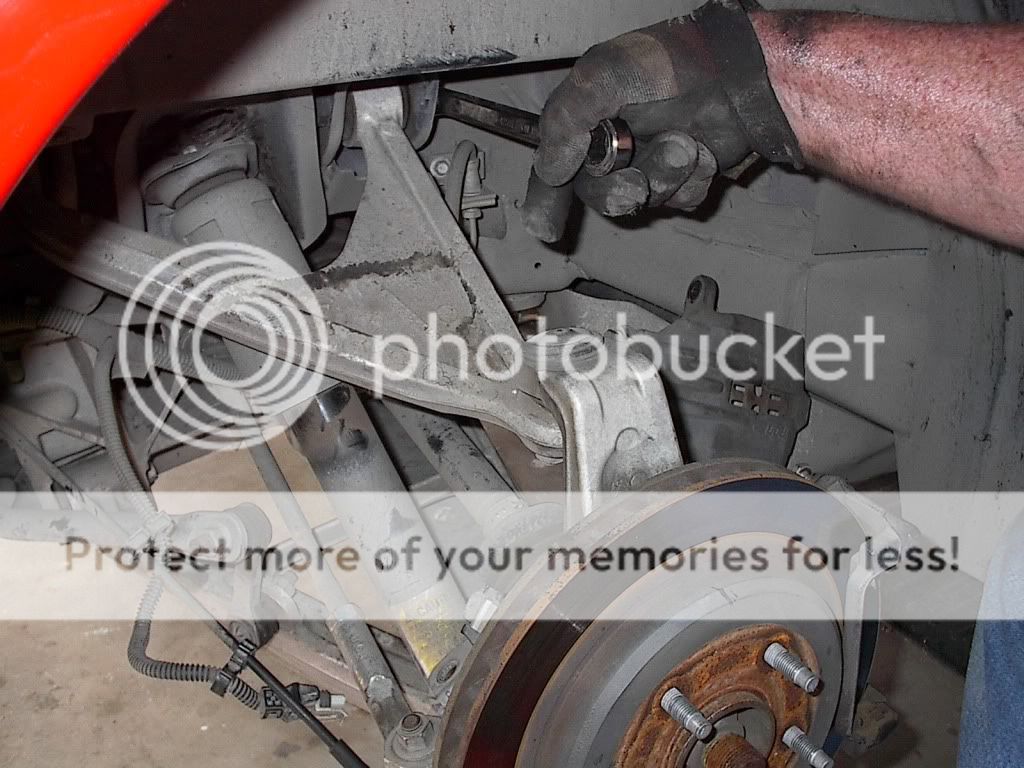
Now it was time to return out attention to the rear suspension. Disconnect the anti-lock sensor wire on the back of the hub.
Next disconnect the parking brake cable from the lever going in to the brakes. There are three tabs that need to be pushed in to remove it from the bracket. They are a booger but I used needle nose pliers and was able to get them loose.
Next is the 15mm upper A-frame bolts.
Now is the time to yank on the upper ball joint and pull the half shafts out of the differential.
I wondered why this was necessary until I got into this. There are two brake lines (one on each side) that run under the half-shaft that remain with the car when the rear is removed. Be sure and watch those suckers during a later step.
Now is a good time to disconnect any sensor connectors on the transmission and differential. Don�t forget the one that is on top of the differential and the reverse lock out one on top of the trans. I missed the trans one and had to do a repair on reassembly. Remove the push pins holding the harness to the cross member. I used a door panel removal tool to ease them out. As it was I ended up breaking a couple. Do another look around and make sure everything is disconnected and you are ready to move on to positioning the transmission jack.
I bought a transmission jack adaptor from Harbor Freight for a floor jack.
Because it wasn�t an exact fit for my jack and I had to modify it a bit. The J bolts that clamp the adaptor to the floor jack were in the wrong place so I had to drill new holes in the plate to move them.
Also the bend of the J bolts had the wrong radius to fit the bar of my jack so I had to widen them. Using a handle from a bottle jack and a vice I was able to make them the right size. Worked like a charm.
Here is where I screwed up again and it took more time to do the job than necessary. Follow along and you will see why.
Next we positioned the jack under the transmission and secured it.
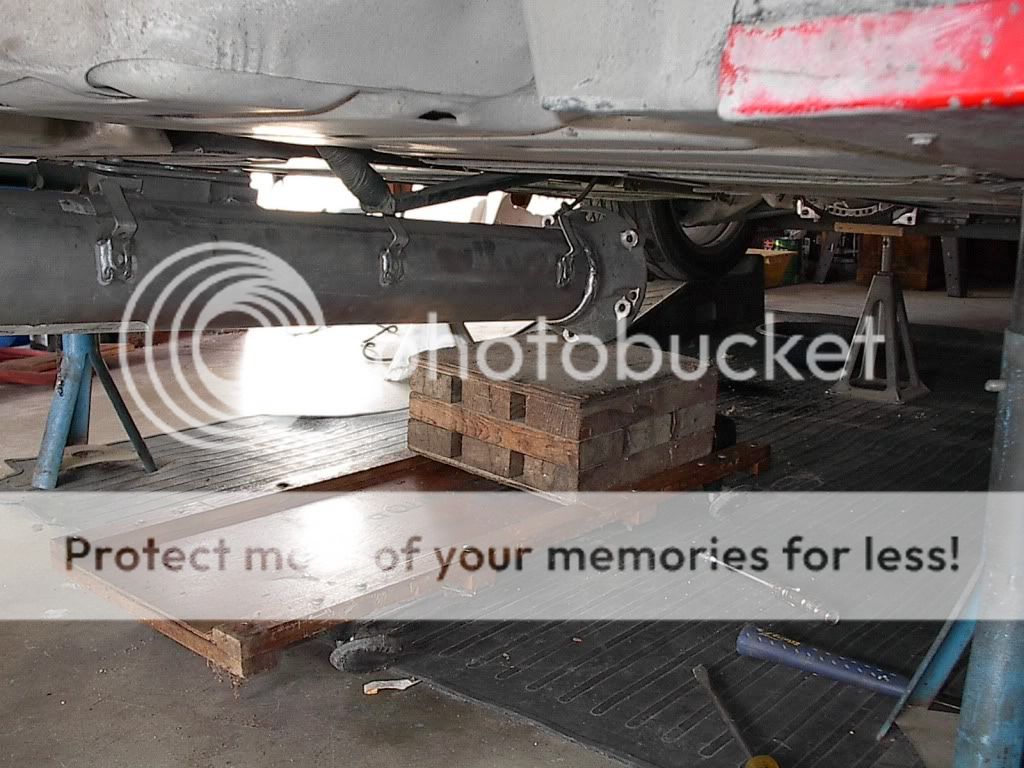
Setback Number 1: Now we could measure the height of the jack and the top of the differential and compare with the trunk well to see if we had enough clearance to remove the drive train. Well we didn�t. The back of the car had to go higher. Not liking where the front stands were placed and concerned about the balance of the car we decided it would be a good idea to put the front wheels back on the car and set them on the Rhino ramps as a safety measure. Then we raised the rear of the car an additional 4� to give us the clearance we needed.
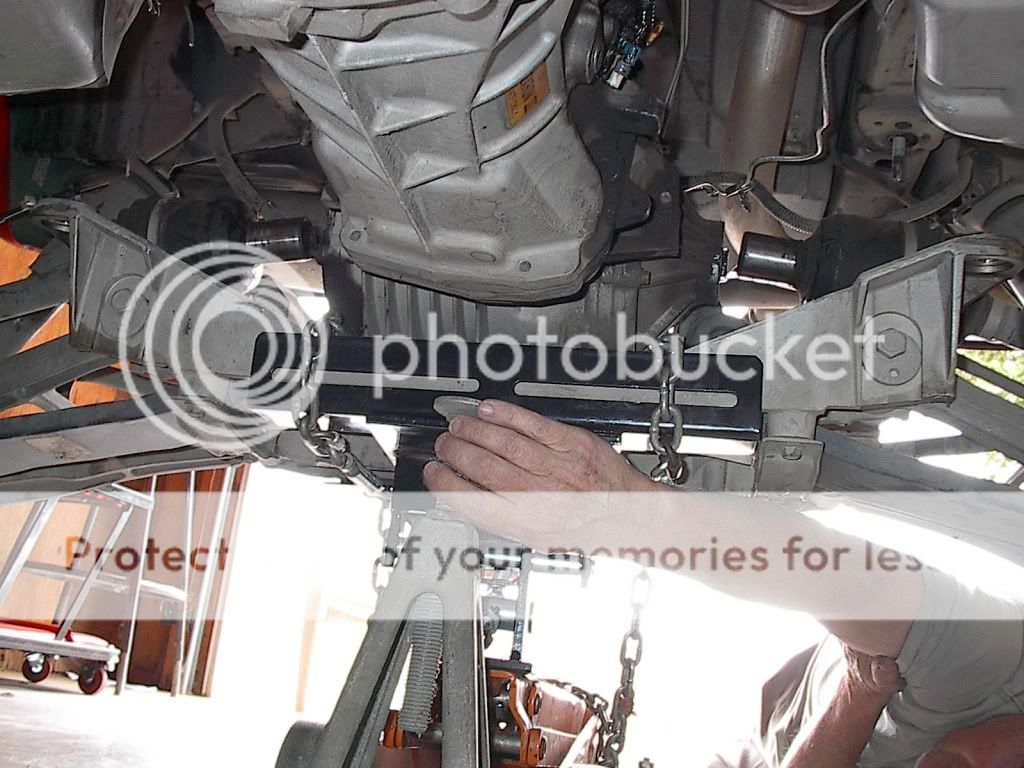
Setback Number 2: We then re-secured the jack to the transmission and proceeded to remove the rear suspension carriage nuts. TIP: Spray the crap out of the bolts with WD-40 the day before and it will make your life easier. As I was unbolting the carriage I noticed that it was tipping to the rear of the car. Not good. So I tightened the bolts down and lowered the jack and placed it under the cross member. This is the correct balance point. Now we were faced with the additional issue of how to secure the unit to the jack. The easiest way was to wrap a chain around the cross member and the jack adaptor making sure we didn�t pinch any harness or anything in the process. We tightened the chain with a couple of heavy duty turnbuckles. It was nice and solid.
Also note that in this picture you can see the left side brake line that must clear the half shafts.
Now we could unbolt the carriage nuts and lower away. Using a �� breaker bar, 10� extension, and a 21mm deep socket I loosened the carriage bolts. Then using a standard �� ratchet removed the bolts. DO NOT USE AN IMPACT WRENCH ON THESE OR DAMAGE WILL RESULD TO THE BOLT ANCHORS INSIDE THE CAR. I started to use the air ratchet but decided it may have too much torque also. At this point you cannot have enough eyes on everything!!!! Watch the brake lines, wiring harness, shocks, and further forward watch the torque tube and shifter as the drive train is lowered. Make sure the shifter clears the brake and fuel lines that line the tunnel. Note: mine did hit and bent them a little but no serious damage. I did have to use a large screwdriver to push them out of the way.
Once the top of the differential has been lowered just below the lowest point of the trunk well, STOP and hold that position. I used and old RV trailer stabilizing jack to hold the position and prevent any bleed down of the floor jack. Now is a great time to get out from under the car and breathe a sigh of relief that nothing major went wrong.
Now snub out the smoke and crawl back under the car and unhook the main harness from the holders on top of the torque tube. There is a push pin on the front most one and the rest just push off to the left side. Another Suggestion from Dope: Now is a good time to measure the distance from the bottom of the cross member to the floor and note the measurement. Likewise pick a spot on the front of the torque tube mark a line and measure from that line to the floor. I used a sharpie to draw a line and write the measurement on the side of the tube. This will help when putting the drive train back in to get the correct angle for alignment purposes.
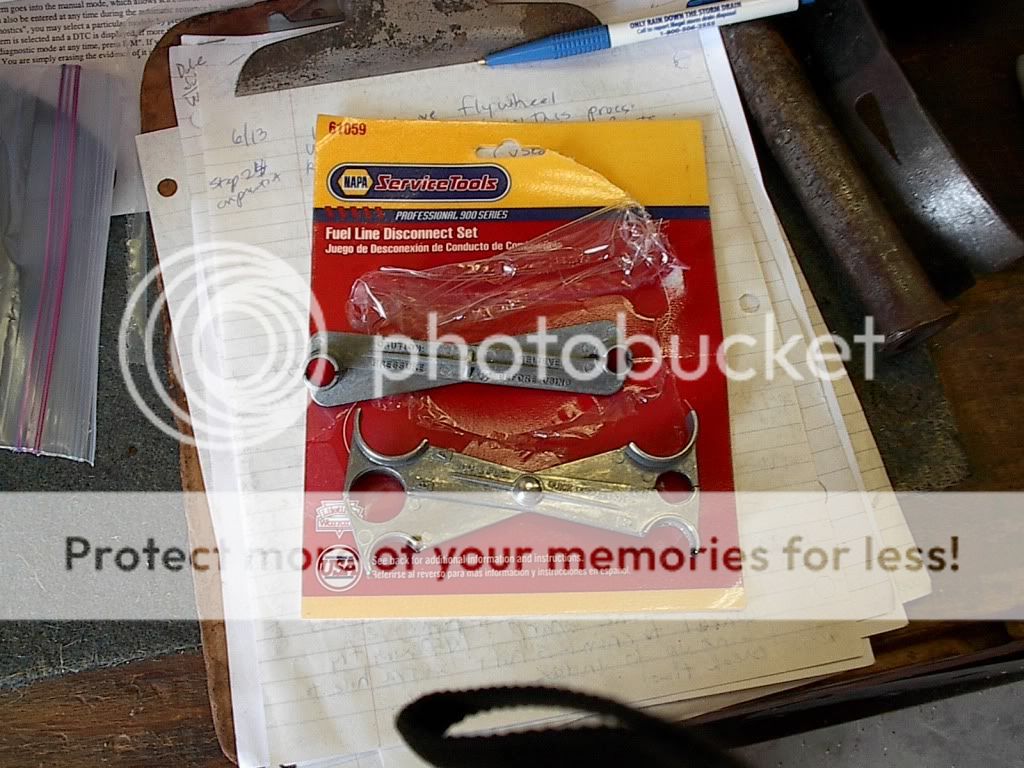
Now here comes the real pain in the neck. The hydraulic line that goes from the clutch master to the slave has a quick disconnect. Actually �quick disconnect� is a misnomer because there is nothing quick or disconnecting about it. Someone said this was a Ford design AC connector and I believe it. The clutch kit came with a funky but useless plastic tool that is supposed to be used to push the white plastic collar into the female part of the connector to release the little springs that hold the halves together. RIGHT! That didn�t work. Tried the 2 screwdriver method and that didn�t work either. After 2 hours of messing with this sucker we decided to call it a day and go to the NAPA and buy their tool for this.
That didn�t work either! Another 2 hours the following morning we decided take action and get the project moving again. I took bolt cutters to the line on the slave side. I�ll deal with that piece of crap later if I have to pull the master and put it on the bench to work with it.
With that done it was time to address the torque tube bolts. I used another trailer stand with a �� piece of plywood under the oil pan to support the rear of the engine. I then took an old creeper and a car stand and some blocks to catch the torque tube once we began to move the drive train back. Using an air ratchet, several extensions, universal joint with a 13mm socket remove the 5 torque tube bolts. The one on the top left has a tab on it that holds the main wire harness and it is a booger to get to. Using a large screwdriver, gently separate the tube from the bell housing. Have your helpers start pulling the carriage to the rear of the car WHILE WATCHING EVERYTHING AGAIN! This is where we found that last sensor connection on top of the differential (still missed the one on the trans). Ease the torque tube back until the input shaft clears the clutch assembly and bell housing and let it rest on the car jack. Now have your helpers lower the transmission jack the rest of the way while you lower the torque tube down the rest of the way. It is not that heavy and now with everything balanced it was easy to do. I used a large block of wood and the creeper so the whole unit can be moved around.
Now you can either remove the drive train from under the car, if you are going to do additional work or do a cleanup, or you can just move it back enough to get it out of the way enough to work on the clutch.
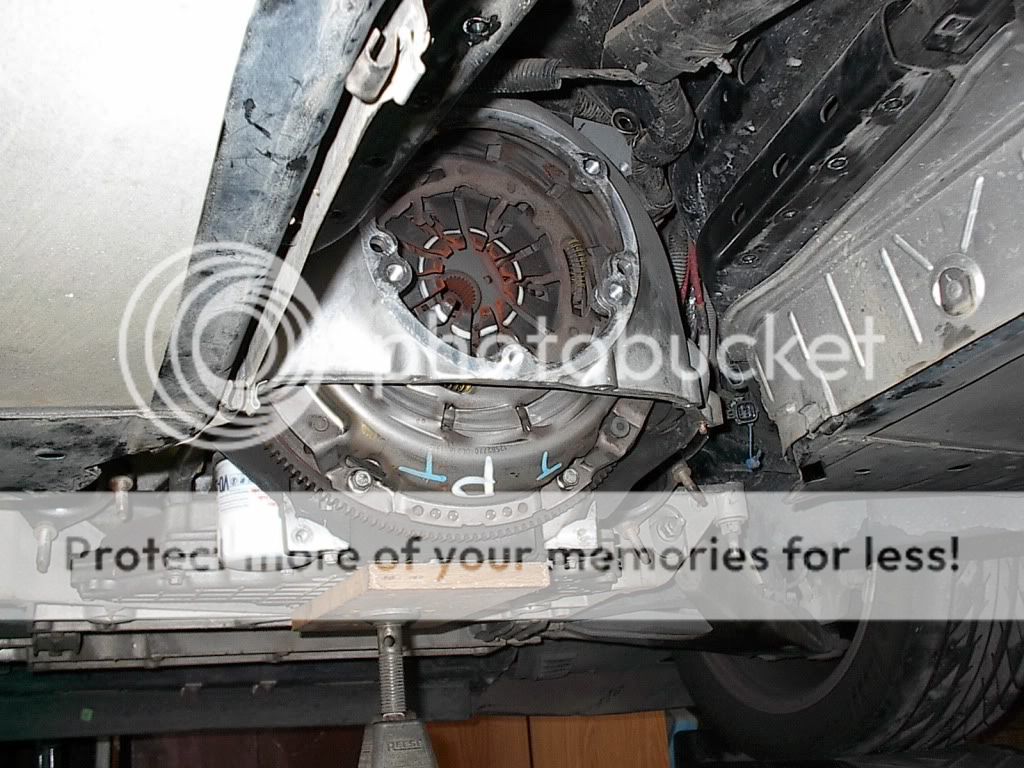
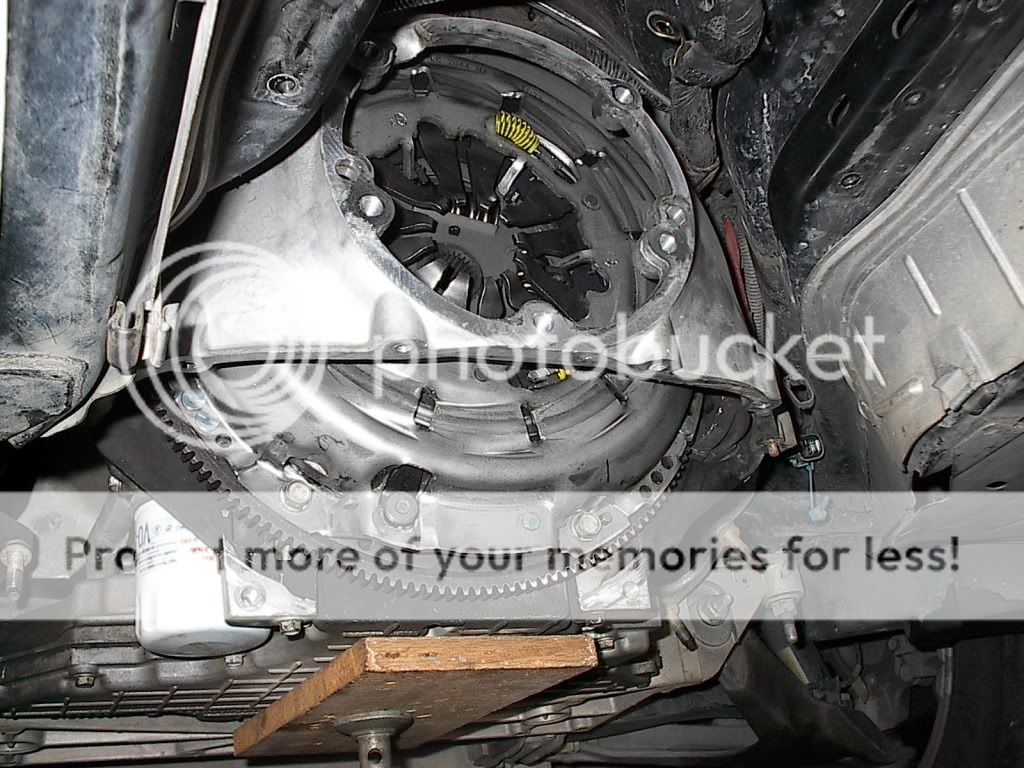
Now the 10mm and 13mm bolts from the clutch inspection cover can be removed. When that is done you will be rewarded with this view.
Now some suggest removing the bell housing but we opted not to. There is plenty of room to work if you have the right tools. One tool that we got from NAPA was a fly wheel holder/turner. My advice is to GET IT! It will make it easier to turn over the engine as you are removing/installing the bolts.
Next is to remove the 6 13mm pressure plate bolts. Tip: put the clutch alignment tool in to keep everything from dropping on your head when the bolts are removed. Now I loosened them in stages while turning the flywheel. This is where a helper will be handy to turn the flywheel. Have you helper hang on to the pressure plate while you remove the last bolt. Now remove the alignment tool and slide the disk out then the pressure plate. NOTE: you kind of have to maneuver it around the starter housing nose to get it out.
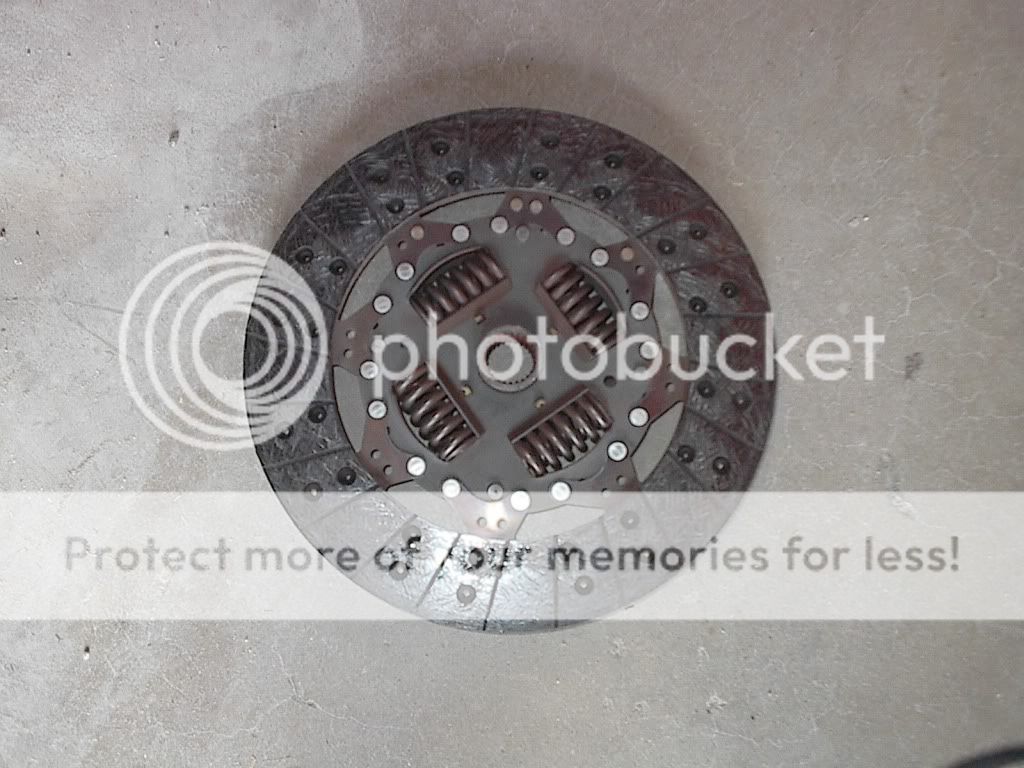
Here is the Clutch disk:
Doesn�t look too bad after 130K miles.
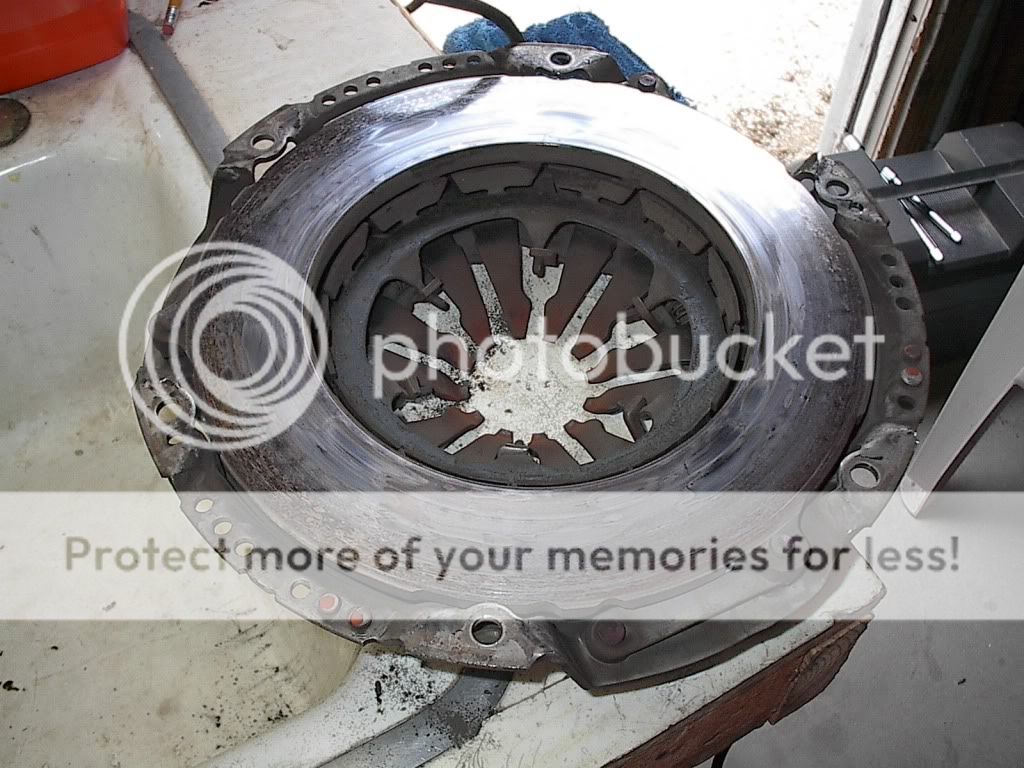
Here is the pressure plate.
I can see why there was an occasional chatter.
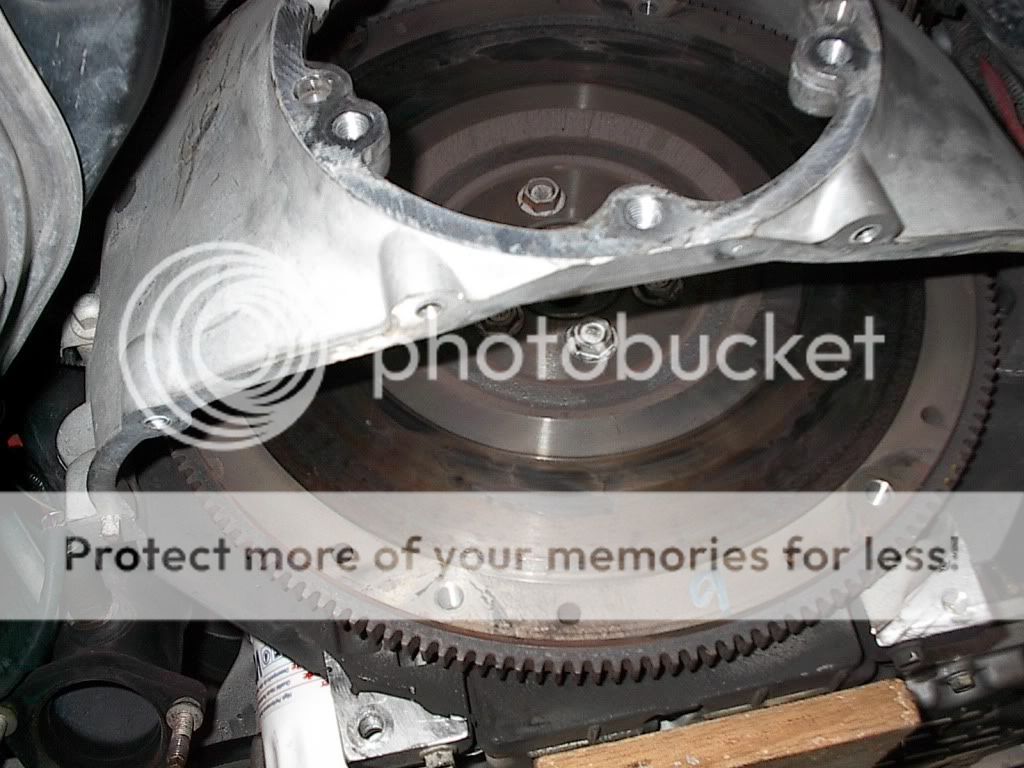
And the Fly Wheel.
Some signs of scoring here also.
Mark the fly wheel�s position in relation to the crank so the new one will go in the same way. Also note that there is an additional hole in the flywheel and crank that doesn�t have a bolt. If you are going to use a stock type of flywheel, this will be the alignment point. Now you can remove the 6 15mm bolts holding the fly wheel. Again having your helper hold it with the special tool makes it easy. Now the fly wheel can be removed.
The next step is removing the pilot bearing. I bought a nifty puller from Harbor Freight that had 3 jaws but it didn�t fit the pilot bearing. So it was off to Auto Zone to �rent� a puller and slide hammer. They charged a $48 deposit fully refundable with the return of the tool. In other words it cost nothing but the gas to drive there and get the tool and then return it.
Here are the tool numbers: Slide hammer OEM#27033 and puller 27059.
Using a couple of large crescent wrenches I tightened the puller to the bearing as tight as I could get it.
Then screwed in the slide hammer and four good whacks and the bearing came out, much easier than I expected.
Step 3 Clutch Installation:
Now take the new bearing and lightly coat it with lithium grease and using a socket the size of the bearing drive it in to the crank until it is flush. The shop manual says to put the flat side in but mine was flat side out so I put the new one in the same way. Once it is in place put some more grease on your little finger and work it into the bearing.
Now is the time to put in the new flywheel. Unless you are going to a non stock replacement clutch, I wouldn�t worry so much about balancing. The drilled balance holes should match up with the holes in the old flywheel. I had no additional weights. When I started the car it was running smooth.
Line it up on the crankshaft the same way the old one was and using blue Locktight on the threads and start the bolts. Here is where we recommend to RTFM (read the freakin� manual) and follow the torque pattern and specs or you will have trouble.
Do this in several stages. Have the helper hold the flywheel with the tool while you torque it down. Make the first pass at 15 FT lbs, Second pass at 37 ft lbs and the last pass at 74 ft lbs.
There are a couple of locator pins on the fly wheel. Look at the bolt holes on the pressure plate and note that the pinhole next to one bolt hole is to the right and on the opposite side it is on the left. Line up the pressure plate with the pins in the flywheel, place the clutch disk (noting flywheel side, its marked in fine print on the disk) into the pressure plate and position on the flywheel. Place the alignment tool through the clutch disk spines and into the pilot bearing to help hold stuff together. Install the bolts again reading the manual and torque them to specs. You will torque in stages again making sure the alignment tool is still centered and you can move it while applying torque. It is important to make sure the alignment is correct! Once it is torque down remove the alignment tool.
If you are replacing the slave and the throw-out bearing now is the time. I installed the remote bleeder on the slave. Next I removed the two bolts holding the old slave in the torque tube and removed slave. Place the new slave in the torque tube and tighten the bolts. The throw-out bearing was already installed on the new slave so I didn�t have to mess with it.
New clutch assembly in.
Now sit back and admire your work, have a brew, a smoke, and clean up calling it a day. I ain�t as young or a flexible as I used to be so I need my rest.
Step 4 Re-assembly:
Now would be a good time to clean off all of the road dirt and grime from the from the rear assembly. Roll the drive train out from under the car.
Cover the half shafts ends, the place on the differential where they go, and any other place that you don�t want to get contaminated with solvent or water. You can use Simple Green or I used a water based solvent to soak the greasy mess and let it sit for about a half an hour.
Using my pressure washer I rinsed the whole mess off. Now it is nice and clean. Using compressed air I dried it off.
If you are going to install new shocks, now is the time to put the rears in position. Previously I loosened the lower shock bolts so removing the old shocks is easy. Remove the �hats� from the old shocks and bolt them on to the new shocks using the new bushings and nuts provided.
Torque them to specs. Now place the shocks in position on the lower A-arm and for now finger tighten the bolts. We will torque them later after the drive train is back in the car.
http://i563.photobucket.com/albums/s...9/IM003375.jpg
Maneuver the drive train back under the car. Raise the front of the torque tube to the measurement we noted earlier. Now have your helper raise the transmission jack to the rear measurement. Have your helper push the drive train while you guide the input shaft into the clutch. Use patience here and it will go in. Also keep the flywheel tool handy in case any minor adjustments are needed. Once the splines are engaged, keep pushing the drive train in until its seated. Now here is a tip. Make sure the rear cross member is fairly level. This will help align the pins in the torque tube to engage in the bell housing. Also use a large C-clamp to help pull everything together. I did have a problem getting the pins lined up so I used a large screwdriver to rotate the torque tune while the helpers were lifting the �low side� of the cross member. With a pop the pins slid in to the holes. Using the C-clamp pull the torque tube forward until it is seated against the bell housing. Now start the bolts and torque them down to specs.
Don�t forget the upper left one will hold the tab on the harness. Whew! Reach up and make sure the main harness is back in the clips on top of the torque tube.
Setback Number 3: Now is a good time to reconnect all the sensors and stuff connected to the transmission and differential. As I was connecting I saw a pink and green wire coming out of the harness with no connector. DOH! After about an hour of looking through the shop manual it was discovered that this goes to the reverse lock out on top of the transmission. Found the connector still connected. Removed it and using a nifty McIntosh tool (a bent paperclip) was able to dissemble the connector and solder the wires back on. Re-assembled the connector and hope it works.
Now we can raise the drive assembly back into position. Again make sure you watch everything, brake lines, wire harness, fuel and brake lines in the tunnel, etc. The half shafts have to be moved around the brake lines so extra hands are good to have too. Once the carriage is back on the bolts put the 4 21mm nuts back on and torque to specs.
Now unchain the transmission jack and lower away. Remember to fasten all the harness holder clips and brake line clips to the carriage. Crawl out from under the car, get cleaned up, have a brew, and prepare for the final assembly.
Setback Number 4: If you could not get the �quick disconnect� disconnected and had to cut the line, you need to remove the clutch master cylinder. The manual says to remove the lower dash panel but I sent the wife under the dash to remove the clip holding the linkage to the pedal.
Next remove the two bolts holding the windshield washer reservoir and move it out of the way. Then remove the two plastic push pins holding the clutch fluid reservoir to the cowl. Now reach under the cowl and turn the master 1/4 turn counter clockwise and remove it from the car. Now you can place that �quick disconnect� in a vice and separate it. I know at this point it is tempting to throw that piece of crap as far as you can but the neighbors may not appreciate the broken window so refrain from doing this. Now replace the master back to the firewall secure the reservoir then send the wife back under the dash to reconnect the linkage. Feed the hydraulic line back down making sure to avoid the steering column and exhaust. Connect the quick disconnect. I used a large pair of channel lock pliers to snap it together. Leave the washer reservoir loose if you are replacing the front shocks. If not tighten the two bolts securing the reservoir to the fender.
Now rummage through the baggies and find the ones that are marked left rear suspension, shock, and caliper bolts. Place your floor jack under the real suspension lower ball joint and while guiding the half shafts back into the differential, raise the suspension so the upper A-frame bolts are aligned. Put in bolts and torque to specs. Secure the upper shock �hat� and then tighten the lower shock bolts to specs. Replace the caliper. You may have to push the piston back a bit to get it to clear the brake pads. I have a large C-clamp I use for this. Now secure the caliper to the brackets and torque to specs.
Connect the Anti-lock sensor and the parking brake cable.
Repeat for the other side.
Now is a great time to bleed the clutch. Fill the reservoir with new dot 3 brake fluid from a new sealed container then open the valve on the remote bleeder. You can let gravity do its job or you can use the vacuum pump or you can have someone press the pedal while you operate the valve. Now I was having issues getting the valve to close so I got a socket to fit the bleeder valve and cranked that sucker down. With that done have the assistant pump the clutch pedal a few more times until you feel resistance. Bleed again. NOTE: during the bleed process, keep checking the fluid level in the master so you don�t suck air. Check the clutch to make sure it is releasing. With the pedal pressed you should be able to rotate the clutch disk. With the pedal released it should be tight.
Route the remote bleeder line up under the hood somewhere and secure it with black zip ties making sure it is clear of exhaust and steering column.
Install the clutch inspection cover and torque to specs and replace the tunnel cover with the 36 bolts. The torque setting on those is in in/lbs so beware.
Now you can replace the H-pipe, route and reconnect the rear O2 sensors and you are done under the car.
I went on to replace the front shocks also. A tip here is to support the lower ball joint with a jack, remove the shock bolts, then remove the four bolts holding the upper A-frame and lower the jack. The shocks will lift right out.
Put in the new front shock and reverse the procedure.
Reversing the steps taken to remove the shifter, replace shifter, radio trim, and center console. Make sure you reconnect everything you disconnected during removal.
Now you can replace the wheels and lower the car back down.
NOTE: One last thing to note that while bolting the pressure plate to the flywheel you had to turn the engine over to reach all the bolts. Because there is no oil pressure you may collapse a lifter. Don�t be surprised, like I was, when you have a lifter knock when the engine is started. Just give it a couple of minutes and that stubborn sucker will quiet down.
Now for the test drive. Be sure to pump the brakes a couple of times to seat the rear brakes. Put the car in reverse (I guess we hooked the lockout connector up correctly) and ease the clutch out and back out of the garage. Now I have driven sticks all my life and the old clutch never really felt right since I bought the car. The first time I let the new clutch out it felt linear and just right. Took the car around a long block and this car never shifted this good. All that�s left now is to take it to the tire dealer for a full alignment.
Conclusion: I stretched this project out over 3 weekends so I could take it slow and hopefully not make too many mistakes. After all this is my first and only Corvette! Those mistakes that were made were easily fixed although some delay was incurred. But mostly I�m not as young as I used to be and I can only spend so much time crawling around on a concrete floor.
I want to thank Dope for the excellent write up he did on the forum which gave me the inspiration to do the job. I also want to thank Wayne King, my neighbor�s son who is visiting from Oregon. He is not much of a car guy but his help was invaluable.
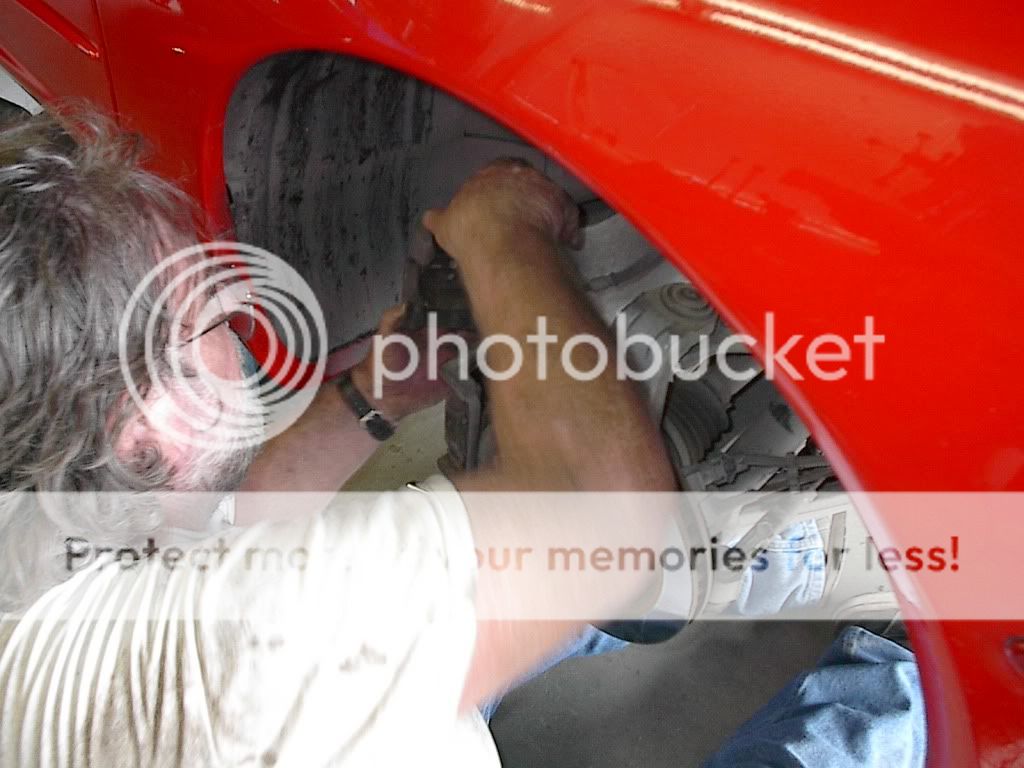
I want to thank my local Chevy dealer for quoting such a ridiculous amount convincing me that I should do this myself. Lastly I want to thank my wife of 32 years for all the pictures, bagging and tagging, and getting under the car and getting dirty. Also her small hands were able to reach parts and bolts that I had trouble reaching.
In know this is long but I wanted others to know what I experienced, what worked and what didn�t, and what I messed up so others know what to watch out for.
More Pics here!
Last edited by FormerBiker; 06-23-2009 at 12:46 PM.

The following users liked this post:
Dutch08 (10-09-2016)

 06-23-2009, 02:28 PM
#3
Team Owner

Excellent job on the write-up and pix. I know what a task it is to document and photograph everything while you're working on something and then go back and edit everything and do the write-up.

 06-23-2009, 03:05 PM
#5
Safety Car

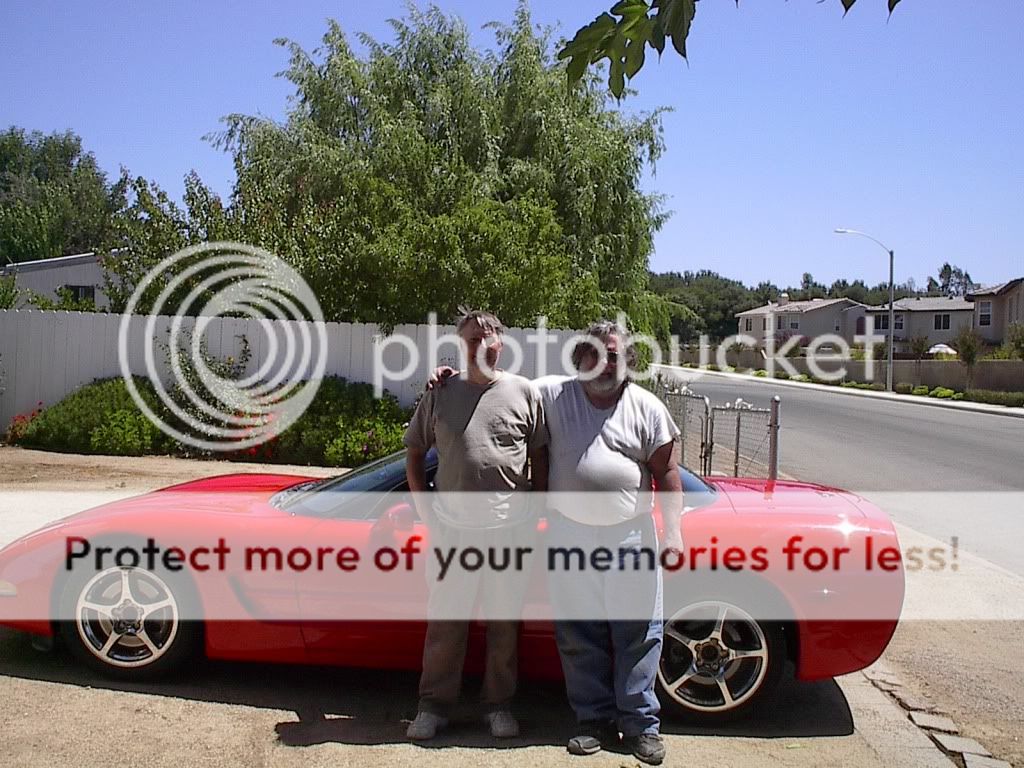
Thanks for sharing the info! The pic of you and your wife is great. Sounds like you found a keeper (but you probably knew new that 28+ years ago). Congrats on gettin' the job done yourself. 
06-23-2009, 04:56 PM
#6
Race Director
Thread Starter
Thanks for the comments. I just hope this will help others save around 2 grand for the job.
When we were younger my brother and I did a lot of car hop-up stuff, him on his 62 chev and me on my 67 chevelle so I know my way around a tool box. But that was a long time ago.
When we were younger my brother and I did a lot of car hop-up stuff, him on his 62 chev and me on my 67 chevelle so I know my way around a tool box. But that was a long time ago.


 06-24-2009, 12:14 PM
#9
Resident moron

FormerBiker - congratulations! Great feeling of accomplishment isn't it? Especially every time you shift and everything works smoothly. Also, when you're driving down the road and the car DOESN'T burst into flames because you screwed something up 
I have to admit, I laughed a few times reading your guide. Parts where you describe something as a pain in the a$$, brings back fond(?) memories I have to admit as well, the ease in which your pilot bearing came out made me VERY jealous. I spent probably 1 FULL DAY working on the pilot bearing and the "quick disconnect" (most ironic term I've ever heard) for the master-slave cylinder connection. I'm also EXTREMELY jealous that you had a helper or two, as I did mine by myself and it can be a real chore sometimes. Then again, I was probably...24 when I did the job and the write-up. The scars are still healing 5 years later...
Love the idea of using the creeper for the end of the torque tube too. I can't remember exactly what I did, I think I used 2 tranny jacks (1 under the diff, 1 under the trans) and that was enough to just yank it all out.
I find it a funny coincidence that you have a torch red FRC just like me. And that you're a proud NRA member in the communist nation of Taxifornia (though I am from Taxachusetts, close enough except for the weather!).
Again, congrats and nice write-up
Dope
I have to admit, I laughed a few times reading your guide. Parts where you describe something as a pain in the a$$, brings back fond(?) memories
I have to admit as well, the ease in which your pilot bearing came out made me VERY jealous. I spent probably 1 FULL DAY working on the pilot bearing and the "quick disconnect" (most ironic term I've ever heard) for the master-slave cylinder connection. I'm also EXTREMELY jealous that you had a helper or two, as I did mine by myself and it can be a real chore sometimes. Then again, I was probably...24 when I did the job and the write-up. The scars are still healing 5 years later... Love the idea of using the creeper for the end of the torque tube too. I can't remember exactly what I did, I think I used 2 tranny jacks (1 under the diff, 1 under the trans) and that was enough to just yank it all out.
I find it a funny coincidence that you have a torch red FRC just like me. And that you're a proud NRA member in the communist nation of Taxifornia (though I am from Taxachusetts, close enough except for the weather!).
Again, congrats and nice write-up
Dope
06-24-2009, 03:11 PM
#11
Race Director
Thread Starter
Dope, Thanks again for your write up. I had a lot of questions and you really helped. After I got the shop manuel I went through it with your writeup and marked all the pages with post-its. It made it easier for quick referencing during the job.
I'm not going to fool anyone and say this was a "piece of cake." It was a lot of work. But it isn't rocket science either. The only tools I bought for this was the 21mm deep socket and the flywheel tool. You can rent transmission jacks if you don't have one or buy the adaptor for a floor jack.
So 3 weekends was time well spent to save almost 2 grand. BTW the dealer quoted me 3 grand just to replace the "special" shocks. He said because of the Active Handling is why it cost so much. WTF!!!! I don't have Active Handling and it wasn't available on the 00 FRC!!! That made up my mind right there to do it myself.
So if anyone else decides to do this and you have a good set of standard tools, I say do it and save some bucks.


 03-31-2010, 09:27 AM
#15
Melting Slicks


I am in the middle of the process and this write up has helped me greatly! Just wanted to say thanks for taking the time to write this up.
I have had 2 other clutches installed in my car over the years and finally decided i wanted to save the $$ and do it myself. I found the quick release on the slave to come off pretty easy (i did cut the line first, then looked at how it worked)... While the master was still on the car, i was able to flex the steel braided line enough to have the quick disconnect accessible from the top (again, i already cut the line to the slave). Once i could inspect it, i simply took a pair of larger pliers and opened them up and slid this over top of the quick disconnect ring. I applied a little pressure and it pop'd right off. I imagine the pliers wouldnt work well with the slave in one piece, but i found this to be very simple with cutting the line.
I have not yet removed the pilot bearing - that is the point i am at now. Wish me luck
Thanks again!
John
06-04-2010, 11:50 AM
#16
Burning Brakes

Member Since: Aug 2009
Location: Virginia Beach Virginia
Posts: 816
Received 0 Likes
on
0 Posts

Definetly a keeper...Thank you.. Does not look so bad and maybe I can save myself 1350.00 and do it myself next time... I have the Centerforce Dual Friction,,, Ever since about 500 miles after break in I have chatter on take off 60% of the time. Really bothers me since almost 2 grand was dropped on the clutch and install. Next time it is a twin disc,,,just because.
06-06-2010, 11:00 AM
#18
Burning Brakes
Member Since: Aug 2009
Location: Virginia Beach Virginia
Posts: 816
Received 0 Likes
on
0 Posts
Hey Brother, How did the clutch change go for you? I might be doing the same this winter. What clutch did you go with? I am definetly going with gears this oct in the form of 3:90's and the clutch will really test my abilities.
06-06-2010, 01:02 PM
#19
Intermediate


Member Since: Nov 2009
Posts: 36
Likes: 0
Received 0 Likes
on
0 Posts
thanks for sharing this with everyone on the forum!
i recently broke my transmission and need to have it replaced/rebuilt and will also do my clutch, slave/master cylinder/remote bleed, etc.
do you think it is possible to do a job like this in a SINGLE car garage?
my car is stuck in 3rd and i'd hate to drive it to my dealership to work on (or tow it). (manager would hate to have a red vette sitting on the lot while the trans is being rebuilt).
06-06-2010, 05:20 PM
#20
Instructor
Member Since: Mar 2007
Location: Austin TX
Posts: 233
Likes: 0
Received 0 Likes
on
0 Posts
Nice writeup!! I actually just finished doing this job for the third time, had the torque tube go bad on me this time.
In every writeup I have seen, everybody disconnects the brake caliper and pulls out the halfshafts. I completely skip that step by simply disconnecting the brake line and when the rear end is being dropped and removed you just carefully maneuver the line under the halfshaft. Saves a lot of time and effort.
Every time I have done this now I had spent a ton of time with the stupid quick disconnect too. I found the best way to do it was using two extremely small flathead screwdrivers to push down the plastic on both sides and carefully getting it out.
Also, the plastic clutch alignment tool I have been using got shaved and it didnt properly align the clutch. Since I had just taken out my old torque tube, I used the input shaft (that just came right off !!) and it worked perfectly.
A couple other things I did during the install and will do every time I have to do this job, replaced tranny fluid, rear axle fluid, rangers clutch fluid method and replaced fuel filter.
Very nice car by the way