DIY front plate cover
 05-04-2010, 11:49 PM
#1
Advanced

Thread Starter
Member Since: May 2009
Location: Louisiana
Posts: 57
Likes: 0
Received 0 Likes
on
0 Posts
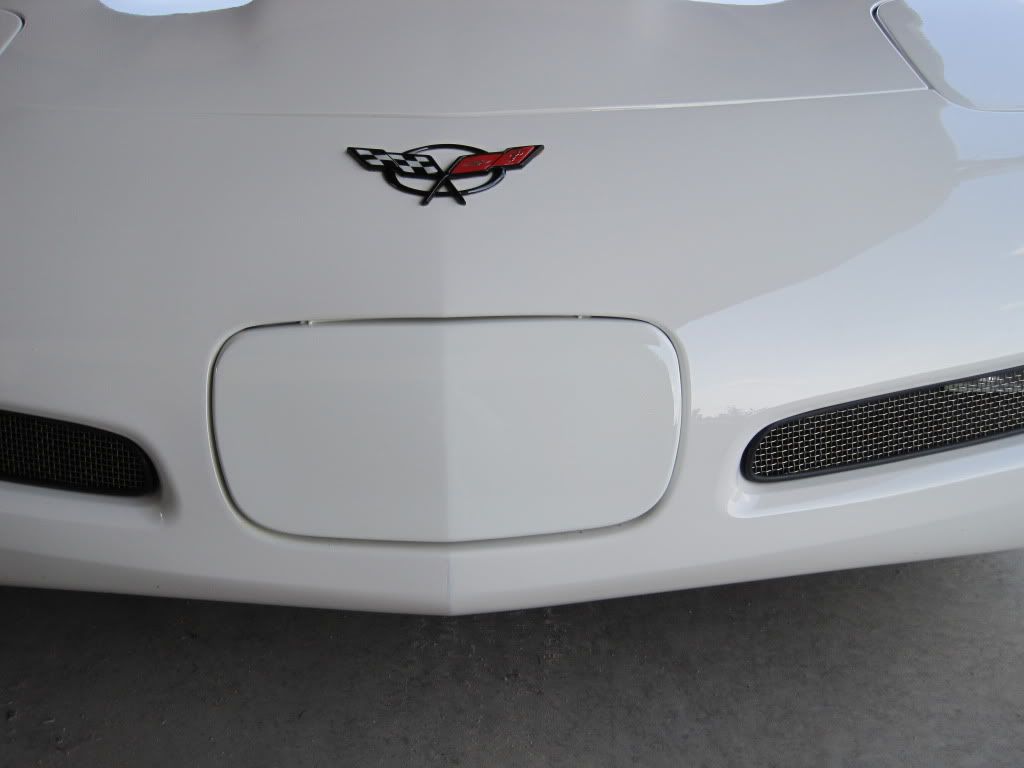
I got tired of trying to track down a Pewter Metallic front plate cover for my car, so I decided to make a custom one.
You will need:
generic c5 clear plate cover $29
600 grit sandpaper $2
Duplicolor to match your car T408 $4
Duplicolor for design (optional) $4
Duplicolor clear coat T125 $4
Manila folder
Razer blade or Exacto knife
1. Buy a clear $29 clear plate cover from ebay or a site vendor

2. Skuff up cover using the 900 grit sandpaper so it takes the glaze off the top of the plastic cover and allows a better painting surface
3. Wash cover, and air dry completely
4. Apply one light coat of your matched paint (Duplicolor T408 here)
5. Wait 12-24 hours, wet sand very lightly with 600 grit sandpaper
6. Repeat steps and lay down two to three coats or until cover is completely opaque, but do not sand the last colored coat
7. Apply clear coat (Duplicolor T125)
I did not sand in between clear coats

Optional:
8. Determine that your front cover is bland and needs a design
9. Search the web for a graphic
10. Size graphic to fit entire sheet of paper in Landscape Orientation
11. Print out Design
12. Cut Manila folder in half and tape design on top of folder. We will be cutting out the design from the folder, using the printed page on top as a guide.
12.5 Use Exacto knife or razer blade to cut out design. For this I put a thick magazine under the folder and cut all the way into the top few sheets of the magazine.
14. Center your new stencil on your painted plate cover and tape in place. Use the rest of the folder as a barrier to block overspray

15. Paint within the stencil at a 90 degree angle to the surface. Do not spray at a 45 degree angle because paint will go under the stencil.(I used Duplicolor Black Metallic)
16. Let dry for 2 hours, then remove Stencil

17. Let dry for an additional 22 hours.
18. Apply more layers of clear coat (with no sanding in between) until a good coat is established
19. After drying for 24 hours, wash and apply a wax or polish if desired
20. Install


I think it came out pretty good, and it is a lot easier than trying to track down a plate cover in some of the harder to find colors.
I got the inspiration from this thread:
http://forums.corvetteforum.com/c5-g...99-pewter.html
You will need:
generic c5 clear plate cover $29
600 grit sandpaper $2
Duplicolor to match your car T408 $4
Duplicolor for design (optional) $4
Duplicolor clear coat T125 $4
Manila folder
Razer blade or Exacto knife
1. Buy a clear $29 clear plate cover from ebay or a site vendor
2. Skuff up cover using the 900 grit sandpaper so it takes the glaze off the top of the plastic cover and allows a better painting surface
3. Wash cover, and air dry completely
4. Apply one light coat of your matched paint (Duplicolor T408 here)
5. Wait 12-24 hours, wet sand very lightly with 600 grit sandpaper
6. Repeat steps and lay down two to three coats or until cover is completely opaque, but do not sand the last colored coat
7. Apply clear coat (Duplicolor T125)
I did not sand in between clear coats
Optional:
8. Determine that your front cover is bland and needs a design
9. Search the web for a graphic
10. Size graphic to fit entire sheet of paper in Landscape Orientation
11. Print out Design
12. Cut Manila folder in half and tape design on top of folder. We will be cutting out the design from the folder, using the printed page on top as a guide.
12.5 Use Exacto knife or razer blade to cut out design. For this I put a thick magazine under the folder and cut all the way into the top few sheets of the magazine.
14. Center your new stencil on your painted plate cover and tape in place. Use the rest of the folder as a barrier to block overspray
15. Paint within the stencil at a 90 degree angle to the surface. Do not spray at a 45 degree angle because paint will go under the stencil.(I used Duplicolor Black Metallic)
16. Let dry for 2 hours, then remove Stencil
17. Let dry for an additional 22 hours.
18. Apply more layers of clear coat (with no sanding in between) until a good coat is established
19. After drying for 24 hours, wash and apply a wax or polish if desired
20. Install
I think it came out pretty good, and it is a lot easier than trying to track down a plate cover in some of the harder to find colors.
I got the inspiration from this thread:
http://forums.corvetteforum.com/c5-g...99-pewter.html
Last edited by banner1; 05-05-2010 at 09:55 AM.
 05-05-2010, 12:01 AM
#2
Team Owner

Member Since: Mar 2004
Location: Oklahoma City OK
Posts: 58,259
Received 1,675 Likes
on
1,298 Posts
C6 of Year Finalist (appearance mods) 2019

Good job!
05-05-2010, 10:28 AM
#3
Melting Slicks


My 03 vert came with a nice one--which sits in it's original pkg in my garage. Idaho is a "front plate state" and the local constabulatory seems to be operating in a "revenue generating mode"...
05-05-2010, 10:49 AM
#5
Tech Contributor

 I actually think it looks cool without the lettering...