
Make your own C5 Oil Sender relocation kit for $50
 01-21-2013, 10:14 AM
#21
Cruising


Member Since: Sep 2012
Location: Crandall Texas
Posts: 12
Likes: 0
Received 0 Likes
on
0 Posts
I am a new corvette owner and also new to the forum and I just want to say thanks to all of you guys for all of your tips. I ordered this parts list from Jegs yesterday. Saved me $100 over just purchasing the premade kit from Ecklers. I also wanted to share that the Oil Sender unit from O'Reilly's is $40 with a lifetime warranty, so from what I am hearing in this forum, this all to common experience will not only be an easy fix in the future, but will also be no money out of pocket if you go with a lifetime warranty. I have had no problems out of my '01 coupe since i bought it 6 months ago, and then this week, the oil sender went out and the seat track broke on me 2 days later, so I am parking it until I can get these two things fixed.
If I can find another way to fasten the sender, I will definitely share with you guys. Thanks again for sharing your experiences....
If I can find another way to fasten the sender, I will definitely share with you guys. Thanks again for sharing your experiences....
 01-21-2013, 10:40 PM
#22

Good news is that the Oriellly's auto parts sender is $40, and it is a limited lifetime warranty (not sure what limited lifetime means).
Bad news is there is no Oriellys in the Northeast (see their website for locations). If bought on-line, there is $14 of shipping via Fed-ex.
Bad news is there is no Oriellys in the Northeast (see their website for locations). If bought on-line, there is $14 of shipping via Fed-ex.
01-30-2013, 03:10 PM
#23
Le Mans Master


I was just looking at a relocation kit for the oil pressure switch sold by Total Performance Engineering which locates the switch under the alternator in an oil galley which comes with an extra long factory looking harness. They claim that it is proven and can be changed just like a spark plug. These come complete with a new switch .Has anyone used these ?
01-30-2013, 04:05 PM
#24
Safety Car

I just moved my sensor to the plug in the front side of the block and used the plug I took out to plug the hole behind the intake. Then it was just running a couple of spliced wires to the new location. Cost nothing but a little time. The only difference is I'm measuring the oil pressure before the filter. I have heard the arguement about a clogged oil filter but in my 35+ years of working on cars I have never had one.

Last edited by printmanjackson; 06-28-2013 at 01:57 AM.
The following 2 users liked this post by printmanjackson:
DECON BLUE (09-12-2020),
old stingray (09-28-2015)
01-30-2013, 06:54 PM
#25
Instructor
Member Since: Jul 2011
Location: Atlanta GA
Posts: 110
Likes: 0
Received 0 Likes
on
0 Posts
I just moved my sensor to the plug in the front side of the block and used the plug I took out to plug the hole behind the intake. Then it was just running a couple of spliced wires to the new location. Cost nothing but a little time. The only difference is I'm measuring the oil pressure before the filter. I have heard the arguement about a clogged oil filter but in my 35+ years of working on cars I have never had one.
01-30-2013, 08:12 PM
#26
Safety Car
01-30-2013, 10:47 PM
#27
Burning Brakes

There is another commercially available kit that is well made, but it's over $200.00. I have it on my car because I thought it was a good design and I was too lazy to make my own. Congrats to the OP - good work!
http://www.dpecorvettes.com/gpage7.html
http://www.dpecorvettes.com/gpage7.html
Last edited by jornahow; 01-30-2013 at 10:50 PM.
01-30-2013, 11:03 PM
#28
Instructor
Just replaced my sender also. Replaced original with brass Borg-Warner. Not looking forward to doing it again any time soon. Does anyone know how long these senders usually last? My original lasted about 60k miles. BTW thank you for great post. If sender goes out again I will relocate it for sure.
 03-16-2013, 02:54 PM
#30
Melting Slicks


I just relocated mine and did it like the OP of this thread but a little different. I added a gauge also.
This is the parts list from Summit in order of installation.
Autometer ATM-2268 metric adapter. 16mm X 1.5 to 1/8" male NPT.
This goes in the engine block where the sensor was.
Earls 982303ERL 45 degree 3 AN male to 1/8" NPT male.
Goes into above adapter.
Russell 658080 15" braided universal hose assembly. 6AN female.
Russell 660410 Adapter AN3 male to 1/8" male NPT.
Goes into tee.
Earls 991701ERL Female Tee 1/8" NPT.
Fitting above and below go into this tee along with 1/8" NPT oil gauge.
Earls 916162ERL 6AN female to 1/8" NPT male.
Goes into tee.
Earls 9894DBJERL Female 16mm x 1.5 to 6AN male.
Goes into fitting above.
New oil pressure sending unit.
New 1/8" NPT analog oil pressure gauge.
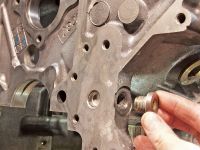
Adapter, 45, and hose in engine block.

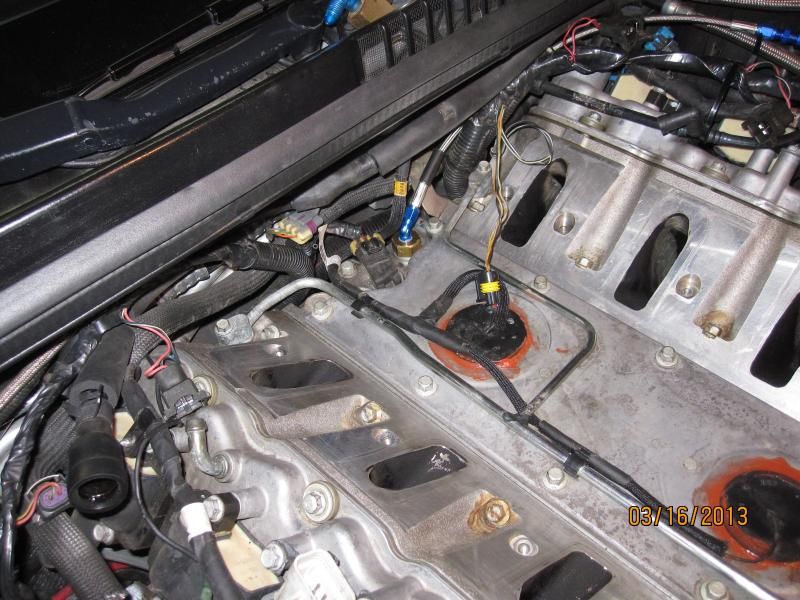
In this picture you can see how I routed it. I also untaped the wires to the sensor so I could extend them. I soldered them then used marine type heat shrink. After that I wrapped it all in electrical tape.
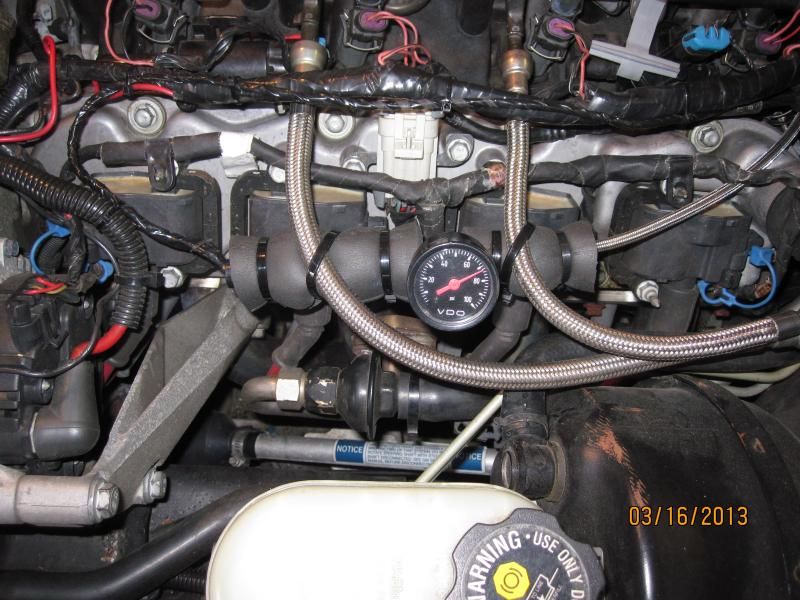
This is how I installed the new analog gauge temporarily. This gauge is actually very inaccurate. It's a used one I had laying around. I ordered a new one. Nice to have an analog gauge as a backup. Here you can see the routing of the extended wires and plug. I don't usually have the engine covers in place but if I do install them, I'll cut a hole for the gauge.
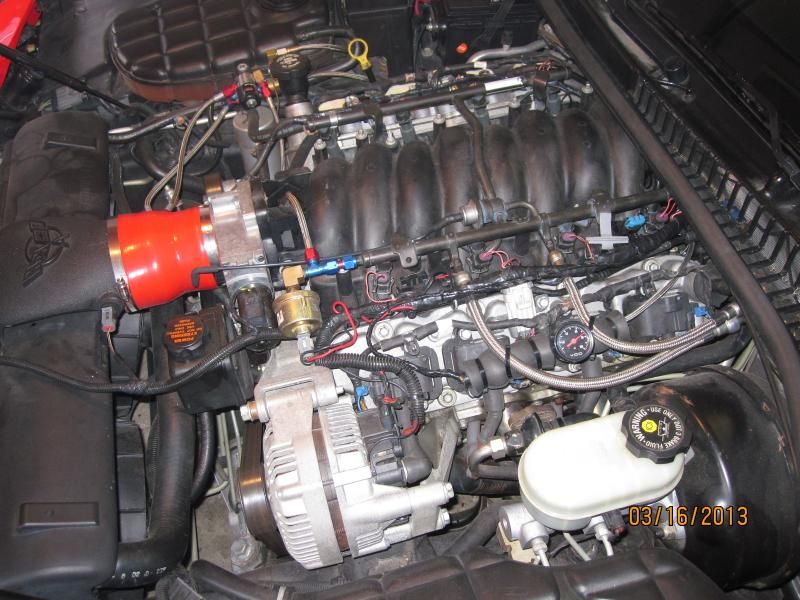
Back in business.
This is the parts list from Summit in order of installation.
Autometer ATM-2268 metric adapter. 16mm X 1.5 to 1/8" male NPT.
This goes in the engine block where the sensor was.
Earls 982303ERL 45 degree 3 AN male to 1/8" NPT male.
Goes into above adapter.
Russell 658080 15" braided universal hose assembly. 6AN female.
Russell 660410 Adapter AN3 male to 1/8" male NPT.
Goes into tee.
Earls 991701ERL Female Tee 1/8" NPT.
Fitting above and below go into this tee along with 1/8" NPT oil gauge.
Earls 916162ERL 6AN female to 1/8" NPT male.
Goes into tee.
Earls 9894DBJERL Female 16mm x 1.5 to 6AN male.
Goes into fitting above.
New oil pressure sending unit.
New 1/8" NPT analog oil pressure gauge.
Adapter, 45, and hose in engine block.
In this picture you can see how I routed it. I also untaped the wires to the sensor so I could extend them. I soldered them then used marine type heat shrink. After that I wrapped it all in electrical tape.
This is how I installed the new analog gauge temporarily. This gauge is actually very inaccurate. It's a used one I had laying around. I ordered a new one. Nice to have an analog gauge as a backup. Here you can see the routing of the extended wires and plug. I don't usually have the engine covers in place but if I do install them, I'll cut a hole for the gauge.
Back in business.
 03-28-2013, 10:29 PM
#32
Burning Brakes
Doing a Fast 92mm and LS2 TB in a couple of weeks. Just order all the parts for the oil pressure sending unit relocation install.
Great info!
Great info!
Last edited by b_rad!; 03-29-2013 at 12:05 AM.
03-28-2013, 10:56 PM
#33
Safety Car

This post was inspirational
I have a failed sensor that was starting to weep oil, and was really looking for a reasonably priced set up, when this post appeared with just what I wanted
I called Jeg's and got all the stuff listed, plus some assembly lube
I want to thank the original poster for the help, and also to the guy on the second page who posted the pictures of the completed work on a nice clean engine
Nice photography, you can clearly see, in the first picture, the rubber "Y" connector I ripped in half removing the manifold
Really wish I knew the part number of that thing
It's kind of slowing down the job completion
04-10-2013, 09:59 AM
#34
Okay, the weather has finally improved, so I'm getting the car out. Fired it up, no leaks with the oil pressure sending unit install. I torqued the manifold to spec, but I'm wondering if the bolts should be re-torqued after ??? miles or hours? Anybody have any recommendations?
06-26-2013, 04:06 PM
#35
6/26/13
The "mode" control to which controls where air is sent (vents, defrost, floor, etc) was showing the change in mode, but airflow remained fixed in the current mode. There is a vacuum tube (VERY small-3/16" OD) coming out of the wiring harness that connects to an right-angle rubber boot on the back of the manifold. (see the picture below..look on the left side of the picture carefully to see the tube sticking out where the metal 3/8" tube makes a 90 deg. bend) There is a sensor that will remove on top of the boot. When you slide the manifold forward in the process of changing the oil-sending unit, this LITTLE tube WILL disconnect, as there is no slack in the tube. To eliminate the problem, you will need about 5" of a 3/16 I.D. rubber tube. Push one end over the exposed tube about 3/4", and take a 1" piece of 3/16 OD copper tube (I used a 3/16 x 3/4" "pop" rivet-cut off the flange and remove the stud) to make up a splice between the extension tube and the right-angle boot. Feed the splice end into the boot, and you are ready to begin reinstall of the manifold.
The "mode" control to which controls where air is sent (vents, defrost, floor, etc) was showing the change in mode, but airflow remained fixed in the current mode. There is a vacuum tube (VERY small-3/16" OD) coming out of the wiring harness that connects to an right-angle rubber boot on the back of the manifold. (see the picture below..look on the left side of the picture carefully to see the tube sticking out where the metal 3/8" tube makes a 90 deg. bend) There is a sensor that will remove on top of the boot. When you slide the manifold forward in the process of changing the oil-sending unit, this LITTLE tube WILL disconnect, as there is no slack in the tube. To eliminate the problem, you will need about 5" of a 3/16 I.D. rubber tube. Push one end over the exposed tube about 3/4", and take a 1" piece of 3/16 OD copper tube (I used a 3/16 x 3/4" "pop" rivet-cut off the flange and remove the stud) to make up a splice between the extension tube and the right-angle boot. Feed the splice end into the boot, and you are ready to begin reinstall of the manifold.
03-26-2015, 07:03 PM
#36

Just wanted to log in to say thanks. Was doing maintenance on my trans am and broke the stupid sensor. I was going to change it out anyway. Im doing the ls6 pcv conversion. And eliminating its hoses. Thanks again.
03-26-2015, 07:27 PM
#37
Le Mans Master
 05-17-2015, 12:17 AM
#38
i finally got my car back together today. it was my first time fooling with hoses like this. when i started the car my oil pressure is at max. i have the oil pressure sensor with the silver threads. another thing is that it doesnt screw all the way into the fitting. also leaks oil. i wanted to use the teflon tap but people say not to use it because it disrupts the ground for the sensor. i know this is for the corvette but its a great idea for the fbody guys. just need some pointers. first time putting these kinds of hoses together and would love to learn more on how to get them to not leak while keeping the oil pressure sensor functioning.
05-17-2015, 07:03 PM
#39
1/4 mile/AutoX

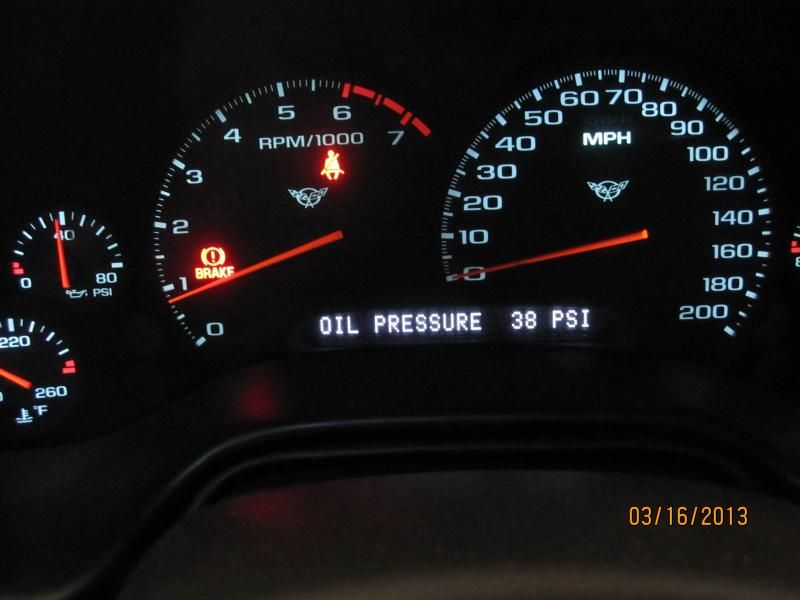
See my post on another post on this issue. Oil Pressure Sensor reading 129psi
IRON MAIDEN
IRON MAIDEN
