
My Cam & Supercharger Build Thread!
 04-30-2014, 10:43 PM
#1
Burning Brakes

Thread Starter

Hey Everyone!
The itch for more power, along with the many fantastic build threads on this forum (I particularly enjoyed Chicago1's build ), have convinced me to dump some money into my trusty 2000 Pewter Coupe. This thread will document my progress start-to-finish.
Toward the end of last year I started collecting parts for my build, and in preparation of the added power I had Joe @ Cordes Performance Racing in Mesa, AZ install a Mantic ER2 clutch with all the goodies. Now I'm finally ready to get started! Here's a list of everything that is sitting in my garage at the moment, in no particular order. I hope this is all I need, because I blew my budget long ago.
I'm working on my car in my free time and am taking things pretty slowly (e.g. remove a few bolts, drink a beer, repeat), so this thread may go on for a month or two.. Also, I'm starting this thread a bit late and am already about 4 nights of work into the project and will be playing catch-up with this post. I will try and keep it up-to-date going forward.
One last thing: if you're wanting to see a really clean car and garage, you won't see that here. For that you'll need to go over to Patches build thread!
OK, now for the fun stuff!
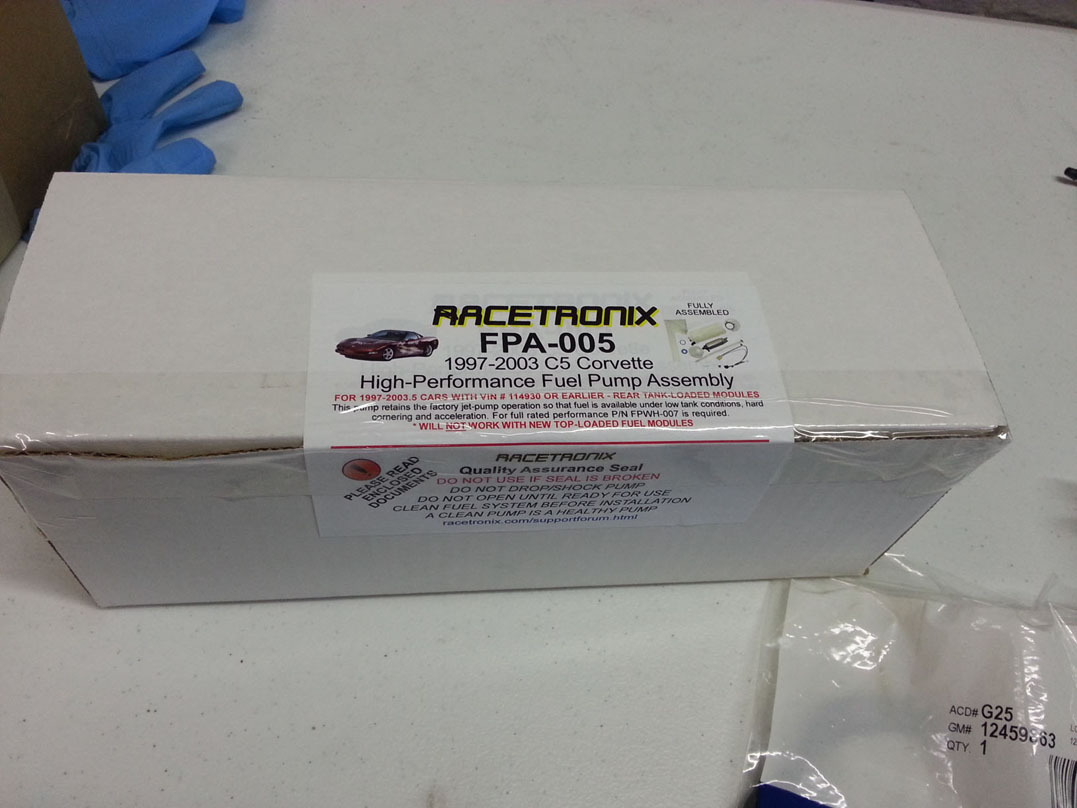
DAY ONE - FUEL SYSTEM (4 hours)
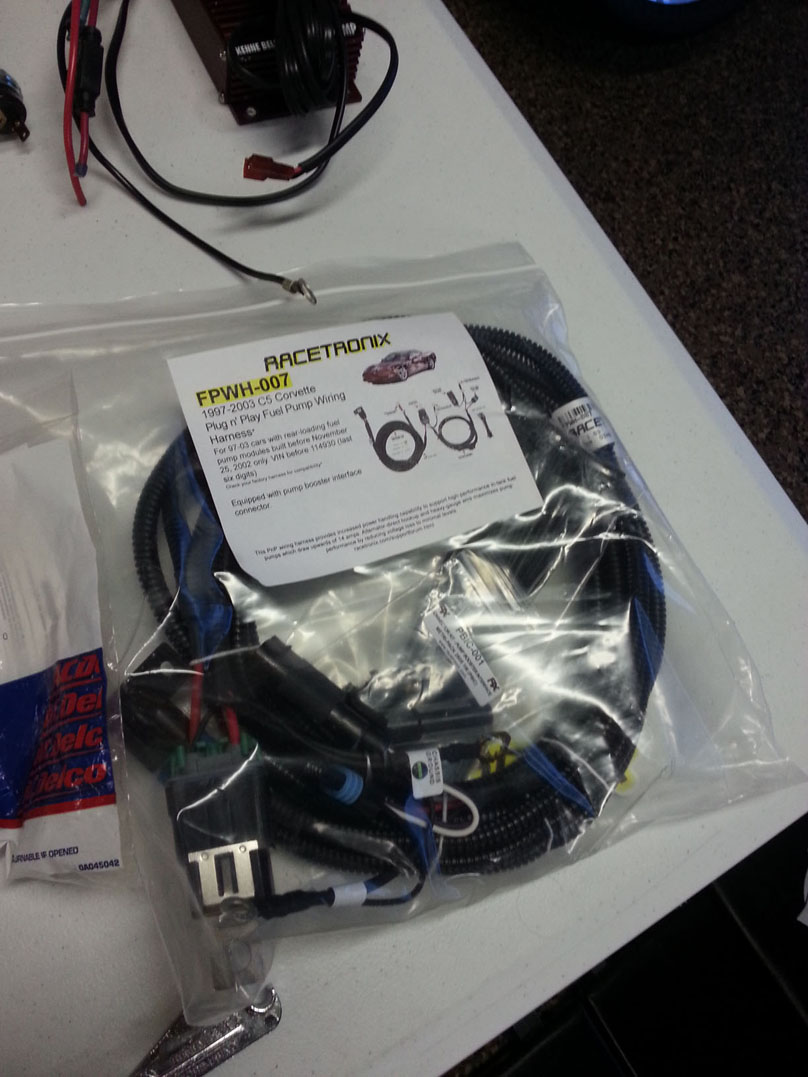
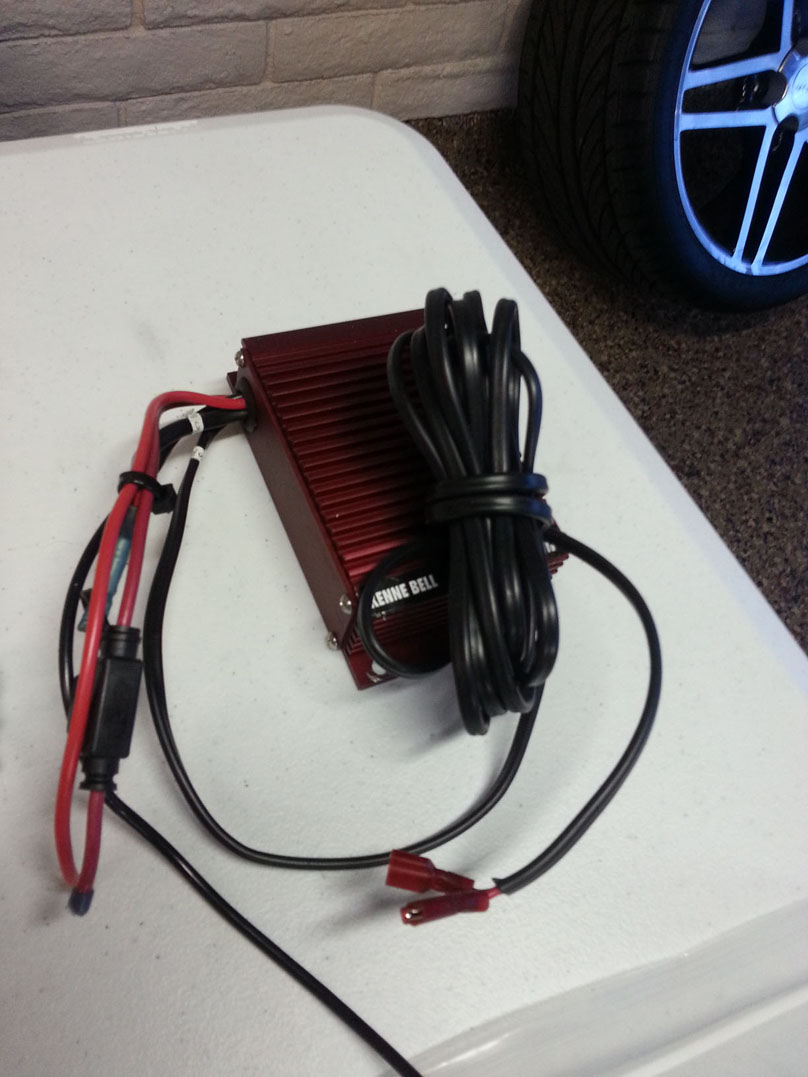
I figured I'd tackle the fuel system first since I'd be able to drive the car around afterward (provided I didn't screw anything up), and it would be a good gauge of whether I wanted to continue with the bigger tasks. Along with swapping out the pump to the new Racetronix setup (Walbro GRJ420), I added their harness and a KB 20A boost a pump and replaced the fuel sender.
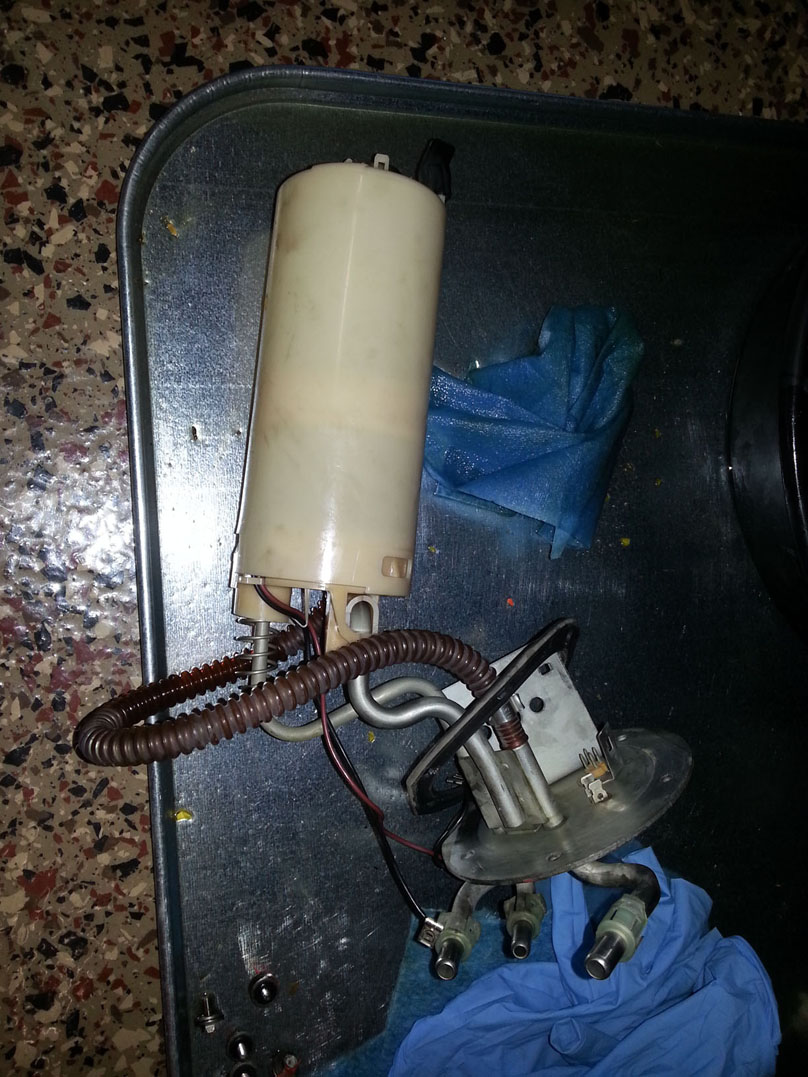
It turned out to be a straight-forward job. The only real hurdles were separating the old pump from the hat and then re-installing the entire assembly (it's a tight fit).
The new pump:
Harness:
Boost-A-Pump:
OK, so I got wrapped up in getting the old pump out and forgot to take pictures. You'll have to use your imagination!
Here's the old pump:
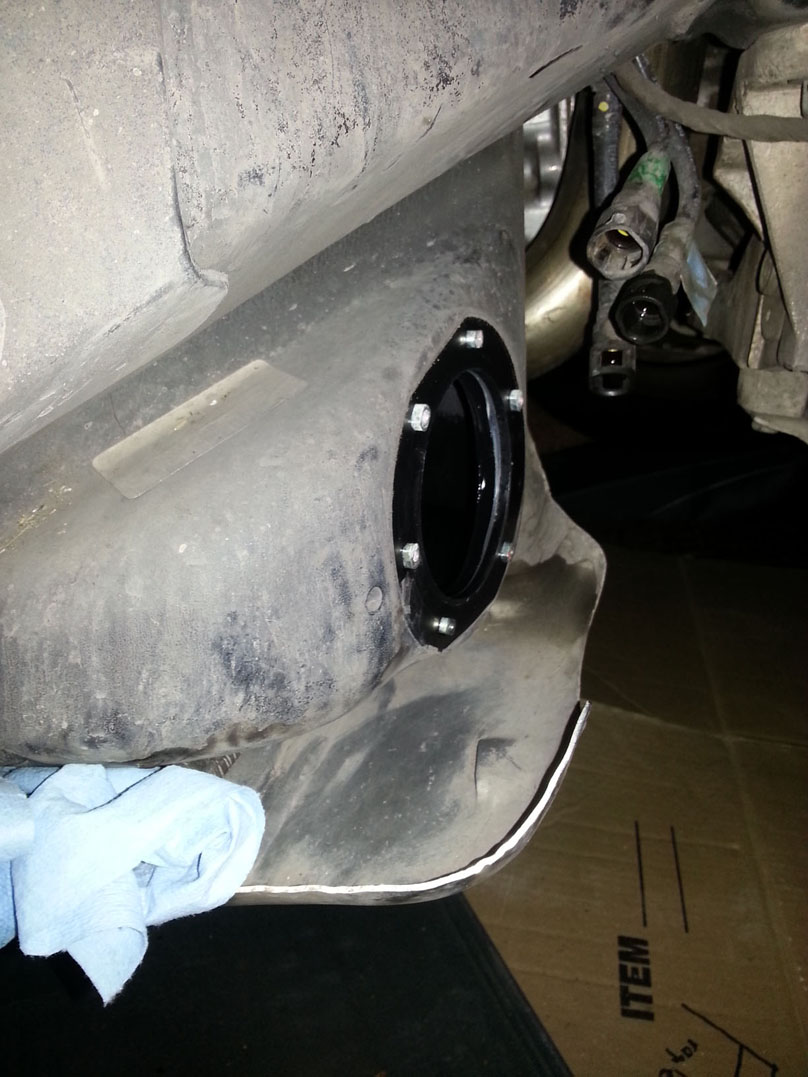
The hole in the driver side tank:
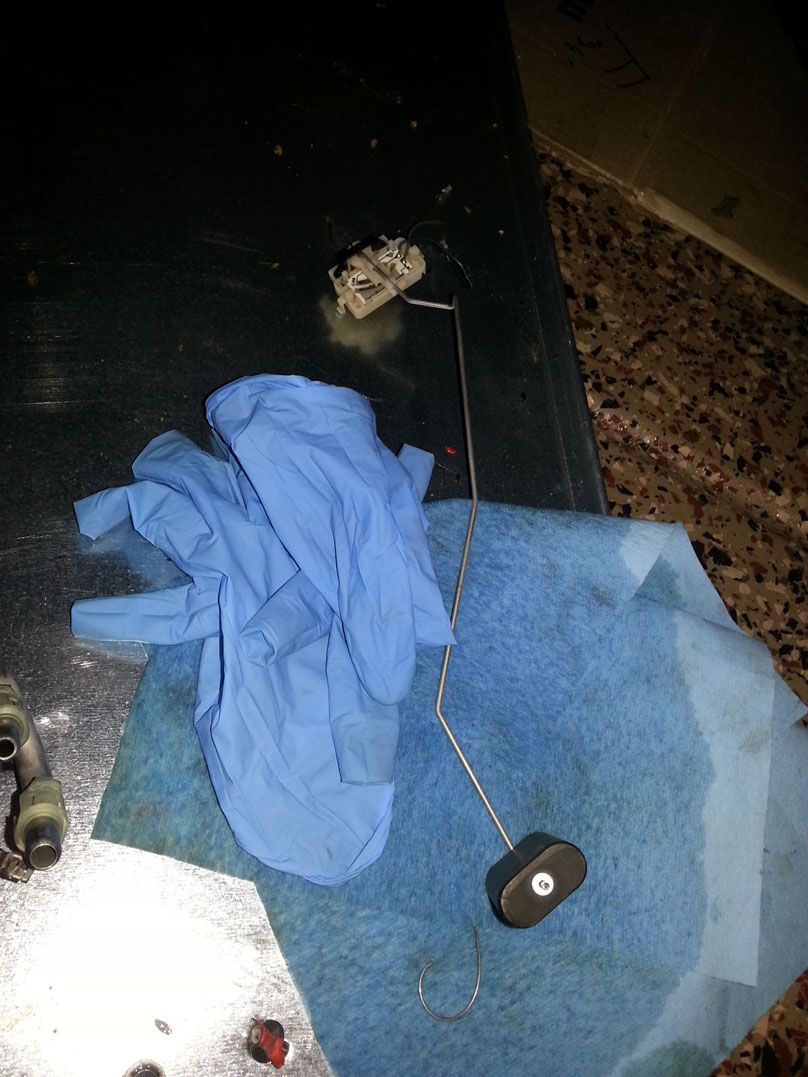
And the old sender:
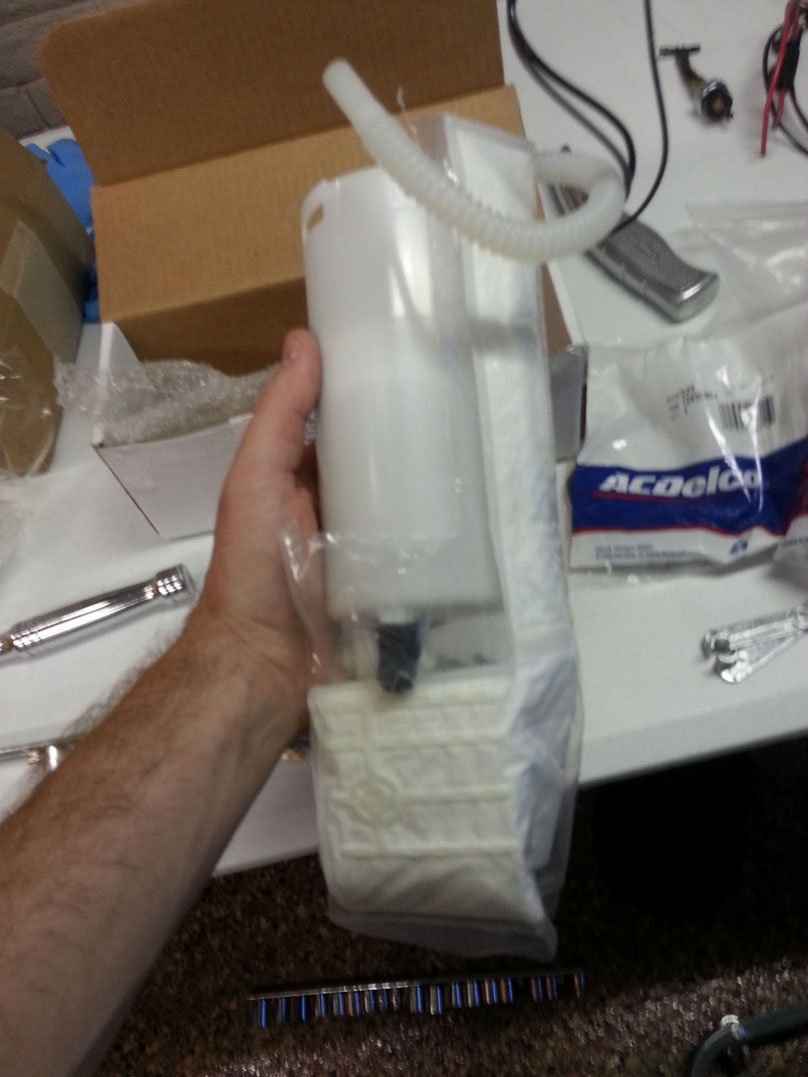
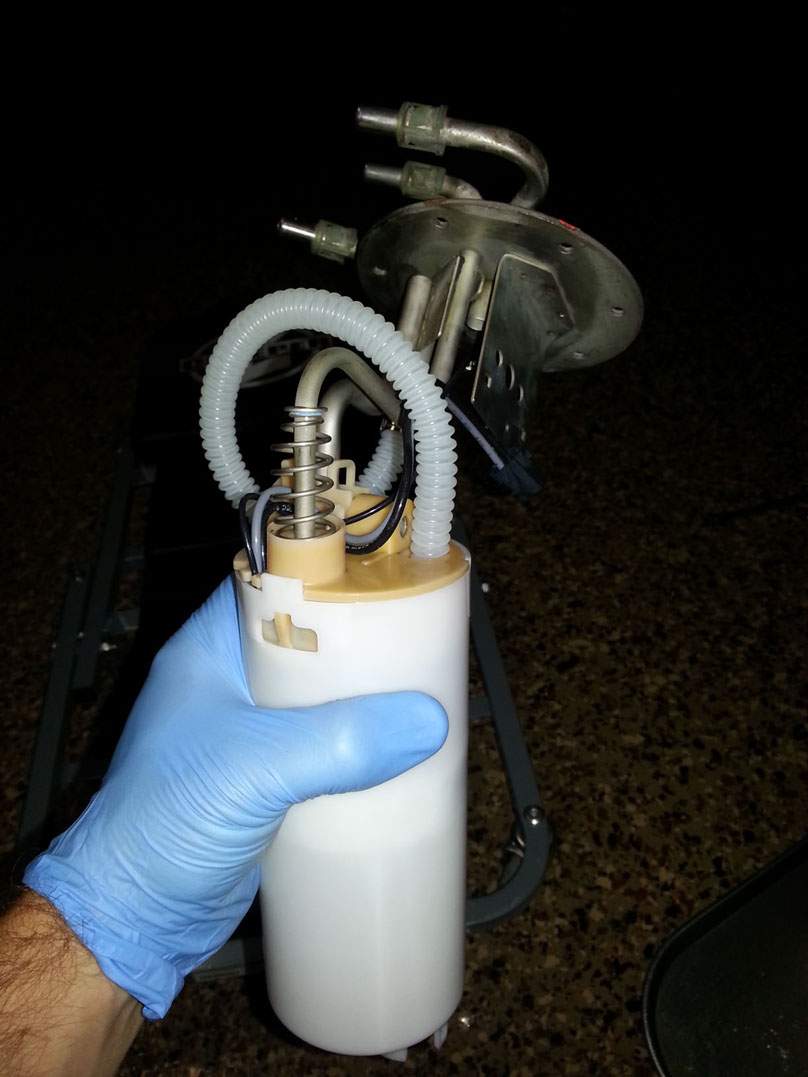
The new pump comes assembled:
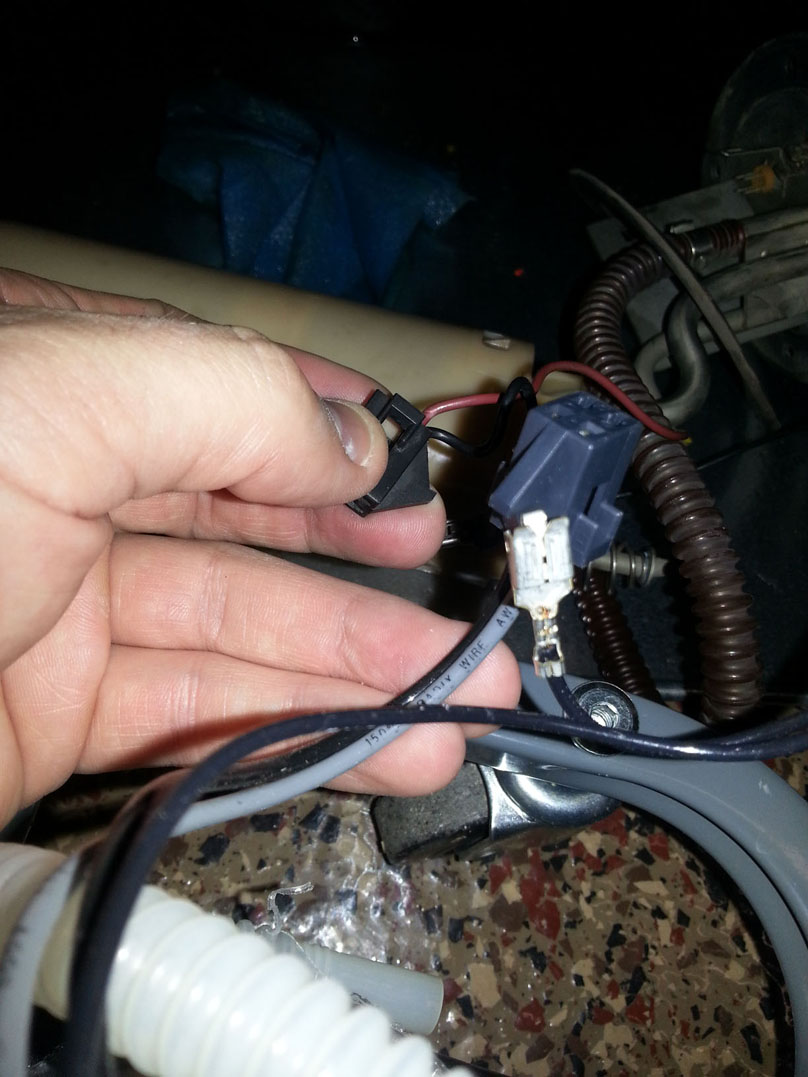
Comparison of the new pump's harness (gray & black) vs. the old (brown & black):
Old pump separated from the fuel lines:
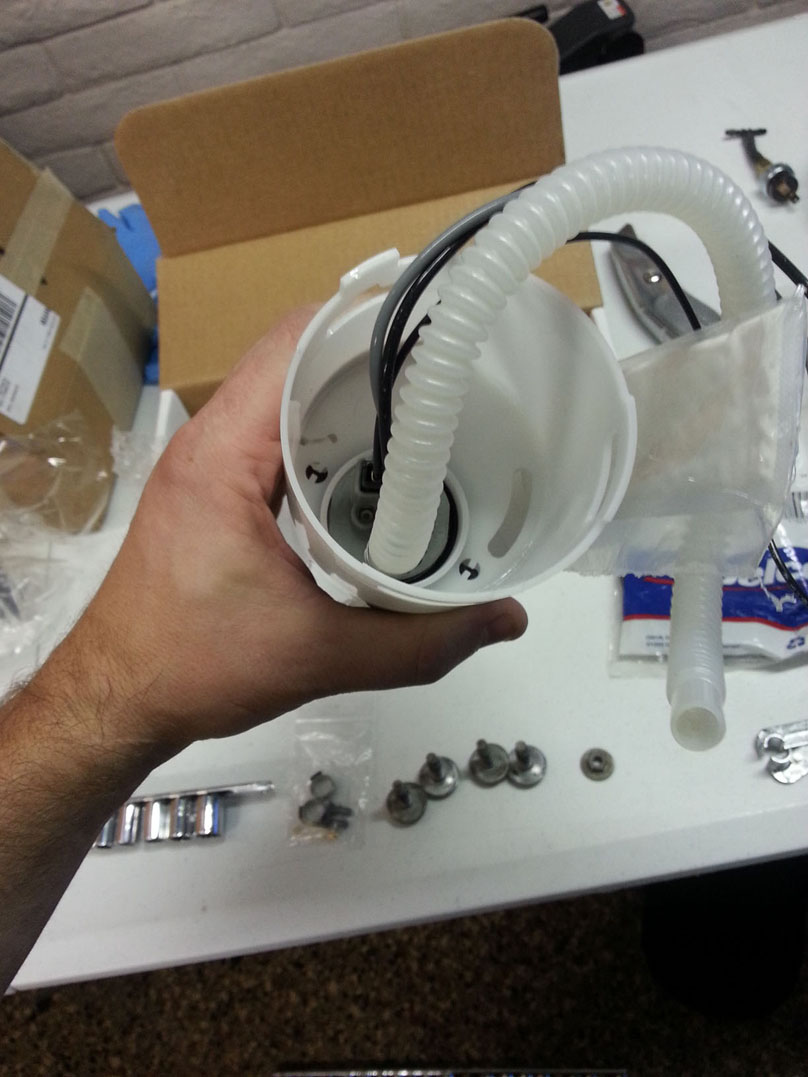
New pump, ready for install:
I somehow forgot to grab some pics of the fuel sender and the installation of the new pump. Trust me, though, I got it in there!
Here's a pic of the car up in the air during the BAP and harness install. I've already mounted the BAP and started on the harness:
BAP mounted to the frame in the inner fender well:
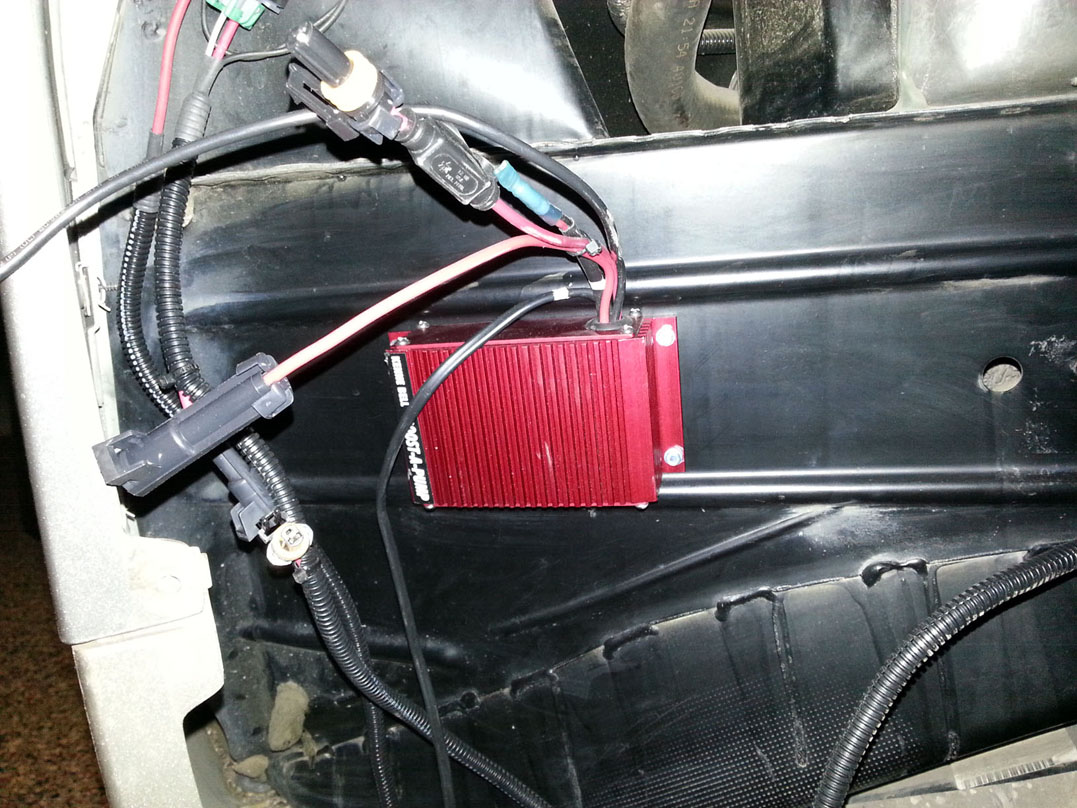
I wrapped the harness and hobbs switch wiring in wire sleeve and fed it through the rocker, through the cowl:
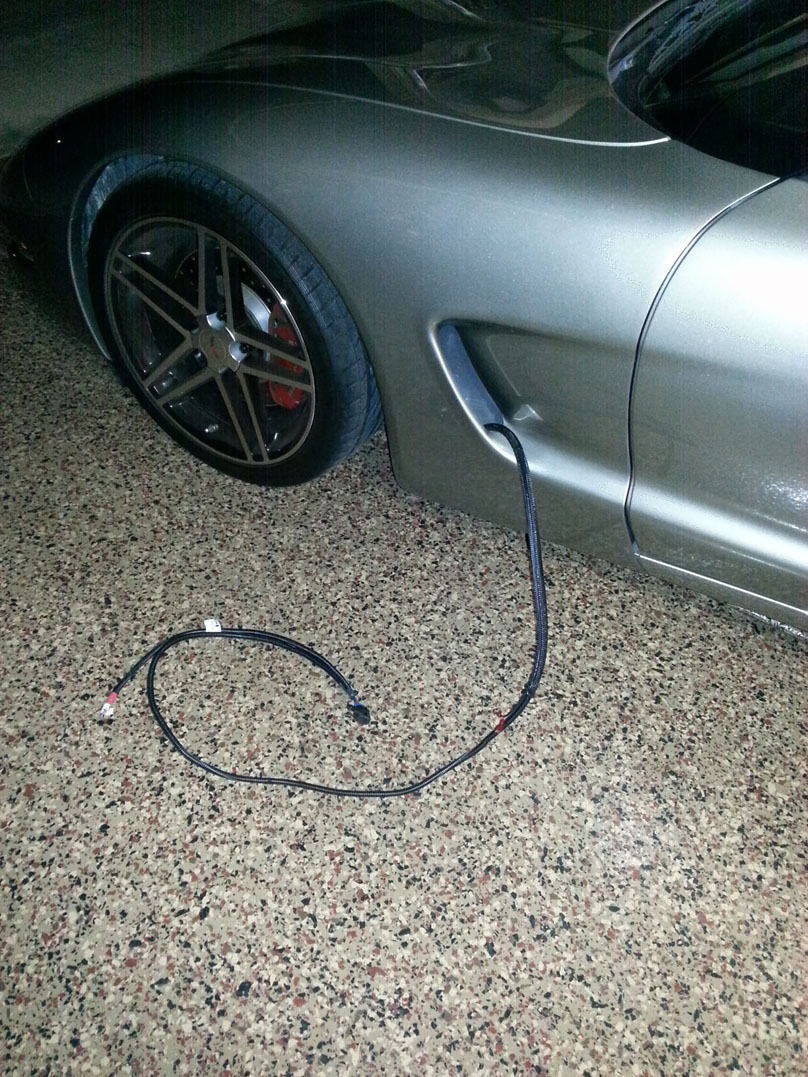
Then up the firewall:

And finally to the alternator (I've since re-routed it a bit more cleanly so it's not ziptied to the fuel line):
After buttoning up the inner fender and securing the harness with zipties, I called it done for the day.
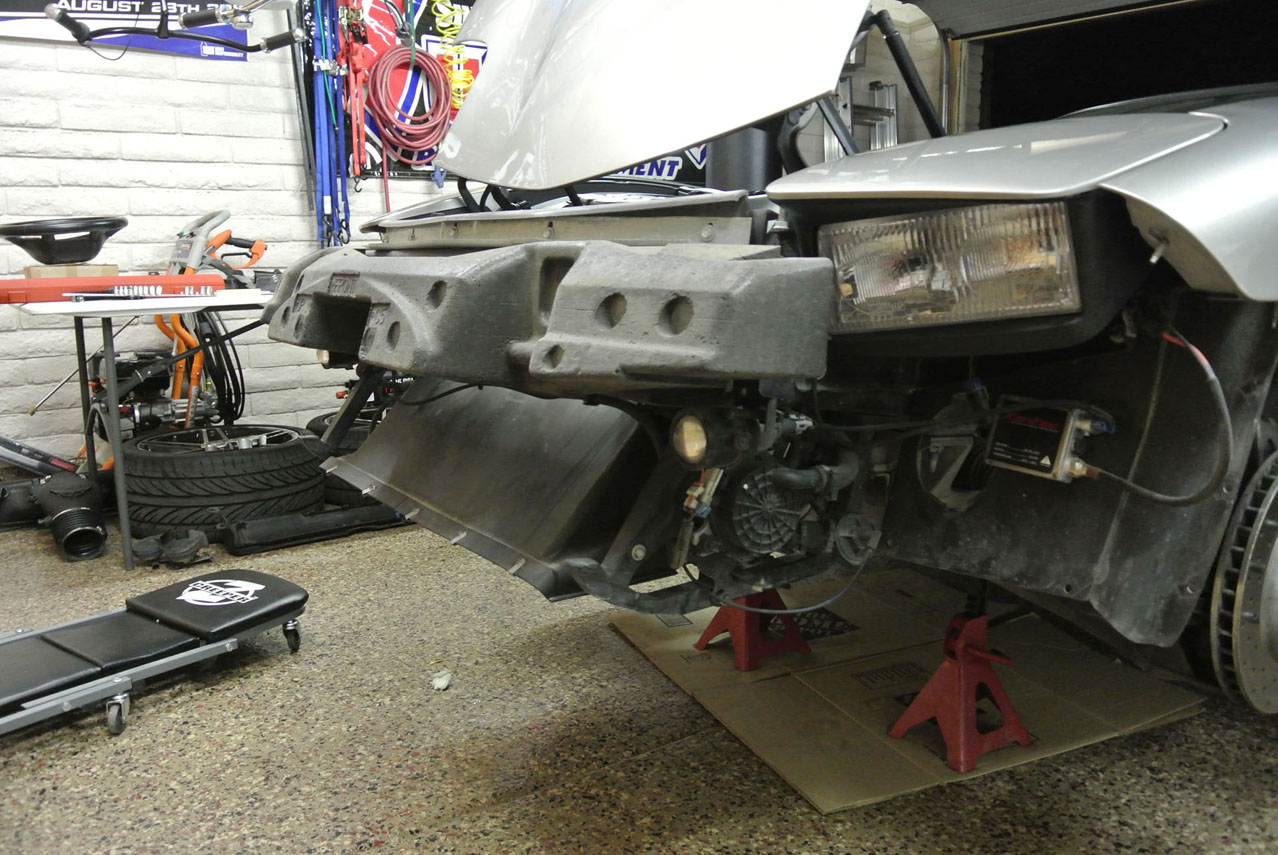
DAY TWO - REMOVE FASCIA & RADIATOR (3 hours)
OK, so I know I didn't have to remove the fascia, but it was simple enough to do and I figure it'll give me more room down the line. Plus I wanted the build sheet!
Jacked up and ready to go:
Facia removed! Sorry, I was on a roll and apparently forgot to take any pictures of this process. It was pretty easy. I followed these instructions.
As you all know, these cars are vacuums!
What is this?

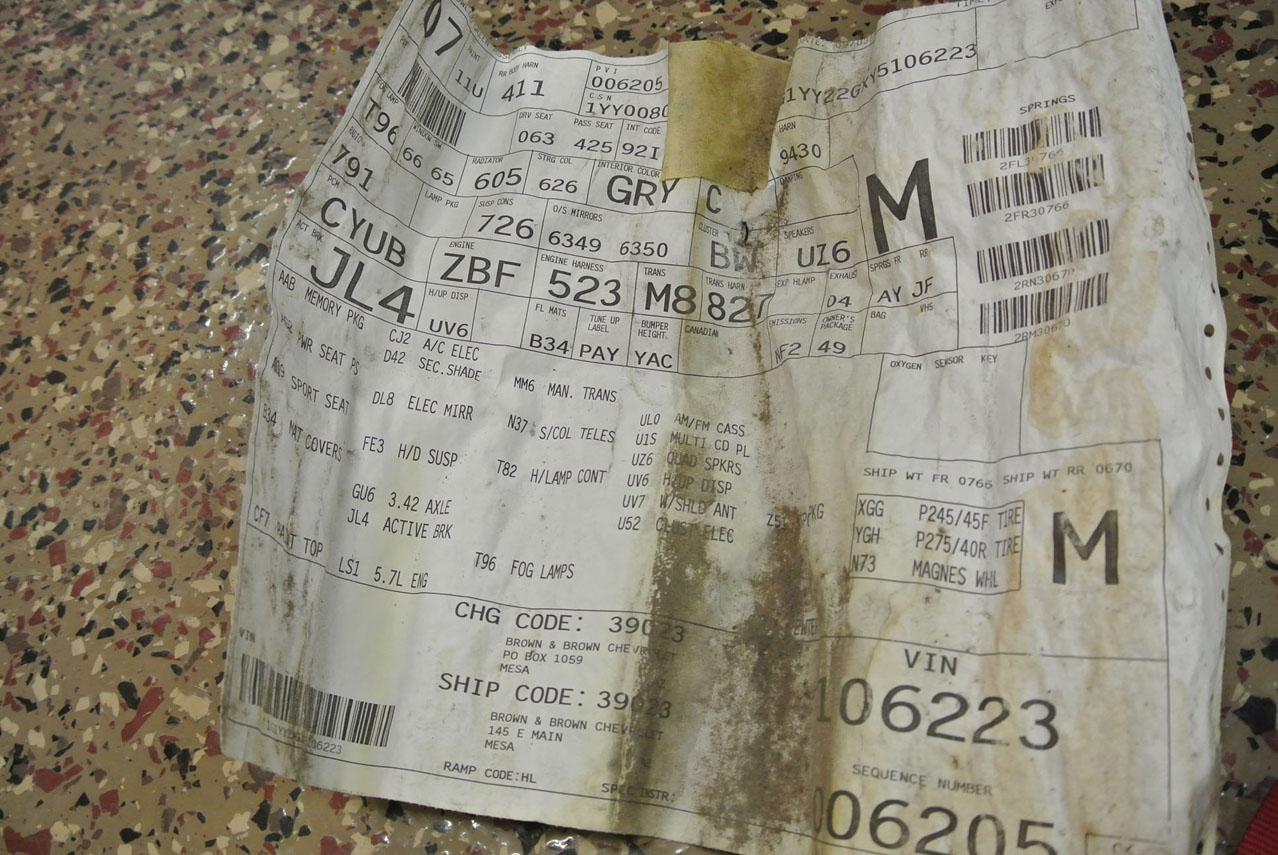
Woohoo, the build sheet! I had no idea that GM hid this here until I read about it on the forum.
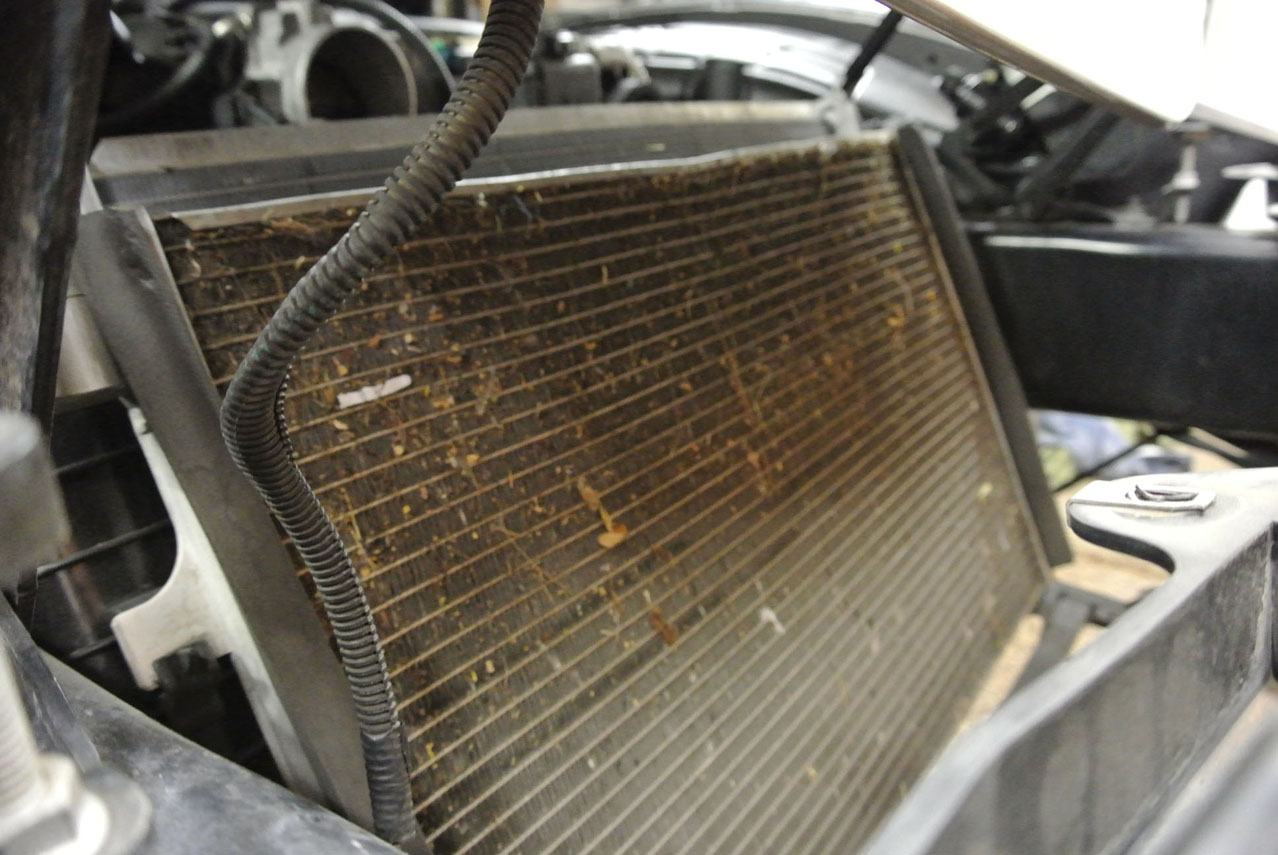
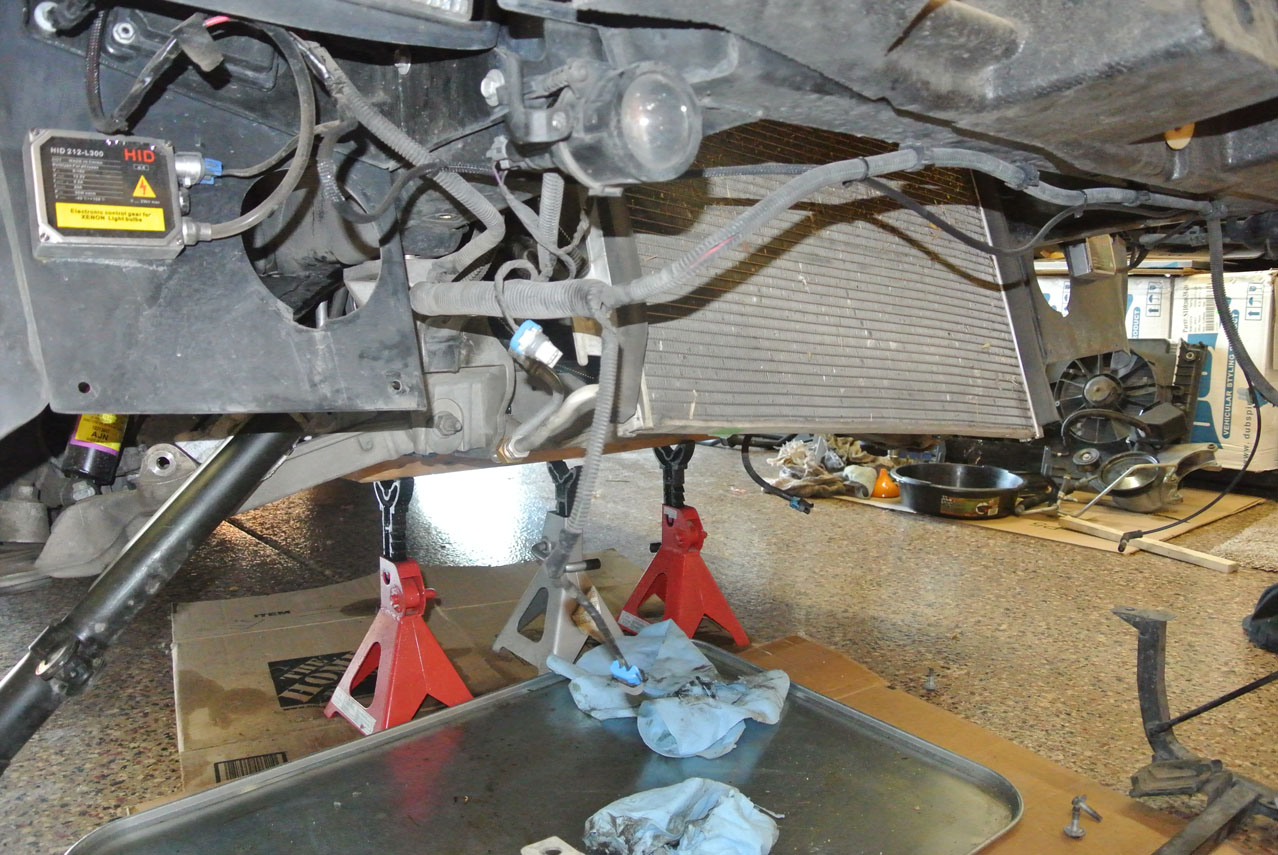
Broke one of the nipples on the radiator...good excuse to upgrade to a DeWitt's!

OK, so day 2 sucked for pics...I'll work on that.
DAY THREE - MORE DISASSEMBLY (4 hours)
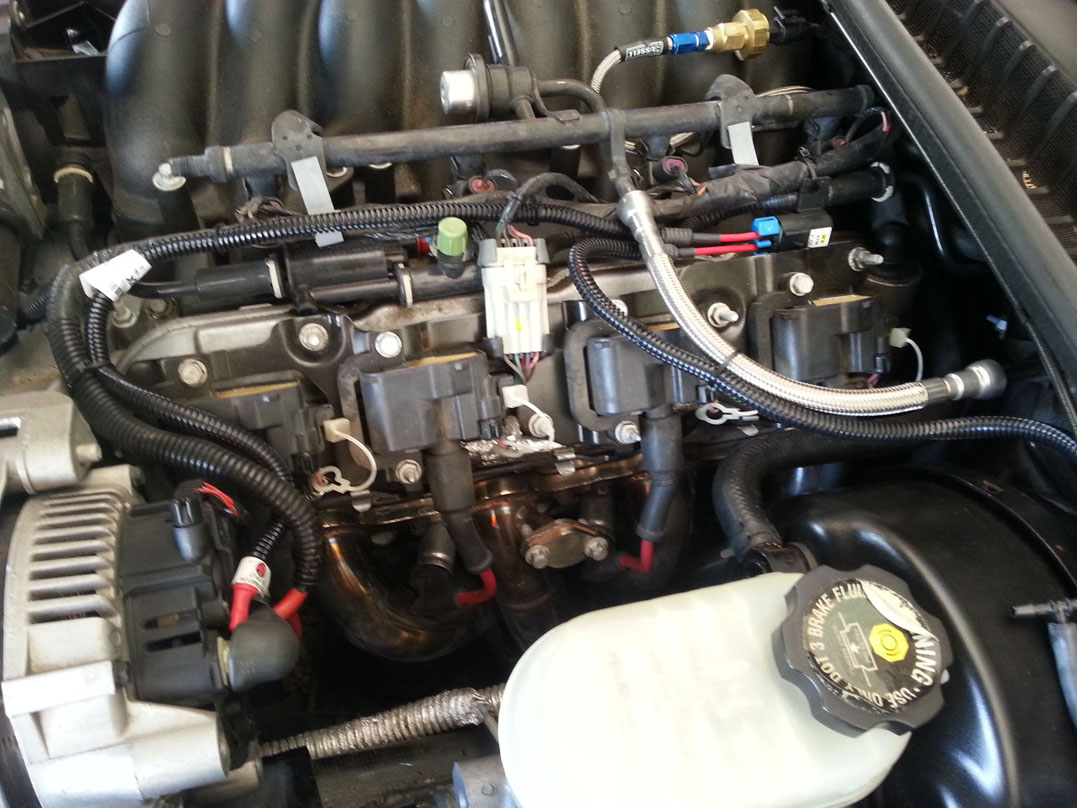
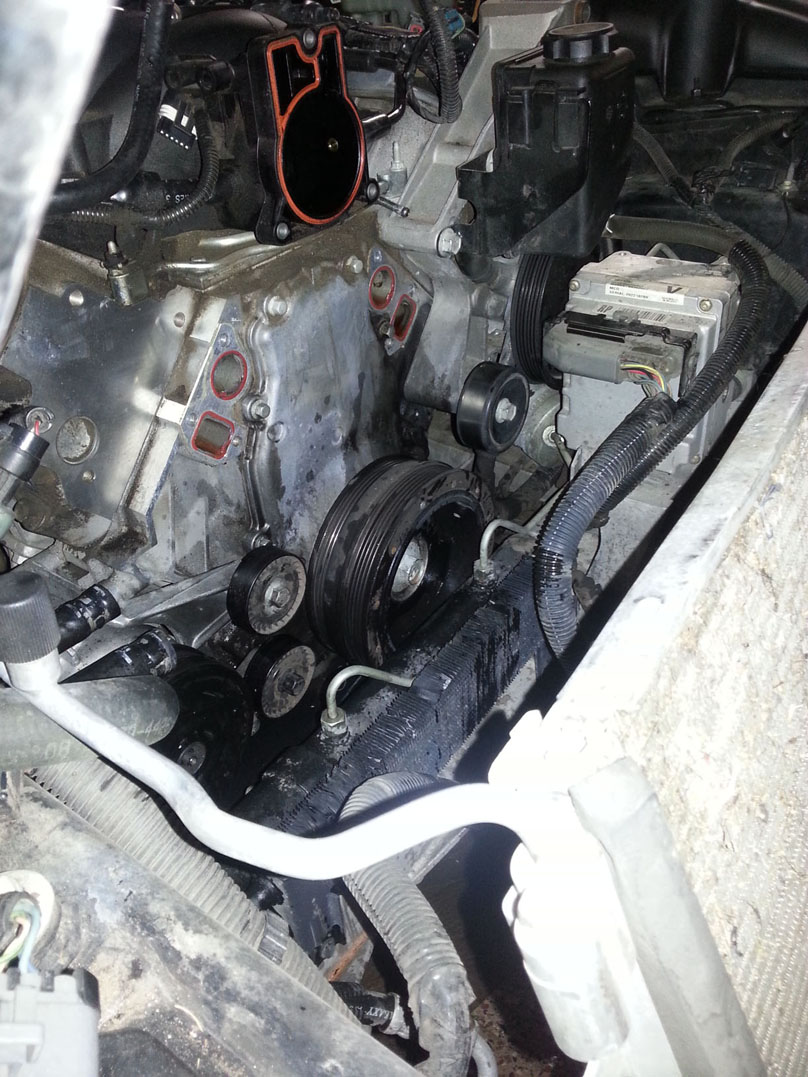
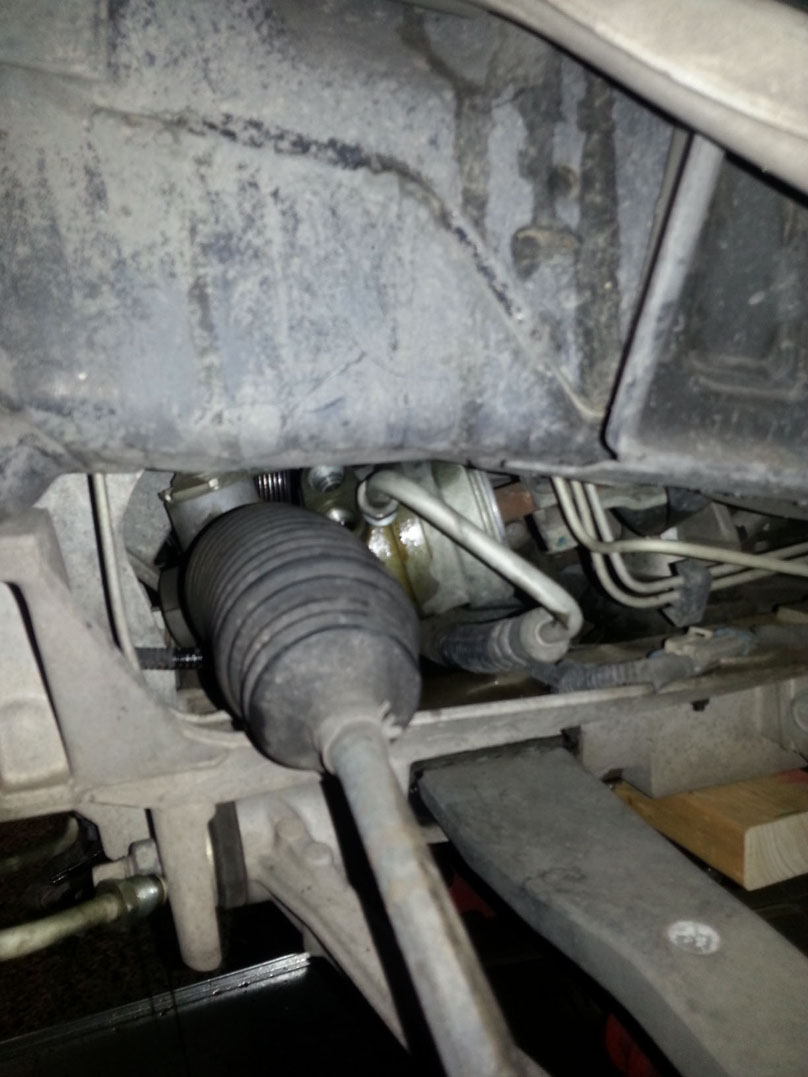
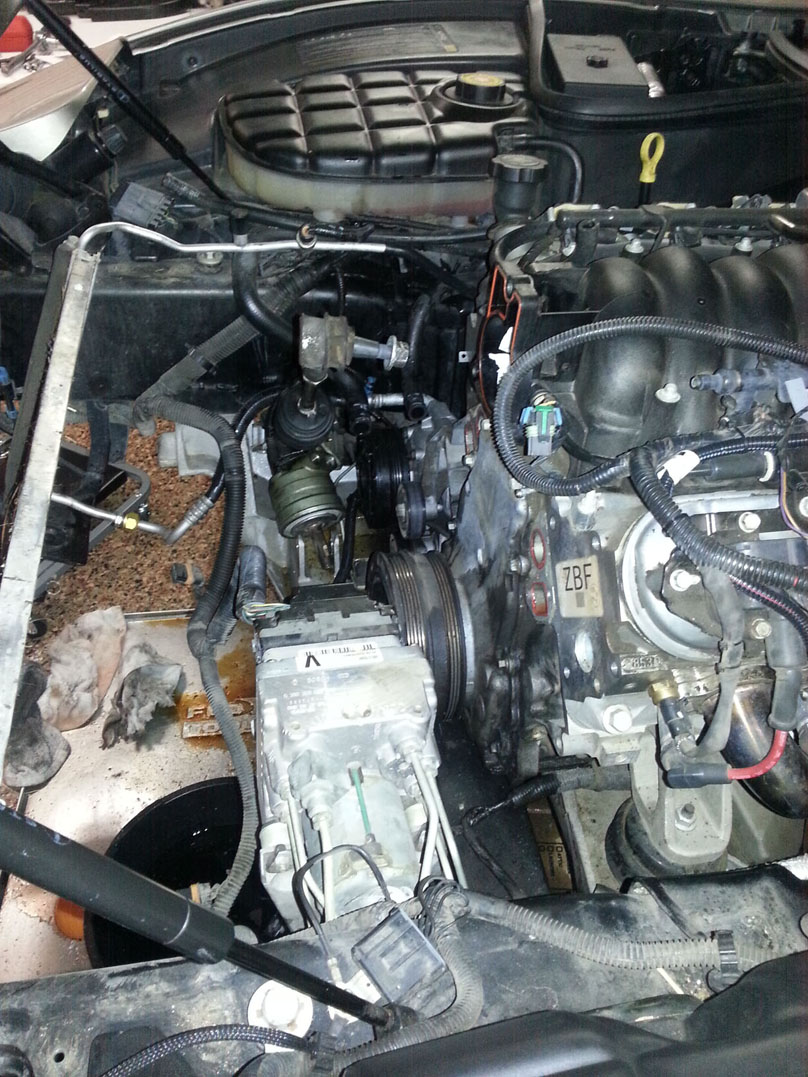
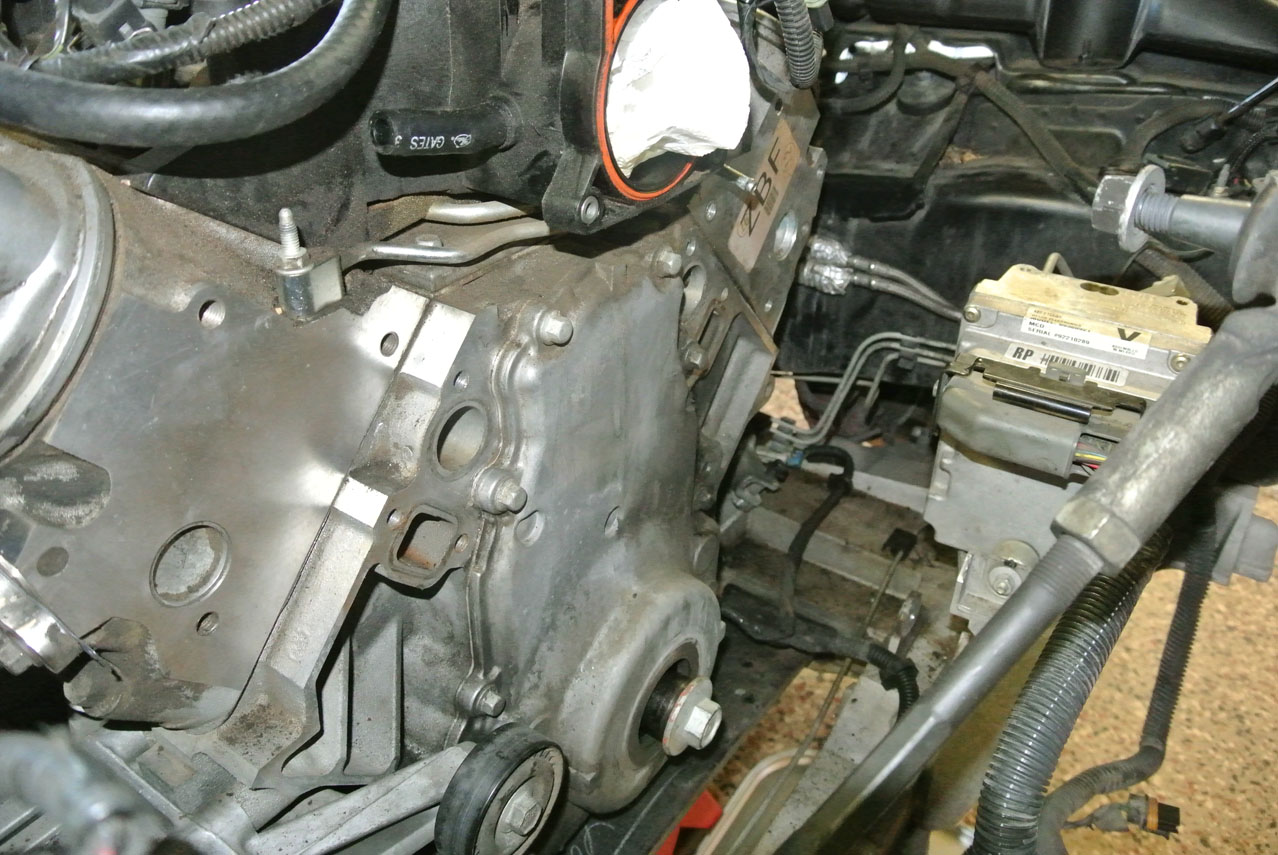
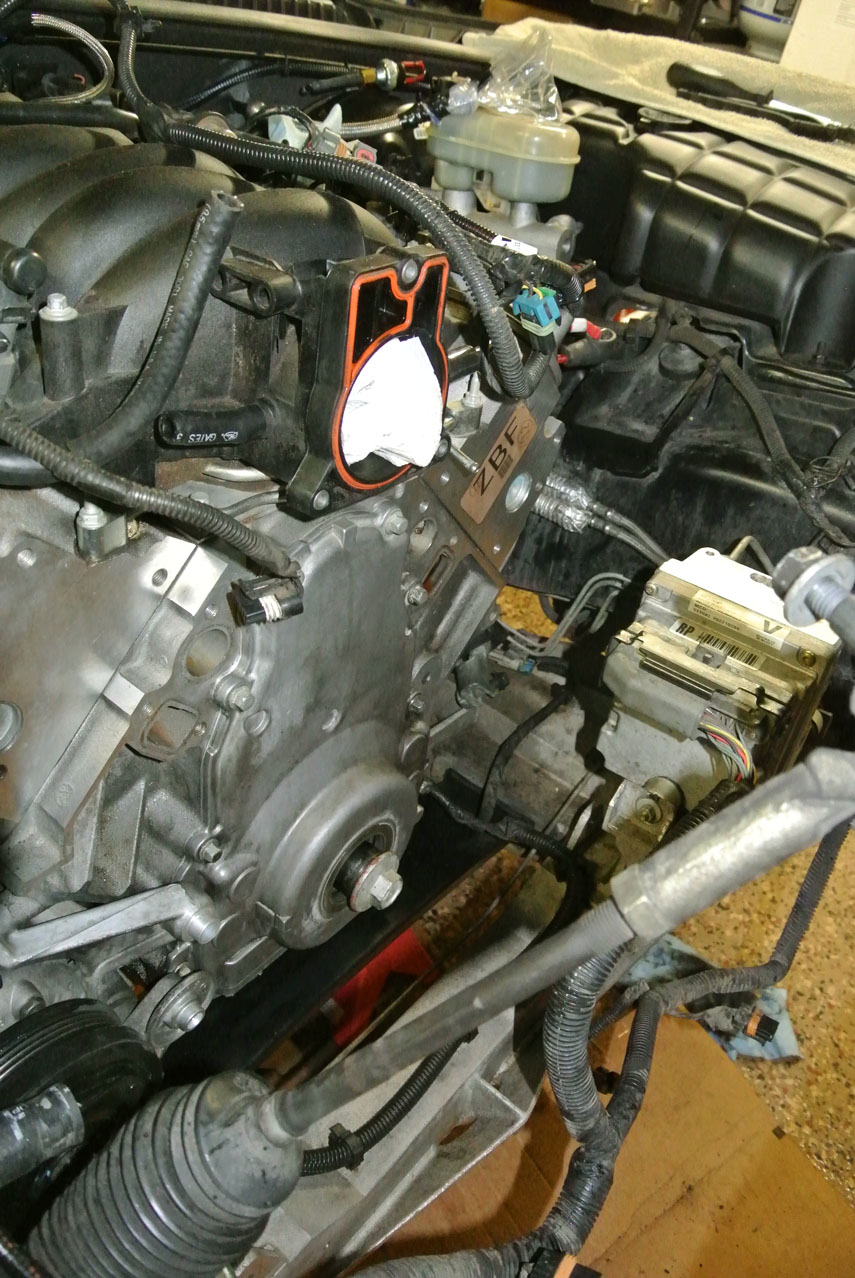
Working my way toward the timing cover. Today I removed the alternator, throttle body, water pump, PS pump and cooler, and moved the rack out of the way.
Alternator, throttle body, and water pump have been removed. These three were easy.
Removed the two lines from the steering rack. I was worried about these since so many people seem to have trouble with them, but they came off without a fuss:
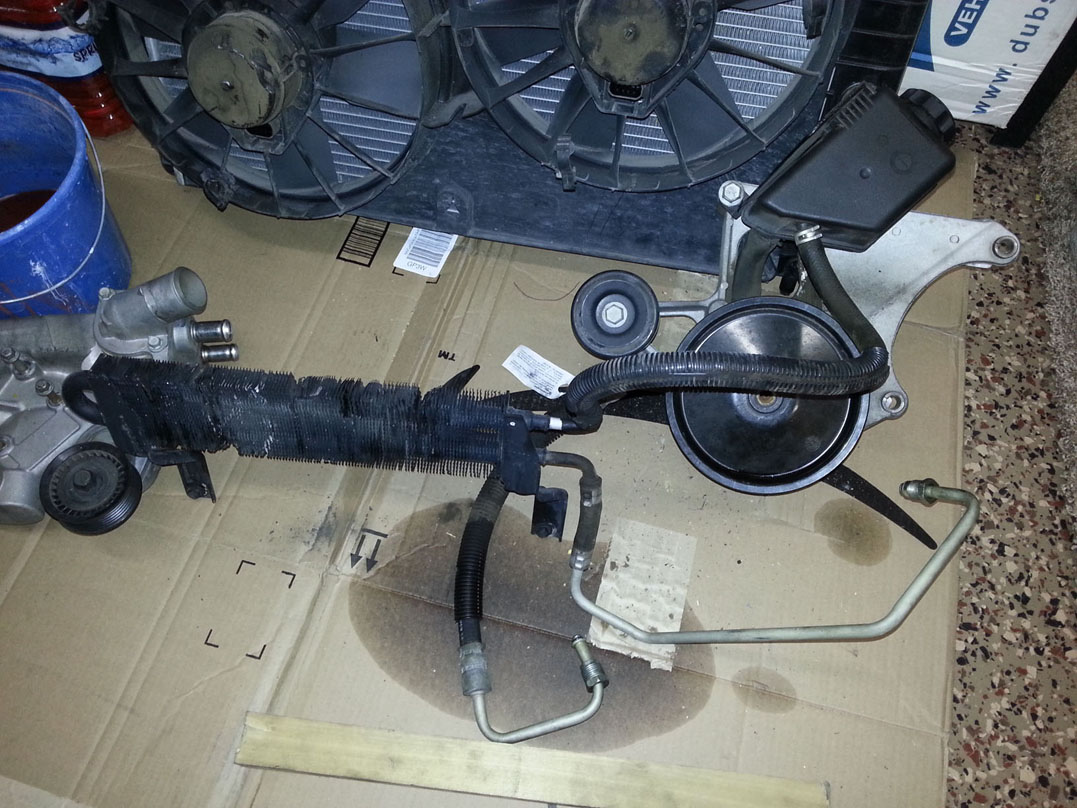
Untangling the power steering hoses from the wiring harness was a bit tricky, but I was able to remove the pump and cooler as one unit.
Next, I unbolted the tie rods, ABS pump and the rack. It was a huge pain in the *** to work the rack free from where it mounts to the passenger side. I had to beat it loose with a block of wood and a rubber mallet. Finally managed to work the rack out the passenger side fenderwell:
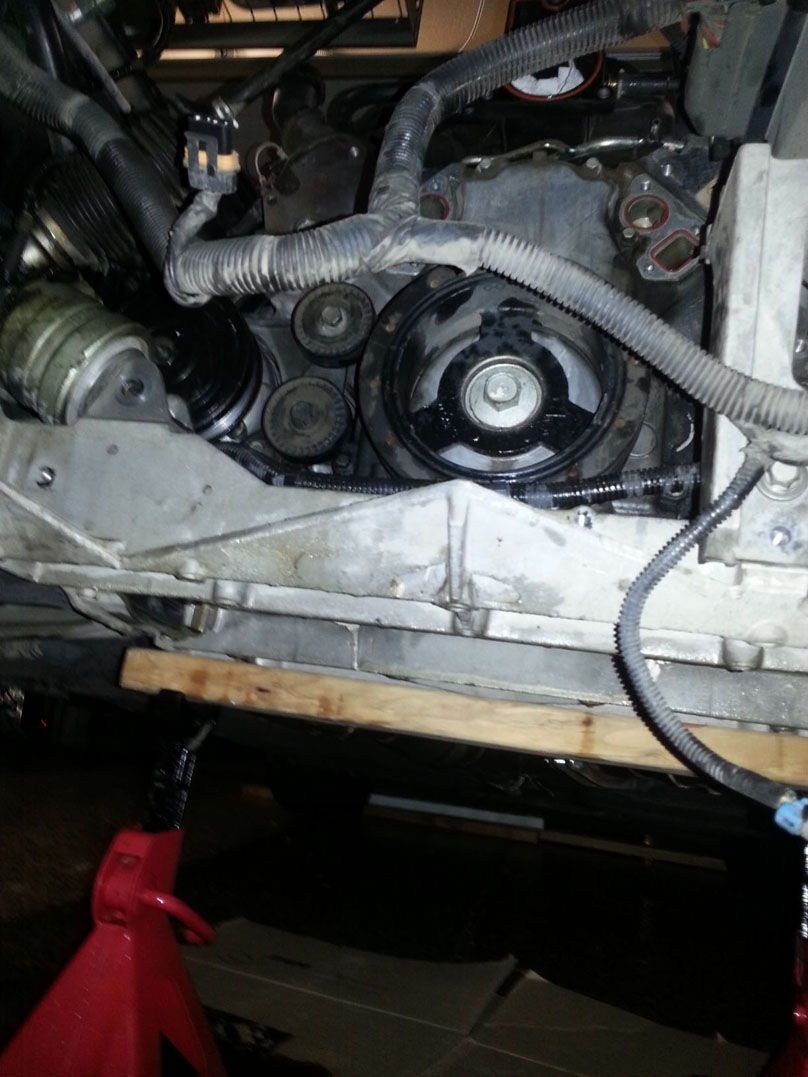
Yay! Finally a clear shot to the balancer:
DAY FOUR - BALANCER AND VALVE COVERS (1.5 hours)
Today was a quick one...just pulled the balancer and removed the coilpacks and valve covers.
My crank bolt broke free pretty easily. I used a three foot breaker bar with the car in 4th gear while my trusty assistant stood on the brakes. Afterward, I used a three jaw puller to remove the balancer. It came loose without much cussing:


Here's the new Powerbond balancer next to the old one. These things are zero-balanced, right?

Next I removed the coil packs (one harness and five 10mm bolts each side) and unbolted the valve covers. Getting closer!

Stay tuned!
The itch for more power, along with the many fantastic build threads on this forum (I particularly enjoyed Chicago1's build
), have convinced me to dump some money into my trusty 2000 Pewter Coupe. This thread will document my progress start-to-finish.Toward the end of last year I started collecting parts for my build, and in preparation of the added power I had Joe @ Cordes Performance Racing in Mesa, AZ install a Mantic ER2 clutch with all the goodies. Now I'm finally ready to get started! Here's a list of everything that is sitting in my garage at the moment, in no particular order. I hope this is all I need, because I blew my budget long ago.
- A&A V3 Si Supercharger Kit (used)
- CC Performance Camshaft (Arun's Stage 3 "Jam Cam")
- Brian Tooley Dual Valve Springs, retainers, seals
- 7.4" Pushrods
- Water Pump (mine's weeping a bit)
- Powerbond PB1117-N Harmonic Damper
- Upgraded Power Steering Bracket (GM 12578068)
- Driver Side Fuel Sender (GM 10333749)
- Racetronix Fuel Pump Kit with Harness (Racetronix RFPK-007)
- Kenne Bell Boost a Pump (20A)
- NGK V-Power TR-6 Plugs
- 60lb Siemens Deka Fuel Injectors
- ARP Crank & Cam Bolts
- Timing Cover Gasket and Seal
- New Gates Belts
- High Volume LS6 Oil Pump (GM 17801830)
- Timing Chain Set (Cloyes 9-3658TX3)
- AEM 30-4900 Wideband Failsafe Gauge
- AEM 30-4401 Pressure Gauge
- LS2 Metal Power Steering Pulley (GM 12568997)
- DeWitt's Cutdown Radiator
- Elite Engineering Catch Can
- Brian Tooley Rocker Trunion Upgrade (installed by Joe @ CPR)
I'm working on my car in my free time and am taking things pretty slowly (e.g. remove a few bolts, drink a beer, repeat), so this thread may go on for a month or two.
. Also, I'm starting this thread a bit late and am already about 4 nights of work into the project and will be playing catch-up with this post. I will try and keep it up-to-date going forward. One last thing: if you're wanting to see a really clean car and garage, you won't see that here. For that you'll need to go over to Patches build thread!
OK, now for the fun stuff!
DAY ONE - FUEL SYSTEM (4 hours)
I figured I'd tackle the fuel system first since I'd be able to drive the car around afterward (provided I didn't screw anything up), and it would be a good gauge of whether I wanted to continue with the bigger tasks. Along with swapping out the pump to the new Racetronix setup (Walbro GRJ420), I added their harness and a KB 20A boost a pump and replaced the fuel sender.
It turned out to be a straight-forward job. The only real hurdles were separating the old pump from the hat and then re-installing the entire assembly (it's a tight fit).
The new pump:
Harness:
Boost-A-Pump:
OK, so I got wrapped up in getting the old pump out and forgot to take pictures. You'll have to use your imagination!
Here's the old pump:
The hole in the driver side tank:
And the old sender:
The new pump comes assembled:
Comparison of the new pump's harness (gray & black) vs. the old (brown & black):
Old pump separated from the fuel lines:
New pump, ready for install:
I somehow forgot to grab some pics of the fuel sender and the installation of the new pump. Trust me, though, I got it in there!
Here's a pic of the car up in the air during the BAP and harness install. I've already mounted the BAP and started on the harness:
BAP mounted to the frame in the inner fender well:
I wrapped the harness and hobbs switch wiring in wire sleeve and fed it through the rocker, through the cowl:
Then up the firewall:
And finally to the alternator (I've since re-routed it a bit more cleanly so it's not ziptied to the fuel line):
After buttoning up the inner fender and securing the harness with zipties, I called it done for the day.
DAY TWO - REMOVE FASCIA & RADIATOR (3 hours)
OK, so I know I didn't have to remove the fascia, but it was simple enough to do and I figure it'll give me more room down the line. Plus I wanted the build sheet!
Jacked up and ready to go:
Facia removed! Sorry, I was on a roll and apparently forgot to take any pictures of this process. It was pretty easy. I followed these instructions.
As you all know, these cars are vacuums!
What is this?
Woohoo, the build sheet! I had no idea that GM hid this here until I read about it on the forum.
Broke one of the nipples on the radiator...good excuse to upgrade to a DeWitt's!
OK, so day 2 sucked for pics...I'll work on that.
DAY THREE - MORE DISASSEMBLY (4 hours)
Working my way toward the timing cover. Today I removed the alternator, throttle body, water pump, PS pump and cooler, and moved the rack out of the way.
Alternator, throttle body, and water pump have been removed. These three were easy.
Removed the two lines from the steering rack. I was worried about these since so many people seem to have trouble with them, but they came off without a fuss:
Untangling the power steering hoses from the wiring harness was a bit tricky, but I was able to remove the pump and cooler as one unit.
Next, I unbolted the tie rods, ABS pump and the rack. It was a huge pain in the *** to work the rack free from where it mounts to the passenger side. I had to beat it loose with a block of wood and a rubber mallet. Finally managed to work the rack out the passenger side fenderwell:
Yay! Finally a clear shot to the balancer:
DAY FOUR - BALANCER AND VALVE COVERS (1.5 hours)
Today was a quick one...just pulled the balancer and removed the coilpacks and valve covers.
My crank bolt broke free pretty easily. I used a three foot breaker bar with the car in 4th gear while my trusty assistant stood on the brakes. Afterward, I used a three jaw puller to remove the balancer. It came loose without much cussing:
Here's the new Powerbond balancer next to the old one. These things are zero-balanced, right?
Next I removed the coil packs (one harness and five 10mm bolts each side) and unbolted the valve covers. Getting closer!
Stay tuned!
Last edited by RoccoC5; 04-27-2017 at 04:32 AM. Reason: spelling
 05-01-2014, 05:15 AM
#3
Heel & Toe


Member Since: Feb 2013
Location: Kekaha Hawaii
Posts: 17
Likes: 0
Received 0 Likes
on
0 Posts
Power to you my brother, we all got your back.
Looks like way to much fun, an then want when you get to lay some rubber. Enjoy the wrench, the beer and the love.
Looks like way to much fun, an then want when you get to lay some rubber. Enjoy the wrench, the beer and the love.


 05-02-2014, 03:24 PM
#8
Burning Brakes
Thread Starter
DAY FIVE - CLEANUP (2 hours)
OK, so another quick update. Long day at work so I didn't have time to do much.
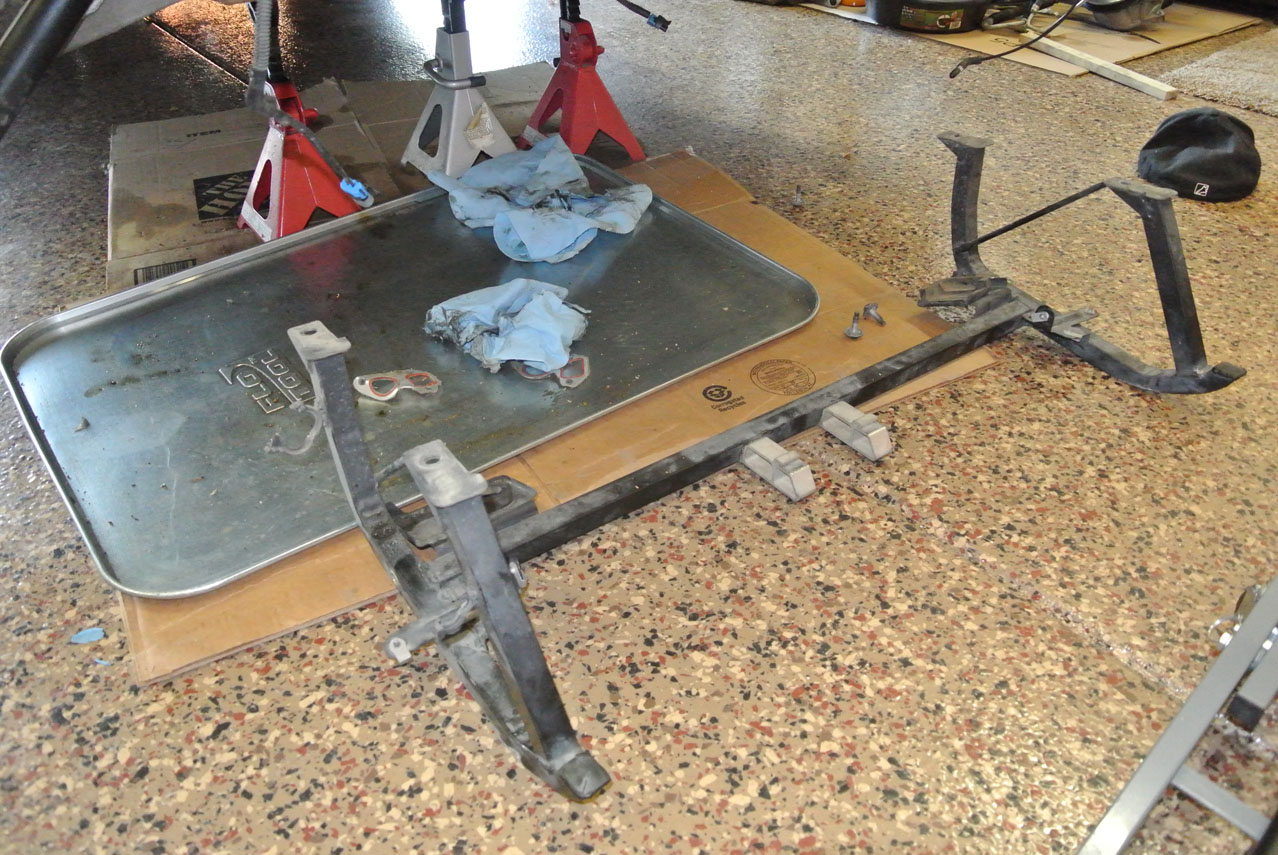
I started by removing the radiator support, not because I really needed to, but because mine is pretty beat up and I'm contemplating either replacing it or reinforcing it somehow. Plus, I may need to cut and re-weld the tabs to lower the radiator depending on how things line up with the new DeWitt's cutdown radiator. The extra space to work under the car doesn't hurt, either.
Simple job, just released the wire harness from the clips on the passenger side and removed the four bolts securing it to the frame:
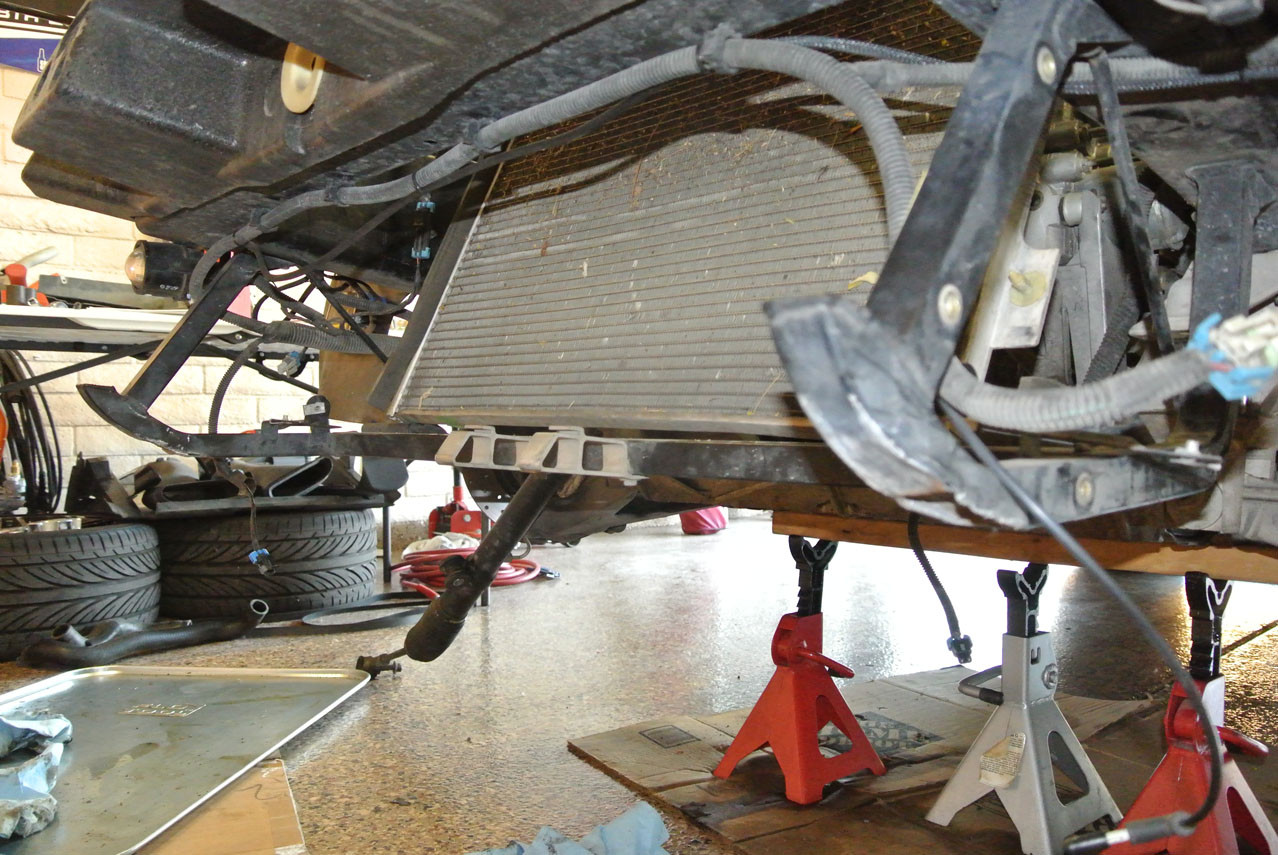
And she's free!
Next, I decided to spend some time cleaning up the engine before further disassembly. 100K and 15 years makes for a dirty engine.
Before:
And after some cleaning:
My OCD took over and forced me to pull the intake to clean under it...
Fuel injector harness removed:
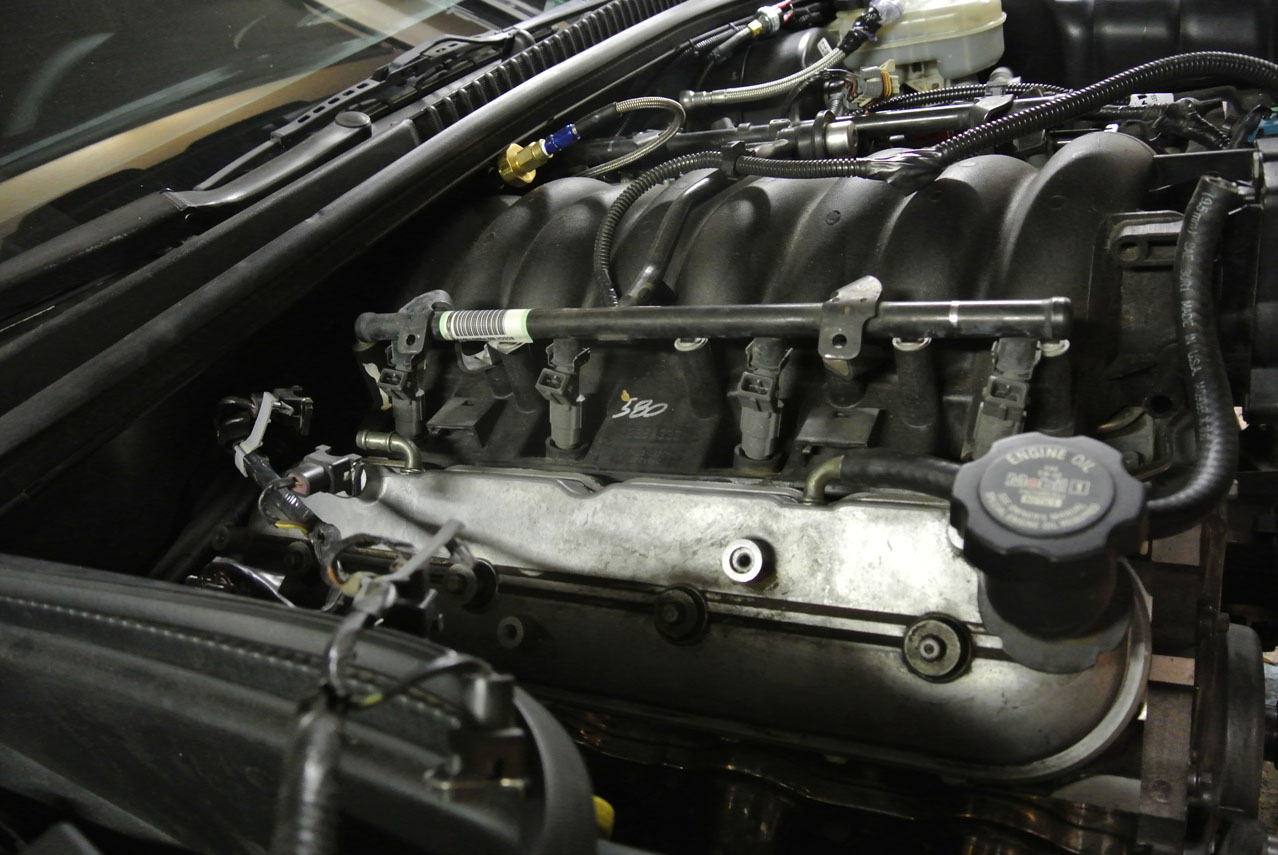
The brake booster hose was a bitch to get loose with the manifold in place, so I removed it from the booster to get some slack and slid the intake forward. Wow, it's dirty under there!
Intake manifold is out, nasty!
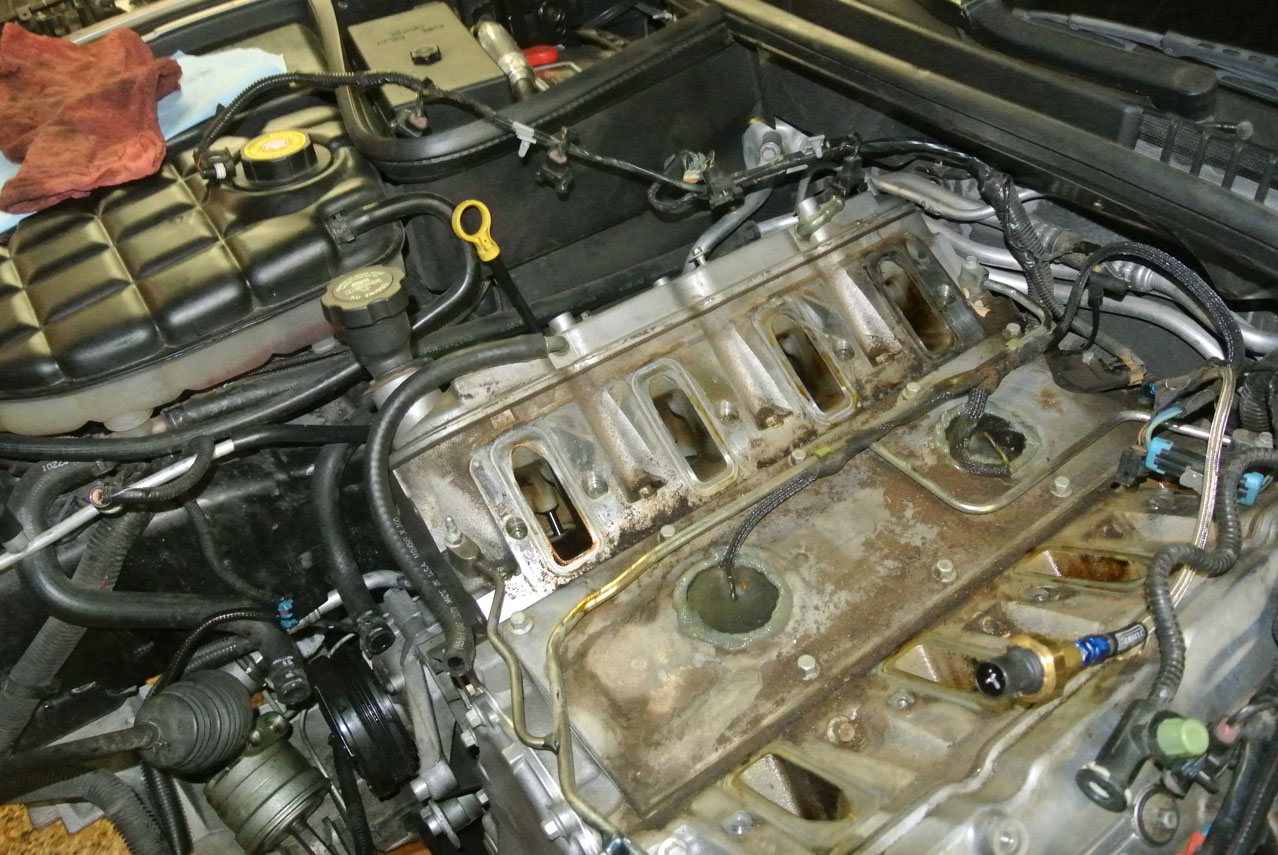
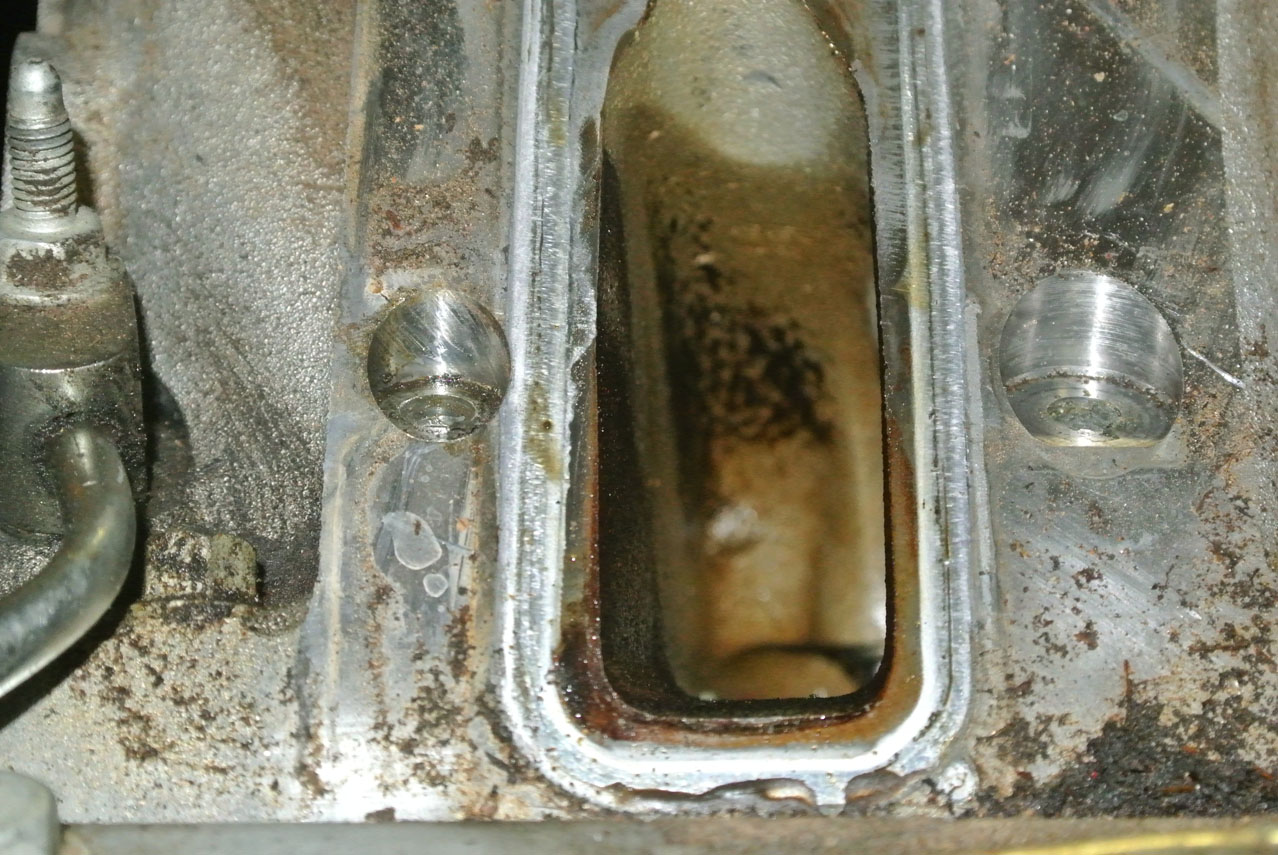
First thing I noticed was sticky oily residue inside the head intake ports. The manifold is coated with oil, too. I guess I should have been running a catch can all along. Anyone have any suggestions to clean out the intake? Should I do anything about the sticky stuff in the heads?
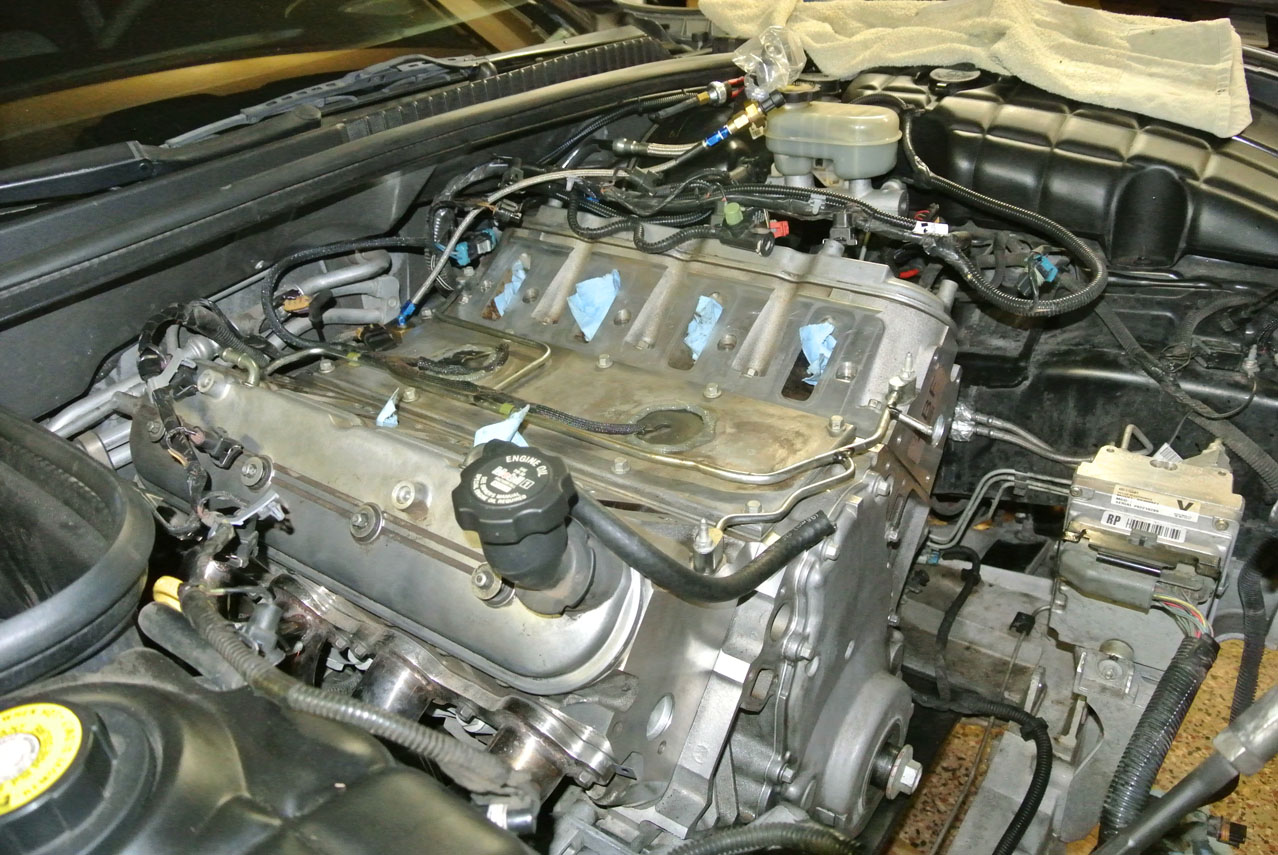
Cleaning is done!
Today was a slow day on the beers...only three.
Next time I'll probably remove the rockers and swap the valve springs.
OK, so another quick update. Long day at work so I didn't have time to do much.
I started by removing the radiator support, not because I really needed to, but because mine is pretty beat up and I'm contemplating either replacing it or reinforcing it somehow. Plus, I may need to cut and re-weld the tabs to lower the radiator depending on how things line up with the new DeWitt's cutdown radiator. The extra space to work under the car doesn't hurt, either.
Simple job, just released the wire harness from the clips on the passenger side and removed the four bolts securing it to the frame:
And she's free!
Next, I decided to spend some time cleaning up the engine before further disassembly. 100K and 15 years makes for a dirty engine.
Before:
And after some cleaning:
My OCD took over and forced me to pull the intake to clean under it...
Fuel injector harness removed:
The brake booster hose was a bitch to get loose with the manifold in place, so I removed it from the booster to get some slack and slid the intake forward. Wow, it's dirty under there!
Intake manifold is out, nasty!
First thing I noticed was sticky oily residue inside the head intake ports. The manifold is coated with oil, too. I guess I should have been running a catch can all along. Anyone have any suggestions to clean out the intake? Should I do anything about the sticky stuff in the heads?
Cleaning is done!
Today was a slow day on the beers...only three.
Next time I'll probably remove the rockers and swap the valve springs.
Last edited by RoccoC5; 04-27-2017 at 04:33 AM.


 05-04-2014, 03:49 PM
#15
Race Director

Thanks Rocco!!!! Build beer and pics!!! I love it!! You are gonna be stoked when it's done. looking forward to your progress my man!!! As far as the intake just use lots of brake cleaner. Think I went through a whole can
Last edited by Chicago1; 05-04-2014 at 04:31 PM.
 05-10-2014, 08:54 PM
#17
Burning Brakes
Thread Starter
05-10-2014, 09:30 PM
#18
Burning Brakes
Thread Starter
DAY SIX - POWER STEERING HELL (3.5 hours)
The plan for today was to swap the power steering pump and idler from the old early style bracket to the newer, stronger one (GM 12578068). Unfortunately I ran into some issues so it took longer than expected, but I was able to get it done. I also swapped to the LS2/3 steel pump pulley (GM 12568997), and replaced the idler and power steering pressure hose (GM 26046501). The idler wasn't squeaking and I don't think the hose was leaking, but I figured what the hell, since I have easy access to them, why not.
Sorry for the crappy pics today. I was used my phone and was working outside.
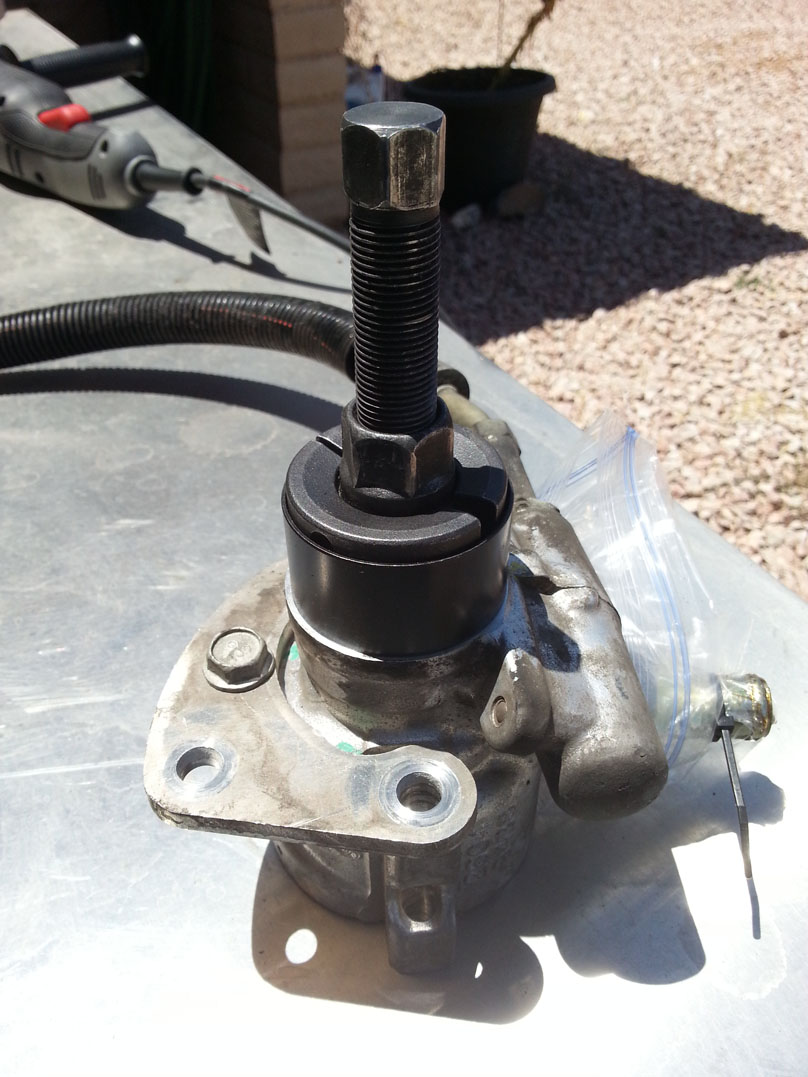
I borrowed this power steering pulley tool to remove the old plastic pulley:
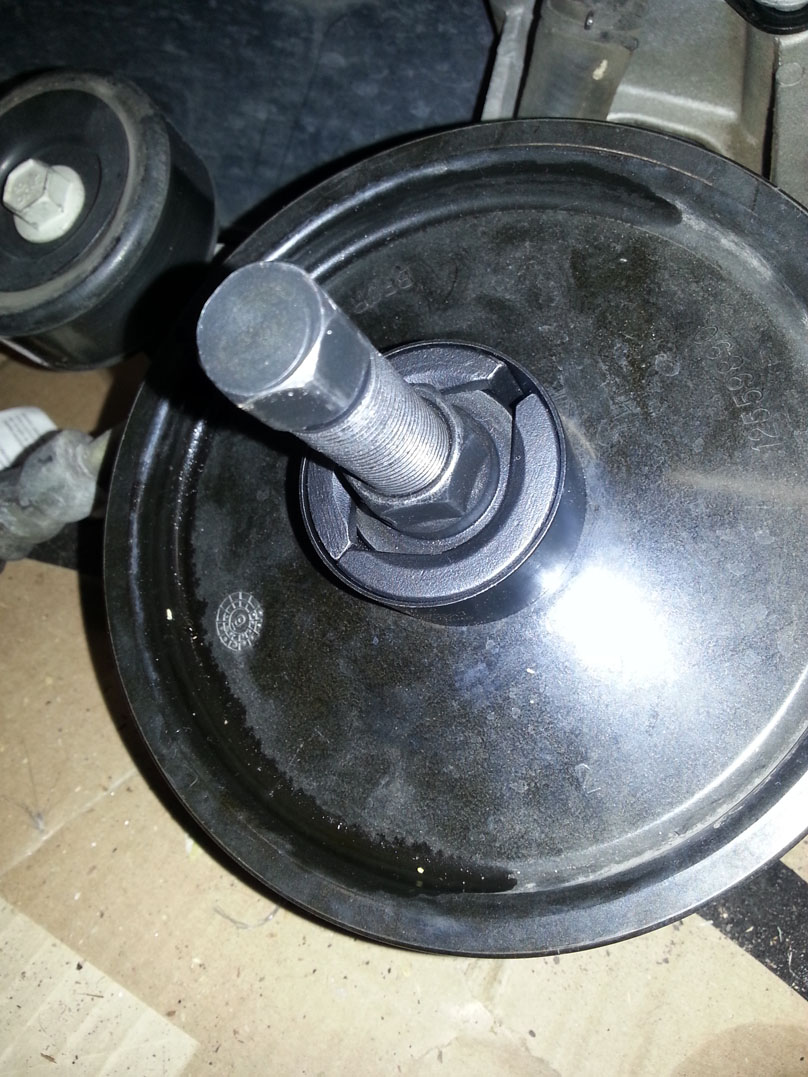
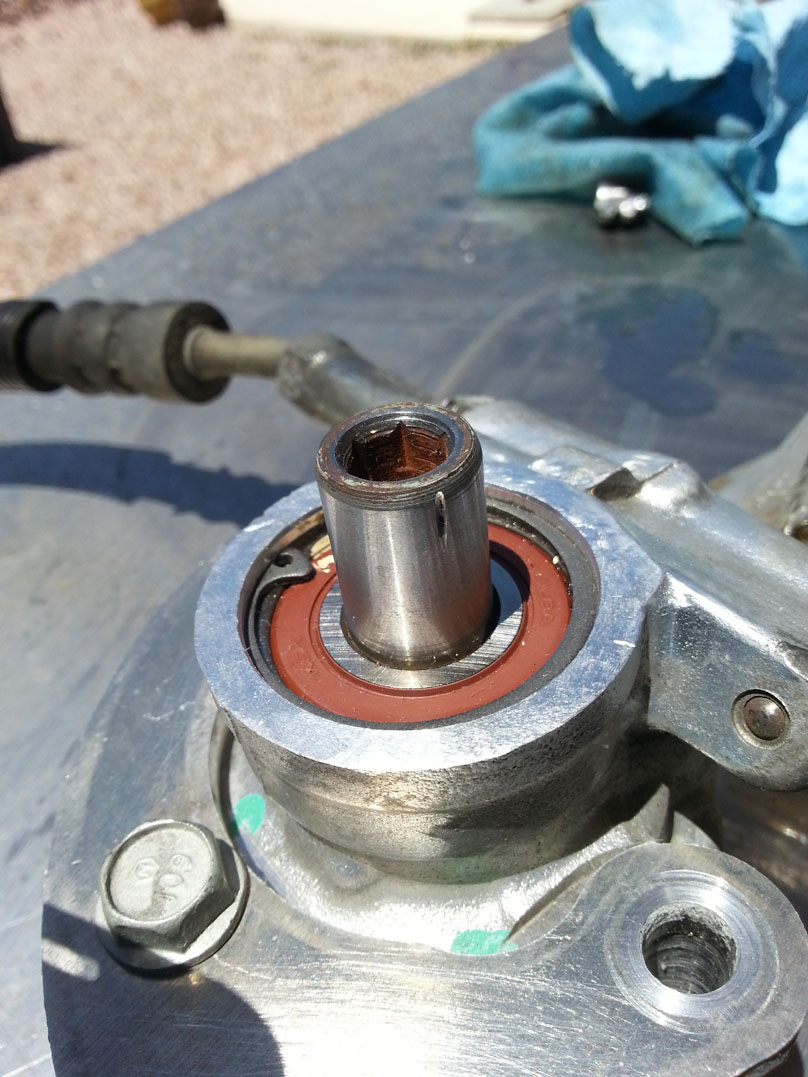
Initially, the pulley wouldn't budge at all. I added a bit of heat from my heat gun and the pulley finally came forward about 1/4", but then my muscles got the best of the pulley hub. The damn lip on the hub sheared completely off on one side! So, I did the only thing I could think of: hit it with a hammer:
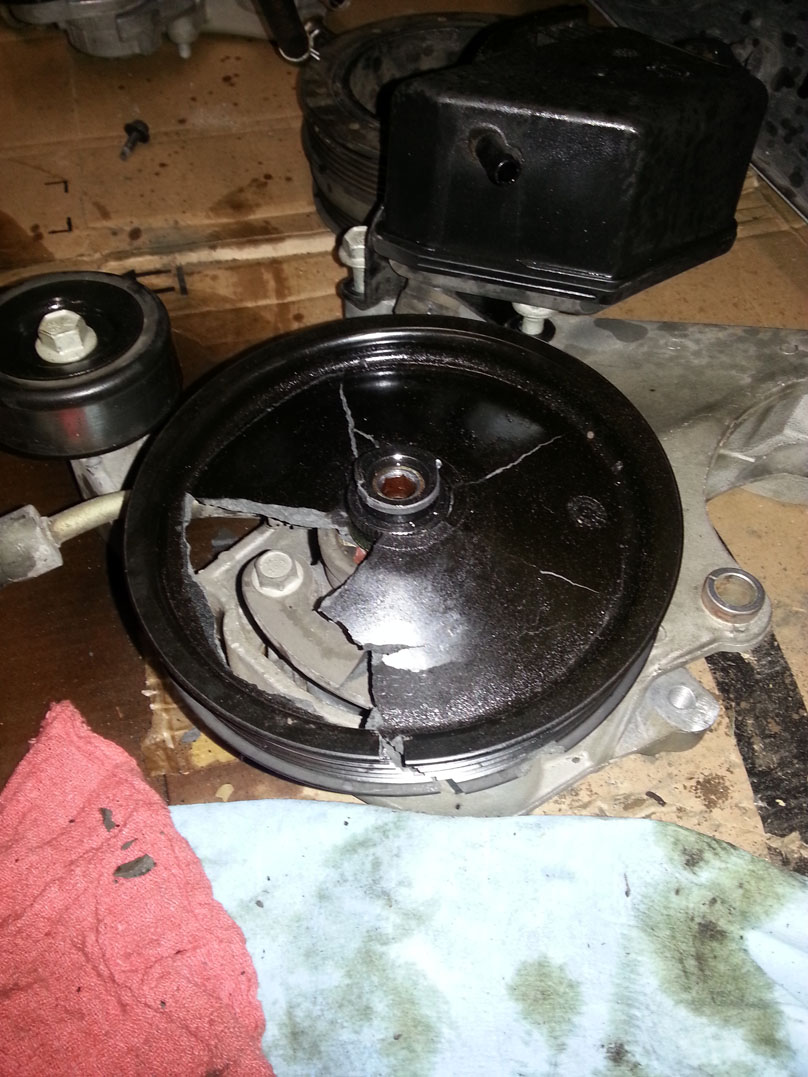
Here you can see the damaged pulley lip:

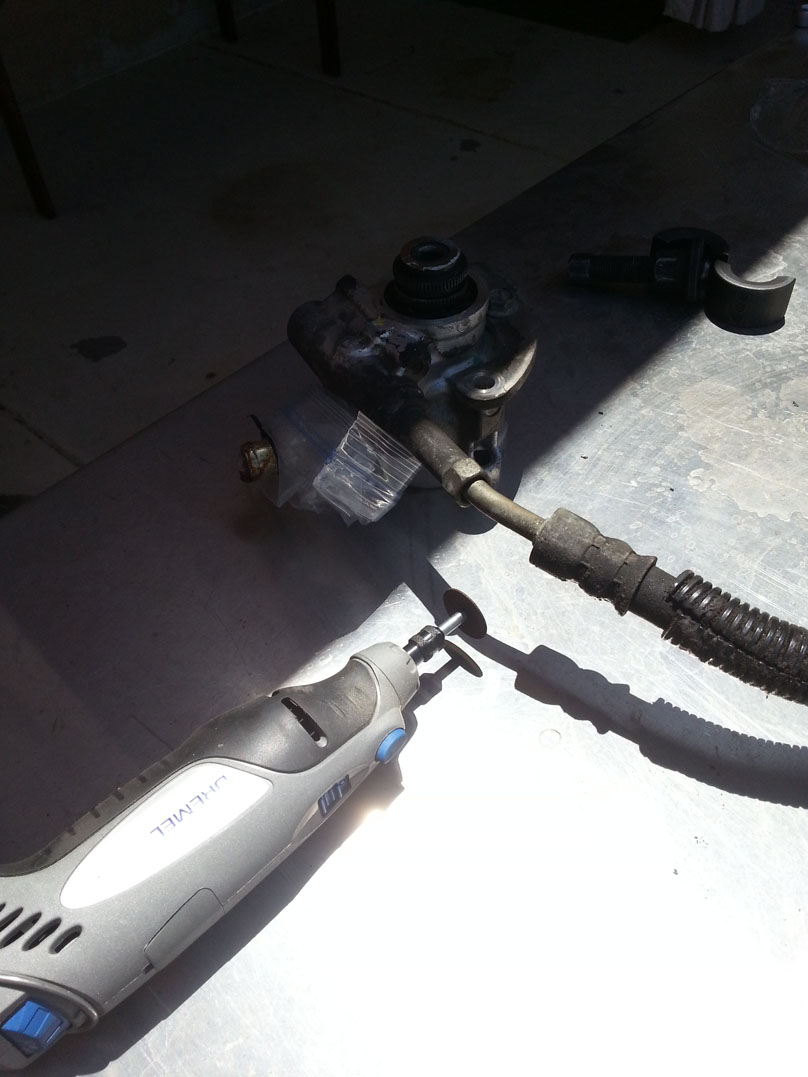
At this point I figured I could just move the tool down to the groove in the center of the hub:
But unfortunately the clam-shell pieces of the puller were too short. I had to grind down the hub a bit to make it fit:
Well, that didn't work. The tool just kept slipping out of the groove. Time for plan B:
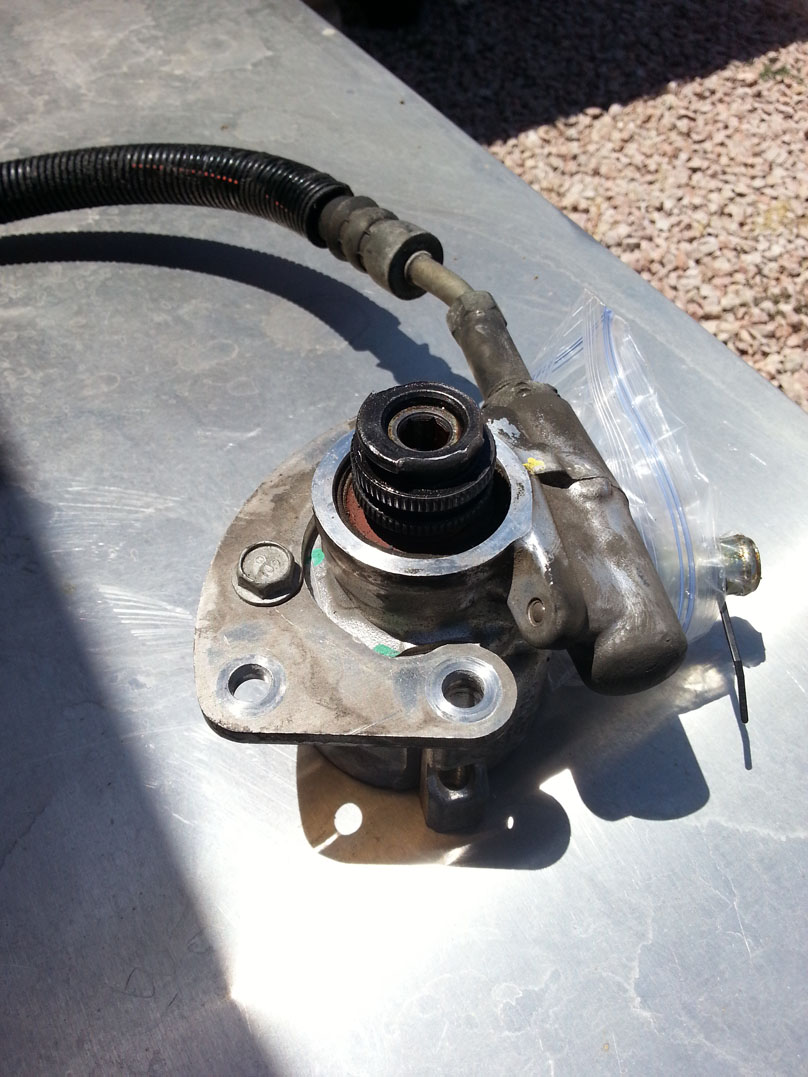
I made four cuts in the hub, being careful to not cut into the shaft:
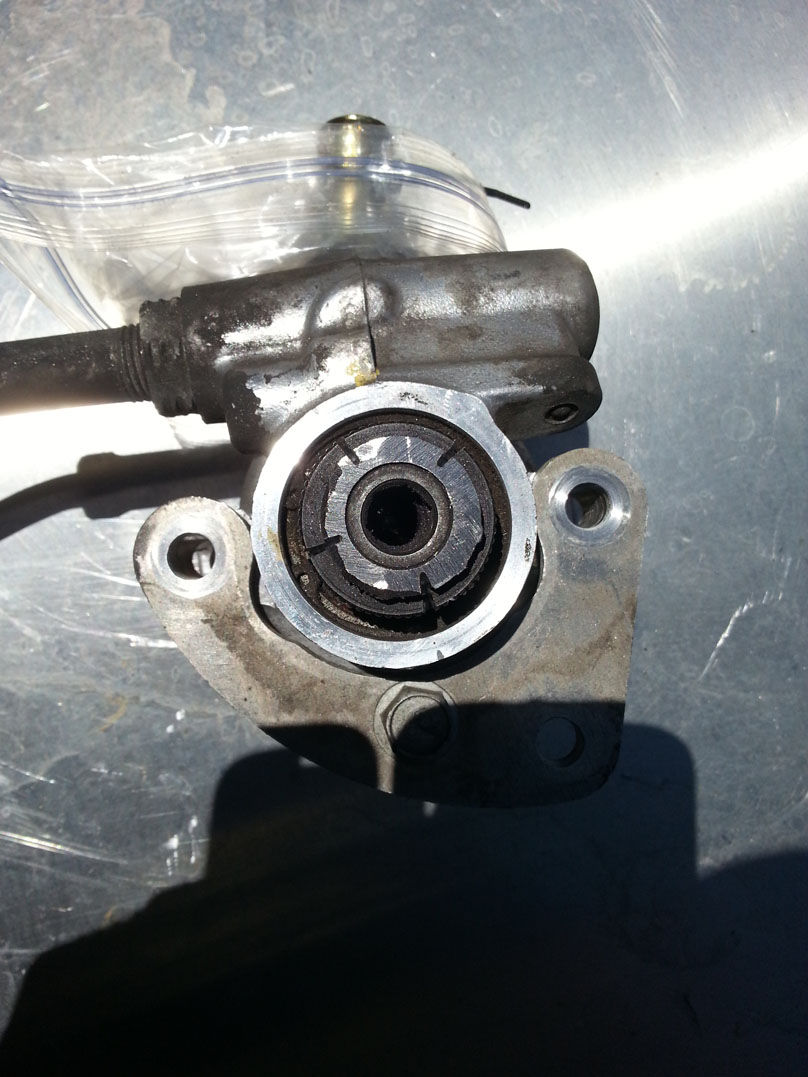
Finally!
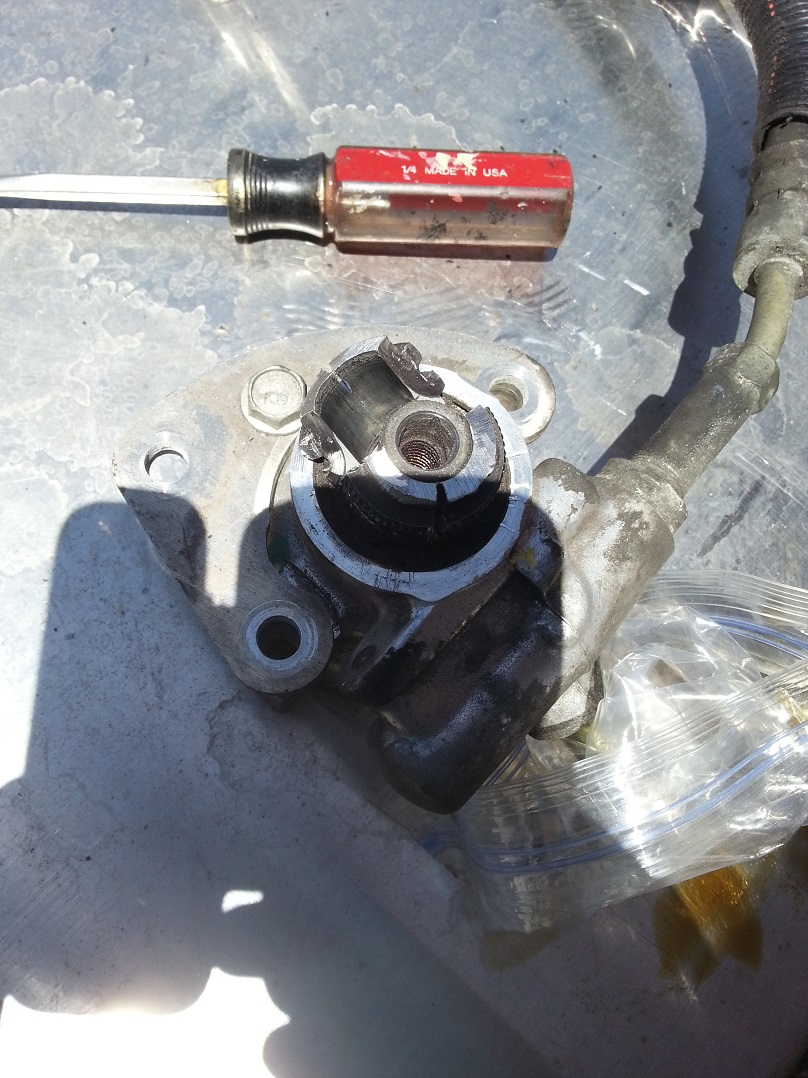
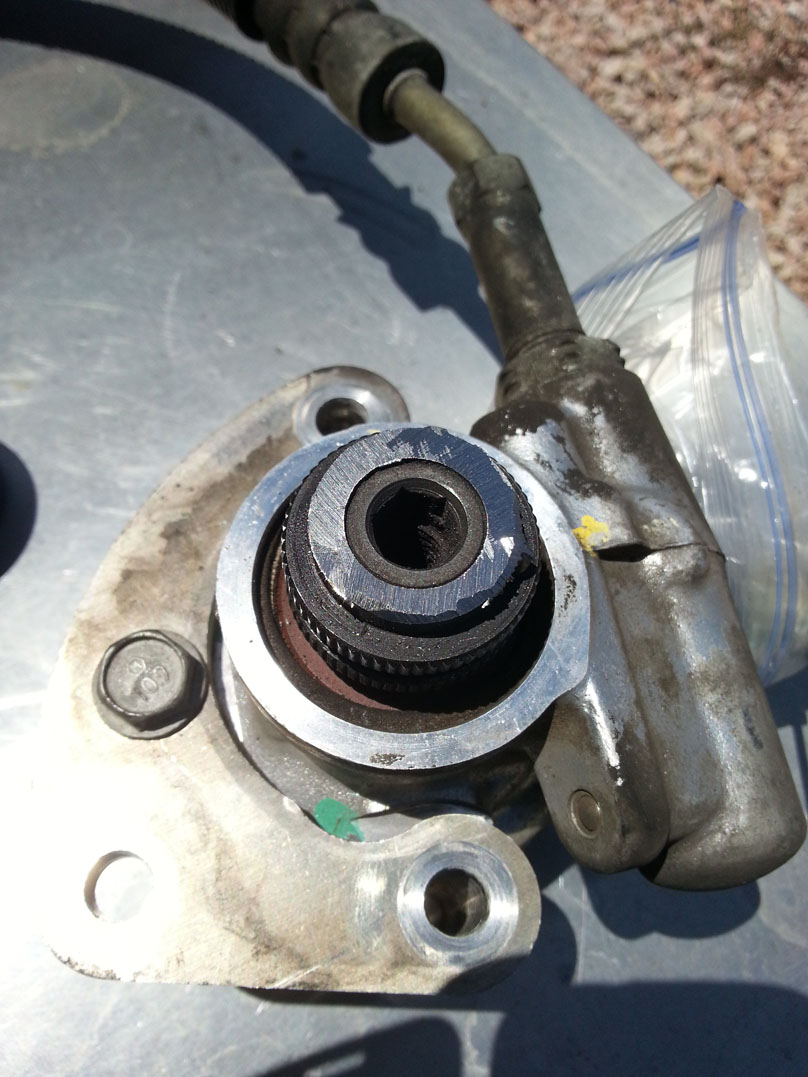
Unfortunately I did cut a bit into the shaft...shouldn't hurt anything, I hope:
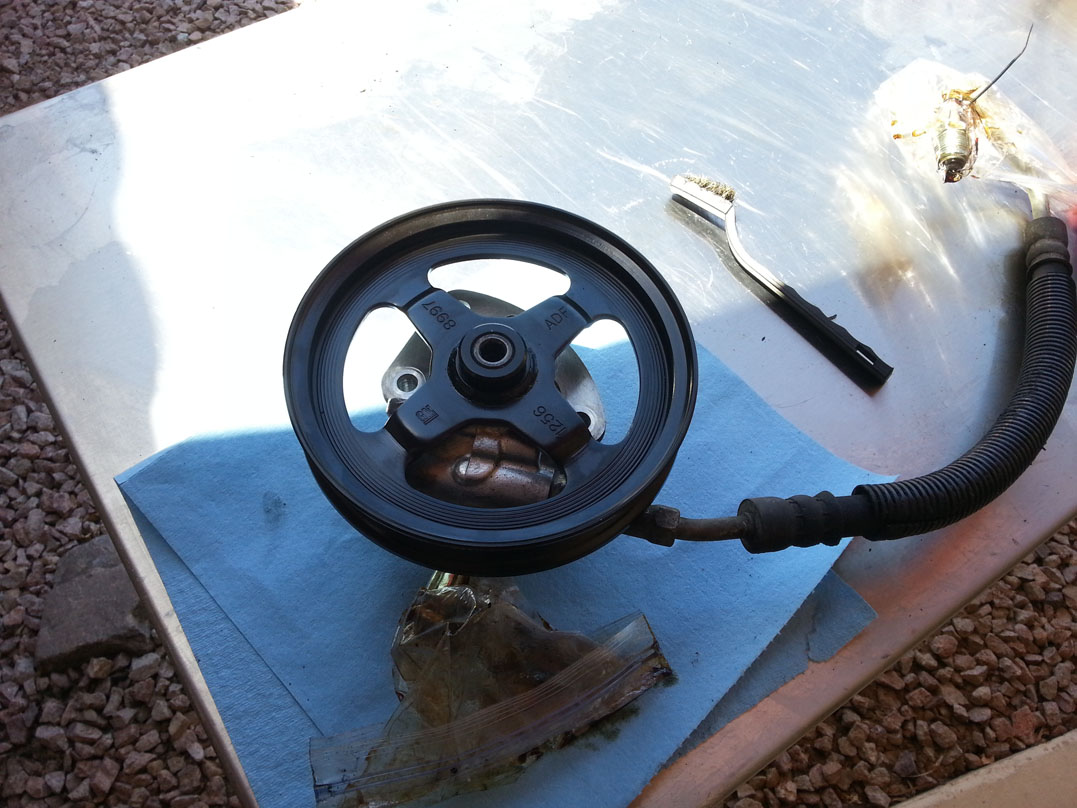
Time to install the new pulley. I used my heat gun to heat up the new pulley and lubed the shaft. It pressed on pretty easily with the installer tool. The shaft is flush with the pulley hub:
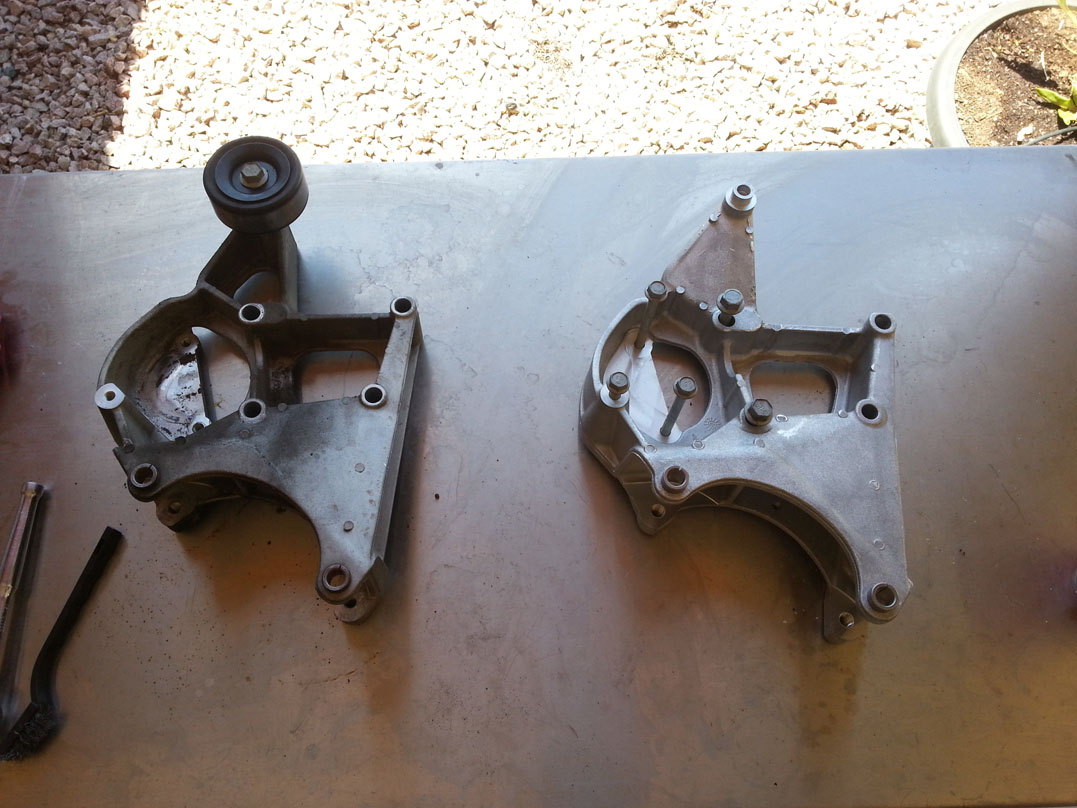
Old bracket on the left; new on the right:
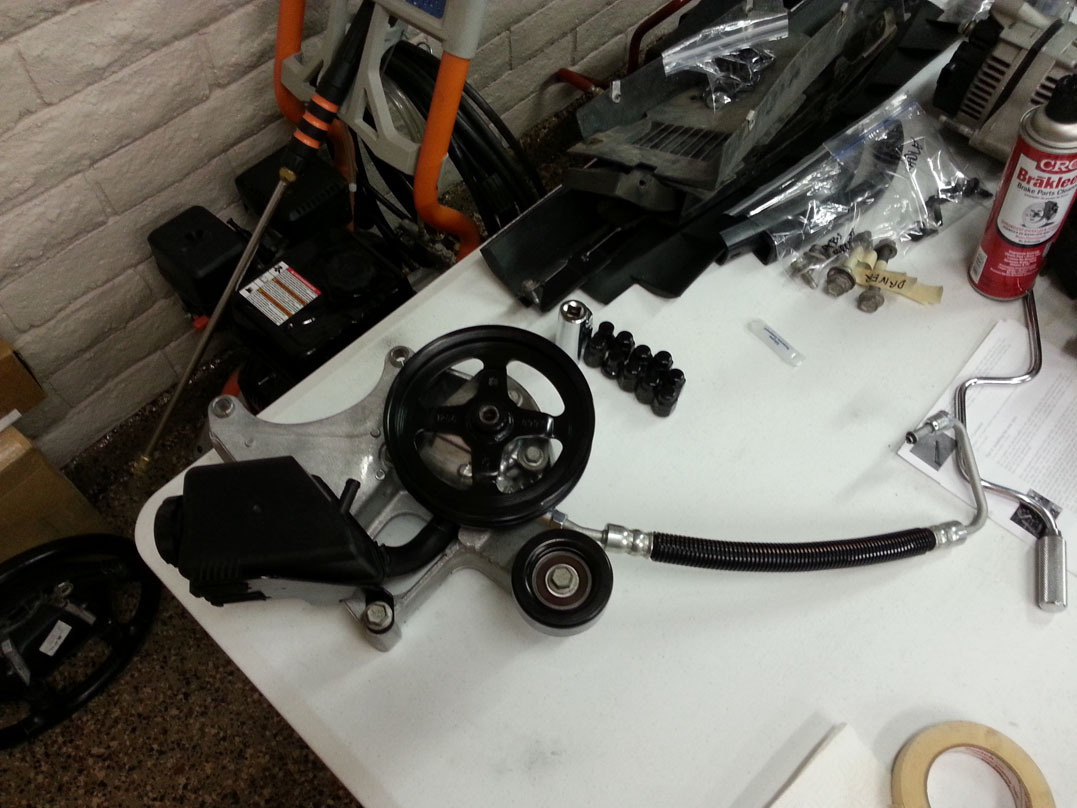
To finish things up, I transferred the pump to the new bracket and installed a new idler and hose:
Hopefully I'll have some time to work on the car tomorrow, but being Mother's Day, Mom comes first!
The plan for today was to swap the power steering pump and idler from the old early style bracket to the newer, stronger one (GM 12578068). Unfortunately I ran into some issues so it took longer than expected, but I was able to get it done. I also swapped to the LS2/3 steel pump pulley (GM 12568997), and replaced the idler and power steering pressure hose (GM 26046501). The idler wasn't squeaking and I don't think the hose was leaking, but I figured what the hell, since I have easy access to them, why not.
Sorry for the crappy pics today. I was used my phone and was working outside.
I borrowed this power steering pulley tool to remove the old plastic pulley:
Initially, the pulley wouldn't budge at all. I added a bit of heat from my heat gun and the pulley finally came forward about 1/4", but then my muscles got the best of the pulley hub. The damn lip on the hub sheared completely off on one side! So, I did the only thing I could think of: hit it with a hammer
:Here you can see the damaged pulley lip:
At this point I figured I could just move the tool down to the groove in the center of the hub:
But unfortunately the clam-shell pieces of the puller were too short. I had to grind down the hub a bit to make it fit:
Well, that didn't work. The tool just kept slipping out of the groove. Time for plan B:
I made four cuts in the hub, being careful to not cut into the shaft:
Finally!
Unfortunately I did cut a bit into the shaft...shouldn't hurt anything, I hope:
Time to install the new pulley. I used my heat gun to heat up the new pulley and lubed the shaft. It pressed on pretty easily with the installer tool. The shaft is flush with the pulley hub:
Old bracket on the left; new on the right:
To finish things up, I transferred the pump to the new bracket and installed a new idler and hose:
Hopefully I'll have some time to work on the car tomorrow, but being Mother's Day, Mom comes first!
Last edited by RoccoC5; 04-27-2017 at 04:34 AM.
05-11-2014, 11:34 AM
#19
Racer
Member Since: Jan 2009
Location: Wichita Kansas
Posts: 352
Likes: 0
Received 0 Likes
on
0 Posts
Looking good buddy, the only thing I will say is that you may need a gates alignment tool! Since you switched bracket and the power steering pulley it's something you may check especially getting blown!. Keep up the good work
. Keep up the good work
05-14-2014, 01:09 AM
#20
Burning Brakes
Thread Starter
 Maybe someone in the Phoenix area has one I can borrow.