
Drivers side mirror replacement help
 07-16-2014, 12:46 PM
#1

Hi,
I've got an 02 C5Z with the Electrochromic drivers side mirror. It's been constantly dark since I've owned the car, but now there is a nice crack and the mirror looks like a broken LCD screen and I'd like to replace it. I went on Amazon and bought one, because I don't care about the auto dimming feature, and I'm not going to spend $200+ to replace it with a stock unit that has a feature I didn't like or care about in the first place. I want a bone stock, regular glass mirror in there. This is what I bought:
Now after reading about a dozen how to's on here, I'm getting very conflicting information and I'm questioning my purchase. So my questions are as follows:
1: Will that fit and be an acceptable replacement, if all I want is plain glass in there?
2: Are there two layers of glass that need to be removed for the Electrochromic option? If so will this still fit?
3: I don't care about the auto dimming (my windows are tinted) or heated option. Will this throw any codes in the diagnostics menu if I don't hook them back up? If so will those be anything to worry about?
4: What about the black trim around the mirror? Does that come off and back on easily?
5: I've read several how-to threads on installing the new mirror and I'm confident I can do it, but is there anything else I should know?
Thanks!
 07-16-2014, 02:33 PM
#2
Safety Car


Member Since: Apr 2013
Location: Oregon
Posts: 4,617
Received 971 Likes
on
783 Posts
St. Jude Donor '14-'15-'16-'17-'18-'19-'20-'21-'22-'23


This will tell you about Electrochromic Mirrors http://www.google.com/patents/US6356376
It looks like it is 2 pieces of glass
as for it being dark all the time the buttons on your inside rear view mirror control that
It is in your owners manual
It looks like it is 2 pieces of glass
as for it being dark all the time the buttons on your inside rear view mirror control that
It is in your owners manual
07-16-2014, 04:09 PM
#3
This will tell you about Electrochromic Mirrors http://www.google.com/patents/US6356376
It looks like it is 2 pieces of glass
as for it being dark all the time the buttons on your inside rear view mirror control that
It is in your owners manual
It looks like it is 2 pieces of glass
as for it being dark all the time the buttons on your inside rear view mirror control that
It is in your owners manual
07-17-2014, 09:10 AM
#4
Le Mans Master


OK, I had the same mirror and it discolored. I DID NOT want some stick on mirror, but you can get them. I wanted a new mirror insert which I got from Corvette Central with the black surround. The stick on mirror just does what it says "just stick it on the existing mirror surface". It should fit inside the black surround.
I have helped a number people replace the mirror so I finally developed this procedure. Let me know if you have any questions. Just takes a friend and a few minutes. I did it myself but would not do it that way in the future.
This guidance is for removing just the mirror insert (with plastic surround) in cases where the actual mirror has an issue or you need to access the motor assembly behind it.
The mirror housing can be left attached to the door.
Before you start, place a blanket under the door so if you drop the mirror it will not break and if any of the positioner pins come out they will not be hard to find, There are 4 of them.
Move the mirror all the way up or down so you can get your fingers behind the mirror.
Placing some tape around the housing edges before you start so as to not scratch the housing paint would be a good idea.
The mirror connects to the motor assembly with 5 snap in connections.
One is the main pivot ball in the center, The other 4 are smaller with one above, below, left, and right of the large center pivot.
The 4 smaller ones are driven by the motor assembly to position the mirror.
Have a friend hold the mirror housing while you pull on the mirror insert.
The mirror insert should “pop” out and be released.
Note: Now you will have to remove the heated mirror wiring connector and if equipped, the connector for the auto dimming.
One or more of the position pins may come out with the mirror insert or just fall on the ground. This is OK and not an issue.
If any pins come out they should have a spring attached to them so don’t lose the springs. The pins actually are inserted into the springs.
When I removed my mirror insert one pin came out with the spring still attached to the mirror insert. I simply removed it from the mirror insert just reinserted it into the motor assembly before I put the mirror insert back on. Everything worked just fine after I finished.
The mirror insert has “cupped” like connectors that the pivot and pins fit/snap into.
Use a good silicone type lubricant on the pins, pivot, and mirror insert connectors to make reattaching the mirror insert easier.
Please note the 4 pins have a small protrusion that has to be aligned correctly to match the mirror insert connectors . Not hard to “eyeball” the correct alignment but if not close the insert will not snap back onto the pins.
You should now be ready to reinstall the mirror insert.
Reattach the one or two wiring connectors.
Have a friend support the housing so it does not move when you press the mirror insert back in.
I recommend (must do) cut a block of wood to cover as much of the mirror as possible so when you press in back on so you distribute the pressure and don’t break the mirror. Also place a small towel or soft material between the block and the mirror so as to not scratch the mirror.
As you start pressing the mirror insert in, try to put move the mirror insert and motor assembly so it is not tilted like you did when you removed it. You want all the pins and pivot to snap in at one time.
It takes a good amount of pressure to snap the mirror insert into place. That is why you need a friend to hold the housing and you need to lubricate the pins/pivot and the mirror insert connectors.
If it does not snap in with “reasonable force”, remove the mirror and double check the alignment of the 4 pins. I found out that I had not correctly aligned them all and had to redo that and then it snapped in.
When I reinstalled my insert I did not have a friend to help so I had to press with one hand while I held the housing with the other. It takes good amount of pressure to snap it in but I did it with one hand.
Good luck.
PS: Remember if you are replacing the motor assembly there are 2 types. One with Memory and one without. The one with Memory has 2 connectors, not one. The one with memory has an additional 4 pin connector.
Last edited by dadaroo; 07-17-2014 at 09:13 AM.
The following 2 users liked this post by dadaroo:
gitarman47 (04-01-2023),
Habervette (01-17-2019)
07-18-2014, 07:01 AM
#6
Le Mans Master
Either use my method to replace your unit or just stick a new mirror on top of what you have. No one tries to break and remove the old glass. ALL the mirrors like you found on Amazon are meant to be "stuck" onto the old mirror.
My method will retain the original heated design since they come with the heated element. A stick on will not eliminate that but just reduce the effectiveness of the heating element.
My method will retain the original heated design since they come with the heated element. A stick on will not eliminate that but just reduce the effectiveness of the heating element.
07-18-2014, 07:12 AM
#7
Either use my method to replace your unit or just stick a new mirror on top of what you have. No one tries to break and remove the old glass. ALL the mirrors like you found on Amazon are meant to be "stuck" onto the old mirror.
My method will retain the original heated design since they come with the heated element. A stick on will not eliminate that but just reduce the effectiveness of the heating element.
My method will retain the original heated design since they come with the heated element. A stick on will not eliminate that but just reduce the effectiveness of the heating element.
07-18-2014, 07:41 AM
#8
Le Mans Master
I highly recommend the way I went. I got mine from Corvette Central but there may be others also. If you need help/questions with the removal or install guidance I provided let me know. You can PM me with your phone number and we can discuss.
Here is what I bought.
http://www.parts123.com/parts123/yb....5Z50000050C~~~
Here is what I bought.
http://www.parts123.com/parts123/yb....5Z50000050C~~~
07-18-2014, 10:12 AM
#9
Drifting

Member Since: Jan 2012
Location: Hopatcong New Jersey
Posts: 1,341
Likes: 0
Received 5 Likes
on
5 Posts
Either use my method to replace your unit or just stick a new mirror on top of what you have. No one tries to break and remove the old glass. ALL the mirrors like you found on Amazon are meant to be "stuck" onto the old mirror.
My method will retain the original heated design since they come with the heated element. A stick on will not eliminate that but just reduce the effectiveness of the heating element.
My method will retain the original heated design since they come with the heated element. A stick on will not eliminate that but just reduce the effectiveness of the heating element.
I went through the same thing a couple years ago and bought just the replacement mirror glass, removed the old cracked glass from the back plate (albeit in a hundred pieces) and stuck the new one on. Sure, I lost the heated feature, but I didn't really care.
I put the backing plate on the mirror motor before I attached the new glass since it's a pain and you have to apply the right pressure in the right place or you will crack the glass again.
07-18-2014, 10:43 AM
#10
Le Mans Master
Not true at all.
I went through the same thing a couple years ago and bought just the replacement mirror glass, removed the old cracked glass from the back plate (albeit in a hundred pieces) and stuck the new one on. Sure, I lost the heated feature, but I didn't really care.
I put the backing plate on the mirror motor before I attached the new glass since it's a pain and you have to apply the right pressure in the right place or you will crack the glass again.
I think if I tried that approach I would remove the mirror with surround and do it on a bench in a more controlled setting. Also gives you the ability to lube the attachment points before reinstallation.
Mr. Sam
 07-18-2014, 11:17 AM
#11
Drifting
Member Since: Jan 2012
Location: Hopatcong New Jersey
Posts: 1,341
Likes: 0
Received 5 Likes
on
5 Posts
Thanks for inputting. My statement on "no one" breaks the glass was too strong. I would assume if you did it carefully you could even reattach the heating element with a high temp epoxy.
I think if I tried that approach I would remove the mirror with surround and do it on a bench in a more controlled setting. Also gives you the ability to lube the attachment points before reinstallation.
Mr. Sam
I think if I tried that approach I would remove the mirror with surround and do it on a bench in a more controlled setting. Also gives you the ability to lube the attachment points before reinstallation.
Mr. Sam
Here is a post from back when I did mine:
http://forums.corvetteforum.com/c5-g...-question.html
coincidentally, we both posted in that one

 07-18-2014, 05:37 PM
#12
Thanks for the info gentlemen, I appreciate it! This was the exact type of help I was looking for. I think I'm going to go with the one that dadaroo linked and just use what I got until it gets here.
07-19-2014, 08:06 AM
#13
Le Mans Master
When you remove the 2 wires for the electromatic mirror just tape them off and make sure they are stuffed back so they don't interfere with the mirror motion. It will be apparent which wires are for the heating element versus the auto dimming.
07-29-2014, 07:55 AM
#14
Drifting

I'm in the process of doing this on my C5 right now. I ordered the Amazon mirror kit mentioned in the OP's post. Was thinking I would take out the OEM lens and replace it with the Amazon lens.
Got the mirror case and backing plate off the car as described by dadaroo. I was able to carefully separate the trim ring from the backing plate, and then separate the lens from the trim ring. As already mentioned, the lens does consist of a mirror, covered by a matching piece of clear glass. The electrochromatic fluid is sandwiched in between the two, and mine had discolored around the edges of the mirror, but had not leaked. Once I had the lens separated from the trim ring, the fluid did start to leak while on the bench.
So, now thinking that the fluid is being pi$$ed away on the bench, why not go a step further and see what can be salvaged regarding the original lens. The original lens has the heating element on the back so that would be worht a little effort to hang on to. To separate the mirror from the layer of clear glass, there is a strip of conductors across the top and bottom of the lens that terminate into two wires that plug in the electrochromatic wire harness from the mirror housing. These can be pulled off the lens, and once they are removed, one can carefully separate the two layers of glass. Now, you have two rather messy pieces of glass - mine were sticky and stained. Took them over to the sink to wash and cleanup. Tried Goo-Gone on the sticky stuff but it was only partially effective. I had some glass polishing compound that with a few minutes of effort took off the remaining goo and the stains. I now had a totally clean and clear mirror and cover plate.
I put the two pieces of glass back in the trim ring, and then put that assembly back into the backing plate, and applied sealant/adhesive into the joint between the trim ring and backing plate to make sure it stayed together and captured the lens (this joint is on the backside of the backing plate and not visible once installed). Lightly clamped the assembly together to let the adhesive cure.
It's now ready to re-install which I will do today. The electrochromatic function will be gone, but the heated mirror should still operate and the fit is OEM. The Amazon mirror was not used and will not be captured within the black OEM trim ring as it is a little smaller than the OEM lens - it truly is meant to be stuck over the top of the original mirror and not cover the original trim ring as has been stated on this thread and in the directions. Hopefully I can now get the the finished product snapped back into the motor assembly without breaking the OEM lens LOL. I think I will use the Amazon mirror as an additional piece of glass plus a pad and board over the whole thing to press the piece back in.
07-29-2014, 11:24 AM
#15
Drifting
Member Since: Jan 2012
Location: Hopatcong New Jersey
Posts: 1,341
Likes: 0
Received 5 Likes
on
5 Posts
The Amazon mirror was not used and will not be captured within the black OEM trim ring as it is a little smaller than the OEM lens - it truly is meant to be stuck over the top of the original mirror and not cover the original trim ring as has been stated on this thread and in the directions.
 07-29-2014, 12:14 PM
#16
Drifting
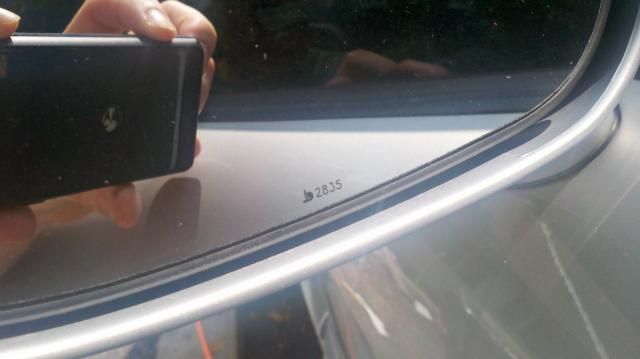
That may be the case. I'll take a pic of the Amazon mirror 'on top' of the OEM lens before I put the unit back on the car. The Amazon mirror part number in your photo is the same as the one I received. Your installtion looks perfect.
07-29-2014, 02:44 PM
#17
Drifting
As promised above, here are a couple pics of the Amazon lens laying on top of the installed OEM lens and trim ring. Hopefully you can see that the Amazon lens sits completely (and just) inside of the trim ring. In fact, when the trim ring was off, the lens would pass completely through the trim ring. I'd have to say agree there may be two different sizes.


 07-29-2014, 04:26 PM
#19
Drifting
Member Since: Jan 2012
Location: Hopatcong New Jersey
Posts: 1,341
Likes: 0
Received 5 Likes
on
5 Posts
I wonder if the backing plates are the same between the EC and non-EC mirrors, and GM added the extended ring to make up for the extra thickness of the double glass....
ie: if you removed the trim ring, and both pieces of glass, the amazon glass would fit like factory without the trim ring reinstalled...
ie: if you removed the trim ring, and both pieces of glass, the amazon glass would fit like factory without the trim ring reinstalled...
07-29-2014, 07:42 PM
#20
Drifting
I wonder if the backing plates are the same between the EC and non-EC mirrors, and GM added the extended ring to make up for the extra thickness of the double glass....
ie: if you removed the trim ring, and both pieces of glass, the amazon glass would fit like factory without the trim ring reinstalled...
ie: if you removed the trim ring, and both pieces of glass, the amazon glass would fit like factory without the trim ring reinstalled...
I saw in another thread that someone started about this mirror that the backing plate that poster was dealing with was indeed different than mine, notably in the holes the wires were passing through - where mine had the two rectangular holes seen on the left in the picture, below, the other poster showed just one at that location.
