When you click on links to various merchants on this site and make a purchase, this can result in this site earning a commission. Affiliate programs and affiliations include, but are not limited to, the eBay Partner Network.
Forum member Lionelhutz recommended a front spring removal proceedure that was very simple. A spring compressor tool is not necessarry. Took a few pics:
Jack the front of the vehicle at least 20 inches. Remove one tire, it does not matter which side.
I removed the shock and sway bar as they both are being replaced. It does help manuvering the lower a-arm over the end of the spring if you disconnect the lower shock mount and sway bar end link however it is not neccessary.
Jack the sring gently at the y of the a-arm. This will relieve the tension at the camber adjustment bolts.
Mark the position of the cam bolts.
Remove the two cam bolts on the side you are working on.
The a-arm is now free to manuver over the end of the spring.
Remove both retaining brackets.
Lower the jack supporting the end of the spring.
Remove the jack and slide the spring out.
Spring removed. Install in reverse order.
Thanks Lionelhutz
Last edited by jlaw1313@comcast.net; 01-25-2015 at 11:44 AM.
Forum member Lionelhutz recommended a front spring removal proceedure that was very simple. A spring compressor tool is not necessarry. Took a few pics:
Jack the front of the vehicle at least 20 inches. Remove one tire, it does not matter which side.
I removed the shock and sway bar as they both are being replaced. It does help manuvering the lower a-arm over the end of the spring if you disconnect the lower shock mount and sway bar end link however it is not neccessary.
Jack the sring gently at the y of the a-arm. This will relieve the tension at the camber adjustment bolts.
Mark the position of the cam bolts.
Remove the two cam bolts on the side you are working on.
The a-arm is now free to manuver over the end of the spring.
Remove both retaining brackets.
Lower the jack supporting the end of the spring.
Remove the jack and slide the spring out.
Spring removed. Install in reverse order.
Thanks Lionelhutz
I replaced mine pretty much the same way except, instead of removing the lower control arm bolts I disconnected the lower ball joint, pushed the steering knuckle to the side, pushed down on the control arm and slide the spring out.....6 of one, 1/2 dozen of the other ! Nice Photo how- to !
2020 Corvette of the Year Finalist (performance mods)
C5 of Year Winner (performance mods) 2019
if you are just swapping springs I wouldn't remove the lca that way you don't have to get an alignment... you can remove the upper control arms from the frame on both sides instead along with the lower shock bolts, tie rod ends, sway bar endlinks, and push down on the passenger side far enough for the spring to clear and come out the driver side... if you are installing coilovers it doesn't matter because you will need an alignment anyway, so whichever method works fine
Thanks for the replies. I guess there is more than one way to get the job done, depends on what else you have to accomplish.
The spring removal is part of a suspention upgrade to FE4 springs, sways and shocks. I am going to lower about 3/4 inch as well folowed up with an alignment.
On another note I want to reuse the front lowering bolts on the new spring, the previous owner of the FE4 spring had cut the front bushings which I did not want.
PB Blaster overnight, a torch to carefully heat the bolt and a 10inch pipe wrench with a cheater bar! This only resulted in breaking the metal insert adhesive bond to the spring so I just puched them out with a socket and hammer.
I torched the insert after removal and went at these bad boys with a second pipe wrench finally getting them to break free. One came out good the other did not fair so well.
Hacked up but savagable,I think.
I am not really sure I bent this bolt up or not.
Last edited by jlaw1313@comcast.net; 01-25-2015 at 10:20 PM.
Thanks for the replies. I guess there is more than one way to get the job done, depends on what else you have to accomplish.
The spring removal is part of a suspention upgrade to FE4 springs, sways and shocks. I am going to lower about 3/4 inch as well folowed up with an alignment.
On another note I want to reuse the front lowering bolts on the new spring, the previous owner of the FE4 spring had cut the front bushings which I did not want.
PB Blaster overnight, a torch to carefully heat the bolt and a 10inch pipe wrench with a cheater bar! This only resulted in breaking the metal insert adhesive bond to the spring so I just puched them out with a socket and hammer.
I torched the insert after removal and went at these bad boys with a second pipe wrench finally getting them to break free. One came out good the other did not fair so well.
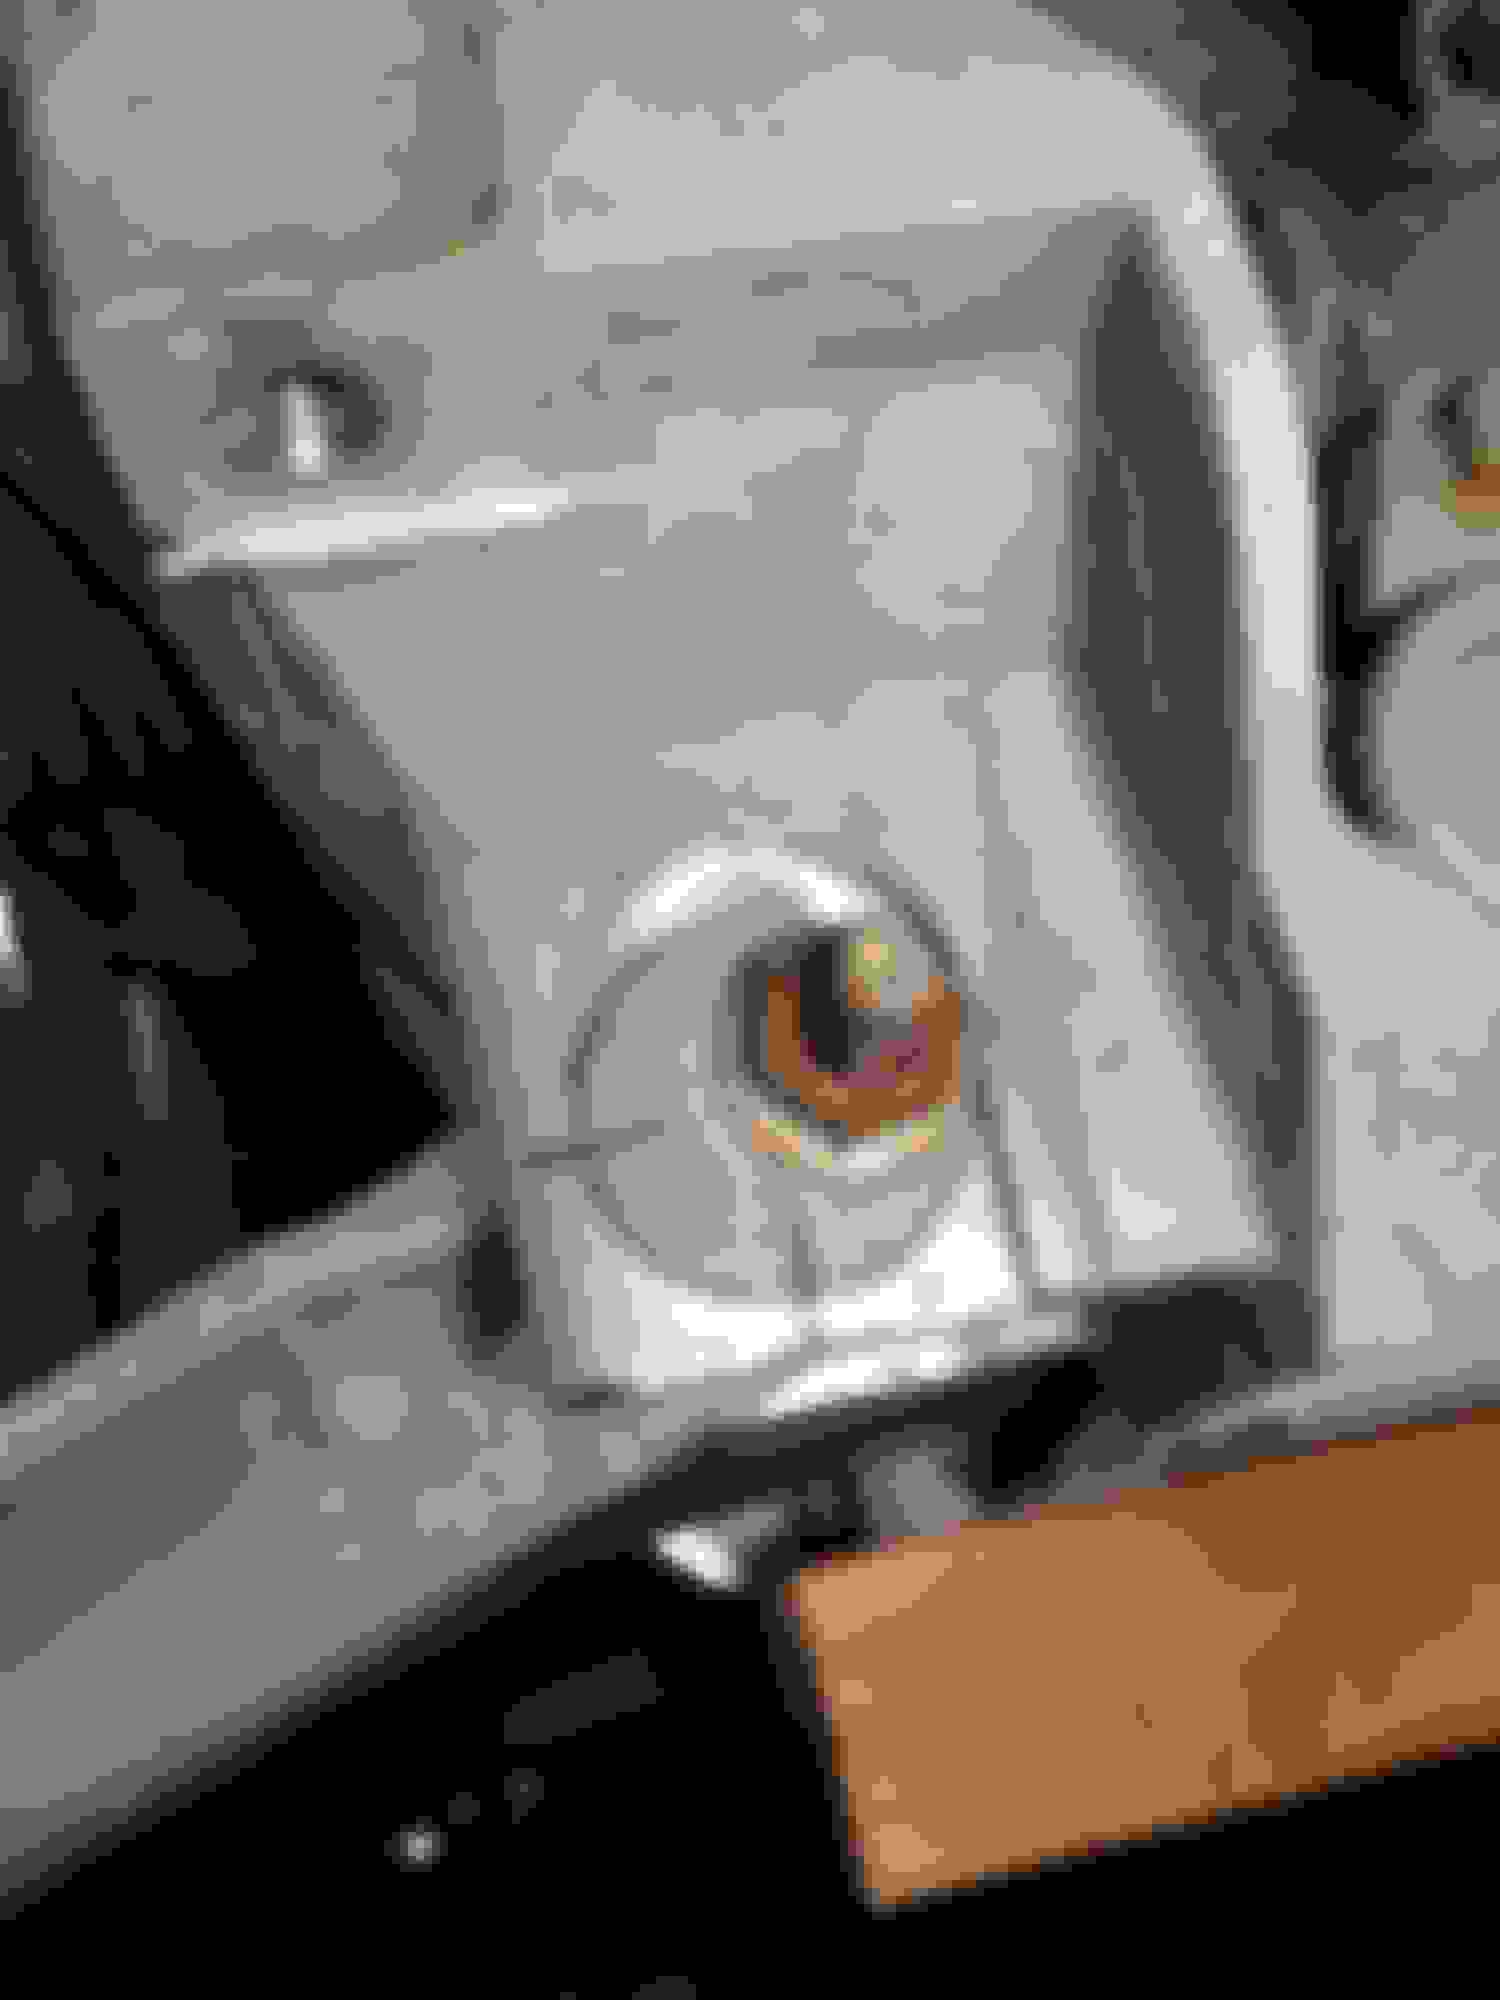
When I replaced my springs for the Z06 springs, the drivers side adjusting bolt was bent.
In fact one of the bolts that came in the used Z06 springs was also bent.......
So I think they just bend! They aren't hardened as far as I can tell. I had to sawsall one in half to get it out. Cut like butter.
Ron
Thanks for posting. I thought I was fairly respectfull removing the adjusters considering what it took just to break them free. I really did't think I bent that adjuster! The pic of the adjuster above is also from the driver side.
When I originally pulled the spring the left rubber insulator was settled at an odd angle compared to the right. It just did not click that the adjusters threaded shaft and plate that the insulator is glued to could be bent. I don't see how they could bend after install and can only assume it was tweaked from day one at the factory ; cheap bolt, partially threaded, dropped when standing up in a rack for assembally kinda theory. Both adjusters appeared never to have been touched.
I did try to straighten that adjuster considering it just sits there. It was just to wasted so I picked up a replacement up from Vettenuts.
Last edited by jlaw1313@comcast.net; 01-27-2015 at 07:00 AM.
I also noted that the pads were very off center in some bolts. As if they cold flowed after years of use.
I bought a couple used as well so had 2 that were decent.
I put some grease under the pads where they contact the control arm. Prob being too **** there....

 01-25-2015, 10:34 AM