
C5 Z06 180 degree header build thread
 02-20-2017, 04:57 PM
#101
Instructor

Thread Starter

Correct, no sparks when tig welding.
It's actually from constantly pushing other projects to the back of the bench... so many projects still needing attention in the garage.
Exactly, beer cans fit 2 3/4" tubing perfectly. I should have mentioned all the welding is being done with an inside purge.
 02-20-2017, 06:01 PM
#102
Instructor
Thread Starter
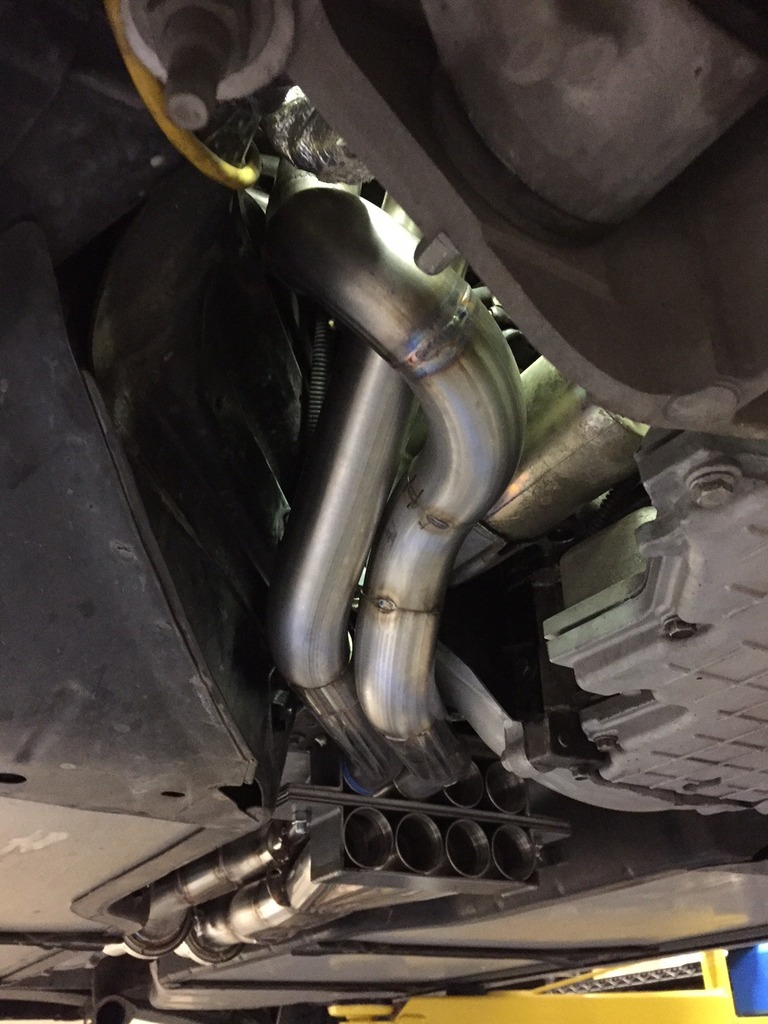
Finally onto the primaries. I started with #2 as it has the longest path to the collector. The #1 primary is actually further away, by the width of a connecting rod, from the collector but because the spark plugs angle forward on the driver side and backwards on the passenger side, the #2 had to go around it's plug unlike #1 that can take a straighter shot.
It came in at an acceptable 38" long while leaving room for the rest of the passenger side pipes to make their way to the collector at the same length. The #8 primary fought me quite a bit. Finally, the third routing option ended up getting both the length at 38" and leaving room for #4 and #6 to make their way.
The first half of #8
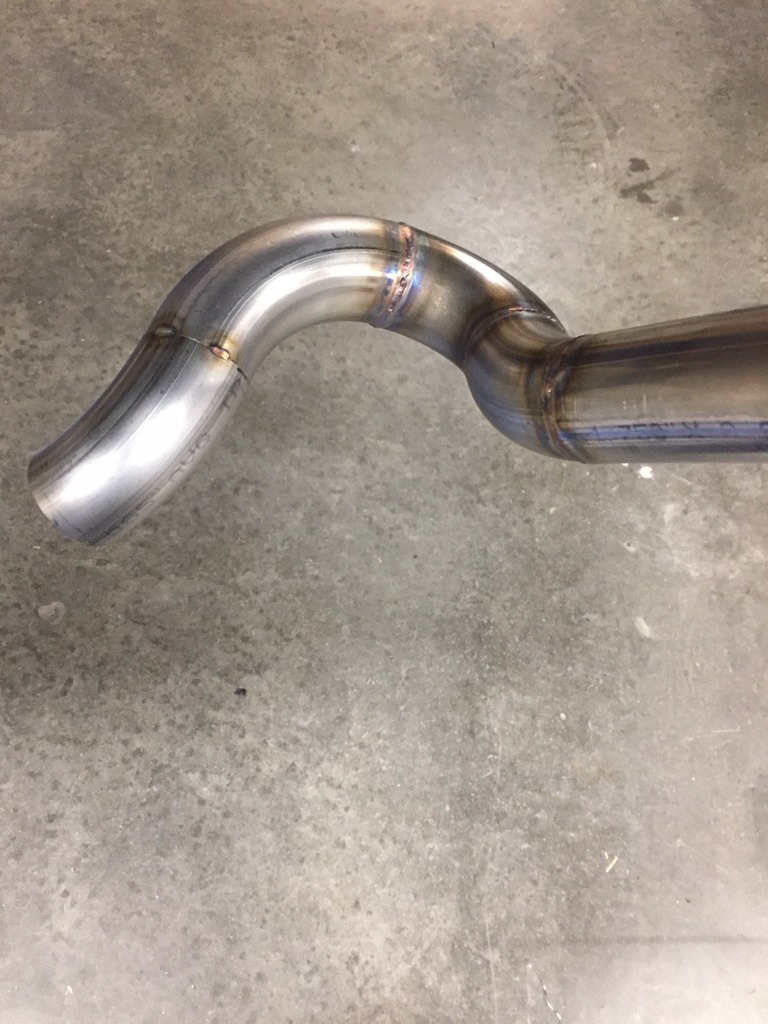
And how it fits around #2


 02-20-2017, 07:02 PM
#103


The following users liked this post:
Tinmatt (02-20-2017)
02-20-2017, 08:09 PM
#105
Instructor
Thread Starter
All i have is an iphone in which to attempt to record the sounds. I'm considering an external microphone for it, if anyone has suggestions as to one that excels in recording exhaust notes at short distances, please speak up.
02-28-2017, 07:51 AM
#106
Drifting


I have no doubts you'd be able to find somone willing to record this in detail. You should show up to a local Cars and Coffee when it's done, you'll get plenty of attention.
The following users liked this post:
Tinmatt (03-01-2017)

The following users liked this post:
Tinmatt (03-01-2017)
03-01-2017, 01:09 PM
#108
Racer
Folks who can come up with, visualize, and actually produce this kind of stuff blow me away. The pictures are great and I appreciate you describing all that goes into the fabrication process. Hats off to you, awesome work. 
03-01-2017, 01:15 PM
#109
1/4 mile/AutoX


 03-01-2017, 03:32 PM
#111
Instructor
Thread Starter
Thanks again for all the kind words 
A little more progress.
O2 bungs welded into the collectors. The upper collector being so tight to the tunnel plate required that I cheat it's position slightly in order to maintain a downward angle of the sensor to prevent damage due to condensation. I was able to get a 5 degree downward angle by placing the bung off center and grinding it at both an angle and radius.
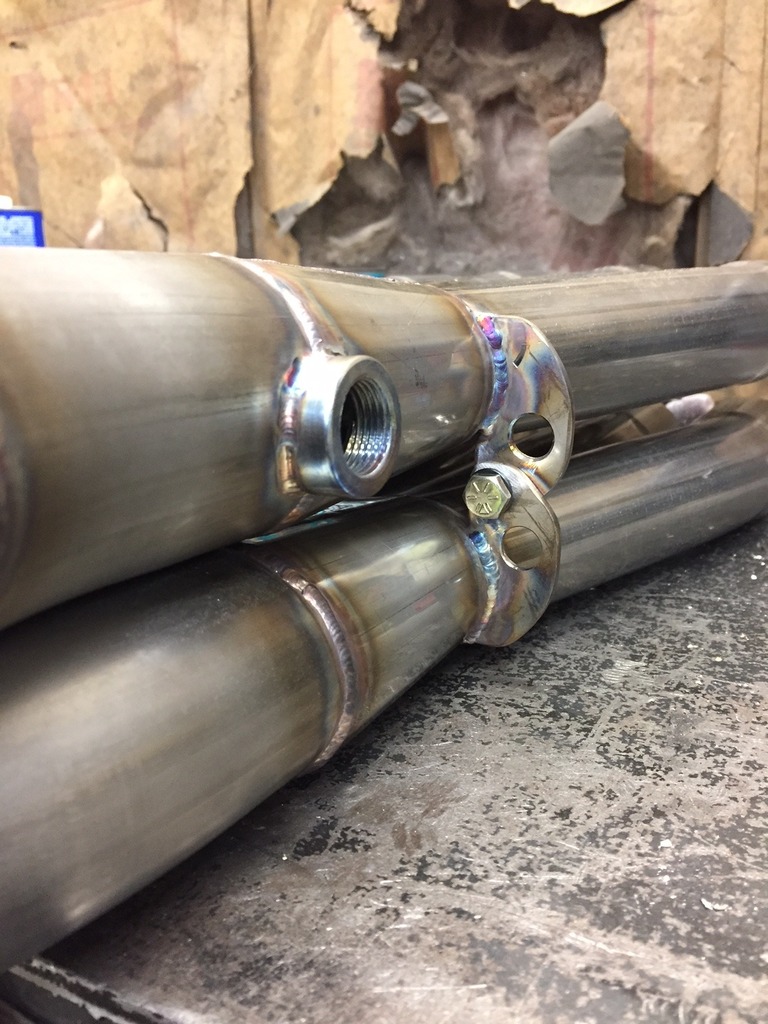
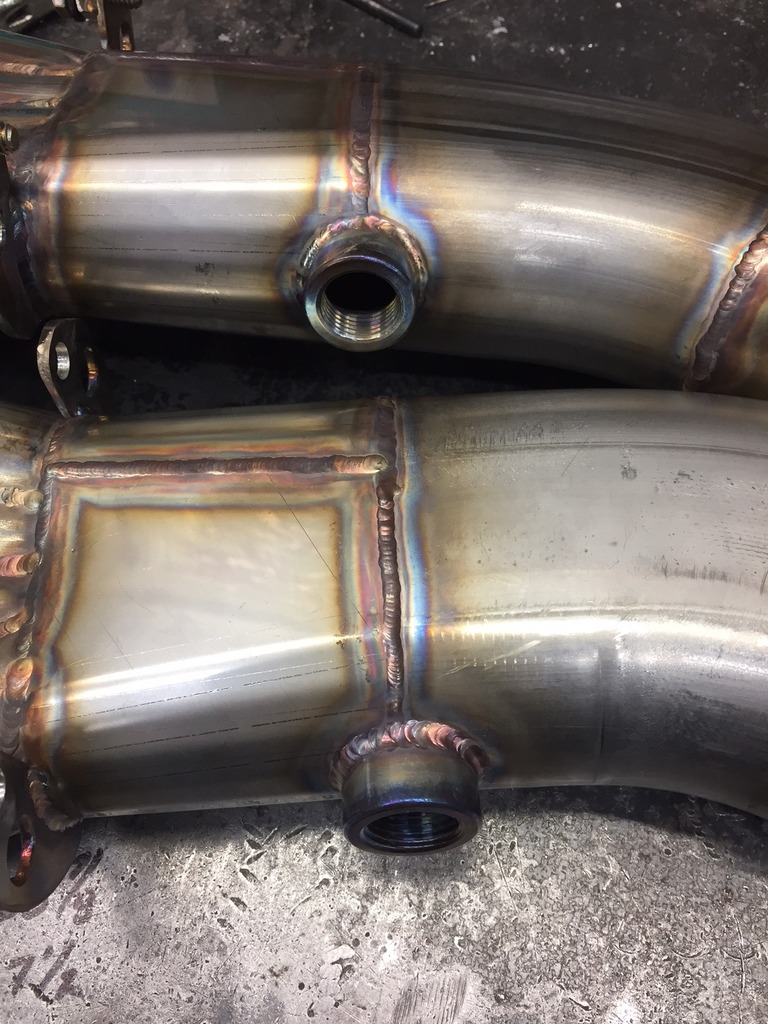
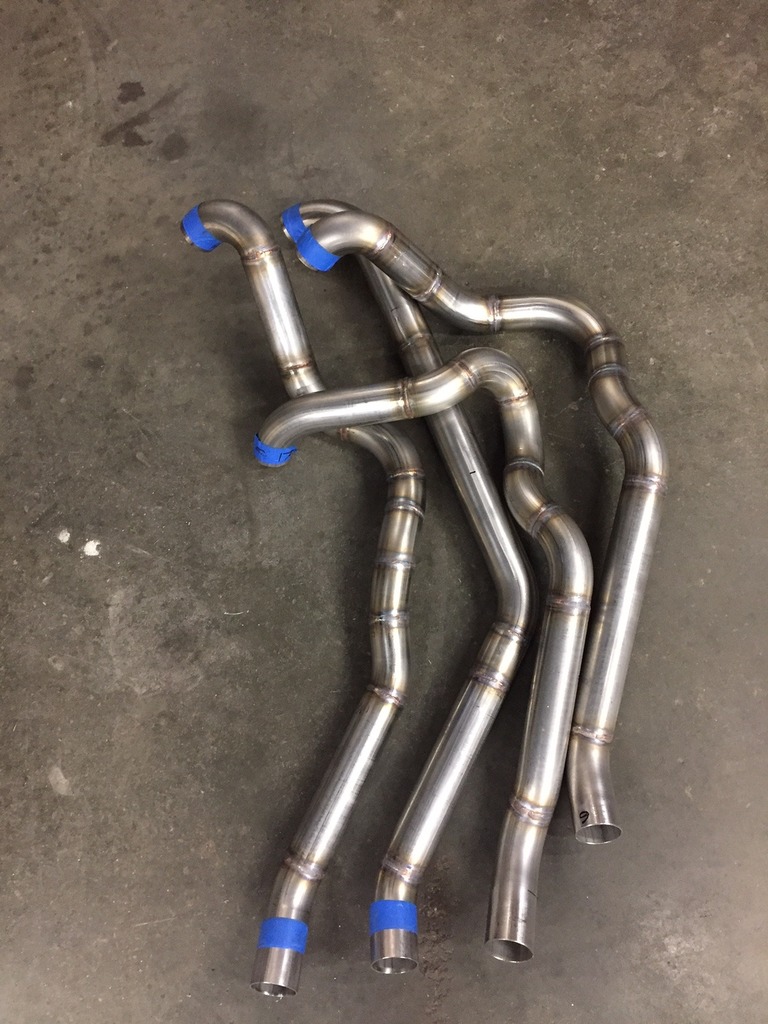
And a pile of passenger side primary pipes welded up and ready to go back into position to tack weld to the header flange. They came in at 38", 38", 38 1/8", and 37 3/4" in lengths. Crossing my fingers, toes, legs, eyes, and anything else I can in hopes that the header, when assembled, will slide out of the engine bay without major surgery. The #4 primary is run close to the side of the block making the header pretty wide in it's mid section.
A little more progress.
O2 bungs welded into the collectors. The upper collector being so tight to the tunnel plate required that I cheat it's position slightly in order to maintain a downward angle of the sensor to prevent damage due to condensation. I was able to get a 5 degree downward angle by placing the bung off center and grinding it at both an angle and radius.


And a pile of passenger side primary pipes welded up and ready to go back into position to tack weld to the header flange. They came in at 38", 38", 38 1/8", and 37 3/4" in lengths. Crossing my fingers, toes, legs, eyes, and anything else I can in hopes that the header, when assembled, will slide out of the engine bay without major surgery. The #4 primary is run close to the side of the block making the header pretty wide in it's mid section.
 03-01-2017, 03:35 PM
#112
Instructor
Thread Starter
They will be almost as easy to remove as any other pair of long tube headers. There will be two headers as normal but without collectors welded to them. The collectors will be slip fit with tabs that either bolt together or are secured with springs, not sure which yet.
03-01-2017, 05:58 PM
#114

Beyond Impressive!
03-02-2017, 02:44 PM
#115
Instructor
Thread Starter
 Major fail #2. Got all the primaries tacked to the header flange and short of removing the cylinder head, there is no way it would come out in one piece. I broke loose the #4 tube and jacked up the passenger side of the engine to get it out.
 Looking at it on the floor and remembering the sticking point when removing it, I figured it was actually the #8 primary interfering with the A/C line, not the #4. So I made a quick little jig to hold the primaries in position at the collector end to allow me to tack #4 back in place. Then I removed #8 from the equation and tried to slide the 3/4's of a header in place. No dice. It's just plain too wide in the area around the starter and A/C line.


New plan of attack. I have more room directly under the flange, near the block between the motor mount and starter to snake the pipes around and take up the distance #4, #6, and #8 need to equal #2's length. So, I will run the four primaries from the collector tight to each other all the way past the starter and A/C line pinch point and then start throwing bends where they need to go to get my equal lengths. This will also allow me to build a good percentage of it on the bench which is far easier than under the car.
03-11-2017, 08:53 PM
#116
Instructor
Thread Starter
Passenger side, version 3.1. Got to this point and once again, no go.

Even with the starter removed and the motor jacked up on the passenger side, she wasn't going in.
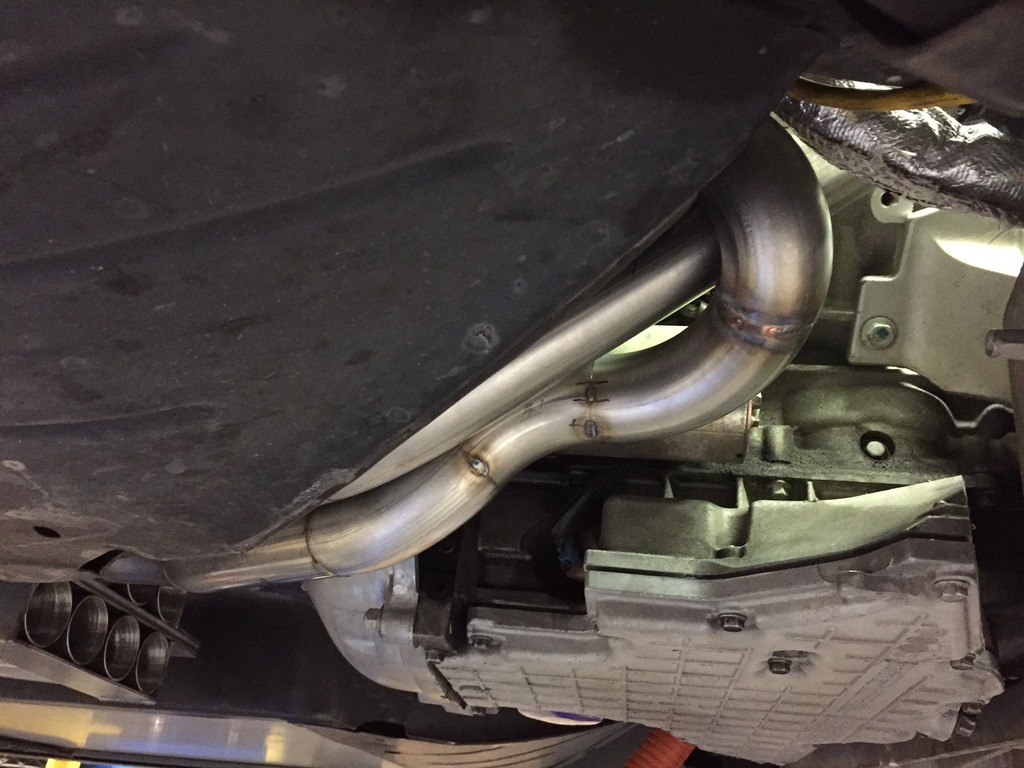
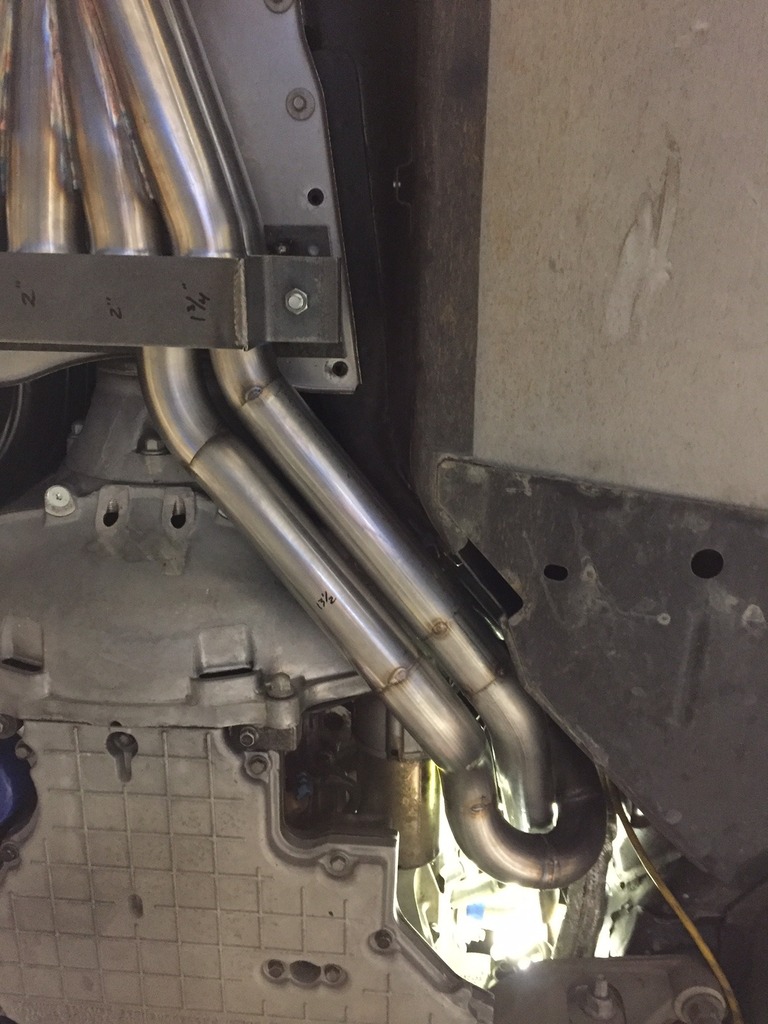
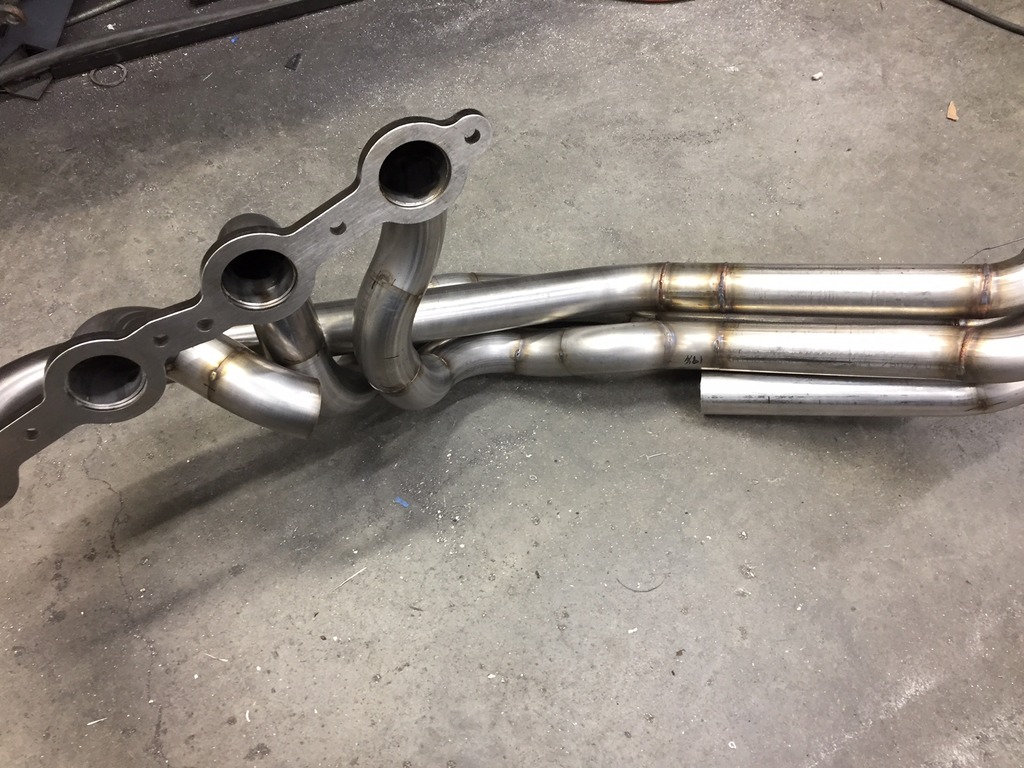
Time for slightly drastic measures. I cut the first half of the #6 primary out to allow the #4 primary to take it's path. Then the #6 was directed to the outside of #2. Everything came in within 3/8" of the target length. As a huge bonus, as I was sliding into place for it's final test fit, it appeared it might slide by the starter. Bolted the starter in and the header slide right by! No jacking of the motor or starter removal required. Only the large positive wire to the starter and ground wire to the block need to be removed.
Version 3.2, the final version!

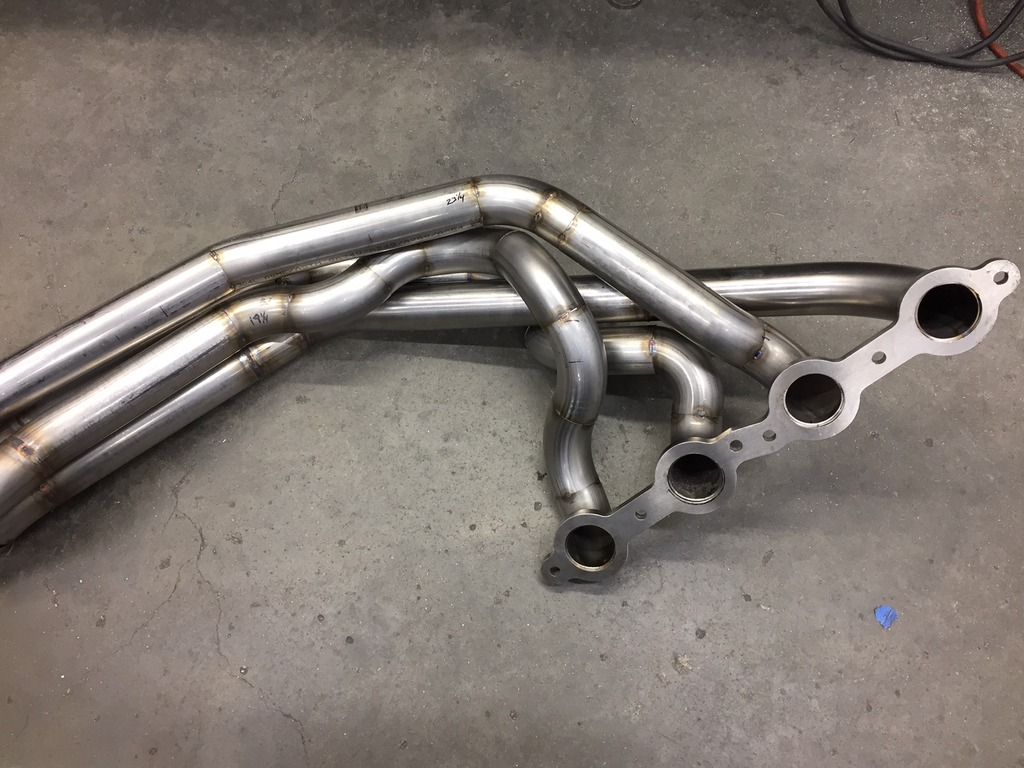
Only thing left on the passenger side is to weld it out. The driver side should go much smoother due to the larger area to work in, the favorable angle of the spark plugs and the lessons I have learned on this one.


Even with the starter removed and the motor jacked up on the passenger side, she wasn't going in.
Time for slightly drastic measures. I cut the first half of the #6 primary out to allow the #4 primary to take it's path. Then the #6 was directed to the outside of #2. Everything came in within 3/8" of the target length. As a huge bonus, as I was sliding into place for it's final test fit, it appeared it might slide by the starter. Bolted the starter in and the header slide right by! No jacking of the motor or starter removal required. Only the large positive wire to the starter and ground wire to the block need to be removed.
Version 3.2, the final version!


Only thing left on the passenger side is to weld it out. The driver side should go much smoother due to the larger area to work in, the favorable angle of the spark plugs and the lessons I have learned on this one.
The following 2 users liked this post by Tinmatt:
C4ProjectCar (04-26-2021),
VFR RC46 (01-29-2020)
03-12-2017, 09:18 AM
#117
Team Owner

 03-13-2017, 10:05 AM
#120
Drifting
Really excited for the first fire up.