
Vortex CAI Install - My Impressions on Install and Performance (PICS, long)
 03-09-2008, 07:44 PM
#1
Melting Slicks

Thread Starter

I had been on the fence for a while trying to decide whether or not I wanted to install a CAI on my 06 A6. I wanted a true CAI, one that got its air from outside of the engine compartment. My only performance mod to date was a tune from Synergy Motorsports. I wondered if a CAI would help, and would I be able to feel a difference. I finally decided to just go ahead and do it. With that decision made, I now needed to decide on which one.  I had narrowed my search to the Vararam, Callaway Honker and the Vortex Rammer.
There is a lot of good press on the performance of the Vararam, but a lot of negatives as well in regards to the fit and finish, and issues in regards to the seal of the filter. Personally, I also didn�t like the way that the Vararam left a gap between the unit itself and the shroud. This allows for a lot of debris/dust to enter the engine compartment. Since I have a lot of visual mods as well, this was an issue for me. I don�t race, but wanted a balance between performance and looks.
The Callaway seems to have good performance numbers as well, although maybe not quite as good as the Vararam. I also liked the fact that it looked close to stock once installed. The one issue with it is that you have to remove the shroud to install it. Depending on who you listen to, this task alone can range from anywhere between a real pain in the a** to not all that bad.
I finally decided on the Vortex Rammer. Its performance numbers seem to be in line if not better than that of the Vararam. There are some differences with the Vortex that are different than some of the other CAI units. You do not have to remove the shroud to install it, it seals to the shroud to prevent debris/dust from entering the engine compartment and you have a choice of three different air boxes - clear, black or carbon fiber (not real carbon fiber, just a carbon fiber look). You don�t see as many threads on this unit, and I had to search quite a bit to find what info I could about it. If you go back a year or two, you�ll find a little more info on this unit as opposed to the past six months to a year. The price of the Vortex is around $75-$100 more than the Vararam and Honker, which may be why you don�t see as much talk about it on the forum. To me, the fit, finish and look are well worth the extra $$. We spent a lot on our Vettes, what�s an extra $100 in the grand scheme of things.
The other thing I liked about the Vortex was the unique design and the attention to detail. The designers (Breathless Performance) try to reduce turbulence in the intake for better performance. The filter itself has a cone inside of it to help reduce this, as well as the elimination of the accordion boot downstream of the MAF. Once the unit is installed, it is pretty much a straight shot from the air bridge to the throttle body - no bends, change of direction or an accordion for the air to bump up around. I liked this attention to detain in the design.
The Vortex unit consists of four major parts. The air bridge, the filter box, the filter and a smooth coupler to replace your accordion coupler downstream of the MAF. The install was pretty straight forward. From start to finish it took me about 2-2 1/2 hours. One of the hardest parts was getting the old filter and couplings apart. The instructions were good and the template provided was of good quality. I only had to cut once, and did not have to do any trimming after the initial cut. What helped out a lot was a 5 minute video Breathless Performance has on their Website on installing the Vortex. It goes into a little more detail than the written instructions, and filled in any gaps nicely.
The performance of the Vortex did not disappoint. Yes, I can feel a difference. My car seems to pull much better now in the middle to upper RPM range. It feels very strong here. The day after the install, I took my car back to my tuner for any tweaks that he might have to make as a result of the Vortex. Instead of placing it on his dyno, he drove it around for about a half hour with his laptop and HP Tuners in tow to make some fine tune adjustments. Being that the Vortex is supposed to get more air at speed, driving it out on the street as opposed to putting it on the dyno makes sense. He did have to make some small moves to the fuel trim as he stated it definitely was getting a little more air. He also stated that for being relatively stock (other than my tune and Vortex), the car has a lot of get up and go.
If customer service is important to you, Ernie at Breathless Performance was great to work with. Even on off hours he answered my calls. I actually placed my order for the Vortex while Ernie was out at the track. Customer service at Breathless Performance was well above my expectations.
In conclusion, the Vortex is everything I wanted in a CAI. It performs great, looks great, and the install was relatively easy. I�m sure the performance difference between the Vararam, Honker and Vortex is relatively small, if none at all. But when adding up performance with ease of install, design, fit and finish the Vortex was a hands down winner for me. I hope this helps with anyone else trying to make this decision on a CAI.
Below are some pictures of the install. Enjoy
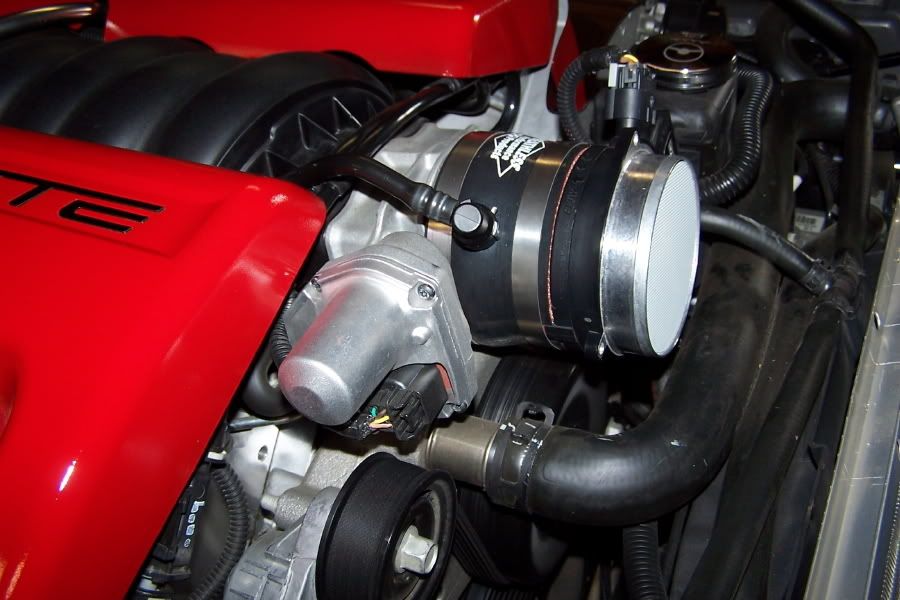
New smooth coupler downstream of MAF. You have to drill a small hole in it to insert the vent tube. Best to do this while the couple is off the throttle body. Place it on, mark where the hole should go then remove and drill.
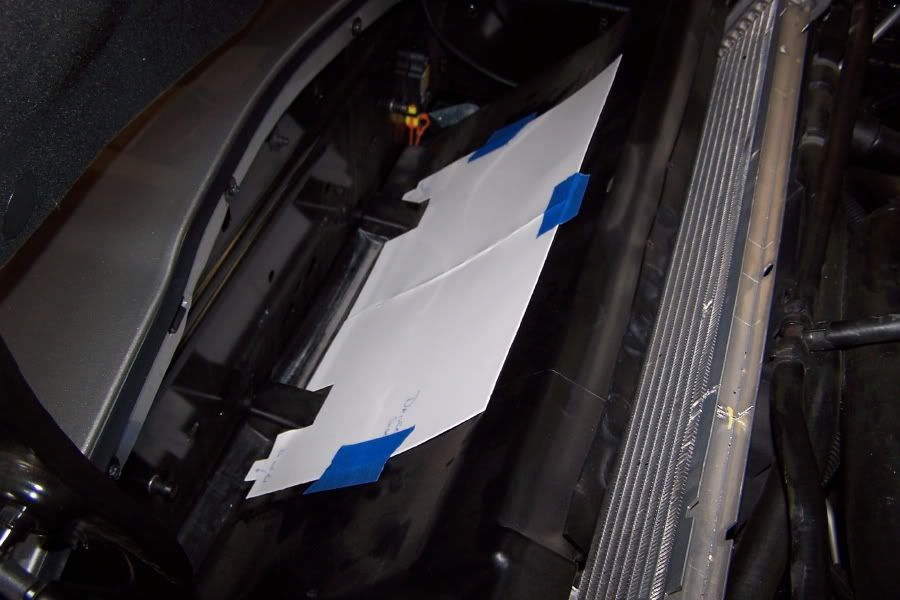
Template in place, ready to trace for cutting.
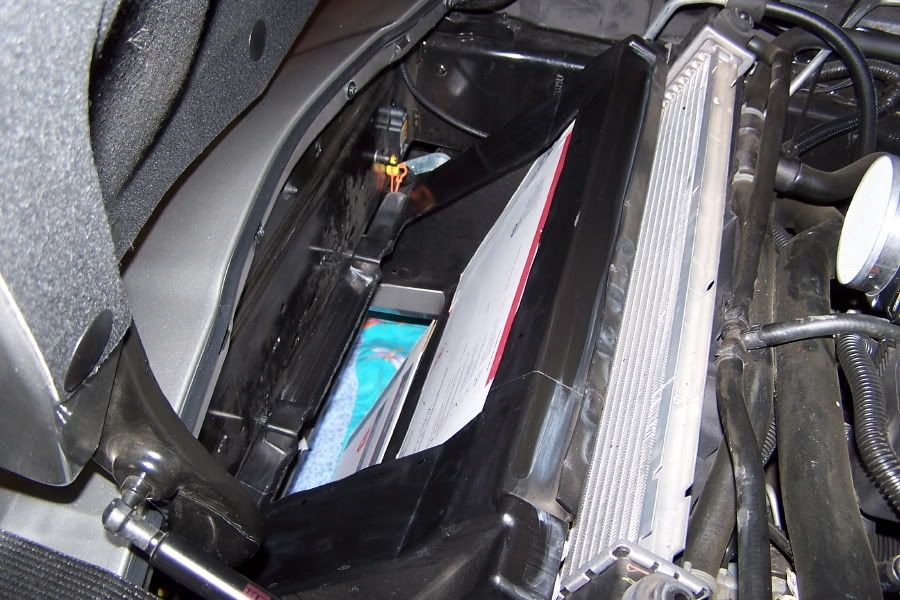
Shroud cut. I used a sharp knife, only extending the blade around � inch when cutting near the top of the shroud. Make sure you place some cardboard between the condenser and the shroud so you don�t accidentally cut/puncture it (I used three layers of cardboard to be on the safe side). When drilling the holes in the shroud for the mounting brackets, I did hit the cardboard a couple of times, but did not go through it. Also, I had an angle drill which allowed for easier drilling of the holes in the shroud.
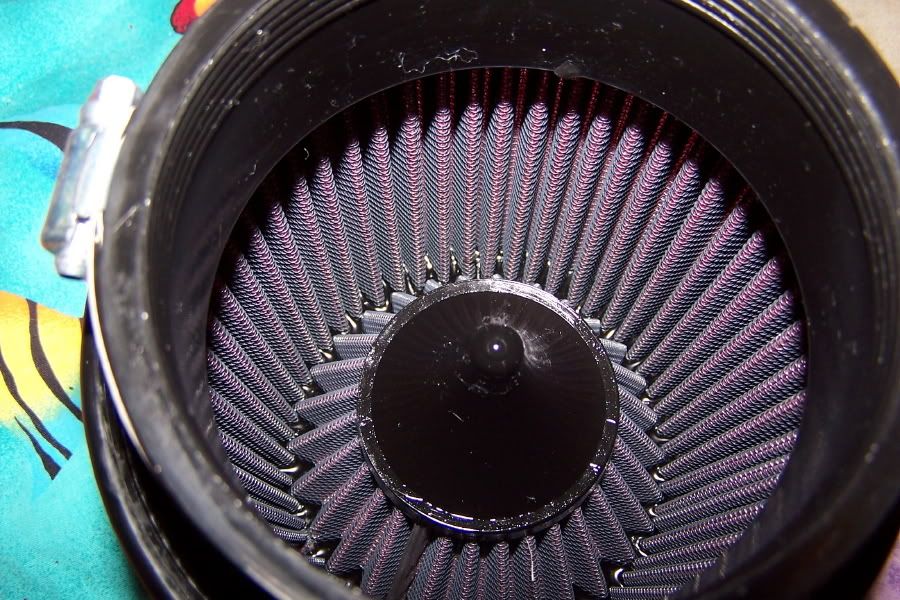
A picture of the inside of the filter. The picture really doesn�t represent the inner cone very well.
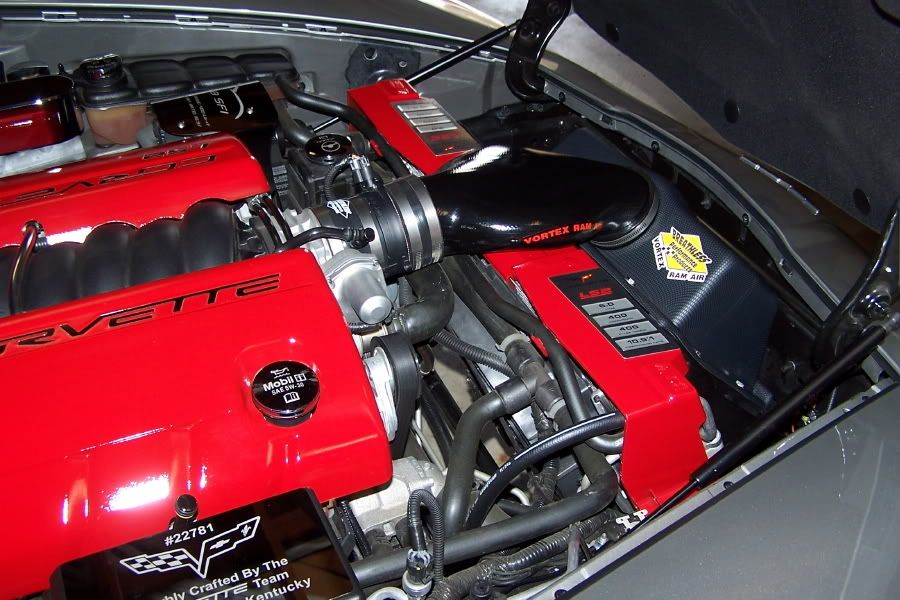
Unit installed. Because of the curvature of the shroud, where was a small gap in a small area between the box and the shroud. I just used a little low density foam to fill in the gaps.
I had narrowed my search to the Vararam, Callaway Honker and the Vortex Rammer. There is a lot of good press on the performance of the Vararam, but a lot of negatives as well in regards to the fit and finish, and issues in regards to the seal of the filter. Personally, I also didn�t like the way that the Vararam left a gap between the unit itself and the shroud. This allows for a lot of debris/dust to enter the engine compartment. Since I have a lot of visual mods as well, this was an issue for me. I don�t race, but wanted a balance between performance and looks.
The Callaway seems to have good performance numbers as well, although maybe not quite as good as the Vararam. I also liked the fact that it looked close to stock once installed. The one issue with it is that you have to remove the shroud to install it. Depending on who you listen to, this task alone can range from anywhere between a real pain in the a** to not all that bad.
I finally decided on the Vortex Rammer. Its performance numbers seem to be in line if not better than that of the Vararam. There are some differences with the Vortex that are different than some of the other CAI units. You do not have to remove the shroud to install it, it seals to the shroud to prevent debris/dust from entering the engine compartment and you have a choice of three different air boxes - clear, black or carbon fiber (not real carbon fiber, just a carbon fiber look). You don�t see as many threads on this unit, and I had to search quite a bit to find what info I could about it. If you go back a year or two, you�ll find a little more info on this unit as opposed to the past six months to a year. The price of the Vortex is around $75-$100 more than the Vararam and Honker, which may be why you don�t see as much talk about it on the forum. To me, the fit, finish and look are well worth the extra $$. We spent a lot on our Vettes, what�s an extra $100 in the grand scheme of things.
The other thing I liked about the Vortex was the unique design and the attention to detail. The designers (Breathless Performance) try to reduce turbulence in the intake for better performance. The filter itself has a cone inside of it to help reduce this, as well as the elimination of the accordion boot downstream of the MAF. Once the unit is installed, it is pretty much a straight shot from the air bridge to the throttle body - no bends, change of direction or an accordion for the air to bump up around. I liked this attention to detain in the design.
The Vortex unit consists of four major parts. The air bridge, the filter box, the filter and a smooth coupler to replace your accordion coupler downstream of the MAF. The install was pretty straight forward. From start to finish it took me about 2-2 1/2 hours. One of the hardest parts was getting the old filter and couplings apart.
The instructions were good and the template provided was of good quality. I only had to cut once, and did not have to do any trimming after the initial cut. What helped out a lot was a 5 minute video Breathless Performance has on their Website on installing the Vortex. It goes into a little more detail than the written instructions, and filled in any gaps nicely. The performance of the Vortex did not disappoint. Yes, I can feel a difference.
My car seems to pull much better now in the middle to upper RPM range. It feels very strong here. The day after the install, I took my car back to my tuner for any tweaks that he might have to make as a result of the Vortex. Instead of placing it on his dyno, he drove it around for about a half hour with his laptop and HP Tuners in tow to make some fine tune adjustments. Being that the Vortex is supposed to get more air at speed, driving it out on the street as opposed to putting it on the dyno makes sense. He did have to make some small moves to the fuel trim as he stated it definitely was getting a little more air. He also stated that for being relatively stock (other than my tune and Vortex), the car has a lot of get up and go. If customer service is important to you, Ernie at Breathless Performance was great to work with. Even on off hours he answered my calls. I actually placed my order for the Vortex while Ernie was out at the track.
Customer service at Breathless Performance was well above my expectations. In conclusion, the Vortex is everything I wanted in a CAI. It performs great, looks great, and the install was relatively easy. I�m sure the performance difference between the Vararam, Honker and Vortex is relatively small, if none at all. But when adding up performance with ease of install, design, fit and finish the Vortex was a hands down winner for me. I hope this helps with anyone else trying to make this decision on a CAI.
Below are some pictures of the install. Enjoy
New smooth coupler downstream of MAF. You have to drill a small hole in it to insert the vent tube. Best to do this while the couple is off the throttle body. Place it on, mark where the hole should go then remove and drill.
Template in place, ready to trace for cutting.
Shroud cut. I used a sharp knife, only extending the blade around � inch when cutting near the top of the shroud. Make sure you place some cardboard between the condenser and the shroud so you don�t accidentally cut/puncture it (I used three layers of cardboard to be on the safe side). When drilling the holes in the shroud for the mounting brackets, I did hit the cardboard a couple of times, but did not go through it. Also, I had an angle drill which allowed for easier drilling of the holes in the shroud.
A picture of the inside of the filter. The picture really doesn�t represent the inner cone very well.
Unit installed. Because of the curvature of the shroud, where was a small gap in a small area between the box and the shroud. I just used a little low density foam to fill in the gaps.

 03-09-2008, 10:48 PM
#7
Burning Brakes


Member Since: Dec 2004
Location: Penn Valley California
Posts: 1,075
Likes: 0
Received 3 Likes
on
3 Posts

My experience with the Vortex rammer has been exactly the same as yours,DaveO. The unit is rock solid when installed-nothing flimsy here! Ernie was great to deal with,and I agree that you do get what you pay for here. Performance and drivability are definitely enhanced,and noticeable via the old "butt dyno". I removed all the decals,put six coats of clear on my "carbon fiber" look airbox to match my TKO carbon fiber fuel rail covers,and added a C6 airbridge flag decal to the power duct. No regrets here. Thanks for the great write up!

 03-10-2008, 11:51 AM
#10
Melting Slicks

Member Since: Mar 1999
Location: Fort Lauderdale Fl
Posts: 2,324
Likes: 0
Received 0 Likes
on
0 Posts

 03-10-2008, 01:02 PM
#13
Pro


Member Since: Dec 2007
Posts: 673
Likes: 0
Received 0 Likes
on
0 Posts
My experience with the Vortex rammer has been exactly the same as yours,DaveO. The unit is rock solid when installed-nothing flimsy here! Ernie was great to deal with,and I agree that you do get what you pay for here. Performance and drivability are definitely enhanced,and noticeable via the old "butt dyno". I removed all the decals,put six coats of clear on my "carbon fiber" look airbox to match my TKO carbon fiber fuel rail covers,and added a C6 airbridge flag decal to the power duct. No regrets here. Thanks for the great write up!
03-10-2008, 01:23 PM
#14
Team Owner


Dave - Under the section where you discuss the Vararam, you say....
"I also didn�t like the way that the Vararam left a gap between the unit itself and the shroud. This allows for a lot of debris/dust to enter the engine compartment.".
But under the write-up of your install, you say....
" Because of the curvature of the shroud, where was a small gap in a small area between the box and the shroud. I just used a little low density foam to fill in the gaps."
I guess I'm a little confused.
I also can't help wonder why the customer has to drill a hole in the coupler - why doesn't it come pre-drilled?
If I come across as being a Vararam fan, let me point this out that I've had a Vortex on both of the C5's I had (still have it up in my attic), and I've never owned a Vararam. My only point is that there are some inconsistencies in why you bought one over the other.
Glad you are happy with it, though. I'm also glad to hear of Ernie's great customer service.
03-10-2008, 06:58 PM
#16
Melting Slicks
Member Since: Mar 1999
Location: Fort Lauderdale Fl
Posts: 2,324
Likes: 0
Received 0 Likes
on
0 Posts
 03-10-2008, 07:07 PM
#19
Melting Slicks

Member Since: Jun 2007
Location: Miami FL.
Posts: 2,241
Likes: 0
Received 0 Likes
on
0 Posts
03-10-2008, 07:13 PM
#20

I've had mine for 16 months, installed when car had only 300 miles on it, no issues, period. First time ever with a CAI. My only question is how long between cleanings/ oiling the filter assembly? I 'vw got 4,360 on the odo now. I heard they can go quite a while..... Thanks