
**New Carbon Fiber Rear Diffuser**


 08-10-2014, 04:56 PM
#404
Guest
Posts: n/a
 08-11-2014, 05:30 PM
#406
Drifting

Member Since: Jun 2010
Location: Litchfield Minnesota
Posts: 1,252
Likes: 0
Received 6 Likes
on
5 Posts
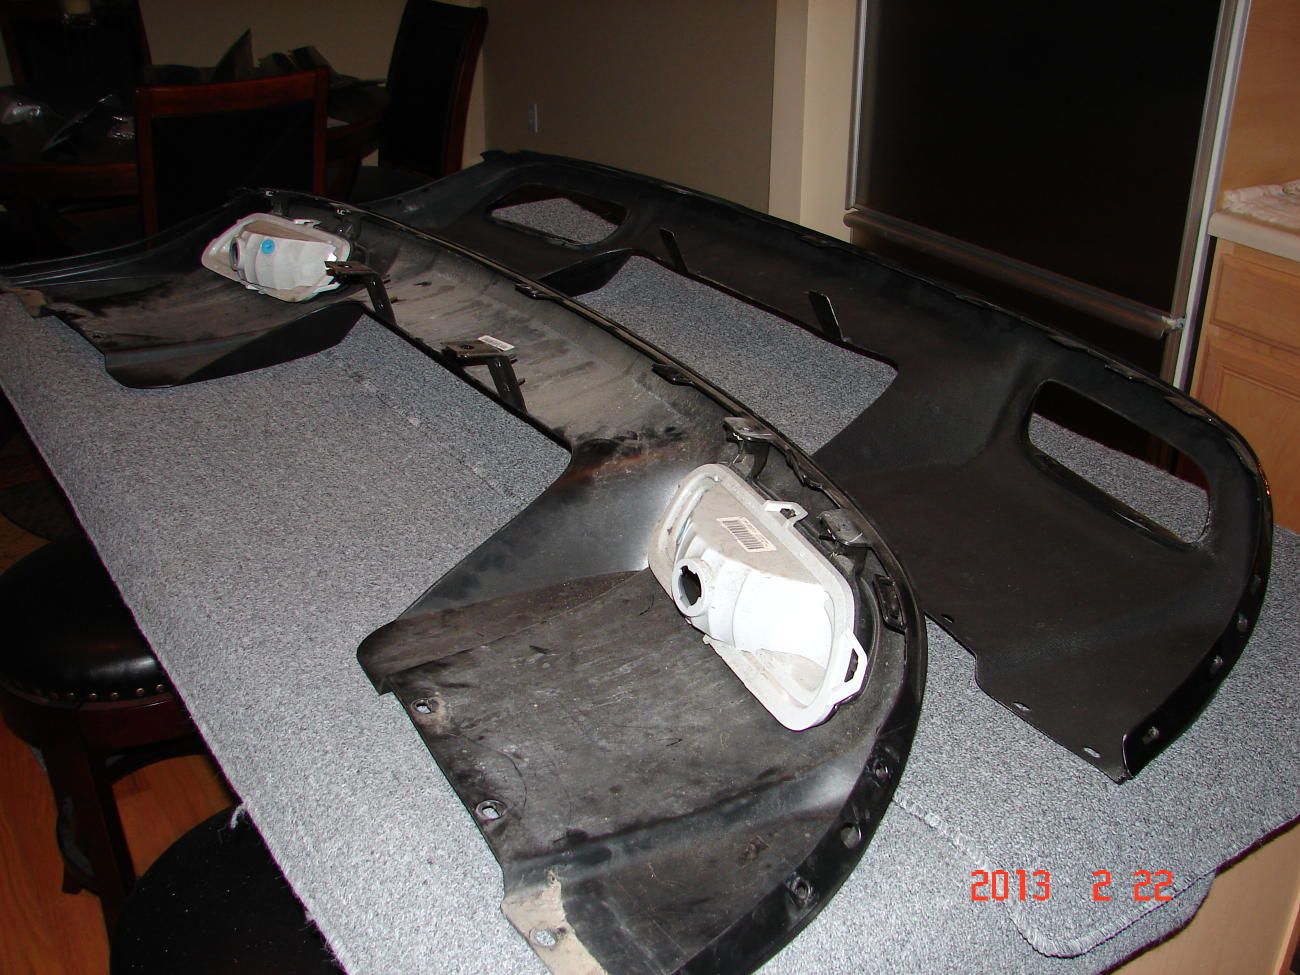
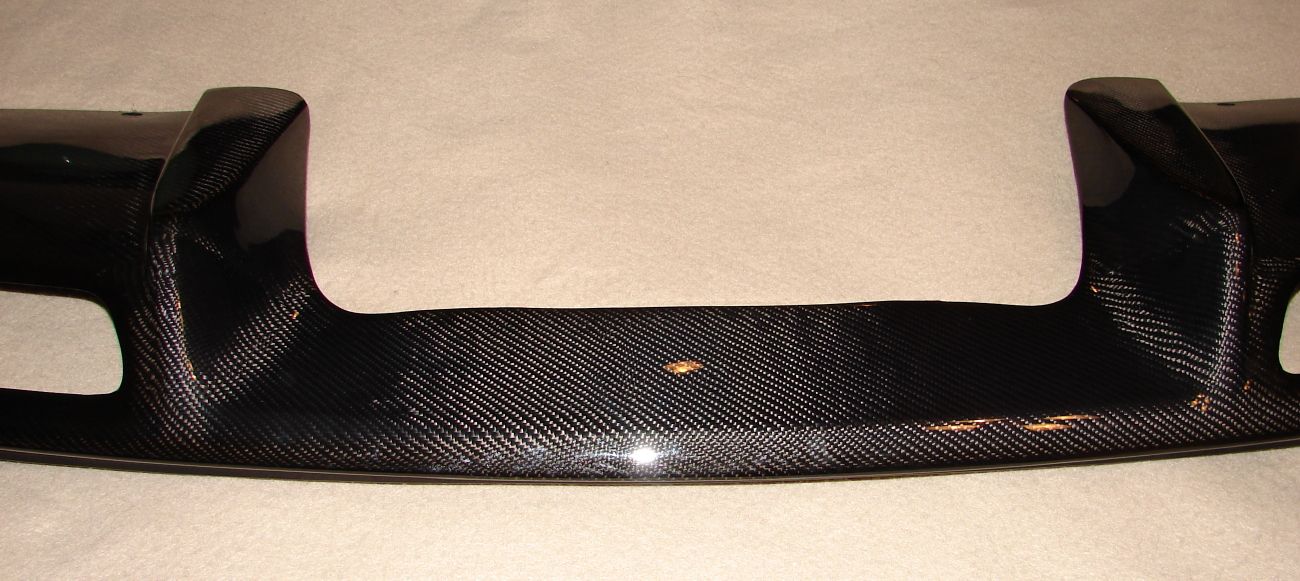
Just received and installed the CF diffuser, from Pat at American Hydrocarbon, today. The overall quality and finish are great. More important is the fact that it fits to perfection. All of the pre-drilled screw mounting holes aligned nicely. Same can be said of the tabs that slide into receiver slots in the rear fascia. I only needed to drill 4 holes to attach the metal brackets that bolt up above the exhaust. I also had to ream out one pre-drilled hole that is there to accomodate a wire stay for the tail light assembly. The entire install took me right at 6 hours. That was with the luxury of a four post lift and all of the correct tools. I would hate to tackle this type of install without the lift. For those that are going to install this on their own, the steps to the install are:
1) Remove both rear wheel and tire assemblies.
2) Remove the wheel well liners.
3) Remove all of the mounting screws for the diffuser.
4) Unplug the bulb units from the back up lights.
5) Unbolt the metal tabs, that are attached to diffuser, from the frame section above the mufflers.
6) Manipulate the plastic tabs, that are integral to the OEM diffuser, so that you are able to pull the diffuser free from the rear fascia.
7) Remove the back up lights from the OEM and install on the CF diffuser.
8) Remove the metal tabs (the ones that ultimately attach above the mufflers) that are still attached to the OEM and drill holes for those and install on the CF diffuser.
9) Now just reverse items 1 through 6 and you are done.
In the interest of wheel balance, whenever I remove the wheel assemblies, I always mark where the valve stem lines up in relation to the rotor and I even make sure to put the lug nuts back on the same lug that they were removed from.
I also use 3M painters tape to line up the many screws that are removed and make note on the tape of where that particular batch of screws was removed from.
For item number 5, just remove the 1 bolt in each metal tab and pull the diffuser with the tabs still attached. I first thought that I would need to remove the screws that mount the tab to the diffuser while it was still on the car. It is a very tight space and next to impossible to do it that way. I wasted 30 minutes trying to figure that out.
For item number 6, you will need to manipulate the tabs up and down to get them to slide out. They are in there tight and it requires some effort.
For item number ,7, when reinstalling the back up lights in the new diffuser, the little nodes that drop into the recessed holes in the new diffuser need to be inserted first and then the back up light assembly slid under the screw mounting tabs while prying those tabs up to allow the unit to slide in under them. This also requires some effort.
For item number 8, you will need to drill the four holes and be sure to mark the drill spots such that the end of the metal tabs are not visible past the diffuser when it is installed. I did not try to reuse the OEM mounting screws (you will see why when you remove the OEM diffuser). I just used some very small nuts and bolts with lock washers.
The one hole that I had to ream out, to accomodate the wire stay, was on the left side of the diffuser viewed from the rear.
Those are the only potential "gotchas" that I can think of for the install other than remembering to torque the wheels to 100 foot/pounds.
I am really pleased with this product and the ease of installation. This is the first time that I have ordered from Pat at AHC. It certainly won't be the last. His price was the best available and he threw in free shipping. Kudos and thanks to Pat S.
I just tried to attach photos and it won't take them for some reason. I'll try again in a new post.
08-11-2014, 07:36 PM
#407
Tech Contributor

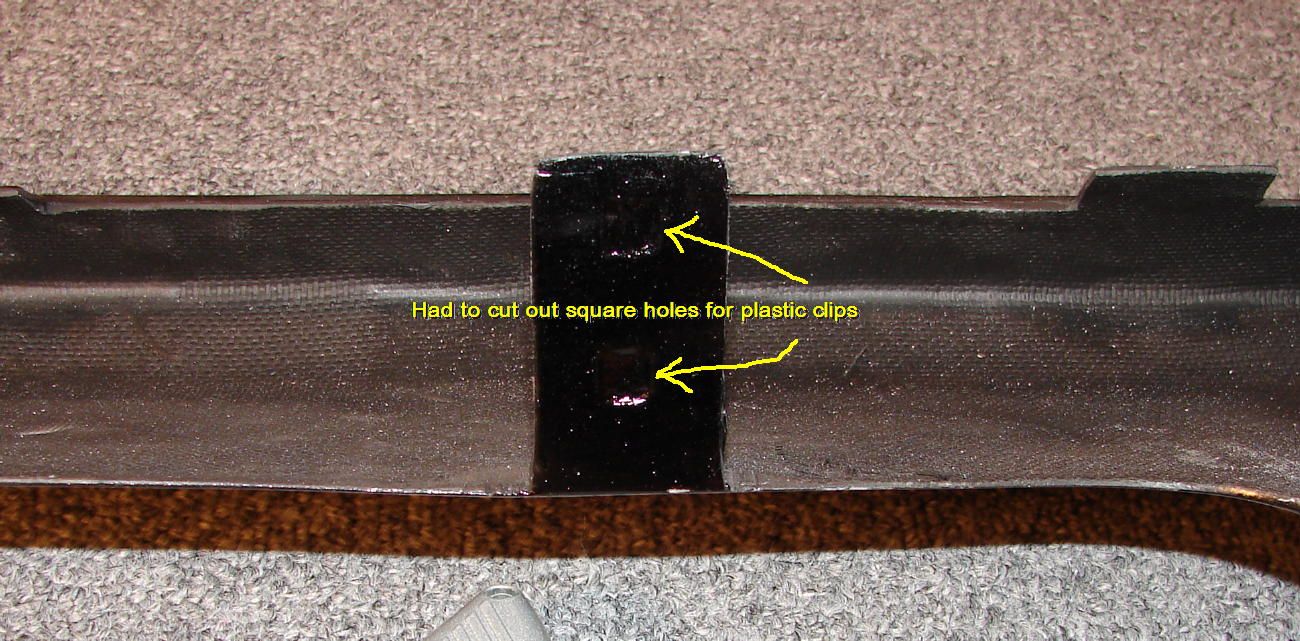
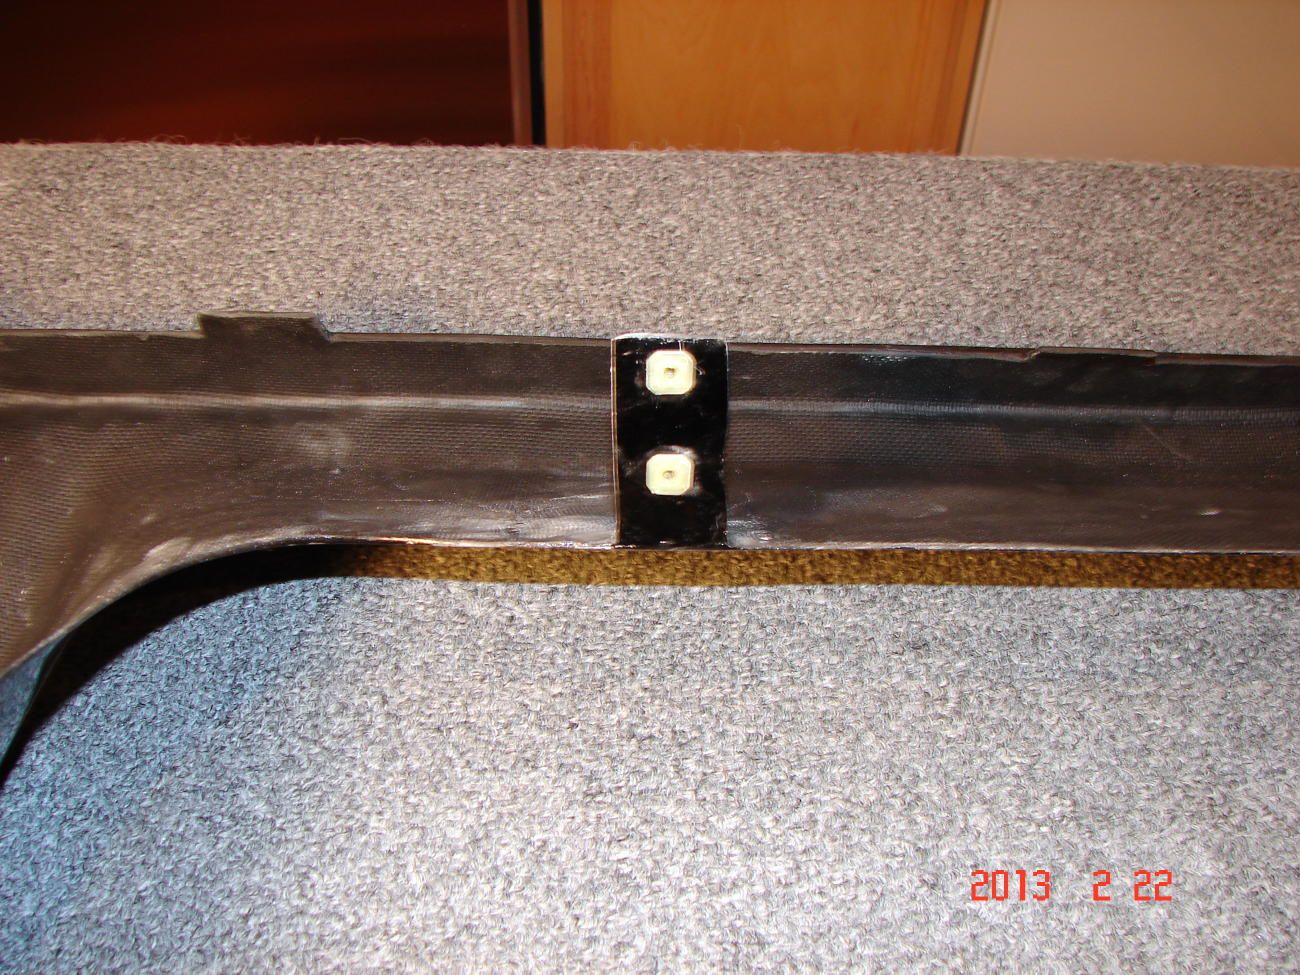
The hardest part is transferring the plastic clips. That and transferring the backup lights.
Mine fit very well except for around one of the fog lights. The gap at the top was a little bigger than I would have liked but you wouldn't notice it unless you were down very low to the ground.

Mine fit very well except for around one of the fog lights. The gap at the top was a little bigger than I would have liked but you wouldn't notice it unless you were down very low to the ground.


 08-11-2014, 10:47 PM
#409
Tech Contributor
I'm 65 and have taken most of my car apart and got it all back together again and I have no mechanical background at all.
It's not rocket science.
But I did see that you mentioned patience levels and it does take that.
 08-16-2014, 05:03 PM
#410
Guest
Posts: n/a
You'd be surprised what you can do with a little help from this forum and a little patience.
I'm 65 and have taken most of my car apart and got it all back together again and I have no mechanical background at all.
It's not rocket science.
But I did see that you mentioned patience levels and it does take that.
I'm 65 and have taken most of my car apart and got it all back together again and I have no mechanical background at all.
It's not rocket science.
But I did see that you mentioned patience levels and it does take that.
Are you bringing the car to Carlisle?
08-16-2014, 05:10 PM
#411
Tech Contributor
 )
)

 08-30-2014, 10:40 AM
#415
Le Mans Master


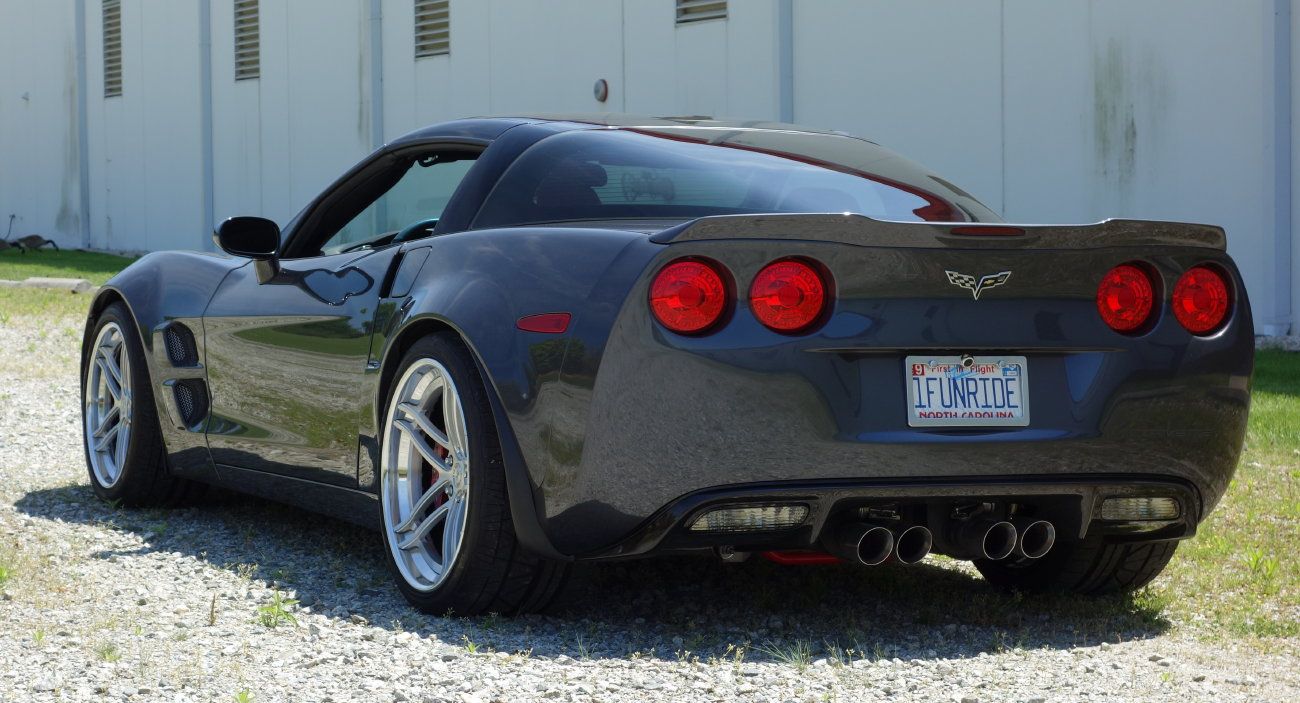
I purchased, from Pat, a CF diffuser. Very nice piece, will go nicely w/my silver '13 GS. Very happy w/ product, and very pleased w/vendor, Am. Hydro.
Will comment, again, after installation.
Thanks, Pat!!

Will comment, again, after installation.
Thanks, Pat!!