
Convertable waterfall cover
 08-30-2012, 11:00 AM
#1
Safety Car

Thread Starter


OK...I give up. I have amassed (sp) a decent amount of general automotive knowledge over my 40 years of self reapair, etc. But every time I try the simplest thing on these newer vehicles I get muffed. I am just trying to take off the waterfall cover between the seats on a my 2006 conv. Thought it would be as simple as removing the 2 torx bolts from the top of the cover. No go. Seems as though there are 2 more regular bolts coming through from behind the small bulkhead behind the cover. Getting to the bolts is no problem....but appearently the nuts on the other side are spinning and I see no way to get to them so they can be held while loosening the bolts. Are these 2 bolts also holding the cover, or is there a "Trick" to this R&R. Thanks
 08-30-2012, 11:51 AM
#2
Drifting


Go to Ray Krawls page and look at the directions for installing the GM PAL he sells. Those are the best directions I know of. There easy ans consise. I will see if I can find them for you.
Here is the link.
This makes it easy. http://www.kawal.net/PAL%20install.htm#Alternative%205
These are from RAYS PAGE. HOPE HE DOESN't MIND....
The waterfall is held in by two T15 Torx screws at the top and three plastic pins:
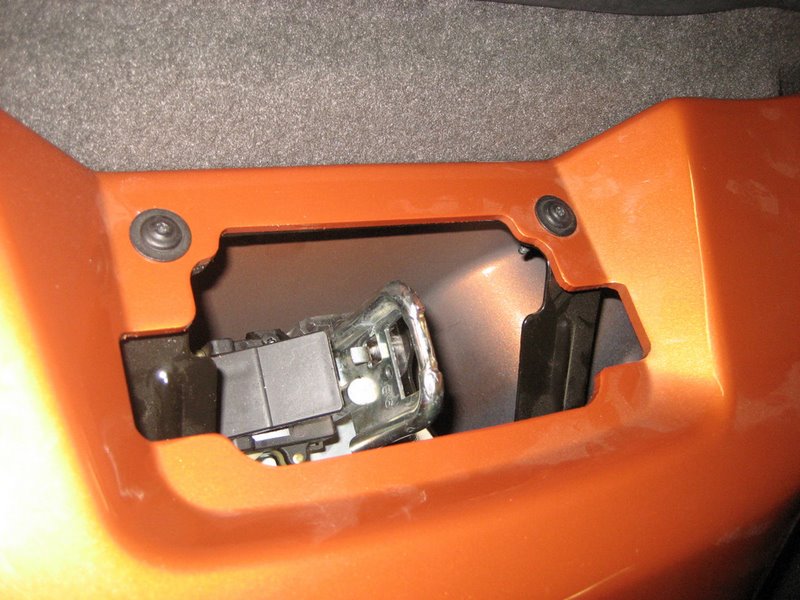
Two of the plastic pins are behind the dividing wall that is in front of the storage area:
If you put your top half way down and look behind the waterfall, you'll see both of them.
The center part of the pin must be pulled out with a small screwdriver to release it:
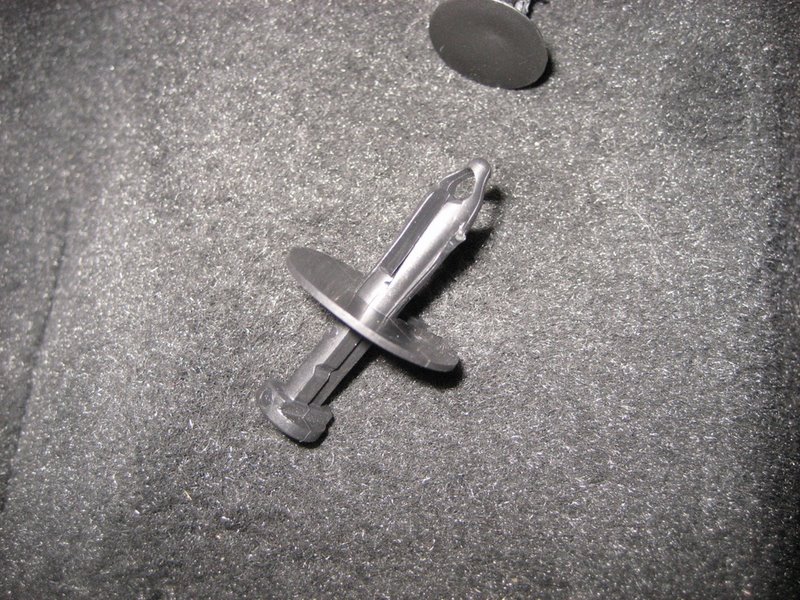
Once the center is pulled out, the main part is able to squeeze together and you can pull the entire pin out.
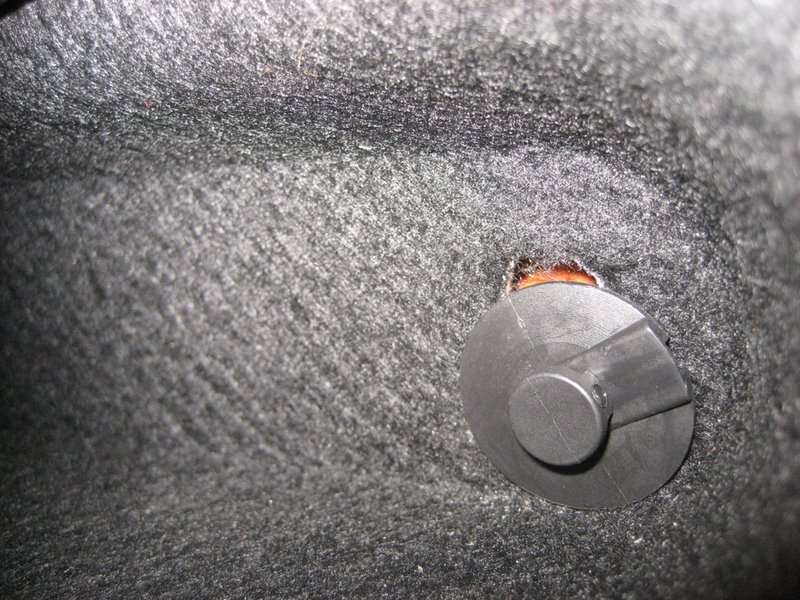
The third pin is on the passenger side of the waterfall:
This one is a bit hard to grab because the head lays flat against the painted waterfall, so don't damage the paint.
Get something flat behind the head (fingernails?) and pull to get it partially out. Then use some bent needlenose pliers to pull out the entire pin. Just pull hard and it will come out.
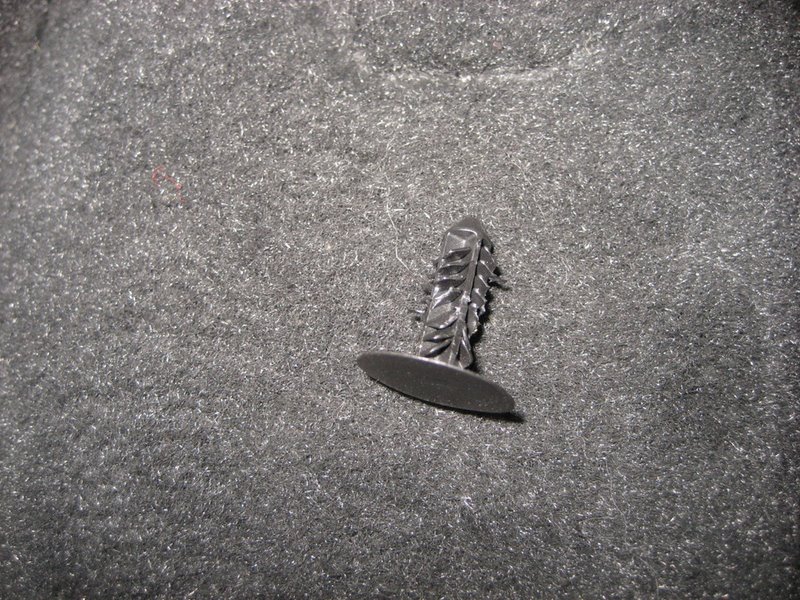
Once the three plastic pins are out and the two Torx screws removed, the waterfall lifts out.
Here is the link.
This makes it easy. http://www.kawal.net/PAL%20install.htm#Alternative%205
These are from RAYS PAGE. HOPE HE DOESN't MIND....
The waterfall is held in by two T15 Torx screws at the top and three plastic pins:
Two of the plastic pins are behind the dividing wall that is in front of the storage area:
If you put your top half way down and look behind the waterfall, you'll see both of them.
The center part of the pin must be pulled out with a small screwdriver to release it:
Once the center is pulled out, the main part is able to squeeze together and you can pull the entire pin out.
The third pin is on the passenger side of the waterfall:
This one is a bit hard to grab because the head lays flat against the painted waterfall, so don't damage the paint.
Get something flat behind the head (fingernails?) and pull to get it partially out. Then use some bent needlenose pliers to pull out the entire pin. Just pull hard and it will come out.
Once the three plastic pins are out and the two Torx screws removed, the waterfall lifts out.
Last edited by 08 ATOMIC-Z; 08-30-2012 at 12:01 PM.
08-30-2012, 12:33 PM
#3
Melting Slicks

I agree that Ray's instructions are very good. I had a couple of issues early with my PAL II and I had to remove the waterfall and unplug one of the PAL cables. After doing this once I am able to do it very quickly now.
08-30-2012, 03:10 PM
#4
Drifting
I've pulled mine several times, getting the flat black pins out (in the last picture above) can be tough if you don't have a tool for it - I don't have a tool for it. I made a little gadget out of two large cable ties, used my nails to get the button up just far enough to slip the cable ties behind, one on either side, squeeze them together and pull. It's really snug in there and tough to remove.
I was able to get the job done using Ray's instructions above though.
I was able to get the job done using Ray's instructions above though.
08-30-2012, 04:45 PM
#5
Safety Car
Thread Starter
Thank you Atomic Z for the pics. I had already dicovered the push pins after using a mirror to look at the back side....but your pics would have definitely helped if i hadn't made that discovery...thanks again