When you click on links to various merchants on this site and make a purchase, this can result in this site earning a commission. Affiliate programs and affiliations include, but are not limited to, the eBay Partner Network.
DYI - How to add lumbar/bolster support to your 2013 Corvette with 2LT seats
How to add lumbar/bolster support to your 2013 Corvette with 2LT seats
First off I want to thank the following forum members for directly helping me or providing guidance via existing threads they contributed to this forum. I could not have done it without their help. This is what makes this forum so great!
Bill Dearborn, Ray Kawal, Bluemeanie, Zap City, ncvette_1funride
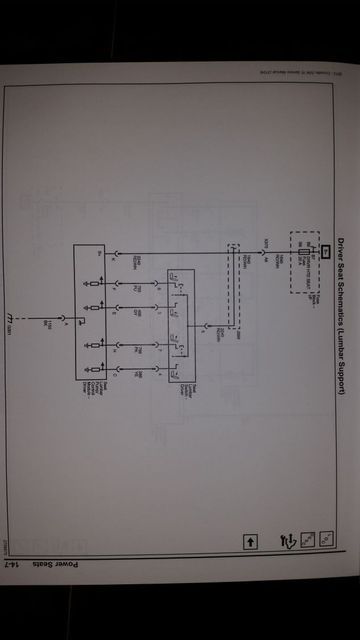
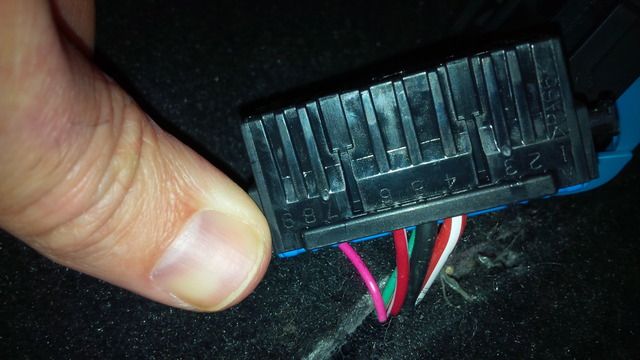
Before completely removing your seat from the car you should check to ensure you have power on pin A6 of your wiring harness (car side) under your seat. You can do this by using a multimeter set to DCV 20, I used the A5 pin as the ground because it was difficult to find a grounded piece of metal within reach of my cables. As a side note my harness was buried under the cut in the carpet and was not easily seen or accessible until I pulled it out. Before installing the new harness and lumbar/bolster support I connected both to the car side harness once the seat was out to ensure they worked before installing.
I won't go over the steps to physically remove the seat from the car as there are many great threads which I have listed below for reference. I also wanted to point out that 2013 2LT seats DO NOT have 2 zippers at the back which many other seats have.
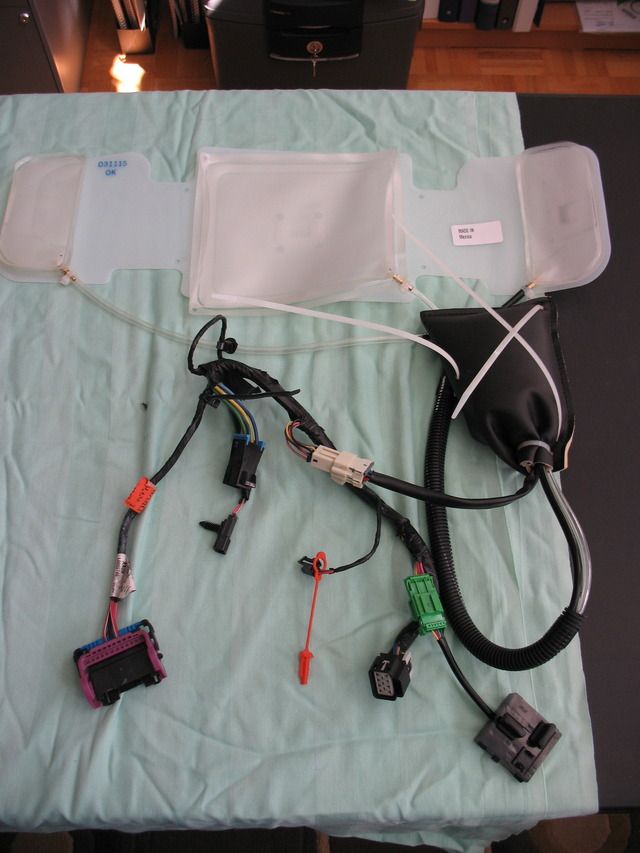
Lumbar Support (including bolster)
GM part number 88993056
Switch (Lumbar/bolster for driver's seat)
GM part number 10315844
Driver side seat trim plate
GM part number 88993630
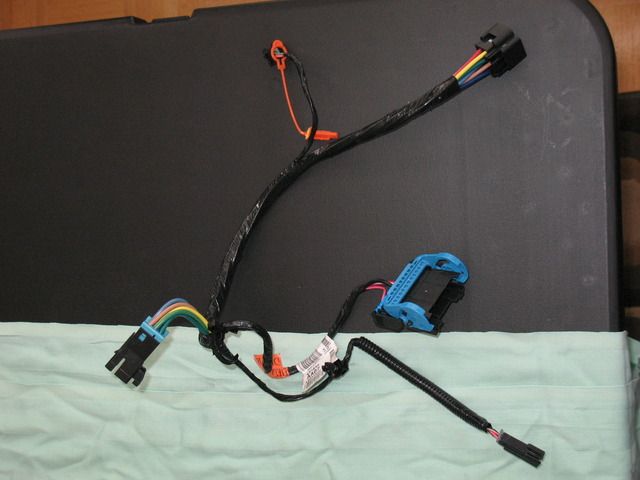
Wiring harness (under seat, includes lumber pump and switch connector)
GM part number 88995327
Black nylon trim panel retainers
Google GM 16674629 (do not buy from GM, super expensive)
Cost
$421 CDN
Items to be removed/undone from seat
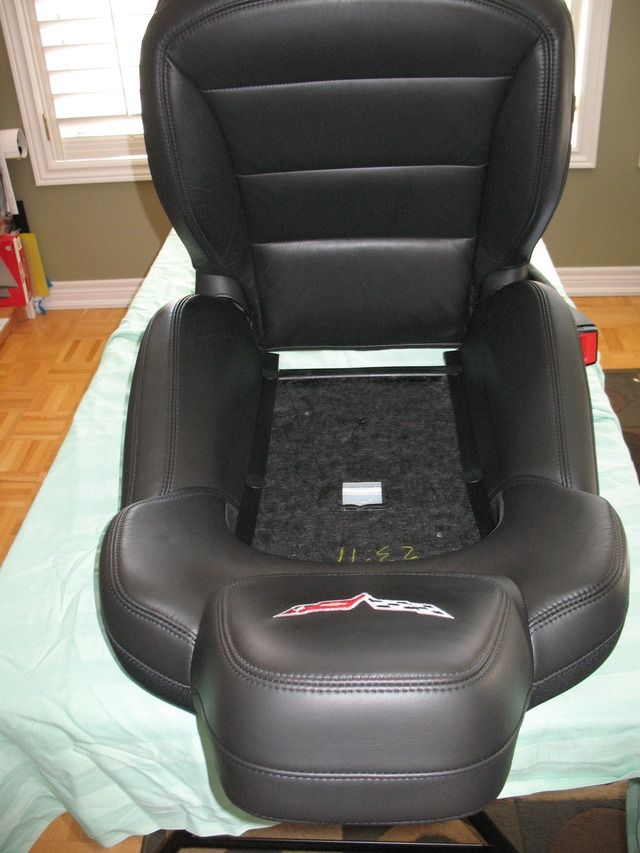
Seat back � Remove the 2 retainer push pins under the back of the seat cover,
I found it very difficult to remove the seat back, it felt as though I was going to break something. What worked best for me was to put the headrest up against my leg for support as I wiggled my hands underneath the top portion while pulling up towards my leg and pulling out at the same time,
Although there were 8 holes drilled for the push pins I only had 6 from the factory (I added the extra 2), remove these next,
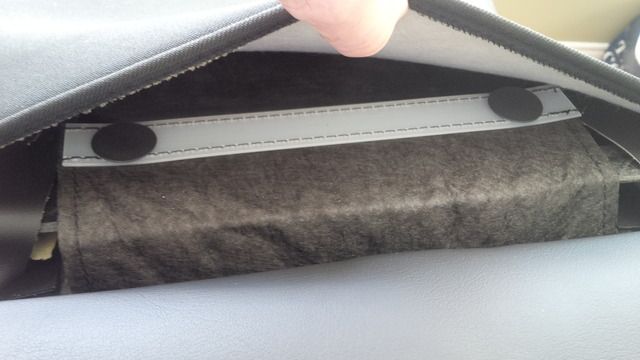
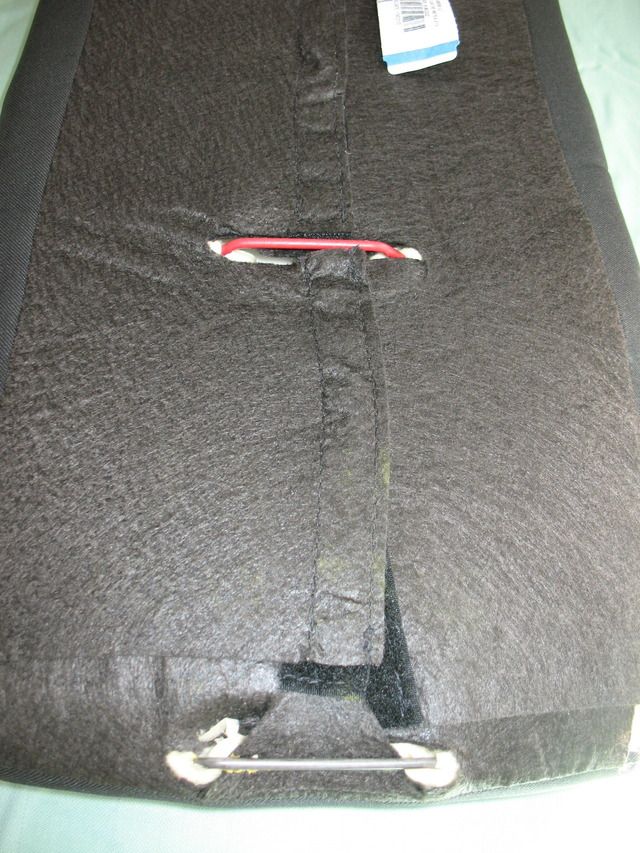
On the backside of the seat near the bottom there is a cover flap that is hog tied to the seat bottom, remove the hog ties. Next, lift flap and undo the velcro and drawstring,
Next remove old wiring harness, I found some of these connectors tricky to remove so take your time,
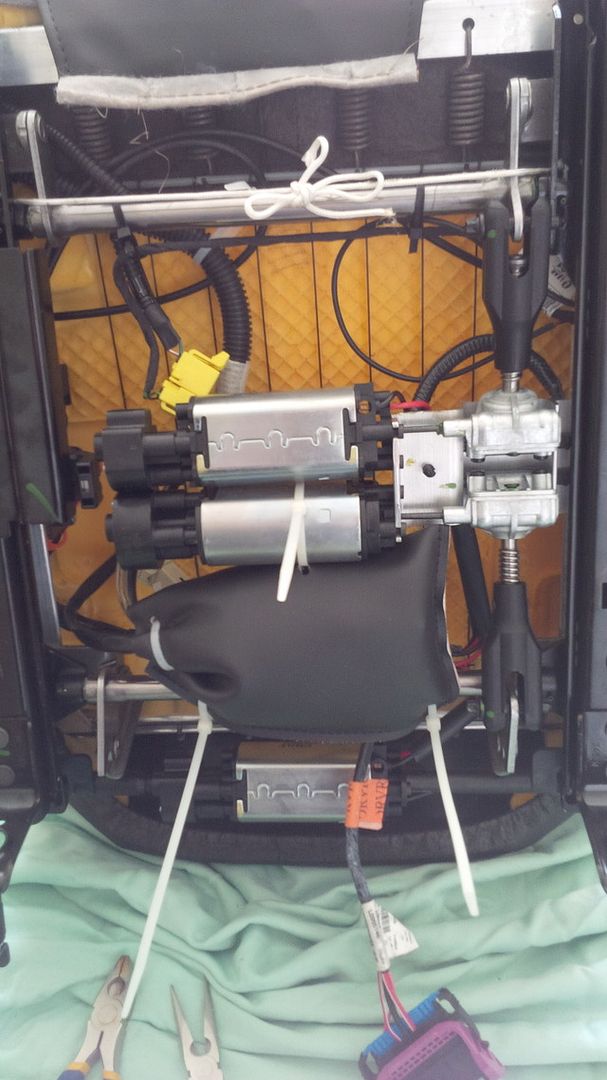
Start to fit the bolsters to the frame of the seat, to do this pull the foam and cover forward while wiggling the bolster in, be sure to pull it in from the rigid plastic backing and not the bag or tube,
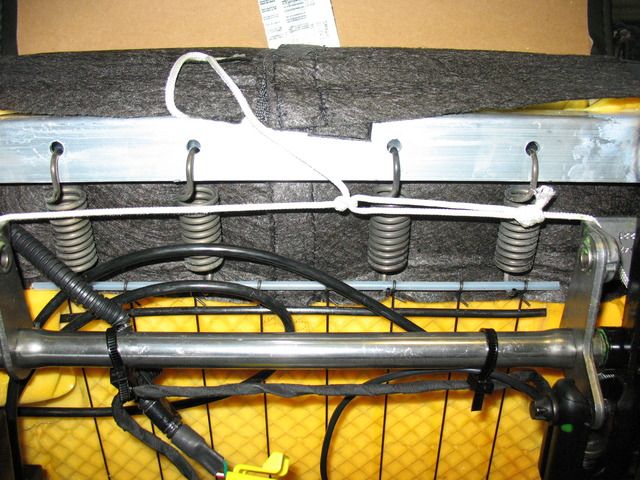
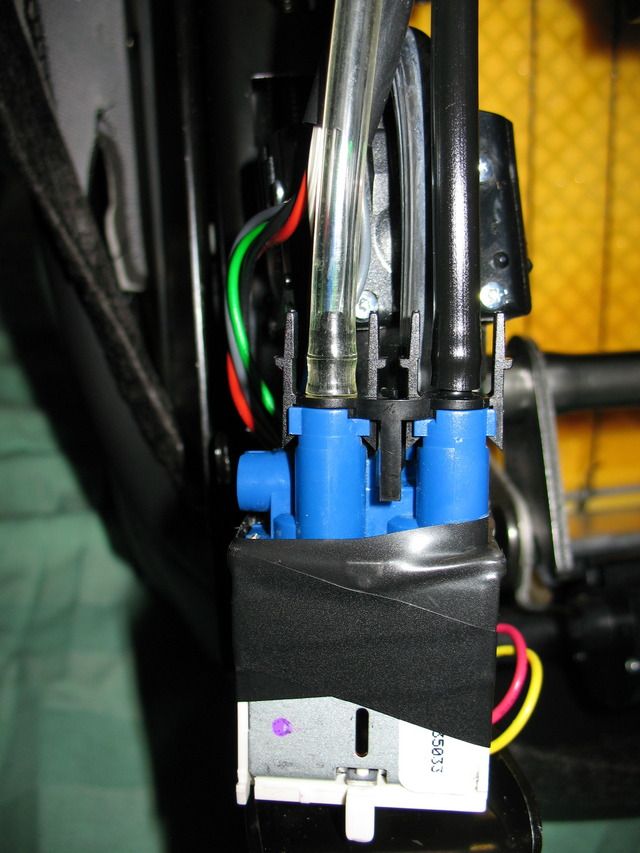
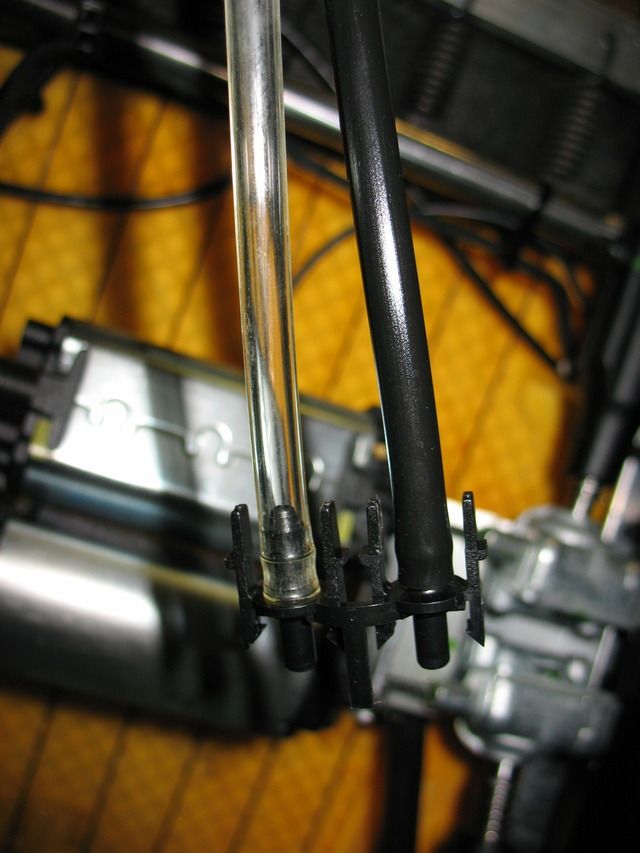
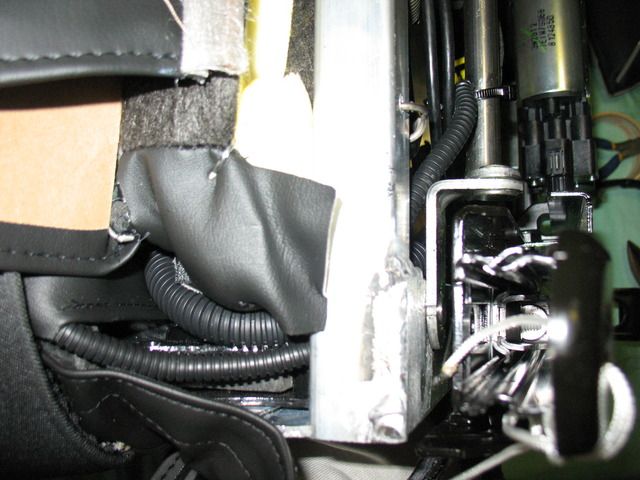
After getting the bolsters in place it's time to run the lumbar pump and air tubes under the seat. To run the tubing as it would be from the factory I found it necessary to remove the pump from the protective sack as well as removing the hoses from the pump itself,
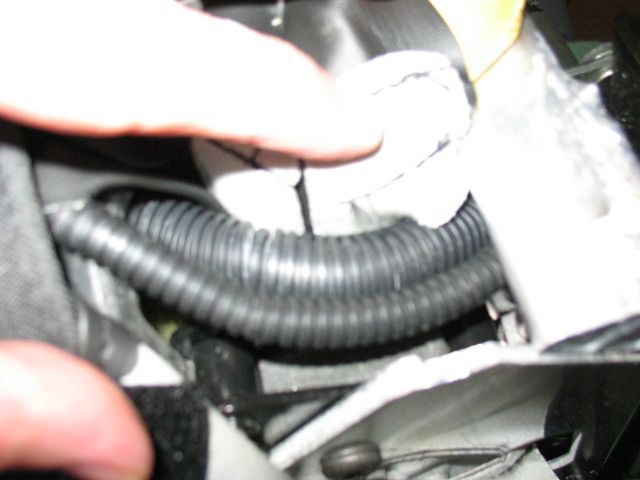
Next, pull down the protective tubing so that it is placed below the lip on the seat frame,
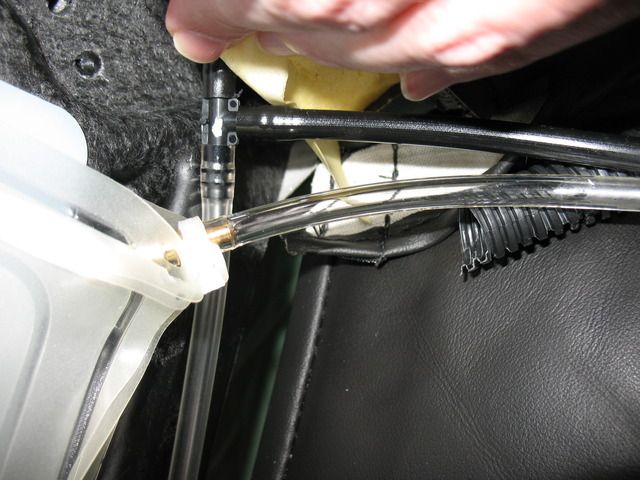
Once this done, it is time to run the hoses under the seat frame, push down the seat foam and carefully push through the air hoses to the front of the seat where you will reconnect to the pump and place it back in the sack. Zip tie pump sack and wrapped hoses to the underside of seat as seen in the picture. Time to re-install everything in reverse order.
If you are using the chrome web browser, there is an extension called "Photobucket Hotlink Fix." If you add that to chrome and follow its instructions, probably just refreshing the page, you will be able to see the pictures. If you are not sure what the heck I'm even talking about, just let me know and I either upload the pictures in a reply to this thread or email them to you.
If you are using the chrome web browser, there is an extension called "Photobucket Hotlink Fix." If you add that to chrome and follow its instructions, probably just refreshing the page, you will be able to see the pictures. If you are not sure what the heck I'm even talking about, just let me know and I either upload the pictures in a reply to this thread or email them to you.
Thank you for that! There are a ton of threads on this forum that return that error message and the add-in you suggested fixed the issue (with Chrome anyway, but it looks like it's available for most browsers).
If you are using the chrome web browser, there is an extension called "Photobucket Hotlink Fix." If you add that to chrome and follow its instructions, probably just refreshing the page, you will be able to see the pictures. If you are not sure what the heck I'm even talking about, just let me know and I either upload the pictures in a reply to this thread or email them to you.
Thank you for the suggestion! This worked. I can see the photos again.
Something that I seem to be missing, is that I see the bladder instal, I see the pump and hoses install - what about the switches and wiring for them? I don't see that.
The timing for this is particularly nice as I've got new seat upholstery for my car and was not far from changing it out. Would be a great time for this upgrade if I can see how the rest of it works.
I'm putting a modified car back to OEM seats and I am in the process of putting everything back to mostly stock as well. So this really helps.
I can try this fix on this computer (work computer) but will when I get home today.
The only think I'm missing now is what do I connect the air lines for the lumbar support to? I assume there is something I'm missing that includes a compressor or something? And I have one plug with no where to go?
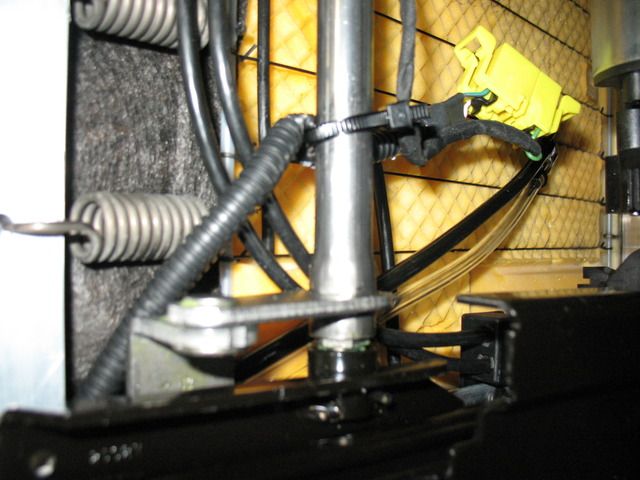
If you do the fix (which works!) and can see the pictures again you'll see three pictures where the hoses connect to the air pump, one where they attach to the bladder, and where the air pump attaches to the seat frame. The pictures fill in all those missing blanks.
If you are using the chrome web browser, there is an extension called "Photobucket Hotlink Fix." If you add that to chrome and follow its instructions, probably just refreshing the page, you will be able to see the pictures. If you are not sure what the heck I'm even talking about, just let me know and I either upload the pictures in a reply to this thread or email them to you.
There is an extension for "Firefox" browser as well. It works! Thanks!
I had Sparco reclining race seats that were mounted to the oem motorized bases. The seats looked and felt great (for sale btw). The issue was they would not go low enough nor back enough and I'm only 5'11" 180#. I like to be really spread out though. I actually found the Sparco just right when I tracked.
I even tried buying the hard low seat mounts to get the Sparcos lower and further back, but it didn't help enough. At that point I reached the conclusion that I was either going to sell the car, or put the seats back to stock. I made the correct decision and the original owner of my car (a forum member) was, as always so helpful as he still had parts of the OEM seats which he sent me.
Also I really disliked that I lost the side airbags with aftermarket seats. Because sliding sideways into something and my head hitting the glass could have been deadly in my opinion to me or my passenger.

 05-02-2016, 06:37 PM


 Nicely Done!