
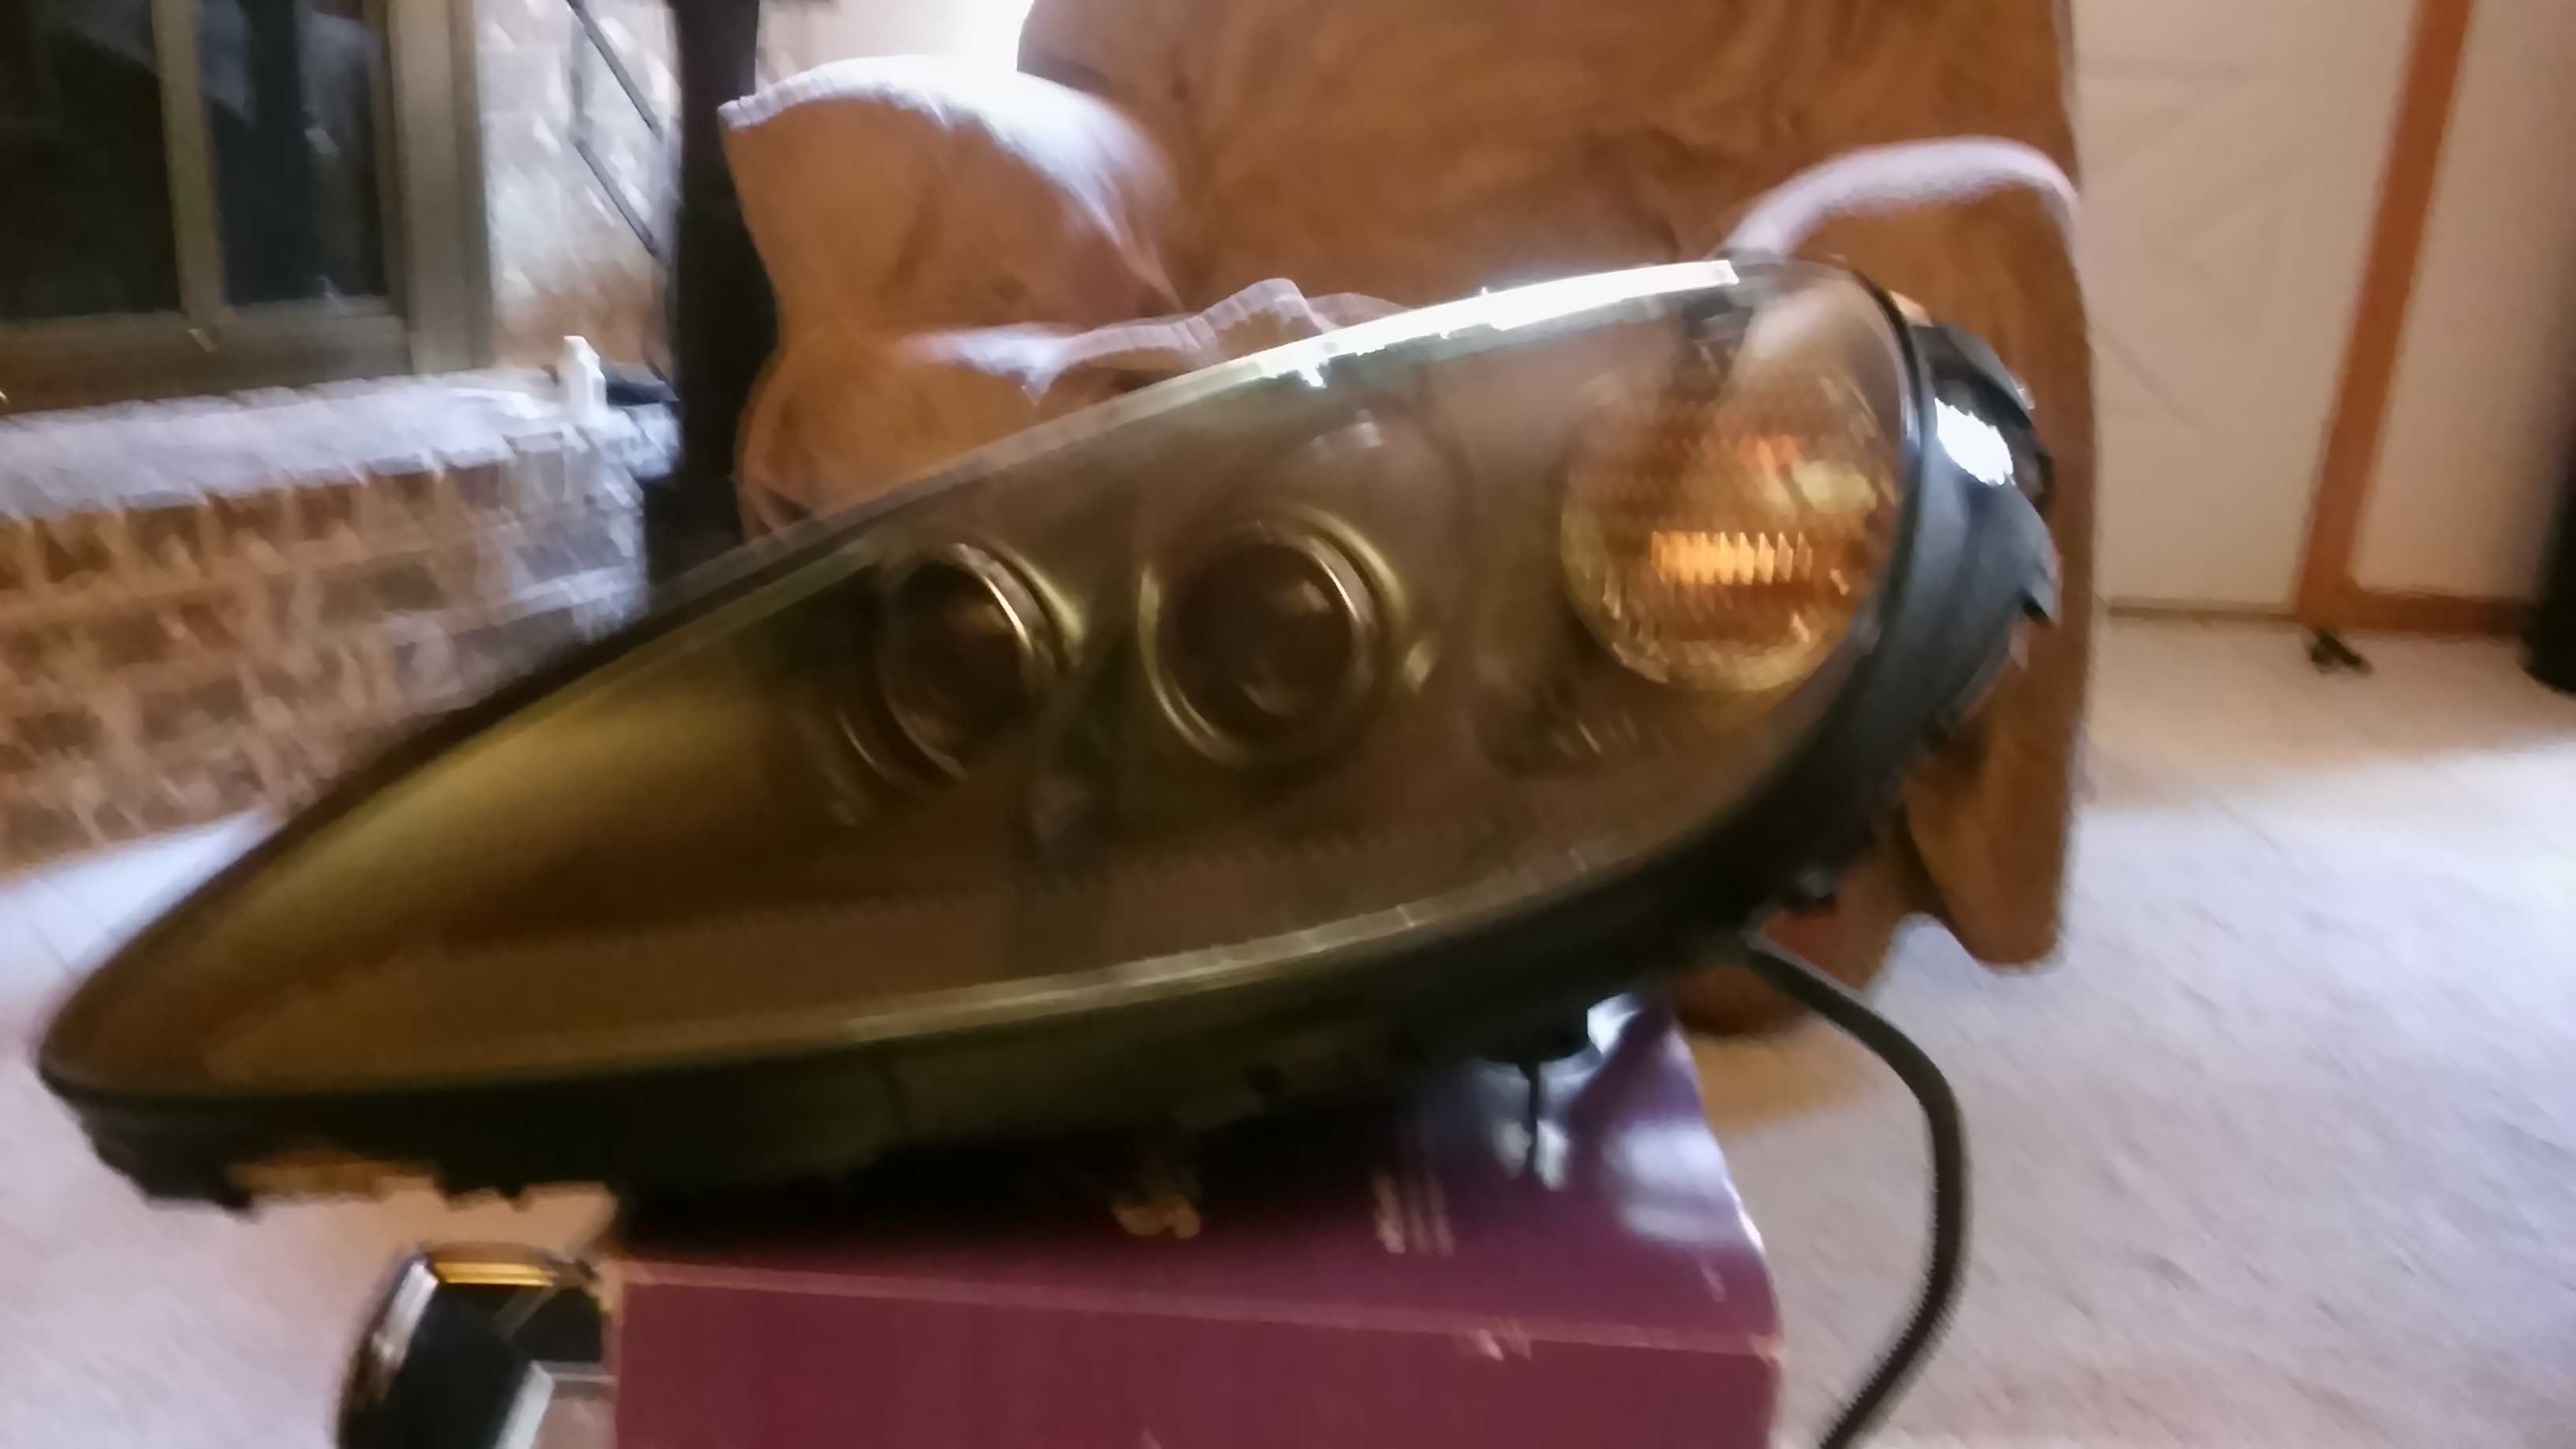
Two small cracks in my headlight
 07-01-2016, 09:45 PM
#1
Racer

Thread Starter

God damn it!!!!
The more i try to keep her flawless the more small things i find. Im dont remember seeing this a couple of days ago. Both are small but they will annoy me. The damn headlight costs a lot as well.
The more i try to keep her flawless the more small things i find. Im dont remember seeing this a couple of days ago. Both are small but they will annoy me. The damn headlight costs a lot as well.
 07-02-2016, 12:05 AM
#2
Le Mans Master

I just noticed my left headlight is " FLAKING" , looks like a bit of the coating on the lens is coming off , car is garaged and handled with kid gloves ......
been watching it to see if it get worse
Dave
07-02-2016, 12:55 AM
#3
Burning Brakes


You don't have to buy new headlights, just the lenses. They are difficult to take apart as I just did mine. I changed the color underneath at the same time. They can be removed from the car without removing the bumper. In my opinion though I still think it's easier to remove the bumper. It takes a few more nuts and bolts to do it but it makes it easier to get to that last mounting bolt in the front corner of the headlight. I'd rather fix an old style pop up headlight than mess with these things again. What a pain getting those lenses off.
07-02-2016, 10:01 AM
#4
Racer
Thread Starter
How did it turn out? I thought it was a difficult process and you had to put the headlight in the oven and heat it. Then pull it apart. I would just probably change the lens. My car is black and dont want to change the color of the inside.
07-02-2016, 10:07 AM
#5
Le Mans Master
Cad vette, is it glue that you have to soften up in the oven ?
How do you reapply the adhesive?
Dave
How do you reapply the adhesive?
Dave
07-03-2016, 05:20 PM
#6
Burning Brakes
 07-03-2016, 05:29 PM
#7
Burning Brakes
Yes it is the glue that has to be softened up in the oven to enable you to pry the lens off of the housing. I applied the adhesive with a caulking gun. Used Loctite PL 3X premium adhesive that can be purchased at the hardware store. Looks pretty close to what the factory used.
07-03-2016, 05:37 PM
#8
Burning Brakes
Another thought. I reused my rubber seals that go around the headlight housing that seals it to the fender and bumper. You may want to buy new ones depending of the condition of yours. I had one tear where it hooks on to the headlight. Used Gorilla glue to repair it. It kind of has a hard feel of foam when it dries. The I took some flat black spray paint to hide the repair. Not sure why I went that far for an area that you don't see afterwards, but you would never know it was repaired afterwards.
07-03-2016, 05:40 PM
#9
Le Mans Master
Yes it is the glue that has to be softened up in the oven to enable you to pry the lens off of the housing. I applied the adhesive with a caulking gun. Used Loctite PL 3X premium adhesive that can be purchased at the hardware store. Looks pretty close to what the factory used.
One more question because I am afraid I will use to much glue and it will squeeze out and you will see it.
How did you know if you applied to much/not enough to glue ?
Dave
07-03-2016, 06:03 PM
#10
Burning Brakes
I applied enough glue inside the channel of the black housing to fill it up even to the top edges. That ended up being the perfect amount. After I squeezed the new lens on almost zero excess glue came out. Then you need to clamp the lens on and let it sit overnight. Put some blue masking tape on your new lenses before you clamp it to protect your lenses from the jaws of the clamps. I had some residue from the masking tape stay on afterwards. I cleaned it off with isopropol alcohol. It took some elbow grease to work it off but those new lenses now look great. One of my headlights had studs that hold the painted part of the headlight to the lens break off. I glued it back on with clear two part epoxy that i bought in two tubes at ACE hardware. I like this stuff over JB Weld because it dries clear. Funny thing is is my second headlight was held to the lens with screws instead of studs with nuts. A better design.
The following users liked this post:
Dcasole (07-03-2016)
07-03-2016, 06:11 PM
#11
Race Car Tech

After you let the new adhesive dry, it is a good idea to go add a clear silicone sealant on the outside where the glue meet the new lenses. It's an insurance to prevent any water or moisture into the lens, just in case there is a small gap of adhesive that may not be completely sealing, or an air bubble in the adhesive.
07-03-2016, 06:14 PM
#12
Burning Brakes
If it's on the outside of the lens that coating can be sanded with 1000 grit sandpaper, then buffed with ultra fine compund till it's not noticeable. Pep Boys sells a sealant to spray on the lens to replace that coating. You can wach a YouTube video by Chris Fix on how this is done. Cheaper and easier that replacing new lenses for sure.
The following users liked this post:
Dcasole (07-06-2016)
07-03-2016, 06:23 PM
#13
Burning Brakes
After you let the new adhesive dry, it is a good idea to go add a clear silicone sealant on the outside where the glue meet the new lenses. It's an insurance to prevent any water or moisture into the lens, just in case there is a small gap of adhesive that may not be completely sealing, or an air bubble in the adhesive.
You could do that if you wanted, but I don't think it's necessary and will probably make a mess. When you take the headlights apart you will notice there are two vent tubes on the back of the black plastic housing. So by design these headlights are not 100% sealed anyway. It's also fairly common for some condensation to form on the inside of the lenses on damp days which evaporates after the lights are turned on.
The following users liked this post:
Dcasole (07-03-2016)
07-03-2016, 06:27 PM
#14
Le Mans Master
Cadvette thanks for sharing , most helpful , now I have to buy the lenses
Dave
Dave
07-03-2016, 06:31 PM
#15
Burning Brakes
07-05-2016, 09:46 PM
#16
Burning Brakes
Member Since: Feb 2010
Location: Clearwater Florida
Posts: 1,046
Likes: 0
Received 8 Likes
on
8 Posts

My lenses went crackled in 2012 they were replaced under warranty. My lenses cracked almost overnight and I did not use glass cleaners, ammonia, or any other chemicals other than car wash soap. I have suspected that a recent wand=type car wash while traveling played a role because it coincided within days of the cracks appearing.
07-06-2016, 06:55 AM
#17
Safety Car

Member Since: Aug 2006
Location: Port St. Lucie West Florida
Posts: 4,115
Received 438 Likes
on
397 Posts

My lenses went crackled in 2012 they were replaced under warranty. My lenses cracked almost overnight and I did not use glass cleaners, ammonia, or any other chemicals other than car wash soap. I have suspected that a recent wand=type car wash while traveling played a role because it coincided within days of the cracks appearing.
07-06-2016, 08:58 AM
#18
Drifting


Too bad no one has come up with a solvent that could ease the removal of the lens while on the car. Taking the bumper off and what not, plus baking the lights in an oven seems to be a job not even the most dedicated enthusiast would relish.
07-06-2016, 10:50 AM
#19
Le Mans Master
Member Since: Sep 2014
Location: lake havasu city arizona
Posts: 7,011
Received 982 Likes
on
711 Posts
Maybe they will replace it again as the new ones are defective. I live with mine but it bothers me it almost looks like hairline scratches on the inside. I wonder if similar style headlamps have these issues? I was thinking of adding a light tint over them but the manufacturer said it may cause cracking on the corvette headlamps. It's a pita job replacing the lens and expensive to get new headlamps . This can happen to the new headlamps.
 So mine has the dreaded inside "haze", no cracks or crazing but bugged me terribly.
After talking with Lamin-X about their disclaimer of the GM warning about their film causing damage to the lenses, they said they have sold and had installed hundreds and had NO PROBLEMS.
Sales pitch ??? I don't know but I took the chance and installed the film in "Gun Smoke" which was a little darker than I thought but I don't drive at nite, I love the look and cant see the "haze" unless the lites are on.
 Oh I also have it on my fogs in yellow.
NSF
