
How To: Oracle Afterburner LED Tail Light Halos
 03-12-2017, 11:55 AM
#1
Pro

Thread Starter
Member Since: Jul 2015
Location: Fort Worth Texas
Posts: 589
Received 166 Likes
on
100 Posts
2018 Corvette of the Year Finalist
2017 C6 of Year
I searched for days for a writeup/install instructions for the Oracle Plasma Afterburner kit, but wasn't able to find anything. Oracle doesn't send instructions with the kit either, so I figured I would do a writeup for those who are interested. Overall it's a pretty easy install if you are somewhat handy.
I started with a set of stock lights I purchased from a member here. I was nervous I would screw my lights up trying to get them apart.
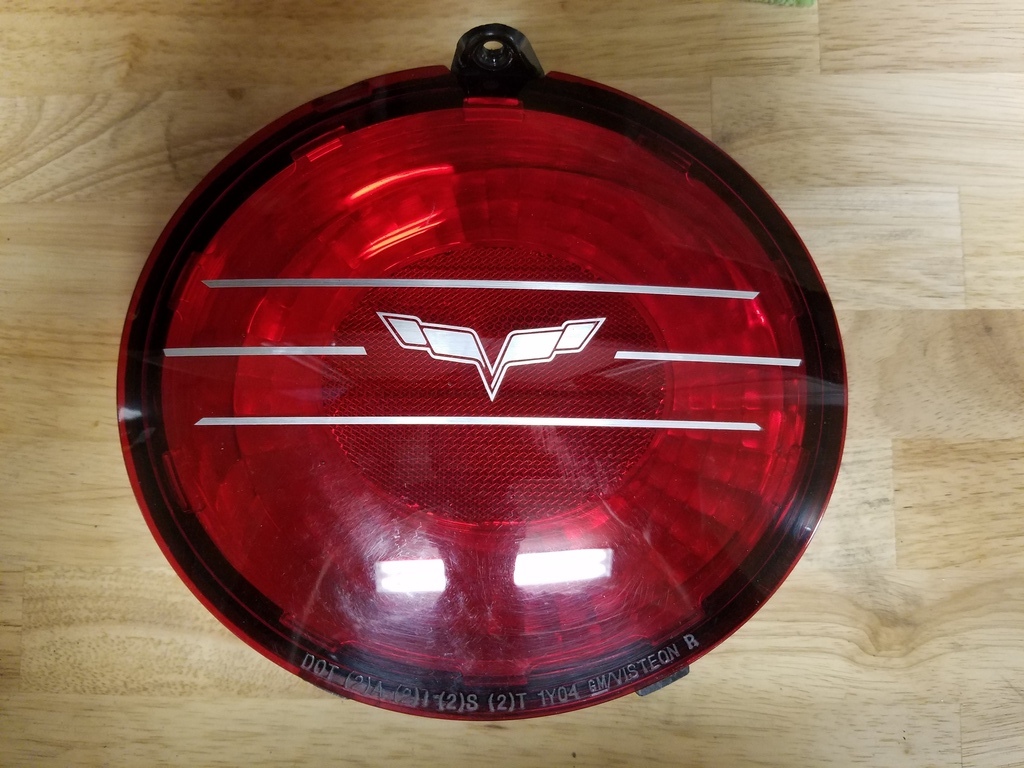
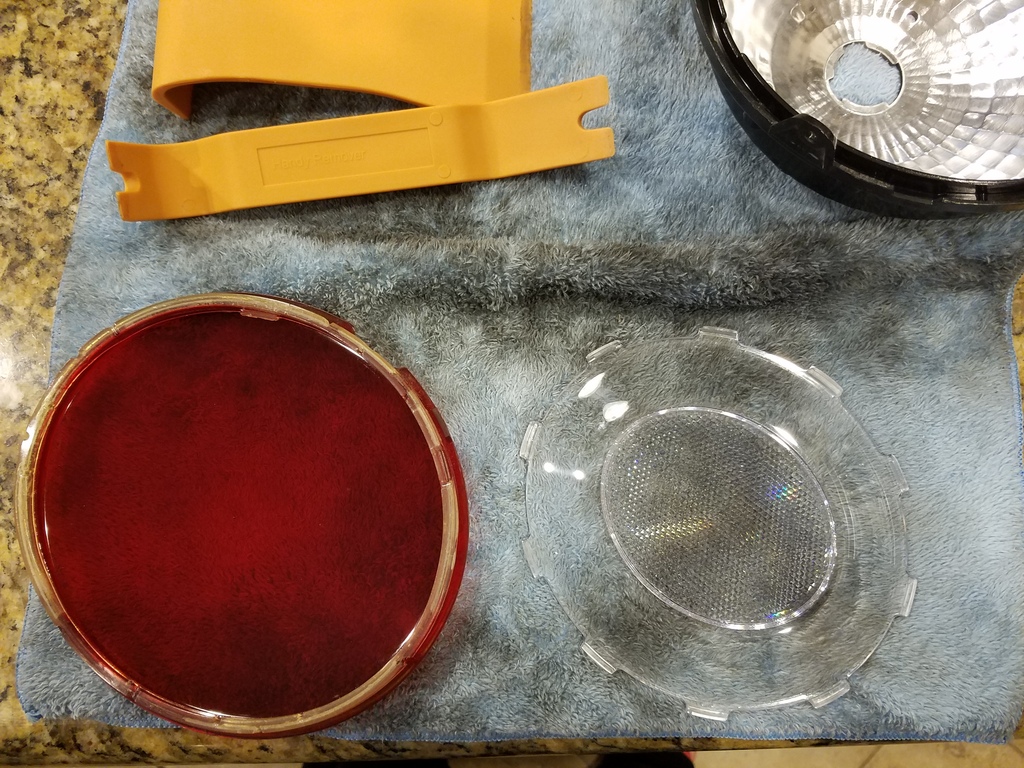
I decided to bake the lights to soften up the adhesive in order to pry them apart. Put them in the oven one at a time. Set on a block of wood so the hot oven rack wouldn't melt them. Bake for 5 min at 250*. Pull the light and wood block out (so the block can cool), and immediately started prying it apart. Wear gloves (I used nitrile), as the light will be hot and I didn't want to get oils on the light. I used the orange pry tools in the photo, mostly the wide one so there was a lot of surface are contact. Slowly work your way around the light until you can grab ahold and pull it the rest of the way apart.
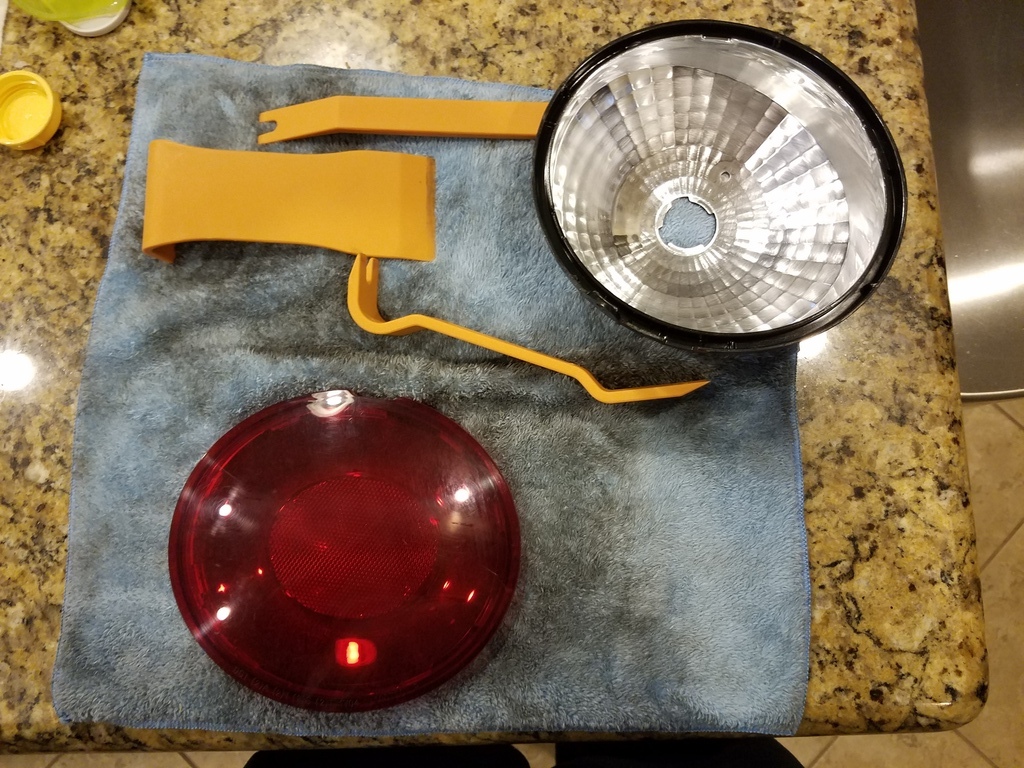
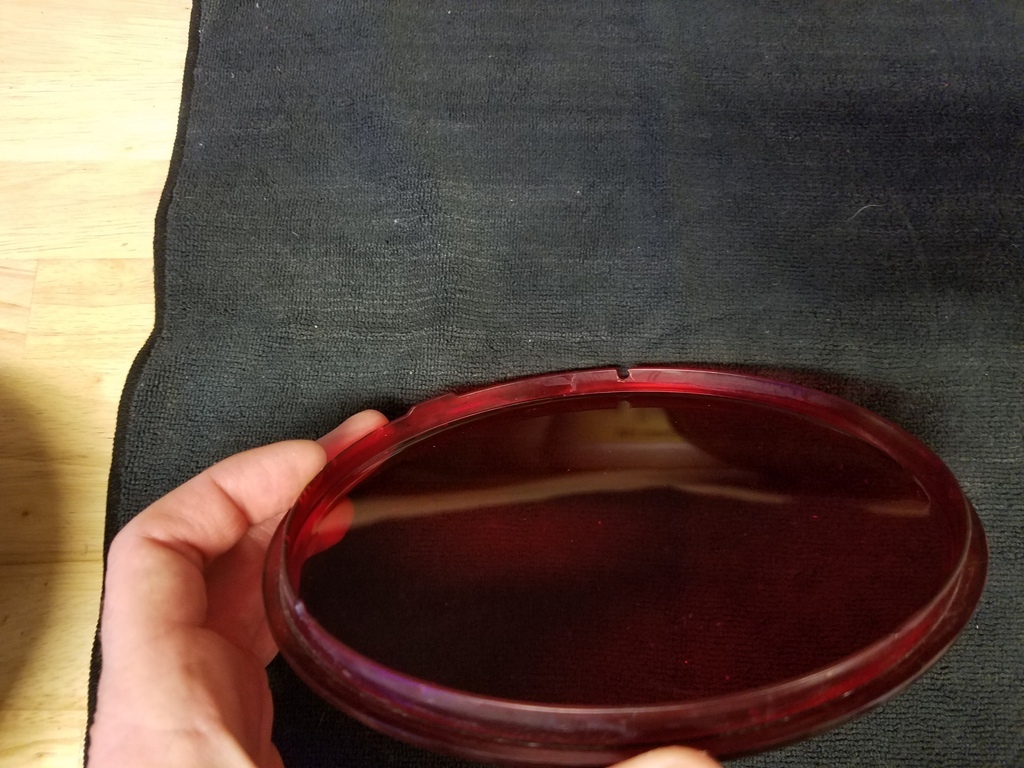
As you can see, the adhesive all stuck to the lens. This stuff is pretty tough.
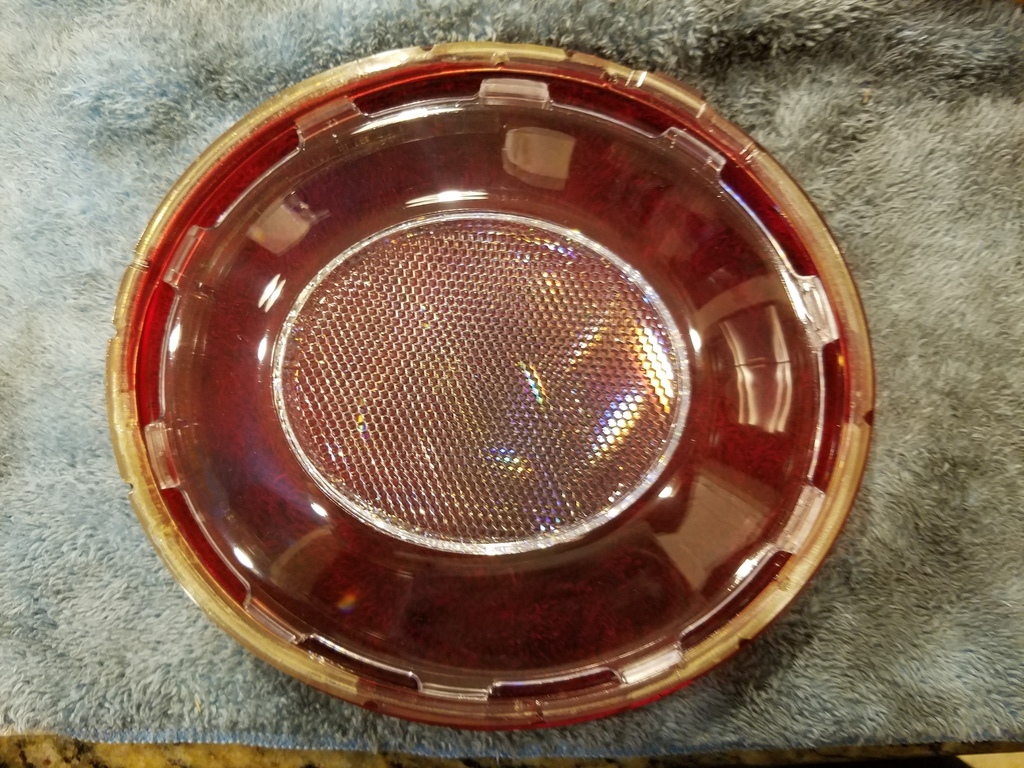
You can also see the inner clear diffuser lens is just sitting in there held by the adhesive. I pried it out with the smaller pry tool.
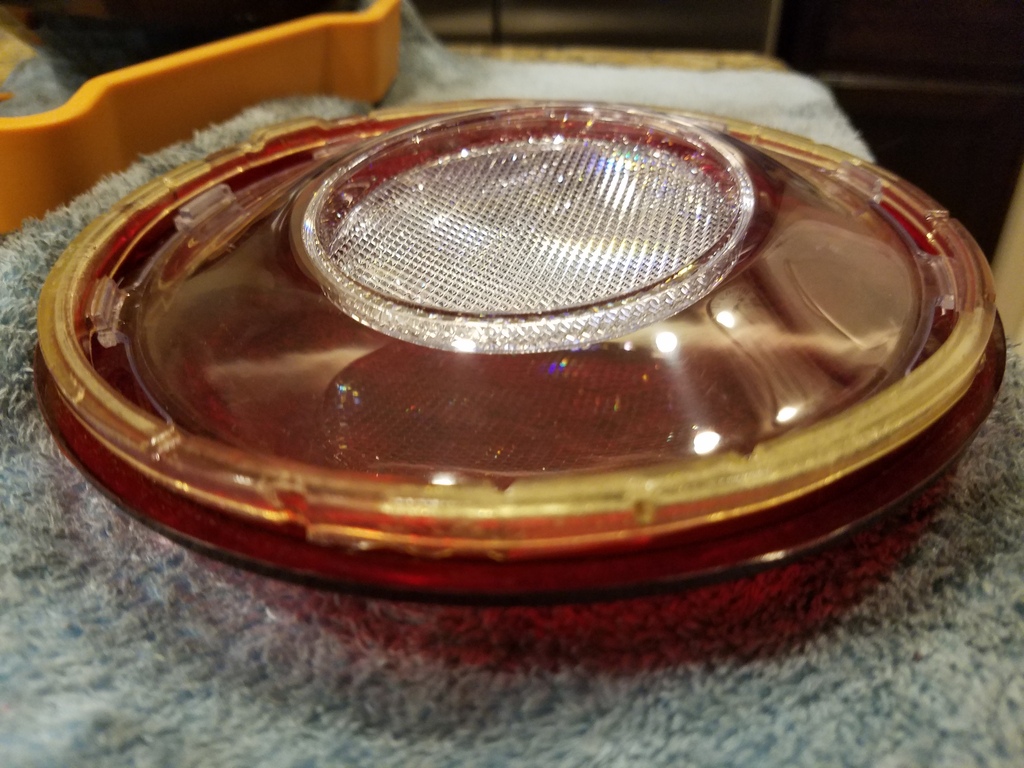
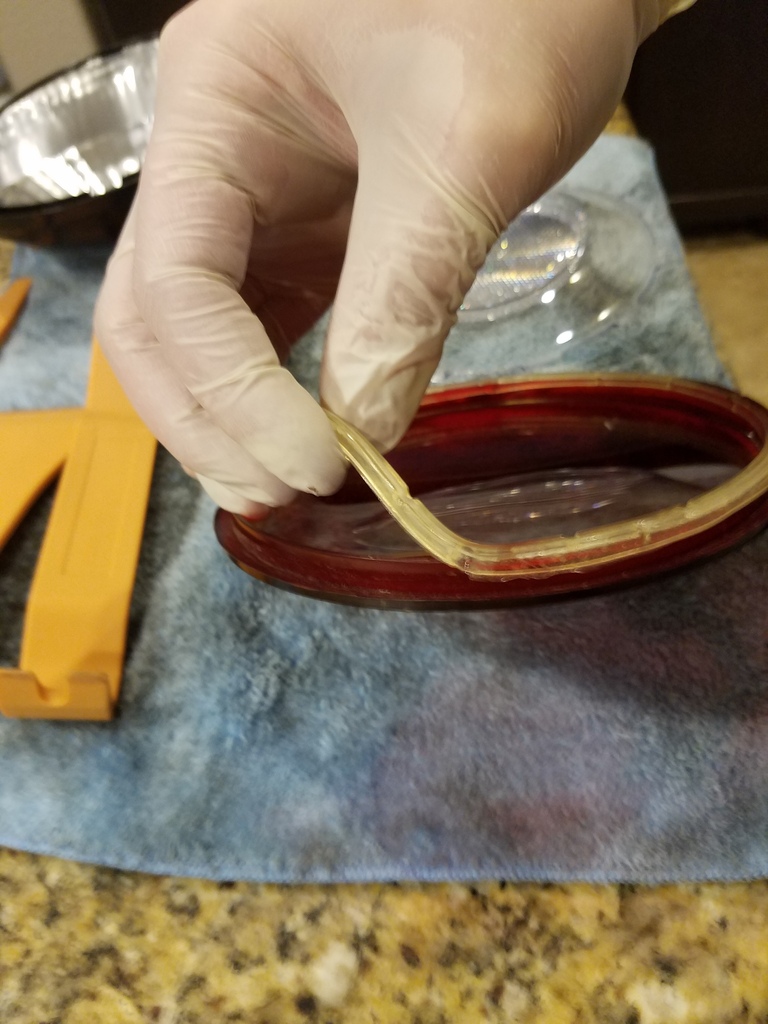
While the adhesive is still warm, pull it off the lens and discard.
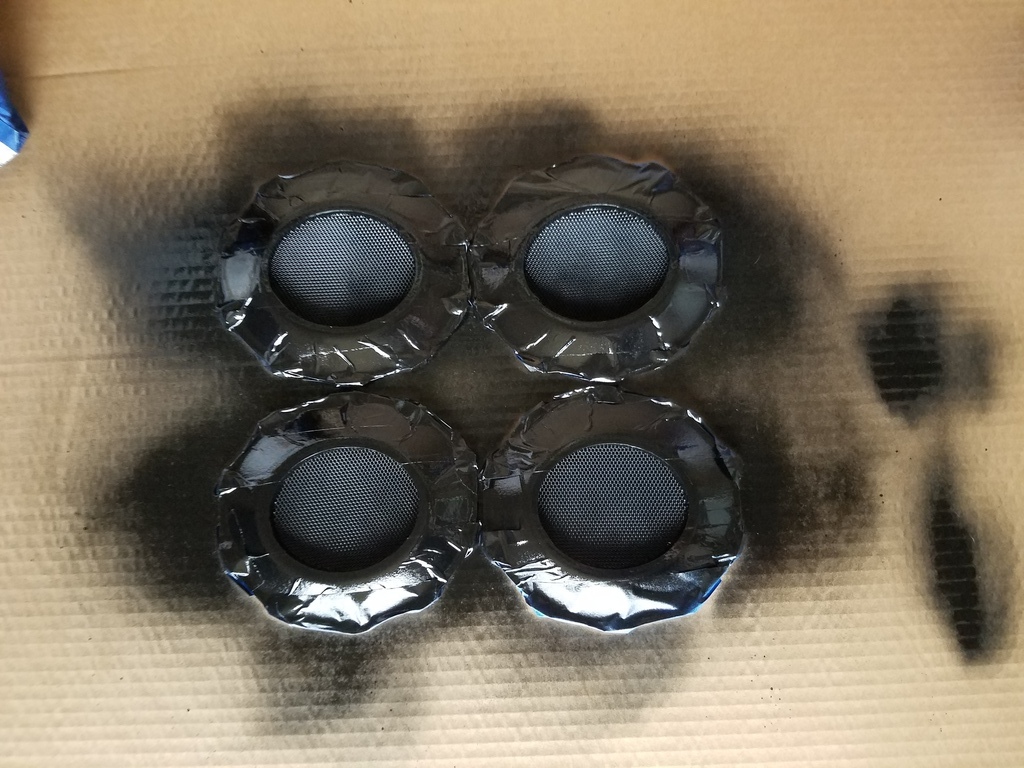
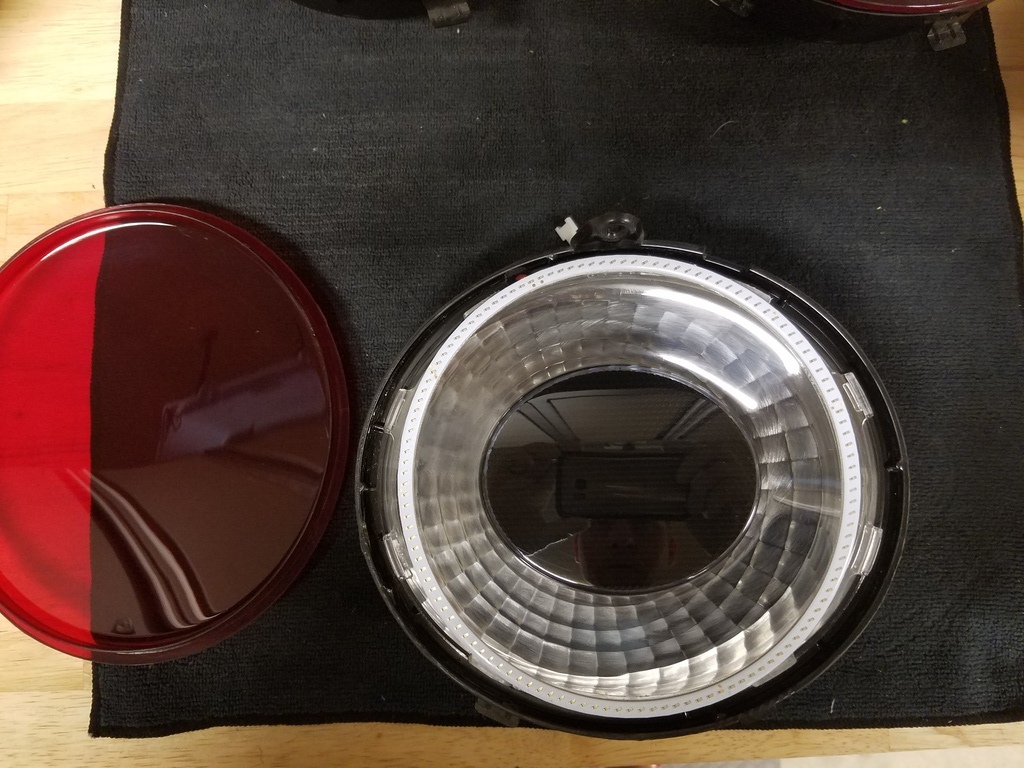
The next step is optional. I looked at the diffuser lens and realized the middle portion only let through a very small amount of light from the bulb. I wanted to eliminate that so all the light when the brakes are applied came out in the outer ring. So I taped up the outer ring and sprayed the inner portion on the rough (back) side with some satin black krylon fusion for plastic. You will see later on that this also made the tails more of a dark blood red when put back together rather than the bright red stock look.
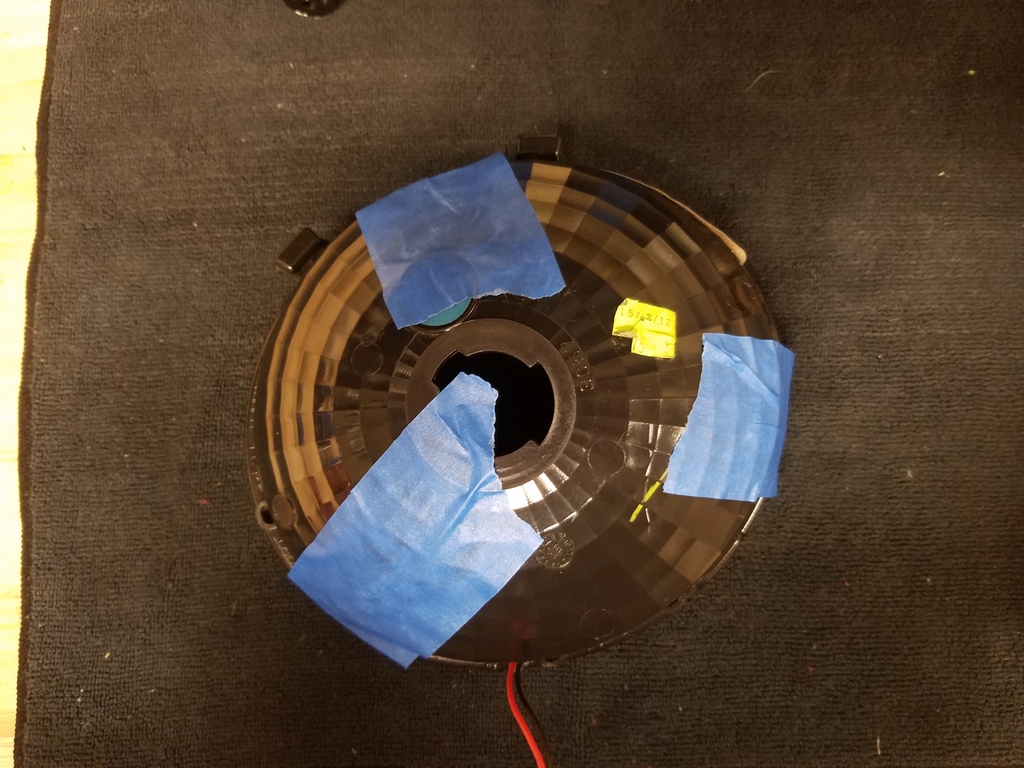
The next step was to cut a hole in the housing for the wiring to pass through. I used a dremel tool with a drill bit to route it out until it was big enough for the small connector on the afterburner ring to pass through.
I also slotted the lens so the wires didn't pinch when I put it all back together.
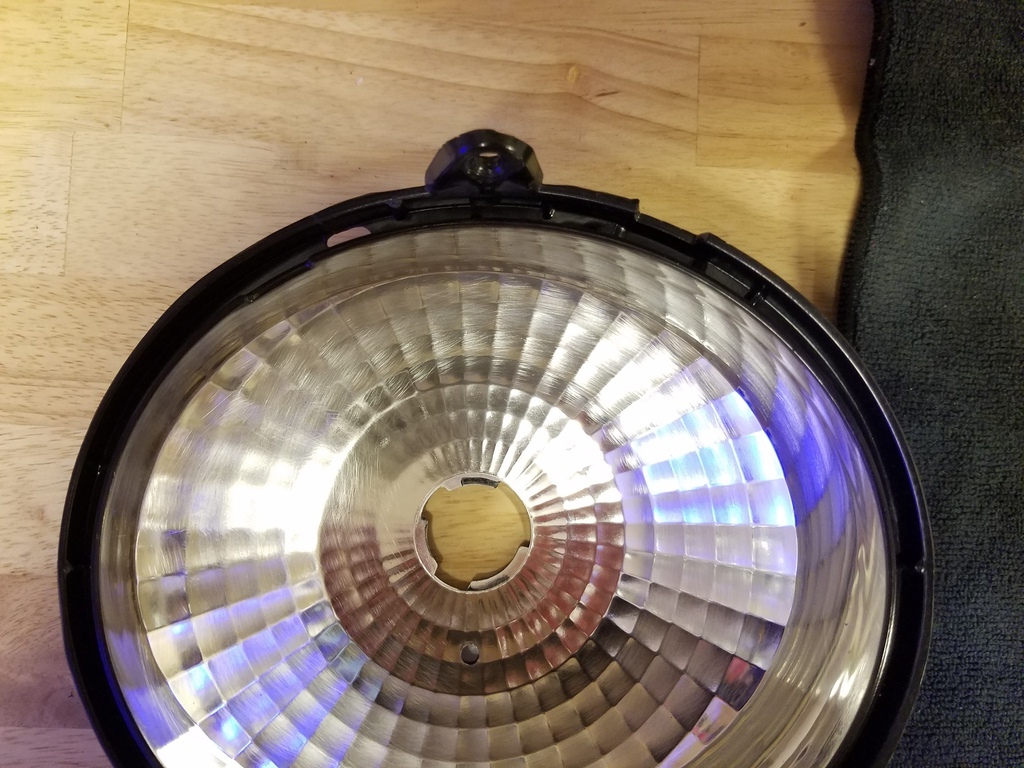
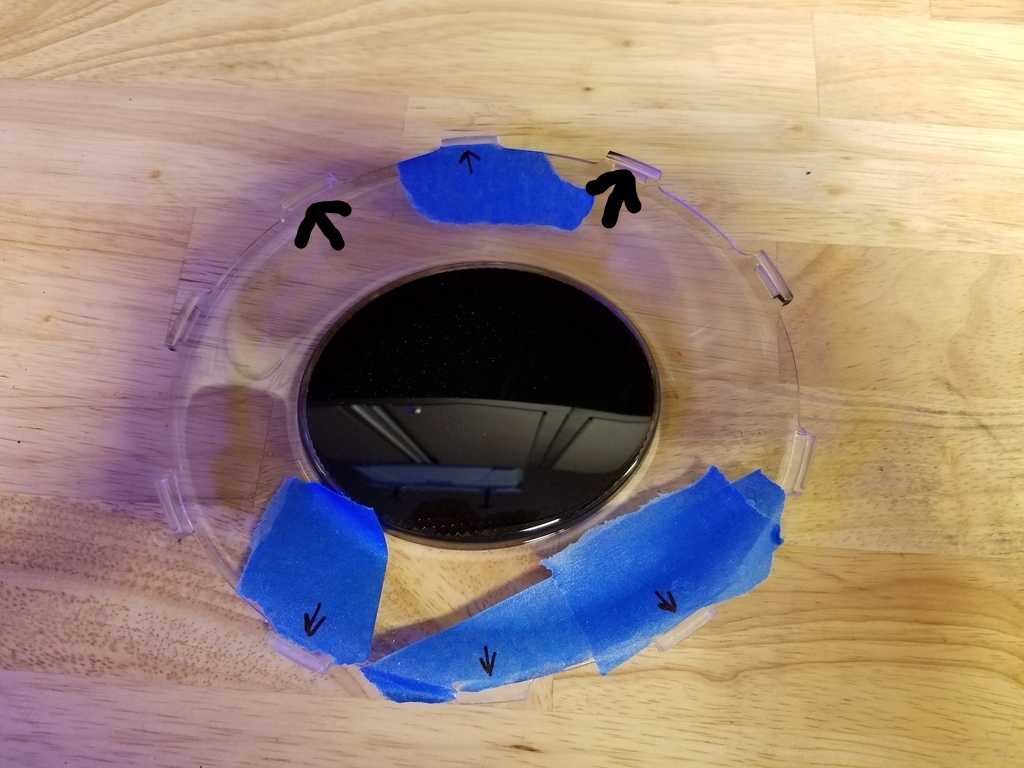
Here you can see the painted diffuser lens. There are little tabs that go around the outside to keep it spaced from the red lens. 6 of these need to be ground flat to allow the afterburner ring to lay flat on the lens. They are marked with arrows. Again, I used a dremel tool with a sanding drum to grind down the raised portions.
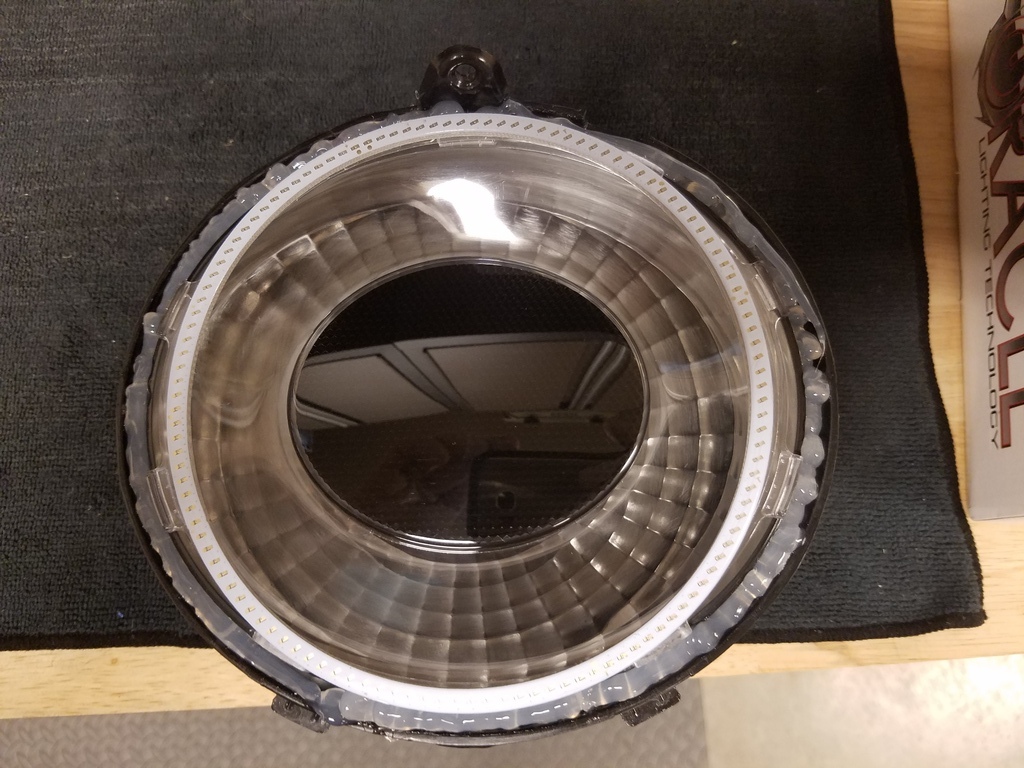
Next, peel the adhesive backing tape off the back of the afterburner ring, and carefully position the ring dead center of the diffuser lens. Make sure the wires line up and pass the wire through the hole you cut. Press down firmly to adhere to ring to the lens.
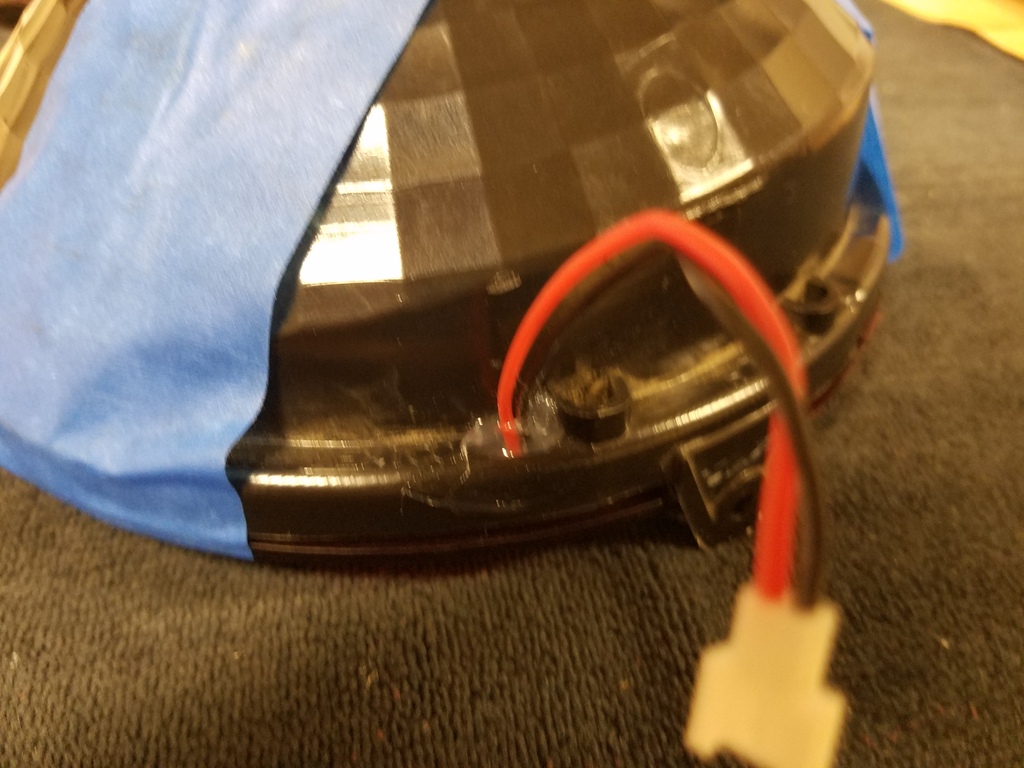
Next, I used clear RTV silicone and filled in the grove around the housing where the lens sits in place.
Install the red lens onto the housing. I used some blue painters tape to hold them together. Use good pressure to make sure everything is as tight as possible.
I put another dab of silicone on the back side of the housing where the wires penetrate to ensure a good seal there.
I started with a set of stock lights I purchased from a member here. I was nervous I would screw my lights up trying to get them apart.
I decided to bake the lights to soften up the adhesive in order to pry them apart. Put them in the oven one at a time. Set on a block of wood so the hot oven rack wouldn't melt them. Bake for 5 min at 250*. Pull the light and wood block out (so the block can cool), and immediately started prying it apart. Wear gloves (I used nitrile), as the light will be hot and I didn't want to get oils on the light. I used the orange pry tools in the photo, mostly the wide one so there was a lot of surface are contact. Slowly work your way around the light until you can grab ahold and pull it the rest of the way apart.
As you can see, the adhesive all stuck to the lens. This stuff is pretty tough.
You can also see the inner clear diffuser lens is just sitting in there held by the adhesive. I pried it out with the smaller pry tool.
While the adhesive is still warm, pull it off the lens and discard.
The next step is optional. I looked at the diffuser lens and realized the middle portion only let through a very small amount of light from the bulb. I wanted to eliminate that so all the light when the brakes are applied came out in the outer ring. So I taped up the outer ring and sprayed the inner portion on the rough (back) side with some satin black krylon fusion for plastic. You will see later on that this also made the tails more of a dark blood red when put back together rather than the bright red stock look.
The next step was to cut a hole in the housing for the wiring to pass through. I used a dremel tool with a drill bit to route it out until it was big enough for the small connector on the afterburner ring to pass through.
I also slotted the lens so the wires didn't pinch when I put it all back together.
Here you can see the painted diffuser lens. There are little tabs that go around the outside to keep it spaced from the red lens. 6 of these need to be ground flat to allow the afterburner ring to lay flat on the lens. They are marked with arrows. Again, I used a dremel tool with a sanding drum to grind down the raised portions.
Next, peel the adhesive backing tape off the back of the afterburner ring, and carefully position the ring dead center of the diffuser lens. Make sure the wires line up and pass the wire through the hole you cut. Press down firmly to adhere to ring to the lens.
Next, I used clear RTV silicone and filled in the grove around the housing where the lens sits in place.
Install the red lens onto the housing. I used some blue painters tape to hold them together. Use good pressure to make sure everything is as tight as possible.
I put another dab of silicone on the back side of the housing where the wires penetrate to ensure a good seal there.
Last edited by BAAD LS2; 04-11-2017 at 08:31 AM.

The following users liked this post:
Bruster (03-12-2017)
03-12-2017, 11:55 AM
#2
Pro
Thread Starter
Member Since: Jul 2015
Location: Fort Worth Texas
Posts: 589
Received 166 Likes
on
100 Posts
2018 Corvette of the Year Finalist
2017 C6 of Year
The wiring is pretty straight forward, and I did not get any pictures of the process.
1. Peel back the electrical tape on the tail light harness.
2. You can use T taps or solder the wires. I tried the T tap one time, but the wires for the afterburner kit are so small, they pulled out of the connector.
3. I stripped a small section of wire on the tail light harness and soldered the afterburner wires to it. Red goes to grey on the harness, and black goes to black. I soldered both sets of the afterburner wires to the same spot on the harness to avoid having to strip 2 seperate locations on each side of the car.
4. Tape the wires back up or use heat shrink if you have it.
5. Zip tie the resistors to the tail light harness near each bulb socket. Then gather and zip tie the excess wire from the afterburners out of the way.
6. Hook up the small connectors and test your wiring skills.

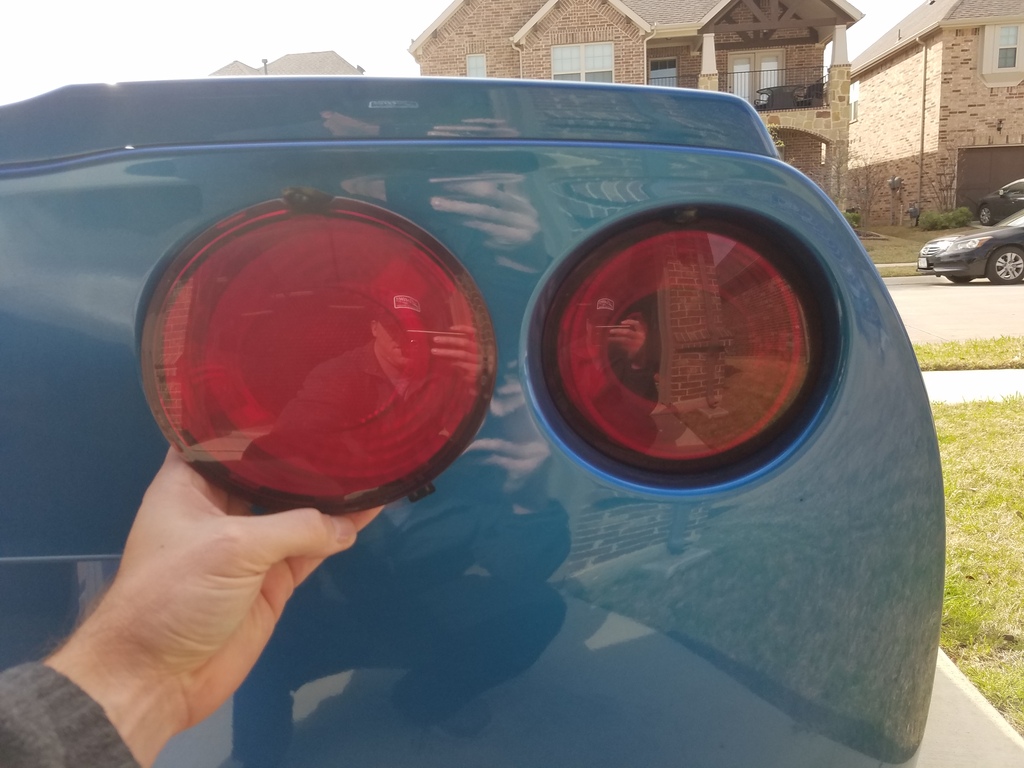
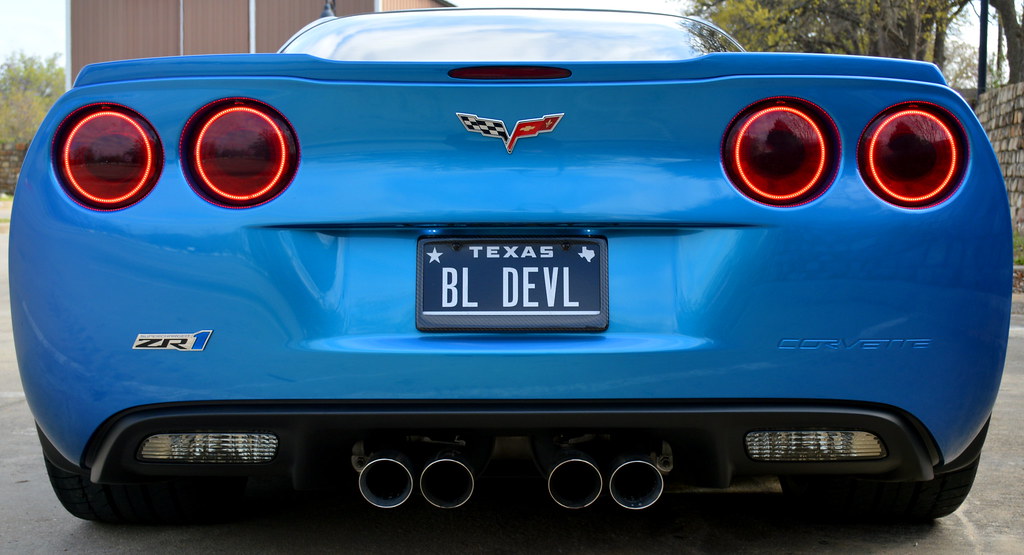
7. I wanted just the rings to light up for the running lights, so I bent and broke off one of the inner wires on the tail light bulb. This allows the high power filament to still light when the brakes are applied. Here is the left side finished, the right side is still stock.
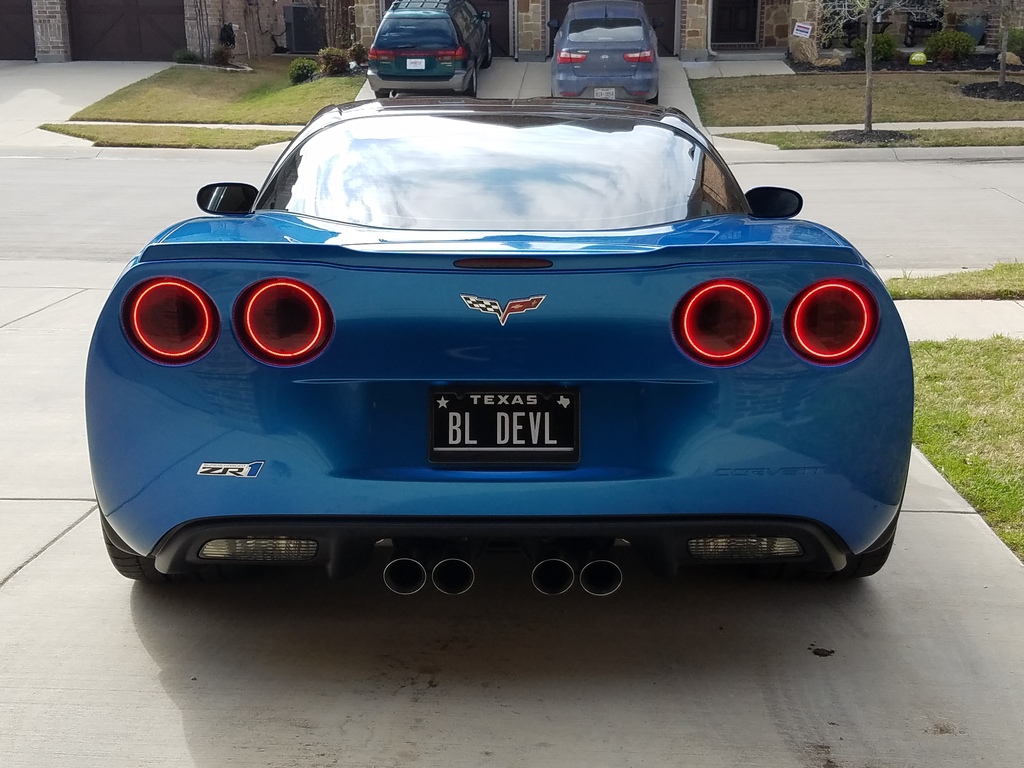
Here is a comparison of stock vs. mine with painted black center.
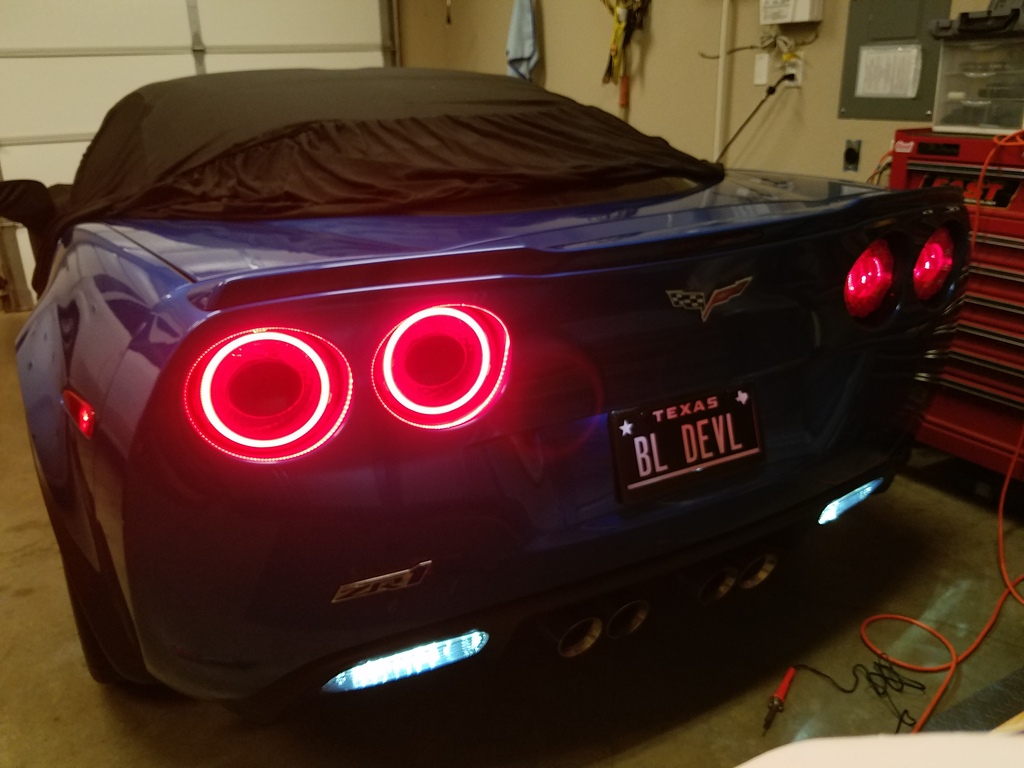
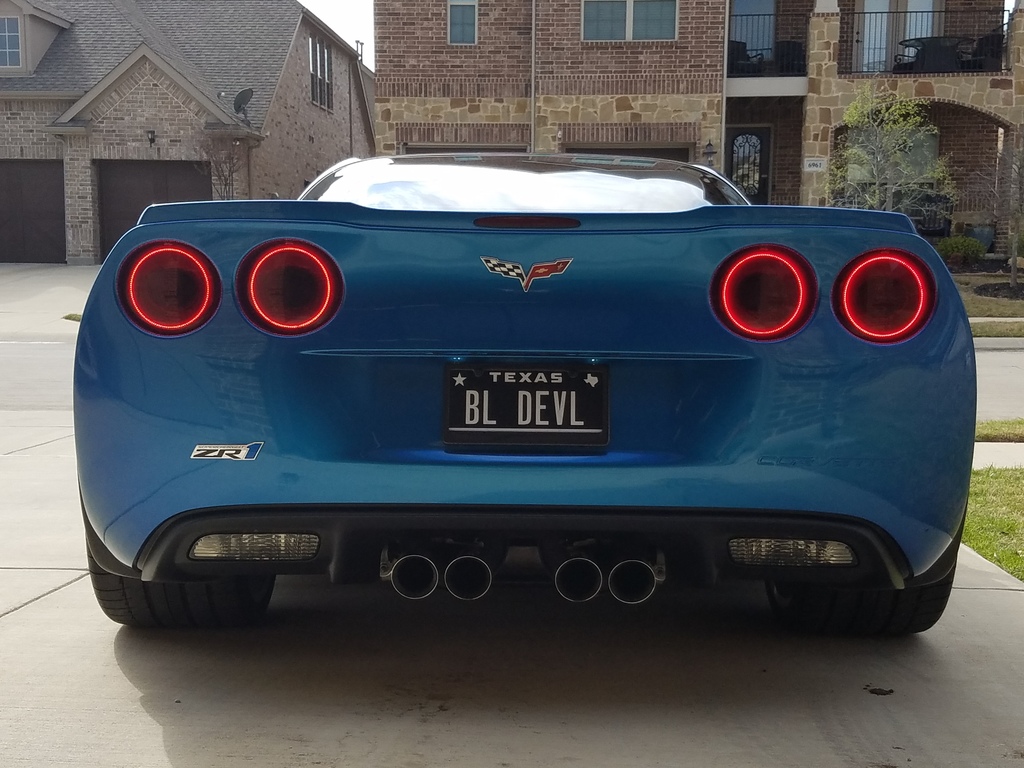
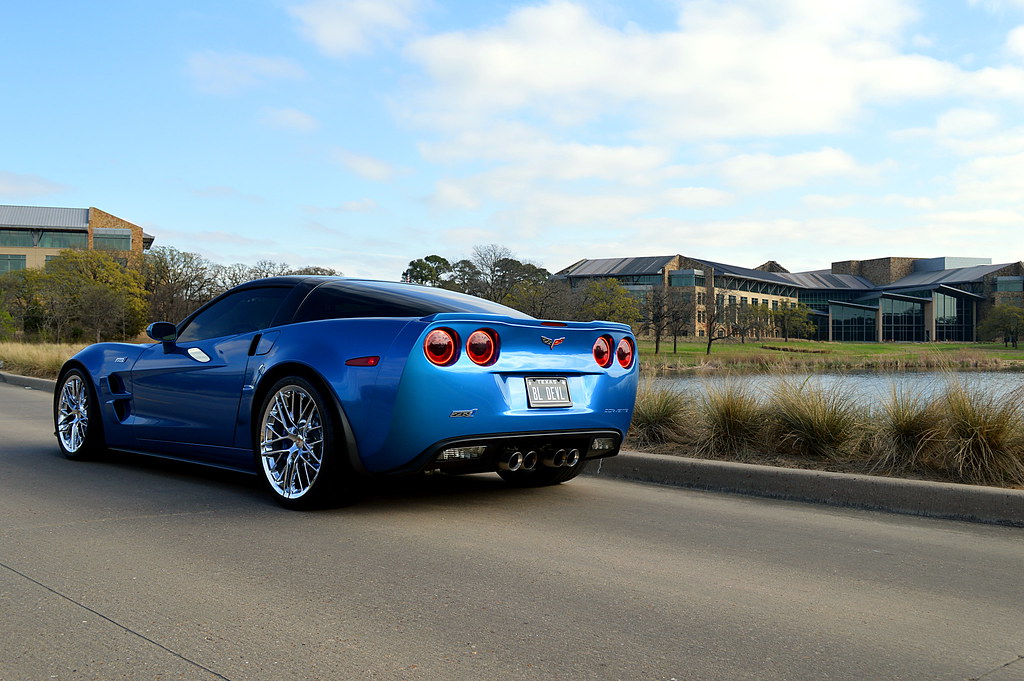
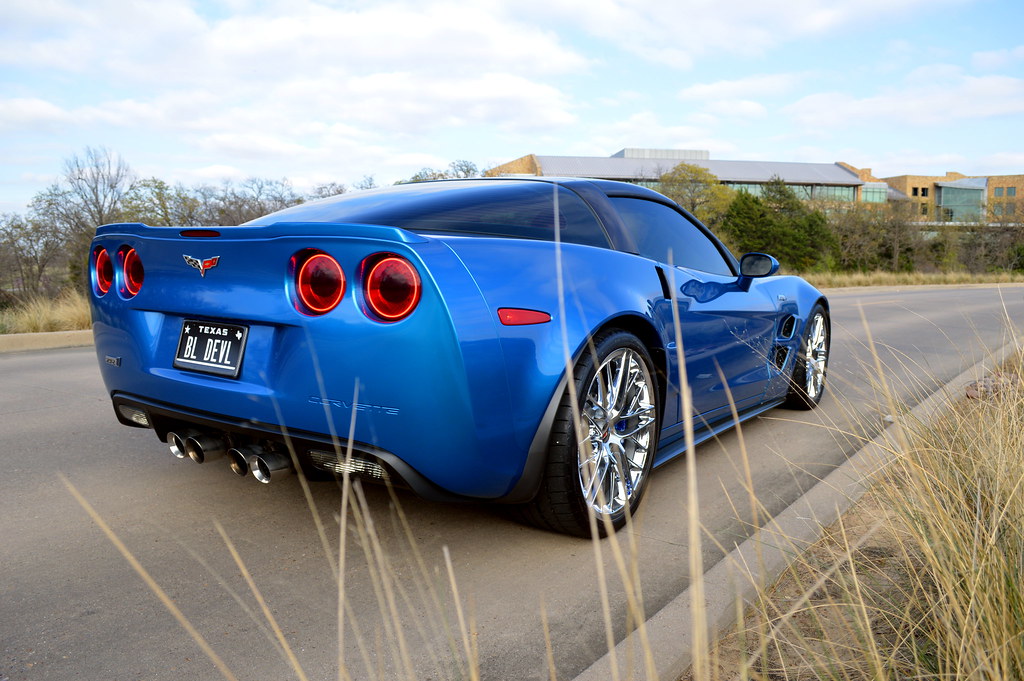
Here is a couple of shots in the driveway. More coming.
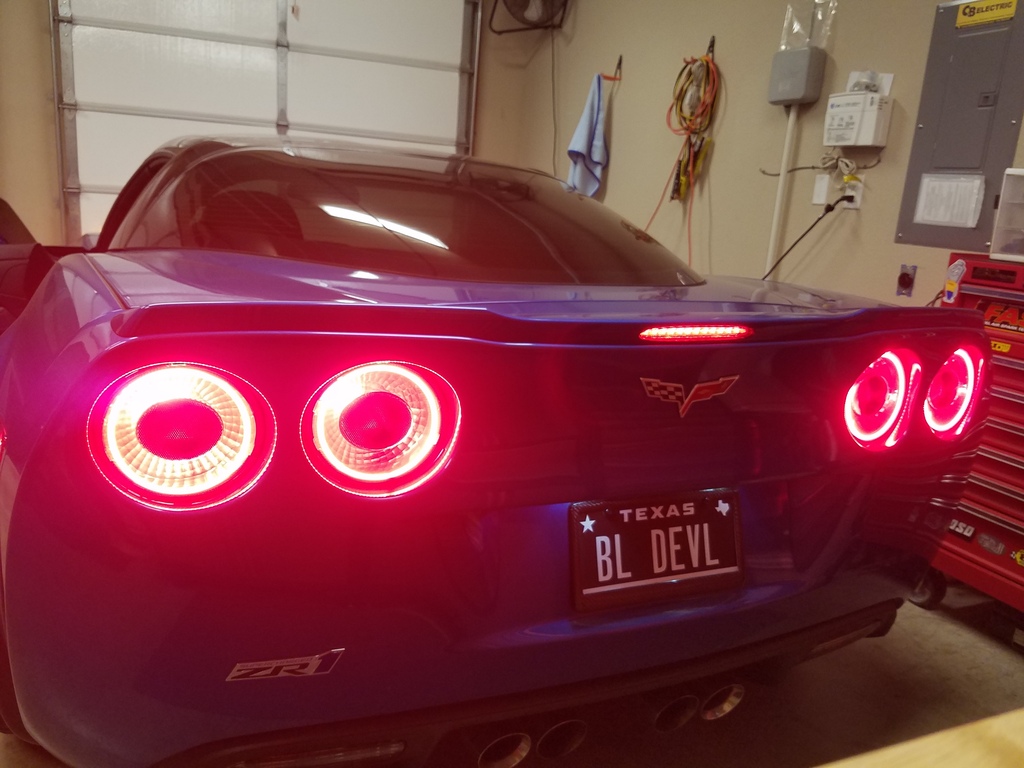
Here is one with the brakes off in the dark:
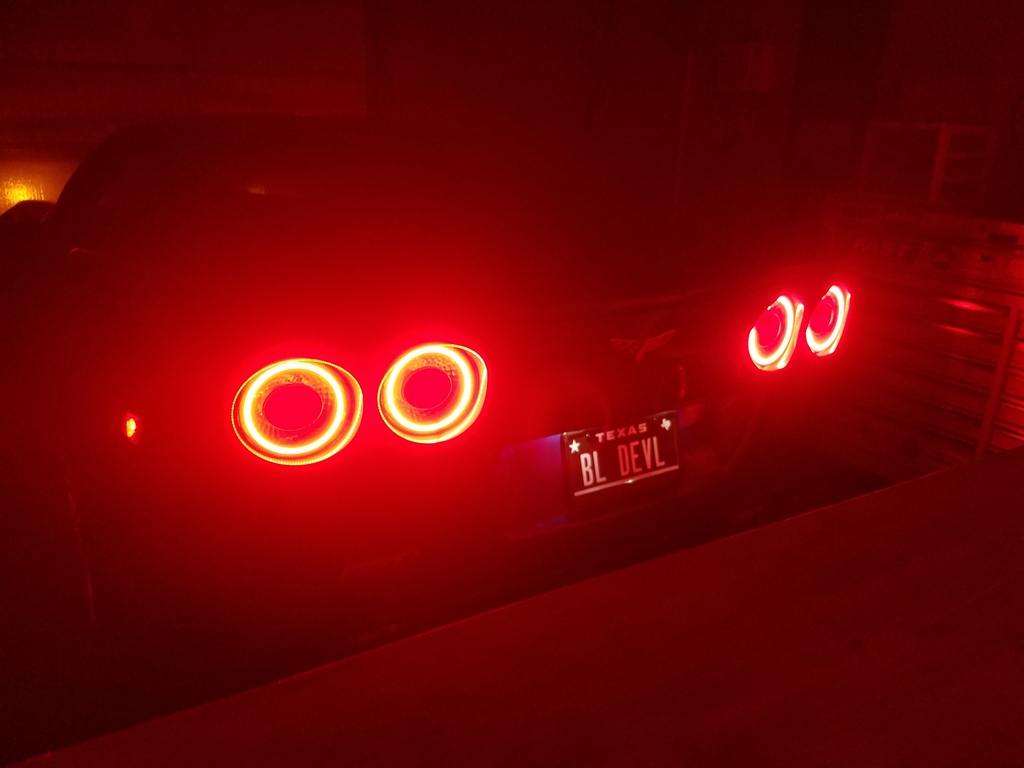
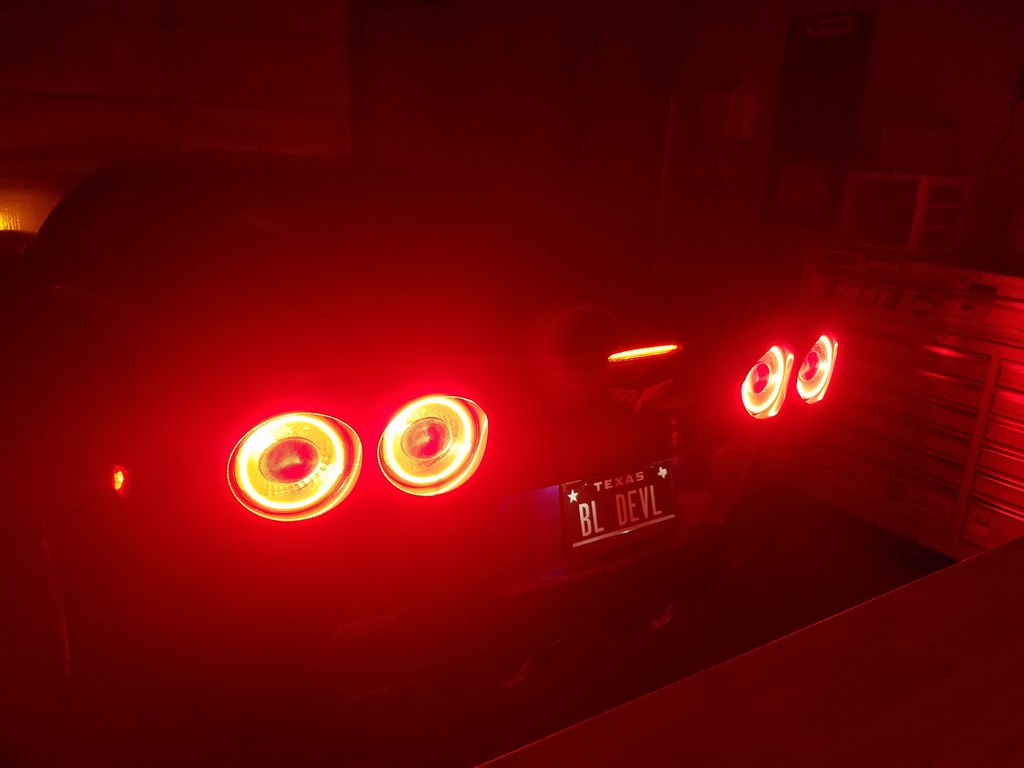
And a couple with the brakes applied:
1. Peel back the electrical tape on the tail light harness.
2. You can use T taps or solder the wires. I tried the T tap one time, but the wires for the afterburner kit are so small, they pulled out of the connector.
3. I stripped a small section of wire on the tail light harness and soldered the afterburner wires to it. Red goes to grey on the harness, and black goes to black. I soldered both sets of the afterburner wires to the same spot on the harness to avoid having to strip 2 seperate locations on each side of the car.
4. Tape the wires back up or use heat shrink if you have it.
5. Zip tie the resistors to the tail light harness near each bulb socket. Then gather and zip tie the excess wire from the afterburners out of the way.
6. Hook up the small connectors and test your wiring skills.
7. I wanted just the rings to light up for the running lights, so I bent and broke off one of the inner wires on the tail light bulb. This allows the high power filament to still light when the brakes are applied. Here is the left side finished, the right side is still stock.
Here is a comparison of stock vs. mine with painted black center.
Here is a couple of shots in the driveway. More coming.
Here is one with the brakes off in the dark:
And a couple with the brakes applied:
Last edited by BAAD LS2; 03-29-2017 at 09:05 PM.
The following users liked this post:
Weasel (10-29-2017)

The following users liked this post:
Frantz (03-26-2020)


The following users liked this post:
BAAD LS2 (03-12-2017)
 03-12-2017, 01:48 PM
#6
Pro
Thread Starter
Member Since: Jul 2015
Location: Fort Worth Texas
Posts: 589
Received 166 Likes
on
100 Posts
2018 Corvette of the Year Finalist
2017 C6 of Year
I don't really intend on doing these for people. There are vendors I believe who will do them for you using your tails. If I had more spare time i would consider it but with a newborn at home and work, I just don't have the time for it.


The following users liked this post:
BAAD LS2 (03-12-2017)
 03-12-2017, 04:46 PM
#9
Race Director

So the way that yours are set up, they only light up for running lights? The brake lights are still the original bulbs?
Do these have the ability to two different brightness levels, like the Eagle Eyes lights?
Do these have the ability to two different brightness levels, like the Eagle Eyes lights?
03-12-2017, 05:23 PM
#11
Instructor

The following users liked this post:
BAAD LS2 (03-12-2017)
 03-12-2017, 07:04 PM
#14
Racer
Great job on the how to. Oracle has a YouTube video on how to install them from the outside.
I just saw some company selling this kit on sale for $135 a few days ago.
I just saw some company selling this kit on sale for $135 a few days ago.
03-12-2017, 07:13 PM
#15
Pro
Thread Starter
Member Since: Jul 2015
Location: Fort Worth Texas
Posts: 589
Received 166 Likes
on
100 Posts
2018 Corvette of the Year Finalist
2017 C6 of Year
Great job on the how to. Oracle has a YouTube video on how to install them from the outside.
https://youtu.be/XJDClLDgEww
I just saw some company selling this kit on sale for $135 a few days ago.
https://youtu.be/XJDClLDgEww
I just saw some company selling this kit on sale for $135 a few days ago.
03-12-2017, 07:17 PM
#16
Race Director
So cost wise they're the same as eagle eyes, but you have to diy. They do look better for sure.
 03-12-2017, 11:40 PM
#20
Race Director
I really like you car. Just an FYI, haha.
The following users liked this post:
BAAD LS2 (03-12-2017)