

 02-20-2015, 01:05 PM
Last edit by: IB Advertising
See related guides and technical advice from our community experts:
Browse all: Exterior How-Tos
- C6 Corvette Favorite C6 Picture Gallery
Important information to help you understand your Corvette..
Browse all: Exterior How-Tos

C6 cam install (with lots of pics)
05-28-2011, 11:50 PM
#1
Melting Slicks

Thread Starter

*** Results in post #60 ***
Got my EPS 234/242 .602/.605" 112LSA +4 advance cam, the same cam from this thread-
http://forums.corvetteforum.com/c6-t...s-503rwhp.html
My current mods-
06 C6 M6
Vararam
Ported TB
FAST 102
Dynatech 1 7/8 3"x3" offroad X C6Z headers
GHL C6Z 3" exhaust
ECS tune
I just started today with the tear down for many pics and I have the new cam in already but the springs still need to be swapped and then reassembly-
I'll update the thread over the next few days and once buttoned up, Horsepwer Sales will be doing the tuning so I should have results this week.
I can't comment on each pic but if you have a question that is specific, I'll be happy to answe it if it helps motivate you to dig into your own car.
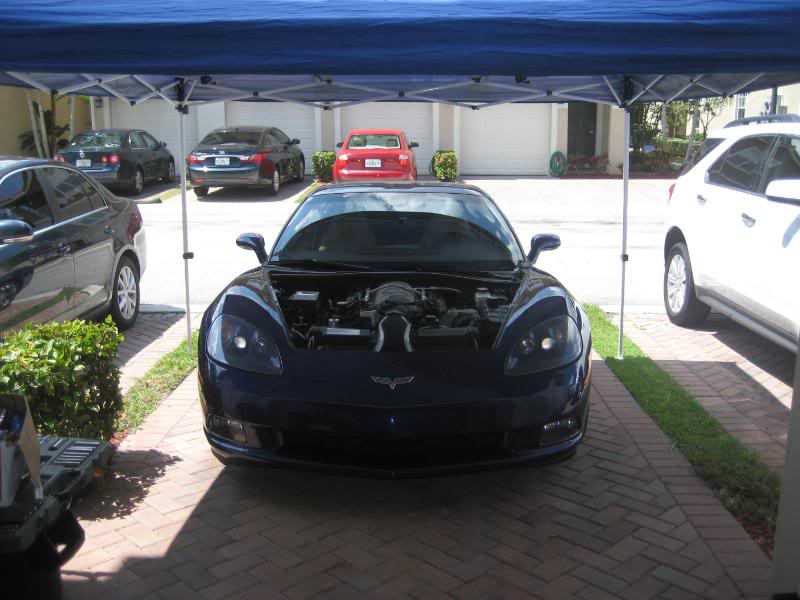
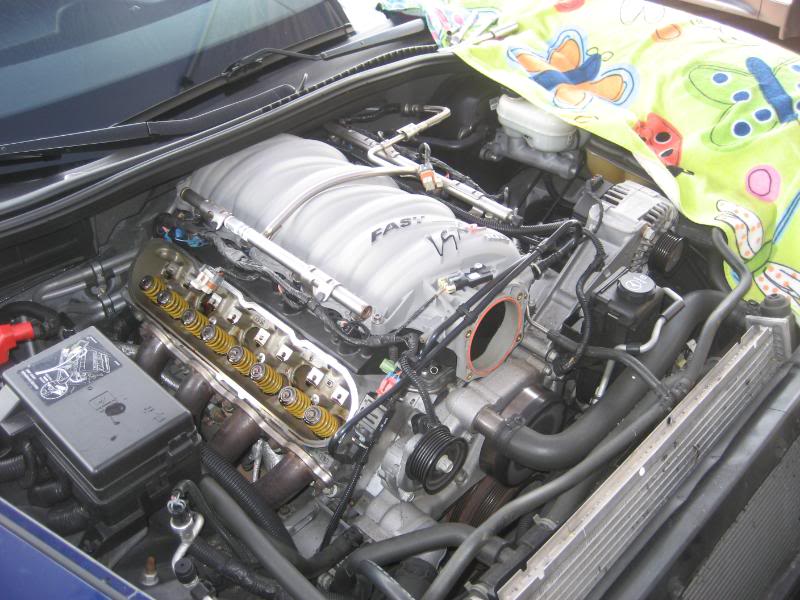
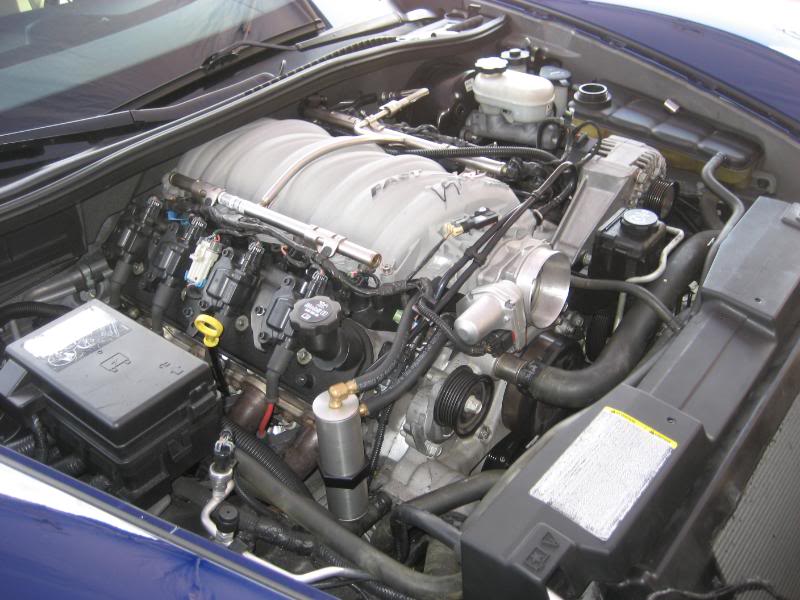
Well, here's where I started-
I yanked the hood to give me plenty of room and I just started the disassembly-
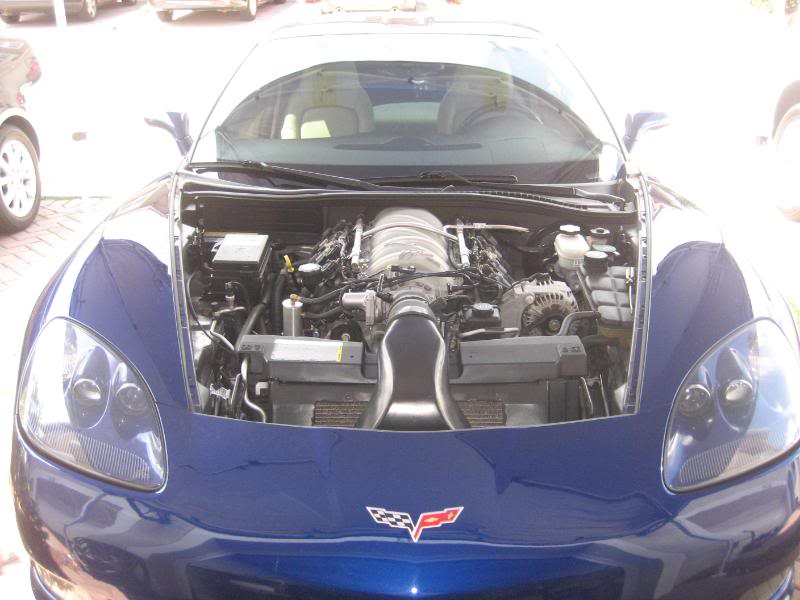
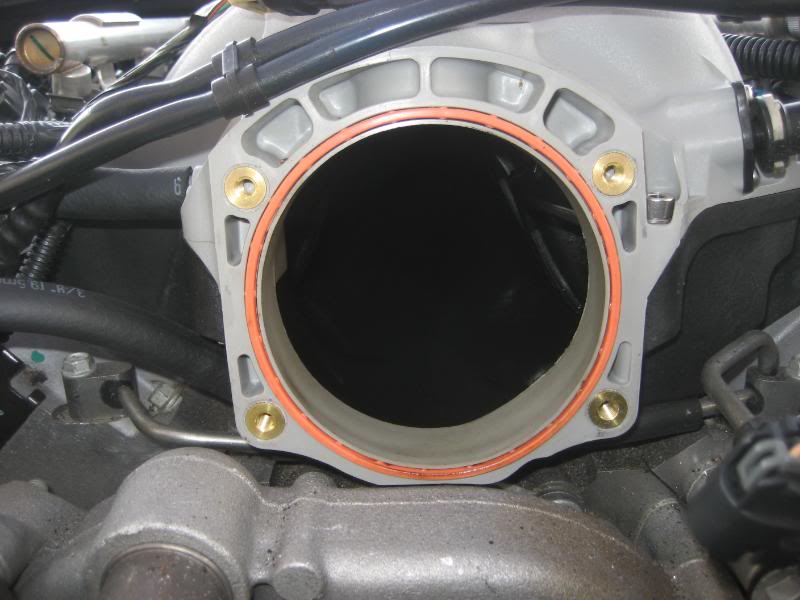
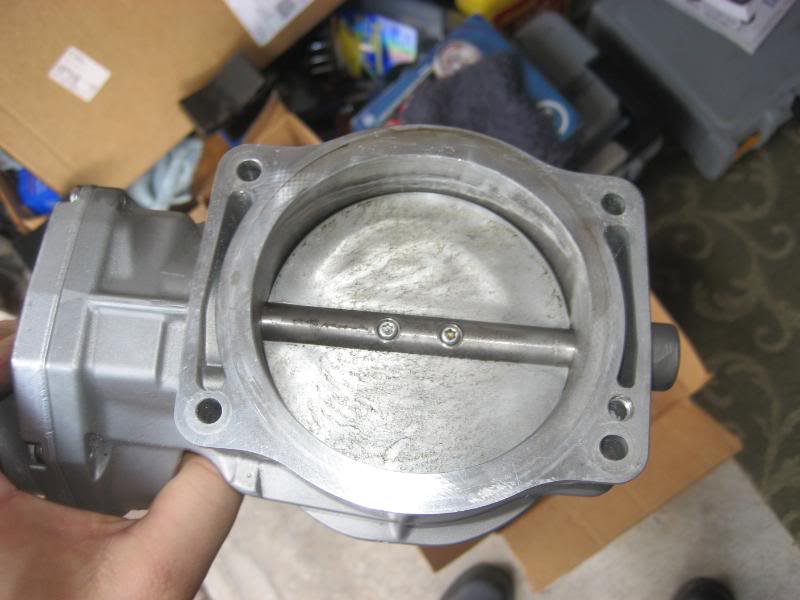
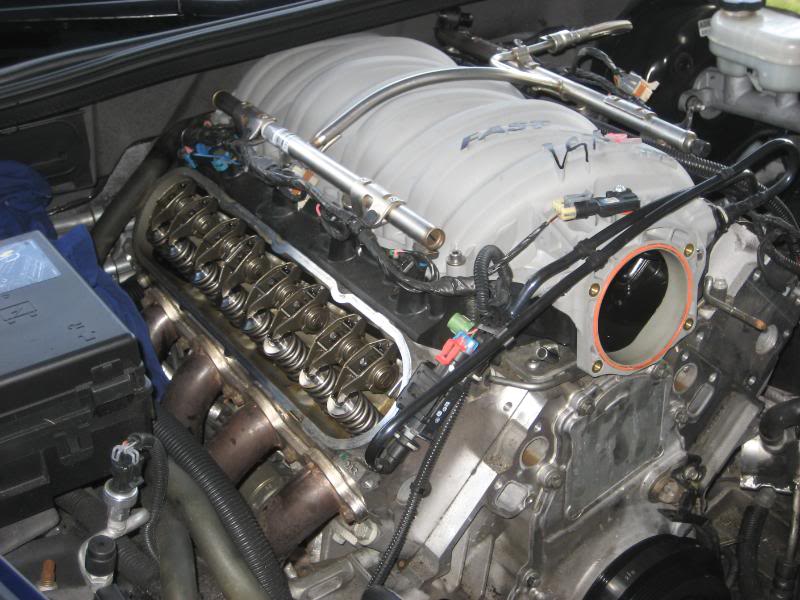
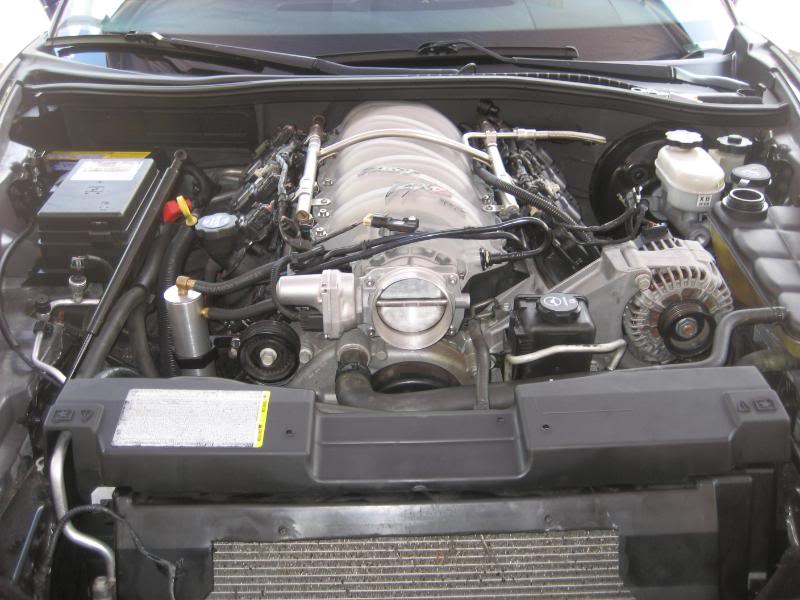
After 2K miles, my FAST and the TB were spotless, hardly a trace of oil thanks to the catch can (I'll remember which one soon..?)
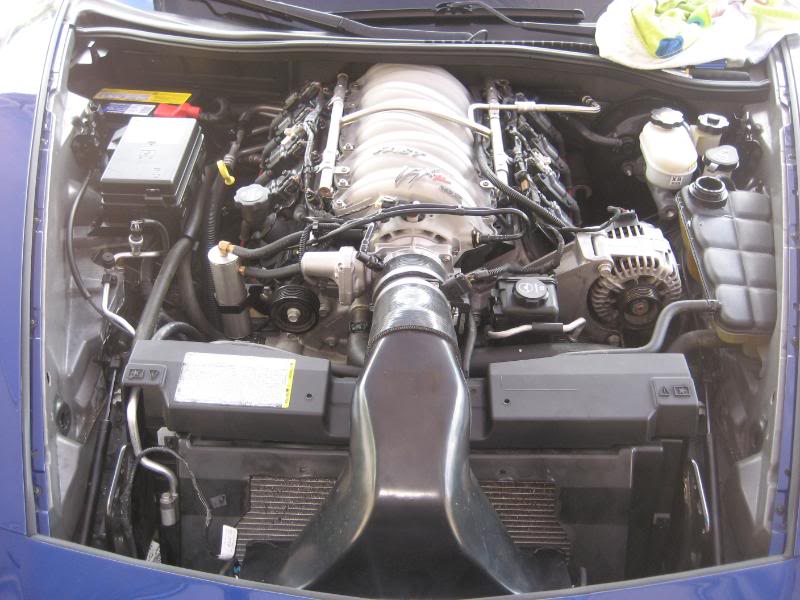
Start yanking stuff, I decided to tackle the cam 1st, instead of worrying about the srpings. The springs are cake anyway-
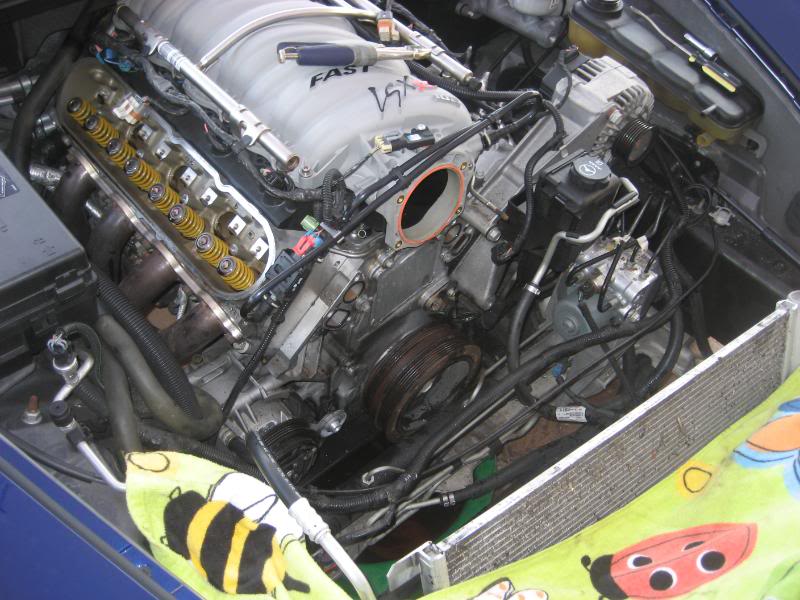
Yank the bracket that holds the ABS module onto the subframe.
I yank the alternator, bracket and ps pump since it makes working with the rack so VERY easy to remove.
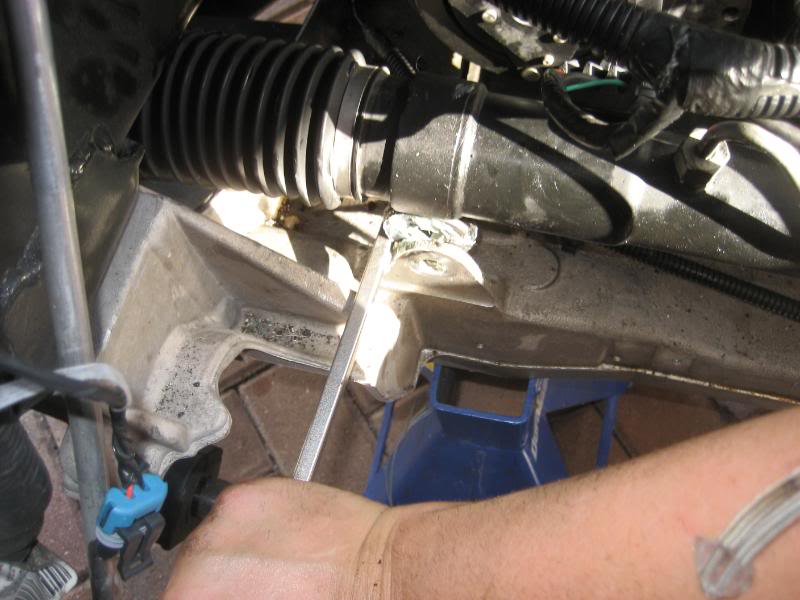
I always (this is my 4th C6 cam install) cut the ps steering resevior bracket with a dremel so that any time I go back, it will slide right off.
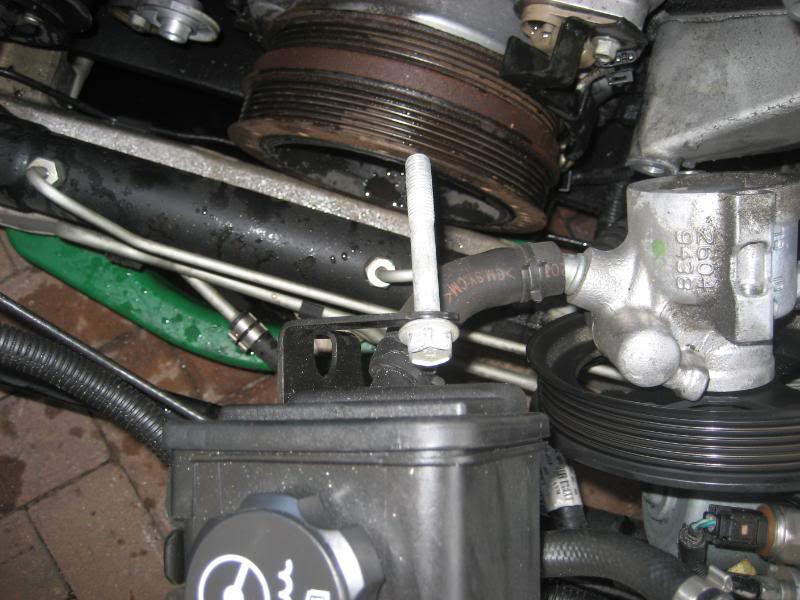
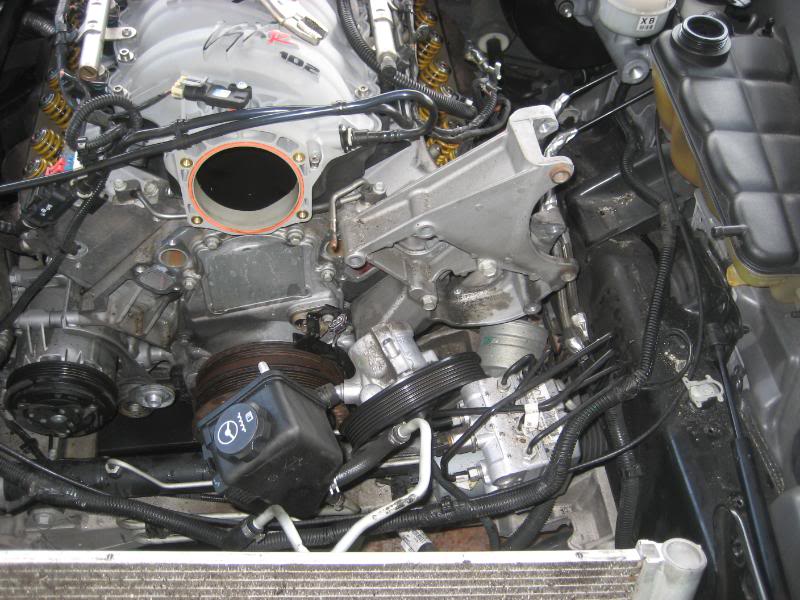
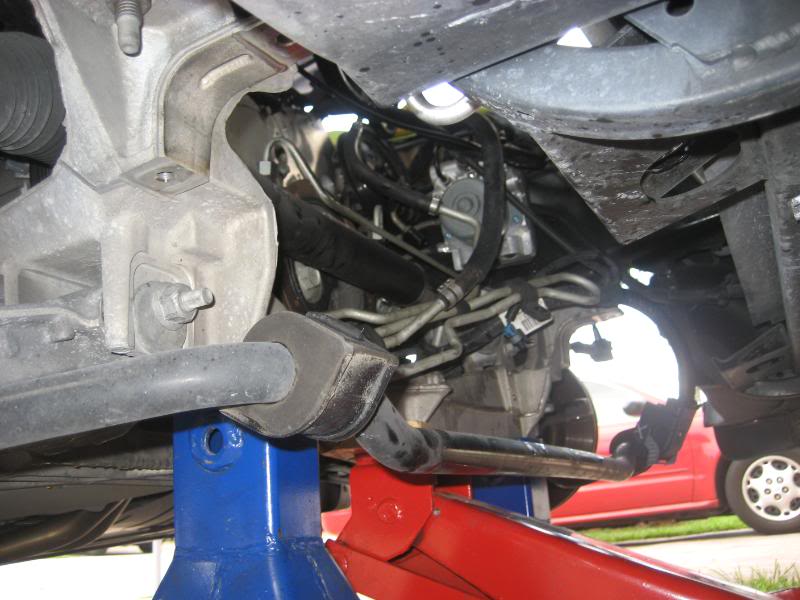
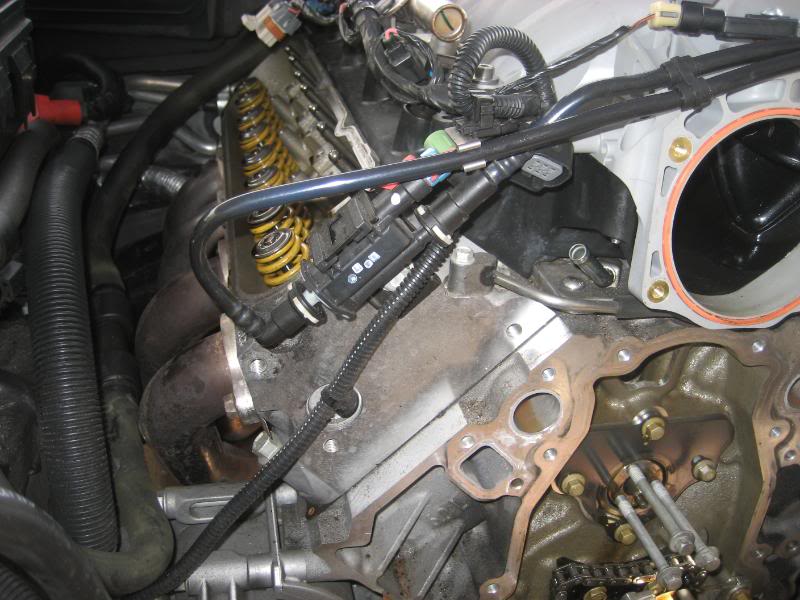
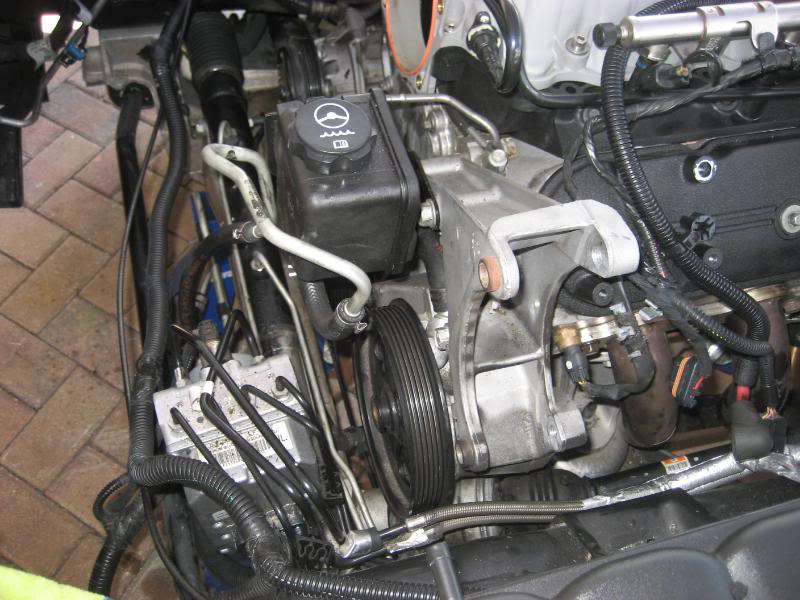
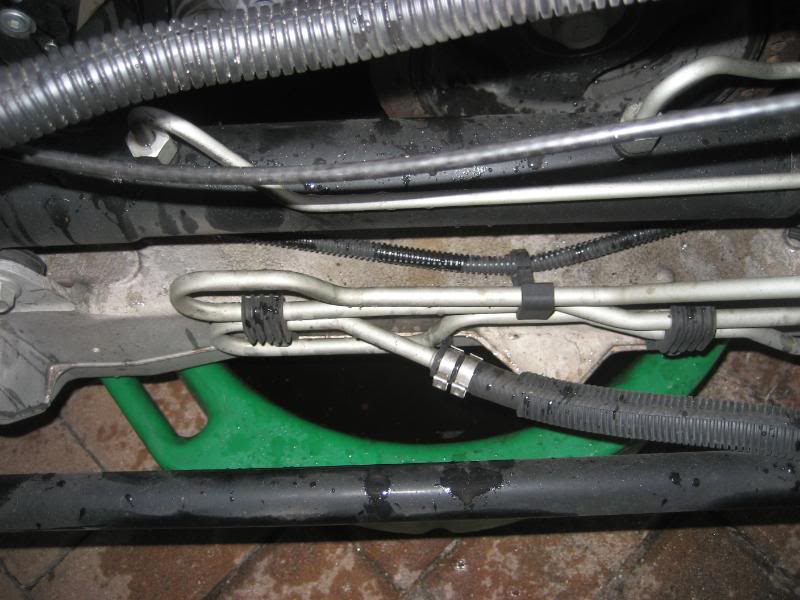
View of ps lines with everything out of the way, lines come right off, no problem

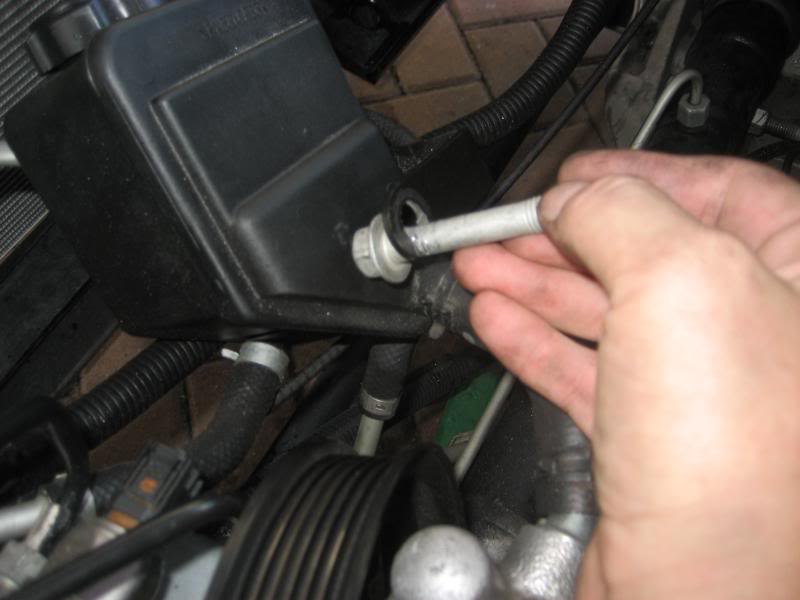
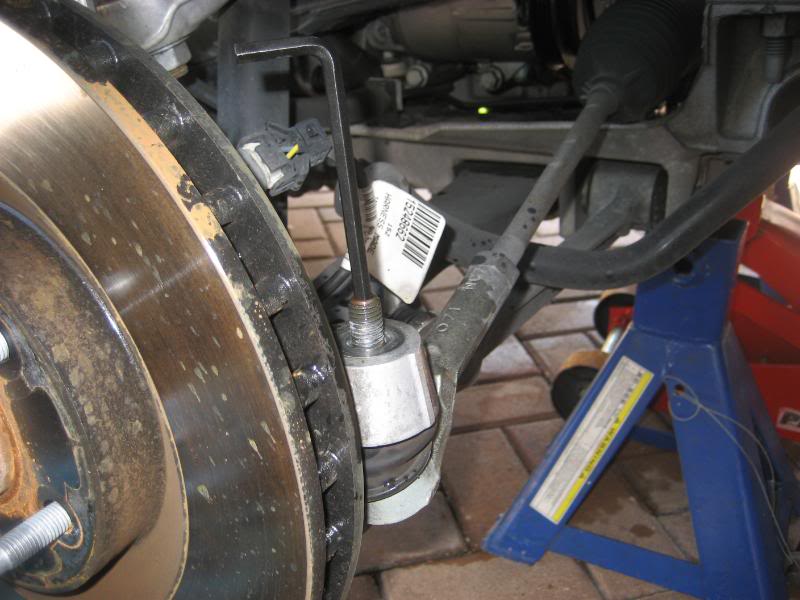
Make sure your steering wheel is straight, slide the rubber boot back and yank the (1) bolt securing the steering shaft to the rack-
Pull the sway bar to get room for the rack bolts, let it hang.
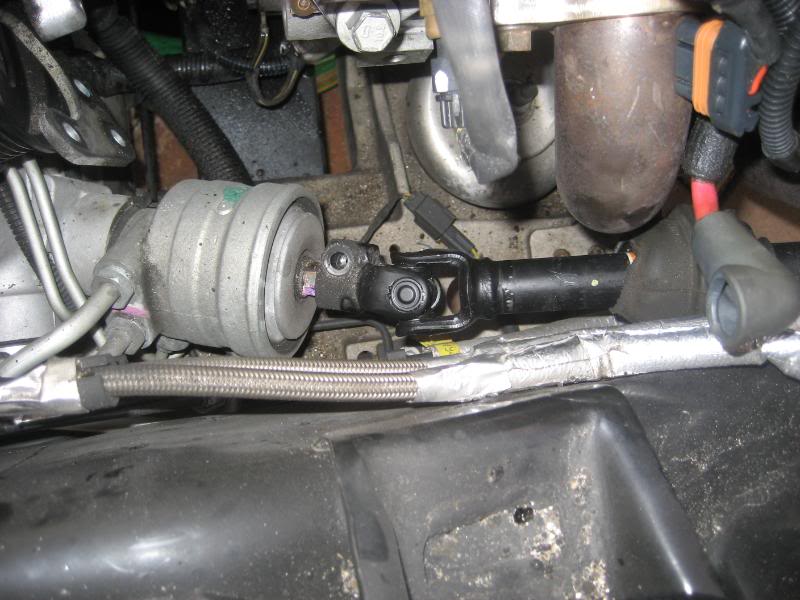
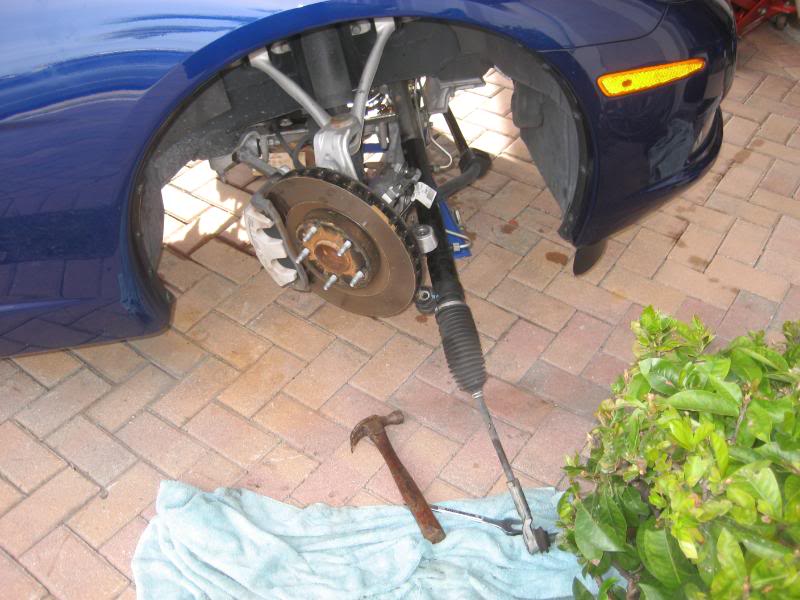
Yank the rack and slide it to the pass side, very easy once the botls are removed and you simply PRY up on the pass side between the rack and the sub frame-
Yank the balancer, cover and use your water pump bolts on each cam to slide it out (3 bolts) and slide the new cam in (3 bolts).
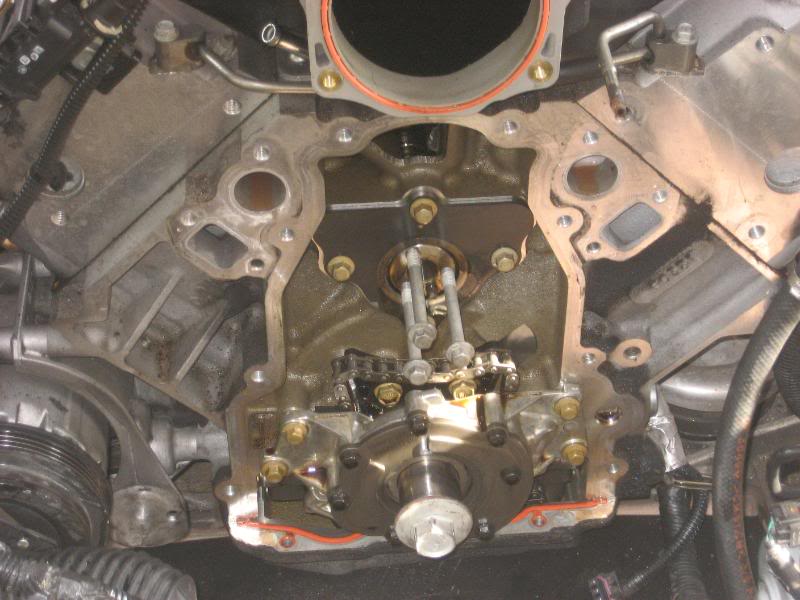
Make sure you install the old bolt back into the crank to line up the timing marks as shown. Cam dot faces down and crank dot faces up-

This is how I do it, always and I have never had a problem with a lifter falling, ever-
Once the cam is ready to be yanked and I am about to pull the retainer plate for the cam, I install the stock push rods back into the heads and I turn the cam over 3-4 times to insure all the push rods are at their top position. Then I push each push rod back down onto the lifter to "feel" how much tension is on each lifter cup. Rotate the cam again, make sure they all come up then I bounce the cam back and forth a little to "simulate" the removal and instalation of the new cam, if none of the lifters move AT ALL, yank it-
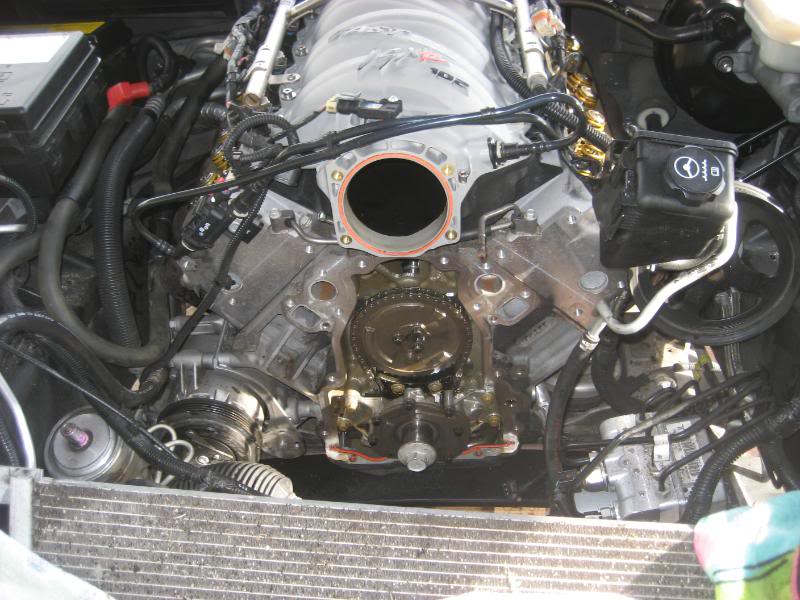
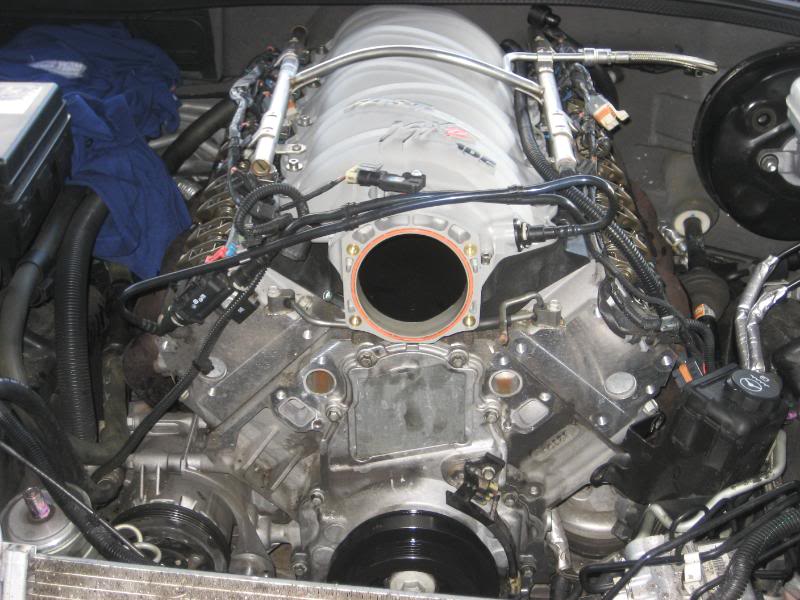
Here you can see the push rods up and the cam about to be yanked-
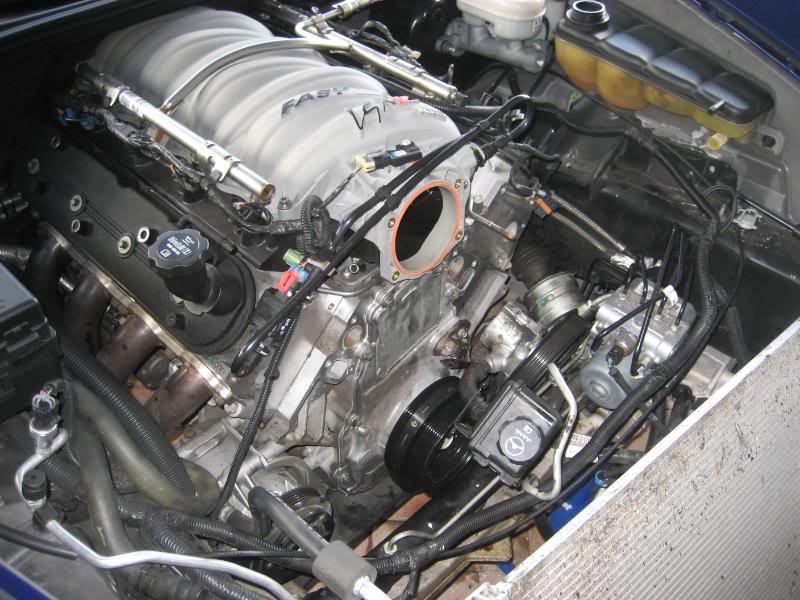
Now I had my Father hold the condensor UP while the lines were still attached and I slowly slide the old cam out and put it down and grabbed the new cam (3 water pump bolts already threaded to help hold) and it slid right in, no fuss-
I personally put a little lock tite on the retainer plate and the cam gear bit that's just me
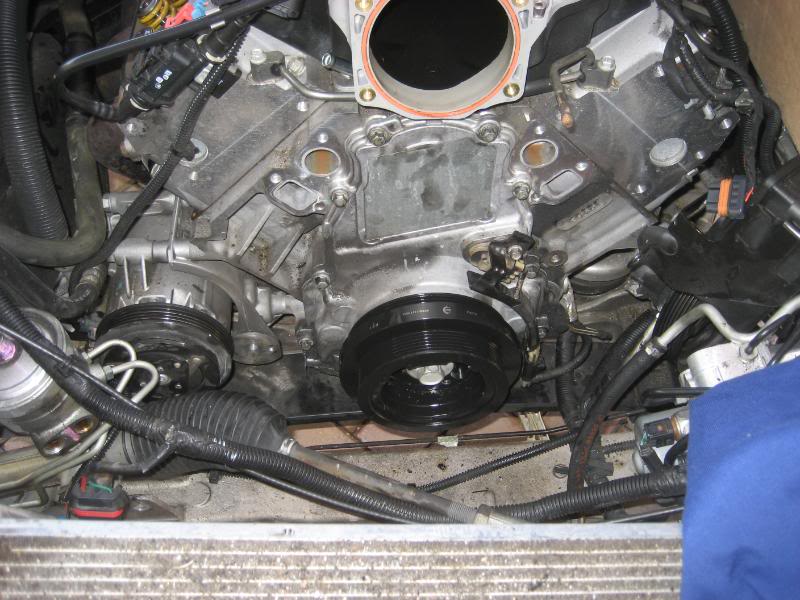
Here is the new cam installed- no sweat at all- I do put a small dab of Loctite on the cam bolts.
Tomorrow I will swap the springs and reassemble everything with more pics-
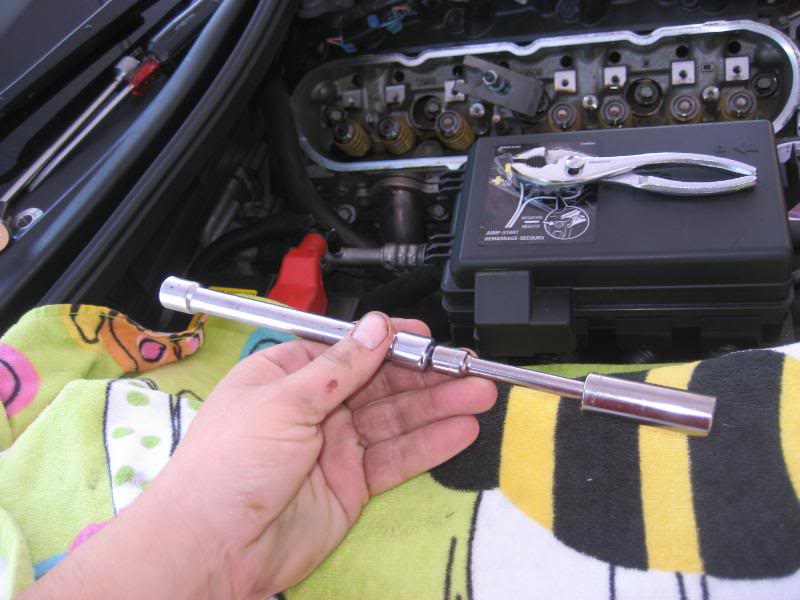
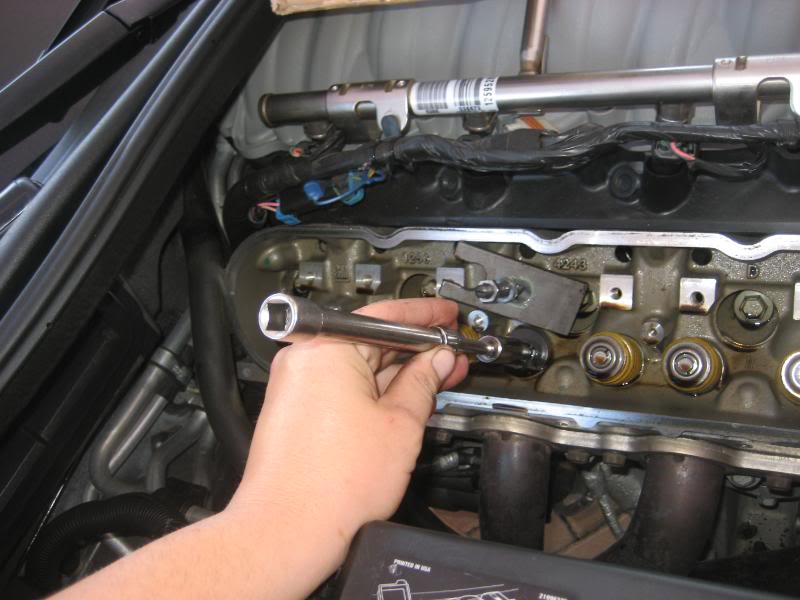
Cover, pulley and new seals/gaskets in place. I just use the axle nut socket and a 10lb hammer to "tap" the pulley on then I use the old bolt to seat it then install the new bolt, done.
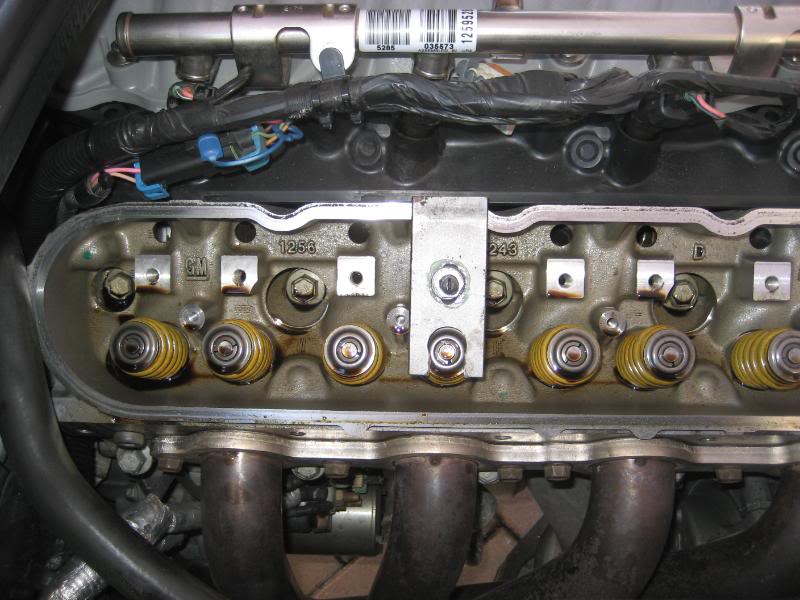
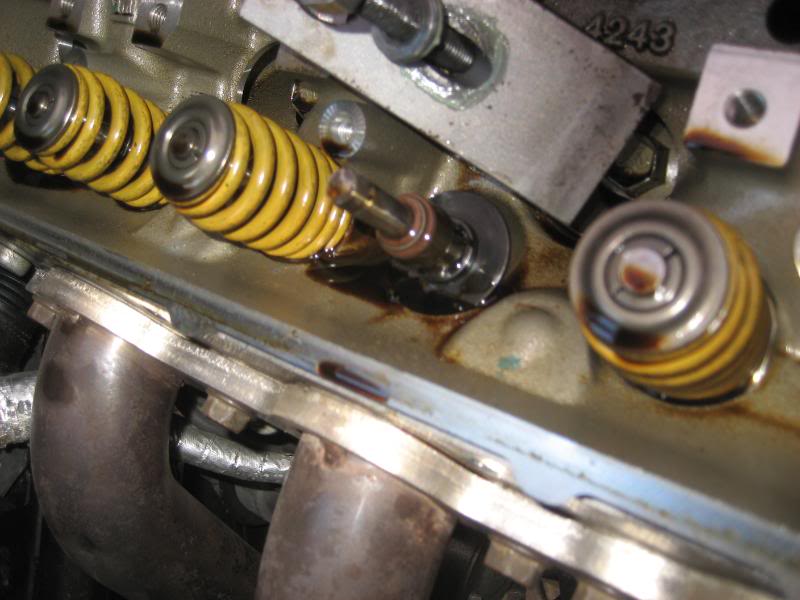
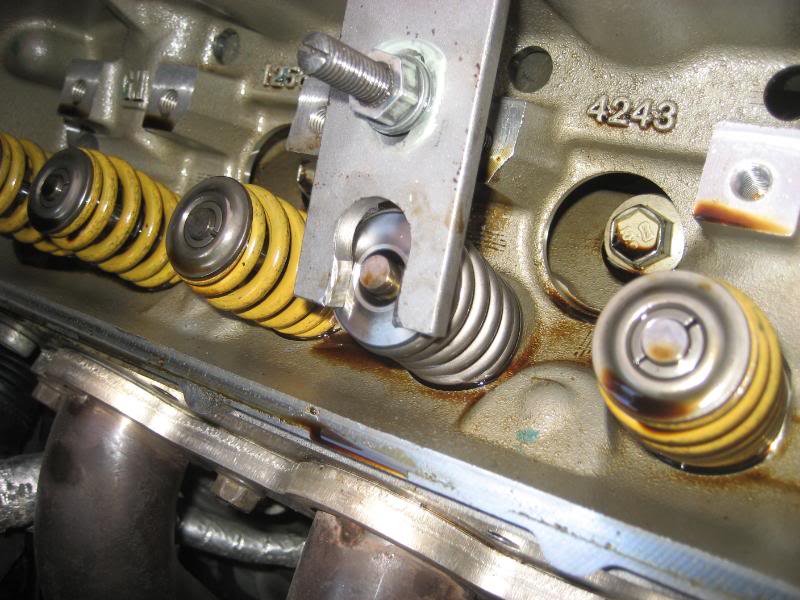
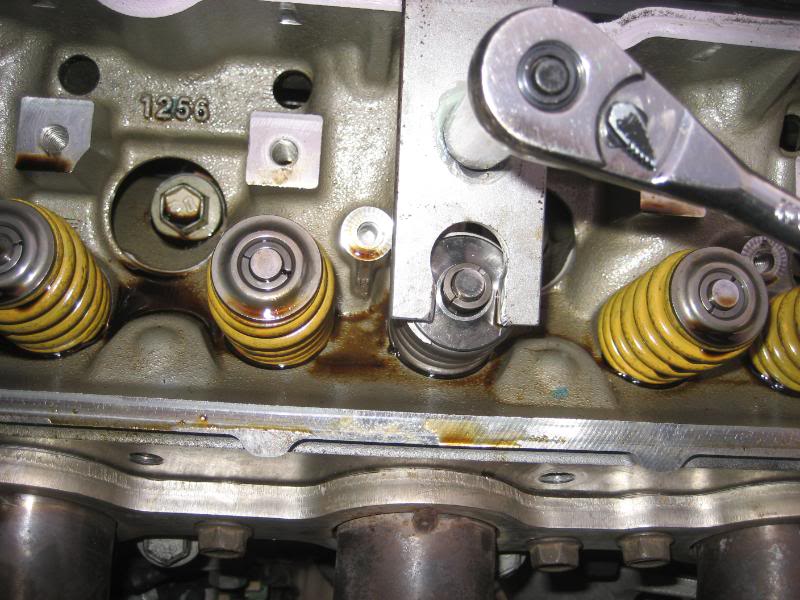
Swapped springs, valve seals and retainers. This is simple so i'll spare the details but I'll show the steps in pics- I use the TDC method as on LS1howto since I have no air available.
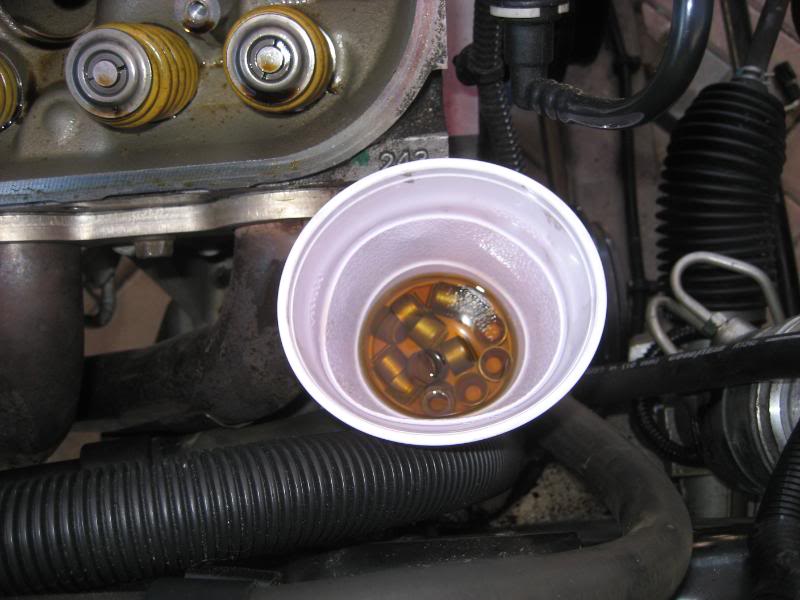
Seals soaking in fresh oil to make them easy to install-
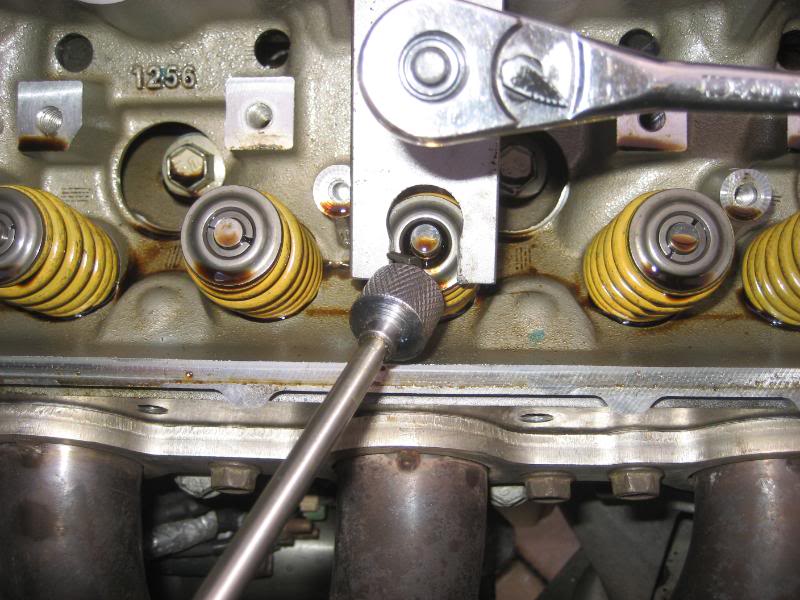
Tap the seals onto the stems
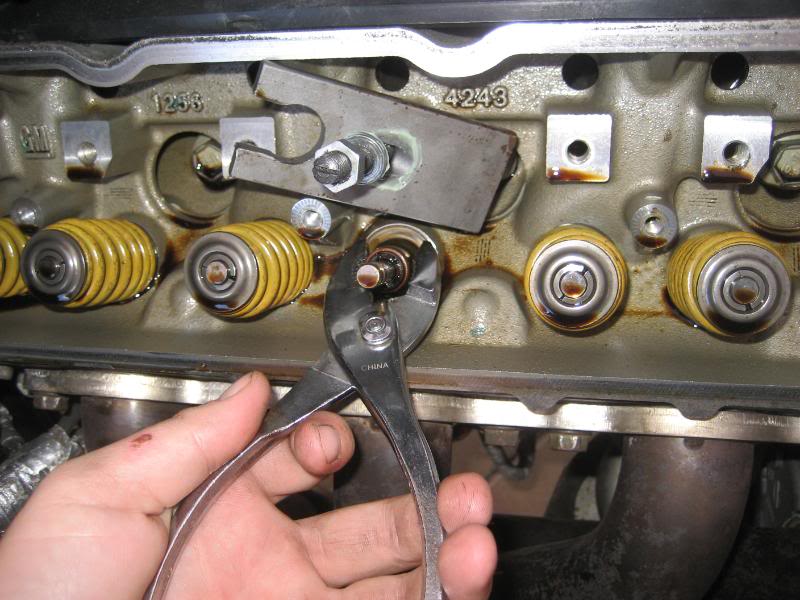
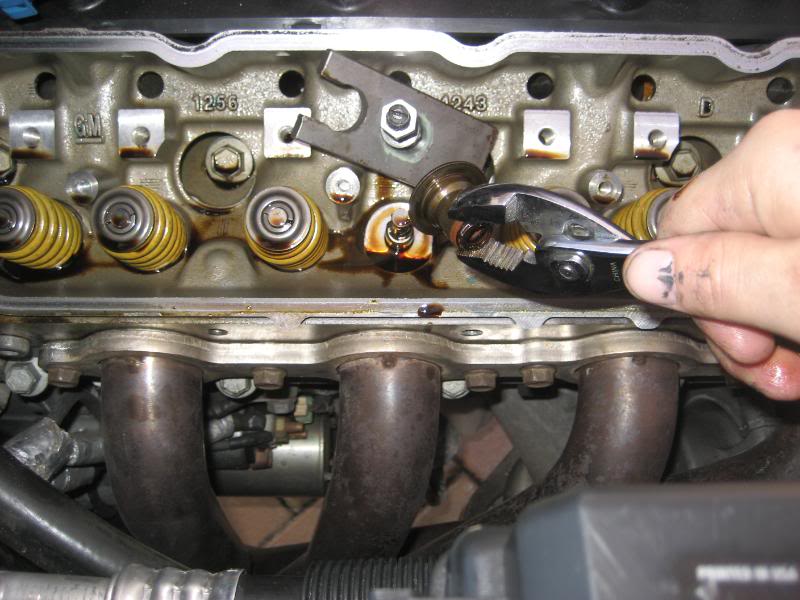
Seal fully seated-
Done- cake
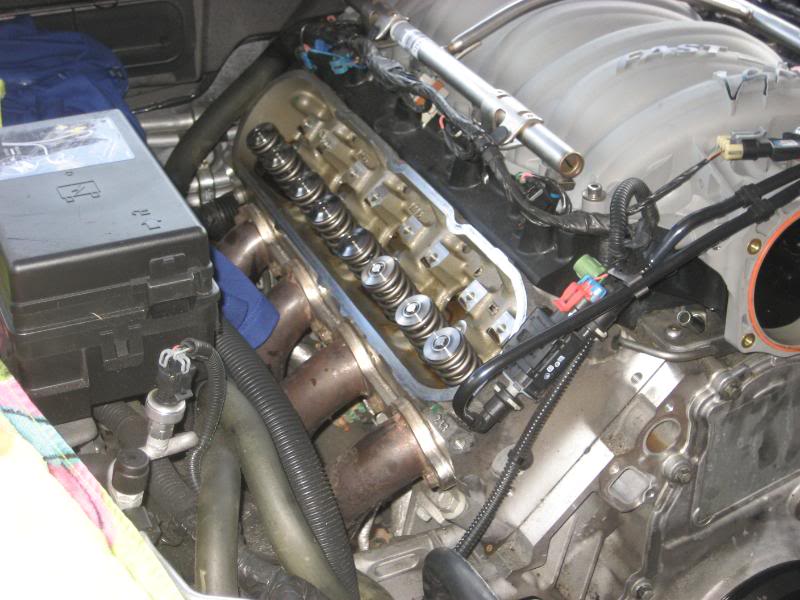
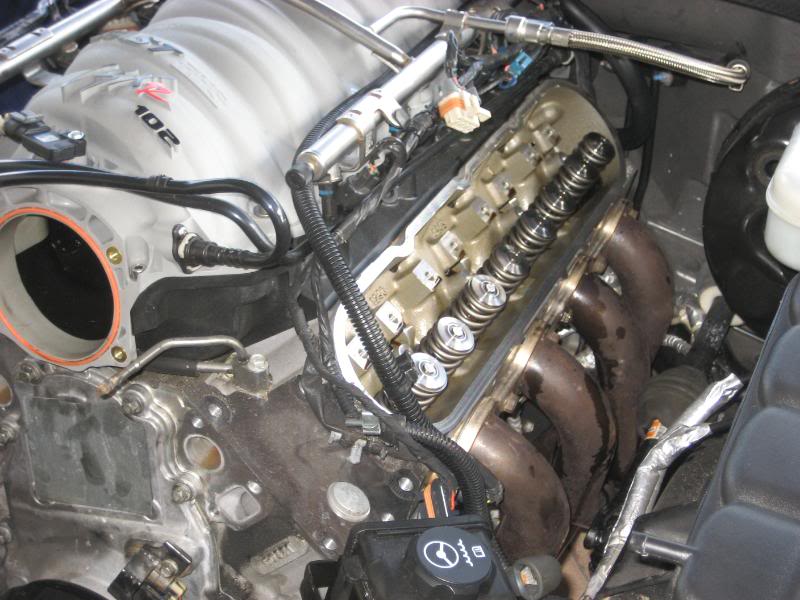
Valve train installed
Rack going back in, just shift it over to the driver side, grease the rubber mount and pry it over with a large screw driver aginst the sub frame. Once it's lined up, use a rubber mallet to get it down flush to install the bolt.

That's it for the day.
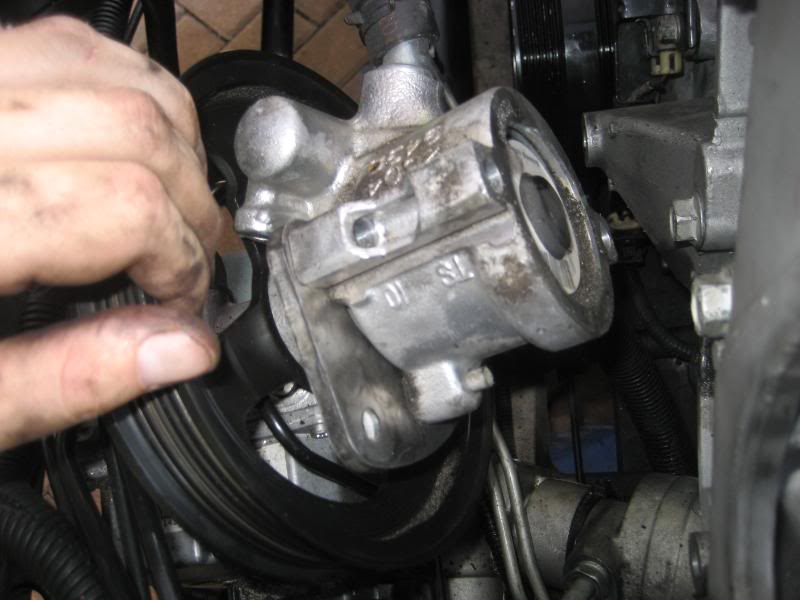
5/30 I started with the pwr steering pump. Easy way is to install the little J shaped bracket onto the pump with 1 of the small bolts as seen in pic. Then slide it into the alternator brakcet and it's easy.
Most of it is back together, no need for any pics there really.
The actual Dayco belts needed from Advanced Auto for the SLP 25% UD pulley are-
Dayco 5060780 (6PK1980) Main belt
Dayco 5040390 (4PK0990) Ac belt
Done- I SOMEHOW lost the vid uploading the pics to Photobucket...??? Anyway, it caught idle right away but after a long drive to heat cycle the valve springs, it sure does like to stall on stops and it idles like azz but a good tune (Horsepower Sales) will resolve that. I'll keep the thread updated in the next few days with a vid and the dyno results. I need a quieter axle back now, that's all I can say
Got my EPS 234/242 .602/.605" 112LSA +4 advance cam, the same cam from this thread-
http://forums.corvetteforum.com/c6-t...s-503rwhp.html
My current mods-
06 C6 M6
Vararam
Ported TB
FAST 102
Dynatech 1 7/8 3"x3" offroad X C6Z headers
GHL C6Z 3" exhaust
ECS tune
I just started today with the tear down for many pics and I have the new cam in already but the springs still need to be swapped and then reassembly-
I'll update the thread over the next few days and once buttoned up, Horsepwer Sales will be doing the tuning so I should have results this week.
I can't comment on each pic but if you have a question that is specific, I'll be happy to answe it if it helps motivate you to dig into your own car.
Well, here's where I started-
I yanked the hood to give me plenty of room and I just started the disassembly-
After 2K miles, my FAST and the TB were spotless, hardly a trace of oil thanks to the catch can (I'll remember which one soon..?)
Start yanking stuff, I decided to tackle the cam 1st, instead of worrying about the srpings. The springs are cake anyway-
Yank the bracket that holds the ABS module onto the subframe.
I yank the alternator, bracket and ps pump since it makes working with the rack so VERY easy to remove.
I always (this is my 4th C6 cam install) cut the ps steering resevior bracket with a dremel so that any time I go back, it will slide right off.
View of ps lines with everything out of the way, lines come right off, no problem
Make sure your steering wheel is straight, slide the rubber boot back and yank the (1) bolt securing the steering shaft to the rack-
Pull the sway bar to get room for the rack bolts, let it hang.
Yank the rack and slide it to the pass side, very easy once the botls are removed and you simply PRY up on the pass side between the rack and the sub frame-
Yank the balancer, cover and use your water pump bolts on each cam to slide it out (3 bolts) and slide the new cam in (3 bolts).
Make sure you install the old bolt back into the crank to line up the timing marks as shown. Cam dot faces down and crank dot faces up-
This is how I do it, always and I have never had a problem with a lifter falling, ever-
Once the cam is ready to be yanked and I am about to pull the retainer plate for the cam, I install the stock push rods back into the heads and I turn the cam over 3-4 times to insure all the push rods are at their top position. Then I push each push rod back down onto the lifter to "feel" how much tension is on each lifter cup. Rotate the cam again, make sure they all come up then I bounce the cam back and forth a little to "simulate" the removal and instalation of the new cam, if none of the lifters move AT ALL, yank it-
Here you can see the push rods up and the cam about to be yanked-
Now I had my Father hold the condensor UP while the lines were still attached and I slowly slide the old cam out and put it down and grabbed the new cam (3 water pump bolts already threaded to help hold) and it slid right in, no fuss-
I personally put a little lock tite on the retainer plate and the cam gear bit that's just me
Here is the new cam installed- no sweat at all- I do put a small dab of Loctite on the cam bolts.
Tomorrow I will swap the springs and reassemble everything with more pics-
Cover, pulley and new seals/gaskets in place. I just use the axle nut socket and a 10lb hammer to "tap" the pulley on then I use the old bolt to seat it then install the new bolt, done.
Swapped springs, valve seals and retainers. This is simple so i'll spare the details but I'll show the steps in pics- I use the TDC method as on LS1howto since I have no air available.
Seals soaking in fresh oil to make them easy to install-
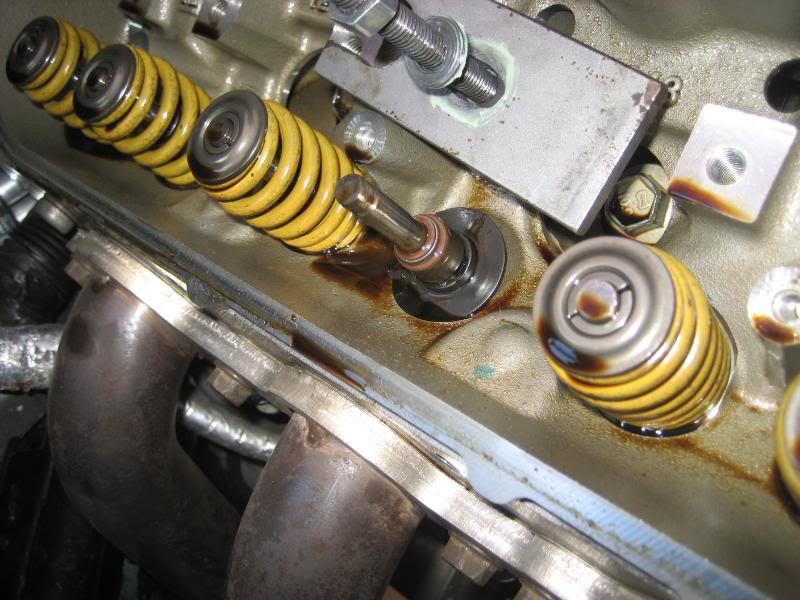
Tap the seals onto the stems
Seal fully seated-
Done- cake
Valve train installed
Rack going back in, just shift it over to the driver side, grease the rubber mount and pry it over with a large screw driver aginst the sub frame. Once it's lined up, use a rubber mallet to get it down flush to install the bolt.
That's it for the day.
5/30 I started with the pwr steering pump. Easy way is to install the little J shaped bracket onto the pump with 1 of the small bolts as seen in pic. Then slide it into the alternator brakcet and it's easy.
Most of it is back together, no need for any pics there really.
The actual Dayco belts needed from Advanced Auto for the SLP 25% UD pulley are-
Dayco 5060780 (6PK1980) Main belt
Dayco 5040390 (4PK0990) Ac belt
Done- I SOMEHOW lost the vid uploading the pics to Photobucket...??? Anyway, it caught idle right away but after a long drive to heat cycle the valve springs, it sure does like to stall on stops and it idles like azz but a good tune (Horsepower Sales) will resolve that. I'll keep the thread updated in the next few days with a vid and the dyno results. I need a quieter axle back now, that's all I can say
Last edited by JayplaySS2; 06-02-2011 at 05:31 PM.
 05-29-2011, 12:13 AM
#2
Le Mans Master


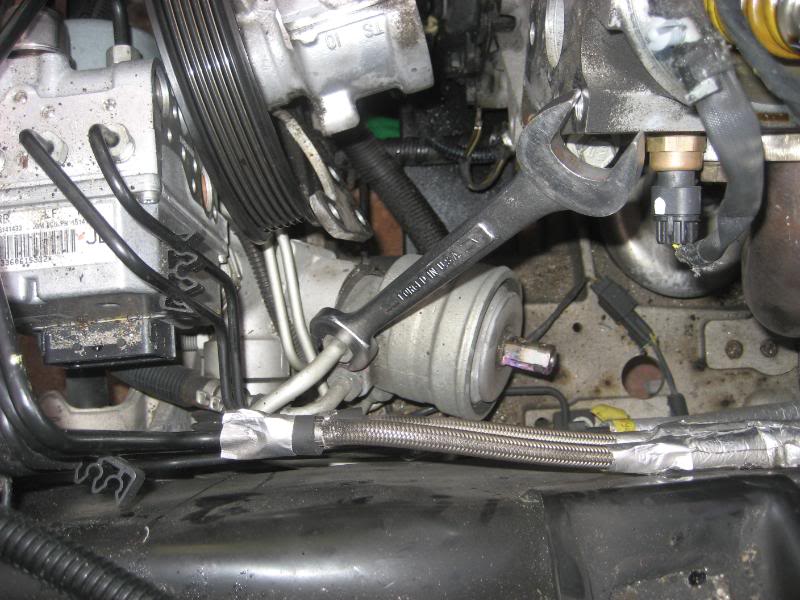
When you pulled the steering rack did you have to loosen the two lines/fittings from along the top of the steering rack in addition to the two lines on the gear box?
Last edited by DSOMC6; 05-29-2011 at 12:25 AM.
05-29-2011, 12:31 AM
#3
Melting Slicks
Thread Starter
Those can stay put, all you need to do is remove the 2 hard lines on the rack (far driver side) and you "may" have to unbolt the ps pump..? I unbolted everything to help with pics and make it easier to R+R.
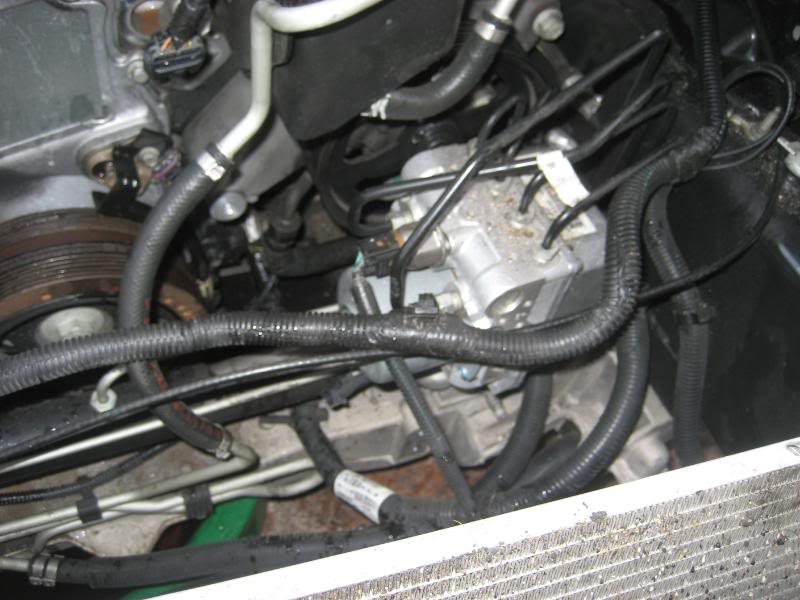
I took this pic ONLY to show the bracket orientation but the lines remain on the top, no need to touch them.
What is the exact problem you're having?
My 6th pic from the bottom going up shows the rack slid out with those lines attached.
Last edited by JayplaySS2; 05-29-2011 at 12:33 AM.
05-29-2011, 10:36 AM
#4
Drifting

Great post Jason!
Very excited to hear about your results,, are you installing an UD pulley? if so, which one?
Back home now...
Thanks,
John
Very excited to hear about your results,, are you installing an UD pulley? if so, which one?
Back home now...
Thanks,
John
05-29-2011, 11:34 AM
#5
Melting Slicks
Thread Starter
This thread feels like a waste of time but hell, I started it already-

I'm only installing the springs and timing cover, ud pulley and rack back on, I'm lazy today, I can feel it
05-29-2011, 11:42 AM
#6
Le Mans Master
I am very interested to see what that cam dyno's.
When do you think it will be tuned / dyno'd?
Great Work, and thanks for sharing.
When do you think it will be tuned / dyno'd?
Great Work, and thanks for sharing.
05-29-2011, 12:11 PM
#7
Melting Slicks
Thread Starter
05-29-2011, 12:34 PM
#9
Le Mans Master
As I'm about to pull the rack later today, your timing/thread is perfect!
 05-29-2011, 02:31 PM
#11


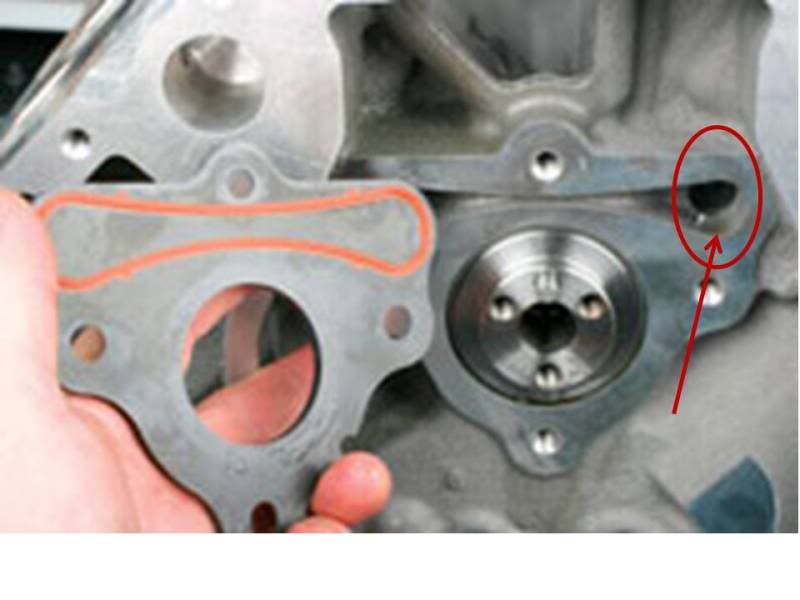
If after spinning the cam to raise the lifters you put a 5/16" wood dowel in each of these two holes under the cam thrust plate there is ZERO chance of a lifter falling in on you.
The following users liked this post:
rc51racer (04-27-2020)
05-29-2011, 02:51 PM
#12
Drifting
Hope you had a good time here buddy. I do have the UD pulley, it's a 25% and i believe it's and ASP but when I install it later today, I'll verity and include it on the tread.
This thread feels like a waste of time but hell, I started it already-
I'm only installing the springs and timing cover, ud pulley and rack back on, I'm lazy today, I can feel it
This thread feels like a waste of time but hell, I started it already-
I'm only installing the springs and timing cover, ud pulley and rack back on, I'm lazy today, I can feel it
This is a great thread and will help many I'm certain, several friends here in STL are talking about getting cams right now.
Looking forward to your next update!
05-29-2011, 02:54 PM
#13
Melting Slicks
Thread Starter
100% correct Motorhead, I'm glad you searched for that. I only used the dowels once on my 99 SS camaro and I didn't like using them.
The GM tool is the safest way for sure but I've personally found on (8-9 LS in car cam installs) that if it's less than 70-80K, the lifter cups work just as intended and I've never had a problem but the dowels would be safe insurance of not having to remove a head and dive into the engine with a magnet and a spot light-
The GM tool is the safest way for sure but I've personally found on (8-9 LS in car cam installs) that if it's less than 70-80K, the lifter cups work just as intended and I've never had a problem but the dowels would be safe insurance of not having to remove a head and dive into the engine with a magnet and a spot light-
05-29-2011, 03:55 PM
#14
Another tidbit if you are doing the job solo...if you unsnap the condenser line from the clip on the passenger side fenderwell you can hinge the entire condenser up and lay it over on top of the intake manifold to get it out of the way. You'll want to slip a trash bag over the condenser though as it is often full of trash.
The following users liked this post:
rc51racer (04-27-2020)
 05-29-2011, 09:25 PM
#16
Melting Slicks
Thread Starter
I can see the light now Updated pics from today.
I'll fire it up tomorrow then tune as soon as HP sales can do it
Joe, I have a drain bucket so I'm not sure how much you loose but it's not much, a couple gallons max..?
Then you loose a little power steering fluid moving the rack, very, very little.
Updated pics from today.I'll fire it up tomorrow then tune as soon as HP sales can do it
Joe, I have a drain bucket so I'm not sure how much you loose but it's not much, a couple gallons max..?
Then you loose a little power steering fluid moving the rack, very, very little.
05-29-2011, 09:42 PM
#17
Instructor


Do you have to take the condenser shroud out? That thing is a PITA? I'm about to tackle a cam swap and want to figure everything out before I attempt this. First time doing it on a vette.
05-29-2011, 10:47 PM
#18
Melting Slicks
Thread Starter
Just remove the plastic push pins and then disconnect the sensors and yank it right up and out. If it makes you feel better, it goes in easier.

 05-30-2011, 02:59 PM
#20
Melting Slicks
Thread Starter
Done
I'll get everything posted later, including the start up vid. It started on the 1st try and the only issue I have run into is the correct length for the UD pulley, damn it. Still researching since the ones I bought were not right, dang it-
I'll get everything posted later, including the start up vid. It started on the 1st try and the only issue I have run into is the correct length for the UD pulley, damn it. Still researching since the ones I bought were not right, dang it-