
C6 alternator fix
 03-24-2015, 12:38 AM
#1
Race Director

Thread Starter


Was having a slight problems with my alternator, being that is was only charging to around 13.6 amps most of the time, instead of holding a steady 14.2 instead. Even after a long drive, and putting it on the tender, the tender would still charge the battery up for hours, meaning the the alternator was not fully charging the battery, even after a long drive.
So figured since I need to do a write up on how to change the brushes in a OEM, figure at least time to strip my down for at least a good cleaning.
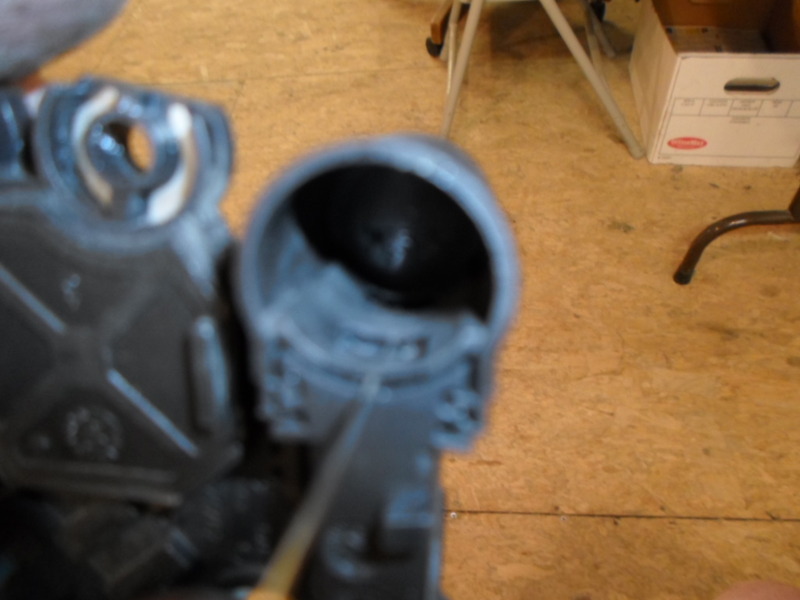
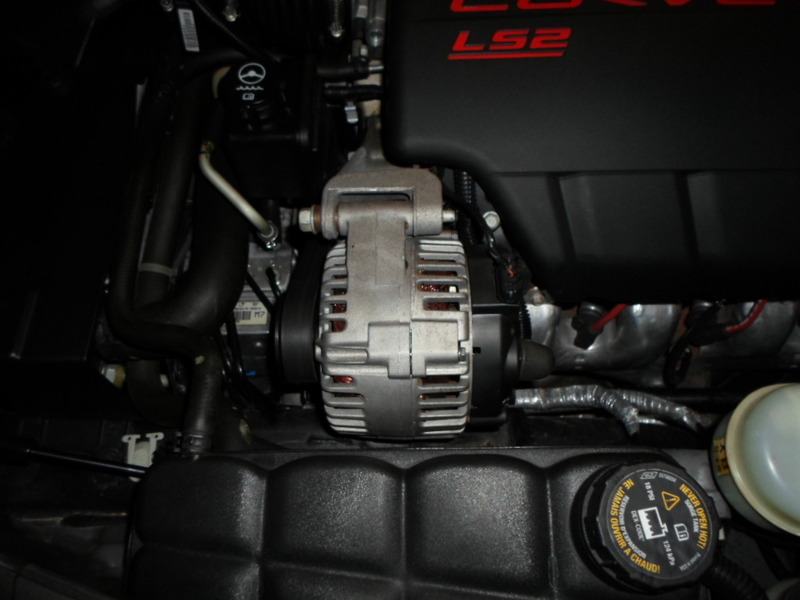
First off, the quick way to get the alternator out once you have removed the belt, and unbolted the alternator, turn it sideways with the pulley straight up, and you can sneak it sideways up between the bracket and the radiator tank (it is a slight wedge so take your time).
Now with the alternator sitting on your bench, slowly work around the bottom of the back black cover and lift the cover off the 3 studs that hold the back cover on.
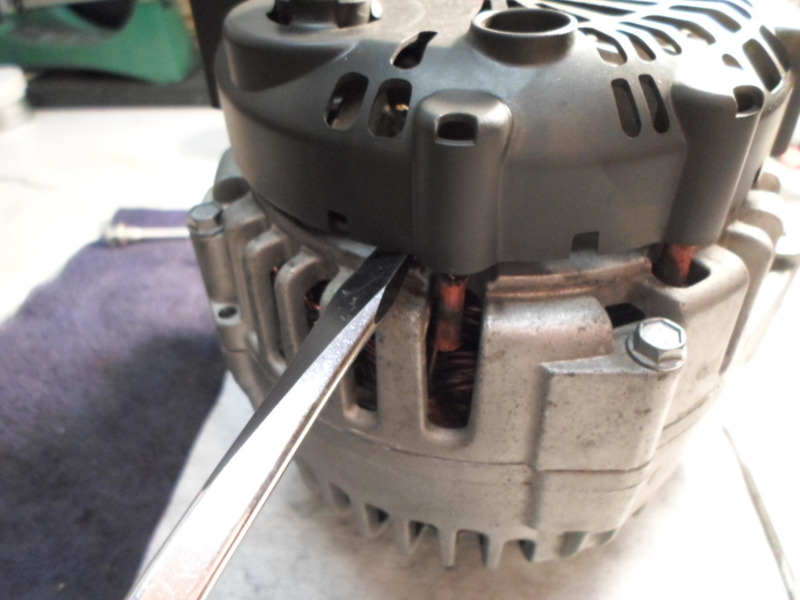
The inside of the back cover has small plastic tabs that will lock on to the stud threads, and you just need to work slowly to raise the cover tabs up off the stud threads by working around the cover all the way around a few times.
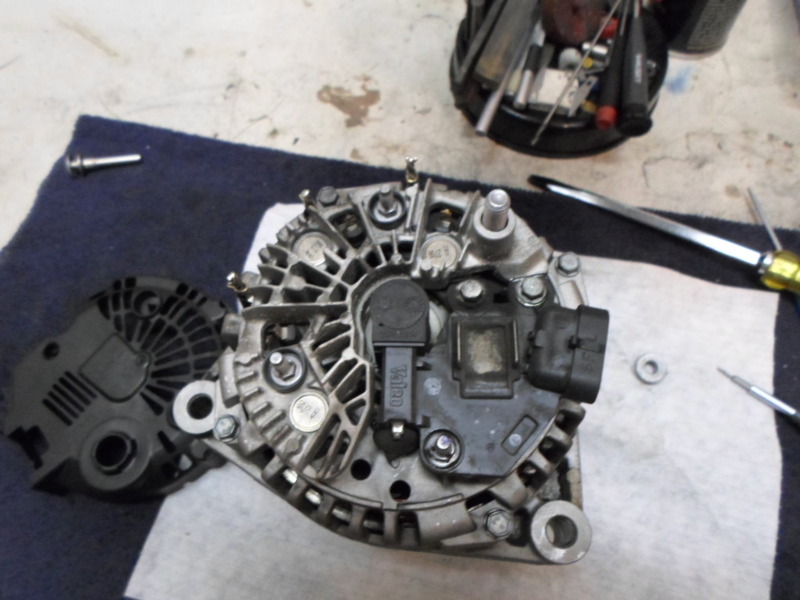
Once you have the cover removed( again, slowly working the plastic cover tabs off the stud), we are ready to begin, so break out the 7mm socket to remove the brushing housing/voltage regulator.

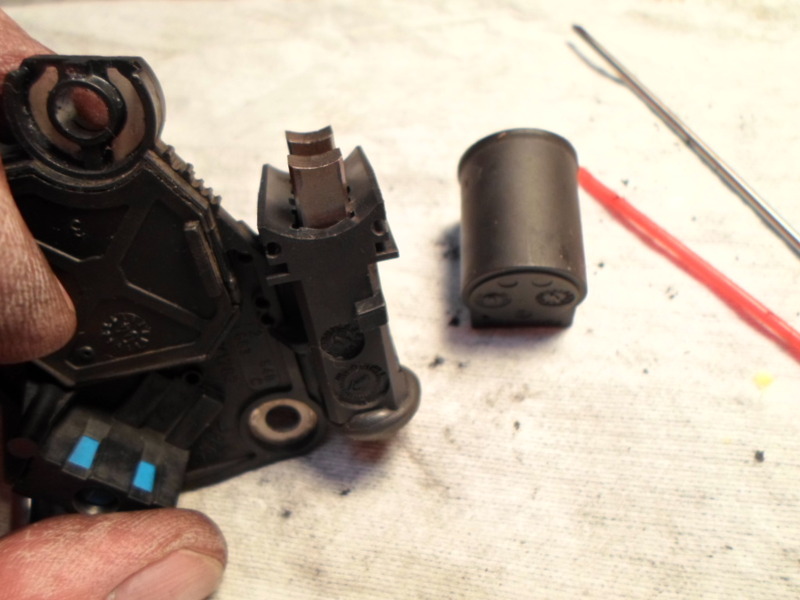
With the brushing/voltage regulator off the unit, now lets get down to do a bit of cleaning, but first lets pull the brushing cap off the brushing housing.
On the link that I will post later in the post, the op kind of goes savage and just cuts out the center brush cap pieces so he can just slide the cover off. I like the idea of the cover adding a bit of brushing channel covers, so Press the Brushes in, slide a pin down the to hold the brushing in the channels, then slide the cap off the housing with the center piece still in place.
Brushing cover off, now time to figure out if the brushing are worn out of not. In my case, there is still plenty of life on the brushes, but if they need to be replaced, next is the low down for that.
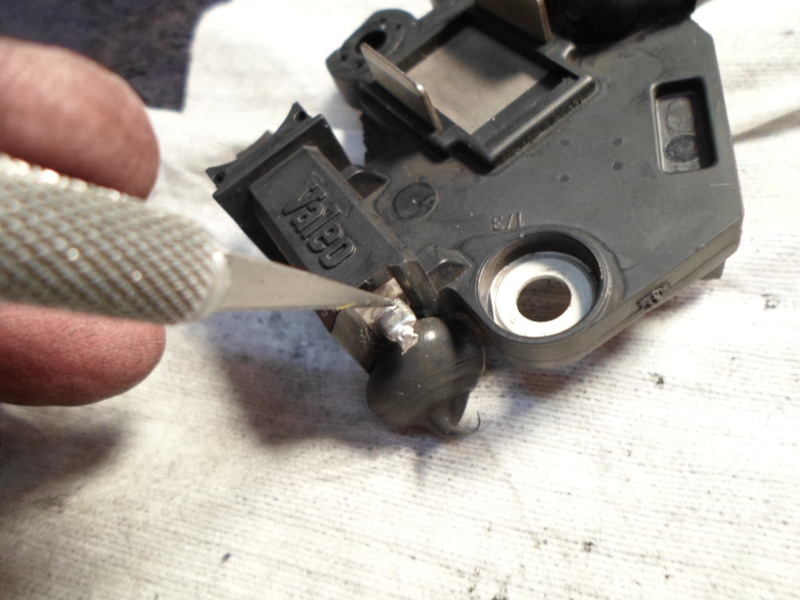
The brushes wires are first crimp to a C type retainers, then their cables are soldered to crimp terminal. You can de-solder, and work the C crimp open (while it still blazing hot) or you can just cut the C crimp part off, then de-solder to remove the brushes cable and springs from the housing. Again, in the below video, it will walk you through now to cut the Crimp tabs, de-solder the old brush cables, and how to solder in the new brushes. Also, below the video I will post the link on the size of the brushes, and at least where to buy them abroad.

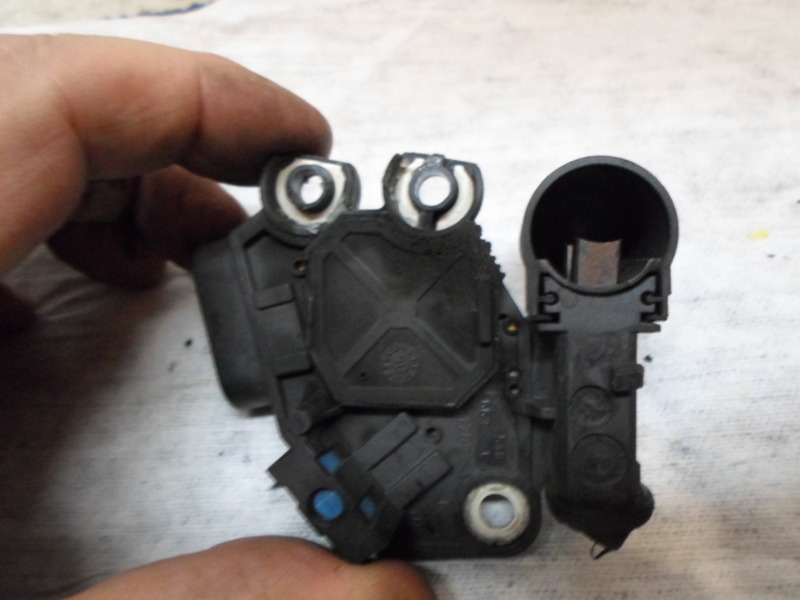
Start with cleaning as much as you can with a spray can of electrical contract cleaner. Also, make sure to get the Brushes in their channels as clean as you can as well. Once you have finished with the contractor cleaner, time to clean up the aluminum mating surfaces of the alternator housing tabs to where it going to be mating to the brush housing/voltage regulator contacts. On the alternator, I have Q-tip on the area's that just need to be hit/cleaned with 400 wet/dry sandpaper, so knock off the old oxide skin of the aluminum stubs so you get a clean contact. On the regulator, the same thing, and as you can see, starting to apply dielectric grease to the cleaned contacts areas as well.
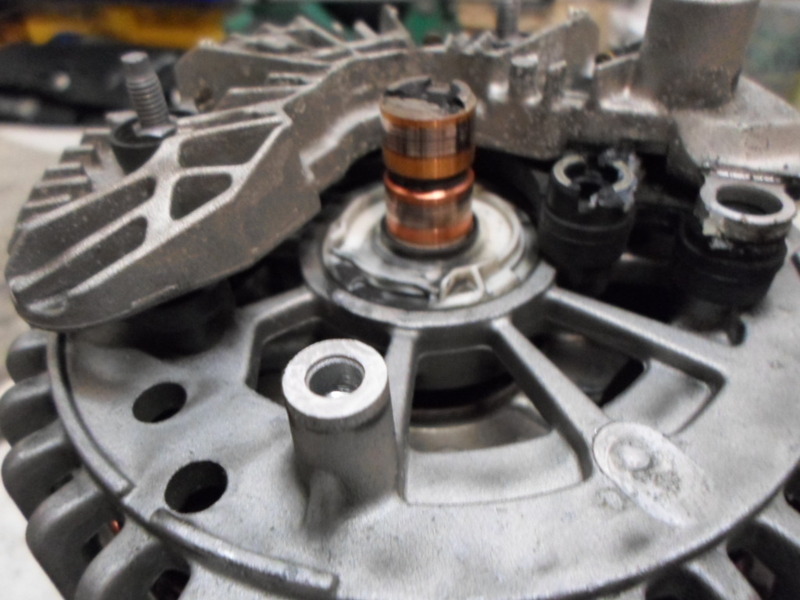
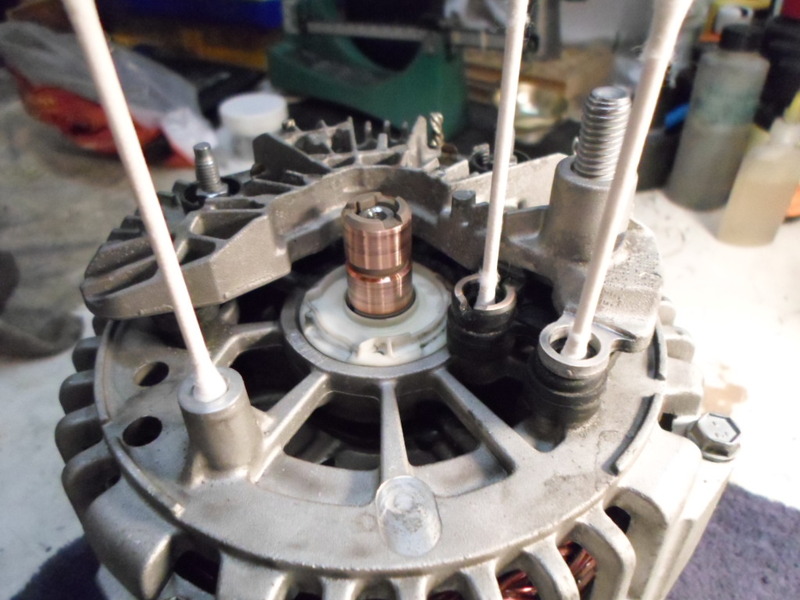
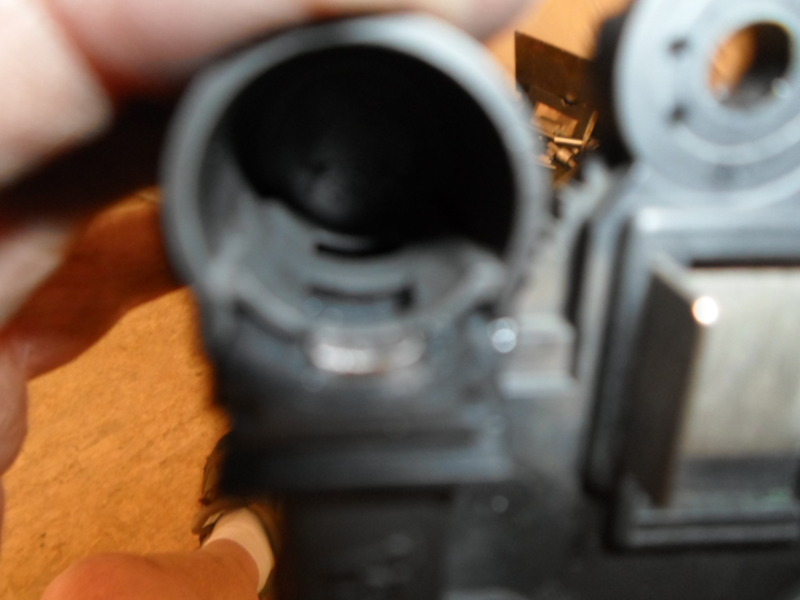
As for my Commutator (what the brushes will ride against), not that bad, so just turned the pulley by hand to clean then with piece of scotch brite pad, and some electrical spray cleaner. If yours are center grooved by the brushes, not the end of the world, and just make sure that the bronze is still continuous all the way around in the grove (no plastic showing where the bronze has been worn down to the plastic below) and just clean inside the groove area.
Here is the reason that I leave the inner slots in the brushing cover in place. It allows me to slide the cover down while pushing in the first brush, then slip it down while holding the other Brush so the housing is going to hold the brushes in the channel while reinstall the brush housing/voltage regulator.
So to recap, brush channels did need a good cleaning to clear out the brush dust in them, as well as the rest of the parts, but more importation, was cleaning the contact of the alternator housing to the voltage regulator contact points. Aluminum will skin oxidize over time and let just say that the amount of dielectric grease the factory uses when assembly the parts to prevent such, very, very lacking instead.
So if your alternator is loosing charge when it spins up higher in the RPM's, chances are the brushes are worn down and need to be replaced.
If your voltage is just lower instead, then chances are is due to the
aluminum skin just oxidizing at the contact points to the brushing housing/regulator, and they need to be cleaned (and use Dielectric grease on the contact points to prevent the aluminum from oxidizing skinning up quickly again.
So the alternator cleaned up and back in the car, holding steady at 14.2volts at idle now.
Here is the video for replacing the brushes if needed,
Note, he does not clean up the contact points, nor did he use dielectric grease on the contact points either (bad move on both parts)
Replacement brushes source, or at least the size of the brushes if you wan to pick them up in the states.
http://www.ebay.ie/itm/150797624638?ssPageName=STRK:MESELX:IT&_ trksid=p3984.m1555.l2649#ht_1519wt_1102
So figured since I need to do a write up on how to change the brushes in a OEM, figure at least time to strip my down for at least a good cleaning.
First off, the quick way to get the alternator out once you have removed the belt, and unbolted the alternator, turn it sideways with the pulley straight up, and you can sneak it sideways up between the bracket and the radiator tank (it is a slight wedge so take your time).
Now with the alternator sitting on your bench, slowly work around the bottom of the back black cover and lift the cover off the 3 studs that hold the back cover on.
The inside of the back cover has small plastic tabs that will lock on to the stud threads, and you just need to work slowly to raise the cover tabs up off the stud threads by working around the cover all the way around a few times.
Once you have the cover removed( again, slowly working the plastic cover tabs off the stud), we are ready to begin, so break out the 7mm socket to remove the brushing housing/voltage regulator.
With the brushing/voltage regulator off the unit, now lets get down to do a bit of cleaning, but first lets pull the brushing cap off the brushing housing.
On the link that I will post later in the post, the op kind of goes savage and just cuts out the center brush cap pieces so he can just slide the cover off. I like the idea of the cover adding a bit of brushing channel covers, so Press the Brushes in, slide a pin down the to hold the brushing in the channels, then slide the cap off the housing with the center piece still in place.
Brushing cover off, now time to figure out if the brushing are worn out of not. In my case, there is still plenty of life on the brushes, but if they need to be replaced, next is the low down for that.
The brushes wires are first crimp to a C type retainers, then their cables are soldered to crimp terminal. You can de-solder, and work the C crimp open (while it still blazing hot) or you can just cut the C crimp part off, then de-solder to remove the brushes cable and springs from the housing. Again, in the below video, it will walk you through now to cut the Crimp tabs, de-solder the old brush cables, and how to solder in the new brushes. Also, below the video I will post the link on the size of the brushes, and at least where to buy them abroad.
Start with cleaning as much as you can with a spray can of electrical contract cleaner. Also, make sure to get the Brushes in their channels as clean as you can as well. Once you have finished with the contractor cleaner, time to clean up the aluminum mating surfaces of the alternator housing tabs to where it going to be mating to the brush housing/voltage regulator contacts. On the alternator, I have Q-tip on the area's that just need to be hit/cleaned with 400 wet/dry sandpaper, so knock off the old oxide skin of the aluminum stubs so you get a clean contact. On the regulator, the same thing, and as you can see, starting to apply dielectric grease to the cleaned contacts areas as well.
As for my Commutator (what the brushes will ride against), not that bad, so just turned the pulley by hand to clean then with piece of scotch brite pad, and some electrical spray cleaner. If yours are center grooved by the brushes, not the end of the world, and just make sure that the bronze is still continuous all the way around in the grove (no plastic showing where the bronze has been worn down to the plastic below) and just clean inside the groove area.
Here is the reason that I leave the inner slots in the brushing cover in place. It allows me to slide the cover down while pushing in the first brush, then slip it down while holding the other Brush so the housing is going to hold the brushes in the channel while reinstall the brush housing/voltage regulator.
So to recap, brush channels did need a good cleaning to clear out the brush dust in them, as well as the rest of the parts, but more importation, was cleaning the contact of the alternator housing to the voltage regulator contact points. Aluminum will skin oxidize over time and let just say that the amount of dielectric grease the factory uses when assembly the parts to prevent such, very, very lacking instead.
So if your alternator is loosing charge when it spins up higher in the RPM's, chances are the brushes are worn down and need to be replaced.
If your voltage is just lower instead, then chances are is due to the
aluminum skin just oxidizing at the contact points to the brushing housing/regulator, and they need to be cleaned (and use Dielectric grease on the contact points to prevent the aluminum from oxidizing skinning up quickly again.
So the alternator cleaned up and back in the car, holding steady at 14.2volts at idle now.
Here is the video for replacing the brushes if needed,
Note, he does not clean up the contact points, nor did he use dielectric grease on the contact points either (bad move on both parts)
Replacement brushes source, or at least the size of the brushes if you wan to pick them up in the states.
http://www.ebay.ie/itm/150797624638?ssPageName=STRK:MESELX:IT&_ trksid=p3984.m1555.l2649#ht_1519wt_1102
Last edited by Dano523; 09-29-2018 at 12:55 AM.

The following 7 users liked this post by Dano523:
72greg (12-01-2020),
ClashBandicoot (11-03-2015),
EZ SPEED (01-13-2016),
Joe_G (11-03-2015),
joliett (09-23-2020),
and 2 others liked this post.
 03-24-2015, 01:05 AM
#3
Race Director
Member Since: Sep 2007
Location: Peoria/Phoenix AZ
Posts: 16,555
Received 2,058 Likes
on
1,503 Posts
C6 of Year Finalist (performance mods) 2019

First off, the quick way to get the alternator out once you have removed the belt, and unbolted the alternator, tune it sideways with the pulley straight up, and you can sneak it sideways up between the bracket and the radiator tank (it is a slight wedge so take your time.

Just a quick tip though. It's a lot easier when removing the alternator from the car after the belt is off, the wiring disconnected, and the bolts out, to slip the alternator initially towards the surge tank and then directly towards the firewall. No turning, rotating, or juggling for space required.
03-24-2015, 01:55 AM
#4
Race Director
Thread Starter
Thanks for the cool write up with pics and video.
Just a quick tip though. It's a lot easier when removing the alternator from the car after the belt is off, the wiring disconnected, and the bolts out, to slip the alternator initially towards the surge tank and then directly towards the firewall. No turning, rotating, or juggling for space required.
Just a quick tip though. It's a lot easier when removing the alternator from the car after the belt is off, the wiring disconnected, and the bolts out, to slip the alternator initially towards the surge tank and then directly towards the firewall. No turning, rotating, or juggling for space required.
Not where you are all stock, since you have the rail cover to the right, and hoses to the left blocking you from going either way.
With just turning it pulley side straight up, it comes right out with only an every so slight rub on the tank.
So lets call it 3 mins to take it out (disconnect the negative battery cable, pop the belt, remove the plug and back positive wire, the two bolts that hold it to the bracket, and then rotation and up out of the car.
As for back in, have to add a extra mins, since pulled both battery terminal cables off the battery posts to give them and the posts a fresh coat of dielectric grease, then had to re-index the windows once the battery was reconnected/quick start up to make sure all was golden.
As for cleaning on the bench, even with taking pictures, about 10mins.
Note, sub taking photo's for swapping brushes, about the same time.
Last edited by Dano523; 08-05-2017 at 12:50 AM.
The following users liked this post:
joliett (09-23-2020)
03-24-2015, 11:35 AM
#6
Race Director
Member Since: Sep 2007
Location: Peoria/Phoenix AZ
Posts: 16,555
Received 2,058 Likes
on
1,503 Posts
C6 of Year Finalist (performance mods) 2019
 I forgot about the FRC, since mine have been off for 7 years.
03-24-2015, 05:36 PM
I forgot about the FRC, since mine have been off for 7 years.
03-24-2015, 05:36 PM
#7
Race Director
Thread Starter
No worries!!!!
Also took the vet for a long drive today since I need to pick up some tools/parts to wrench on the truck (read valve cover bolts where turning by hand, so explains my slight oil leak down the back of the motor).
Started the vet, and the voltage was 14.5 volts to quickly recharge the battery from starting it in about 5 mins. Once the battery was charged fully, the voltage dropped down to 14.2, then tested the alternator by turning every thing on that I could, and all be dammed, held steady at 14.2 volts even at idle!!!!
So cleaning the bushing channel and Commutator may help a touch, but pretty sure that the problem was just the contacts of the voltage regulator to the alternator contact points instead that was causing the 13.5 voltage.
So again, make sure to clean the contact rings on the regulator both sides, and make sure that you clean/gleam the alternator contact points before you dielectric grease to put the regulator/brush housing back on (Q tip marked areas).
Note, the alternator is pulling it's ground from the bracket bolted to the motor, so make sure to clean and grease both sides of the bolt mounting bolt channel eyelets before you mount it back in the bracket as well.
P.S, Side note, but we are in spring here, so just got a full tank of none E-10 93 in the Vet. Night and difference between summer and winter fuels here performance wise, plus the roads where even warm enough to get my winter beater tires still on the car to semi stick.
Last edited by Dano523; 03-24-2015 at 05:40 PM.
11-03-2015, 06:18 AM
#8
Tech Contributor

Ran across this trying to help another member diagnose alternator problems. Great thread Dano523! Thanks for taking the time to create it.
The following users liked this post:
ClashBandicoot (11-03-2015)
11-03-2015, 11:58 AM
#9

 07-20-2017, 10:52 PM
#12
Race Director
Thread Starter
Planned to get around to it this weekend if I have time.
I used to use Photo bucket before they want to extort, pulled all my photo's down from and deleted the account, and now need to find another site to third part host them (thinking imgur, unless I can find a better hosting site instead).
07-31-2017, 03:33 PM
#13
Hello, I want to personally thank Dano523, as I contacted him on an alternator problem with my C6, he took his time and called me back leaving a message with very specific instructions that I was able to follow and diagnose the problem!!!!
Thanks a lot Dano523!!!!!
Thanks a lot Dano523!!!!!

 08-05-2017, 12:40 AM
#15
Race Director
Thread Starter
Lost a few photo's but still gives you the general idea how to pull it apart and clean the parts.
Hence the contact points on the alternator body parts (Q tip points) , against the contact points on the voltage regulator surfaces have to be clean and shiny before you dielectric grease, so both they and the bushings to the slip rings have full clean contacts.
Note, do not put any dielectric grease on the either the slip ring surfaces or the brushes. Leave them bone dry.
Attachment 48331674
Attachment 48341199
So long as the brushes are protruding out the at least half this distance out, they are still good and just need to pull the hood so you can get in there with spray electrical cleaner to get the dust out of the housing so the bushes can move freely under there spring tension.
Note, you can tell when the brushes have worn too short or binding in the hood housing/not making clean contact with the slip ring constantly, since you will have black marks on the slip ring from the bushing that is too short and arcing instead.
Attachment 48331675
Last edited by Dano523; 08-05-2017 at 12:52 AM.


