
[Z06] Pictures of my interior mods!
 07-18-2011, 07:44 PM
#1
Safety Car

Thread Starter

UPDATE: Here is part 2!
http://forums.corvetteforum.com/c6-c...-part-2-a.html
Backstory:
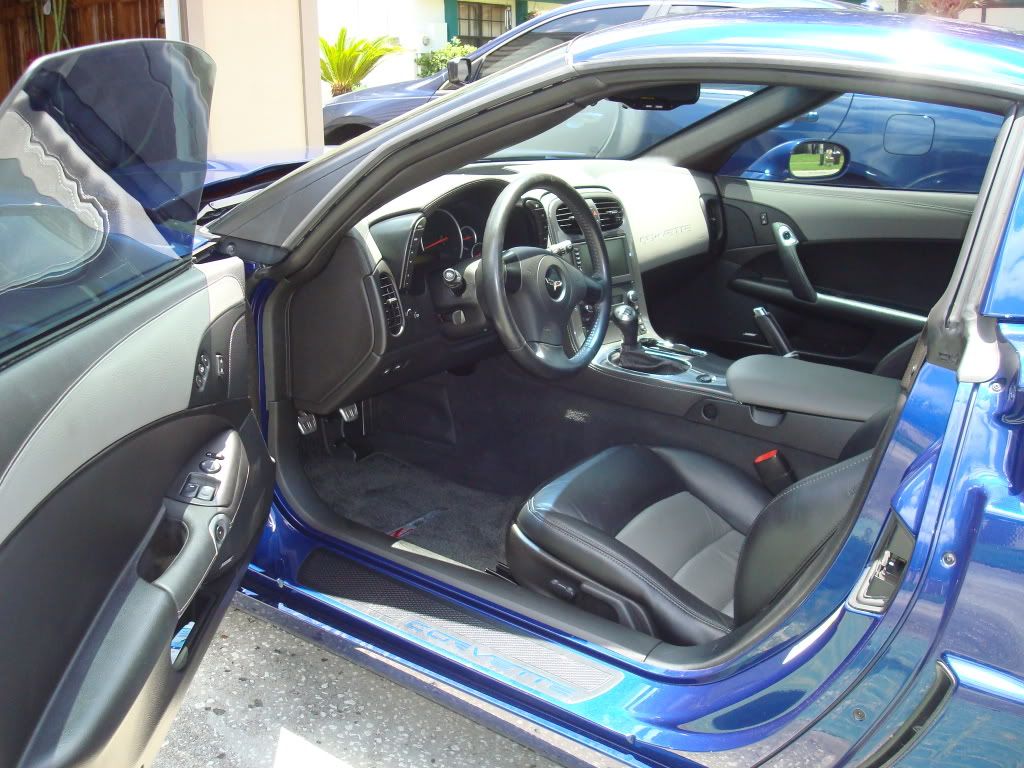
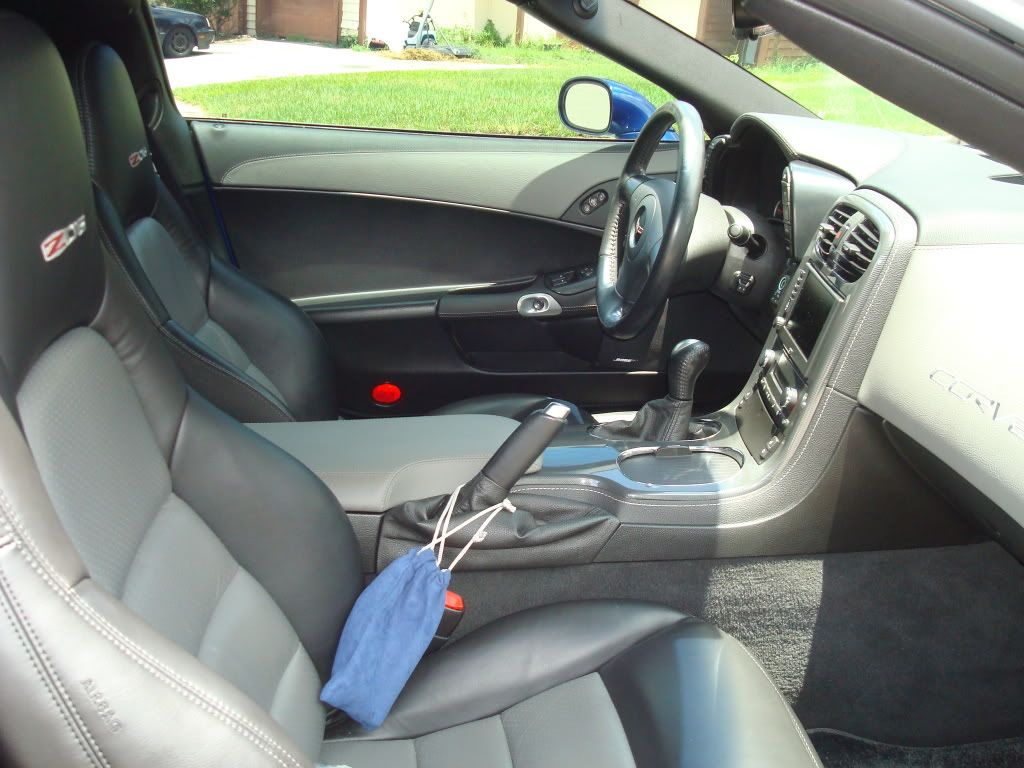
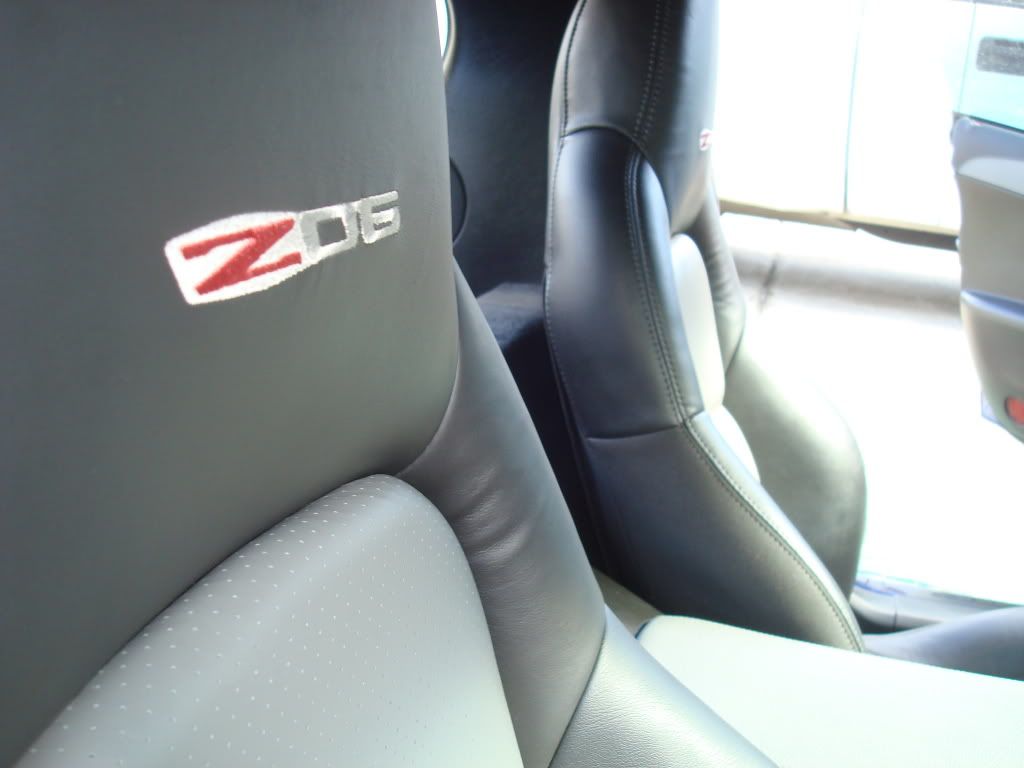
Since well before I purchased my Z06, I’ve always had a vision of what I wanted it to be and how much I was willing to spend. I knew I wanted a bone stock Lemans Blue Z06 with a 3lz ebony/dark titanium interior, and full ZR1 ground effects kit. The budget was $40,000 or just a little over. I can happily say, I came really close to that goal, and the hard part (the interior) is complete…for the most part.
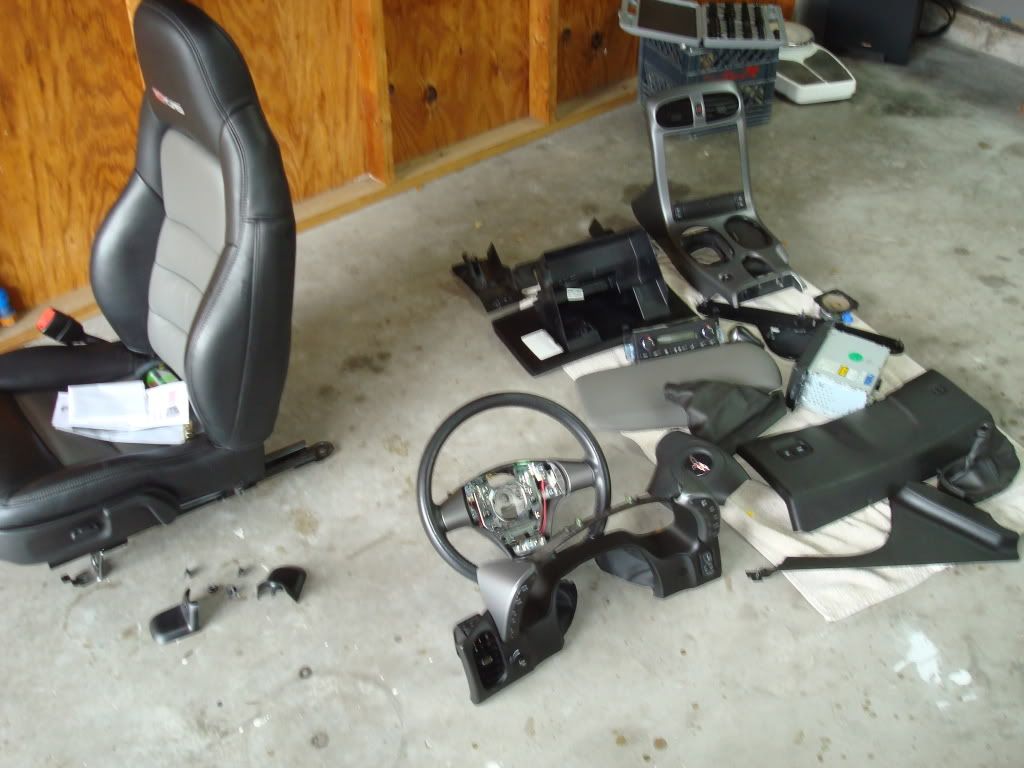
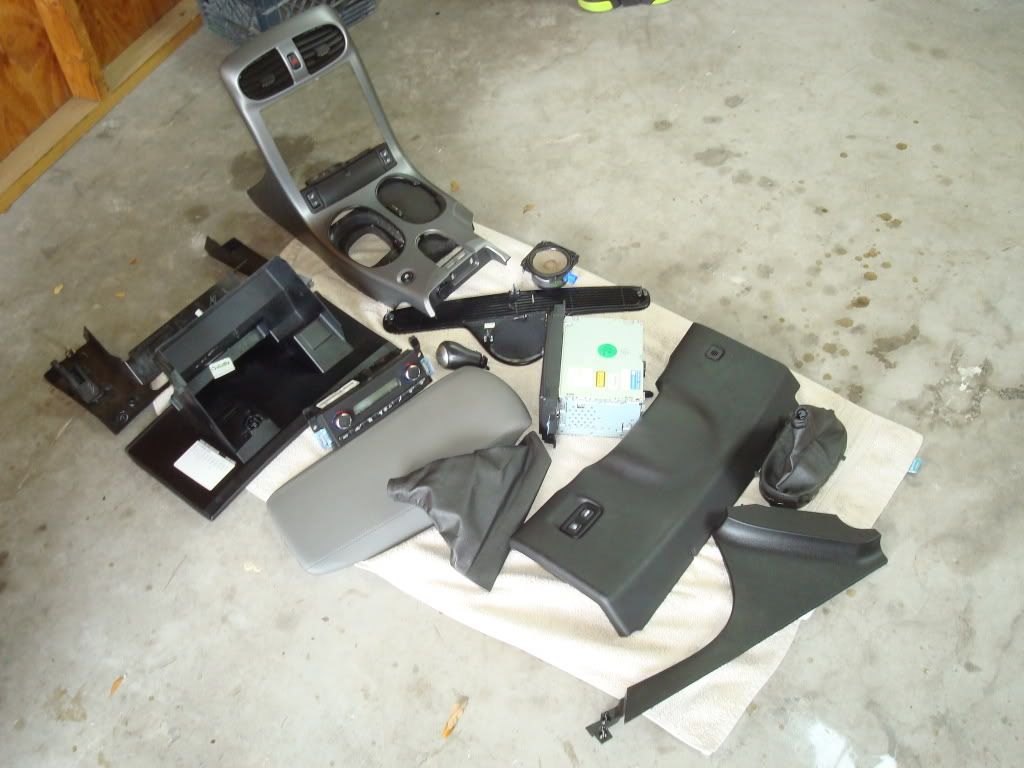
To make this all happen for around $40,000 took some serious luck, bargaining and meeting the right people. The first thing I did was of course buy the car. I bought it on here for $33,500. I took a chance, but I can without a doubt say, this was the deal of the century. This car runs so strong. Once I had the car, I didn’t waste any time. I immediately started focusing on the interior, acquiring the parts I needed. What I needed was:
1 dash
2 door panels
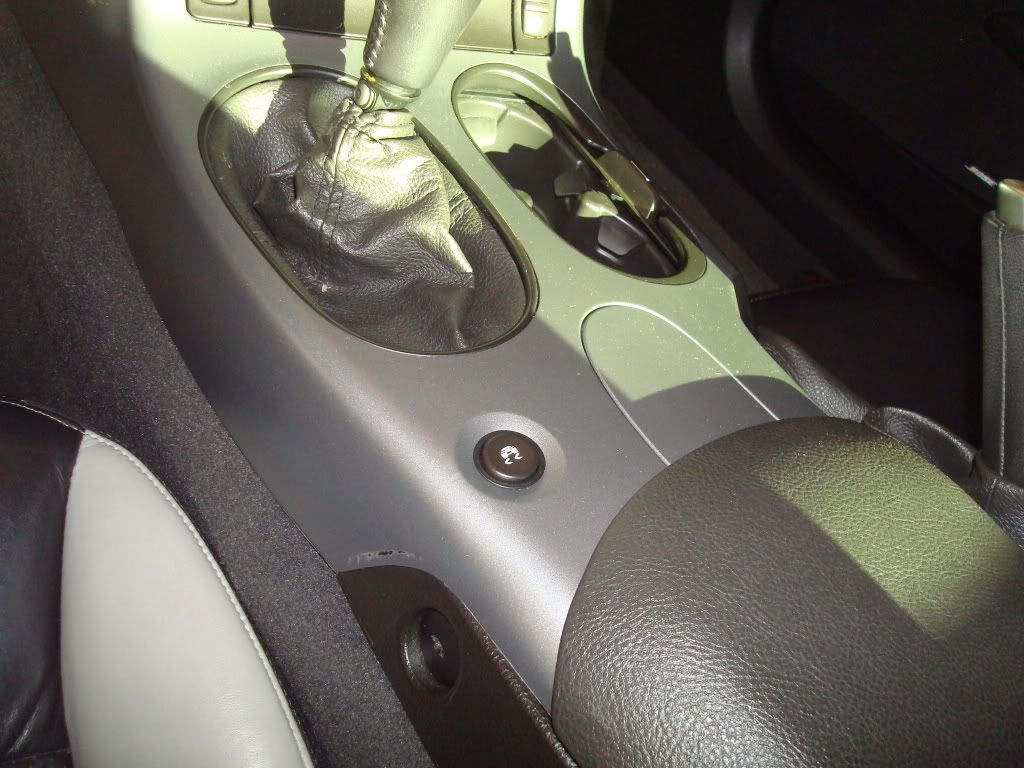
1 center console
1 center console lid
2 seat covers
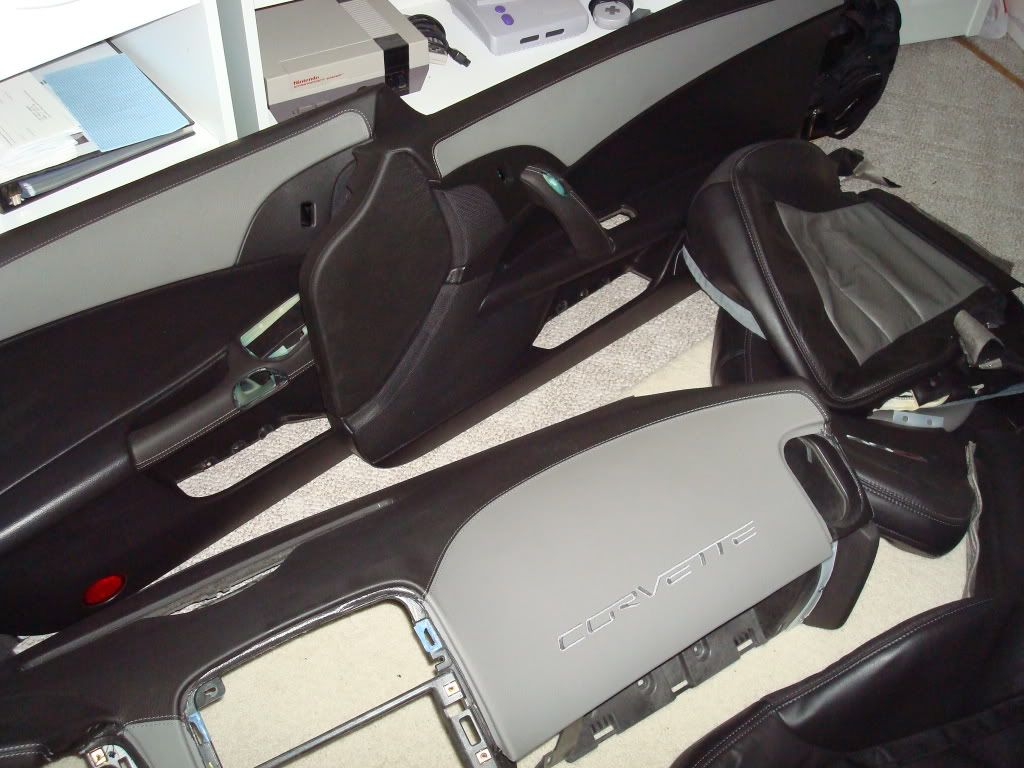
All had to be in the ebony/dark titanium color scheme. I looked at buying these parts new but that came out to be over $5,000. I hit a stroke of luck when I was contacted by a forum vender here who works on interiors and he had all the parts I was looking for. Total cost for all came out to be $3,200 shipped to my door! He even bought back my old panels and dash for $1,100.
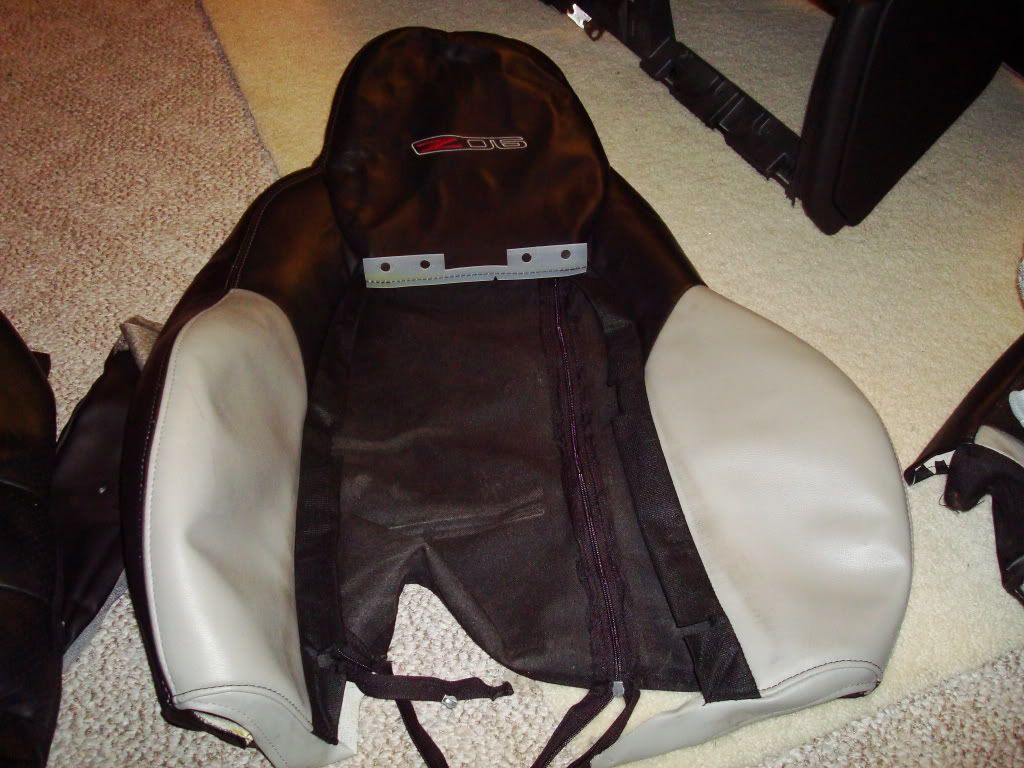
Aside from the seats, I did all the install work myself with a little labor help from my dad when doing the dash. Total labor costs for the seats to be re-skinned and rebuilt up with new padding and foam was $200. I sold my old seat skins for $125 so it all evened out quite nice.
Stock interior:
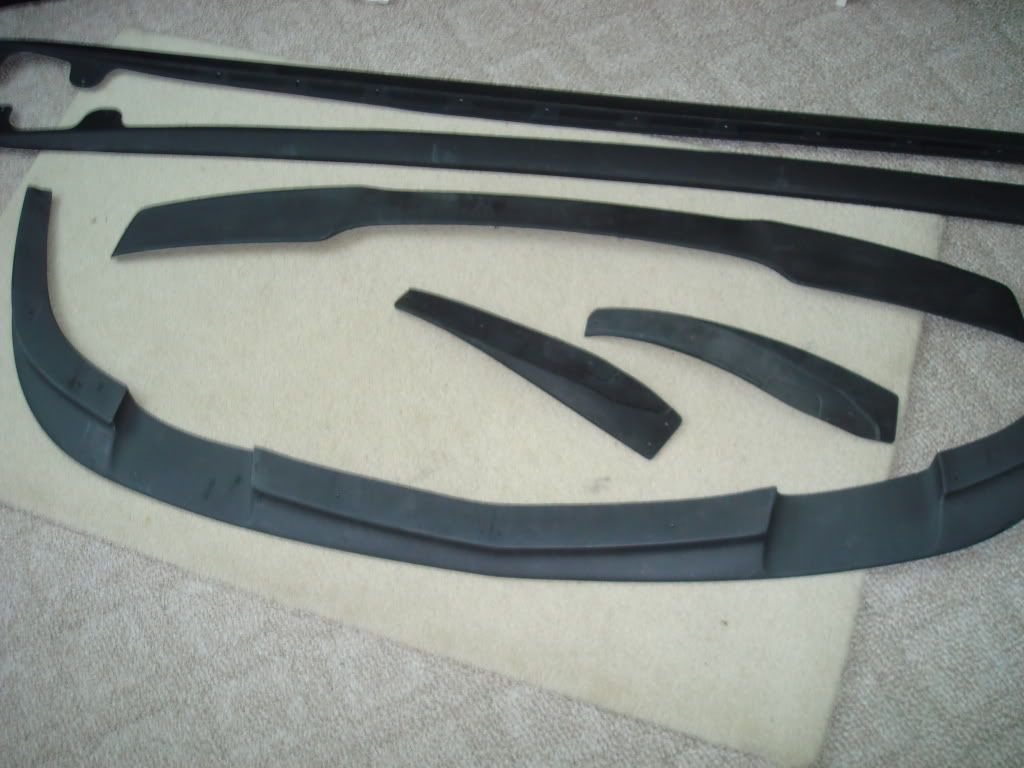
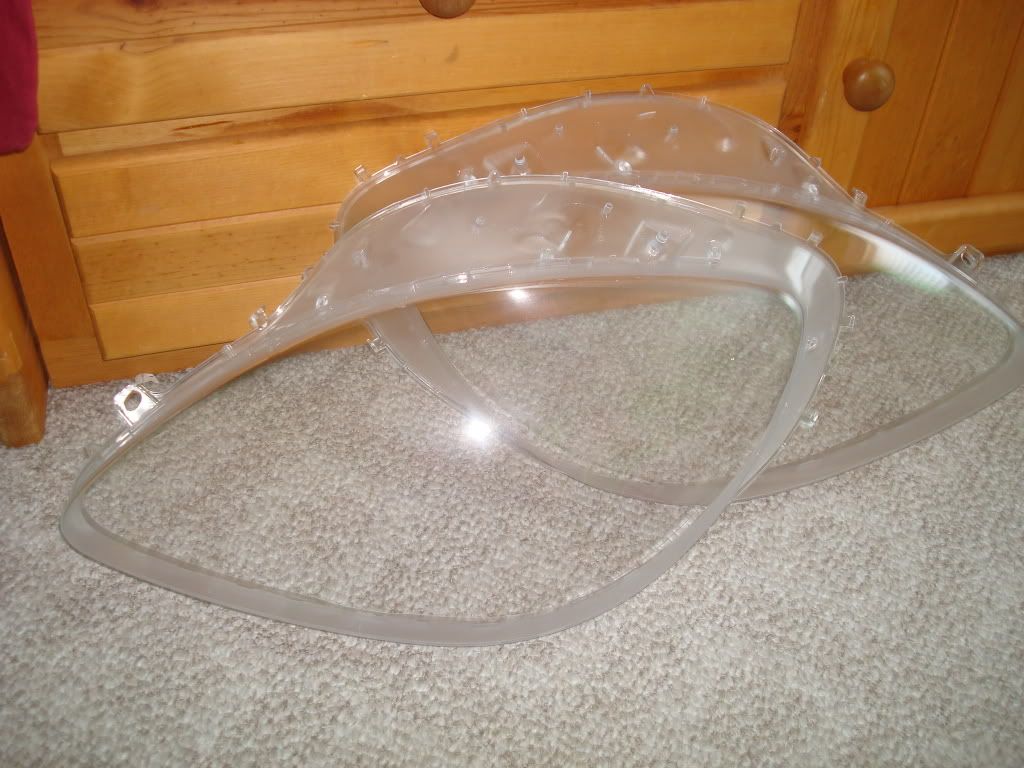
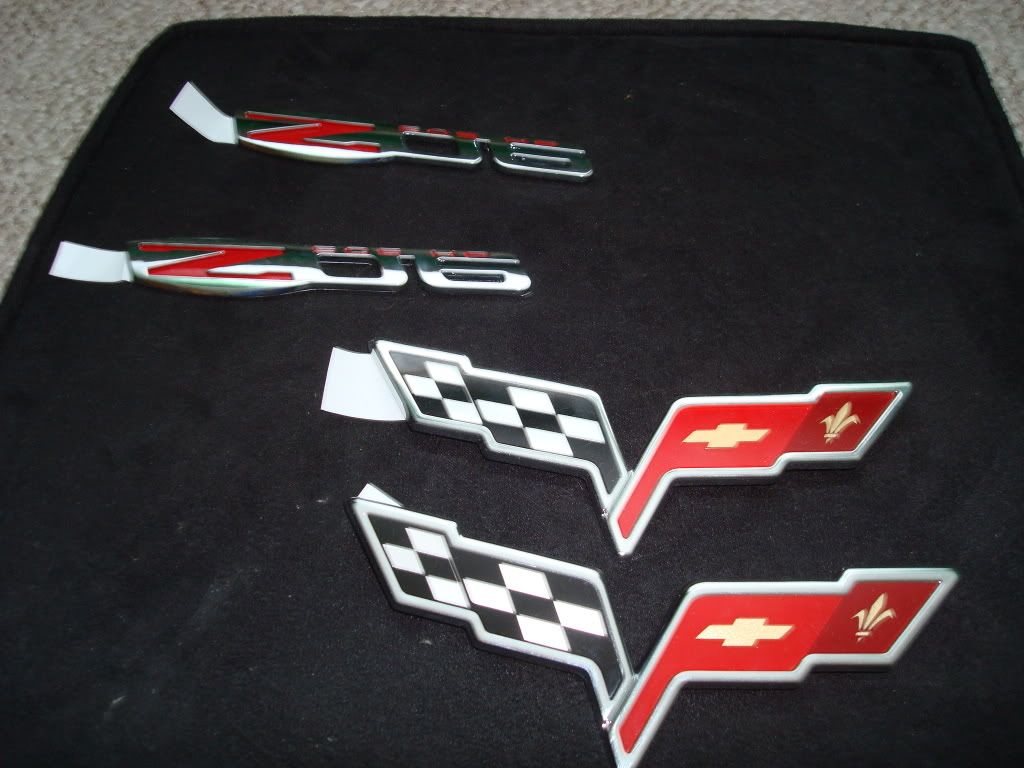
As for the exterior, well my car was, and is quite “beat up”. It has a plethora of rock chips, bug splatter, paint chips and a ton of scratches and scuffs. Thankfully, my dad paints cars for a living and as soon as he has a break in his schedule, the car will be headed to the shop for a full repaint, same color. Labor is free of course, the paint I’ve been told should be around $250-400. I also had to buy new headlight lenses, emblems and of course, the ZR1 ground effects. Total cost for all of these parts came out of be around $900. That includes:
2 new lenses
1 ZR1 splitter
1 ZR1 spoiler
2 ZR1 side skirts w/mudflaps
All new 2009 style chrome emblems
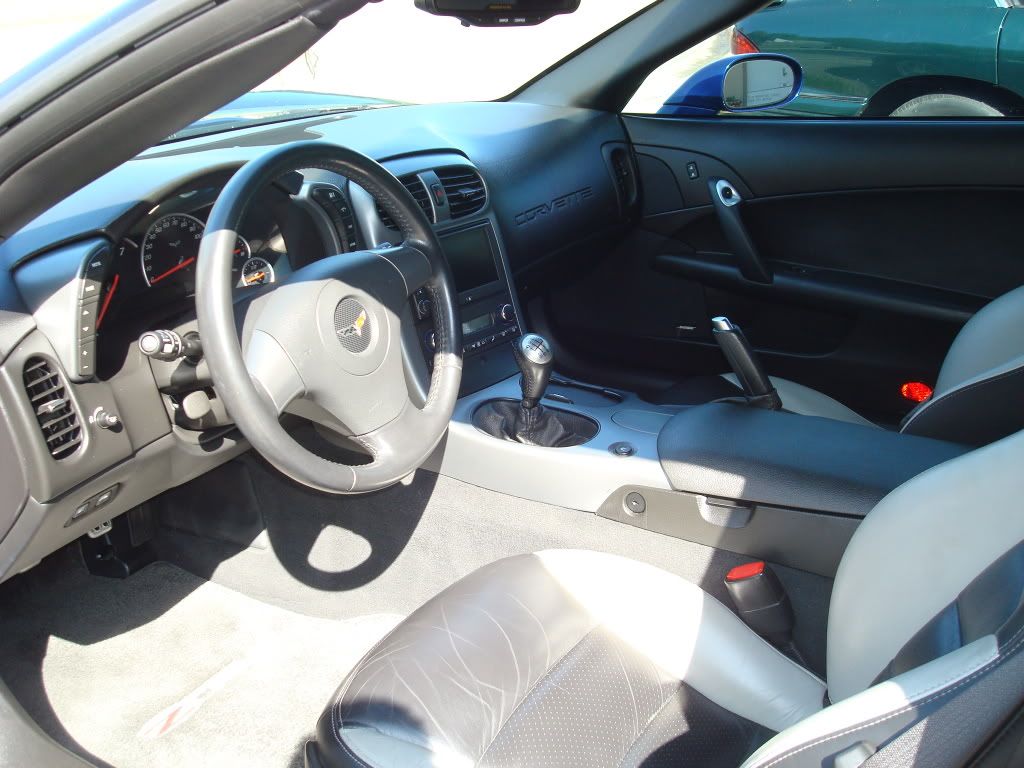
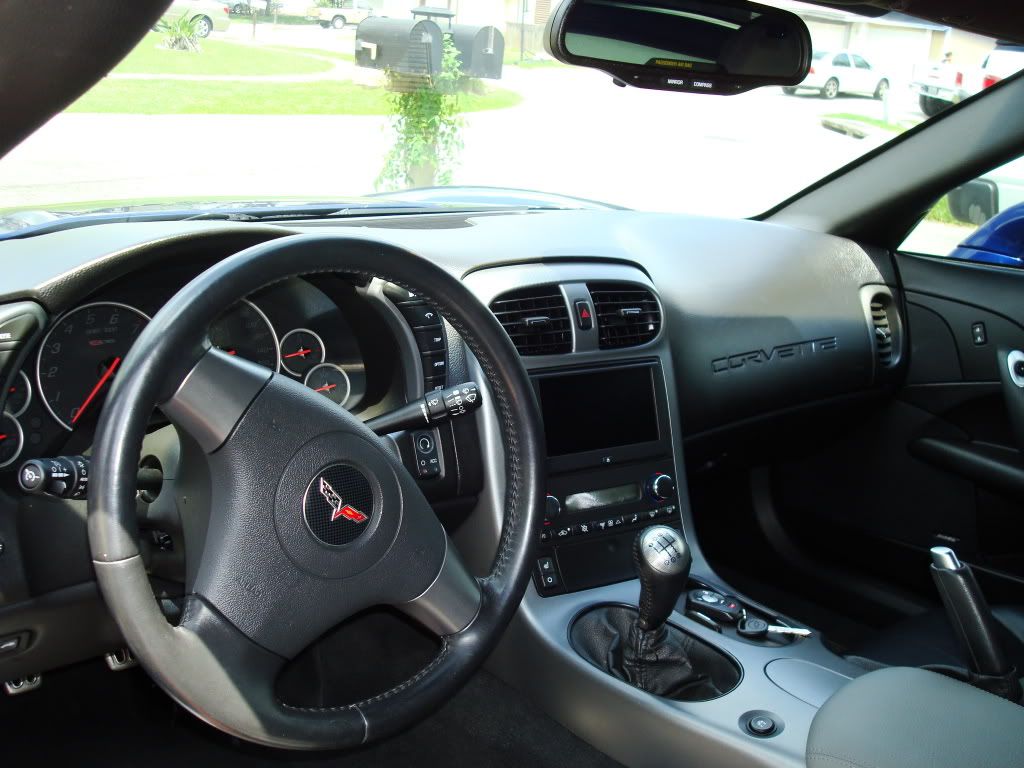
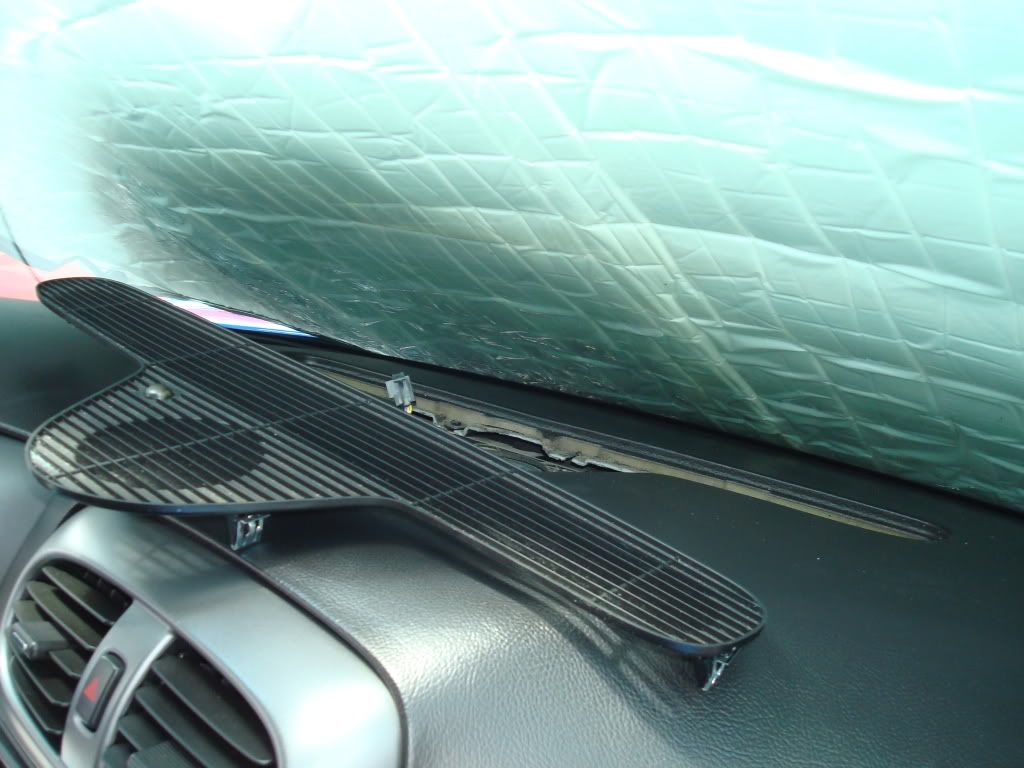
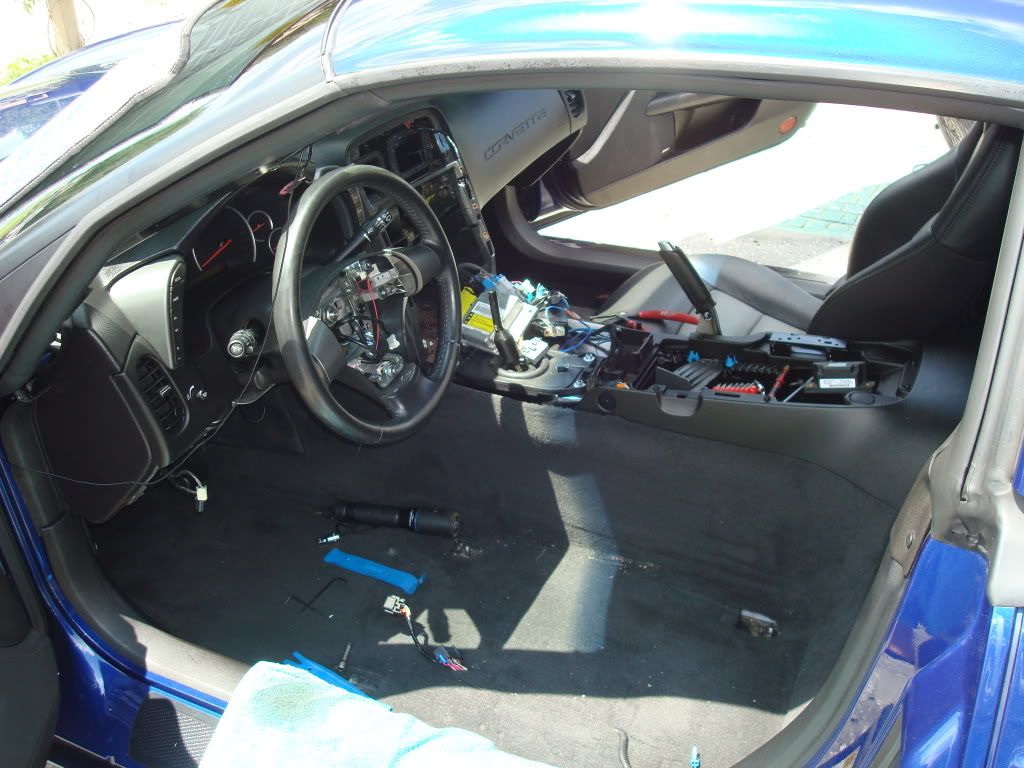
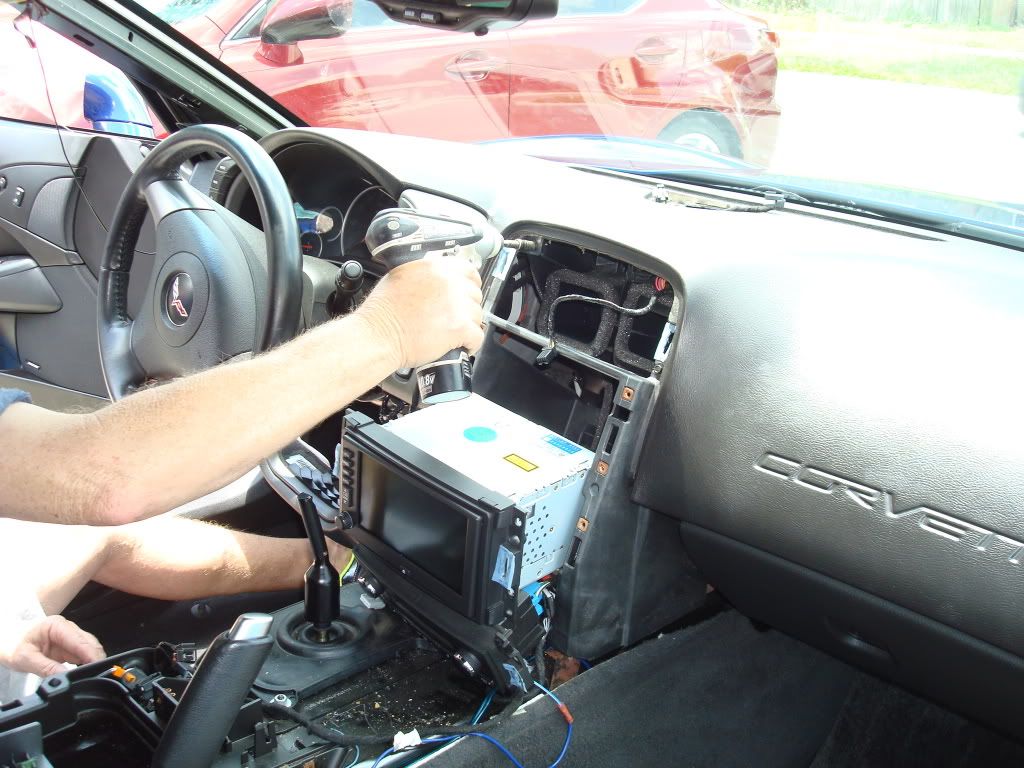
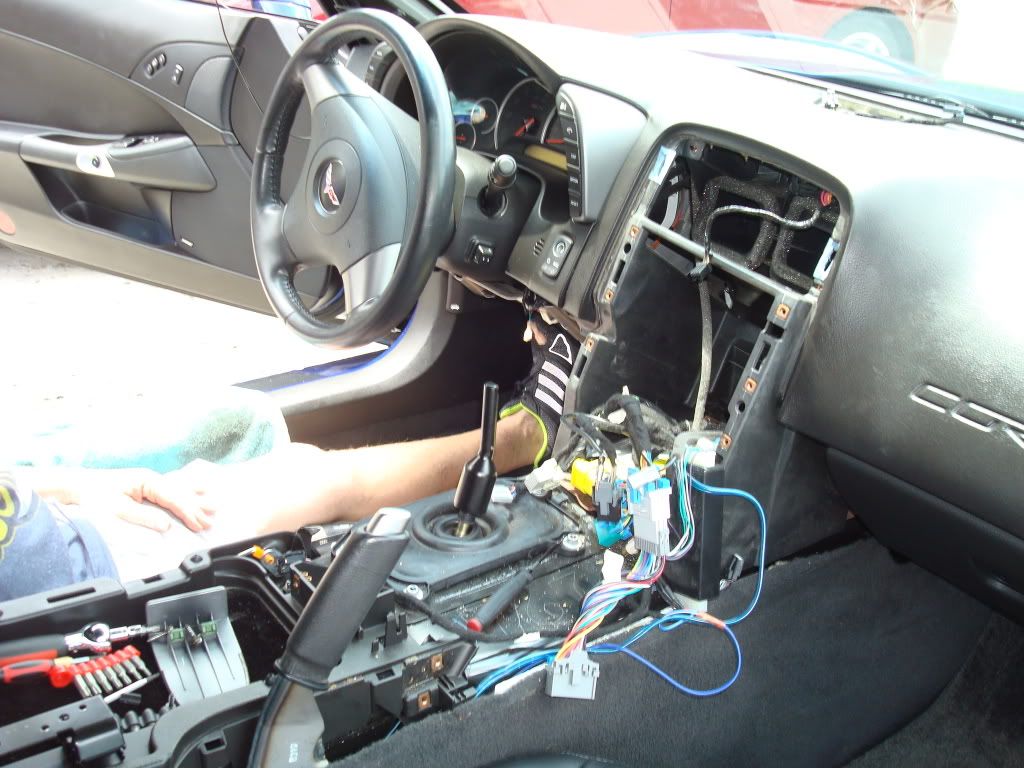
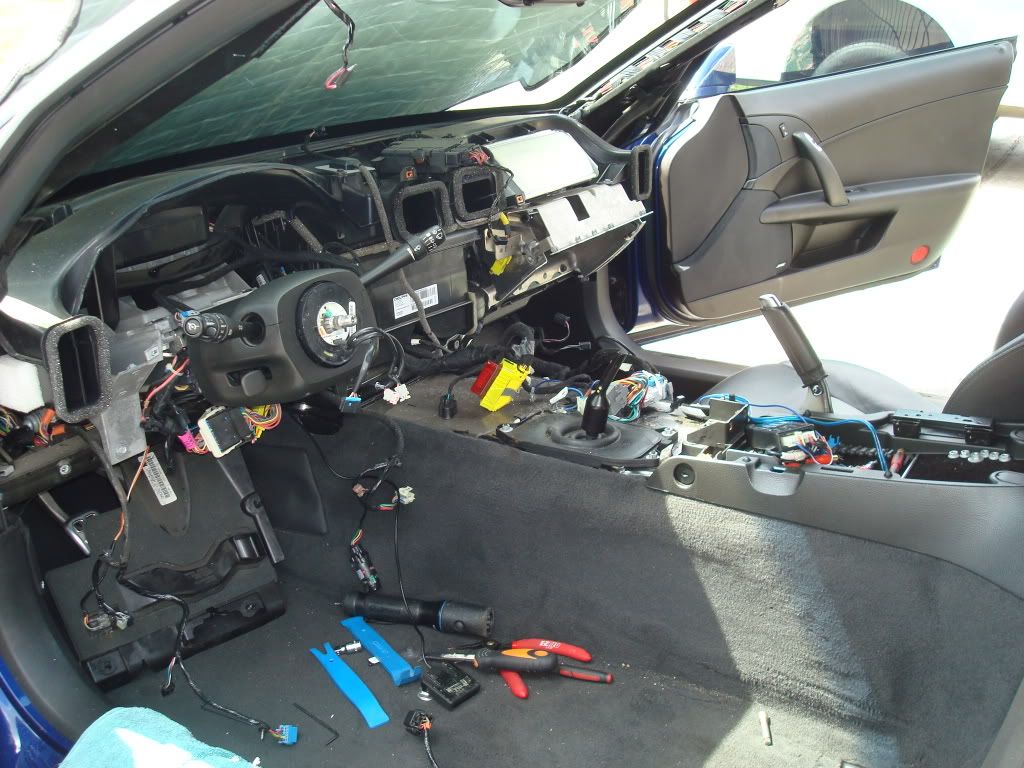
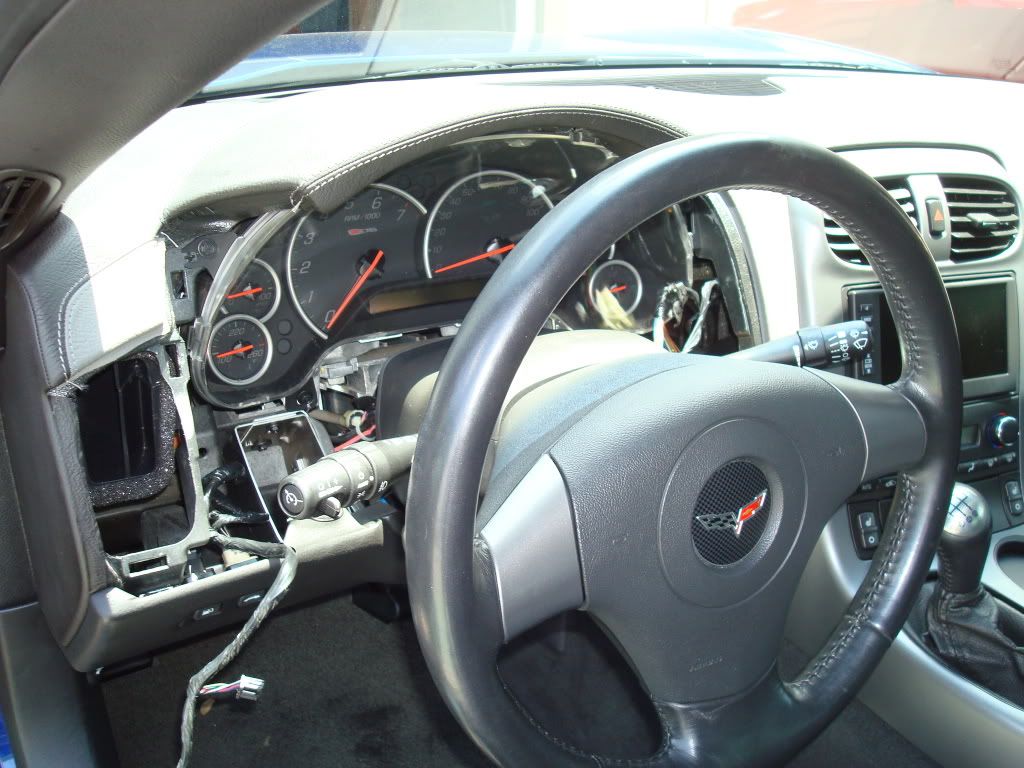
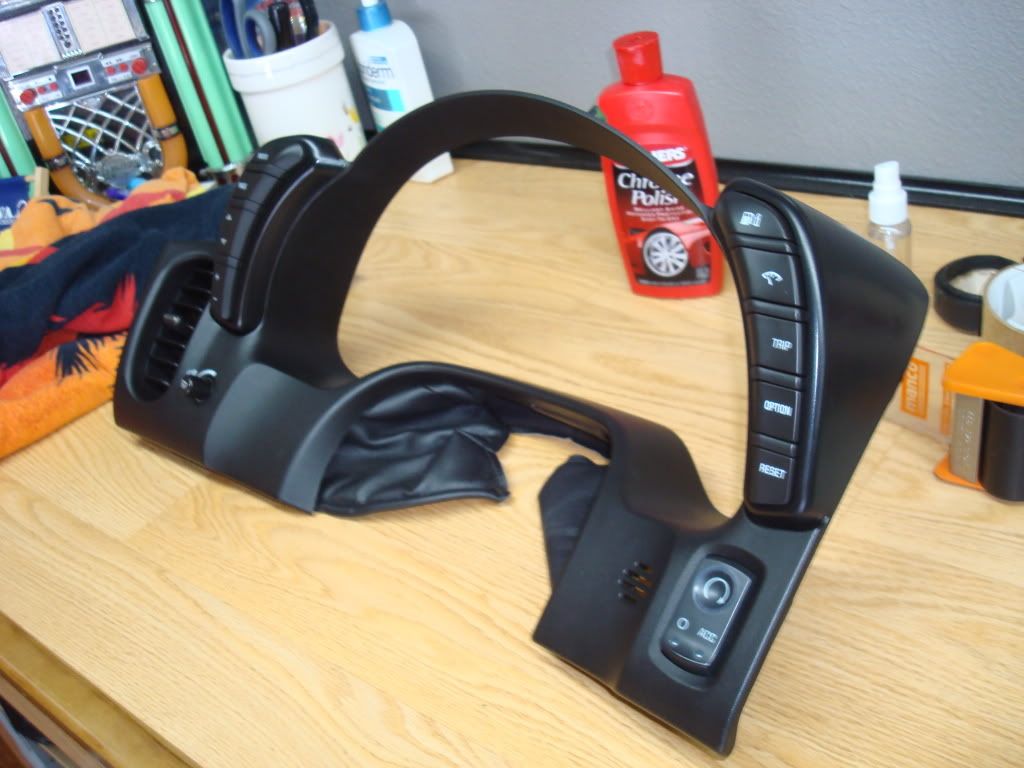
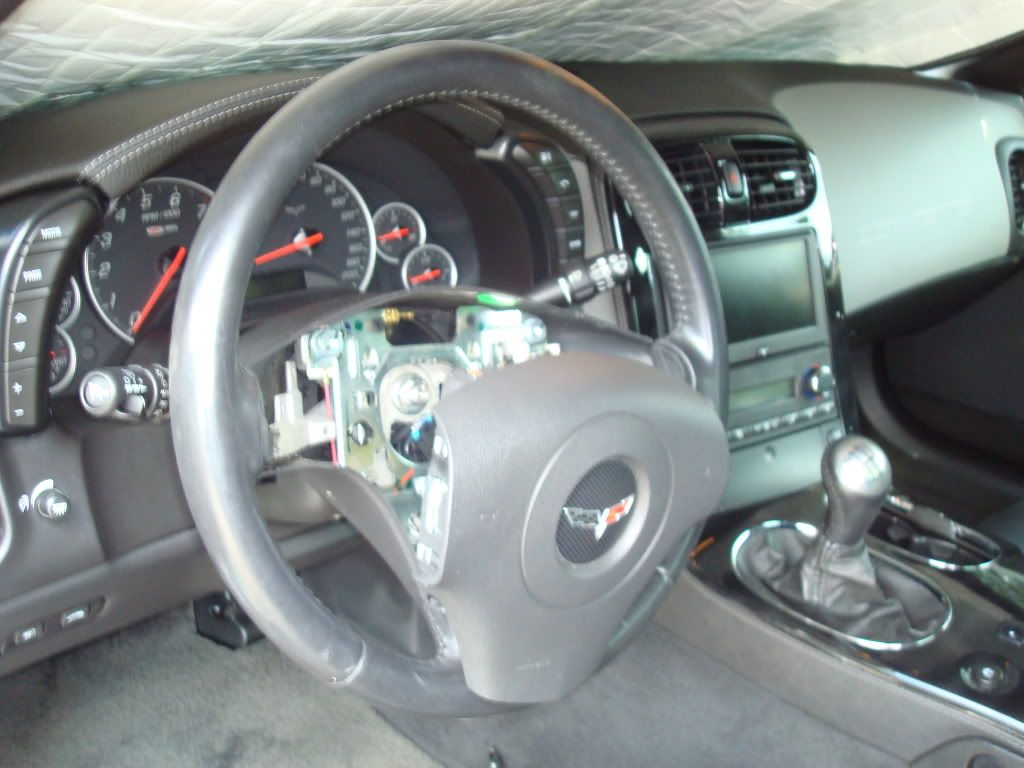
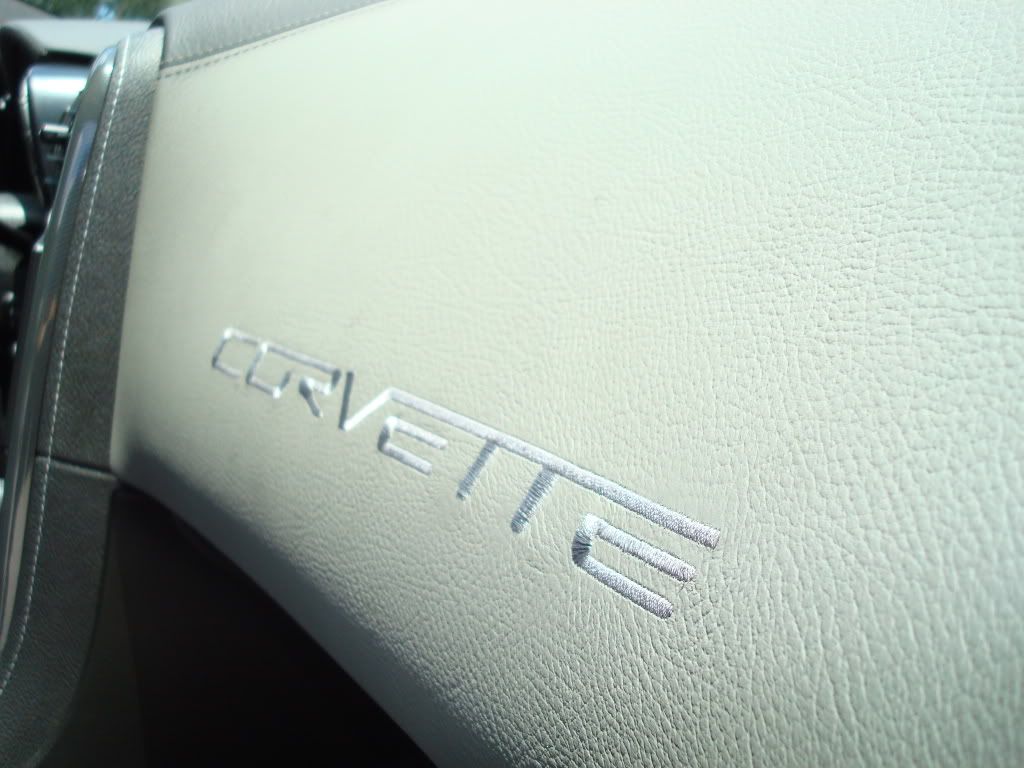
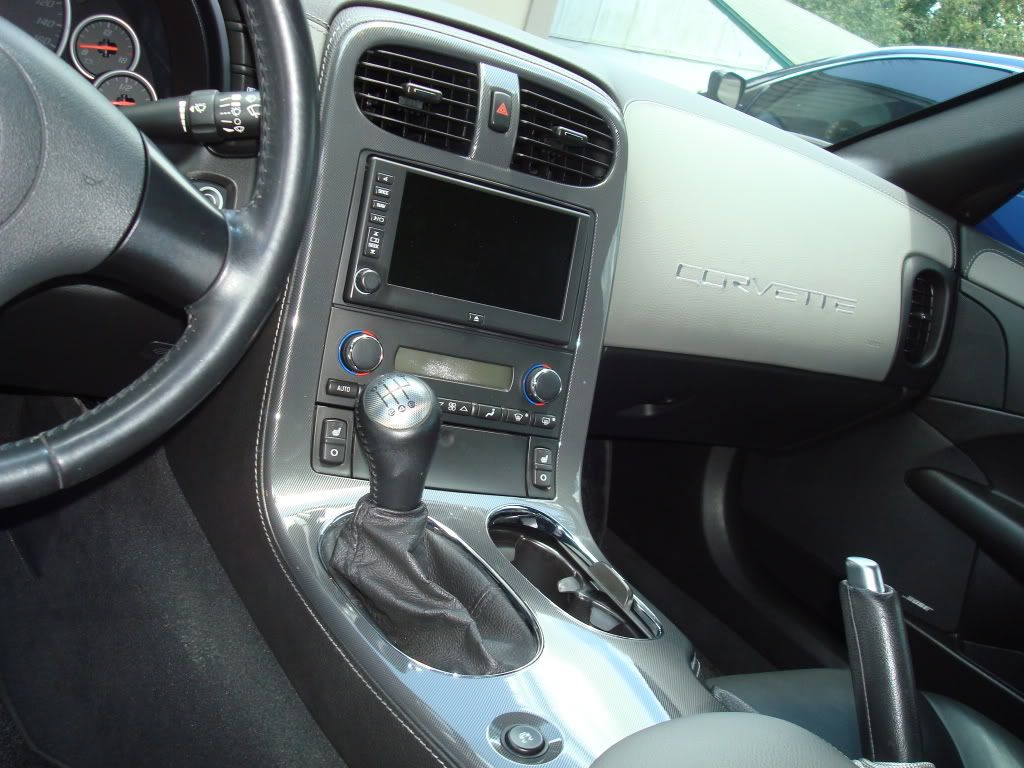
Dash pad install:
The first thing I did was the dash. In all it took a total of 10 hours to do and is most certainly a 2 person job. I have never attempted to do anything remotely like this before, so it was a big learning experience. I would like to thank Ray Kawal for his amazing, detailed write up found here: http://www.kawal.net/Dash%20Replacement.htm We did the whole thing just looking at this write up. Here are the pictures:
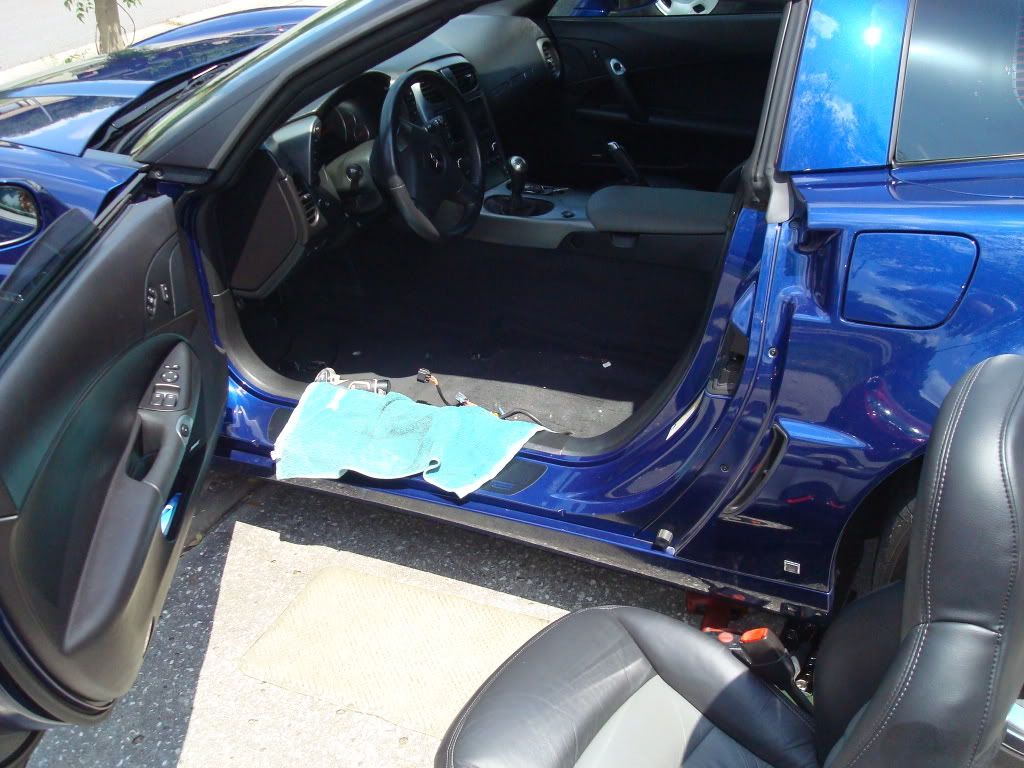

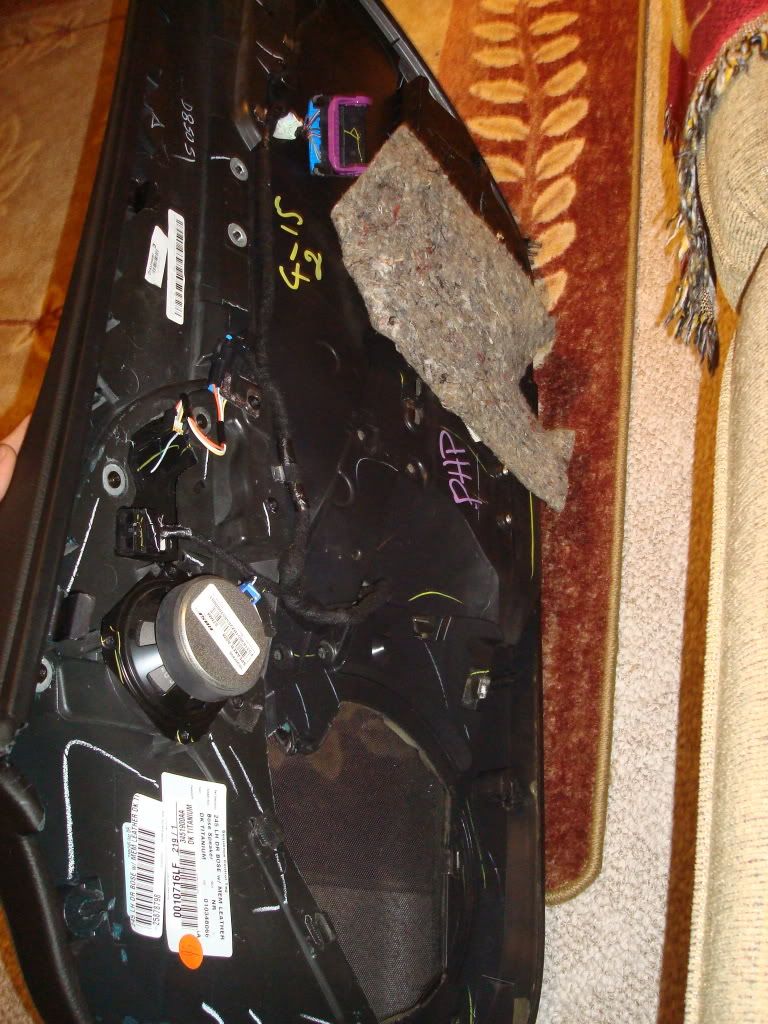
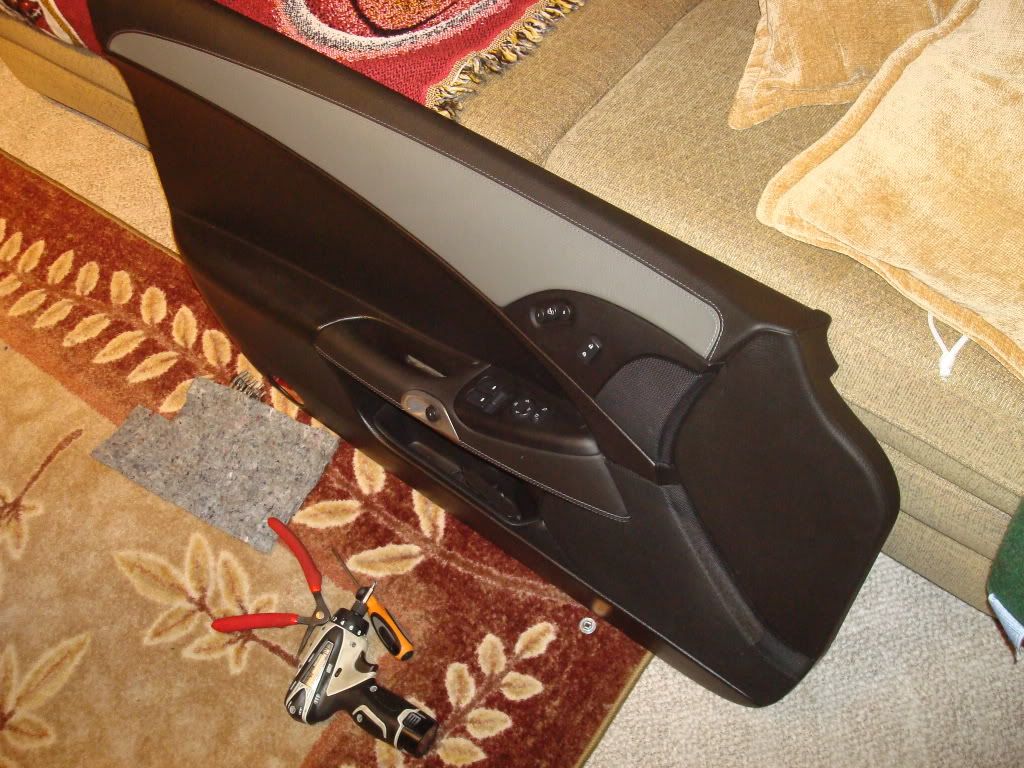
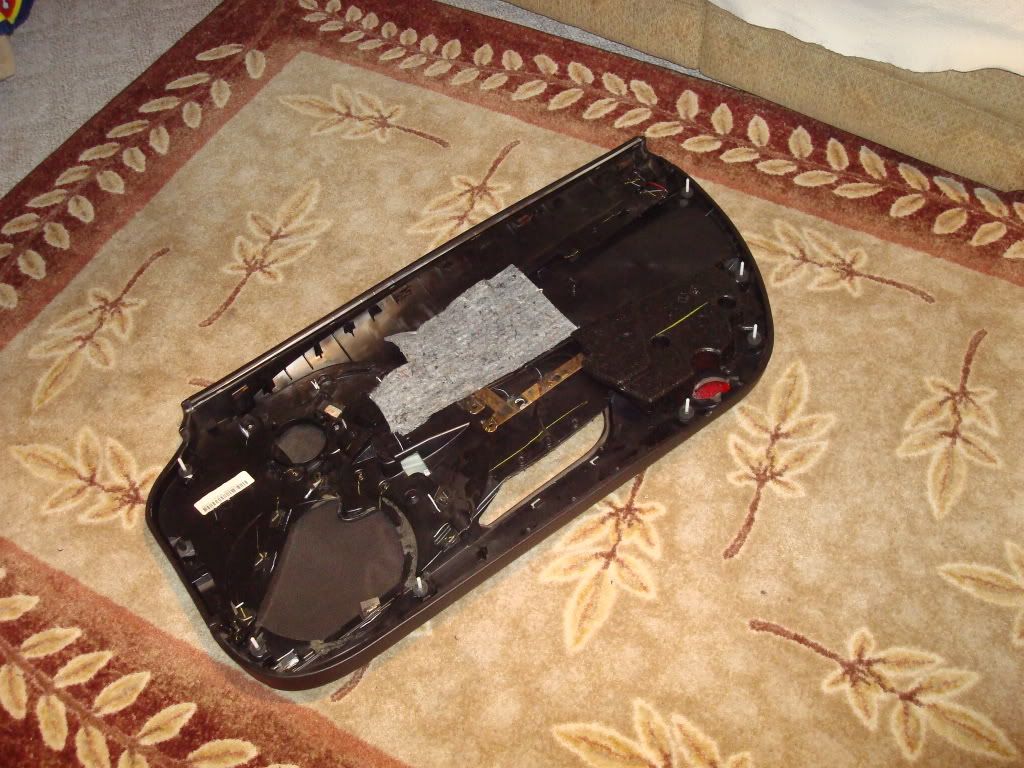
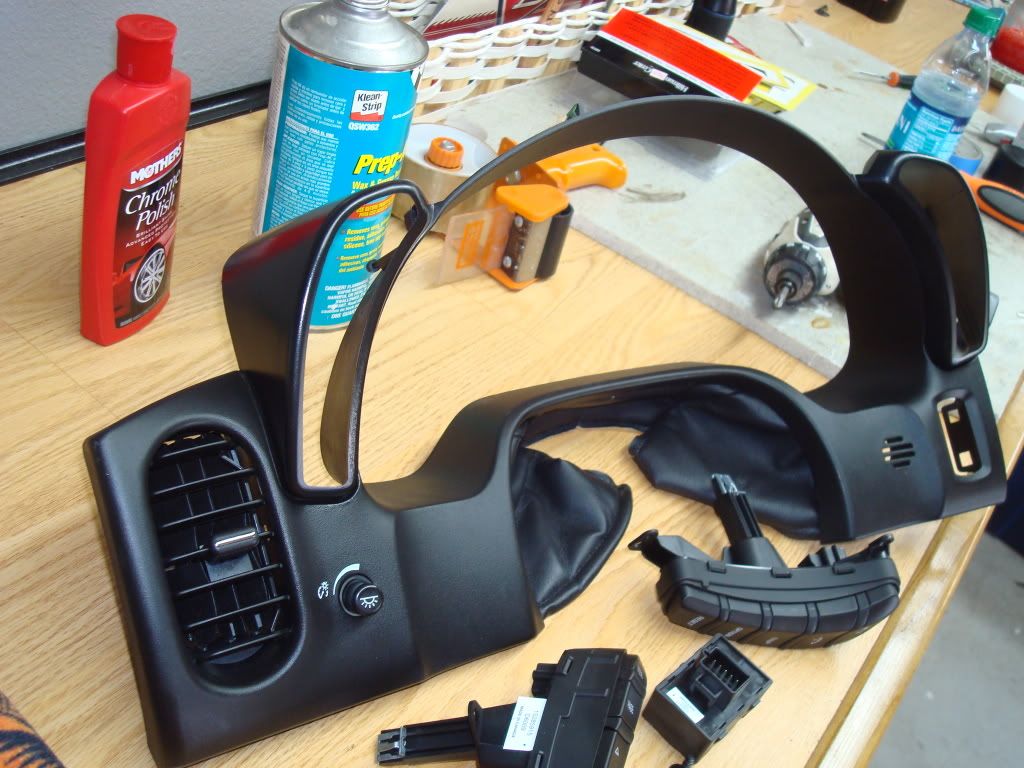
Doors:
The door panels were not bad; they were actually the easiest part of the job. I did this on my own with a simple tutorial, I couldn’t find the link. I wish I had taken more pictures but here is what I have:
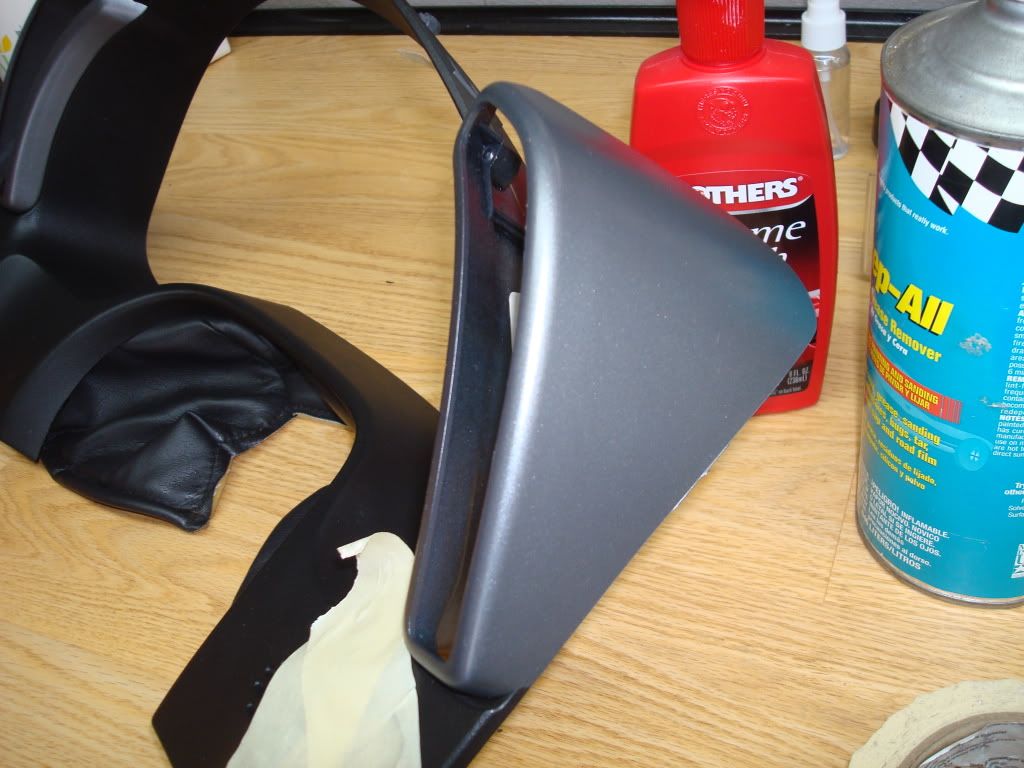
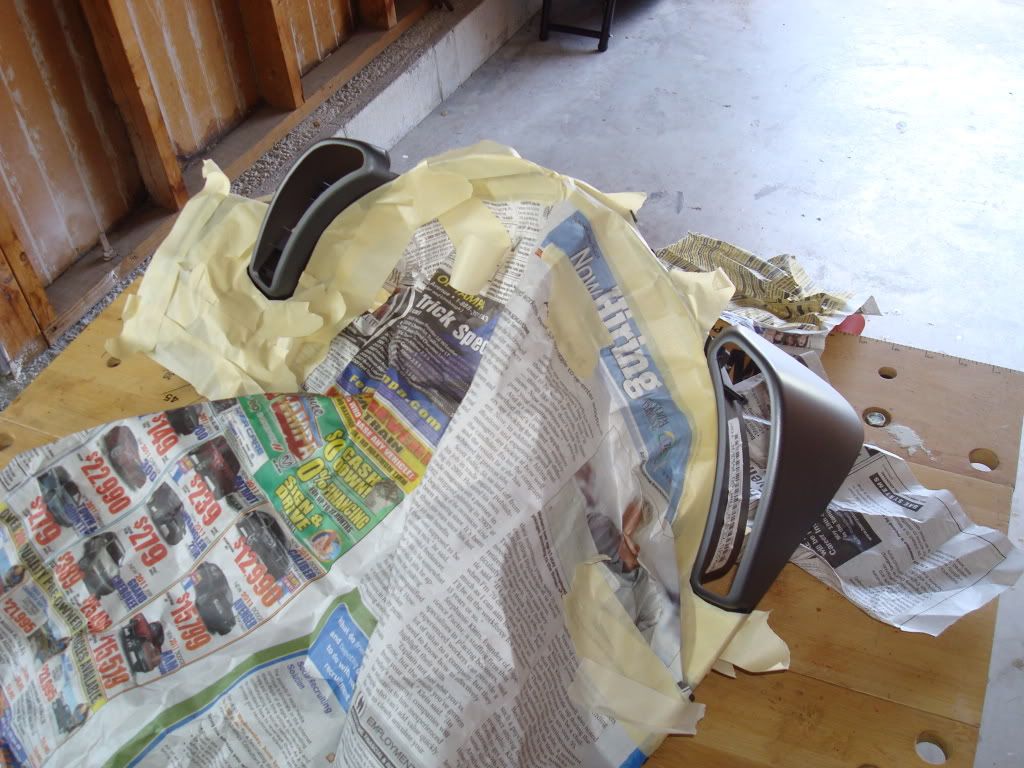
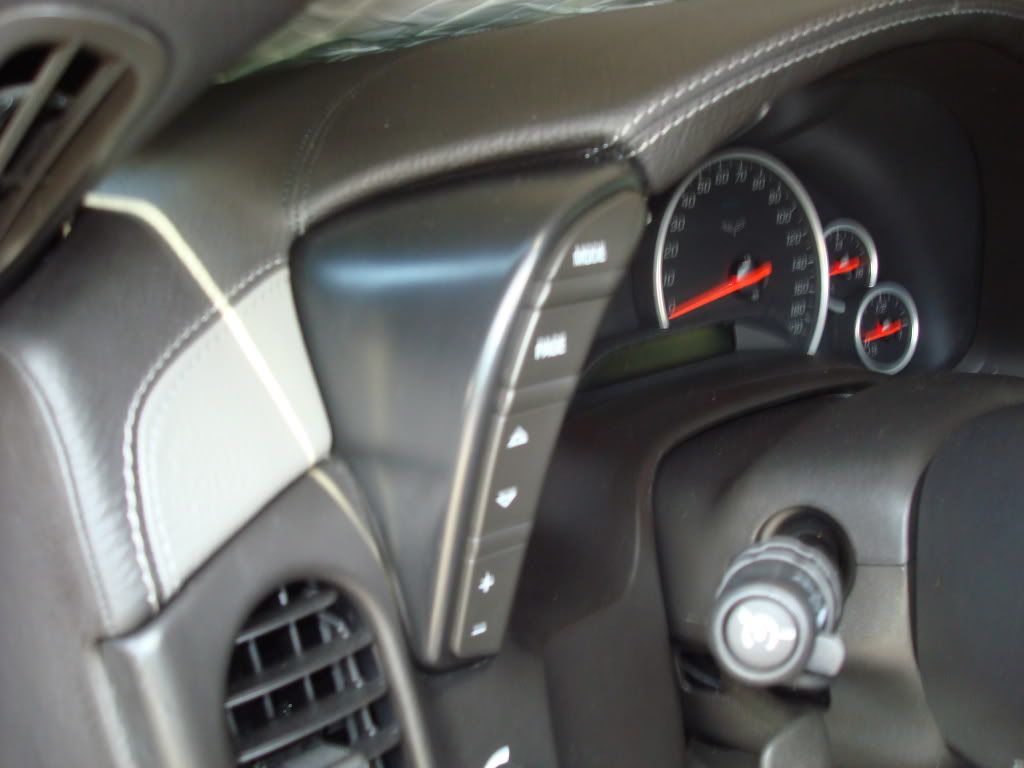
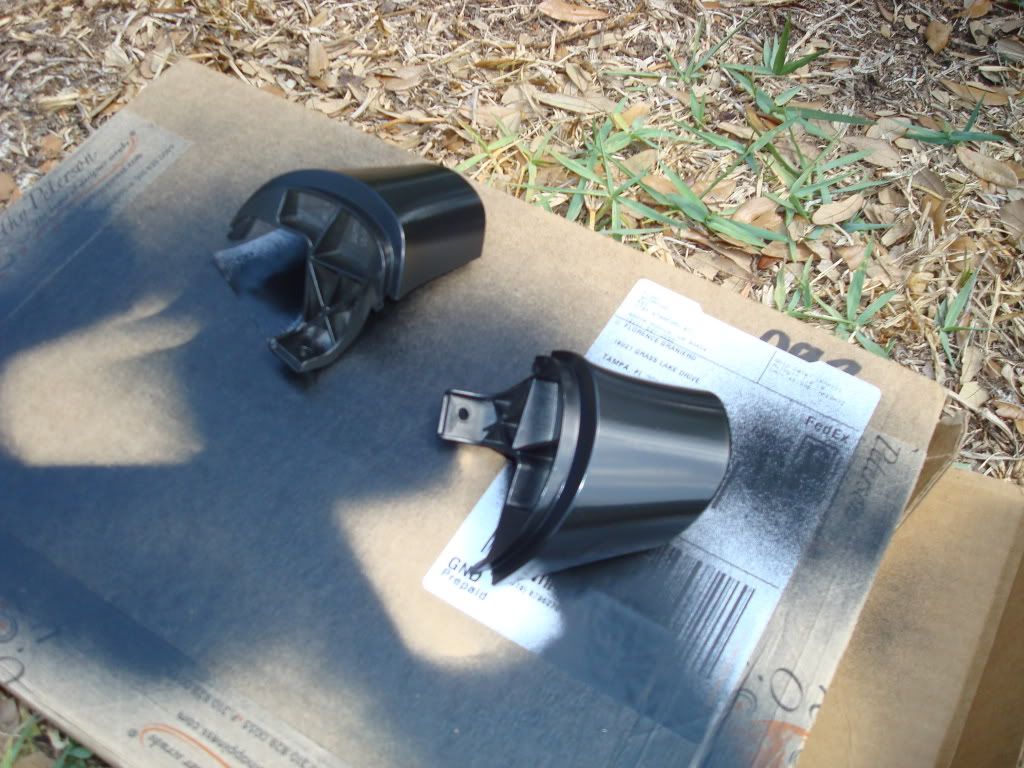
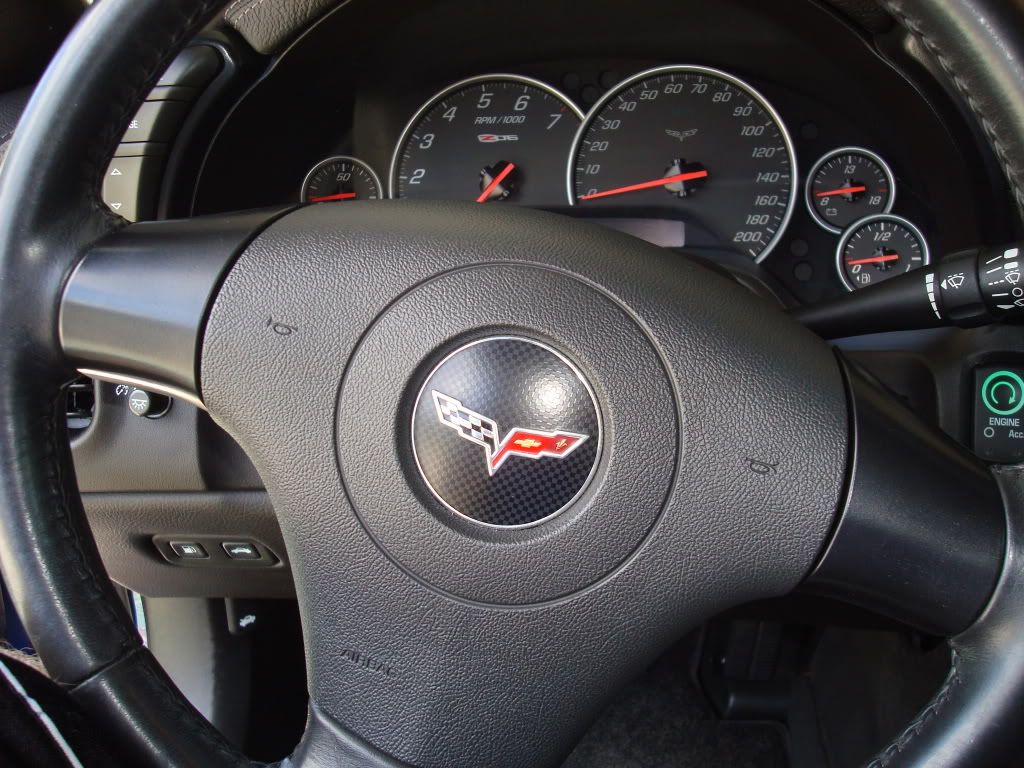
Gauge cluster pods:
This job took around 1 hour. The hardest part was getting the panel off the car. It’s held on by some gnarly clips. After that, it was just a matter of sanding with some 2000 grit sand paper and masking off the piece. I then sprayed them with some DuPont flat black bumper paint.


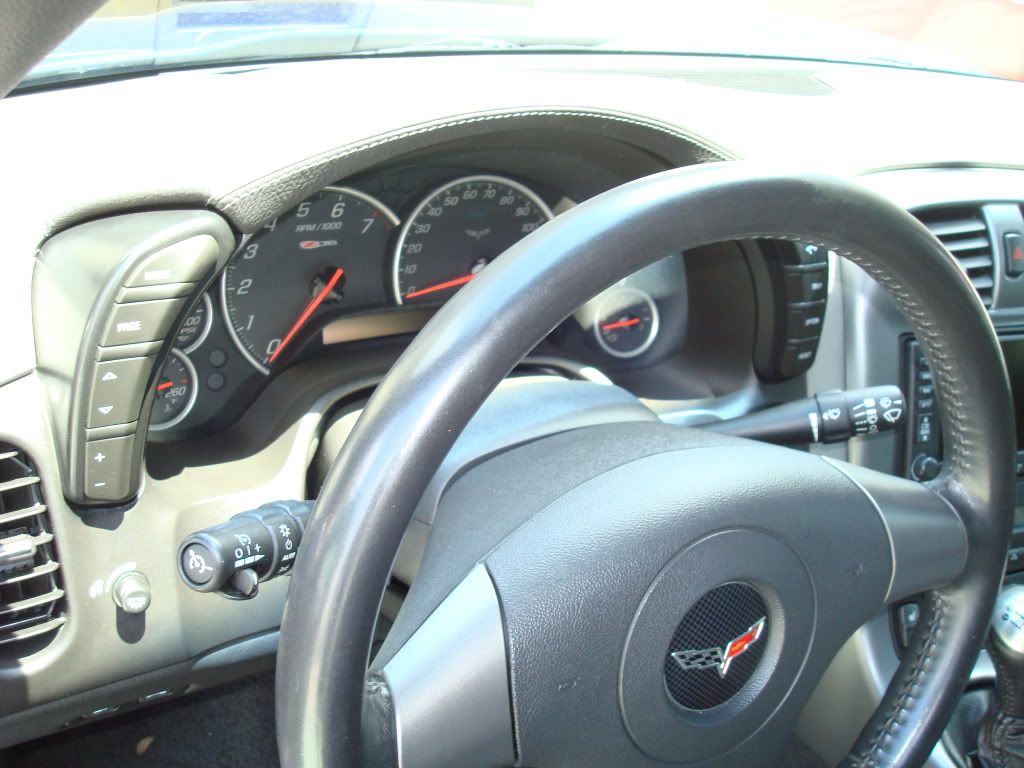
Steering wheel spokes:
I did this in less than ten minutes. I used the same DuPont flat black bumper paint as used on the pods.
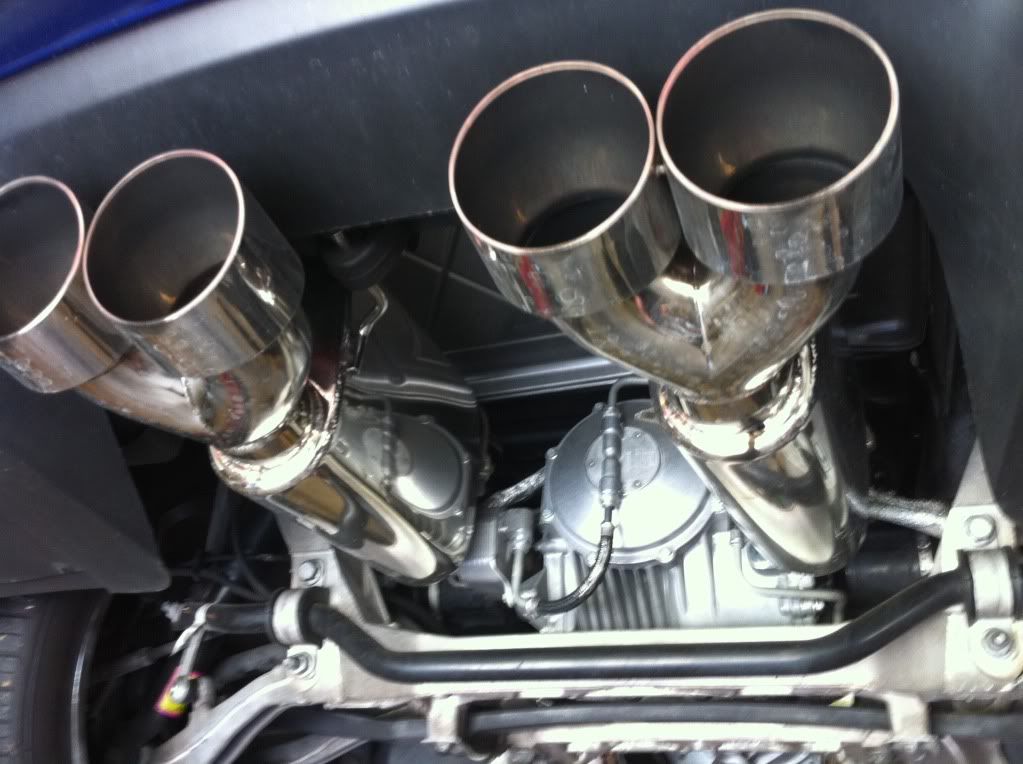
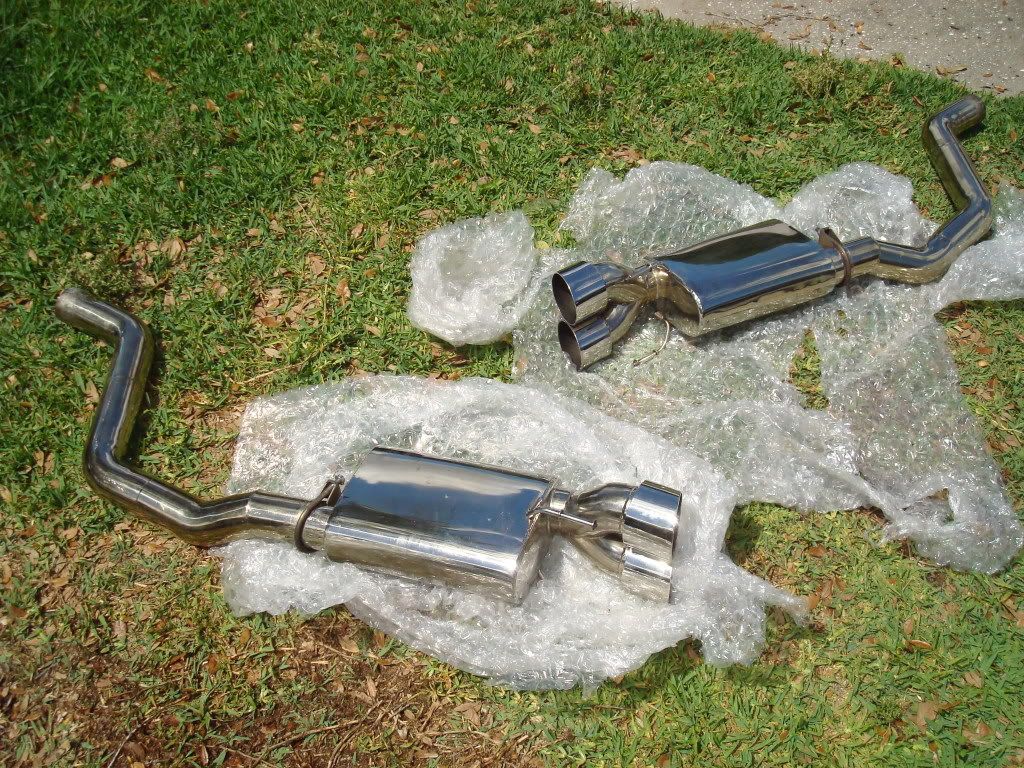
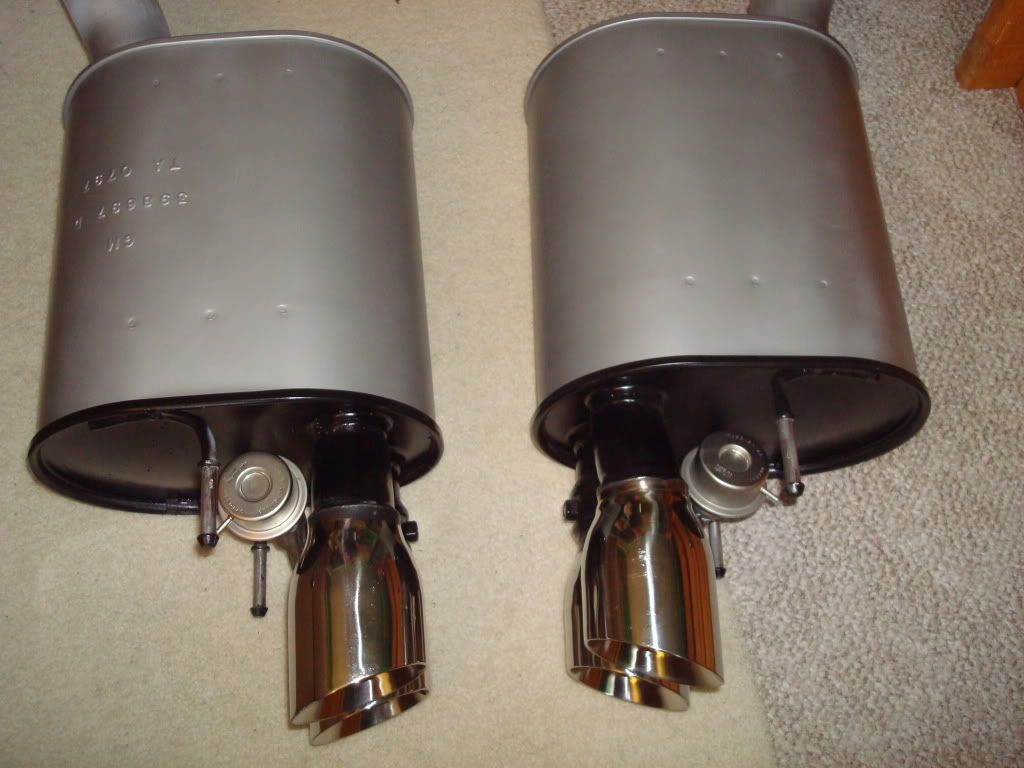
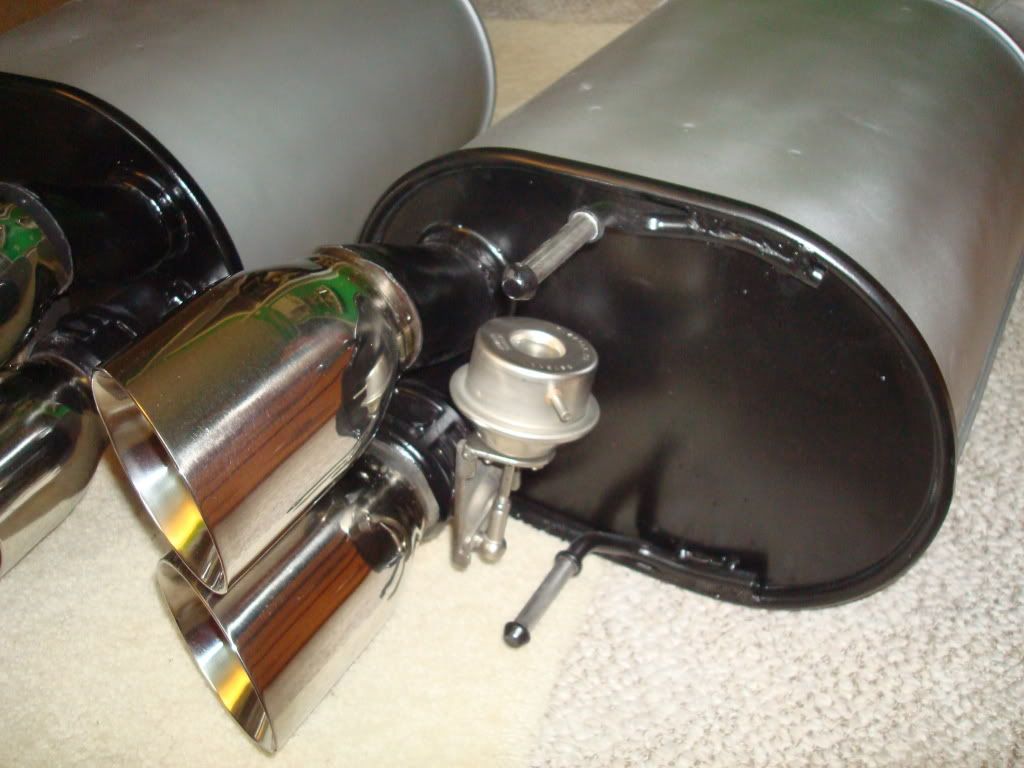
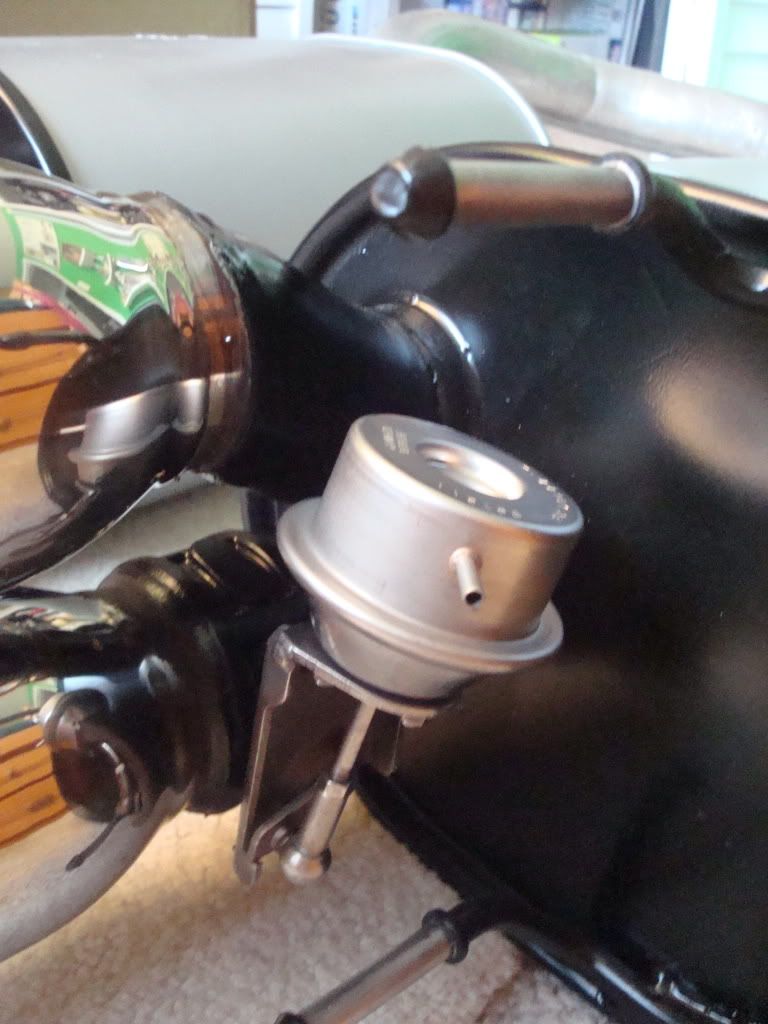
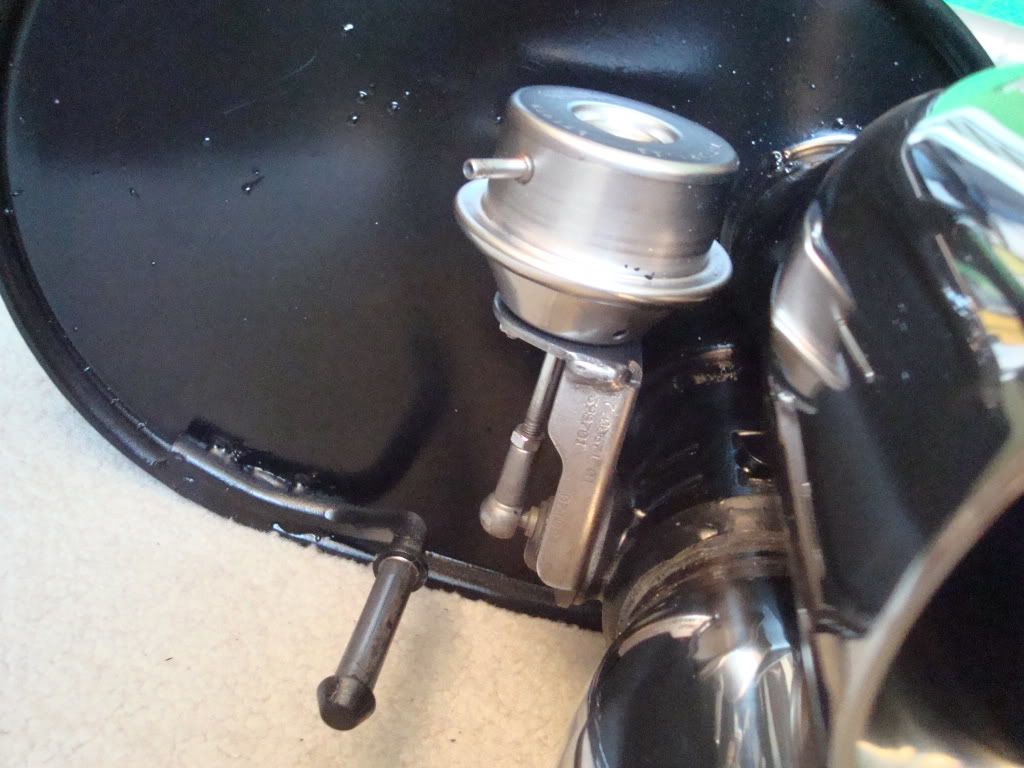
Exhaust muffler mod:
I bought the car with a GHL 3” Z06 exhaust. In the end, I just couldn’t get over the drone. It was ungodly. I had the seller include the original, stock mufflers and I am very glad I did. I had a local performance shop swap out my exhausts and I sold the GHL for $550. Soon after, I bought a new set of Z06 mufflers (with the mod already done), cleaned them up and put them on the car; I did this myself on a lift at my dad’s shop. It took 3 hours to do the swap, and another 3 hours prior to that to clean up and paint the mufflers. I am beyond happy with how everything turned out. I sold my old can and in the end, got newer mufflers with better tips, a wireless exhaust controller and the muffler mod done and installed for $130.
GHL:

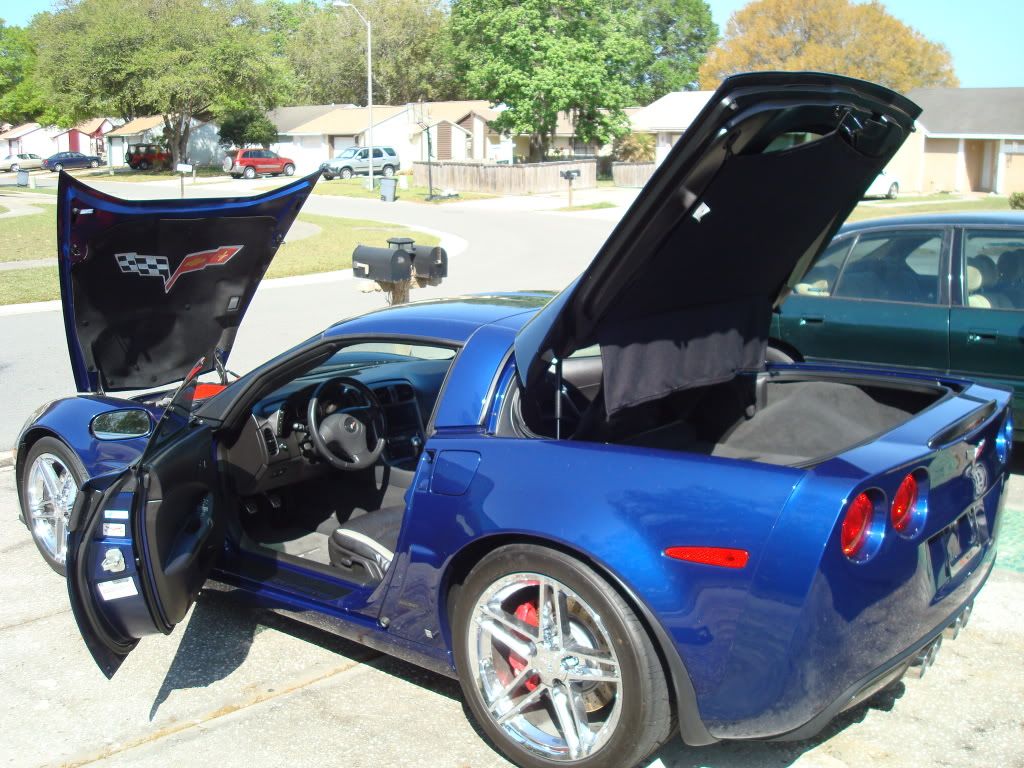
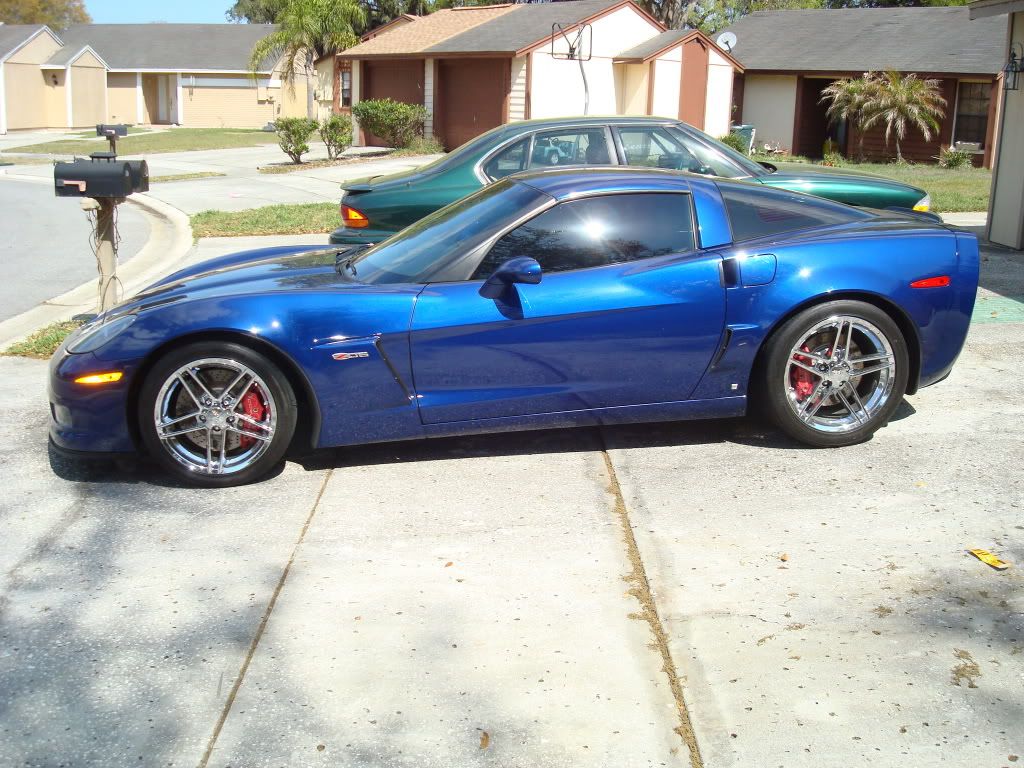
Finished Results:

I'm beyond happy with how everything turned out and Ill update when I get the car in the shop to work on the exterior. All my attention now is on the exterior.
Thanks for reading, I tried to make it easy by including a lot of pictures.
http://forums.corvetteforum.com/c6-c...-part-2-a.html
Backstory:
Since well before I purchased my Z06, I’ve always had a vision of what I wanted it to be and how much I was willing to spend. I knew I wanted a bone stock Lemans Blue Z06 with a 3lz ebony/dark titanium interior, and full ZR1 ground effects kit. The budget was $40,000 or just a little over. I can happily say, I came really close to that goal, and the hard part (the interior) is complete…for the most part.
To make this all happen for around $40,000 took some serious luck, bargaining and meeting the right people. The first thing I did was of course buy the car. I bought it on here for $33,500. I took a chance, but I can without a doubt say, this was the deal of the century. This car runs so strong. Once I had the car, I didn’t waste any time. I immediately started focusing on the interior, acquiring the parts I needed. What I needed was:
1 dash
2 door panels
1 center console
1 center console lid
2 seat covers
All had to be in the ebony/dark titanium color scheme. I looked at buying these parts new but that came out to be over $5,000. I hit a stroke of luck when I was contacted by a forum vender here who works on interiors and he had all the parts I was looking for. Total cost for all came out to be $3,200 shipped to my door! He even bought back my old panels and dash for $1,100.
Aside from the seats, I did all the install work myself with a little labor help from my dad when doing the dash. Total labor costs for the seats to be re-skinned and rebuilt up with new padding and foam was $200. I sold my old seat skins for $125 so it all evened out quite nice.
Stock interior:
As for the exterior, well my car was, and is quite “beat up”. It has a plethora of rock chips, bug splatter, paint chips and a ton of scratches and scuffs. Thankfully, my dad paints cars for a living and as soon as he has a break in his schedule, the car will be headed to the shop for a full repaint, same color. Labor is free of course, the paint I’ve been told should be around $250-400. I also had to buy new headlight lenses, emblems and of course, the ZR1 ground effects. Total cost for all of these parts came out of be around $900. That includes:
2 new lenses
1 ZR1 splitter
1 ZR1 spoiler
2 ZR1 side skirts w/mudflaps
All new 2009 style chrome emblems
Dash pad install:
The first thing I did was the dash. In all it took a total of 10 hours to do and is most certainly a 2 person job. I have never attempted to do anything remotely like this before, so it was a big learning experience. I would like to thank Ray Kawal for his amazing, detailed write up found here: http://www.kawal.net/Dash%20Replacement.htm We did the whole thing just looking at this write up. Here are the pictures:
Doors:
The door panels were not bad; they were actually the easiest part of the job. I did this on my own with a simple tutorial, I couldn’t find the link. I wish I had taken more pictures but here is what I have:
Gauge cluster pods:
This job took around 1 hour. The hardest part was getting the panel off the car. It’s held on by some gnarly clips. After that, it was just a matter of sanding with some 2000 grit sand paper and masking off the piece. I then sprayed them with some DuPont flat black bumper paint.
Steering wheel spokes:
I did this in less than ten minutes. I used the same DuPont flat black bumper paint as used on the pods.
Exhaust muffler mod:
I bought the car with a GHL 3” Z06 exhaust. In the end, I just couldn’t get over the drone. It was ungodly. I had the seller include the original, stock mufflers and I am very glad I did. I had a local performance shop swap out my exhausts and I sold the GHL for $550. Soon after, I bought a new set of Z06 mufflers (with the mod already done), cleaned them up and put them on the car; I did this myself on a lift at my dad’s shop. It took 3 hours to do the swap, and another 3 hours prior to that to clean up and paint the mufflers. I am beyond happy with how everything turned out. I sold my old can and in the end, got newer mufflers with better tips, a wireless exhaust controller and the muffler mod done and installed for $130.
GHL:
Finished Results:
I'm beyond happy with how everything turned out and Ill update when I get the car in the shop to work on the exterior. All my attention now is on the exterior.
Thanks for reading, I tried to make it easy by including a lot of pictures.
Last edited by forg0tmypen; 11-08-2011 at 03:13 PM.
 07-18-2011, 08:08 PM
#2
Safety Car

Member Since: Dec 2006
Location: NC
Posts: 3,576
Received 1,041 Likes
on
592 Posts
2023 C7 of the Year Finalist - Unmodified
2019 C6 of Year Finalist (performance mods)

Nice job. Looks like you did a nice job, saved some coin, and learned a lot about your car. You should be proud of it. Congrats.


 07-18-2011, 08:20 PM
#7
Racer

Member Since: Nov 2008
Location: Illinois
Posts: 264
Likes: 0
Received 0 Likes
on
0 Posts

 07-18-2011, 08:30 PM
#9
Drifting


I am really impressed. Most guys on here do a lot of mods to their cars by opening a fat wallet. I wish I had the patience and expertise to do more of my own work. I can't seem to remove a plastic panel without breaking something and then, when it is off I go, "Oh, that's how it is supposed to come off." I lost count of how many of those spring tabs I have broken and my rear speaker covers still rattle since I had them off. This was not only a great build, it was also a great documentary.
Gary
Gary
07-18-2011, 08:45 PM
#10
Le Mans Master


Great job! Car looks awesome!

 07-18-2011, 08:58 PM
#12
Le Mans Master
awesome job. Just upgrade the steering wheel, shift **** and boot and e-brake handle and boot and it will be complete. Any rattles after the install?
07-18-2011, 09:17 PM
#13
Safety Car
Thread Starter
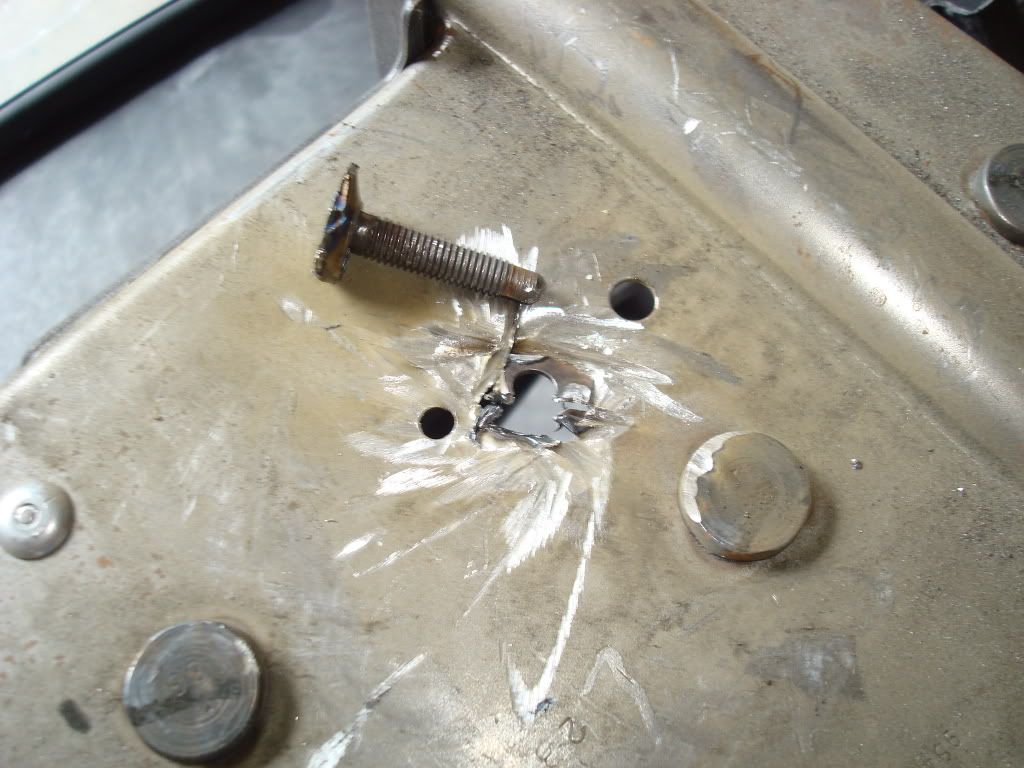
None whatsoever. I accounted for every last nut bolt and screw! I actually think I cured a few. The only thing I couldn't avoid was stripping the white plastic door retainer screws. When I get the car painted, I'll be switching those out again.
07-18-2011, 09:25 PM
#14
Safety Car
Thread Starter
07-18-2011, 09:26 PM
#15
Le Mans Master
nice job and well worth the effort!!
07-18-2011, 09:43 PM
#17
Safety Car
Thread Starter
07-18-2011, 09:49 PM
#18
Safety Car
Thread Starter
 07-18-2011, 09:57 PM
#20
Advanced

Member Since: Aug 2010
Location: Bedford Texas
Posts: 60
Likes: 0
Received 0 Likes
on
0 Posts
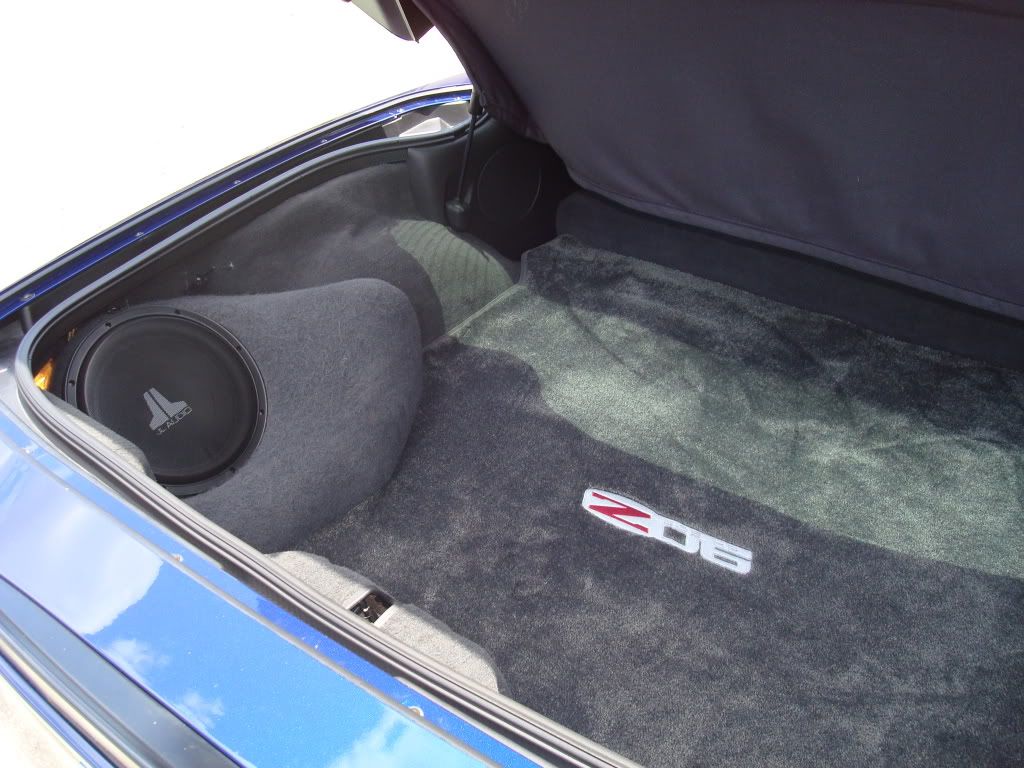
Right on! This is one of the best DIY jobs I have seen. Did you purchase the Z06 with the JL sub enclosure in back? I would assume the exhaust + the bass is a nice added rumble to your sweet ride 