
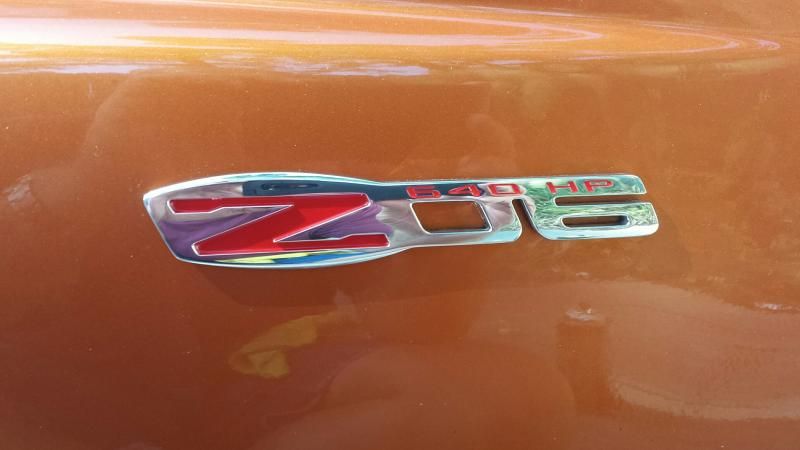
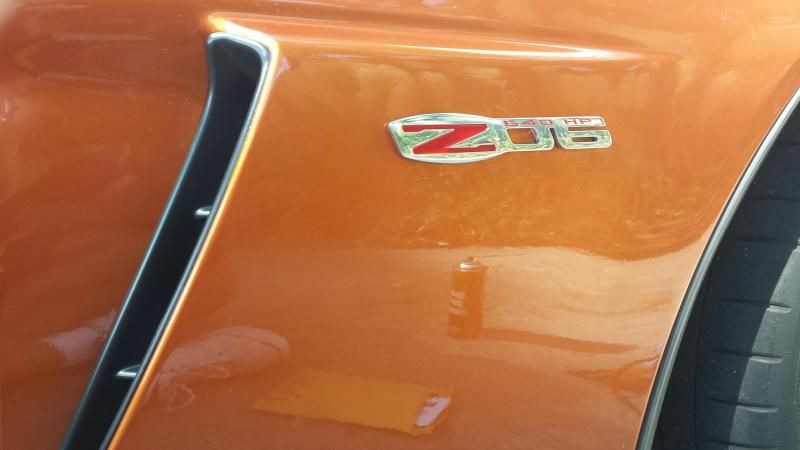
[Z06] Z-06 Emblems For those who "Stock" wasn't enough...
 08-21-2014, 11:57 AM
#1
Racer

Thread Starter

Member Since: Apr 2014
Posts: 254
Likes: 0
Received 0 Likes
on
0 Posts
Thank You Austin Barnett Designs; The finest quality I have ever seen.

PS Now the more difficult part, of the project; Earning the right to install the badges...

PS Now the more difficult part, of the project; Earning the right to install the badges...
 08-21-2014, 01:48 PM
#2
Melting Slicks


They look OEM quality 


 08-21-2014, 06:33 PM
#8
Drifting

Member Since: Feb 2012
Location: CHARLOTTE NC
Posts: 1,503
Likes: 0
Received 0 Likes
on
0 Posts
 08-22-2014, 12:29 AM
#10
Racer
Thread Starter
Member Since: Apr 2014
Posts: 254
Likes: 0
Received 0 Likes
on
0 Posts
08-22-2014, 07:29 AM
#11
Safety Car


Member Since: Dec 1999
Location: Virginia Beach, VA & Port Charlotte, FL (snowbird)
Posts: 4,406
Received 1,095 Likes
on
578 Posts


One thing, the emblems are not coated and from time to time will require some aluminum polish touch-up. I talked to Austin about this and he said he had problems with coating them that didn't yield good results.
 08-23-2014, 06:33 AM
#16
Safety Car
Member Since: Dec 1999
Location: Virginia Beach, VA & Port Charlotte, FL (snowbird)
Posts: 4,406
Received 1,095 Likes
on
578 Posts
I talked to Austin specifically about this. Polished aluminum is the ONLY option. He was adament about that. He said he'd tried coatings and he didn't like the results.
BTW... these emblems aren't his main hustle (as was mentioneded before) and he said he will stop making these in the not-so-distant future. I'm actually a bit surprised that GM hasn't shut him down for copywrite infringement. They've done it before on similar situations.
BTW... these emblems aren't his main hustle (as was mentioneded before) and he said he will stop making these in the not-so-distant future. I'm actually a bit surprised that GM hasn't shut him down for copywrite infringement. They've done it before on similar situations.
 08-29-2014, 10:37 AM
#19
Melting Slicks

I will need to update (700 hp) so I will be selling mine so if interested PM me.
08-29-2014, 11:35 AM
#20
Safety Car
Member Since: Dec 1999
Location: Virginia Beach, VA & Port Charlotte, FL (snowbird)
Posts: 4,406
Received 1,095 Likes
on
578 Posts
I installed them today. These are the steps I used.
1) Put 2 pieces piece of masking tape on the paint, vertically and against the front and rear of the emblem. Mark touch points with a sharpie between the emblem and the masking tape to enable correct location/installation of the new emblems.
2) Use a heat gun or hair drier to heat up the old emblems. Get them real hot and don't fry the paint.
3) Use a light weight fishing line and "saw" between the emblem and the body immediately after heating. You might have to reheat several times to get through it. Note: Dental floss was mentioned before. I tried and it didn't work. Friggin' floss kept breaking.
4) Rub as much of the existing adhesive off with your clean fingers. I used brake clean as a solvent. It took a lot of rubbing to get all the residue off. Other solvents may work better but I was paranoid about experimenting and damaging my paint finish.
5) Line the new emblem up with previous sharpie marks on the masking tape then peel 'n stick.


Last edited by Undy; 08-29-2014 at 11:39 AM.