
[Z06] A dead Z06s return to life


 11-27-2014, 09:46 PM
#26
Le Mans Master

nice job to date - looking forward the first fire-up ! Keep going........
 11-28-2014, 08:52 AM
#27
Burning Brakes

Thank you for sharing! Great find on the block. Lots of time and dollars vested into this project!
Keep up the great work !
!
Keep up the great work
!
11-29-2014, 12:58 AM
#28
Former Vendor
Thread Starter

I worked on it a little more tonight after more Thanksgiving festivities.
I dropped the engine back out to install the harness and other odds and ends. It was just held in by the 4 cradle bolts so it was very simple to remove.
I got the rockers installed and the valve covers buttoned up. Installed the dip stick and prepared for wiring harness installation.


I should have known this harness was going to kick my *** as soon as it came out of the box.... It was coiled so tight that it just stayed in a nice big lump.

I got it laid out in the general location that it is supposed to go. I have to consult another Z06 to see how exactly it is routed around the driver side along the pan rail and up to the ABS block.
 11-29-2014, 06:00 AM
#29
Melting Slicks

Member Since: Dec 2009
Location: Smallingerland Friesland, Netherlands
Posts: 3,421
Received 39 Likes
on
27 Posts

I have seen pictures before (here on CF) of a-arms and spindles that were treated with aluminum brightener, but that's a bit hazardous to use. I can't even buy that stuff in my country!
11-29-2014, 01:57 PM
#30
Former Vendor
Thread Starter
No this was professionally done in house. We micro polish the internals on a lot of our transmission builds for added strength and performance but it also looks good too.
11-29-2014, 02:14 PM
#31
Former Vendor
Thread Starter
Ive been in the process of removing all red from the Z06. The calipers are off bring powder coated blue metallic, I have new 2013 4LT Z06 seats with light gray suede inserts and blue stitching and I am having the "Z" in the head rests professionally dyed blue. The last red I needed to eliminate was the red in the Z06 emblems. Instead of just painting the Z blue I decided to have a set of custom emblems made by Emblem Pros. They made a set for me with polished stainless and blue acrylic mirror.


 11-29-2014, 03:53 PM
#34
Melting Slicks
Member Since: Dec 2009
Location: Smallingerland Friesland, Netherlands
Posts: 3,421
Received 39 Likes
on
27 Posts
Ive been in the process of removing all red from the Z06. The calipers are off bring powder coated blue metallic, I have new 2013 4LT Z06 seats with light gray suede inserts and blue stitching and I am having the "Z" in the head rests professionally dyed blue. The last red I needed to eliminate was the red in the Z06 emblems. Instead of just painting the Z blue I decided to have a set of custom emblems made by Emblem Pros. They made a set for me with polished stainless and blue acrylic mirror.


 11-29-2014, 06:03 PM
#36
Racer

Member Since: Nov 2013
Location: Fort Walton Beach Florida
Posts: 438
Likes: 0
Received 4 Likes
on
3 Posts
Good on you Jeremy for bringing a Z back from the dead. These cars are too special to let die before their time. It must feel great to see the car come together. Congrats.
12-08-2014, 10:35 AM
#37
Former Vendor
Thread Starter
Thanks again guys. I've been making a little bit of progress.
As many of you probably know our cars are notorious for killing slave cylinders. Monster Clutch Co. has addressed one of the issue with the failure. The plastic bearing retainer on them is known to melt and seize on bearing support tube.
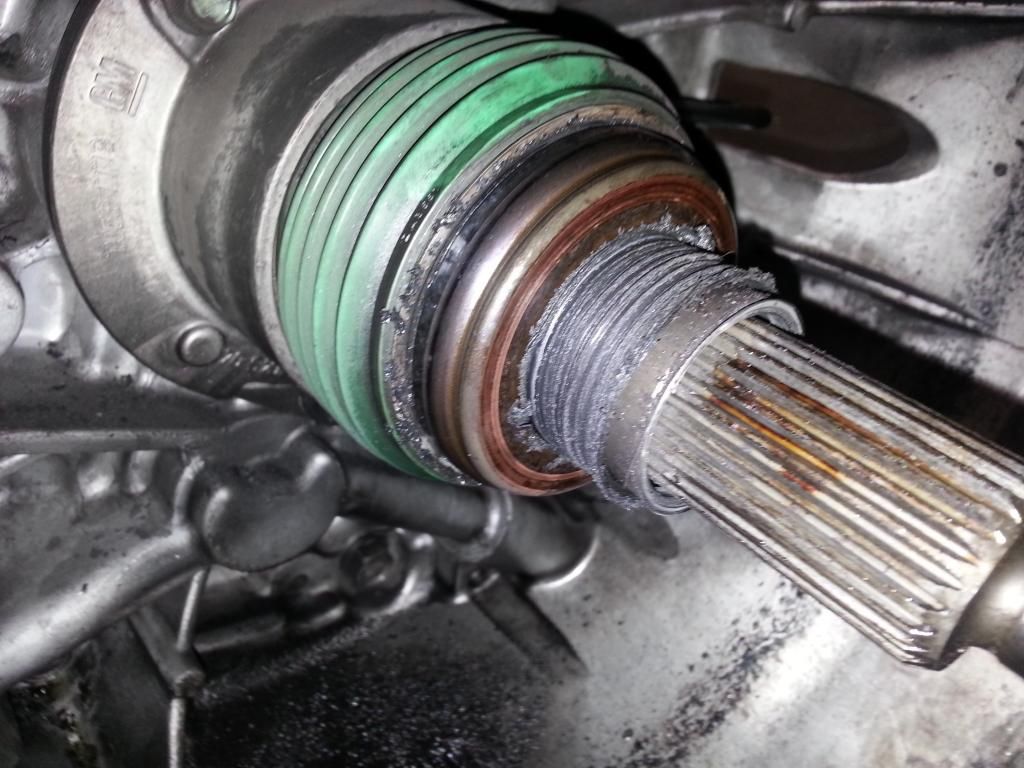
Monster has solved this problem with their billet bearing retainer.

It is a simple replacement and swaps directly in place of the factory plastic one.


To install it you simply compress the spring by sliding the plastic retainer down. Then pry the locking ring out of the end of the tub and this will release the plastic retainer. Take the plastic retainer and throw it in the trash.


Then you slide the billet bearing retainer on. Hammer the retaining ring back in place and after fighting with the green rubber dust boot for 5 mins to get it back in the groove you're done.
 12-08-2014, 10:40 AM
#38
Former Vendor
Thread Starter
Here in the engine in for the last time. Now the tedious task of routing wires, lines and making everything fit without getting burnt on the headers.


Here I just finished clearancing the Nick Williams 102mm throttle body to clear the Mezier water pump. It was a tight fit requiring a good bit of machining on the throttle body. The milled heads didn't help matters.


Here I just finished clearancing the Nick Williams 102mm throttle body to clear the Mezier water pump. It was a tight fit requiring a good bit of machining on the throttle body. The milled heads didn't help matters.

Last edited by Jeremy@RPMTransmissions; 12-08-2014 at 12:22 PM.
12-08-2014, 10:43 AM
#39
Former Vendor
Thread Starter
This is my newest go fast goodie. The boss had this stashed away for a special use. It was my lucky day because he chose my car to use it on. It is a Drive Shaft Shop 3.5" couplerless piece. We installed it with ceramic torque tube bearings to help improve high RPM shifting.


 12-08-2014, 10:58 AM
#40
Former Vendor

Thanks again guys. I've been making a little bit of progress.
As many of you probably know our cars are notorious for killing slave cylinders. Monster Clutch Co. has addressed one of the issue with the failure. The plastic bearing retainer on them is known to melt and seize on bearing support tube.
Monster has solved this problem with their billet bearing retainer.
It is a simple replacement and swaps directly in place of the factory plastic one.
To install it you simply compress the spring by sliding the plastic retainer down. Then pry the locking ring out of the end of the tub and this will release the plastic retainer. Take the plastic retainer and throw it in the trash.
Then you slide the billet bearing retainer on. Hammer the retaining ring back in place and after fighting with the green rubber dust boot for 5 mins to get it back in the groove you're done.
Last edited by SNL/MonsterClutchCo; 12-08-2014 at 11:38 AM.

