When you click on links to various merchants on this site and make a purchase, this can result in this site earning a commission. Affiliate programs and affiliations include, but are not limited to, the eBay Partner Network.
I'm not super impressed. (OK see update at bottom of post, officially truly impressed.) :/ For anyone considering getting one here are some things to know.
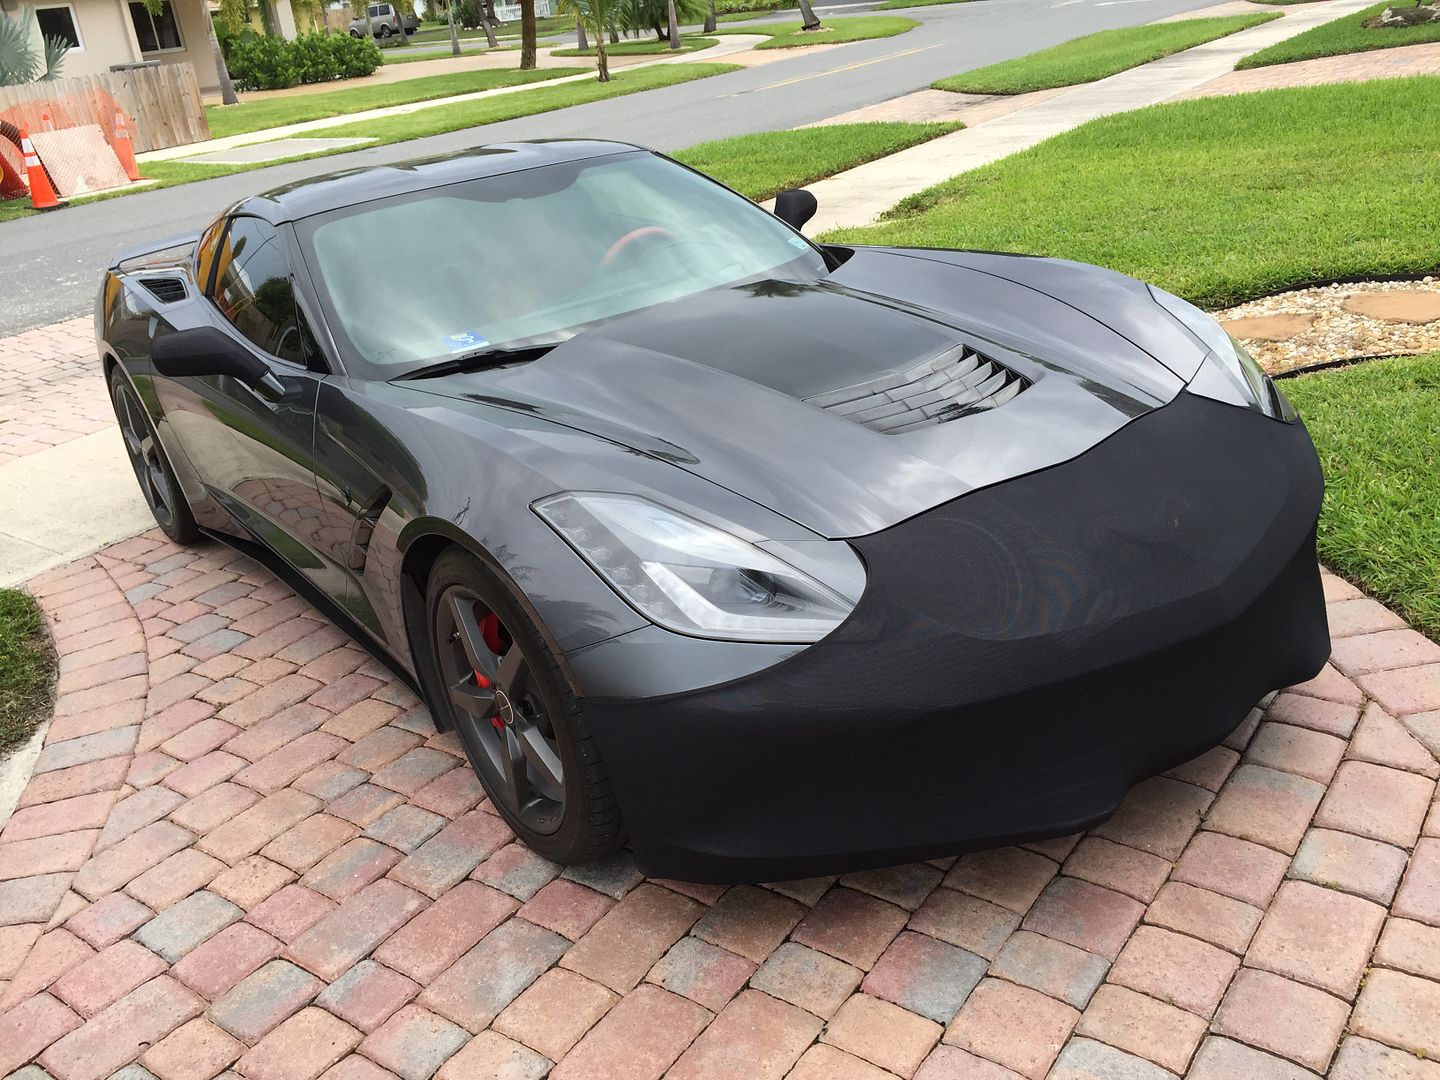
#1 - Carbon Flash (Black Metallic) color does not match Carbon Flash on vehicle. It is a clearly different shade, decent bit lighter. I'd say its a really dark gray as opposed to black. I'm not picky but they are really not close. At least the one I got wasn't. See pic below.
#2 The transfer tape/backing is too thick and hard to see through. This caused me two issues.
First, see pic above. I have a tiny bit of white between the stripe and vent. I couldn't see through the paper enough to know exactly how far down i was getting. Not a huge deal and actually looks pretty cool but still made it hard to tell exactly where it was landing. If I did it again I'd probably just take the backing off first and take my chances.
Second, even though I made the whole thing completely flush with the car after pulling off the backing there were things that no one would have any way of seeing or feeling due to the thickness and color density of the backing. See below. While that looks almost like a scratch it's actually a very thin wrinkle. The backing was completely flat against the car so there was no way to see this until the stripe was fixed and the backing removed. It is possible for the backing to be flush feeling while the vinyl isn't. I've included a picture of that as well. There are also a few tiny bubbles but I'm hoping some drying time will remove those. That said, i only had this happen in that one spot so it really is luck of the draw I guess.
Don't take this as a bash as its not. While shopping around I looked for specifics but couldn't find a whole lot. I decided to make this post as what I know now would've been useful to me before my purchase and will hopefully help someone else at some point.
UPDATE:
I've been busy and didn't contact Sean at VetteFX right away. As soon as I did he got me pics showing the stripe and sent it on its way. It got here quick and while I can't install it just yet I put it up to my other carbon flash parts and its as close as anyone could hope for. It's perfect.
Sean thanks again. It looks great. I guess now I do understand the legendary customer service and even after this thread. I will definitely be sending you my business and others in the future.
Mirror on left, stripe on right. Picture is pretty terrible but colors are perfect match! Thanks again Sean/VetteFX!
Last edited by FawkeeMcGee; 03-04-2016 at 07:18 AM.
Did you install this wet or dry? I bought mine from VetteFX as well and very pleased. The color is almost a dead match, and it looks factory. I would call them to discuss. Your color doesn't look right. GL
Last edited by dovervold; 02-08-2016 at 11:06 AM.
Reason: deleted one picture
You shouldn't need masking on this piece. Wet application and squeegee with felt covered end would have worked perfectly. I would call seller and see about possible replacement without masking.
I did the rooftop blackout dry and botched the job. Wet is the only way to go... the color match was perfect on mine so email Sean Dunshee azbowtie@icloud.com and show him your pics. BTW if any coupe owners want that roof blackout piece done you need to use the gloss black because my visible carbon roof has a different tint from the carbon flash vinyl. Look how blacking it out changes the flow of the lines on the roof windshield to hatch glass.
Thanks for sharing your experience. Has VetteFX been of any help in dealing with/helping resolve the problems you had?
I haven't contacted them. I posted this in the middle of the night after just finishing.
Originally Posted by Rooster OG
Did you talk to Sean at Vettefx? At least let them know, see what they say.
Will do.
Originally Posted by dovervold
Did you install this wet or dry? I bought mine from VetteFX as well and very pleased. The color is almost a dead match, and it looks factory. I would call them to discuss. Your color doesn't look right. GL
Wet. It seemed like it went great until I pulled off that backing and saw it. I'll contact them and see if I somehow got the wrong color or see if anyone else has reported this. Thanks.
Sounds like you may have skipped step #4 in the application instructions....
INSTALLATION INSTRUCTIONS
WET METHOD - WITH TRANSFER TAPE
IMPORTANT -
If your decals came rolled in a shipping tube please remove and lay flat. Allow a few hours before installing. Applying a book or other heavy flat object (that will not damage the vinyl) can aid in flattening your stripe. Take your time and you will get professional results, if you are not comfortable installing we always recommend having a local tint shop install.
CONDITIONS -
It is best to install your stripe in temperatures between 70 and 90 degrees F. If it is too cold your vinyl will not stick. If it is too hot your vinyl may stick improperly and stretch.
TOOLS-
-32 oz spray bottle filled with water & 3-4 drops of liquid soap
-Squeegee (credit card or license wrapped in a soft paper towel will work)
-Measuring Tape, Masking Tape
1- Clean surface VERY well using isopropyl rubbing alcohol to remove any old wax etc.
2- Line stripe up using measuring tape, use masking tape to mark guide lines to aid in lining stripe up once you start installation.
3- Spray a liberal amount of soap and water on the surface where you will be installing your stripe
4- Remove backing paper from vinyl and spray solution on adhesive side of the stripe
5- Apply stripe to desired position, you will have a little time to slide stripe around to adjust its location, keep spraying solution under stripe until you have it in the right position.
6- Using your non-squeegee hand apply a small amount of pressure to keep stripe from moving. Using the squeegee, lock the stripe into place by taking a squeegee stroke down the middle of the stripe.
7- Using a small amount of pressure squeegee water out starting from the middle of the stripe working your way out to each edge. If there are areas where the water pools up simply use a dry paper towel wrapped around the squeegee and slowly soak up the excess water. If you are trying to wrap the material around an edge a hairdryer will help the material to adhere.
8- When all of the water and bubbles are removed from under the stripe you are done. If your stripes came with transfer tape make sure the stripe is good and set and then remove the transfer tape pulling up at a 45 degree angle, pulling slowly to not disturb the stripe. Park your car in the sun and give it a chance to dry before you drive the car.
Do NOT wash the vehicle for at least 48-72 hours - You may see some small water blisters under the stripe for the first few days, this is completely normal, setting the car in the sun and allowing them to dry naturally for 3-4 days should remove all of the left over water.
9- Enjoy your new VETTEFX stripe kit!
I'm think I might just be getting lazy with my terminology. I removed it from the backing. Until you remove the backing there is no "adhesive side." The part you see in the pics is the transfer tape. I was just referring to it as the backing. Or I could be wrong and that is what they are referring to as backing. Either way, there was no color transfer. That's just the color it is.
Last edited by FawkeeMcGee; 02-08-2016 at 12:49 PM.
Having seen issues with the decal approach, I researched the idea of just going with a painted stinger.....no issues with matching, can be touched up with Mr. Color Chip, looks and shines like the rest of the car, two step paint; can not feel an edge between the two colors . Paid may local (Chevy dealer) body shop $500 (same price as decal when ordering car) and got a much better looking stinger IMO.
NOTE; the paint goes all the way around the edge of the hood grille.
I think anyone who has a problem with a vendor and blasts them on social media before talking to them, is really a bad deal.........Sean is straight up guy and does not deserve this...
So glad I'm outta retail.....
My vetteFX stinger was fine, color was a match and I had it installed wet...
I think anyone who has a problem with a vendor and blasts them on social media before talking to them, is really a bad deal.........Sean is straight up guy and does not deserve this...
So glad I'm outta retail.....
My vetteFX stinger was fine, color was a match and I had it installed wet...
Who is blasting them? I posted an experience with a product. I've said nothing about the vendor or customer service. Stand up guys or not has about 0 to do with what I posted. Thanks for your input though.
I really like the split stripe and even though the one shown here's color is off, I still am tempted to get one. Only thing is, I'd get a window guy to install it.

 02-08-2016, 08:09 AM


 . Paid may local (Chevy dealer) body shop $500 (same price as decal when ordering car) and got a much better looking stinger IMO.