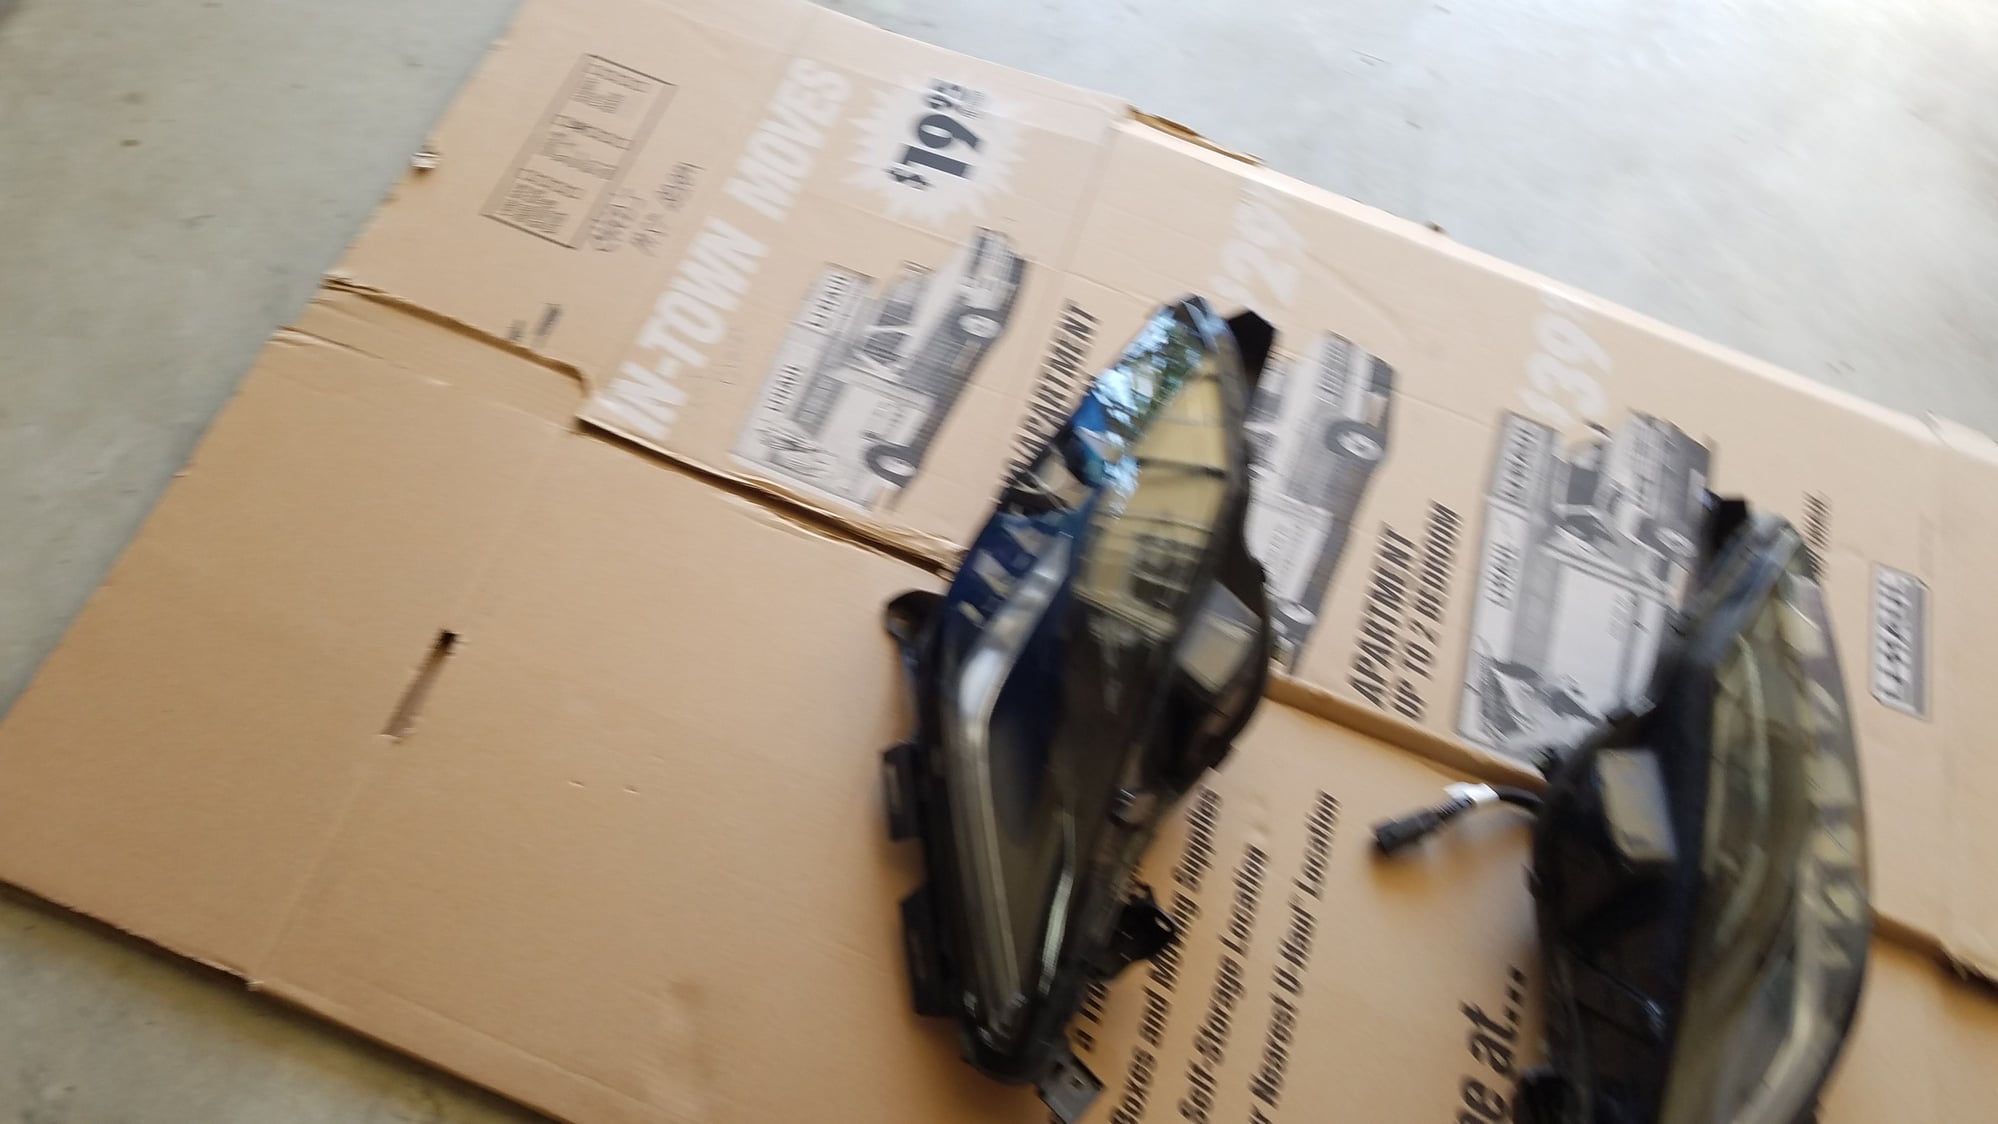
How-To: Replace Front Headlamp HID Bulb
#42
Moderator/Tech Contributor

Member Since: Jun 2001
Location: Jacksonville Florida BWO Dayton, Cincinnati, Bloomsbury NJ, Cincinnati
Posts: 18,232
Received 3,821 Likes
on
2,065 Posts
2015 C7 of the Year Finalist

With those GM instructions, I'm surprised that you aren't told to remove the passenger seat and the right rear taillight!
 Someone needs to quit being an "engineer" or "tech writer" and grab a wrench and spin a few bolts to get it correct.
Elmer
#44
Moderator/Tech Contributor

Member Since: Jun 2001
Location: Jacksonville Florida BWO Dayton, Cincinnati, Bloomsbury NJ, Cincinnati
Posts: 18,232
Received 3,821 Likes
on
2,065 Posts
2015 C7 of the Year Finalist

#45
Exactly - they're usually $100 a pop for quality, authentic Philips/Osram 4300K or 5000K. 6000K, depending on manufacturer, can be cheaper/more expensive, but there are some OEMs that still make 6000K (contrary to popular belief). For reference, as everyone has most likely figured, the factory bulbs are, indeed, 4300K. I was going to swap to 5000K or 6000K before learning of this clusterf.... Oh well. 

Do you know who sells these builds and what brand is the best one. I Have a bulb out only after two oil changes. I want a brighter bulb but not sure if I should do the 6000k or just move up to 5000k.
Any suggestions would be greatly appreciated
Thanks
Billy
#46
Tech Contributor
Thread Starter
Member Since: Jan 2006
Location: Saint Louis MO
Posts: 4,761
Likes: 0
Received 219 Likes
on
110 Posts
St. Jude Donor '14-'15
Hi, Billy,
If you're looking for 'brighter', then you'll still be best off with 4300K. This is the ideal spectrum for distance/output. I prefer the look of 5000K, as it's a 'pure' white, rather than the slight yellowed tint of the 4300K. Though, that yellow band of the 4300K bulb actually adds to the lighting and helps further illuminate the road - your eyes do far better with yellow light at night then with white or blue light. This is one of the reasons night racing cars use 3000K bulbs, as on top of increasing visibility, it also lessens eye strain and fatigue.
As for 6000K, that's a drop in output, but does go cooler into the spectrum (blue-ish tint) - it's mostly used for looks, but is still viable as a light choice.
8000K and on are difficult to drive at moderate to high speeds with, and generally are only used on show cars and the like. They're also illegal here, and easy as heck to pick out due to the purple color.
Whoops! Forgot about your first question: I'd look into the Philips (genuine) or Osram products for real 5000K bulbs. As these are D3S, they will be a bit harder to find than the D1S, and you'll want to be very careful to avoid fakes - they're everywhere.
..
Last edited by Theta; 01-29-2015 at 12:03 AM.
#47
Hi, Billy, If you're looking for 'brighter', then you'll still be best off with 4300K. This is the ideal spectrum for distance/output. I prefer the look of 5000K, as it's a 'pure' white, rather than the slight yellowed tint of the 4300K. Though, that yellow band of the 4300K bulb actually adds to the lighting and helps further illuminate the road - your eyes do far better with yellow light at night then with white or blue light. This is one of the reasons night racing cars use 3000K bulbs, as on top of increasing visibility, it also lessens eye strain and fatigue. As for 6000K, that's a drop in output, but does go cooler into the spectrum (blue-ish tint) - it's mostly used for looks, but is still viable as a light choice. 8000K and on are difficult to drive at moderate to high speeds with, and generally are only used on show cars and the like. They're also illegal here, and easy as heck to pick out due to the purple color. Whoops! Forgot about your first question: I'd look into the Philips (genuine) or Osram products for real 5000K bulbs. As these are D3S, they will be a bit harder to find than the D1S, and you'll want to be very careful to avoid fakes - they're everywhere. ..
I believe You mentioned that the stock bulbs are not true 4300 k. Is this correct or did I misunderstand the threads. If that's correct then I would be better off replacing both bulbs myself and get a better bulb vs having the dealer just replace one bulb under warranty. I find the stock bulbs not being very bright to me. Now on high beam they are very bright. Then again i might need to adjust the beam.
#48
Tech Contributor
Thread Starter
Member Since: Jan 2006
Location: Saint Louis MO
Posts: 4,761
Likes: 0
Received 219 Likes
on
110 Posts
St. Jude Donor '14-'15
Before I forget - I had a typo there - the bulbs are D3S.
The stockers are 4300K - the bulbs used by the factory are of Osram origin, so they're already about the best you can get. If you're getting plenty of light with the brights on, I would suggest re-aiming the lights either by trial-and-error (without blinding anyone, of course), or via the official method inside a garage or other flat space facing a wall.
The stockers are 4300K - the bulbs used by the factory are of Osram origin, so they're already about the best you can get. If you're getting plenty of light with the brights on, I would suggest re-aiming the lights either by trial-and-error (without blinding anyone, of course), or via the official method inside a garage or other flat space facing a wall.
#49
Before I forget - I had a typo there - the bulbs are D3S. The stockers are 4300K - the bulbs used by the factory are of Osram origin, so they're already about the best you can get. If you're getting plenty of light with the brights on, I would suggest re-aiming the lights either by trial-and-error (without blinding anyone, of course), or via the official method inside a garage or other flat space facing a wall.
#50
7th Gear


Member Since: Apr 2008
Location: Chickamauga Georgia
Posts: 7
Likes: 0
Received 0 Likes
on
0 Posts
Since my left headlight dropped out and only comes on dim intermittently, I took it to the dealer. Replacing the bulb is complicated and involves a lot of parts removal just to get at it.(There are procedures on the forum detailing how to replace the bulb etc.) Not recommended in the owners manual. Dealer price to replace entire assembly was recommended as diagnostics could not isolate to bulb, "control module" or ballast. Quoted $1300 for replacement. After whining service tech approached his manager who contacted GM for some help. Price reduced to $742.90 after GM invoked extended warranty even though I am at 77,000 miles in 11 months. Cannot stay out of the car. While I appreciate GM's help immensely, even $742.90 is a helluva price to pay for a headlight that we are not allowed to replace. I thought these bulbs never go bad so suspect the ballast alone is the culprit. Had ballast problems with my C6 but got some that were not sealed against moisture. Installer showed me water dripping out two days after installation of new bulbs and ballasts were full of water and it hadn't rained or been through a car wash. $10 each for new ballasts then. The dealer recommended replacing BOTH assemblies at that $1300 price each and that is when I started whining. Not going there unless and until the other fails. So, I have to get in my daily driving during daylight because I am now paranoid that some dark night the other one will go out and I will die on the road somewhere in the dark. One to two weeks of daylight driving only as the parts have to come from Canada and "go through customs" which can take one to two weeks! Even at dusk or cloudy days, it is humiliating to be a $70,000 car with one headlight. Very embarrassing to me.
#51
Tech Contributor
Thread Starter
Member Since: Jan 2006
Location: Saint Louis MO
Posts: 4,761
Likes: 0
Received 219 Likes
on
110 Posts
St. Jude Donor '14-'15
Holy cow! 
At least we know you're enjoying the car!
Sorry to hear about the bulb - that price still sucks, but with the labor list this long, a lot of that is the 3.5 hour shop time on top of the ballast and bulb (which is really the same thing in this case). Unless you keep your HIDs on constantly, that's an early failure.
In all my years of having cars with OE HIDs, I've lost one ballast (and no bulbs). Aftermarket bulbs and retrofits were another thing entirely, but with regard to Osram/Xenarc, I've been fortunate. Of course, this is the first car that takes more than 15 minutes to change a bulb/ballast, and I've had some doozies.

At least we know you're enjoying the car!

Sorry to hear about the bulb - that price still sucks, but with the labor list this long, a lot of that is the 3.5 hour shop time on top of the ballast and bulb (which is really the same thing in this case). Unless you keep your HIDs on constantly, that's an early failure.
In all my years of having cars with OE HIDs, I've lost one ballast (and no bulbs). Aftermarket bulbs and retrofits were another thing entirely, but with regard to Osram/Xenarc, I've been fortunate. Of course, this is the first car that takes more than 15 minutes to change a bulb/ballast, and I've had some doozies.
#53
Moderator/Tech Contributor

Member Since: Jun 2001
Location: Jacksonville Florida BWO Dayton, Cincinnati, Bloomsbury NJ, Cincinnati
Posts: 18,232
Received 3,821 Likes
on
2,065 Posts
2015 C7 of the Year Finalist

#55
Moderator/Tech Contributor

Member Since: Jun 2001
Location: Jacksonville Florida BWO Dayton, Cincinnati, Bloomsbury NJ, Cincinnati
Posts: 18,232
Received 3,821 Likes
on
2,065 Posts
2015 C7 of the Year Finalist

#56
Well all I know was the light went out. When I picked it up they said they had to replace the entire unit. I asked why and the service writer said that's just what you have to do with these cars.i just found out last night when I talked to the shop Forman exactly what happen to the light. That's while I was looking at my car in the shop again this week but brought in on a flat bed this time.
#57
Moderator/Tech Contributor

Member Since: Jun 2001
Location: Jacksonville Florida BWO Dayton, Cincinnati, Bloomsbury NJ, Cincinnati
Posts: 18,232
Received 3,821 Likes
on
2,065 Posts
2015 C7 of the Year Finalist

Well all I know was the light went out. When I picked it up they said they had to replace the entire unit. I asked why and the service writer said that's just what you have to do with these cars.i just found out last night when I talked to the shop Forman exactly what happen to the light. That's while I was looking at my car in the shop again this week but brought in on a flat bed this time.
Dayem... You are spending entirely too much time "bonding" with your dealer!


Elmer
#58
#59
Pro


Since my left headlight dropped out and only comes on dim intermittently, I took it to the dealer. Replacing the bulb is complicated and involves a lot of parts removal just to get at it.(There are procedures on the forum detailing how to replace the bulb etc.) Not recommended in the owners manual. Dealer price to replace entire assembly was recommended as diagnostics could not isolate to bulb, "control module" or ballast. Quoted $1300 for replacement. After whining service tech approached his manager who contacted GM for some help. Price reduced to $742.90 after GM invoked extended warranty even though I am at 77,000 miles in 11 months. Cannot stay out of the car. While I appreciate GM's help immensely, even $742.90 is a helluva price to pay for a headlight that we are not allowed to replace. I thought these bulbs never go bad so suspect the ballast alone is the culprit. Had ballast problems with my C6 but got some that were not sealed against moisture. Installer showed me water dripping out two days after installation of new bulbs and ballasts were full of water and it hadn't rained or been through a car wash. $10 each for new ballasts then. The dealer recommended replacing BOTH assemblies at that $1300 price each and that is when I started whining. Not going there unless and until the other fails. So, I have to get in my daily driving during daylight because I am now paranoid that some dark night the other one will go out and I will die on the road somewhere in the dark. One to two weeks of daylight driving only as the parts have to come from Canada and "go through customs" which can take one to two weeks! Even at dusk or cloudy days, it is humiliating to be a $70,000 car with one headlight. Very embarrassing to me.
#60
Ok, I have absolute instructions for changing the bulbs. I now have 2 6K bulbs operating on the front of my car. (Well, those and a new Z06 grill, I did both at the same effort. Have to have the nose off to do either so, I was in the neighborhood!)
1) YES, you do have to remove the nose but that is ALL, no other steps are required to get the bulbs changed. You do not remove the wheels, the wheel liners or anything else that I don't list! Got it?
Ok, here goes.
1) Remove the 3 fasteners in the wheel well that are on the front edge right next to the side light on each front wheel well.
2) In the engine bay: Remove the two black covers at the front of the fenders and the take out the fasteners on the top edge of the nose. two push pins and 4 torx bolts
3) Crawl underneath:
Remove all of the 7mm fasteners that sit directly on the nose cover.
Remove 4 10 mm bolts from the rear of the Air Deflector. The air Deflector can now be removed.
Look again in the area that the air deflector exposes. There are 5 or 6 MORE 7mm bolts to come out.
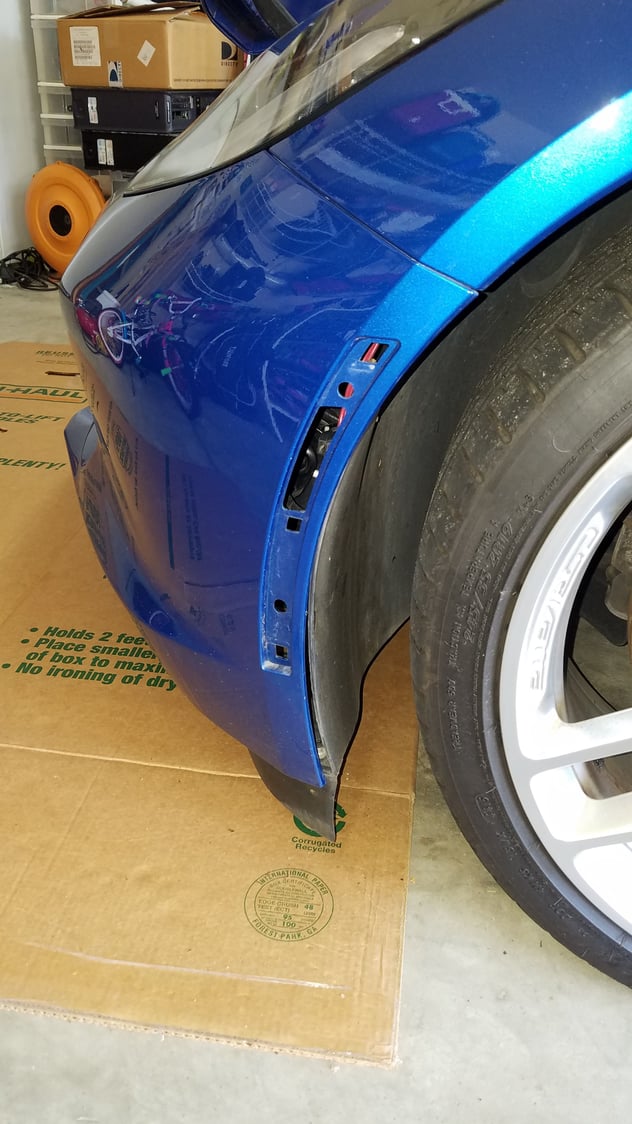
4) Separate the nose in the wheel liner below the light pod to get at the side light connection. You can bend in the fender liner to get the connection in view. There is a small lock that has to be slid away from the connector and then squeeze and pull. Do that for both sides.
5) Ok, ready to remove the nose. Lift up at the last edge of the nose cover exposed in the engine bay. This is the hardest part of the entire process. the edge of the nose going over to the side fender DIRECTLY TO THE headlight pod has 2 tabs that need to pop out of a retaining clamp. This is the short piece that is touching the front quarter panel. IT IS HARD to get them to release. I used a trim removing tool to get under the far edge (next to the light pods) to get the the nose to pop out of the retainer. DO THAT for both ends of the nose covering at the area next to the headlight pods at the seam touching the quarter panel. Once you get those to pop out of the retaining clip, the cover will almost fall off the front to the floor (WHICH you have covered with a large soft cloth to protect the nose paint, right?). It would be best to have a partner when you take off the nose. Once it starts to come off, it can fall to the floor if you don't have 2 people to support the ends of the nose piece.
6) Remove three bolts (each pod) that hold the headlight pod in place.
7) THIS IS IMPORTANT! PAY ATTENTION!!! The black clip that was such a pain in the *** to get the nose to release will be in your way when you try to remove the pod. The black clip is held in place by 2 7mm screws. NOTE THE LOCATION OF THE CLIP. Mark it or whatever you need to do because you MUST put the clip back in the exact location it started. Failure to put it back in the same spot will cause a misalignment of the nose in relation to the fender and that will look like feces!!!
8) Disconnect the electrical connection on the light pod and slowly pull the pod off the car.
9) Open the big round plastic cover on the pod. (Small counterclockwise turn will do it.)
Disconnect the light from the wire plug (pulls straight off)
There are 2 tabs that you now need to turn to unlock the light bulb. They are black and sit at 180 degrees to each other on the base of the light bulb.
Turn the tabs.
Pull straight out on the light bulb base. (Needless to say, don't even THINK about touching the bulb glass with your bare hand.)
Reverse these steps to install the new bulb.
Put the pod back into it's position on the car. Reconnect the connector.
Put the nose clip bracket back in the exact location and tighten down the two 7mm screws.
Do the other pod.
To put the nose back on, it is pretty much in the reverse order of taking it off. I would remind you that there is a piece of trim under the car that needs to be INSIDE of the nose piece as you get everything started for the install. Be sure to get the two tabs of the nose piece that fit under the light pods in to the slots and then lift the nose back into place. I lined up the "hard part to get off" first and used my palm to push those tabs back into place at the black clip.
When you run out of stuff you took off, you should be all set!
No, I did not take pictures. I was working!
It's not really that hard to do. Just take your time and be careful to not scratch up the paint!
Elmer
Step 1
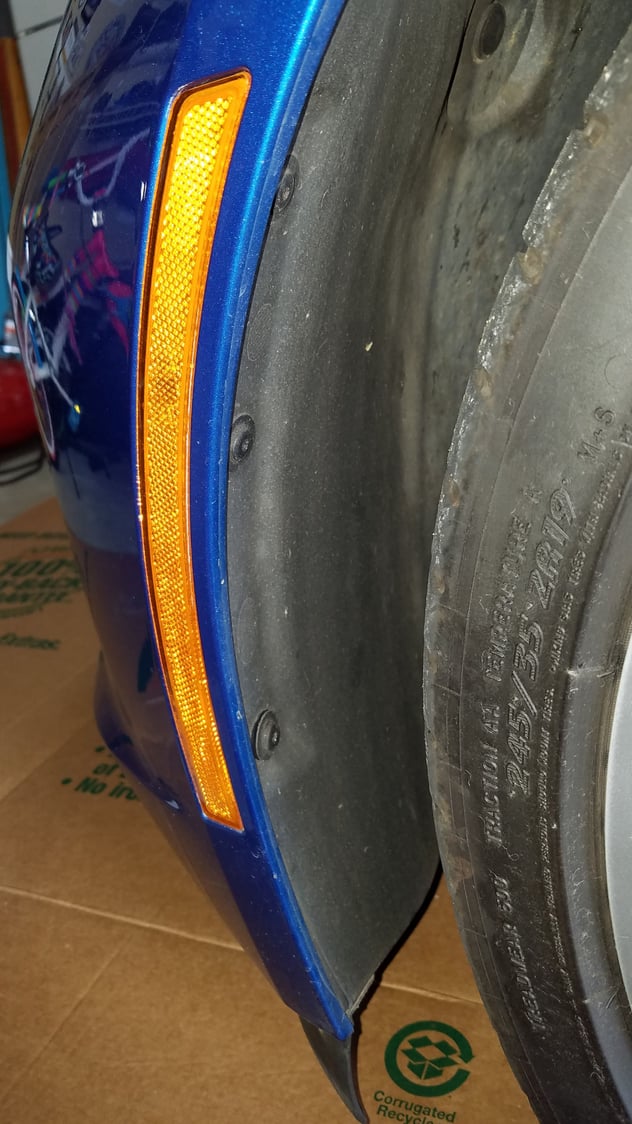
Step 2
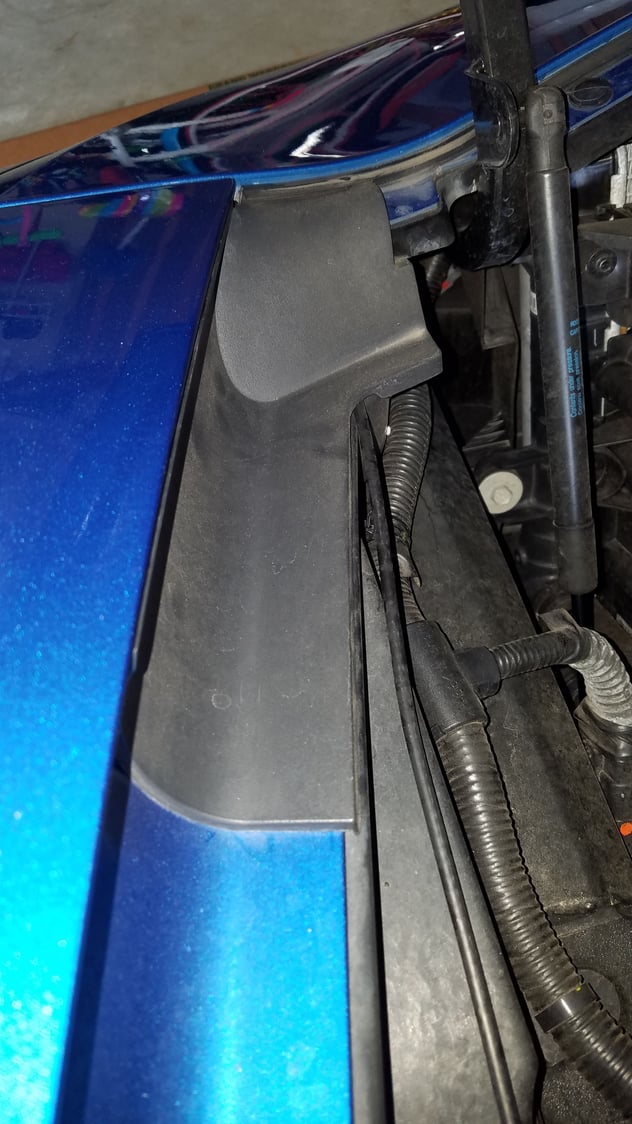

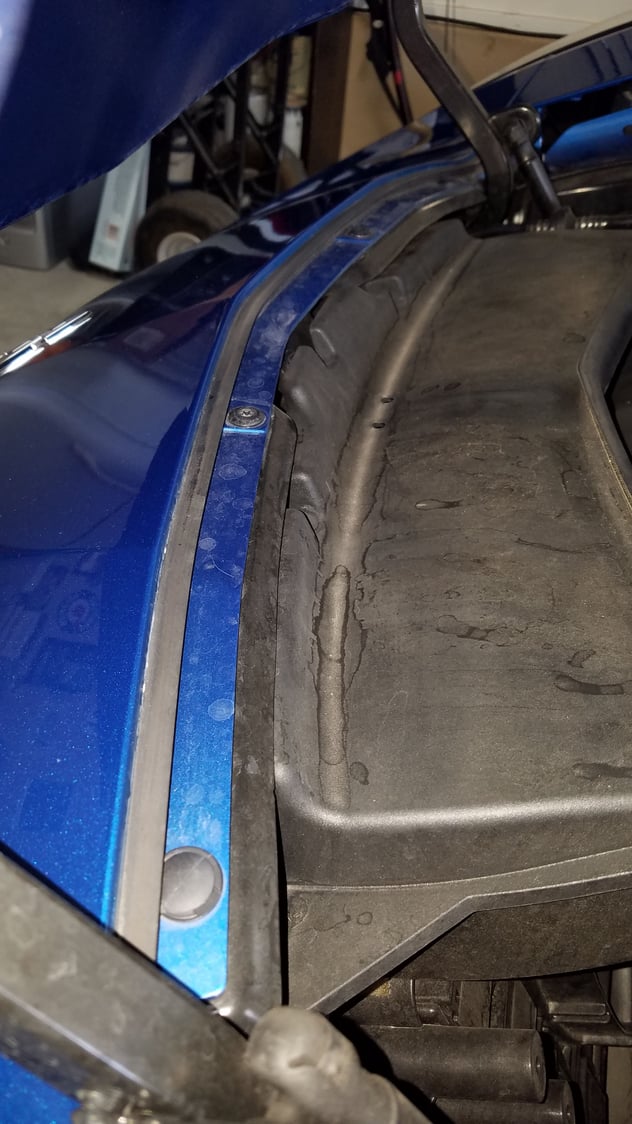
Step 3
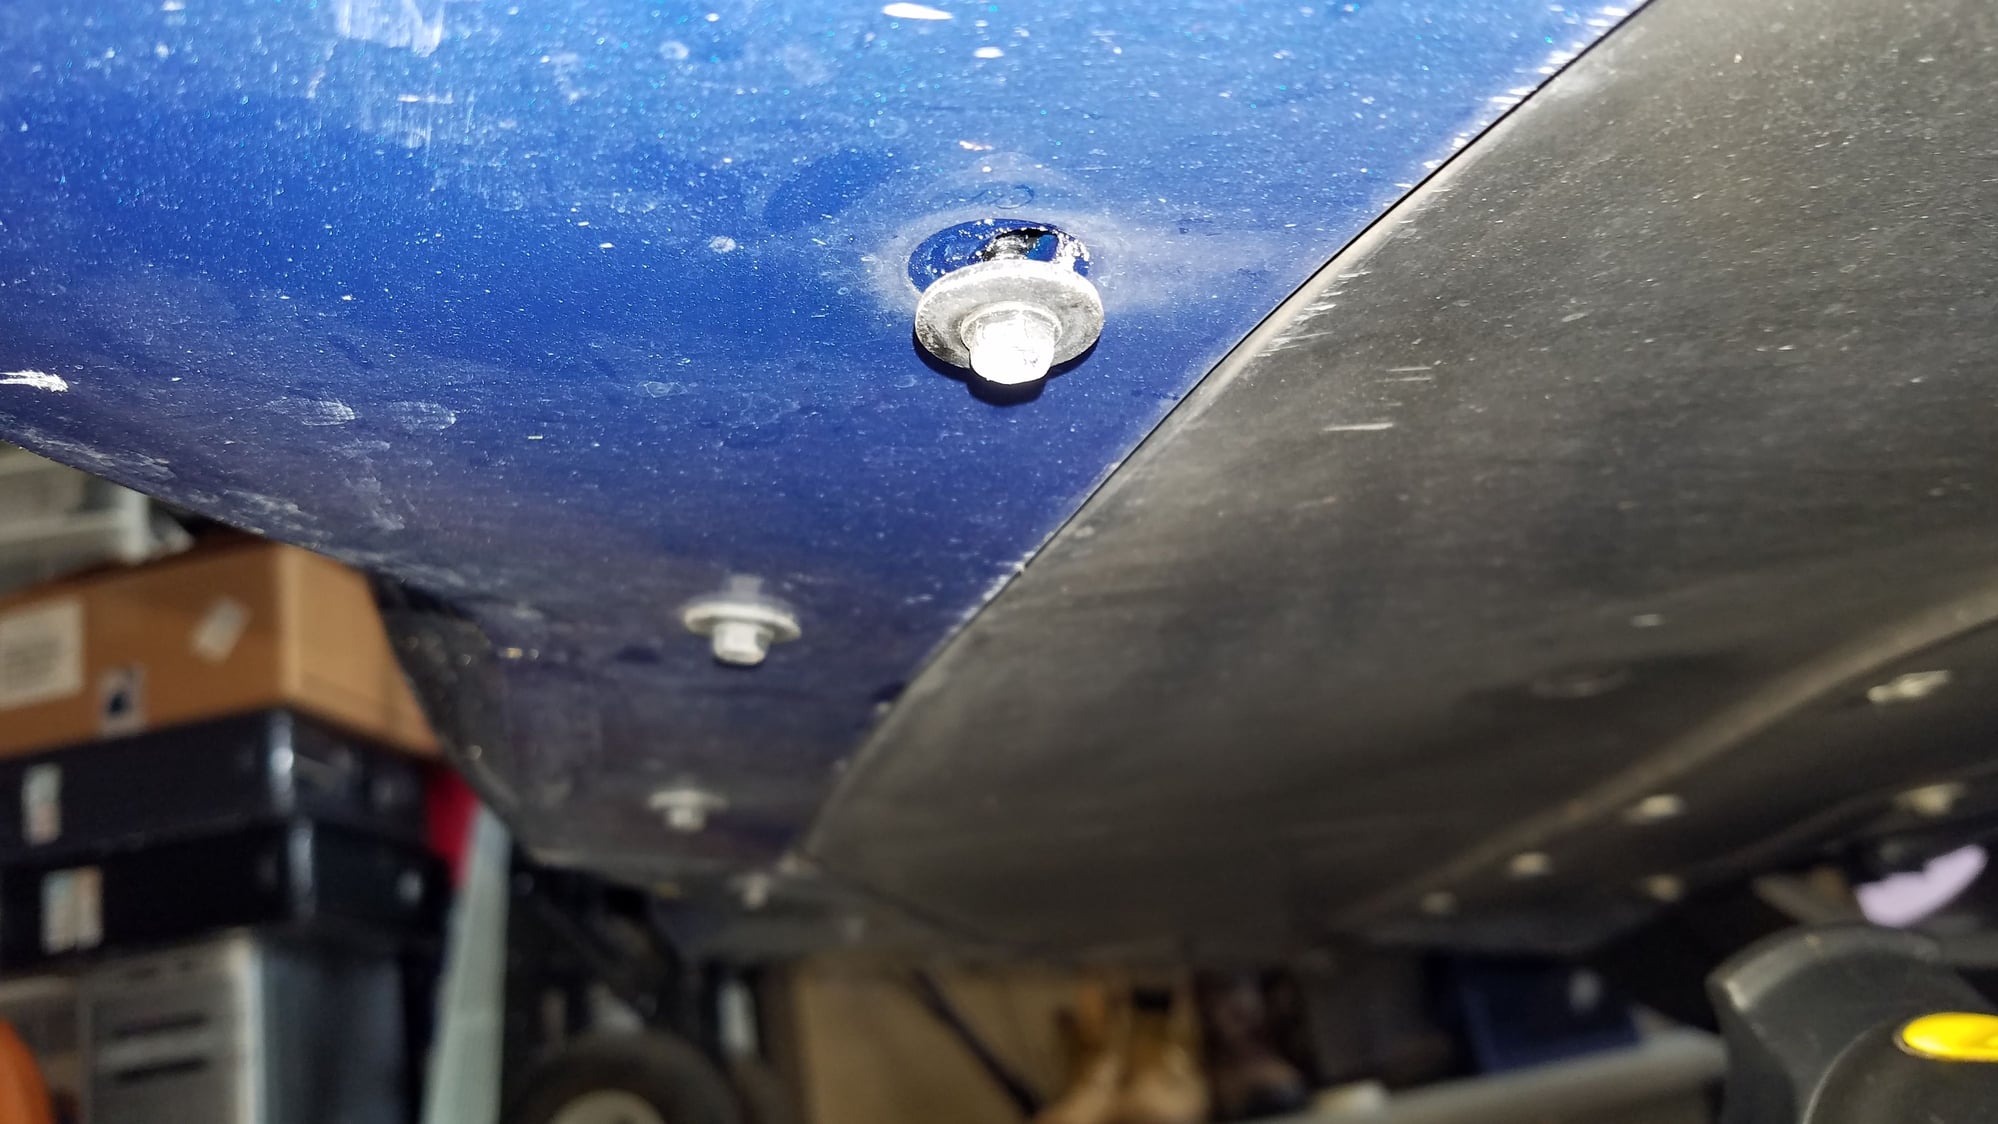


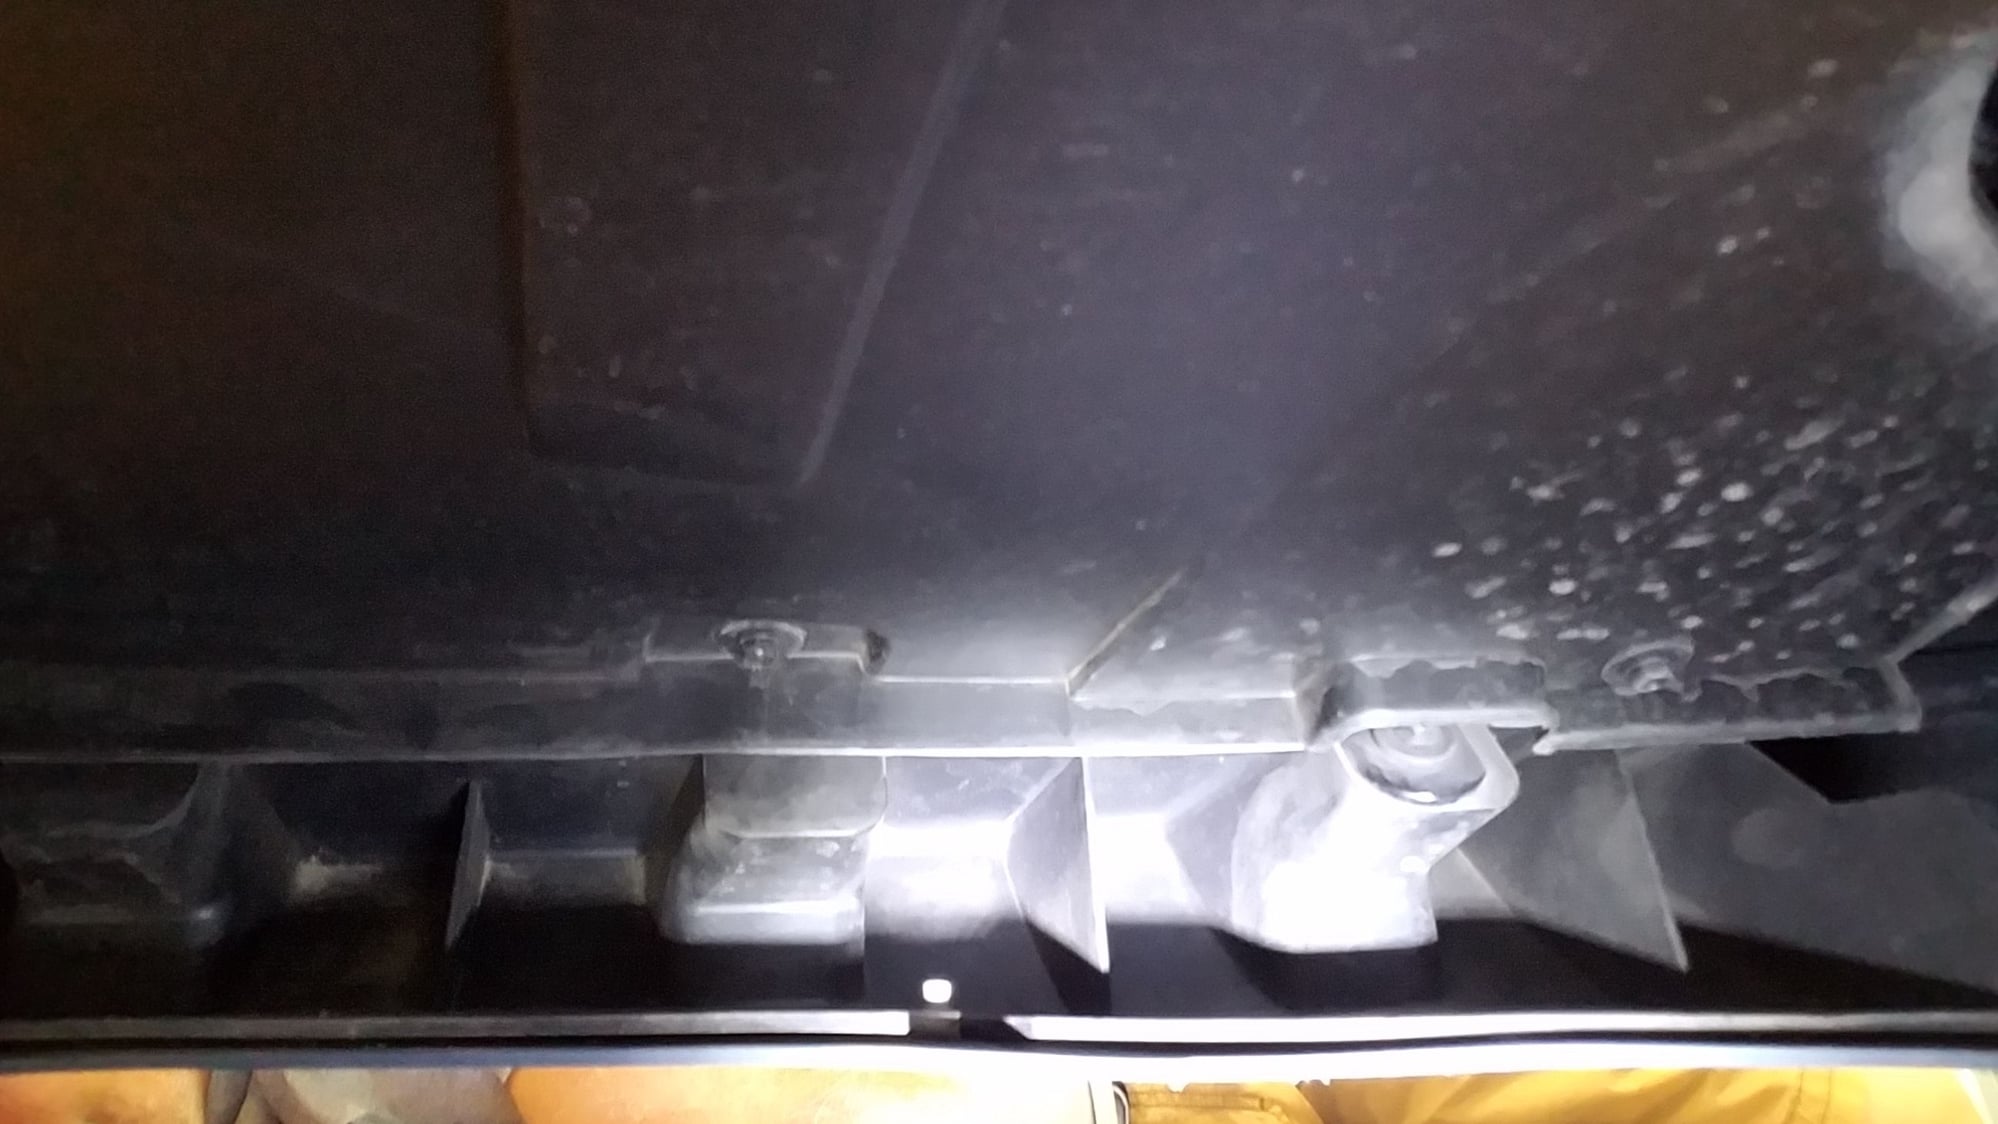
Step 4 - I reached in an popped out the lights as this was easier


Step 5
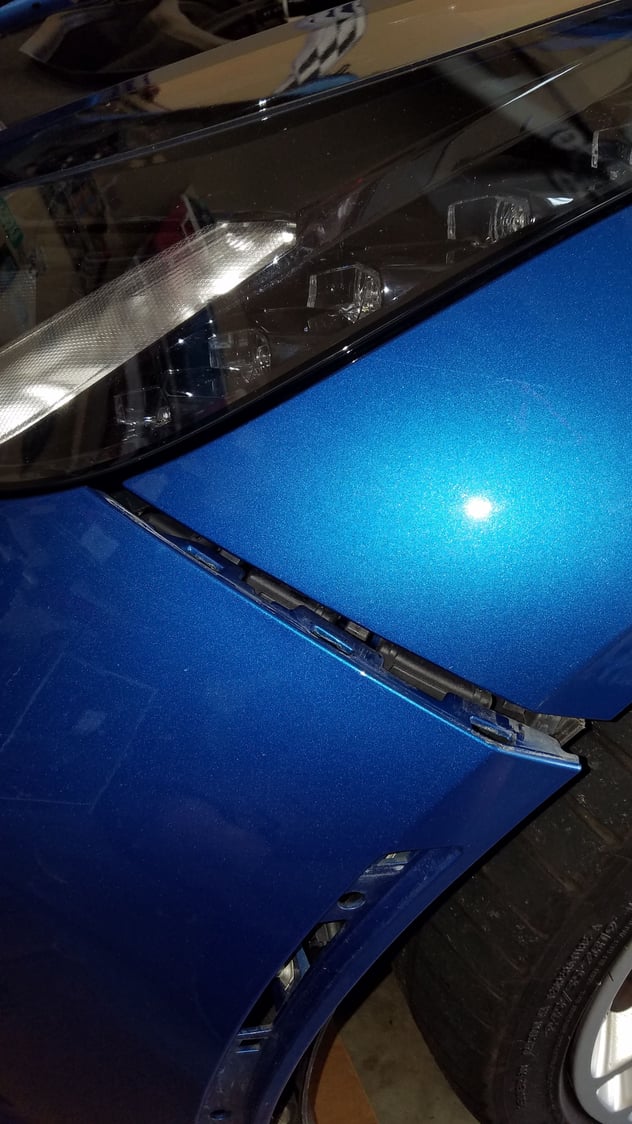


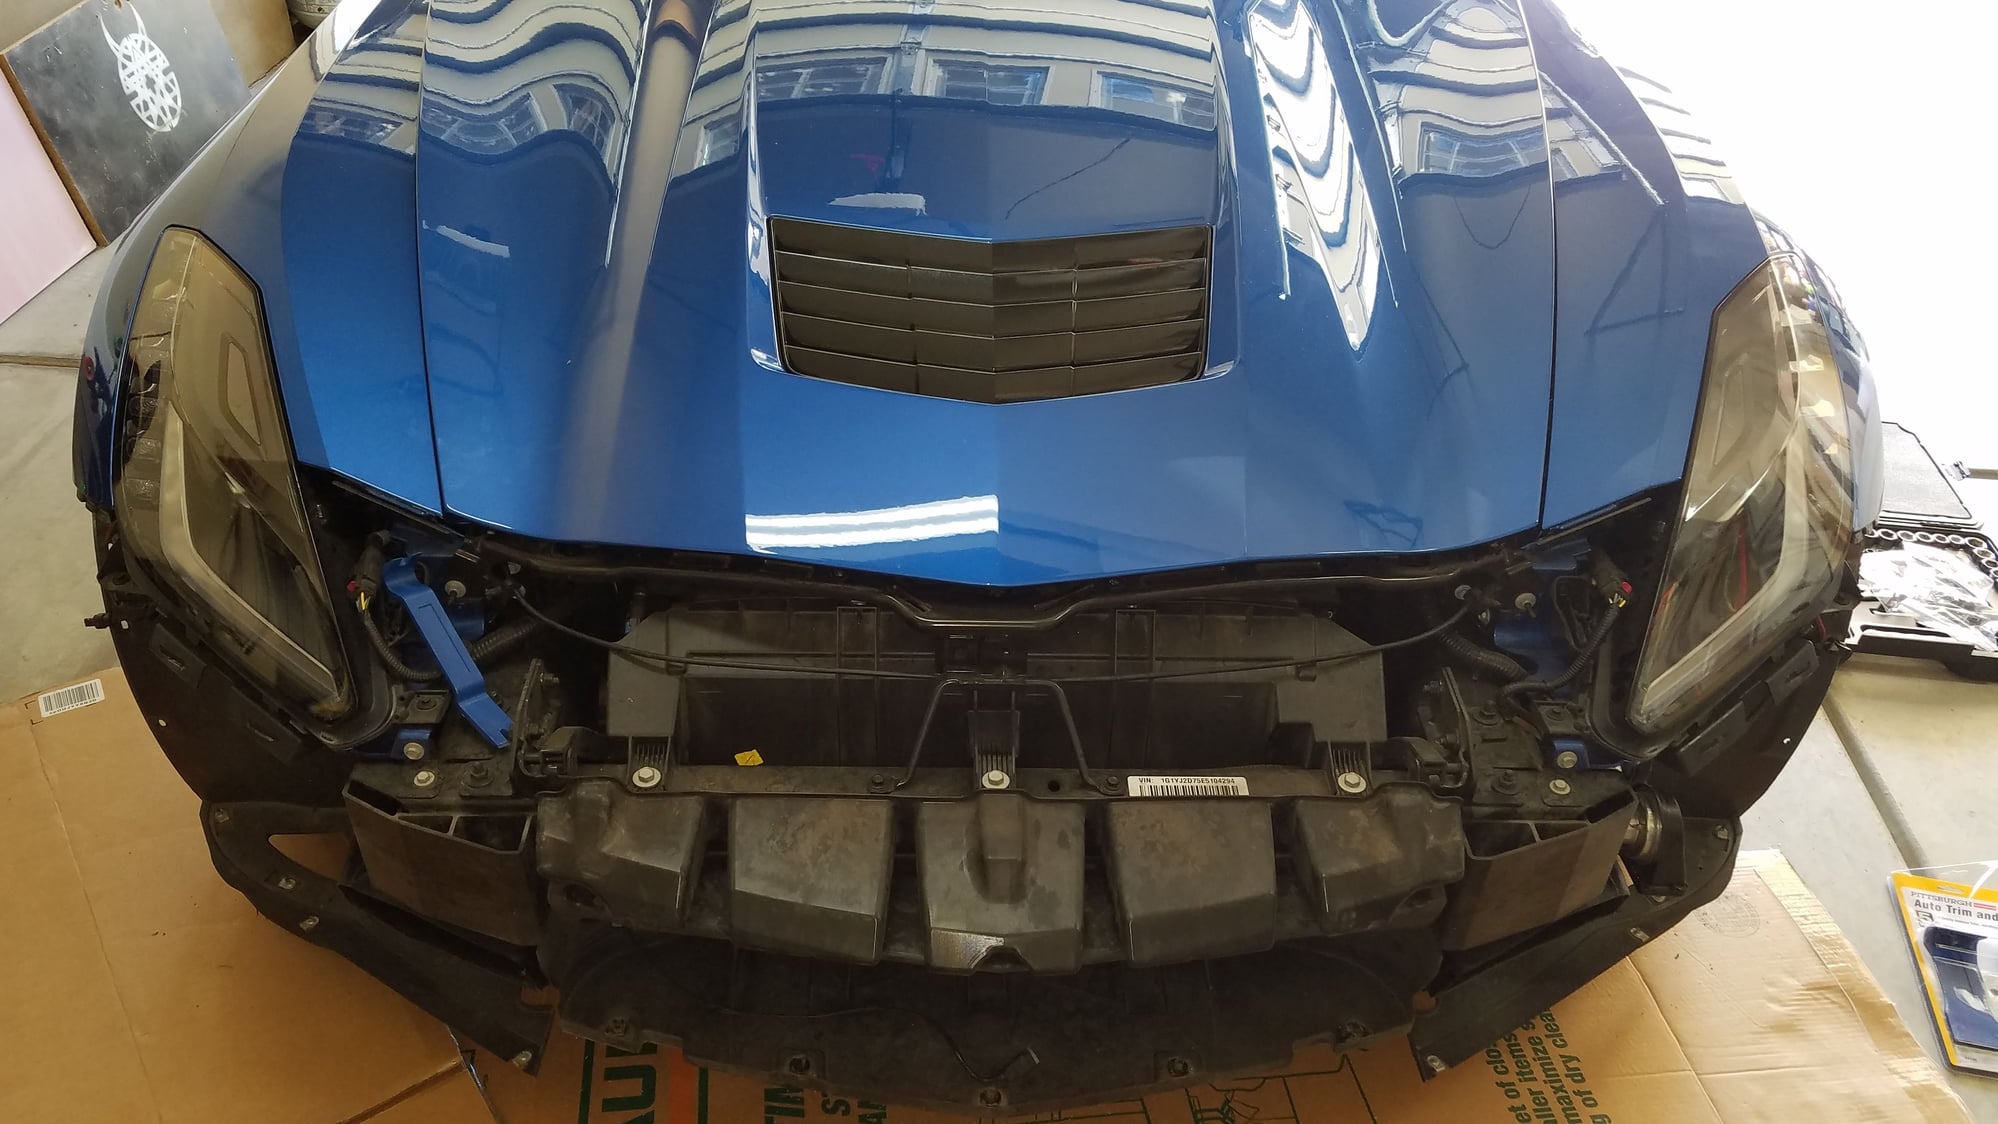
Here is the black clip that was difficult to release

Step 6, 7 and 8 - no pictures needed, very easy
remove 3 screws holding light fixture in place
remove the clip in photo above (both sides)
headlight housing out
