

 03-05-2015, 06:24 PM
Last edit by: IB Advertising
See related guides and technical advice from our community experts:
Browse all: Exterior How-Tos
- How to Replace Emblems
Step by step instructions for do-it-yourselfers.
Browse all: Exterior How-Tos

How-To: Remove/Replace Front/Side/Rear Emblems & Nameplate
06-15-2014, 03:40 PM
#1
Tech Contributor
Thread Starter
Member Since: Jan 2006
Location: Saint Louis MO
Posts: 4,761
Likes: 0
Received 219 Likes
on
110 Posts
St. Jude Donor '14-'15
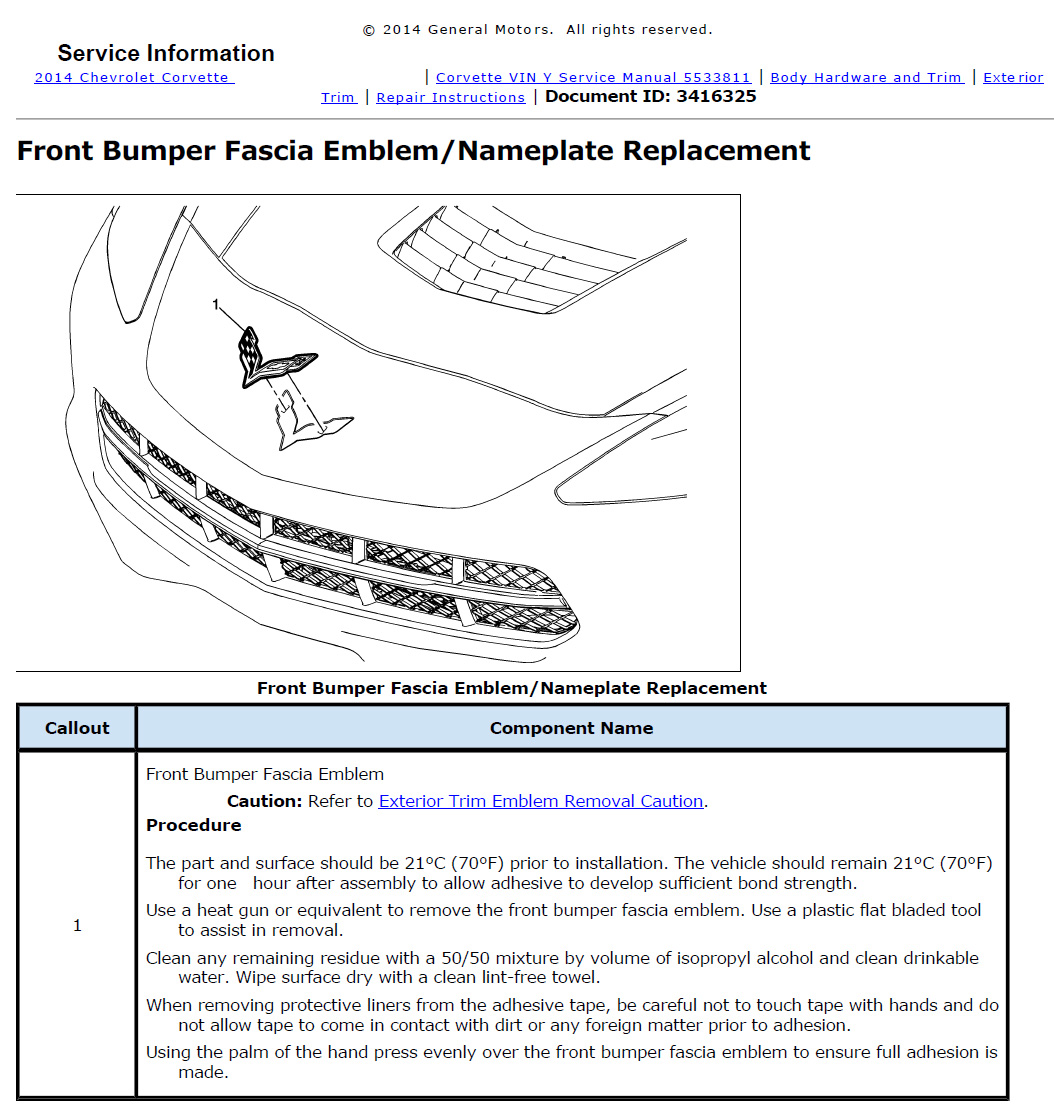
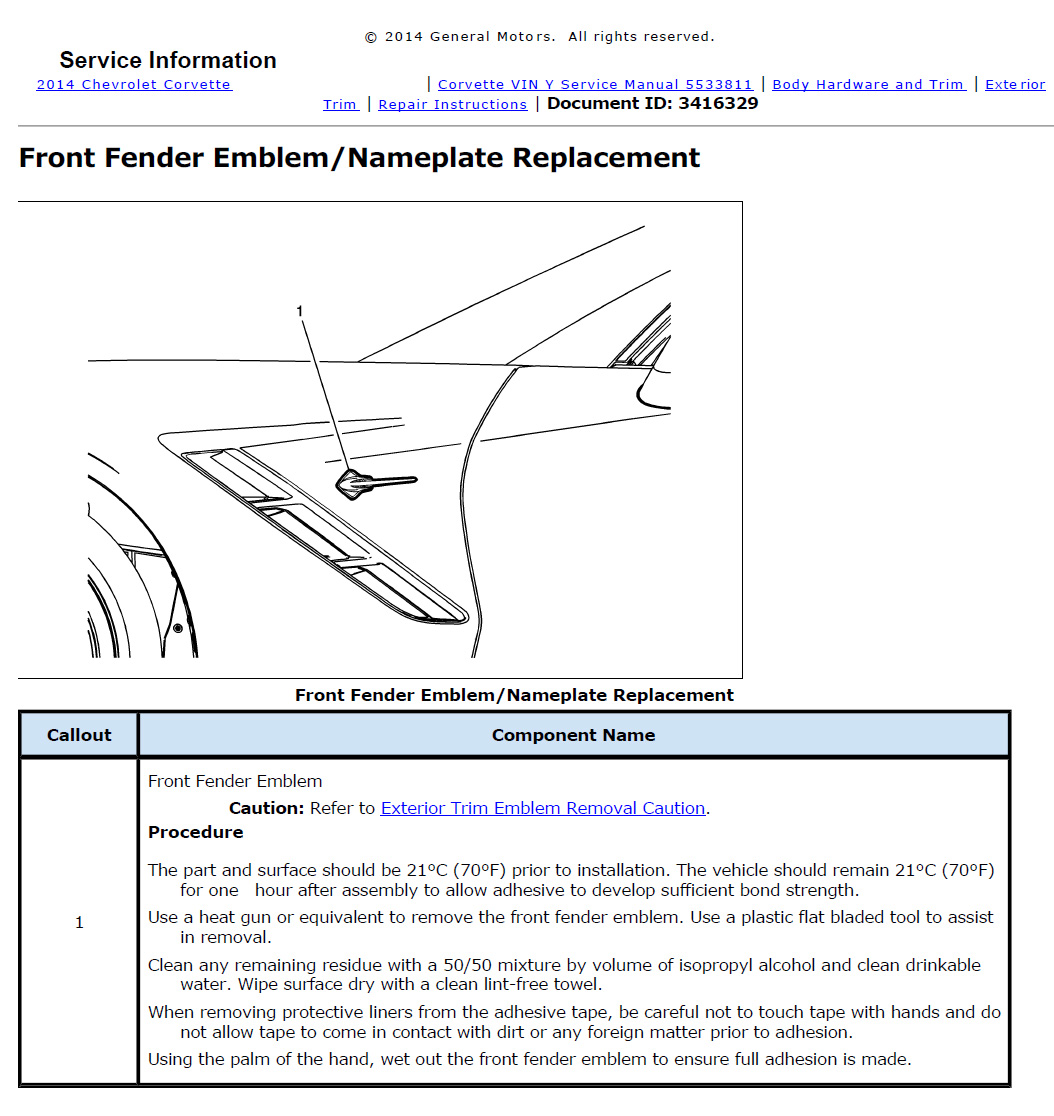
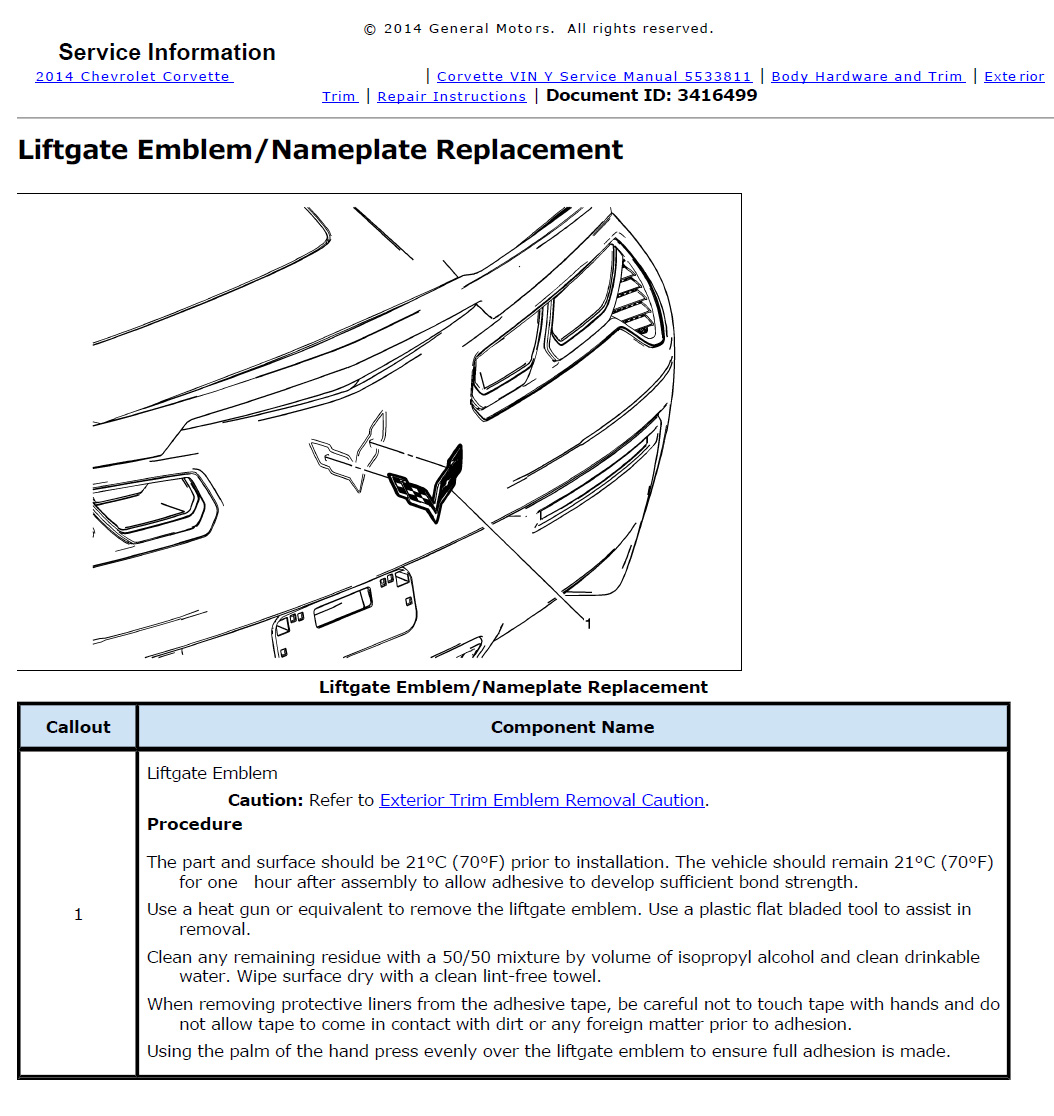
The following How-To covers the explanation of how to Remove/Replace the Front/Side/Rear Emblems & Nameplate and includes specifications, schematics, etc.
These How-To guides are neither endorsed by or property of Corvette Forum or myself in any way/shape/form. All liability stemming from any actions taken in relation to these guides is solely placed upon the user.
We hope you will find these guides useful.
These How-To guides are neither endorsed by or property of Corvette Forum or myself in any way/shape/form. All liability stemming from any actions taken in relation to these guides is solely placed upon the user.
We hope you will find these guides useful.

The following users liked this post:
RACE U (02-08-2016)
The following users liked this post:
zbrett (09-10-2017)
03-09-2015, 03:18 PM
#6
Burning Brakes


Are there any alignment holes or aids for the front bumper fascia emblem? I am thinking about removing the emblem when I have Xpel installed and reinstalling the emblem after.
03-09-2015, 04:56 PM
#7
Drifting


I would like to know that answer as well. I don't think there is holes but maybe someone has good tips for alignment
03-09-2015, 05:35 PM
#8
Pro

The following How-To covers the explanation of how to Remove/Replace the Front/Side/Rear Emblems & Nameplate and includes specifications, schematics, etc.
These How-To guides are neither endorsed by or property of Corvette Forum or myself in any way/shape/form. All liability stemming from any actions taken in relation to these guides is solely placed upon the user.
We hope you will find these guides useful.
These How-To guides are neither endorsed by or property of Corvette Forum or myself in any way/shape/form. All liability stemming from any actions taken in relation to these guides is solely placed upon the user.
We hope you will find these guides useful.
 03-09-2015, 05:37 PM
#9
Pro
Now I just need the distance between the flag and corvette lettering since I already removed the lettering a while back.
03-09-2015, 10:02 PM
#10

The following users liked this post:
JasonInTexas (08-28-2022)
03-09-2015, 10:08 PM
#11
Burning Brakes

 03-10-2015, 03:22 PM
#14
Drifting
05-25-2015, 06:06 PM
#15


I replaced both fender emblems on both of our C7's with no issues!
This process is used if you are replacing them with different emblems!
Tools and supplies: Roll of 2 inch painters tape, red grease pencil, plastic car interior removal tool set (a couple bucks at Harbor Freight), Goo-Gone, mild soap, shop paper towels, car wax, and polishing towels.
Steps
1. Using 2 inch painters tape, I placed it close to the emblems on all 4 sides of the emblems.( this will protect the paint from scratches when using the plastic tool to remove the emblems)
2. Before removing the emblems, use a red grease pencil and make lines on the painters tape at either end of the emblem ( at the center of the head and end of the tail of the Stingray). Extend the lines from each end at least 3/4 of an inch.
3. At the bottom and top of the emblem place the tape as close as possible to the emblems head!
4. Using a heat gun, begin heating the emblem and insert the plastic tool under the tail ! Put some minor lifting pressure on the tool until you feel the adhesive start to release. (Do not overheat the paint!!!)Continue to move the tool towards the head as the adhesive releases. Be careful not to damage the emblems if you want to keep them.
5. After removing the emblems there may be some adhesive residue (I sprayed Goo-Gone on a paper towel, then dabbed it on to remove the adhesive). Make sure to clean any area that has had Goo-Gone on it; with some soap and water.
(Caution: be careful not to remove the red grease pencil lines when cleaning this area or you will have alignment issues with the new emblems).
6. Clean the area where the new emblems will be installed with alcohol wipes!
7. Install the new emblems using the grease pencil lines for alignment.
8. Remove the painters tape and clean the area again with mild soap and water. Using a clean polishing cloth and car wax, Wax the area!
9. Your done
I took about 15-20 minutes per vehicle!
Hope this helps!
05-06-2016, 12:55 PM
#16
Burning Brakes
Has anyone change the Corvette Interior Dash Name Plate?
I would really like to replace it with Car Spec Version that's available.
If so what was the procedure to remove it.
I would really like to replace it with Car Spec Version that's available.
If so what was the procedure to remove it.
09-10-2017, 04:32 PM
#17
Burning Brakes
I discovered the C part of the Corvette emblem on the back had come off while washing the car last weekend. The foam tape was still there, but the plastic letters were gone.
I ordered a new emblem and put it on today following the instructions here. I also used a piece of masking tape to help line the emblem up while putting it in place, using the masking tape as a hinge. I was able to line the emblem up on the first try. I thought maybe it would be helpful to share it here.

I ordered a new emblem and put it on today following the instructions here. I also used a piece of masking tape to help line the emblem up while putting it in place, using the masking tape as a hinge. I was able to line the emblem up on the first try. I thought maybe it would be helpful to share it here.
