
Pfadt Poly Bushings and Inverted Sport Shocks Review
 05-14-2012, 08:16 PM
#1
Instructor

Thread Starter

Over the winter (off season up here in the northeast) I installed Pfadt poly control arm bushings and inverted adjustable sport shocks in my 02 Z06. The car sees mostly weekend driving and typically 10-20 autoX events a season. I have been autocrossing the car for about a year and a half and my driving skills have come a long way (with still a lot to learn!) but I decided I wanted to make a few changes last fall. I was never particularly pleased with the stock dampers, I�ve always felt they had a certain quirkiness to them, unstable over bumps mid corner, touchy when the tail gets loose, etc. so I knew those were going. Having read about all the issues with flex in the rubber bushings and the nasty wheel hop tendency that the car had I decided it was time to do away with the 10 year old stock rubber bushings as well. In addition I was hoping to improve the turn-in and overall responsiveness of the car in quick transient maneuvers on the autoX course.
So with that in mind when the car went into the garage for the winter work began. Because the car was in an unheated garage I decided to completely remove all of the control arms for the bushing install and replace the shocks when I put everything back together. For the removal of the old bushings I used nothing more than a descent sized bench vise and some aluminum blocks and a few sockets and extensions. I basically spaced the blocks out to support the arm so that the bushings could be pushed out between the blocks using a socket. It was a bit tricky to position everything but removing all the bushings took about an hour. The rear shock mount bushings did require the use of an arbor press to remove. After everything was removed I cleaned all of the control arms and then got to work installing the new pieces. The install went fairly smoothly. As many people who have done this have found out, I had to split some bushings in half and shorten them due to the arms having slightly smaller bores in order for everything to fit correct. The only bushings that went in as one piece and fit correctly were the front-most bushing in the rear lower controls arms. Everything else that came as one piece had to be split in half and trimmed slightly. I also had to trim the front upper control arm bushings to eliminate too much preload on the washer/snap ring. I used a hacksaw to cut the bushings in half and a razor blade to carefully remove material from the inside most mating surfaces. The goal being to make sure there was no gap between the inside edge of the bushing flange and the outside surface of the control arm. This took some time and patience but I had all winter so I worked on one arm at a time and gradually got things done. I performed all of the test fitting using a mixture of water and rubbing alcohol in a small spray bottle. The sleeves need to be installed into the bushings to see if there is a gap between the inside face of the bushing and the control arm. Before you put the sleeves in everything can appear fine but with the sleeves in there can be a large gap so make sure to test fit EVERYTHING! Once I was happy with the fitment of all the bushings and sleeves I lubricated everything with the supplied grease and assembled the sleeves for the last time. The grease is VERY sticky but WD-40 works like a charm to remove it and clean up your hands when you�re done. Make sure to grease the outside face of all the bushings as well regardless of whether or not a flanged sleeve is used. If there�s no flange the bushing needs to rotate against the aluminum sub frame and having grease there is important. After that I reassembled everything on the car. During disassembly I made sure I did two things 1) mark all the eccentric bolts with a sharpie and 2) measure the amount of ride height adjustment bolt exposed above the nut in the rear. This allowed me to set the ride height and alignment back as close as possible to where it was when I started. With all the arms back in place I installed the new shocks and torqued everything down to spec. I would recommend using Loctite on the top nut of the rear shocks, I had one loosen up after a few weeks of driving because I didn�t use Loctite at first.
After driving the car around for a few hundred miles I took it took a local shop to have it aligned. Knowing what my goals were and the fact that I run street tires (nitto NT05) and am not overly concerned with tire wear I went with the following specs:
Front:
Camber: -1.8 degrees
Caster: 7 degrees
Total Toe: 0.1 degrees in
Rear:
Camber: -1.0 degrees
Total Toe: 0.3 degrees in
I also had them put the car on scales and check the cross weight percentages. Car weighed in at 3130 with a full tank of gas and cross weights were at 49.6%, good enough for me!
So how does the car feel?? Pretty impressive compared to where it started on the stock setup. On the street it is very comfortable. I�ve been running the Pfadt recommended 6 out of 16 (0 being the softest) for damping on all the shocks on the street and it rides very nice. Maybe a bit more road feel with the poly bushings but the damping is much improved over stock. Traction is improved and the odd feelings from the stock dampers are gone. Still some occasional wheel hop in the right conditions but mostly in cold weather on summer tires and not nearly as bad as it was. On an autocross course the car is amazing. I am still running stock sway bars but the turn-in and response of the whole car is improved. The first test and tune I dialed the rear damping up to help the car rotate to 10 out of 16 clicks, and that alone felt very good. By the next weekend at a timed event I was able to really get a better feel for it. With 10 clicks of damping in the back it was oversteering a bit more than I wanted so I dialed it back to 9 out of 16 and that seemed pretty good. The car is very neutral, a bit of gas mid corner and it pushes, tap the brakes and it oversteers, all very smoothly and progressively. Back to back runs I was able to feel the difference one less click of damping made, that alone is pretty impressive. All in all it was well worth the time and money and the car feels great, thanks Pfadt!!
And now for a few obligatory pictures:
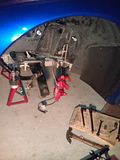
Front disassembled:
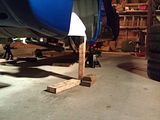
All suspension arms removed:
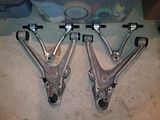
Front arms ready to go back in:
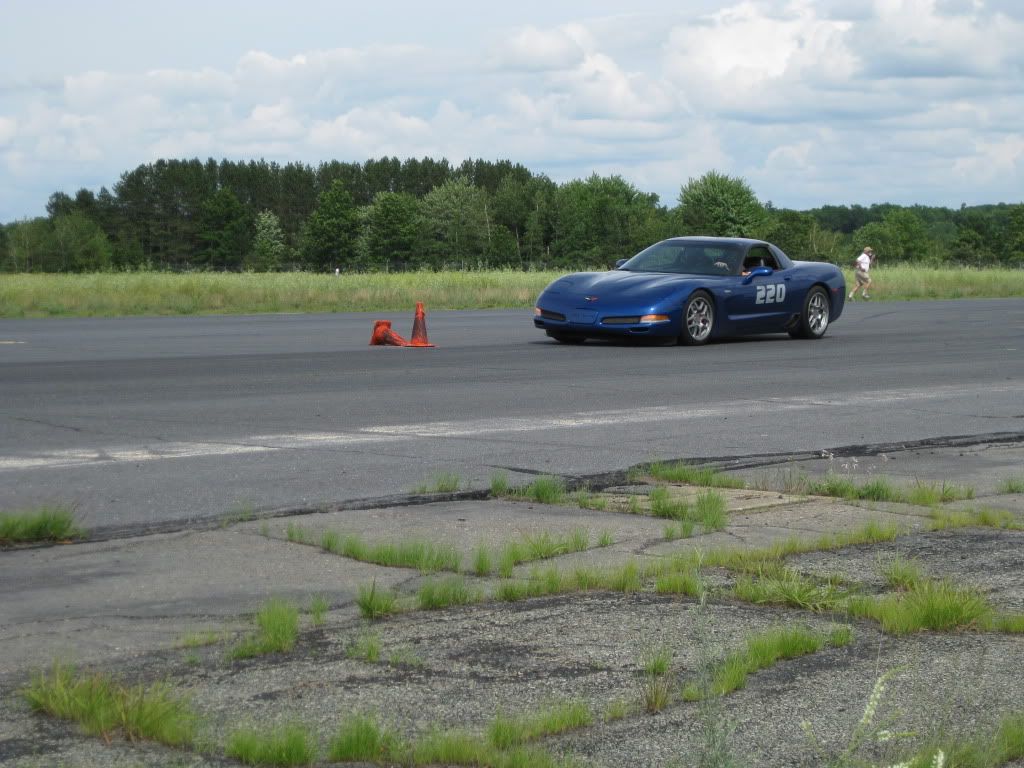
And of course out having fun!
So with that in mind when the car went into the garage for the winter work began. Because the car was in an unheated garage I decided to completely remove all of the control arms for the bushing install and replace the shocks when I put everything back together. For the removal of the old bushings I used nothing more than a descent sized bench vise and some aluminum blocks and a few sockets and extensions. I basically spaced the blocks out to support the arm so that the bushings could be pushed out between the blocks using a socket. It was a bit tricky to position everything but removing all the bushings took about an hour. The rear shock mount bushings did require the use of an arbor press to remove. After everything was removed I cleaned all of the control arms and then got to work installing the new pieces. The install went fairly smoothly. As many people who have done this have found out, I had to split some bushings in half and shorten them due to the arms having slightly smaller bores in order for everything to fit correct. The only bushings that went in as one piece and fit correctly were the front-most bushing in the rear lower controls arms. Everything else that came as one piece had to be split in half and trimmed slightly. I also had to trim the front upper control arm bushings to eliminate too much preload on the washer/snap ring. I used a hacksaw to cut the bushings in half and a razor blade to carefully remove material from the inside most mating surfaces. The goal being to make sure there was no gap between the inside edge of the bushing flange and the outside surface of the control arm. This took some time and patience but I had all winter so I worked on one arm at a time and gradually got things done. I performed all of the test fitting using a mixture of water and rubbing alcohol in a small spray bottle. The sleeves need to be installed into the bushings to see if there is a gap between the inside face of the bushing and the control arm. Before you put the sleeves in everything can appear fine but with the sleeves in there can be a large gap so make sure to test fit EVERYTHING! Once I was happy with the fitment of all the bushings and sleeves I lubricated everything with the supplied grease and assembled the sleeves for the last time. The grease is VERY sticky but WD-40 works like a charm to remove it and clean up your hands when you�re done. Make sure to grease the outside face of all the bushings as well regardless of whether or not a flanged sleeve is used. If there�s no flange the bushing needs to rotate against the aluminum sub frame and having grease there is important. After that I reassembled everything on the car. During disassembly I made sure I did two things 1) mark all the eccentric bolts with a sharpie and 2) measure the amount of ride height adjustment bolt exposed above the nut in the rear. This allowed me to set the ride height and alignment back as close as possible to where it was when I started. With all the arms back in place I installed the new shocks and torqued everything down to spec. I would recommend using Loctite on the top nut of the rear shocks, I had one loosen up after a few weeks of driving because I didn�t use Loctite at first.
After driving the car around for a few hundred miles I took it took a local shop to have it aligned. Knowing what my goals were and the fact that I run street tires (nitto NT05) and am not overly concerned with tire wear I went with the following specs:
Front:
Camber: -1.8 degrees
Caster: 7 degrees
Total Toe: 0.1 degrees in
Rear:
Camber: -1.0 degrees
Total Toe: 0.3 degrees in
I also had them put the car on scales and check the cross weight percentages. Car weighed in at 3130 with a full tank of gas and cross weights were at 49.6%, good enough for me!
So how does the car feel?? Pretty impressive compared to where it started on the stock setup. On the street it is very comfortable. I�ve been running the Pfadt recommended 6 out of 16 (0 being the softest) for damping on all the shocks on the street and it rides very nice. Maybe a bit more road feel with the poly bushings but the damping is much improved over stock. Traction is improved and the odd feelings from the stock dampers are gone. Still some occasional wheel hop in the right conditions but mostly in cold weather on summer tires and not nearly as bad as it was. On an autocross course the car is amazing. I am still running stock sway bars but the turn-in and response of the whole car is improved. The first test and tune I dialed the rear damping up to help the car rotate to 10 out of 16 clicks, and that alone felt very good. By the next weekend at a timed event I was able to really get a better feel for it. With 10 clicks of damping in the back it was oversteering a bit more than I wanted so I dialed it back to 9 out of 16 and that seemed pretty good. The car is very neutral, a bit of gas mid corner and it pushes, tap the brakes and it oversteers, all very smoothly and progressively. Back to back runs I was able to feel the difference one less click of damping made, that alone is pretty impressive. All in all it was well worth the time and money and the car feels great, thanks Pfadt!!
And now for a few obligatory pictures:
Front disassembled:

All suspension arms removed:

Front arms ready to go back in:

And of course out having fun!


