
My oil cooler install
 07-15-2012, 12:53 AM
#1
Safety Car

Thread Starter

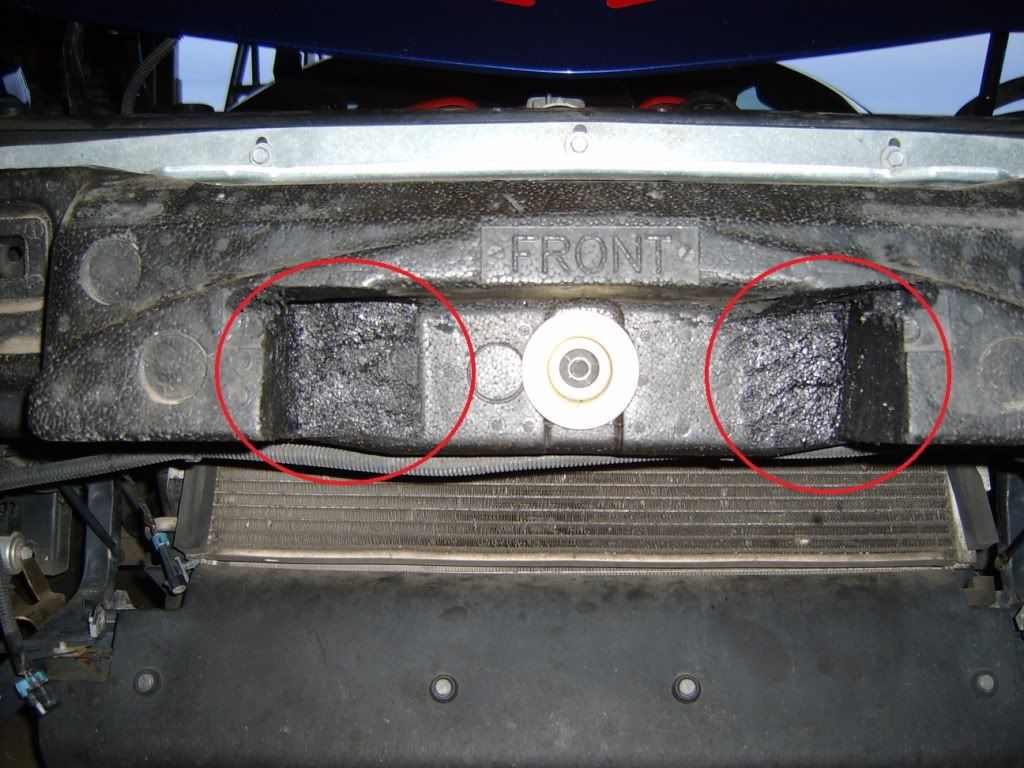
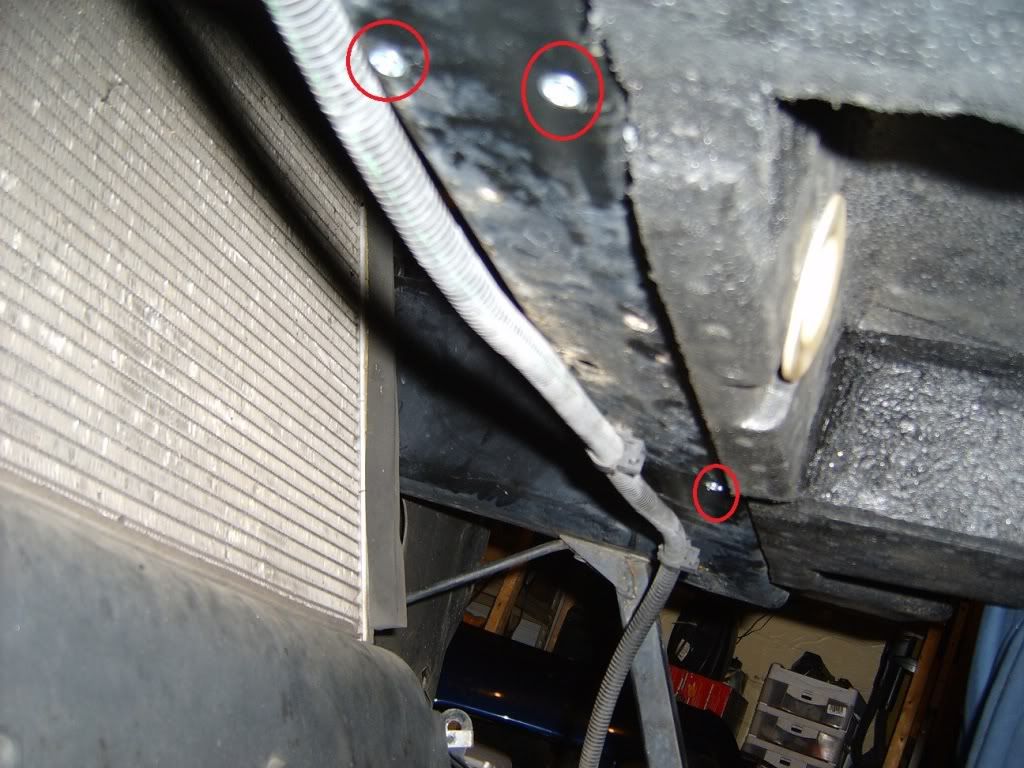
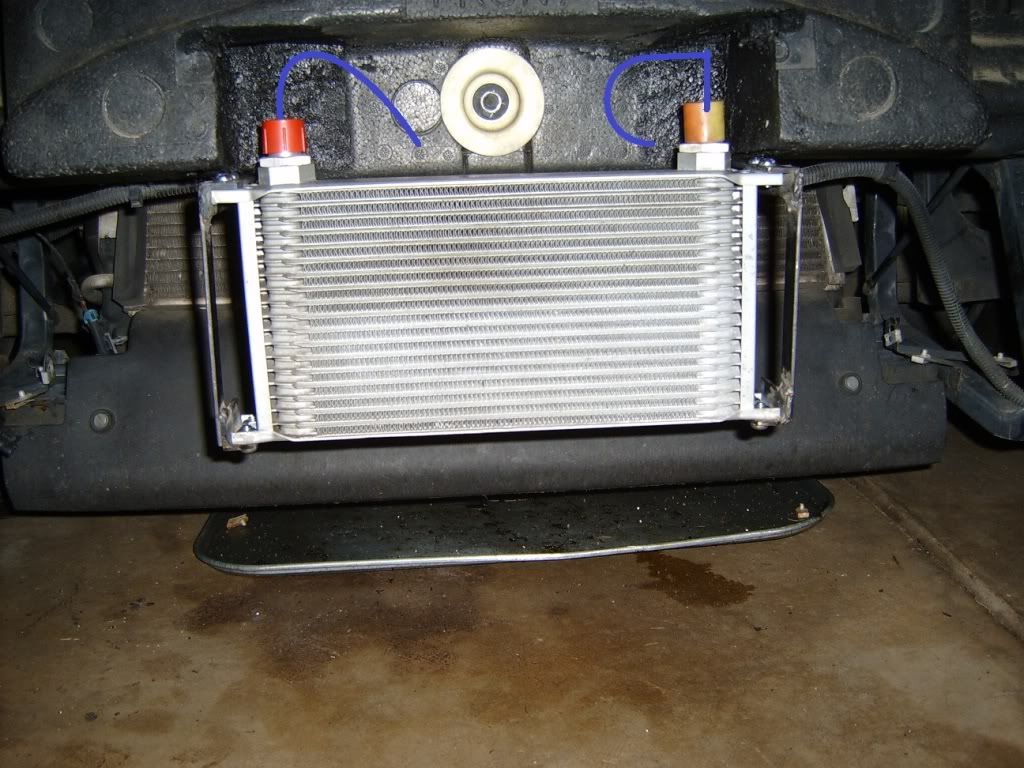
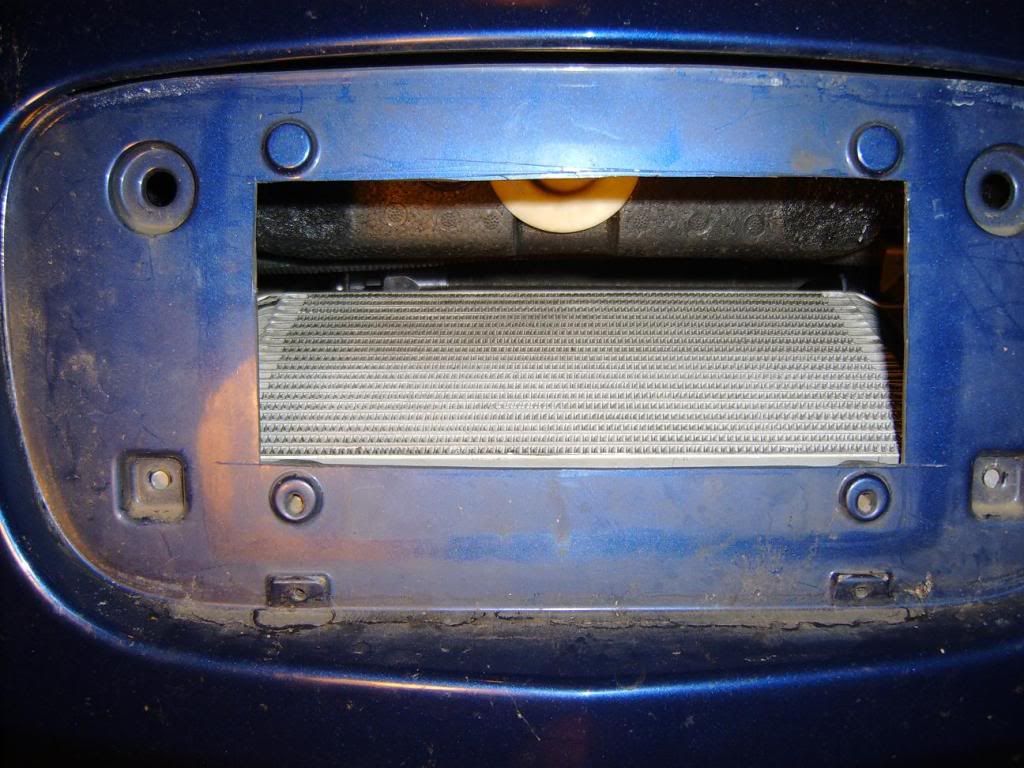
I figure this'll draw criticism from all body styles in here and not just mine. The idea is that the plate deal blocks airflow when not at the track and keeps oil temps as they would be without a cooler on the street and in the cold. I won't have oil heating the coolant or vice versa, there's no thermostat to take away from any cooling benefit, and the oil cooler won't preheat/block the air that flows over the AC and radiator. The bumper foam makes it especially challenging to come up with a good upper mount, I'll fab the lowers tomorrow and am relatively confident that they'll come out good. Some smallish angle iron bolted to the back of the bumper with rivnuts. We shall see. I'll buzz off the foam above the upper mounts in order to gain access to them. For now, I think the oil cooler is about where I want it. The red circles in the pic below illustrate the material removed from the bumper foam in order to fit teh cooler. I'm also going to rivet some baffles to the oil cooler to minimize air leakage around it. I think I'll sink the cooler into the foam just a little bit more in case of impact. Hopefully this doesn't take forever. . .
Last edited by Supercharged111; 07-15-2012 at 12:56 AM.
 07-15-2012, 06:55 AM
#2
Burning Brakes


I like the idea of installing the cooler here.
When I started researching where I was going to install my cooler, this is where I wanted it to go.
Unfortunately, theposition of the cooler should have the fittings on top, not bottom. So, that idea got scratched since I was not about to remove all the foam to get the lines routed to the top.
http://forums.corvetteforum.com/auto...-location.html
Thus the reason why I installed mine against the radiator like most installs.
07-15-2012, 08:24 AM
#3
Safety Car
Member Since: Nov 2000
Location: Shenandoah Valley Virginia
Posts: 4,549
Likes: 0
Received 27 Likes
on
24 Posts

You will not get any where near the maximum benefit from installing the cooler in that location. Proper air flow through the coils is the major concern, you have to move a lot of air to remove heat from the oil. Your intake is not the same size as the cooler restricting flow. Exhaust from the cooler is totally blocked on the top half of the coils by the impact foam. Lines need to enter and exit through the top of the cooler. You are going to be very unhappy with the results if you continue in the direction you are going. Spend an additional $100, get a Mocal 150 degree thermostat and install it on the cooler intake line. The thermostat allows about a 5% flow through the cooler until the oil reaches 150 degrees and then opens gradually to eliminate possible thermal shock. Use a standard mounting location and get some air flow in through the coils. Don't reinvent the wheel.
07-15-2012, 11:52 AM
#4
Safety Car
Thread Starter
You will not get any where near the maximum benefit from installing the cooler in that location. Proper air flow through the coils is the major concern, you have to move a lot of air to remove heat from the oil. Your intake is not the same size as the cooler restricting flow. Exhaust from the cooler is totally blocked on the top half of the coils by the impact foam. Lines need to enter and exit through the top of the cooler. You are going to be very unhappy with the results if you continue in the direction you are going. Spend an additional $100, get a Mocal 150 degree thermostat and install it on the cooler intake line. The thermostat allows about a 5% flow through the cooler until the oil reaches 150 degrees and then opens gradually to eliminate possible thermal shock. Use a standard mounting location and get some air flow in through the coils. Don't reinvent the wheel.
After reading the link, I see where I went wrong on the lines. Last oil cooler install I did was a sideways one where the feed entered the bottom, so I thought the all had to enter the bottom. It's all an effort to prevent the cooler from draining when the car's off. That's cool, I'd prefer to have the lines out of impact's way anyway. There's more cooler above my cutout than below, so I think I can find a way to make this work. The best way is probably to lower it and angle it back like the rad/AC.
Last edited by Supercharged111; 07-15-2012 at 11:58 AM.
 07-15-2012, 06:04 PM
#6
Safety Car
Thread Starter
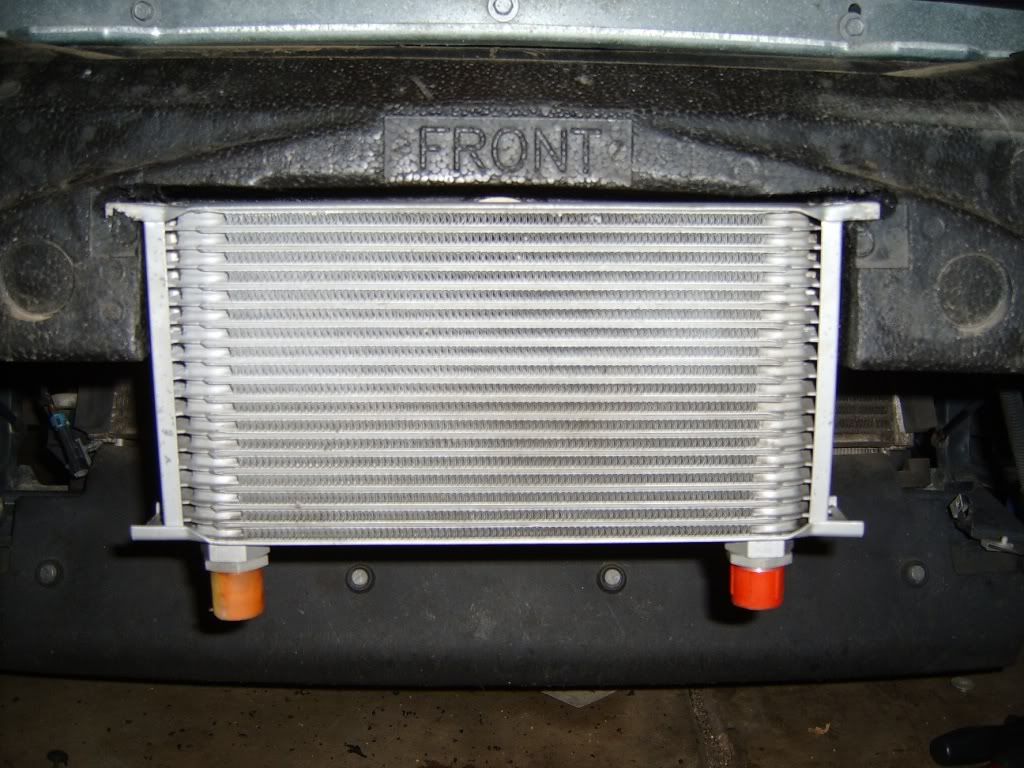
Yeah, I did some more research after I posted and found that out. I guess the cooler might never fill up all the way. No biggie, I made some mounts to hold it with the lines facing up, buried about 1" behind the foam for some level of protection. The bumper foam is no longer an exhaust restriction for the cooler, but the radiator shroud sure is. We'll see what my oil temps do with the addition of the cooler. I'm going to plug the Z06 screens to hopefully help with the pressure differential across the core. Once I get the rivnuts in the bumper to hold up the mounts, I'll post some pics.
07-19-2012, 01:26 AM
#7
Safety Car
Thread Starter
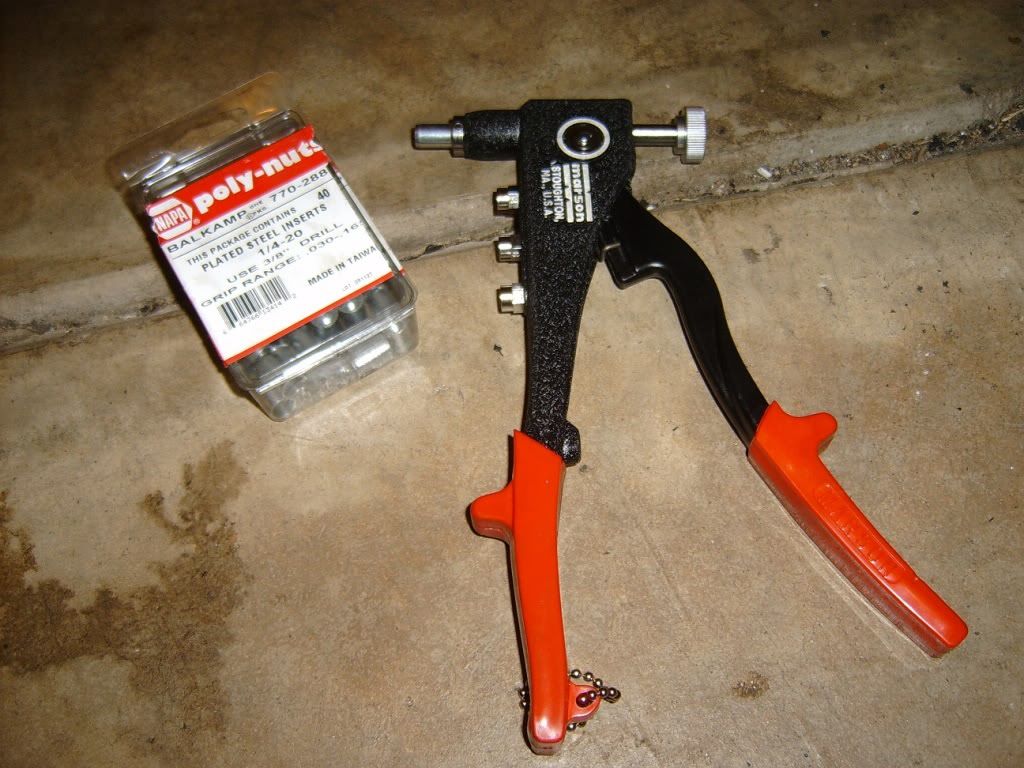
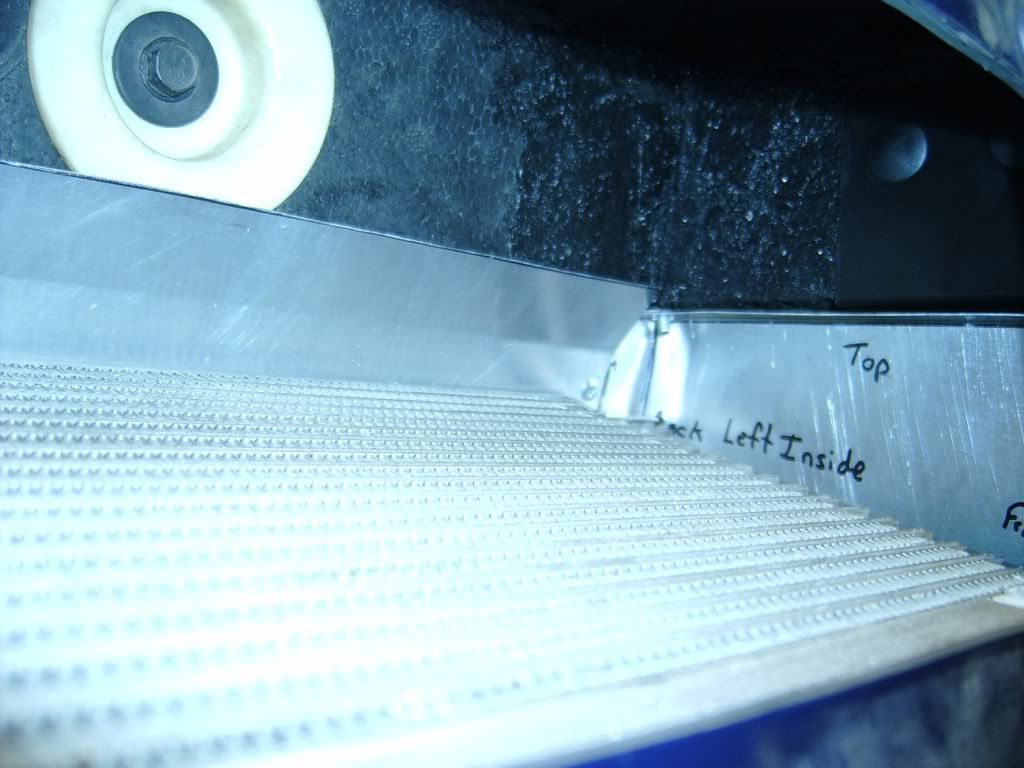
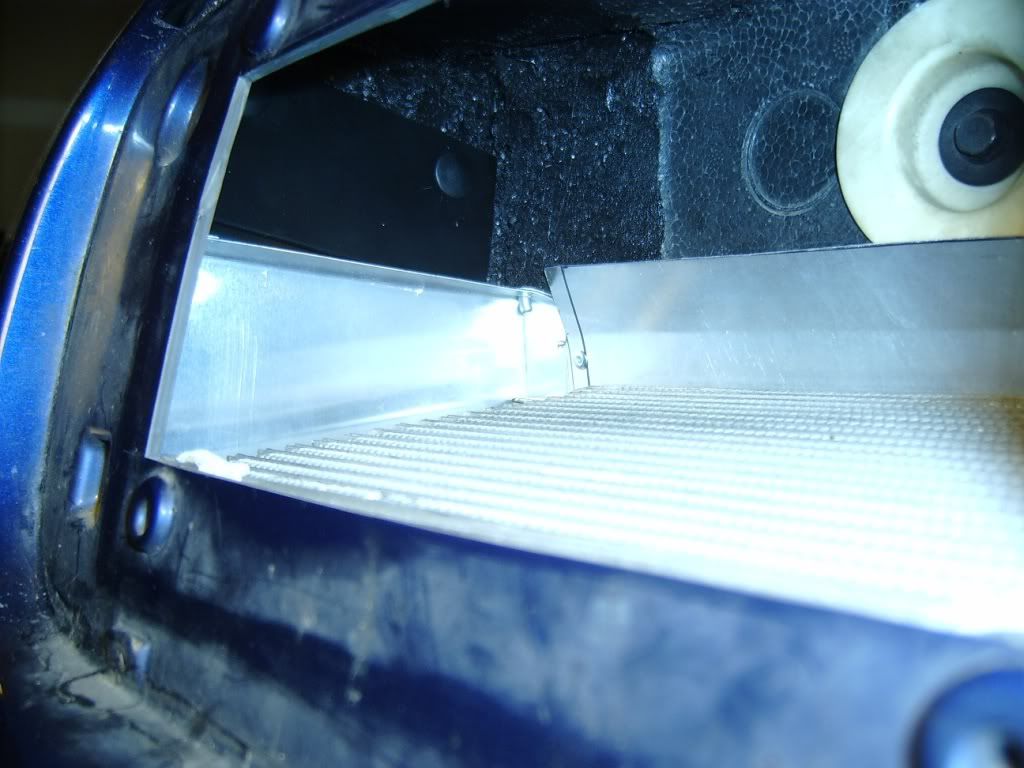
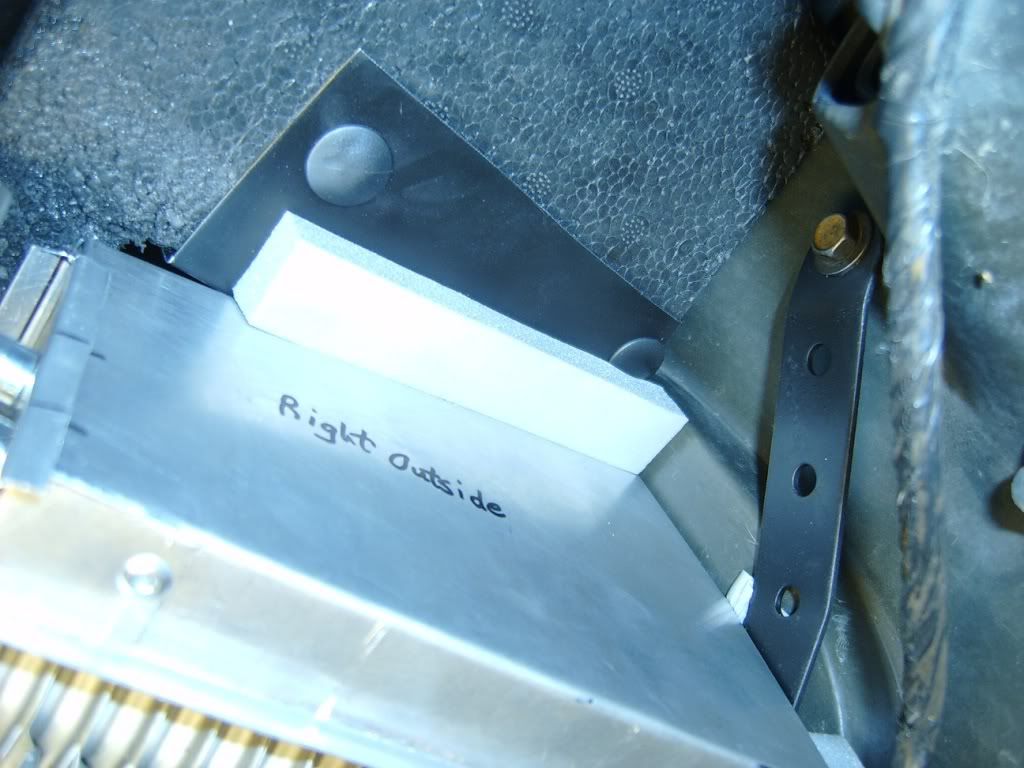
I finally got the rivnut gun and the correct mandrel for it and got them all popped into the stock bumper. I managed to utilize the 2 unused factory rivnuts leftover from the stock airbox too.
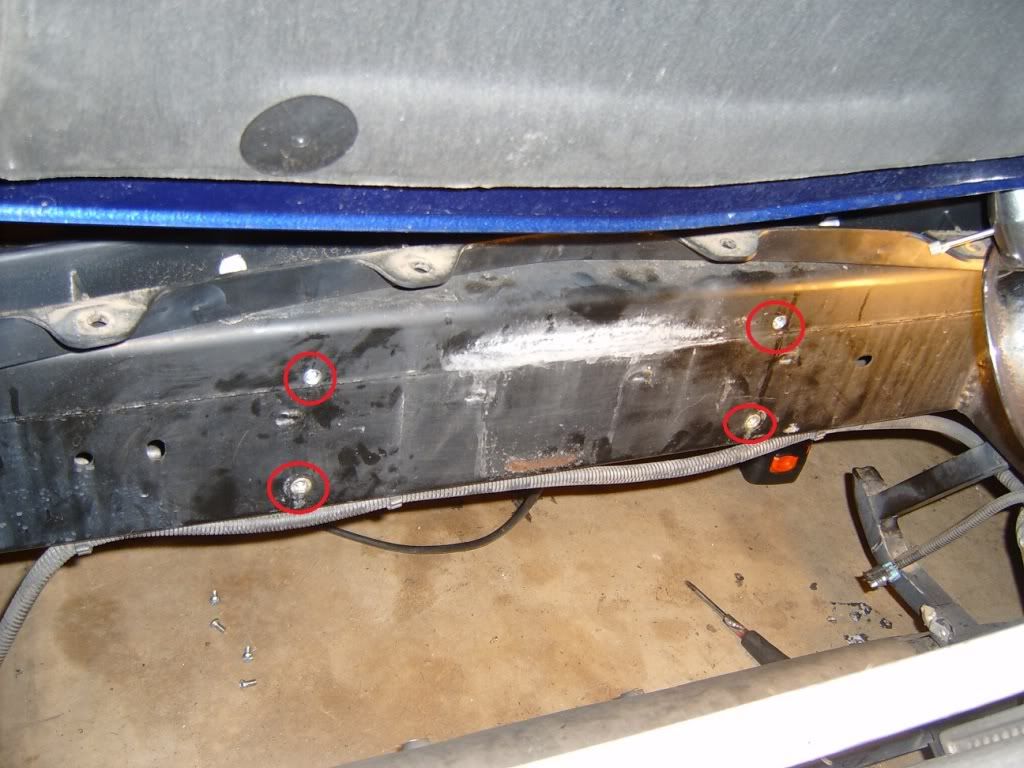
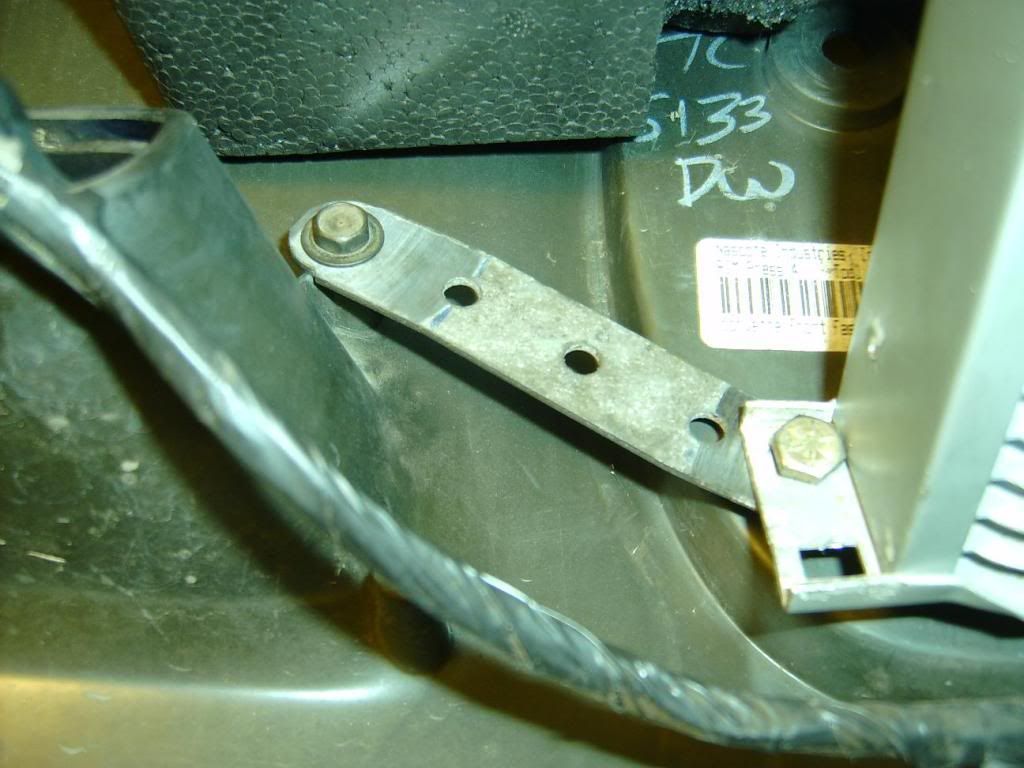
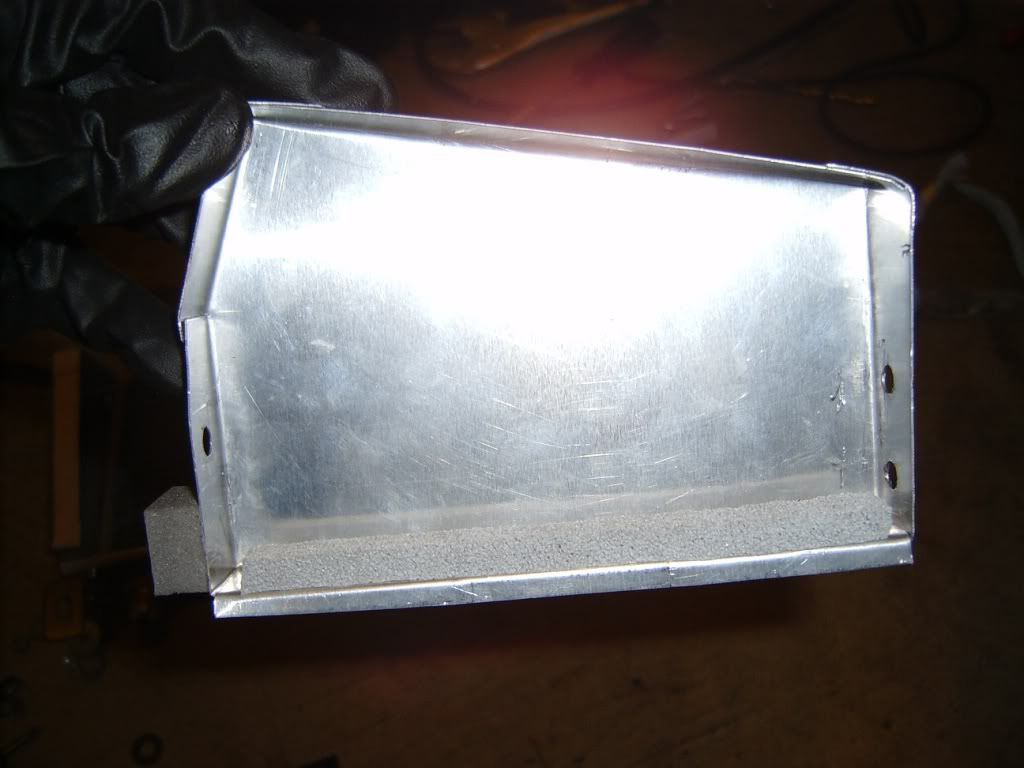
The mounts are pretty much done, just needs a final grinding and painting, but it bolts up nicely and holds the oil cooler quite firmly in position.
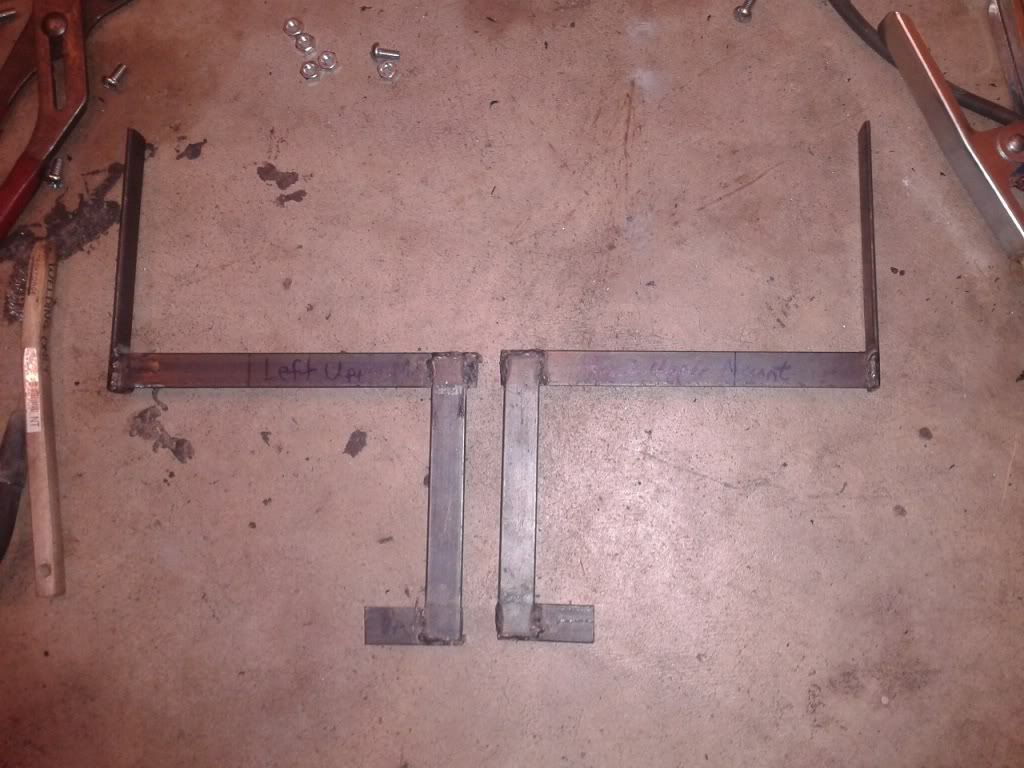
I intend to run a 120 degree fitting on the passenger side and a 90 degree coupler to a 180 degree fitting on the driver's side of the cooler. Tomorrow, I'll see about installing the block, measuring for lines, deciding on fittings, and placing my order. While I wait for my order, I can start on the ducting to the cooler. I should be done milking this in time for the August 4-5 HPDE. Does anyone know where to find that orange insulation chafe guard cover stuff?
The mounts are pretty much done, just needs a final grinding and painting, but it bolts up nicely and holds the oil cooler quite firmly in position.
I intend to run a 120 degree fitting on the passenger side and a 90 degree coupler to a 180 degree fitting on the driver's side of the cooler. Tomorrow, I'll see about installing the block, measuring for lines, deciding on fittings, and placing my order. While I wait for my order, I can start on the ducting to the cooler. I should be done milking this in time for the August 4-5 HPDE. Does anyone know where to find that orange insulation chafe guard cover stuff?
Last edited by Supercharged111; 07-19-2012 at 01:39 AM.
07-19-2012, 09:15 AM
#8
Safety Car
Member Since: Nov 2000
Location: Shenandoah Valley Virginia
Posts: 4,549
Likes: 0
Received 27 Likes
on
24 Posts
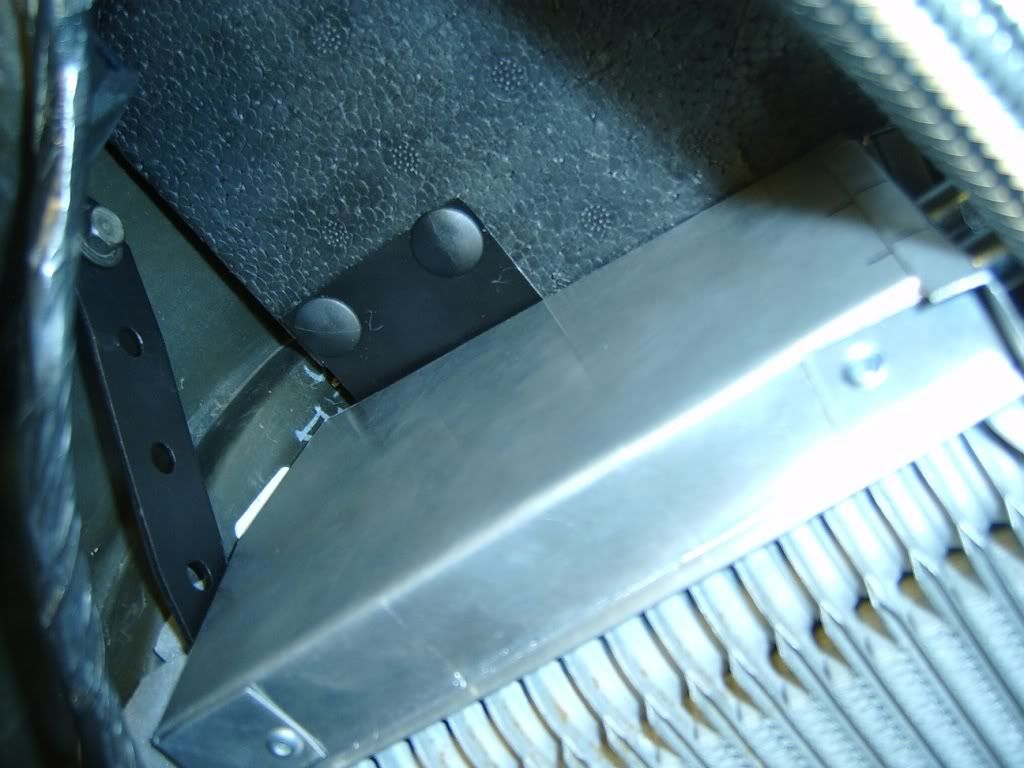
Nice bracket arrangement. That location will definitely give you better air flow. How is the ducting from the front of the car going to work ? For hose chafe protection, I used the black plastic electric wire loom guard product. It is available at all the big box home stores in the electrical supply section. They usually have several thicknesses and I.D.s of products available. Let us know what temp reductions you get.
08-19-2012, 12:01 AM
#9
Safety Car
Thread Starter
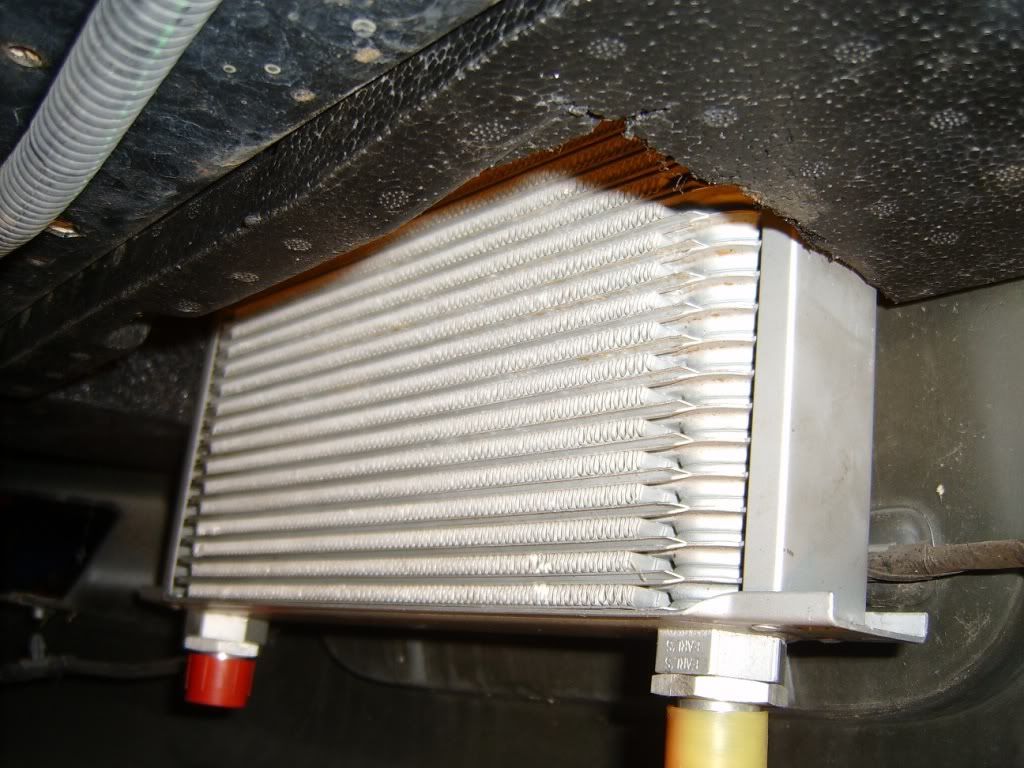
That 90 degree fitting was going to restrict flow, so I was going to do just the 180 and it was looking like there was sufficient hose flex to pull it off. Most of the cooler was lower than the opening, so I ducted it completely. Then I got to making the lines, and realized how weird the Earl's fittings looked, called Earl's and they recommended using hose and ends from the same manufacturer. According to Summit's site, the Earl's hose is about .020" bigger OD than the Russel, so I decided to just get 2 more Russel 90 degree fittings and re-mount the cooler just like the Pfadt setup.
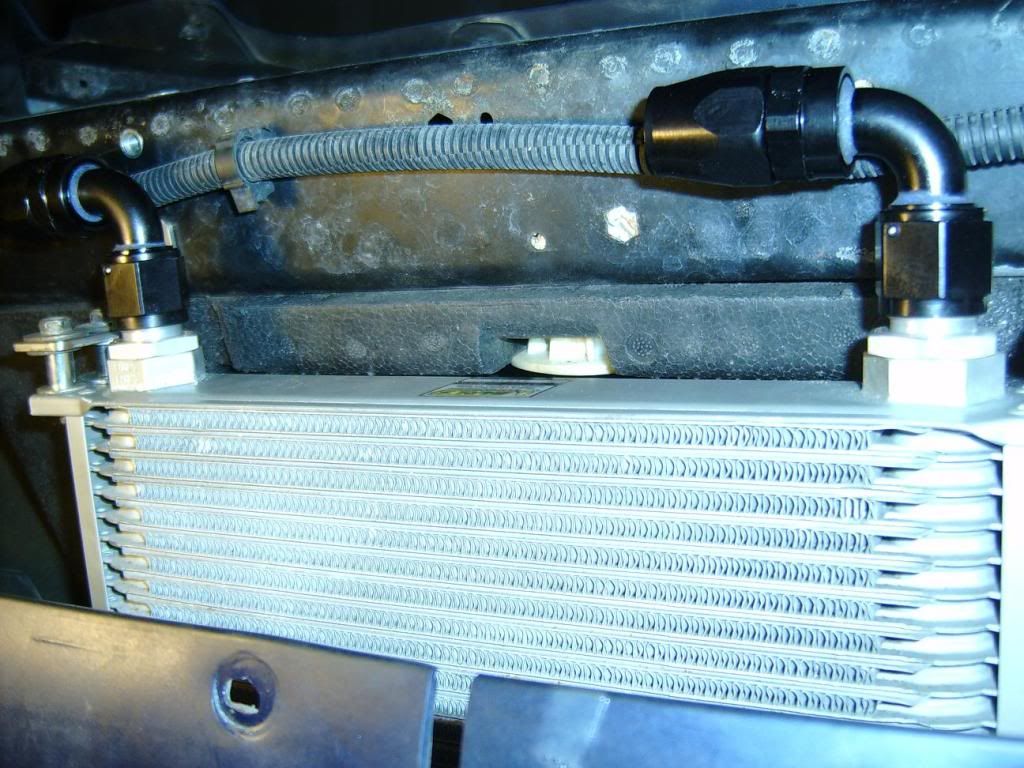
This went together in absolutely no time. I'll foam the back side of the bumper to seal the cooler to the bumper and shroud the sides and back. I think the airflow will be a lot more direct, and still have the same pressure differential as before. It should hit the whole core equally and since the cooler is canted slightly upward in the back, shouldn't have any issues with air bubbles either. I installed the 3/8" spacers in the rear mount bolts to get myself a more comfortable amount of clearance between the hose ends and the radiator/intake shroud. It also put the oil cooler close enough to the bumper to be able to seal it with just a piece of foam.
This went together in absolutely no time. I'll foam the back side of the bumper to seal the cooler to the bumper and shroud the sides and back. I think the airflow will be a lot more direct, and still have the same pressure differential as before. It should hit the whole core equally and since the cooler is canted slightly upward in the back, shouldn't have any issues with air bubbles either. I installed the 3/8" spacers in the rear mount bolts to get myself a more comfortable amount of clearance between the hose ends and the radiator/intake shroud. It also put the oil cooler close enough to the bumper to be able to seal it with just a piece of foam.
Last edited by Supercharged111; 08-19-2012 at 12:03 AM.
08-25-2012, 11:43 PM
#11
Safety Car
Thread Starter
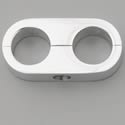
I should have this thing done tomorrow, just need to get creative with 2 adel clamps and mounts for them to hold the lines where I want them. I'm using some overpriced things to hold the lines together so I only need to clamp one line to hold the pair where I want them.
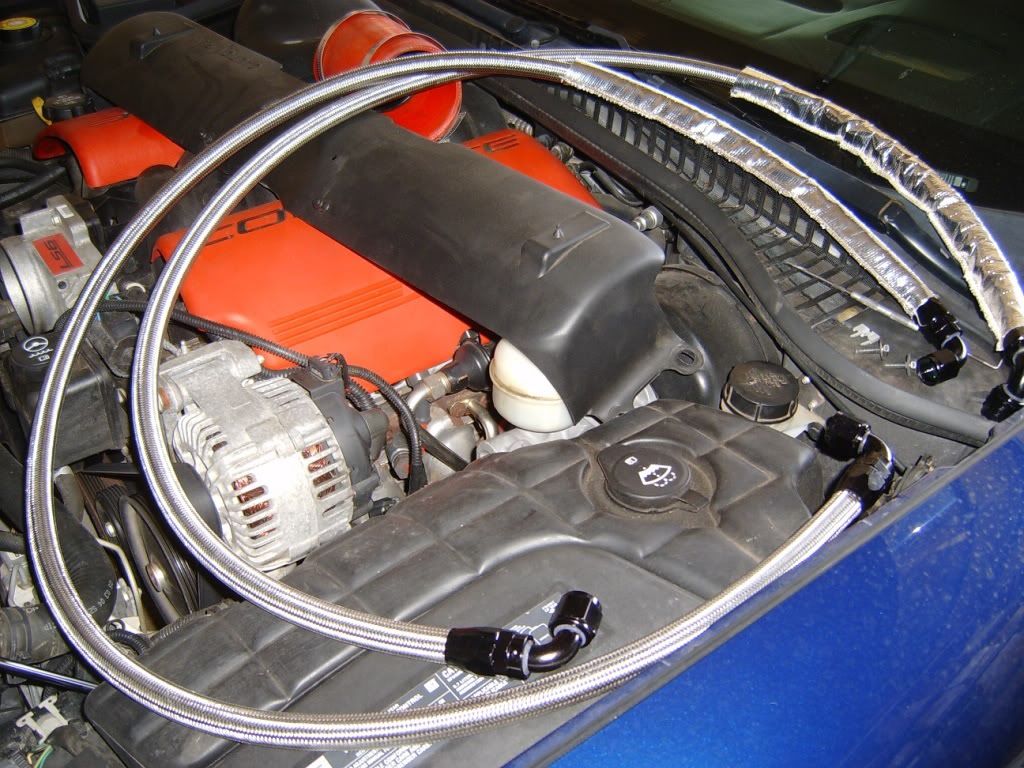
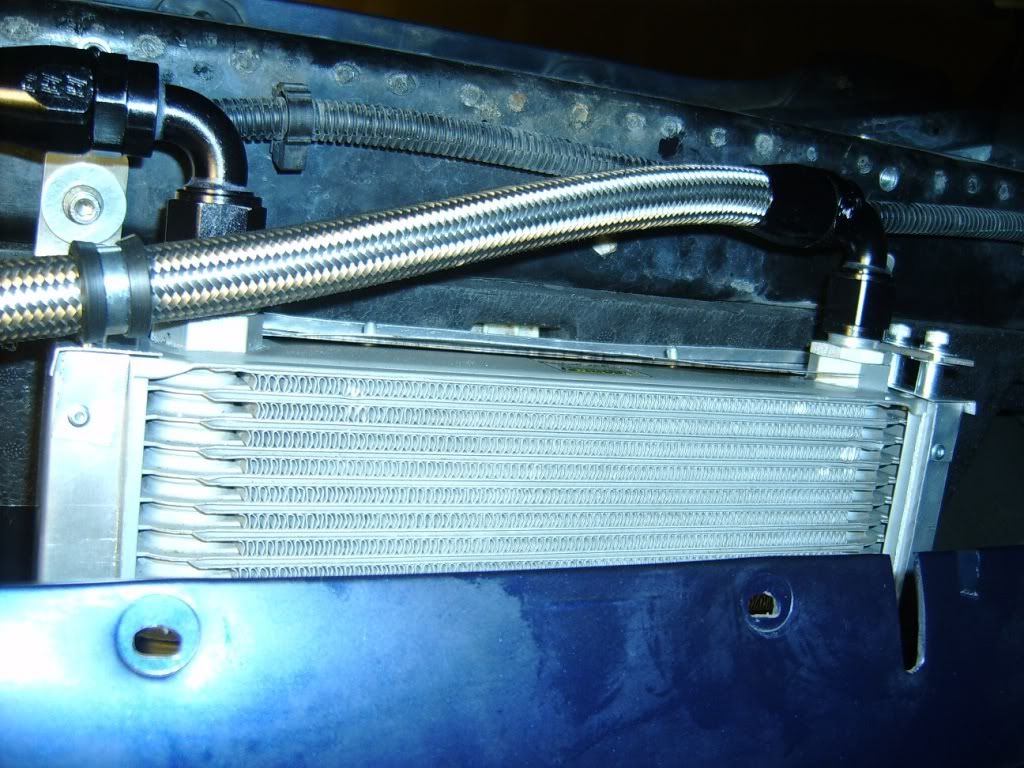
This is the first time I've used AN hoses, certainly won't be the last. Assembly was super easy, I sprung for the vise tool from Aeroquip (Eaton) to hold things and not gouge up my fittings. I used a chop saw and strapped mailing tape to cut it and had no trouble, my cuts were actually cleaner than the factory's. I also threw some thermal covering on the hose that's near the manifolds since they tend to generate a bit of heat.
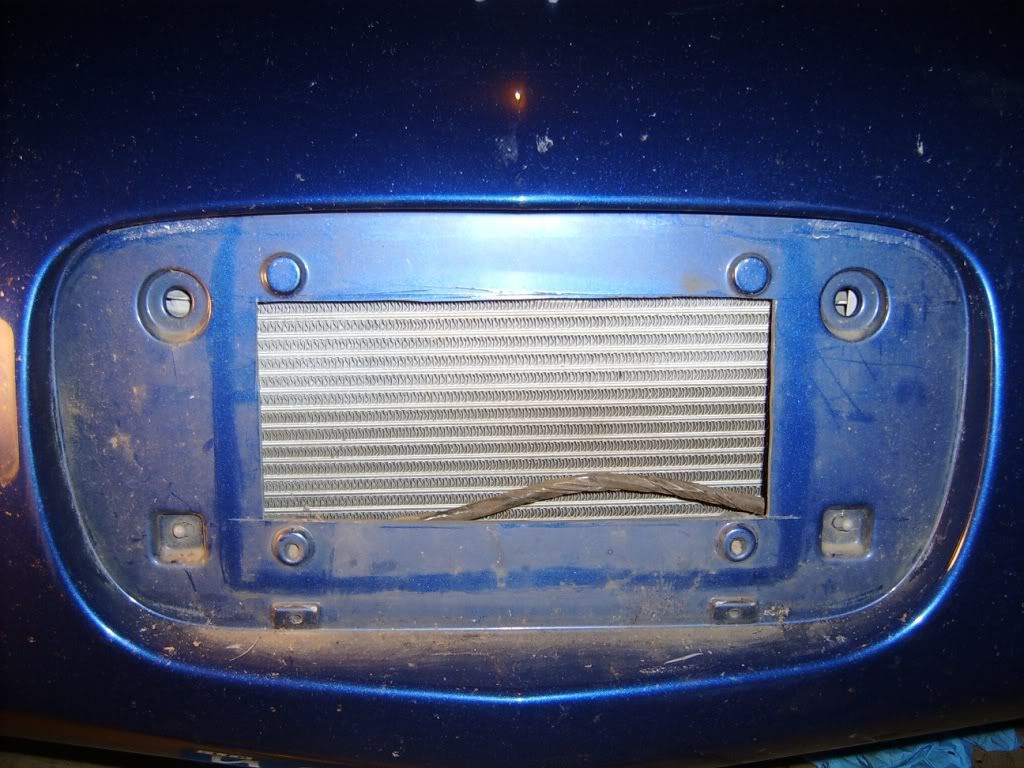
Next up was sealing the cooler to the opening.
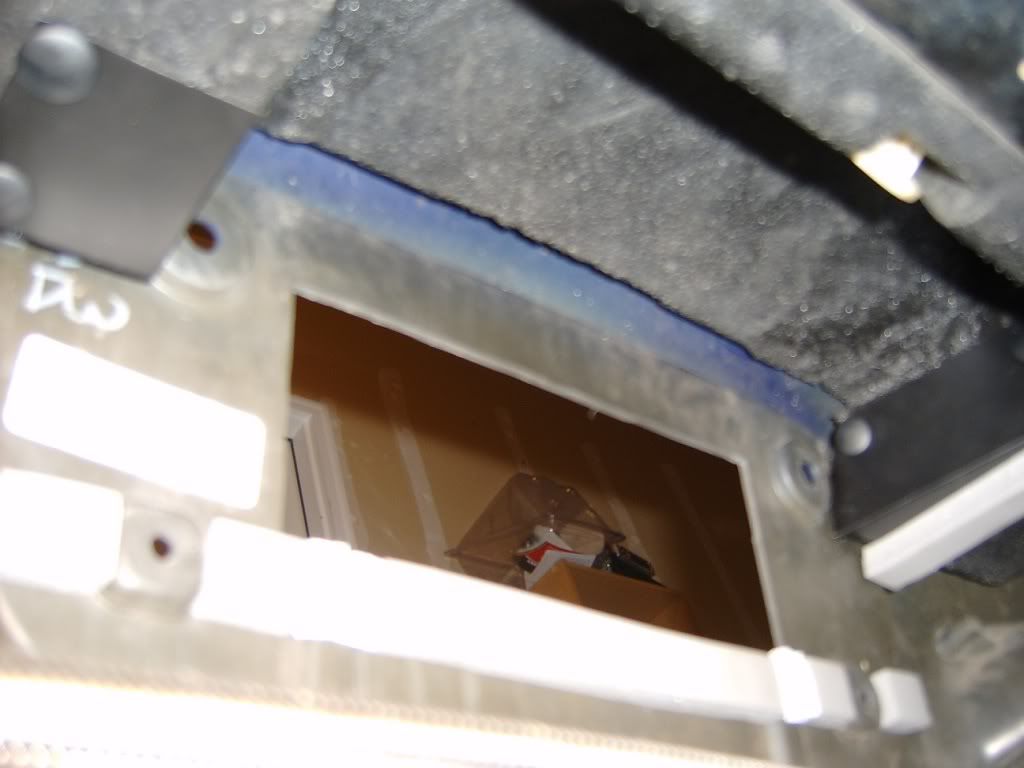
See the gap in the pic above? Unfortunately, I didn't get it as good as the left side, but I did address the issue.
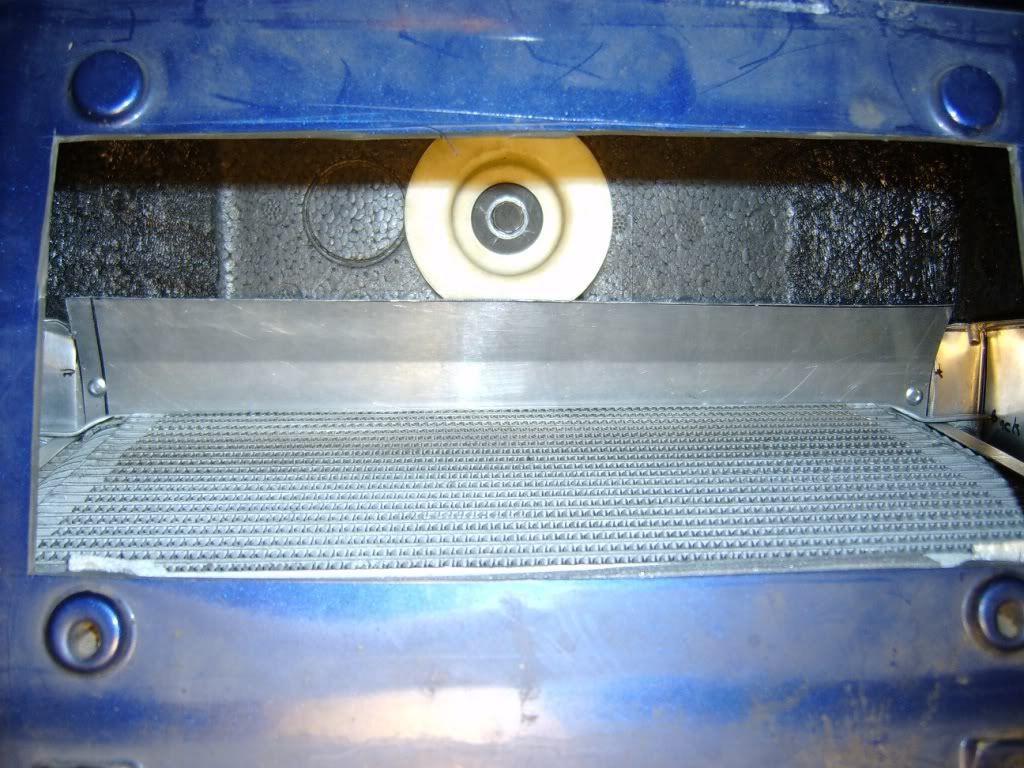
Even sealed the inside of the baffles.
The adel clamp has since been flipped in the pics below to get the hoses more in line with each other.
The general oil line routing has also been slightly altered. It's been re-routed through the line coming off the PS cooler so the bend is more relaxed and the lines aren't forced to chafe on the cradle.
I also fished the right front ABS sensor wire out from between the 2 lines, fun times. So tomorrow I just find a wrench to tighten the fittings on the adapter block (crescent wrench doesn't fit so great in there), extend the oil temp sensor wiring (awesome), rig up those other 2 adel clamps, and prime the oil system prior to firing it up speed density to check for leaks. If all is well, I'll drop the shroud back on and get back to beating on it.
This is the first time I've used AN hoses, certainly won't be the last. Assembly was super easy, I sprung for the vise tool from Aeroquip (Eaton) to hold things and not gouge up my fittings. I used a chop saw and strapped mailing tape to cut it and had no trouble, my cuts were actually cleaner than the factory's. I also threw some thermal covering on the hose that's near the manifolds since they tend to generate a bit of heat.
Next up was sealing the cooler to the opening.
See the gap in the pic above? Unfortunately, I didn't get it as good as the left side, but I did address the issue.
Even sealed the inside of the baffles.
The adel clamp has since been flipped in the pics below to get the hoses more in line with each other.
The general oil line routing has also been slightly altered. It's been re-routed through the line coming off the PS cooler so the bend is more relaxed and the lines aren't forced to chafe on the cradle.
I also fished the right front ABS sensor wire out from between the 2 lines, fun times. So tomorrow I just find a wrench to tighten the fittings on the adapter block (crescent wrench doesn't fit so great in there), extend the oil temp sensor wiring (awesome), rig up those other 2 adel clamps, and prime the oil system prior to firing it up speed density to check for leaks. If all is well, I'll drop the shroud back on and get back to beating on it.
08-27-2012, 01:22 AM
#12
Safety Car
Thread Starter
The line routing is starting to look a lot more like something I'd put my name on. I started up next to the oil cooler and added a 2nd adel clamp.
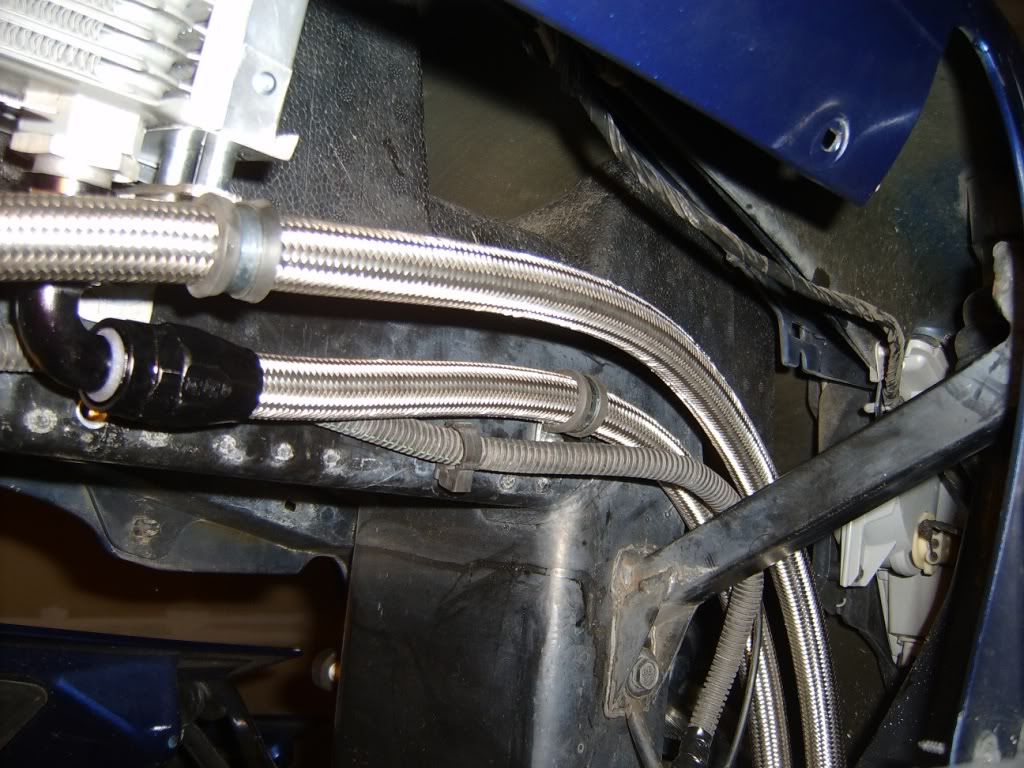
This, coupled with the billet hose separator that you can't see really stabilized this section of hose. The separators ensure the hoses don't chafe themselves and also let me get away with just 1 clamp to stabilize both hoses simultaneously, I think I want just 1 more separator though. Next I was unsure where to mount another adel clamp, but the inner fender is surprisingly sturdy so I chose it over the core support beam which would have royally sucked to drill.
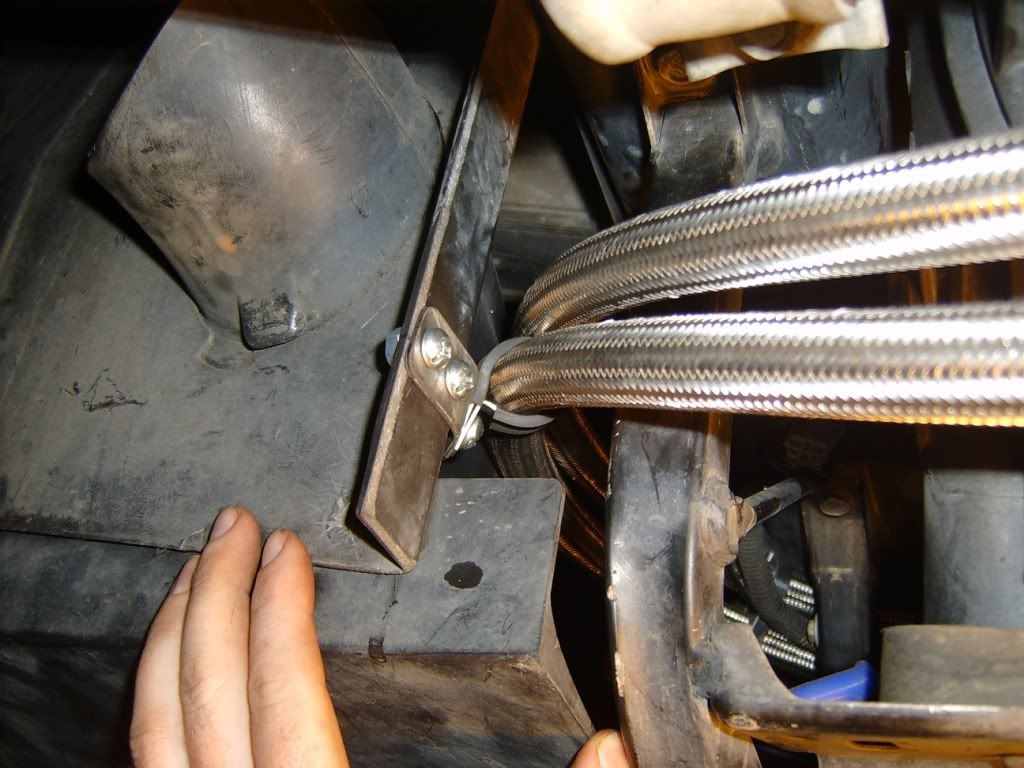
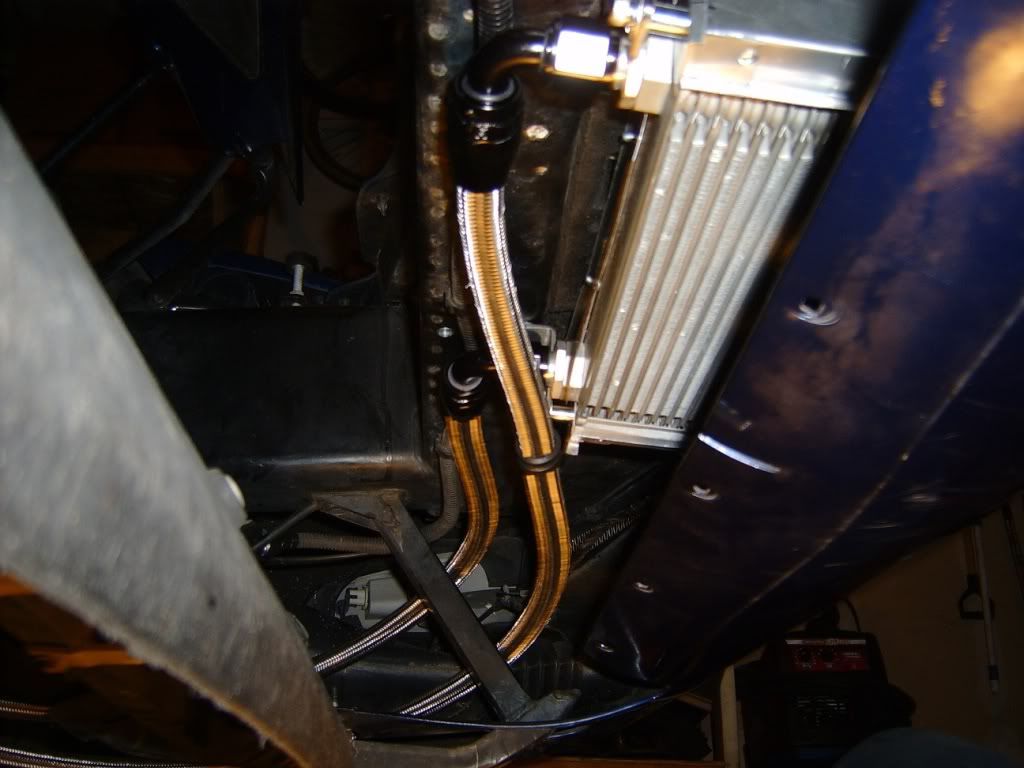
Last was the clamp setup near the rack/engine cradle. This one was pretty easy too. While the hoses weren't contacting anything without this clamp, I could see them getting hot and sagging/bouncing on a track day and slowly chafing into the cradle, so I took no chances here especially with an 8mm boss just waiting to have something bolted to it.


Here you can see what's going on behind the rack.
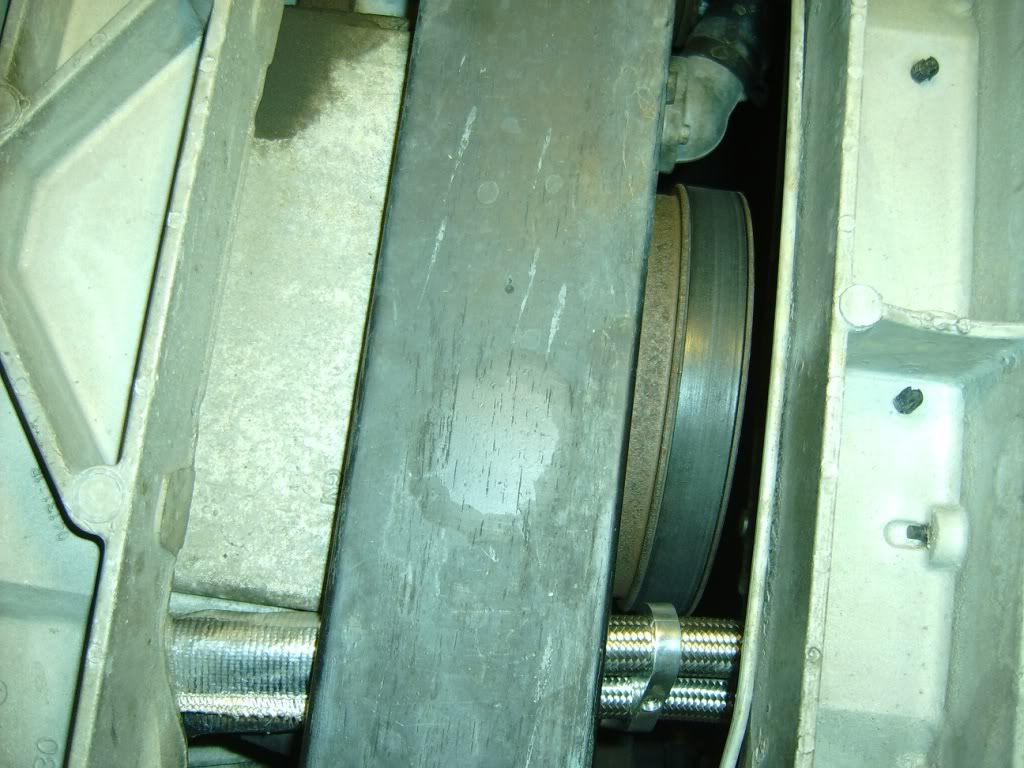
The thermal wrap plays double duty through the motor mount as a chafe guard and runs out just on top of the leaf spring. Notice the separator just in front of the spring too, from there forward the hoses are firmly supported and separated to preclude any chafing which, eventually, could fvck something up. I'm headed to Napa tomorrow for some plastic split loom wire covering to chafe guard the remaining hose and I also plan to zip tie some radiator hose to the swaybar. This install needs to be solid enough to be ignored for 10 years even though that won't happen, I'd just hate to worry about a mod that I did letting loose and blowing my motor up. After all, the whole point of the cooler is to prevent me from blowing it up in the first place.
This, coupled with the billet hose separator that you can't see really stabilized this section of hose. The separators ensure the hoses don't chafe themselves and also let me get away with just 1 clamp to stabilize both hoses simultaneously, I think I want just 1 more separator though. Next I was unsure where to mount another adel clamp, but the inner fender is surprisingly sturdy so I chose it over the core support beam which would have royally sucked to drill.
Last was the clamp setup near the rack/engine cradle. This one was pretty easy too. While the hoses weren't contacting anything without this clamp, I could see them getting hot and sagging/bouncing on a track day and slowly chafing into the cradle, so I took no chances here especially with an 8mm boss just waiting to have something bolted to it.
Here you can see what's going on behind the rack.
The thermal wrap plays double duty through the motor mount as a chafe guard and runs out just on top of the leaf spring. Notice the separator just in front of the spring too, from there forward the hoses are firmly supported and separated to preclude any chafing which, eventually, could fvck something up. I'm headed to Napa tomorrow for some plastic split loom wire covering to chafe guard the remaining hose and I also plan to zip tie some radiator hose to the swaybar. This install needs to be solid enough to be ignored for 10 years even though that won't happen, I'd just hate to worry about a mod that I did letting loose and blowing my motor up. After all, the whole point of the cooler is to prevent me from blowing it up in the first place.
Last edited by Supercharged111; 08-27-2012 at 01:24 AM.
08-28-2012, 01:13 AM
#13
Safety Car
Thread Starter
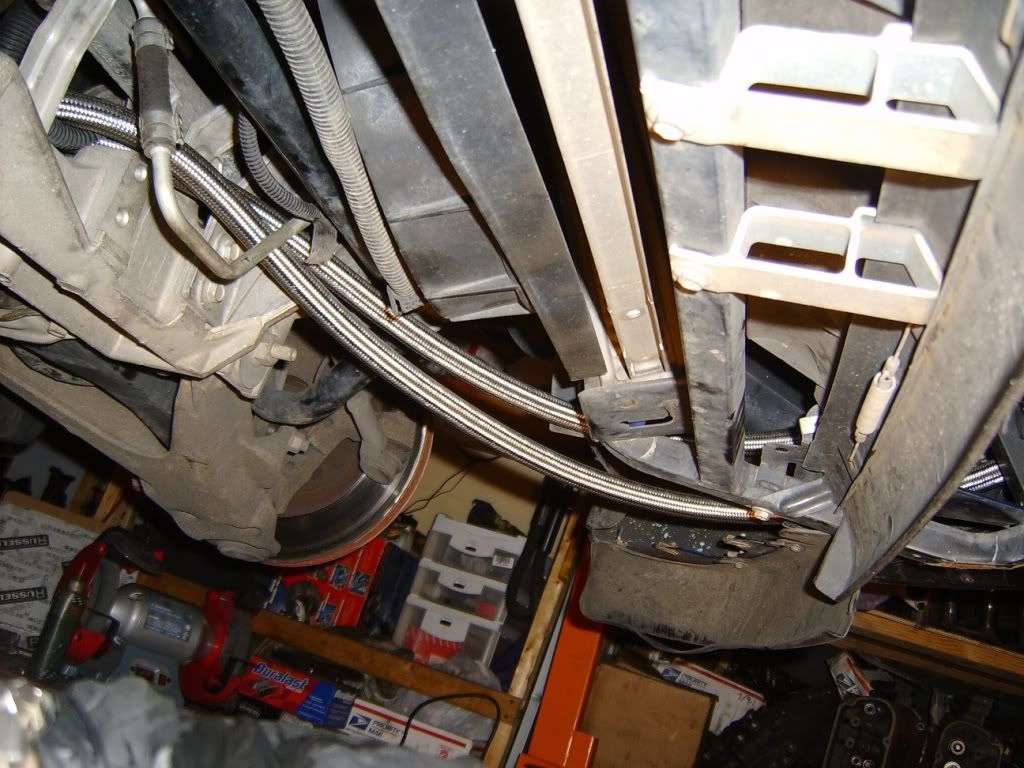
So I jumped the gun today as I was painting one of the brackets I conjured up last night and started covering the hoses.
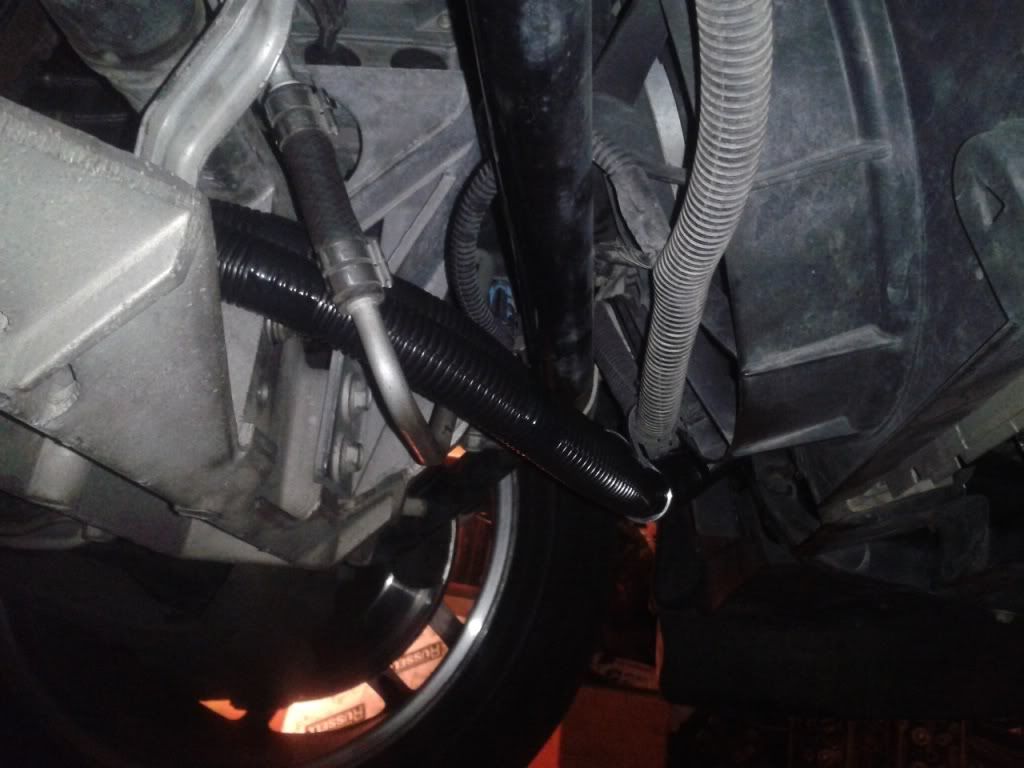
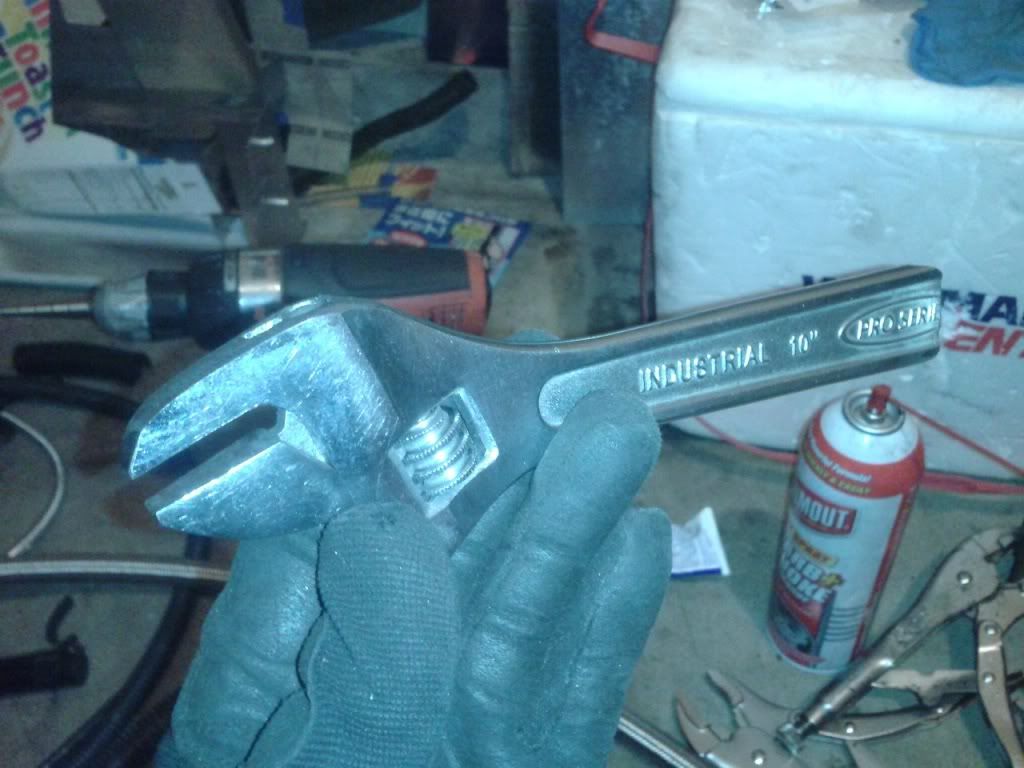
FYI Napa sells the split loom stuff by the foot, I got 6ft of 1" for $4.69. The lines are now very secure, they don't touch anything not even themselves. It'll be hard pressed to bounce up to the swaybar and absolutely cannot chafe on the engine cradle. Amazingly too as it snakes next to the fender and core support it still doesn't touch anything. It does graze the brake duct but that's why I wrapped the lines, that and they'll be all shiny and new in the years to come. That wasn't all the fun I had though, getting those 1" b nuts tightened down on the block by the motor was all kinds of awesome. So much so that I had to make my own wrench, I was at Lowe's with an $18 combo wrench in my hand when I remembered I had this el cheapo crescent in another toolbox at home and decided to sacrifice it to the cause.
Once the lines were tight, I disconnected the coils and all 8 injectors and cranked the motor over until I thought I wouldn't have it fire with no oil pressure for 30 seconds. I did pump the cooler full of oil yesterday in anticipation of this. After plugging the injectors and coils back in, I fired it up speed density with no shroud or MAF and got no clacking and near immediate oil pressure, I had about 42psi at a cold idle. I think I'll end up jumping on the high volume train here shortly if the pressures don't hold up on track. Car's put back together awaiting payday so I can fill the tank and see how it does on the street.
FYI Napa sells the split loom stuff by the foot, I got 6ft of 1" for $4.69.
The lines are now very secure, they don't touch anything not even themselves. It'll be hard pressed to bounce up to the swaybar and absolutely cannot chafe on the engine cradle. Amazingly too as it snakes next to the fender and core support it still doesn't touch anything. It does graze the brake duct but that's why I wrapped the lines, that and they'll be all shiny and new in the years to come. That wasn't all the fun I had though, getting those 1" b nuts tightened down on the block by the motor was all kinds of awesome. So much so that I had to make my own wrench, I was at Lowe's with an $18 combo wrench in my hand when I remembered I had this el cheapo crescent in another toolbox at home and decided to sacrifice it to the cause. Once the lines were tight, I disconnected the coils and all 8 injectors and cranked the motor over until I thought I wouldn't have it fire with no oil pressure for 30 seconds. I did pump the cooler full of oil yesterday in anticipation of this. After plugging the injectors and coils back in, I fired it up speed density with no shroud or MAF and got no clacking and near immediate oil pressure, I had about 42psi at a cold idle. I think I'll end up jumping on the high volume train here shortly if the pressures don't hold up on track. Car's put back together awaiting payday so I can fill the tank and see how it does on the street.