When you click on links to various merchants on this site and make a purchase, this can result in this site earning a commission. Affiliate programs and affiliations include, but are not limited to, the eBay Partner Network.
Big scale `67 Corvette L-88 - The $3.5million car.
Auto Extras & MemorabiliaAccessories for your Corvette that aren�t budget-busters. Plus, Corvette memorabilia and die cast models (1:24 and 1:18 scale).
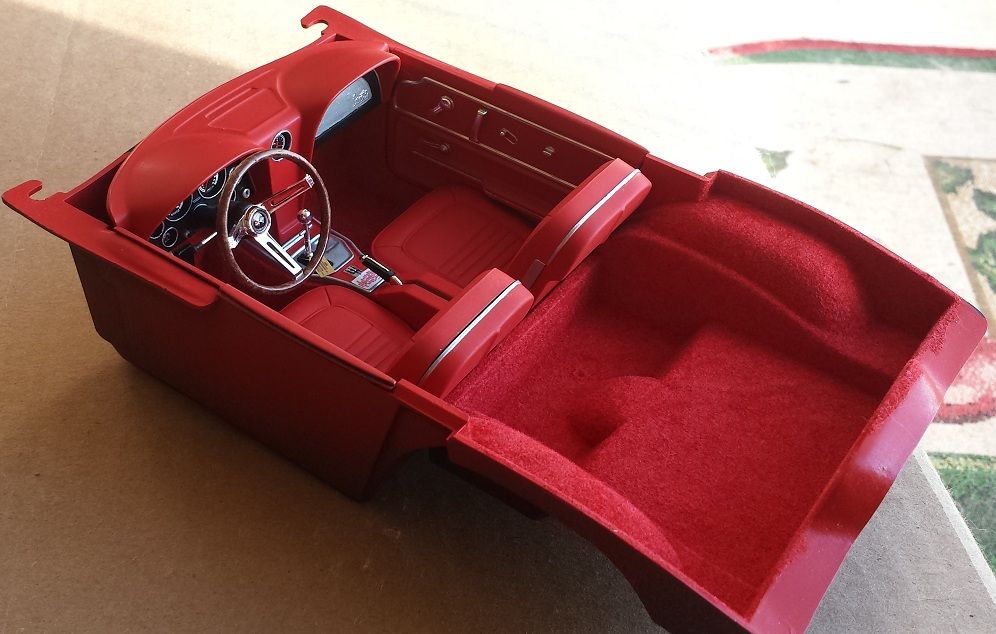
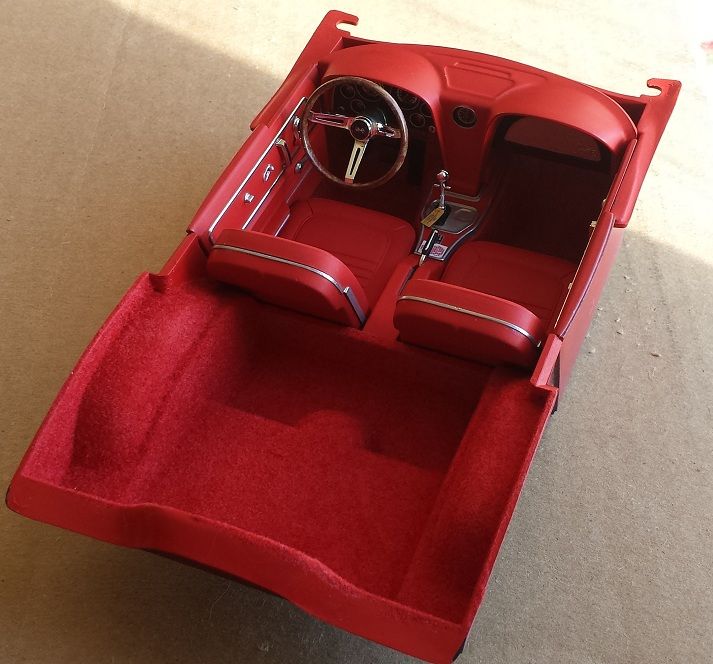
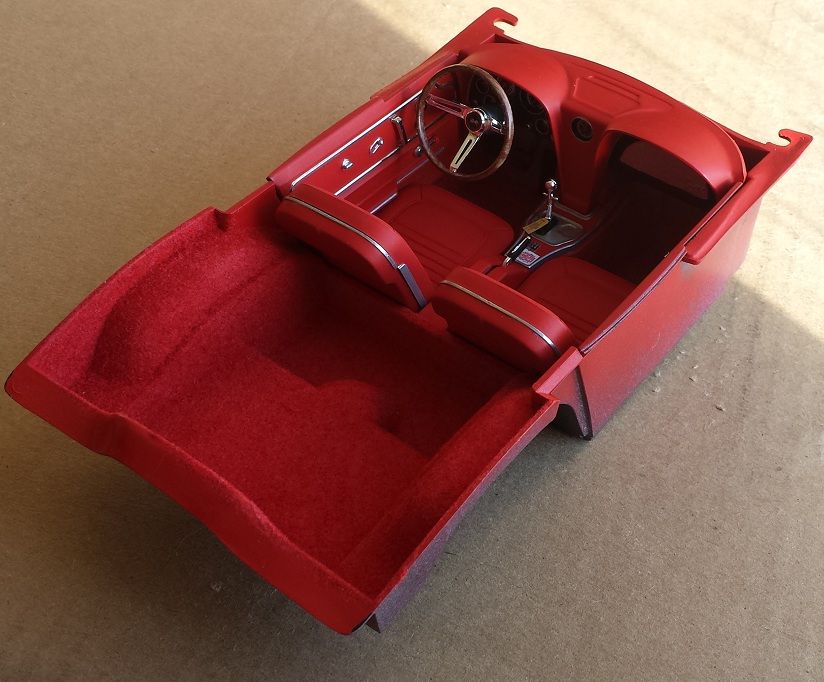
So here is the interior. Did I capture it?
I overlooked the fact that the real car doesn`t have power windows, so I had to raid the 1/12 Camaro kit for an extra set of roll-up window handles for the door panels. I also had to carve off the power window switches from the console, after it was already painted and detailed mind you. I also used a completely new method of doing wood grain on the steering wheel. I think it came out better then my previous method, which was a little to streaky. The appropriate label and tag were added, both printed from 1:1 labels.
Looks great! I can only see one little thing that I think could be done for just a tad more realism: paint inside the door handle chrome flat black. That is just a hole through the door panel for the handle to slide back and forth when in use.
Thanks jroc. I`m not sure how I missed that. Now I just need to figure out how to get the paintbrush in there to get at it.
For the steering wheel, I used a gloss brown base coat, than used a wide stiff brush to "dry brush" the lighter color. Before I used to use a small brush and sort of "draw' the wood grain on. It was much more streaky this way, and too much contrast typically between the two colors. I think the new way looks much more realistic.
Thanks again guys.
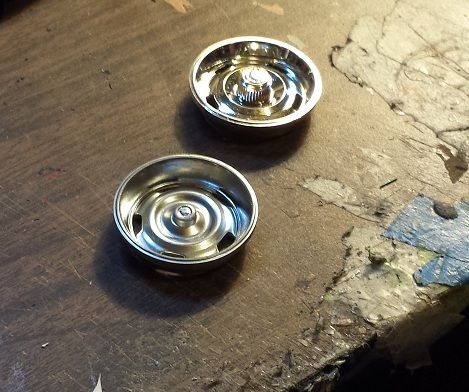
Ok, I think I am just about satisfied with the wheel. I have spent waaaayyyy to much time on these. Now to assemble and cast them. I think I will have to have them chromed, as the chrome spray plating isn`t quite brilliant enough. What do you think?
Looks great! I can only see one little thing that I think could be done for just a tad more realism: paint inside the door handle chrome flat black. That is just a hole through the door panel for the handle to slide back and forth when in use.
What was your new method on the steering wheel?
Originally Posted by Hawk312
Thanks jroc. I`m not sure how I missed that. Now I just need to figure out how to get the paintbrush in there to get at it.
For the steering wheel, I used a gloss brown base coat, than used a wide stiff brush to "dry brush" the lighter color. Before I used to use a small brush and sort of "draw' the wood grain on. It was much more streaky this way, and too much contrast typically between the two colors. I think the new way looks much more realistic.
Maybe the same for the defroster slot on the top of the dash, and to be really picky the holes in the speaker screen? Since it was radio delete I don't know if there was still an opening behind that grill or if the top of the dash was left solid and not cut out for a speaker?
Thanks for the great tips everyone! My life is in transition in a lot of ways, so I am struggling to find time to complete this project.
Originally Posted by Yetiman
What kit did you start with?
I am using both the 1/12 Monogram `67 Corvette kit:
and 1/12 Revell `69 Camaro kit:
The Camaro kit is a little more challenging and quirky than the Corvette (unless you are doing the crazy things I am doing), but it is still very rewarding:
Yep, that is a window sticker printed from a scan of a real `69 Camaro window sticker. On my previous L-88, I think I had one on that as well. Since this one didn`t have one when it went across the block, I probably wont be adding one.
I'm just going to say that I am flat out amazed by this. Honestly, I don't really believe what I've seen here is real, lol.
Absoutely insanely high craftsmanship here. I tried to make a copy of my old C6 Z51, and it didn't come out anywhere near as pretty as yours, despite my attempts to polish it to a shine. It's sort of shiny, but your models are like liquid glass.
I wish I had this sort of skill. I would make a model for my C6GS.
I'm not really looking to have one made, but it seems like the sort of project that would be fun to do. It's unfortunate it's a project and that nobody makes a model of the GS.
I am using both the 1/12 Monogram `67 Corvette kit:
I have this kit that I just dug out of the attic this afternoon to sell. It's built and has no box or spare parts. Not sure if you needed it for anything? It's really rough as I made it as a kid, but given your skills I'm sure you could do just about anything with it.
I have always loved following your builds here on the forum. I am just amazed at the craftsmanship of your work. I wish I had 1/10th of your skills as I have been building models for over 50 years and never acquired the skills that you have. Great Work! Thanks for posting your builds here on the Corvette Forum.
 05-23-2014, 07:56 AM


 Maybe the same for the defroster slot on the top of the dash, and to be really picky
  the holes in the speaker screen? Since it was radio delete I don't know if there was still an opening behind that grill or if the top of the dash was left solid and not cut out for a speaker?


