Big scale `67 Corvette L-88 - The $3.5million car.
 04-12-2014, 04:09 PM
#1
Pro

Thread Starter


This is up on Ebay now:
http://www.ebay.com/itm/1967-Corvett.../131413060458?
Ok, I am going to give a try on a work in progress thread. Updates might be few and far between with my crazy schedule. I know it`s possible some of you may not be interested in a thread like this. Please let me know if you would like me to stop. I appreciate everyones comments and suggestions in advance. You guys always have great information on details that have really helped my previous builds!
So I am going to try to build a red on red L88 coupe without side pipes and with Rallye wheels, like the one that went across Barrett Jackson. I`m sure most of you saw it sell for $3.5 million.
I will be using the Monogram `67 Covette Coupe kit from the mid-90`s. This will take alot of modification to get right. A while back, I built a black on blue one which was the cover feature on the "Big Scale Beauty" issue of Model Cars Magazine from a few years ago. I will follow the same procedures as I documented there, but this will take more modification given the exhaust, chassis, and body work needed to match the real car. I told myself I would never build myself another one of these given the difficulty and time commitments, but some unforseen events have made it necessary (it will be going up for sale once done).
*
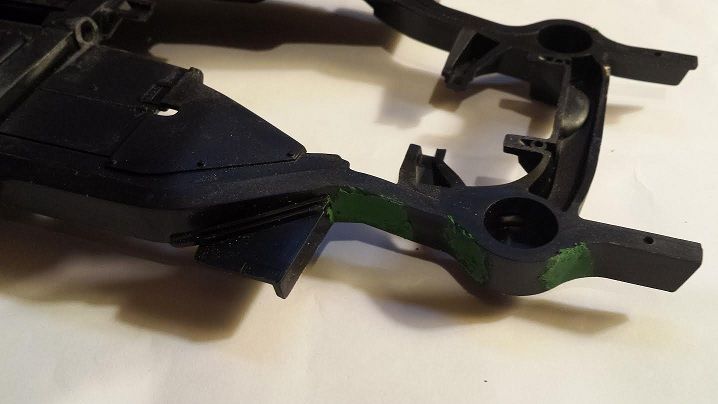
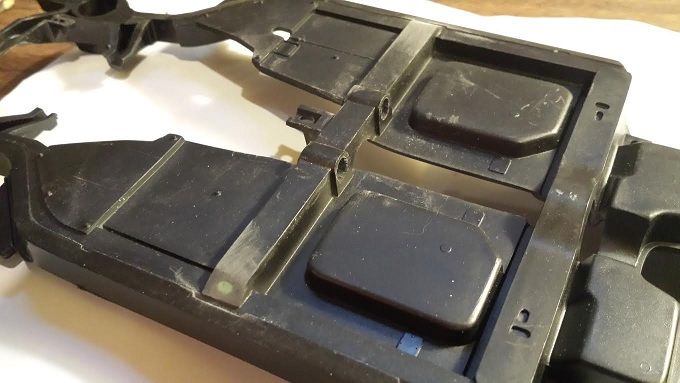
The first problem is the sink marks in the chassis. Since this will be a full detail build including chalk markings, it would make no sense to not address this.*Especially since I will be selling this one, and the buyer will probably not want to see this.
*
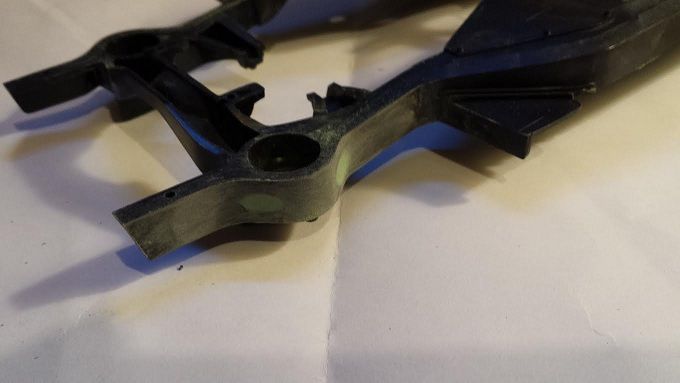
After some sanding:
*
*
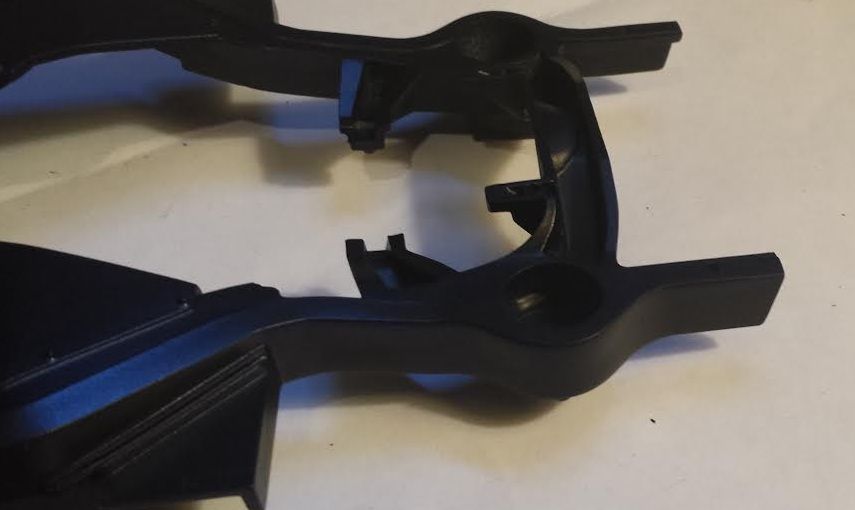
Since the 1:1 car doesn`t have side pipes, exhaust pipes that make their way through the frame cross-member will need to be fabricated. And since the cross member is solid, I needed to carve out holes for the pipes. Given the surrounding surfaces that get in the way, this was a little more difficult than it looks:
*
*
The finished and painted chassis:
*
*
I have a gripe with kits that have two engine halves that divide the oil pan. Sanding, filling, priming, and eventually painting rectify this:
*
*
*
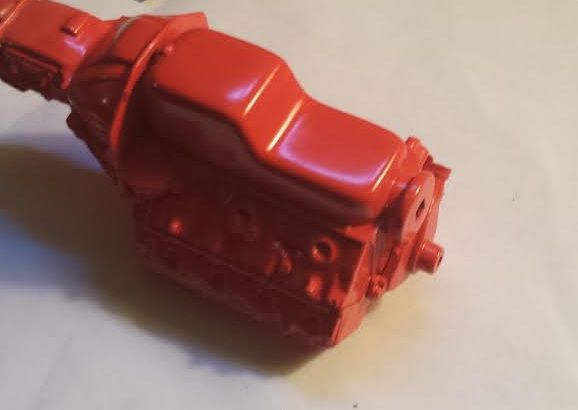
*
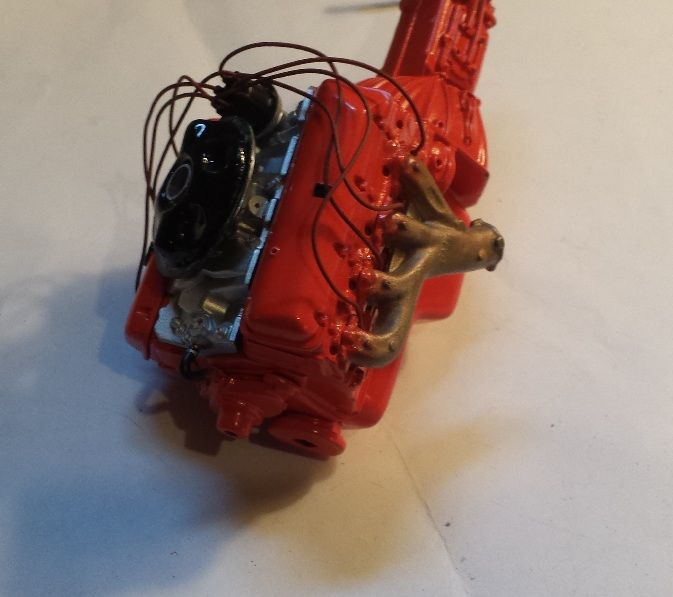
This car has no heater. That means removing the heater box from the firewall. It also has a special intake that needed to be fabricated. The bottom carburetor cover piece is actually one of the drag wheels conformed to the general shape of the cover using an open flame, then the outer rim removed. I am using filler putty to fill in the details and to get an accurate shape. The top small cover is actually the aftermarket Moroso air cleaner lid trimmed to the size you see here. The L-88 cars had the unshielded spark plug wires (no radios) and were a flat orangish red.
*
*
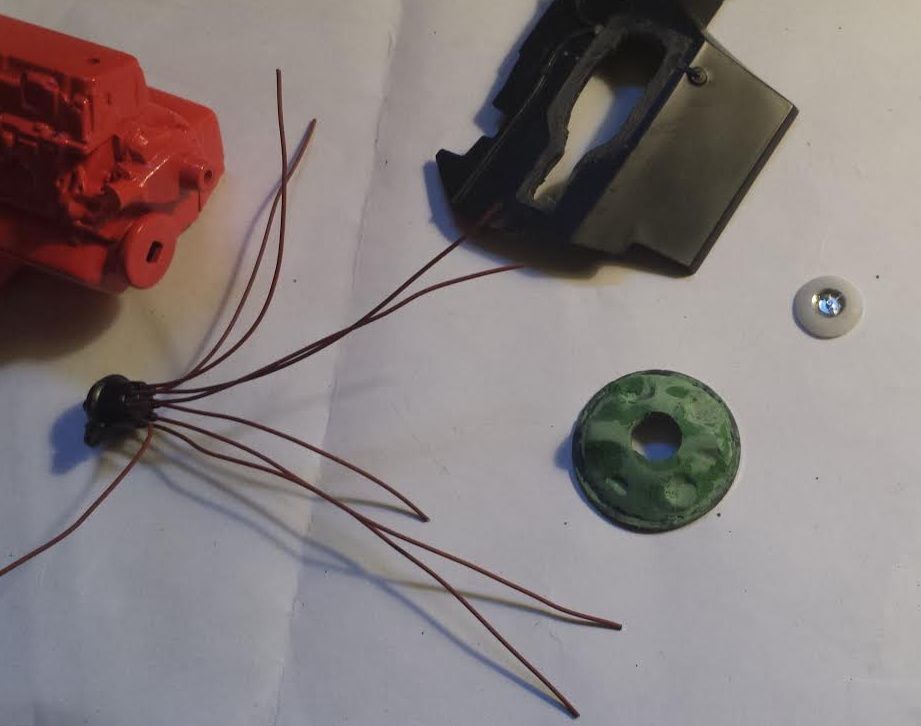
Since there is no heater and radio, and the kit version comes with these, I needed to carefully remove them. This is tricky because of the surrounding ridges in the dash. But lots of careful trimming, sanding, and filling results in this:
*
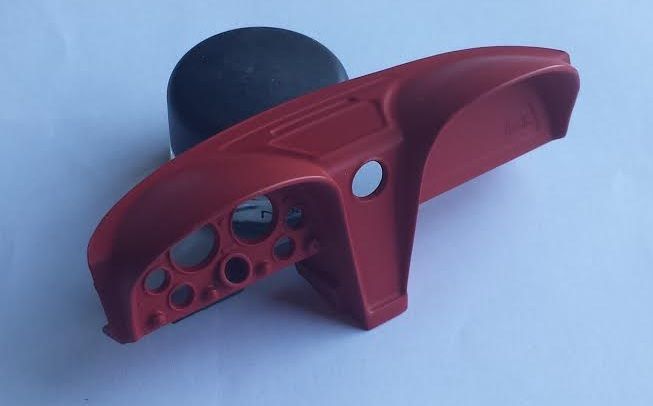
*
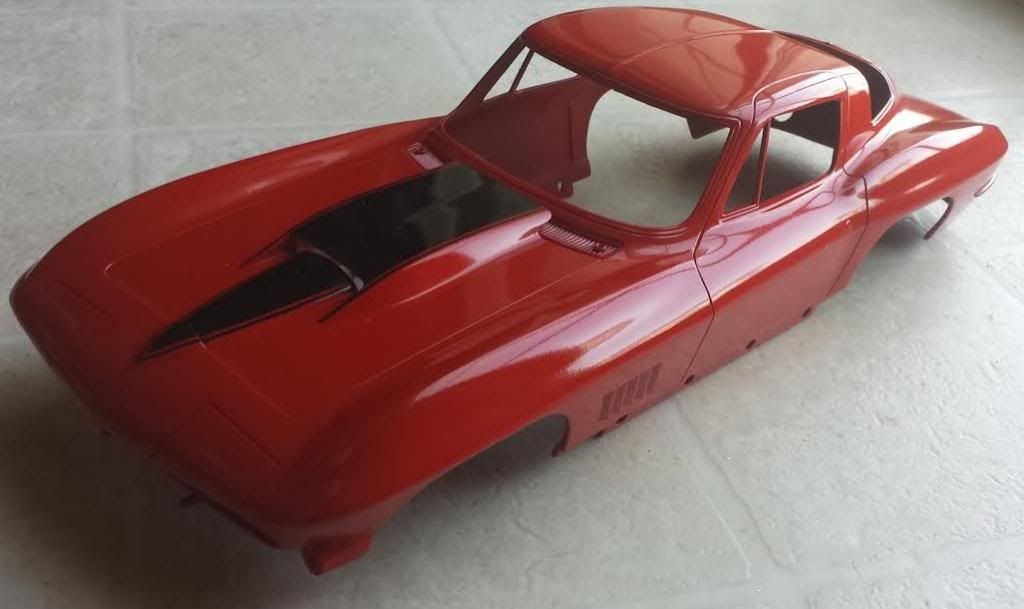
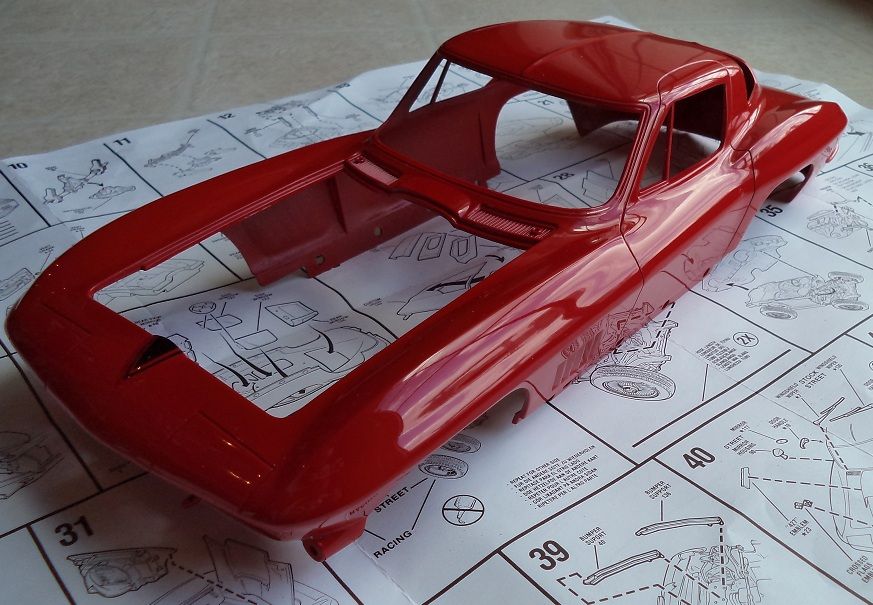
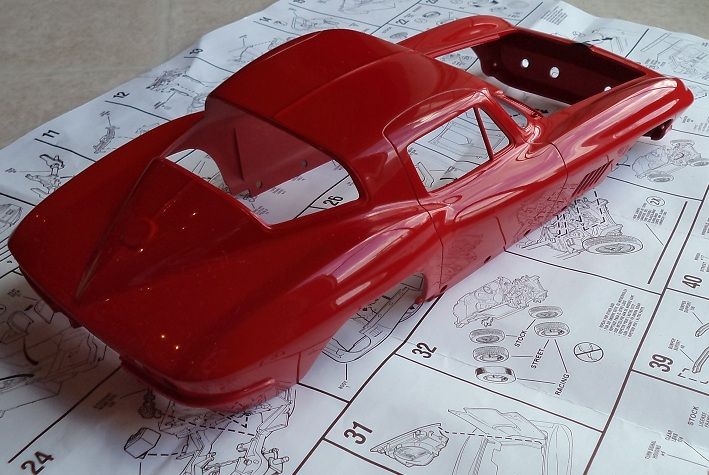
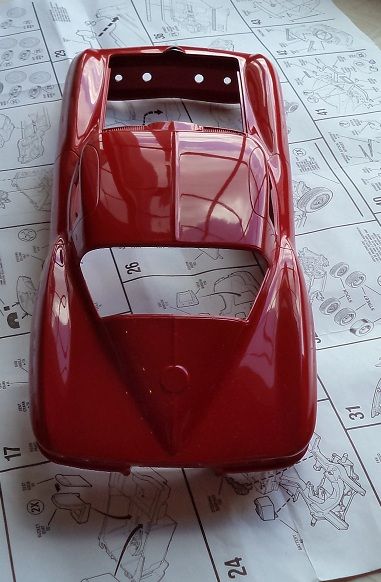
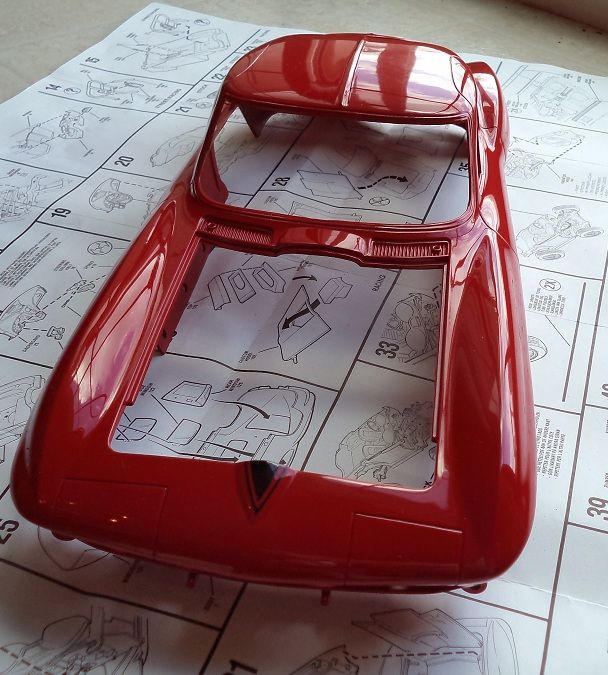
The 1:1 car is Rally Red with Tuxedo Black striping. Yes, this is what it looks like right after being sprayed from the can before any sanding or polishing. I have my work cut out to get this mirror smooth. Automotive lacquers are used throughout.
*
http://www.ebay.com/itm/1967-Corvett.../131413060458?
Ok, I am going to give a try on a work in progress thread. Updates might be few and far between with my crazy schedule. I know it`s possible some of you may not be interested in a thread like this. Please let me know if you would like me to stop. I appreciate everyones comments and suggestions in advance. You guys always have great information on details that have really helped my previous builds!
So I am going to try to build a red on red L88 coupe without side pipes and with Rallye wheels, like the one that went across Barrett Jackson. I`m sure most of you saw it sell for $3.5 million.
I will be using the Monogram `67 Covette Coupe kit from the mid-90`s. This will take alot of modification to get right. A while back, I built a black on blue one which was the cover feature on the "Big Scale Beauty" issue of Model Cars Magazine from a few years ago. I will follow the same procedures as I documented there, but this will take more modification given the exhaust, chassis, and body work needed to match the real car. I told myself I would never build myself another one of these given the difficulty and time commitments, but some unforseen events have made it necessary (it will be going up for sale once done).
*
The first problem is the sink marks in the chassis. Since this will be a full detail build including chalk markings, it would make no sense to not address this.*Especially since I will be selling this one, and the buyer will probably not want to see this.
*
After some sanding:
*
*
Since the 1:1 car doesn`t have side pipes, exhaust pipes that make their way through the frame cross-member will need to be fabricated. And since the cross member is solid, I needed to carve out holes for the pipes. Given the surrounding surfaces that get in the way, this was a little more difficult than it looks:
*
*
The finished and painted chassis:
*
*
I have a gripe with kits that have two engine halves that divide the oil pan. Sanding, filling, priming, and eventually painting rectify this:
*
*
*
*
This car has no heater. That means removing the heater box from the firewall. It also has a special intake that needed to be fabricated. The bottom carburetor cover piece is actually one of the drag wheels conformed to the general shape of the cover using an open flame, then the outer rim removed. I am using filler putty to fill in the details and to get an accurate shape. The top small cover is actually the aftermarket Moroso air cleaner lid trimmed to the size you see here. The L-88 cars had the unshielded spark plug wires (no radios) and were a flat orangish red.
*
*
Since there is no heater and radio, and the kit version comes with these, I needed to carefully remove them. This is tricky because of the surrounding ridges in the dash. But lots of careful trimming, sanding, and filling results in this:
*
*
The 1:1 car is Rally Red with Tuxedo Black striping. Yes, this is what it looks like right after being sprayed from the can before any sanding or polishing. I have my work cut out to get this mirror smooth. Automotive lacquers are used throughout.
*
Last edited by Hawk312; 01-25-2015 at 05:48 PM.
 04-12-2014, 04:37 PM
#2
Race Director


I see you are at it again. I like the choice you have made. A lot of work involved in the detail you go through. Can't wait to see the finished piece. I am sure it will be as outstanding as the ones you have done in the past. Have fun.
 04-13-2014, 05:29 PM
#4
Racer

Member Since: Feb 2012
Location: Louisville Kentucky
Posts: 306
Likes: 0
Received 0 Likes
on
0 Posts
Are those the kit decals with clear applied over them, or are they painted on (stinger stripe)? Are you sourcing the rally wheels from the 1/12 Camaro kit?
Also, how do you correct the hood since the kit doesn't include the trim piece? Do you make your own?
Also, how do you correct the hood since the kit doesn't include the trim piece? Do you make your own?
04-13-2014, 08:47 PM
#5
Pro
Thread Starter
Thanks guys!
Hi jroc,
The stinger stripe was masked and painted on. No decals used. Because of this, I had to use clear coat, which some here might frown upon.
Yeah, I will be using the 1/12 Camaro kit wheels. At least that is the plan at this point.
On my previous builds, I never worried about that trim piece and noone seemed to notice. Some of them have gone to owners of real 1:1 cars, and they paid good $$$ for the model. Just looking at some pictures of the real car now, it is hardly noticeable in the pics I have.
04-13-2014, 10:30 PM
#6
Racer
Member Since: Feb 2012
Location: Louisville Kentucky
Posts: 306
Likes: 0
Received 0 Likes
on
0 Posts
Thanks guys!
Hi jroc,
The stinger stripe was masked and painted on. No decals used. Because of this, I had to use clear coat, which some here might frown upon.
Yeah, I will be using the 1/12 Camaro kit wheels. At least that is the plan at this point.
On my previous builds, I never worried about that trim piece and noone seemed to notice. Some of them have gone to owners of real 1:1 cars, and they paid good $$$ for the model. Just looking at some pictures of the real car now, it is hardly noticeable in the pics I have.
04-15-2014, 07:41 AM
#7
Pro
Thread Starter
Thanks again jroc. Originally, I was going to attempt to modify the `68+ Camaro wheel to look like the `67 wheel. The more I think about, the less I am sure I want to attempt that. I would need to make a mold and cast copies or modify all 4 wheels, and then ship them off to have them chromed. It`s hard to justify the time and cost given that, again, out of everyone who bought my previous builds, noone ever mentioned anything about the wheels. Also, I know many people think it is a fortune what these usually sell for. But really, even at what I usually get, given the time commitment, the cost of the kit and supplies, it is already hard to justify building these. Much less the cost of fabricating and chroming wheels. I know someone doing this professionally who would charge over 2x what I get easily. If I was able to do that, I wouldn`t think twice about making the wheels. We will see though.
 04-15-2014, 07:00 PM
#9
Racer
Member Since: Feb 2012
Location: Louisville Kentucky
Posts: 306
Likes: 0
Received 0 Likes
on
0 Posts
Thanks again jroc. Originally, I was going to attempt to modify the `68+ Camaro wheel to look like the `67 wheel. The more I think about, the less I am sure I want to attempt that. I would need to make a mold and cast copies or modify all 4 wheels, and then ship them off to have them chromed. It`s hard to justify the time and cost given that, again, out of everyone who bought my previous builds, noone ever mentioned anything about the wheels. Also, I know many people think it is a fortune what these usually sell for. But really, even at what I usually get, given the time commitment, the cost of the kit and supplies, it is already hard to justify building these. Much less the cost of fabricating and chroming wheels. I know someone doing this professionally who would charge over 2x what I get easily. If I was able to do that, I wouldn`t think twice about making the wheels. We will see though.
04-15-2014, 10:46 PM
#10
Drifting


Your remarks about cost versus eventual selling price are spot-on. While I've custom-built and sold many, many large scale cars (mostly Corvettes) and big rigs (1/16) and sold a lot of them, most of the mods I've sold were 1/18 diecast cars. I can confirm that what I've sold them for, both outright and on take-a-chance Ebay auctions, is in most cases not that much more than what I had into them. You should absolutely not be worried about what other people think if you happen to sell your models for very good prices. The ones that fetch good selling prices help compensate for the ones you may feel that you've all but given away.
The most I've ever sold one mod for was the 1/12-scale Ko-Motion drag Corvette that I made using a Franklin Mint 1/12 fiberglass 1967 Corvette. I was very proud of that particular project and it's in a friend's extensive Corvette collection and I know it's in good hands.
The most I've ever sold one mod for was the 1/12-scale Ko-Motion drag Corvette that I made using a Franklin Mint 1/12 fiberglass 1967 Corvette. I was very proud of that particular project and it's in a friend's extensive Corvette collection and I know it's in good hands.
04-16-2014, 09:51 PM
#11
Pro
Thread Starter
Thanks guys. Hopefully I will have some updates soon. I am making some progress on this build, but it`s going slowly.
Thanks jroc! Still undecided on the wheels...we will see. 

04-16-2014, 09:55 PM
#12
Pro
Thread Starter
Your remarks about cost versus eventual selling price are spot-on. While I've custom-built and sold many, many large scale cars (mostly Corvettes) and big rigs (1/16) and sold a lot of them, most of the mods I've sold were 1/18 diecast cars. I can confirm that what I've sold them for, both outright and on take-a-chance Ebay auctions, is in most cases not that much more than what I had into them. You should absolutely not be worried about what other people think if you happen to sell your models for very good prices. The ones that fetch good selling prices help compensate for the ones you may feel that you've all but given away.
The most I've ever sold one mod for was the 1/12-scale Ko-Motion drag Corvette that I made using a Franklin Mint 1/12 fiberglass 1967 Corvette. I was very proud of that particular project and it's in a friend's extensive Corvette collection and I know it's in good hands.
The most I've ever sold one mod for was the 1/12-scale Ko-Motion drag Corvette that I made using a Franklin Mint 1/12 fiberglass 1967 Corvette. I was very proud of that particular project and it's in a friend's extensive Corvette collection and I know it's in good hands.
BTW, I really liked your `61, and your California Street Vette is sooooo
 .
.  04-17-2014, 06:18 AM
#13
Melting Slicks

Great project......here is a link to my gallery of the actual car in the event that you need a reference point.
http://cruz21105.zenfolio.com/p286811198
http://cruz21105.zenfolio.com/p286811198
04-20-2014, 09:55 AM
#14
Pro
Thread Starter
Just a quick update. This project is going a little slower than I had hoped, but I am going to try to spend more time on it the next couple weeks.
I got the carb cover where I want it to be, and am going to cast it soon. It took me a while to simulate the colors on the exhaust manifolds. It was a 4 step process to get it right. The spark plug wires were painted with red primer, which looks more orangish than red, which is what i was shooting for.*
*
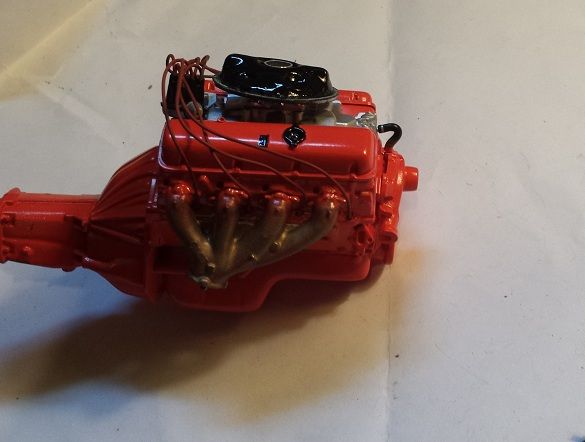
 05-16-2014, 07:59 AM
#17
Pro
Thread Starter
Thanks sarge.*
*
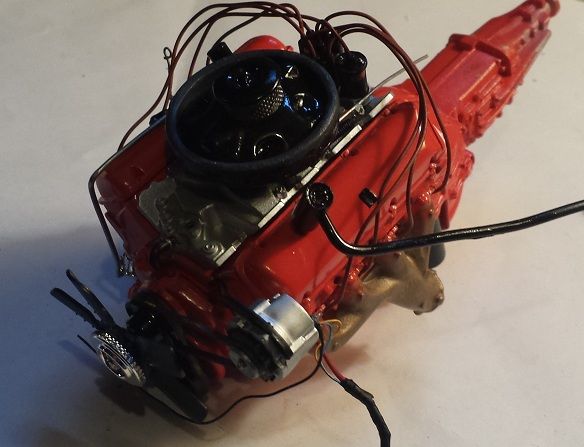
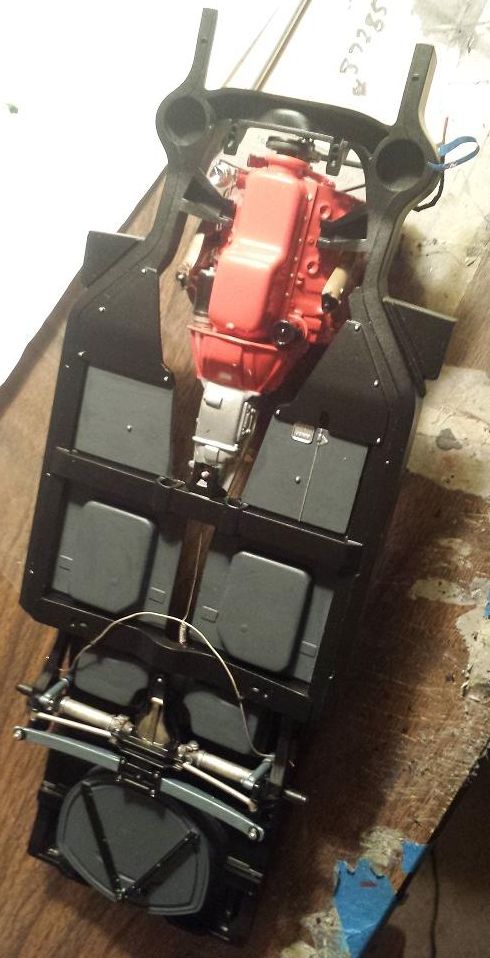
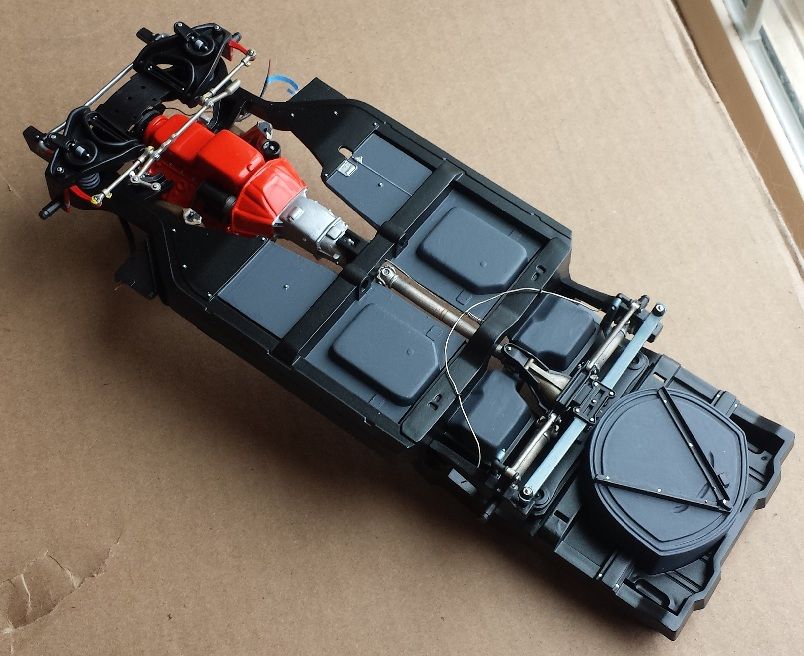
I`m making some progress on the chassis, I am just mocking up the engine to the chassis, so it isn`t glued down yet. For some reason, with this build, I am constantly going back to reference pictures of the real car to get all the painting right. I still have to add some of the chalk/paint markings on chassis components and the front suspension. I`m also making progress on the red interior. Hopefully I will be wrapping up this build soon.
*
*
I`m making some progress on the chassis, I am just mocking up the engine to the chassis, so it isn`t glued down yet. For some reason, with this build, I am constantly going back to reference pictures of the real car to get all the painting right. I still have to add some of the chalk/paint markings on chassis components and the front suspension. I`m also making progress on the red interior. Hopefully I will be wrapping up this build soon.
*
 05-20-2014, 07:57 PM
#19
Pro
Thread Starter
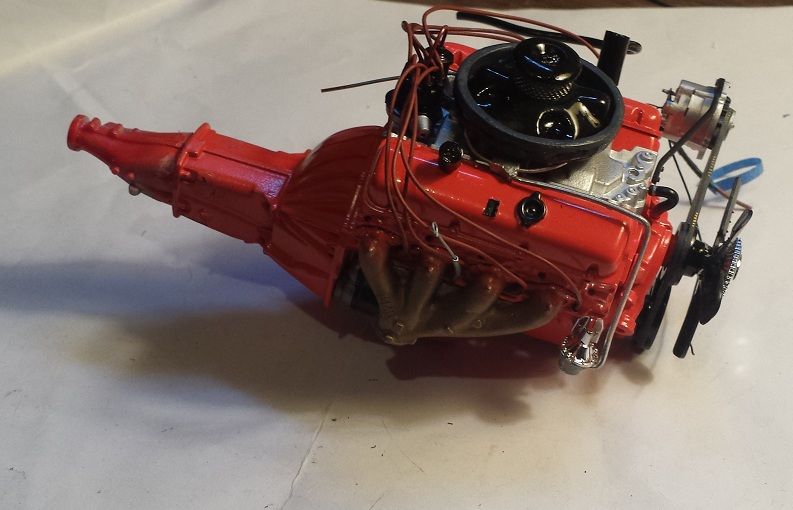
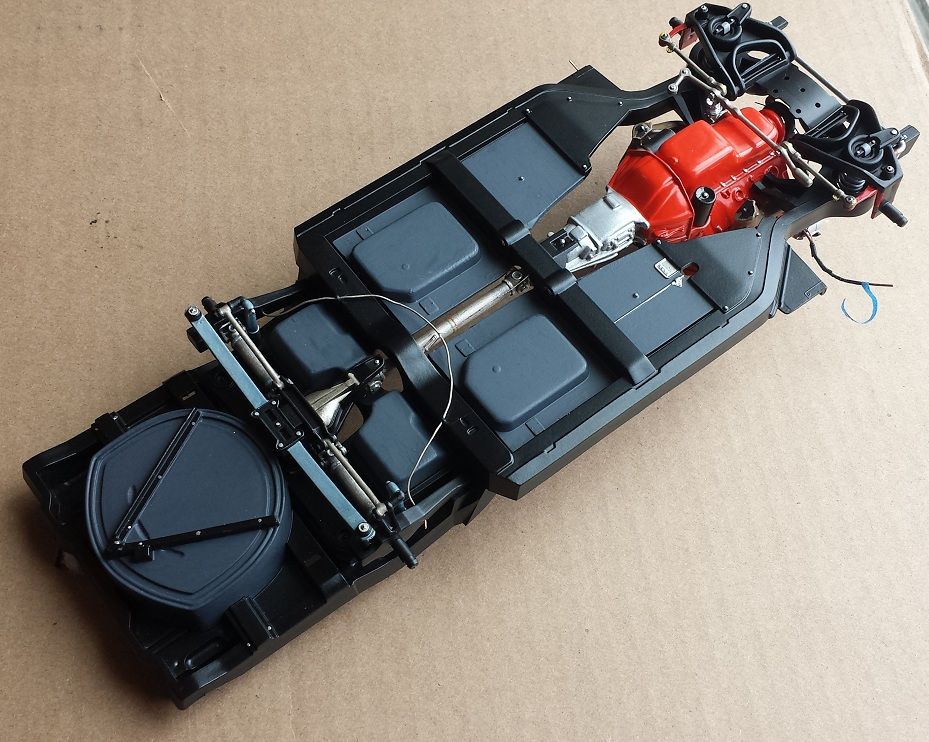
Mostly finished with the chassis. As I watched the real 1:1 car roll over the chassis cam, I noticed there were a few small differences from my previous builds, and I tried to reflect it on this one. I think I captured most of the details accurately. There are probably ten different colors on the driveshaft alone. I also tried to get all the chalk markings/paint markings, but they are kind of hard to see in these pictures.
I will hopefully have interior pics soon.
I will hopefully have interior pics soon.

