When you click on links to various merchants on this site and make a purchase, this can result in this site earning a commission. Affiliate programs and affiliations include, but are not limited to, the eBay Partner Network.
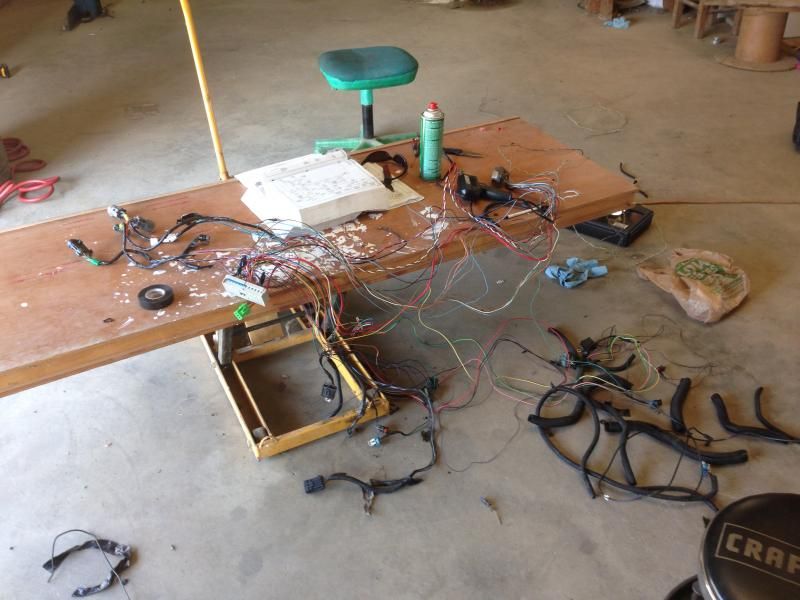
After procrastinating for a couple days I dug back into the wiring today. I had to pull out the new harness and start from scratch. Longest part was removing all of the split loom and tape.
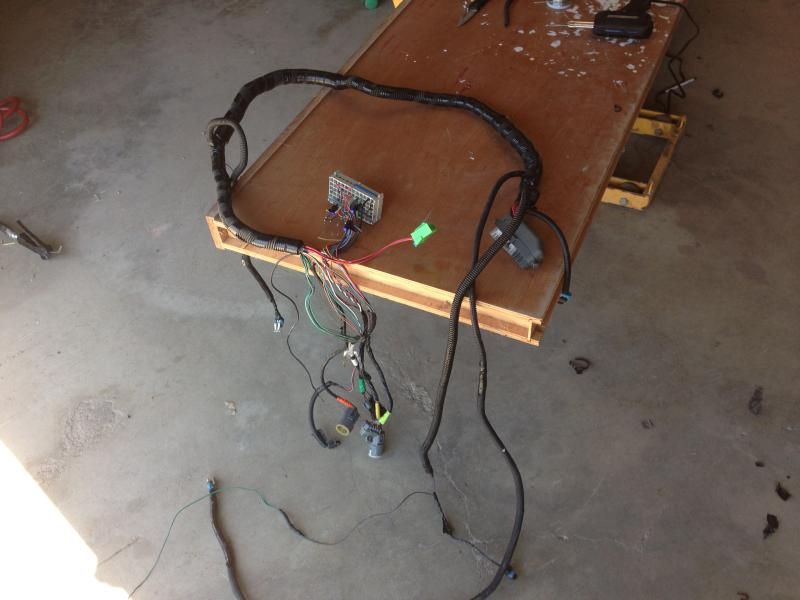
After that, I could trace wires and figure out how this thing is wired. One thing I forgot is that the OEM speed sensors terminate in a plug behind the underhood fuse panels and below my dry sump tank. So the new harness is fine. I decided to cut out all the unnecessary wiring and run the front wheel speed sensors directly to the EBTCM instead to the plug. I took my time and soldered every connection and then re-installed the split loom. Result is a nice clean harness about half the weight of the original.
After installing the new harness and the replacement EBTCM, I added some insulating mat between the dry sump tank and wiring/fuse block. Then I fired up the car and so far no codes . I still have the C1255H code, but hopefully it's just a history code and won't come back. Tomorrow I'll take the car out and activate abs and see how it goes. I'm also going to install a switch to turn on/off my abs system from the driver's seat. I cut a 40 amp fuse in half and I'm going to solder wire to each half and insert them into the abs fuse location under the hood. Then I'm running wire to a switch on the dash with an in-line fuse. Now I will be able to turn off abs if/when needed or reset the system while driving.
Thanks Robert! I was happy with the car's performance without abs, and I think that will be the way to go in the future. I have to say though, if my competition had shown up without car issues of their own I would have probably lost the races. A lot of this seems to come down to not only who the better racer is that day, but who brings the best car that day. Most of us are DIY mechanics with limited resoures in addition to racers. For me, that's a huge part of the challenge and reward of racing. Setting up my own car and figuring out how to make everything work as a whole. Of course part of that comes down to knowing what you can and cannot do and finding partners to help such as Synergy Motorsports, TC Design, and Abel Chevrolet.
Last year was kind of "ignorance is bliss" for me with respect to the brakes. Up until the championship race where it all went wrong I thought I had a good brake setup except for the occasional ice mode issues. This year has been a learning curve and I'm really glad to be sorting out my brakes finally. I took the car out for a drive yesterday on some bumpy back roads and mashed the brake pedal several times. One nice thing is it took some serious effort to even get abs to engage (ie. lock up a tire) because my front/rear bias is dialed in. However, I found some bumpy areas and hit the brakes hard to engage abs and the pedal felt good while the abs did it's job. So initial testing is positive. Next step will be track testing and fingers crossed!
Runoffs is only 8 weeks away now and I really hope to be able to start focusing on driving the car and stop having to worry if the car and brakes are working. So far there are 17 racers signed up in T1 and 16 in GT2. One thing I'm really looking forward to is racing with only my class on the track. I've never had that experience as we always race with mixed classes. That will be awesome.
The runoffs are at Laguna also? You're absolutely right about needing the machine to work as intended the whole time. That part personally for me is frustrating but I have much more patience and maintainence in mind now vs back when I raced sport bikes.
The runoffs are at Laguna also? You're absolutely right about needing the machine to work as intended the whole time. That part personally for me is frustrating but I have much more patience and maintainence in mind now vs back when I raced sport bikes.
Yes, Runoffs at Laguna first week of October. I either forgot you raced sport bikes or I didn't know that. No wonder tracking your vette is coming so easy to you.
I installed my ABS on/off switch and it seems to work well. I'm looking forward to trying some back to back laps with abs on and then off and see what happens. After I verify that the abs works well on track, I will probably start doing most of my track time with abs off to get some practice.
I finally received the fitting I was waiting a month for so I could install my new stock brake master cylinder and keep the wilwood manual prop valve. But when I tried installing it today, it ended up being the wrong size fitting. So screw it, I also bought a set of oem lines off ebay for $39 and ended up installing those. The stock lines have a non-adjustable rear prop valve so I will see how that works. I'm just not sure yet if the rears or fronts will lock first with the oem prop valve. If the rears lock and it's an issue then I'll make a custom adapter to the wilwood prop valve using the oem tubing and making my own flared end.
Here's the old master with the wilwood valve:
BTW, I figured out how to install a master and not get a single air bubble in the hydraulic system. First install the new master to the brake booster and fill with fluid. Next, install the lines only to the master but not to the abs block. Bleed the front line with a helper in the car pushing the brake pedal and a clear tube over the end of the line until all air is out of the line. Kink the clear tubing while the helper releases the pedal to prevent air from getting sucked back into the line. Then while the helper is slowly pushing down the pedal pushing fluid out of the line, screw the line into the abs block. Now bleed the rear line until no air escapes. Install the rear line to the 2nd master location on the abs block while the helper gradually pushes down the pedal. When we were done, the pedal was firm with no air. I bled each caliper anyway just in case, but no air bubbles came out. This is the 3rd or 4th time I've done this and it works every time.
I was curious how the new master would affect the brake pedal so I took the car out for another quick street test. Half with abs on and half with abs off. Brakes felt great and pedal felt awesome! Wasn't too low like I feared. It was literally perfect. I'm signed up for a last minute test day at Laguna next Saturday with Speed Ventures to test my brakes on the track. It's only a 90 dB day, so I'll be putting my 6x14" burns mufflers with turndowns to the test also but I think they should do the job.
Here's a clip of my off in T2 at Laguna. ABS module was completely unpredictable and malfunctioning. You can hear it trying to engage abs as the tires were periodically locking and unlocking. The brake pedal was hard as a rock and I tried pumping it a few times with no luck. What a helpless feeling. At least I earned $700 in tires by managing to get my car out of the gravel pit and finishing the race .
I've had that same feeling in my street car except it was sears point and no nice gravel trap to slow me down. If I were you I would dump the entire factory hydraulic system and plumb it like a proper race car. That's the only way the driver has full control over what he/she is doing in regards to the brakes. None of the cars I raced in the past had any form of abs in them and I had zero brake failures or even offs due to brakes in the few years that I raced.
Imagine if you had that same failure hauling *** into t-11 instead of t-2 what could have happened.
Yeah the more I think about it and look at all this wiring, modules, speed sensors, boosters, and crap the more I want to just gut it all and run without abs. That will probably be my winter project. I really enjoyed racing with the abs fuse pulled because there was no guessing what the abs was going to do in each brake zone it was the first time I've done it with a decent and consistent front to rear bias. With my previous setups the rears would lock too easily and make the experience pretty miserable. I think with testing and practice I should be able to be as fast or faster without the factory abs system and MUCH less likely to overshoot a brake zone or go off track like I tend to do with my current setup when ice mode kicks in or it malfunctions. Looking forward to testing on Saturday and seeing if my recent work solved my brake problems for now. I'll also try some laps with abs off and see what happens to the bias with the factory rear prop valve.
Your confidence will only improve with proper brakes. Once you set them up correctly you will never have to think about them again. The factory abs is garbage. Now-a-days lots of people think they cannot do without it. Those people don't belong anywhere near a race track(same thing with the active handling). Brakes on production cars have turned into an on/off switch. One more thing to make driver's even stupider. Modulating brakes is not difficult if they are setup right.
Your confidence will only improve with proper brakes. Once you set them up correctly you will never have to think about them again. The factory abs is garbage. Now-a-days lots of people think they cannot do without it. Those people don't belong anywhere near a race track(same thing with the active handling). Brakes on production cars have turned into an on/off switch. One more thing to make driver's even stupider. Modulating brakes is not difficult if they are setup right.
Have you modified your vette brakes to remove the brake booster and abs? I love the idea of eliminating all the remaining electronic crap that can interfere with the car other than engine management. Do you have to get an aftermarket pedal assembly or can you keep the stock pedals?
Not on the corvette. That is just my street car. I have done it on a few race cars however. None were corvette, but that doesn't really matter. I've tried a few versions. The first car I used a modified factory brake pedal that changed the ratio and geometry which allowed removal of the booster. Worked well. One downside was there was still one master cylinder so I had to make sure the front and rear calipers played well together. I could tune pedal effort however by changing up m/c sizes. On another something similar was done, but it was a complete bolt in kit. After those two I stuck to installing complete pedal assemblies. I've used wilwood (very affordable), but there are several to choose from. That is the best way to go. Allows for mounting wherever one prefers and if done properly it can be very rigid. All the factory pedal conversions still mounted to the firewall which is very weak. Have someone step on your brake hard while you look at your booster. It will move. That can all be eliminated with a custom setup that is mounted properly to the cage.
I've driven several race cars. All with custom pedal assemblies. As far as installation, I think the easiest way to go is the floor mount 3 pedal systems since they include the throttle. Otherwise one has to either build a custom throttle (what I did) or use an existing one and place it where the driver prefers in relation to the brake pedal. There are hung 3 pedal systems available from AP, for those not wanting to do a floor mount, but they are very expensive. All the 3 pedals will require a throttle cable. If you are still drive by wire you either need to convert of use a two pedal (clutch, brake) and locate your factory pedal correctly. Whatever you do install make sure you can easily access it for inspection and for adjustment/service. At first you may need to bring a couple m/c's to a test day to get the bias right. If you have all the stock dash and other garbage in the way a hung mount will not be easy to get to. On the last race car I did it was all custom so I just removed the windshield and had full access to the pedals.
FWIW, I like to install them with adjustability. Put the drivers seat in the correct spot and move the pedals for different drivers as opposed to moving the seat around. It takes some work, but once done it's solid.
Thanks for the info V! The floor mount pedals sound like the way to go. Today was pretty successful at Laguna Seca. The new (used) abs module and harness seemed to have fixed my abs system even on the track. The new master was good also, but took some getting used to with my braking force and heel/toe downshifting. I'm pretty sure I have a lot more front bias now with the stock rear prop valve. I'm going to install the manual prop valve so I can get the bias where I want it. My car is getting better, but still needs some fine tuning in the handling department. My buddy Oli was also at Laguna today testing for the Runoffs. He's basically going through the same issues I am with brakes plus trying to get a front splitter/undertray that doesn't fall apart on the track but also doesn't take off the whole front bumper out in a hit. I'm going the other route and made my front splitter/undertray super strong and tightly tied in with the front bumper. It can take a hell of a hit and not break, but if it does break, so will my front bumper. My undertray was made by Wasp Composites in Bakersfield and is excellent quality and price.
FYI, I ran the large Burns mufflers with turn downs pointed up and to the left. I made sound as long as I short shifted to 4th and went part throttle up the hill. One time I tried full throttle in 3rd, but hit 95.9 dB, which is pretty good but not good enough on a 90 dB day.
Next weekend I'm running time trials with nasa at T-hill on the full 5 miles. No racing because I want to preserve the car at this point.
Good luck with the new setup You and Trackboss make me feel guilty about waiting for our new engine for the vintage car and not working on other things on the car.
Good luck with the new setup You and Trackboss make me feel guilty about waiting for our new engine for the vintage car and not working on other things on the car.
Yeah, always something to work on. Helps fight boredom between races.
Sweet car. I'd be scared to drive that thing . There is a lot to be said about having a real race car instead of a modified street car. But my car is getting close once I ditch the factory brake system. I see a full racing pedal assembly in my future with no brake booster. The brake booster is another thing I hate on the track with or without abs. It changes the pressure to the calipers when you downshift and the engine creates more vacuum. That makes modulating the brakes more difficult. But like Trackboss said, you need to either change the leverage of your pedal to ditch the booster or go to an aftermarket assembly with 2 masters.
This is a cool chart and I have referenced it many times over the years. But I always wondered how accurate it really was. For one thing the relative stiffness on the vertical axis may be misleading depending on what "0" is. Also, I discovered the Pfadt bars are much softer than shown on the chart due to their aluminum arms. The bars themselves are steel, but the arms are aluminum. I happened to have one of the Pfadt low rate bars (35 mm) with 3 holes for adjustability as well as a T1 bar (38 mm) and Hotchkis bar (32 mm) so I just ran a test. My hunch was that the hotchkis bar at 32 mm would actually be stiffer than the Pfadt bar at 35 mm due to it's aluminum ends. I tested each bar including the 3 different settings on the Pfadt bar for torsional stiffness by jacking up the driver's side front tire with 600 lbs of force and measuring how far the passenger side rotor raised off the ground due to the sway bar. My results are as follows:
Starting point (distance from passneger side rotor to ground with car on lift) = 52.25"
Jack up driver's side tire with 600 lbs force (scale on a tranny jack):
Pfadt outer hole: 53.75"
Pfadt middle hole: 53.9"
Pfadt inner hole: 54.125"
Hotchkis bar: 54.25"
T1 bar: 54.75"
Sure enough, the Hotchkis bar is stiffer than the stiffest setting on the Pfadt bar. The chart shows the Hotchkis bar softer than the softest setting on the Pfadt bar because it doesn't account for the aluminum arms.
Also, I spoke with LG Motorsports, and they said their bar is stiffer than the GM T1 bars. It might be a good choice for those that want a one-piece bar.
Also, I spoke with LG Motorsports, and they said their bar is stiffer than the GM T1 bars. It might be a good choice for those that want a one-piece bar.
In case anyone was wondering, I ran time trials today at T-hill. I only ran the morning sessions to save the car and I'm limited to 1 set of A6 scrubs and 1 set of R6 scrubs. My goal today was to qualify for TT2 at nasa nationals and test my recent repairs and car setup changes. After a full season of testing the car with various spring rates, sway bars, and shock settings I think I have the car dialed in finally! The SCCA aero is quite limited so mechanical grip is key. Also, my brake system is working and I'm gaining my braking confidence back again. This was the first day all year that I turned a lap and said, "wow, that was faster than I thought". All year, it's been "crap I was faster last year". So it feels good to have the car doing what I want it to do. Here's my fast lap today in the 5 mile track:
 08-12-2014, 09:25 PM


 . I still have the C1255H code, but hopefully it's just a history code and won't come back. Tomorrow I'll take the car out and activate abs and see how it goes. I'm also going to install a switch to turn on/off my abs system from the driver's seat. I cut a 40 amp fuse in half and I'm going to solder wire to each half and insert them into the abs fuse location under the hood. Then I'm running wire to a switch on the dash with an in-line fuse. Now I will be able to turn off abs if/when needed or reset the system while driving.


 .
. 

 . There is a lot to be said about having a real race car instead of a modified street car. But my car is getting close once I ditch the factory brake system. I see a full racing pedal assembly in my future with no brake booster. The brake booster is another thing I hate on the track with or without abs. It changes the pressure to the calipers when you downshift and the engine creates more vacuum. That makes modulating the brakes more difficult. But like Trackboss said, you need to either change the leverage of your pedal to ditch the booster or go to an aftermarket assembly with 2 masters.

