[VPA] "Skim Coat of VPA" advice
 08-23-2014, 07:57 PM
#1
Race Director

Thread Starter

Don't laugh at me!!! My first time using VPA and only 2nd time applying stuff with a bondo spreader.
Paging DUB or anyone else with VPA experience.
1. The VPA hardens in a matter of minutes... how much less hardener can I apply so I have more time to work...but enough that it still hardens overnight or so? I can't gain experience and do a quality job when I'm rushed and forced to just slap it on before it hardens
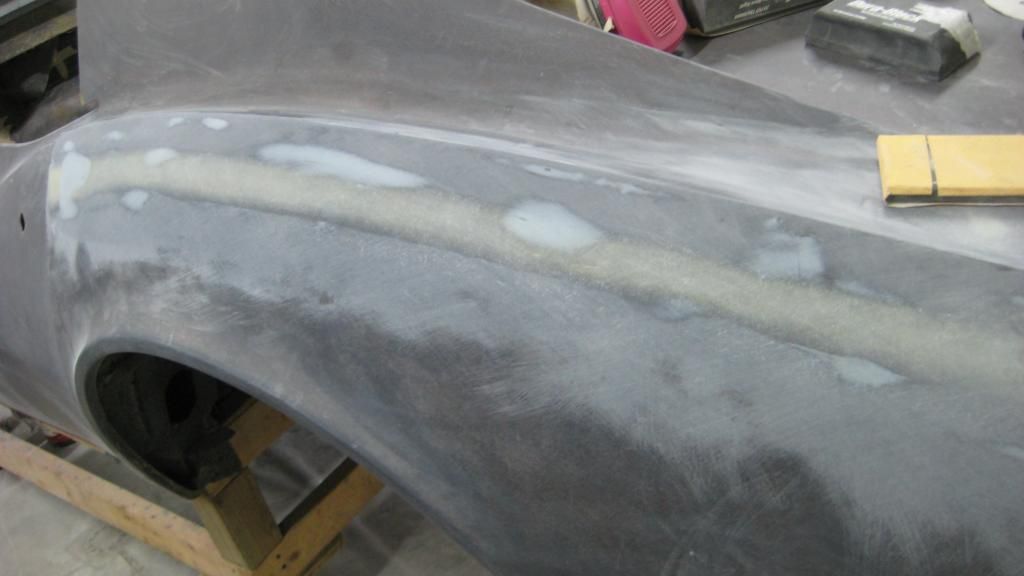
I was informed it's a good idea to put a "skim coat of VPA" over my fiberglass repairs.
Does that mean picture 1?
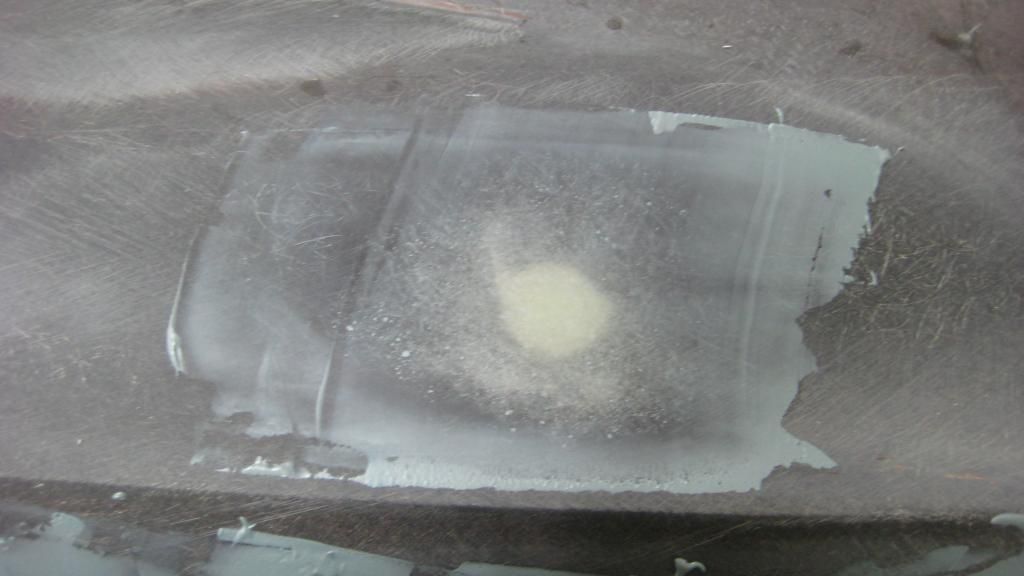
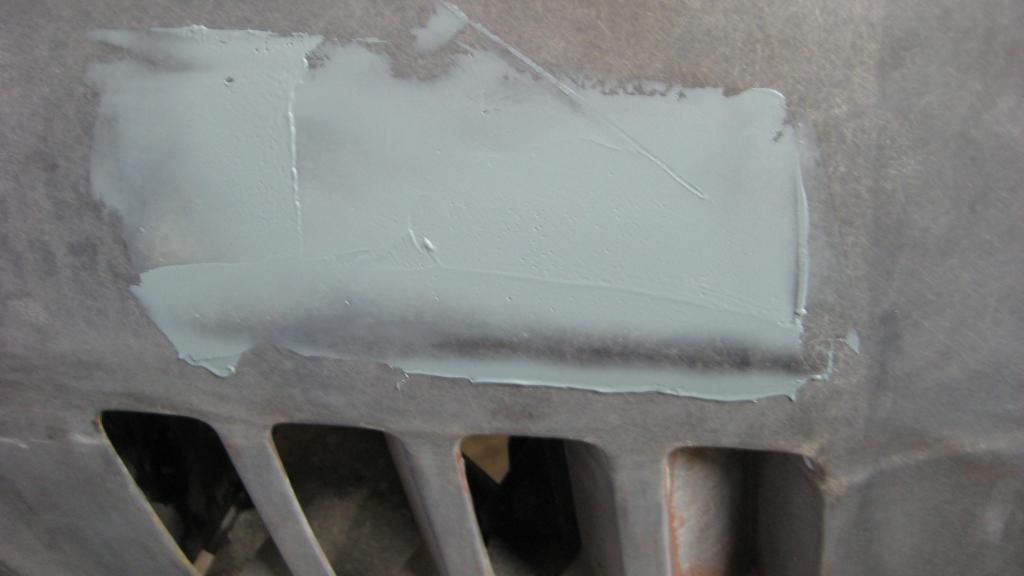
or the other two?
I mixed up way too much not knowing how it goes on....sorry.
Any tips on how to get it out of the can without making a mess?
what do you use to clean your mixing board and spreader when done?
Also... What other things can I do with the VPA? Will it fill the holes that hold insulation or wire loom rivets? That would save me a ton of time grinding, glassing, sanding,... but only if it holds.
If I want to apply multiple coats of VPA to build up an area how do I go about that? I probably don't have the skills to apply a "thick" coat. So how do i apply multiple "skim" coats? 1, dry, 2, dry...? Or 1, dry, sand, 2, dry, sand,...? or 1, tack, 2, tack, 3, tack...?
Paging DUB or anyone else with VPA experience.
1. The VPA hardens in a matter of minutes... how much less hardener can I apply so I have more time to work...but enough that it still hardens overnight or so? I can't gain experience and do a quality job when I'm rushed and forced to just slap it on before it hardens
I was informed it's a good idea to put a "skim coat of VPA" over my fiberglass repairs.
Does that mean picture 1?

or the other two?


I mixed up way too much not knowing how it goes on....sorry.
Any tips on how to get it out of the can without making a mess?
what do you use to clean your mixing board and spreader when done?
Also... What other things can I do with the VPA? Will it fill the holes that hold insulation or wire loom rivets? That would save me a ton of time grinding, glassing, sanding,... but only if it holds.
If I want to apply multiple coats of VPA to build up an area how do I go about that? I probably don't have the skills to apply a "thick" coat. So how do i apply multiple "skim" coats? 1, dry, 2, dry...? Or 1, dry, sand, 2, dry, sand,...? or 1, tack, 2, tack, 3, tack...?
 08-23-2014, 08:16 PM
#2
Race Director
Thread Starter
Also...last summer when I bought some stuff I bought
Everglass (short strand filler)
along with the
Evercoat(VPA)
what are the applications I can use the cheaper Everglass on vs. having to use the double the price VPA?
Everglass (short strand filler)
along with the
Evercoat(VPA)
what are the applications I can use the cheaper Everglass on vs. having to use the double the price VPA?
08-24-2014, 06:53 PM
#3
Race Director


First off . I am not laughing....and you have my number...you could have called me...and if you do not have my number...i will give it to you in a PM if you need it.
.When applying the VPA...Make sure that you do not have thick edges at the ends of your wiping stokes. It makes it that much harder to sand. You always want to make sure that the edge of the VPA where it stops and meets the fiberglass panel..is TIGHT. Meaning that you press hard on the end of the spreader so there is basically NO EDGE to your VPA...much like if it were as thick as a razor blade at the edges. This practice makes it so when you go and block..you are not having a hard time getting your filler down and feathered. MAKE SENSE???
I will not use any long or short strand filer on the exterior of a panel . I will use it on the backside or underside...but never on the outside. Getting it mixed well and all of the air out is not worth it to me. And I will not waste the money, time and effort on vacuum bagging this stuff due to setting up to fast.
The key with the VPA is being CONSISTENT when mixing and applying. When I apply several layers to a bonding strip area. And then I block it down and see where went through the layers. The color of my VPA is very consistent and hard to see a color change.
When doing bonding seams...go front to rear or rear to front...NOT up and down with your application strokes. AND it is OK to apply some VPA and go 5-6 inches...then apply another 5-6 inches and keep doing this down the panel. Then..put some on your spreader and go from one end to the other IN ONE STROKE so you have a smooth coat. AND DO NOT FORGET to keep you bottom edge of the VPA TIGHT and thin by pressing hard on your spreader and slightly angling it or curving the spreader to begin making the shape of the quarter or fender. Which is why you do not want spreaders that are rock hard like for applying decal. And the spreader has 2 ways of being used due to the tapered edge. One way makes the spreader stiffer...the other way gives it some flex. And with that and your pressure of how you apply the VPA can aid you in applying it in some areas.
The VPA will get to a point where you can sand on it and rough it in while it is still setting up. I use 36 grit and can tell by when I swipe my sandpaper on it..and check it...that the VPA is still not so wet. So..when I block it and the VPA gets stuck in the paper...I can smack it with a wood paint stick and the VPA falls out and I can keep sanding and shaping QUICKLY. SO be prepared to use sandpaper. It is a part of the job.
When you get your area very close to the shape you want...BECAUSE you want to make sure that when you re-coat the VPA onto itself that it is ENTIRELY sanded.....I switch to fresh 80 grit and let the VPA set up and it will block and feather really well. WHICH IS WHY it is important that your spreading techniques are in check.
When mixing the VPA...do NOT swirl it too much. I prefer to swirl it about 5-8 times(depending on volume)...and then I scrape it up and then drag it out onto my mixing board while applying pressure to mash out the air and further mix it ...and I am NOT 'dilly-dallying' around.
I hate to write this...but I am not concerned about how much a product costs in doing a job. So any suggestions here cannot come from me. I have not found any fillers that even come close to the properties of the VPA and are cheaper. ALL I use is VPA on the exterior of a body when it is a fiberglass/SMC panel. I do not even use any glazing putties. To me the foundation of the body for my paint is more important than the costs it takes to make it right...in my opinion. BECAUSE ...I have experienced enough "WOULDA-COULDA-SHOULDA's" in my career and have learned.
For your other questions/concerns on filling in holes it will but it does have some limitations by itself....so instead of me typing here for hours covering all the possibilities. You have my number so call me and it will take much less time talking with you instead of typing it all out.
DUB
08-24-2014, 08:11 PM
#4
Race Director

Haven't used VPA. Does it get that "almost hard" stage where you can cheese grate it?
For those that don't know, cheese grating looks like this:

Fillers will retain a semi-hard state for 15 minutes or so before hardening completely. During that time you can use this tool to do 90% of your shaping. Then you let it harden all the way and it only takes a short time to finish it with the block.
For those that don't know, cheese grating looks like this:
Fillers will retain a semi-hard state for 15 minutes or so before hardening completely. During that time you can use this tool to do 90% of your shaping. Then you let it harden all the way and it only takes a short time to finish it with the block.
08-24-2014, 08:36 PM
#5
Race Director
Thread Starter
Thanks DUB!!!!
I'll have to PM you for your number as I'm pretty sure I never saved it for fear of pissing you off with basic questions lol.
Yeah. I found out pretty quick when I started sanding that the thick edges made it harder.
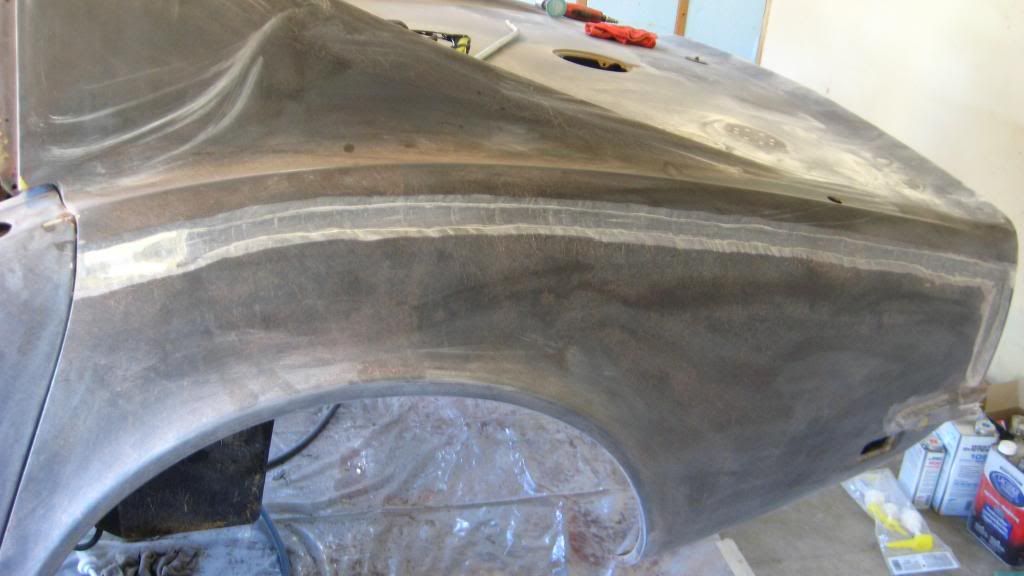
I went up/down thinking the curve of the fender would make laying the VPA down smooth way easier.. I'll try the other way next time.
I ordered a flexible long board as I was worried the dura blocks i'm using now aren't flexible enough or long enough for this curved of a project.
I'll also have to work on my mixing skills as I must have either had air bubbles OR my spreader wasn't smooth enough and left some gaps.

I'll have to PM you for your number as I'm pretty sure I never saved it for fear of pissing you off with basic questions lol.
Yeah. I found out pretty quick when I started sanding that the thick edges made it harder.
I went up/down thinking the curve of the fender would make laying the VPA down smooth way easier.. I'll try the other way next time.
I ordered a flexible long board as I was worried the dura blocks i'm using now aren't flexible enough or long enough for this curved of a project.
I'll also have to work on my mixing skills as I must have either had air bubbles OR my spreader wasn't smooth enough and left some gaps.


 08-25-2014, 05:21 PM
#6
Race Director
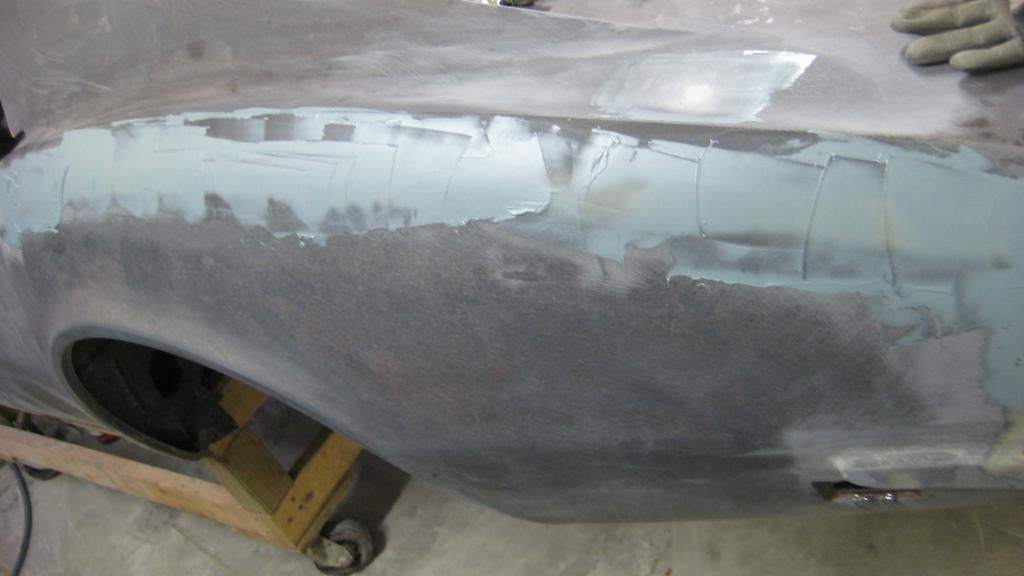
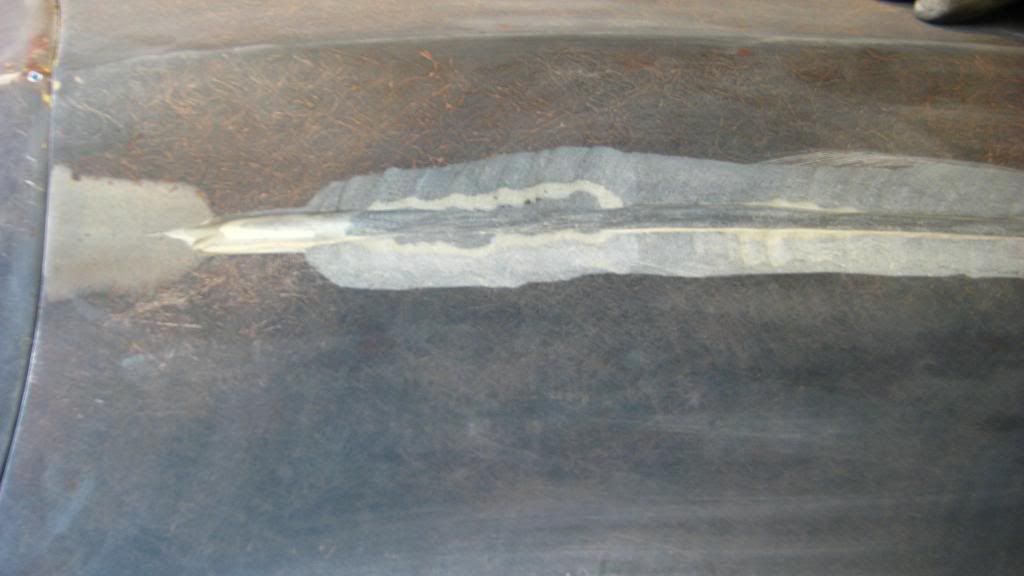
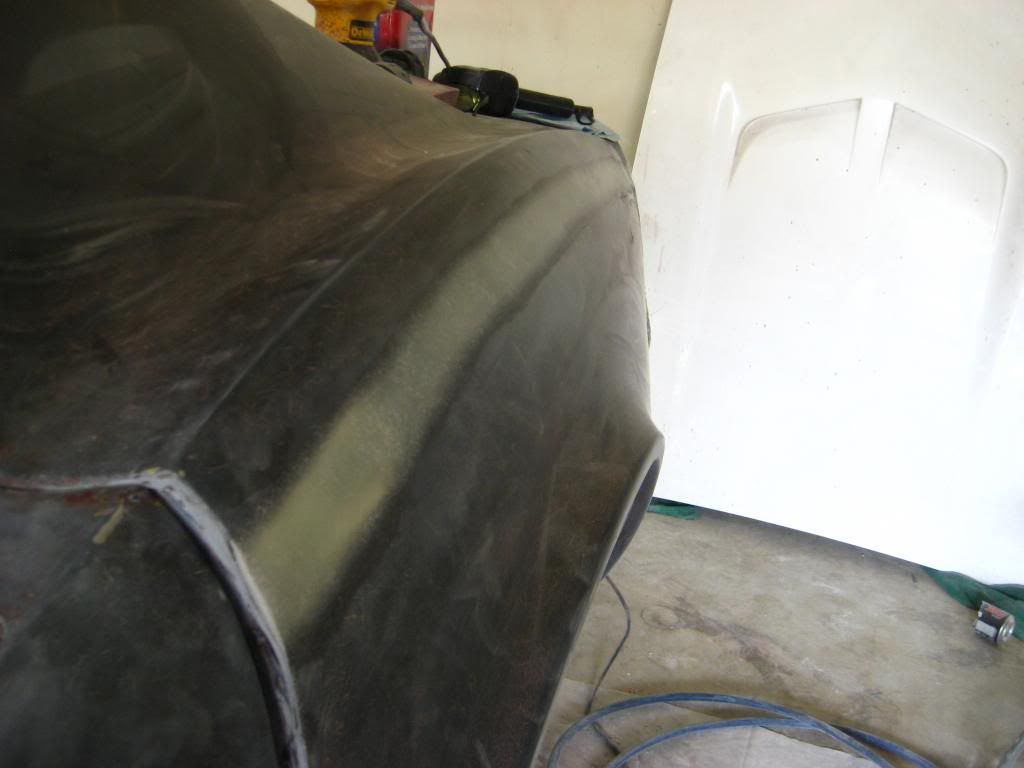
QUESTION: What is that material in your bonding seam area that is a creamy yellow/white color???? I am sure it is resin and mat...correct.
FOR THE RECORD...you can call me everyday and ask me questions and I won't get pissed off. Where I do get pissed off is when we have to go over something for the THIRD TIME...second time is fine...but THIRD time lets me know you are not paying attention....and possibly have lost the ability to write things down...like we all did in school.
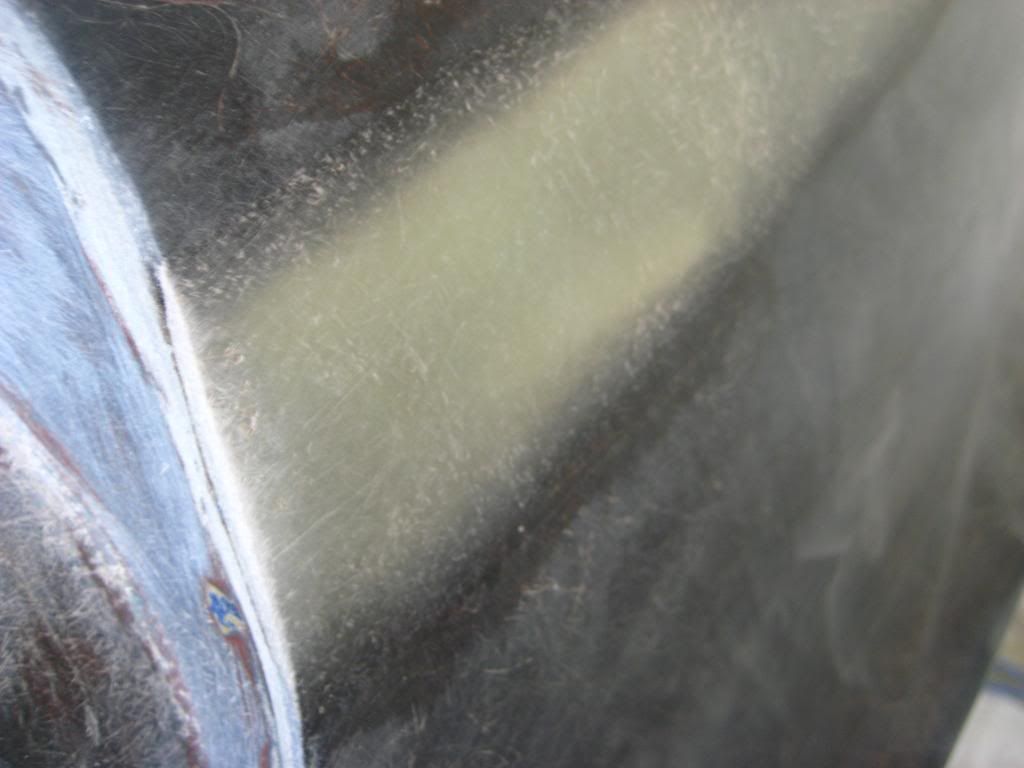
Sent you a PM with my number...DO NOT be afraid to use it...Because all I can say is that last photo needs more work. Call me and I will tell you why I would not let that get into the booth for gelcoat or 'whatever'.
DUB
FOR THE RECORD...you can call me everyday and ask me questions and I won't get pissed off. Where I do get pissed off is when we have to go over something for the THIRD TIME...second time is fine...but THIRD time lets me know you are not paying attention....and possibly have lost the ability to write things down...like we all did in school.
Sent you a PM with my number...DO NOT be afraid to use it...Because all I can say is that last photo needs more work. Call me and I will tell you why I would not let that get into the booth for gelcoat or 'whatever'.
DUB
08-25-2014, 06:03 PM
#7
Race Director
Thread Starter
Thanks DUB. I'll give you a call first day this week I get off work at a decent time.
That area concerned me too when I was glassing as it was my first seam, practically first repair job, and I had no clue why it was different.
The bonding seam all of a sudden changed and it wasn't a typical gray bonding seam anymore but that white color.
All I know is it was also made of fiberglass so I preceded to glass over it like normal.


 08-25-2014, 07:29 PM
#8
Race Director
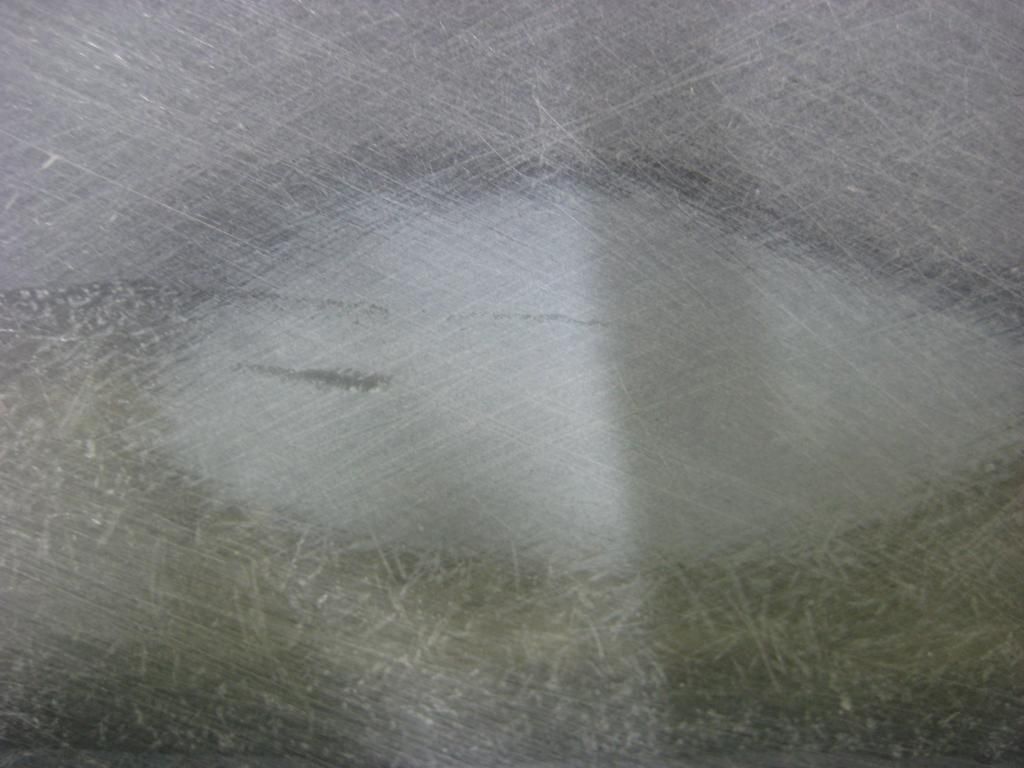
My concerns are more dealing with NOT having any product (VPA) covering your lamination's. Exposed fibers can come back and get you...either when a product is being sprayed on top of it....or with a possible settling in the future when it gets hot.
DUB
DUB
08-25-2014, 08:21 PM
#9
Race Director
Thread Starter
Only way to fix that would be to grind out the 1000+ hours of glassing/sanding smooth I did on the dozens of repairs all over the body
I look to you for advice but I'm afraid even I might not be willing to do that unless I knew 100% the gelcoat/paint isn't going to stick for 5-10 years.
08-26-2014, 07:47 PM
#10
Race Director
There's no product that works over repairs without VPA spread on top of them?
Only way to fix that would be to grind out the 1000+ hours of glassing/sanding smooth I did on the dozens of repairs all over the body
I look to you for advice but I'm afraid even I might not be willing to do that unless I knew 100% the gelcoat/paint isn't going to stick for 5-10 years.
Only way to fix that would be to grind out the 1000+ hours of glassing/sanding smooth I did on the dozens of repairs all over the body
I look to you for advice but I'm afraid even I might not be willing to do that unless I knew 100% the gelcoat/paint isn't going to stick for 5-10 years.
I am only telling you what can POSSIBLY happen when you go and apply gelcoat or whatever.
I have done this before and have been burned...so take my suggestions and use them or do not. it is entirely up to you. BUT...if your car were in my shop and you working for me...I would grind down the seams a little and skim coat over them...and that is that.
I have gelcoated and polyester primed so many Corvettes that regardless on how many hours I have in it. SOMETHING will pop up. It happens to me also....but I know how to handle these issues.
I will ask you this...and then you decide. BUT first. I am REALLY good at laminating...and I am very picky and watchful and really pay attention. I basically know the size of a small air bubble in resin and what it can do to a paint job when it is just under the sanded surface that is SMOOTH.
SO..are you so sure that your lamination is so good that you have no fear??? IF so...do not do anything.
BUT...I grind down the lamination and apply a layer of VPA...which is about the thickness of a wood matchstick and feather it out....because as you know...the thickness of VPA is so strong...that an air bubble that is under this layer of VPA would have to be so large to show up when put out in the sun. That is why I write this stuff. I have PAID DEARLY in mistakes. Just trying to keep you from having to deal with something....but it is your car...your choice.
Which is why I try to help people use the VPA without problems. Proper mixing and application techniques so you do not introduce air into what is being spread out. I can not count the number of gallons of VPA that I have made employees grind back out because they chose to mix and apply it 'their' way...and the VPA was loaded with air bubbles.
I hope it all goes well for you.
DUB
10-10-2014, 02:11 PM
#11


I hope I'm not taking over this thread but has DUB or anyone else here tried setting their VPA a a vibrator for a second to make the air bubbles rise to the top?
I got this idea when watching a friends dad make dental appliances. After mixing the "pookee" he would set the bowl on the vibrator for about one second, the air would instantly come to the top. His main concern was strength in the appliance,
Kevin
I got this idea when watching a friends dad make dental appliances. After mixing the "pookee" he would set the bowl on the vibrator for about one second, the air would instantly come to the top. His main concern was strength in the appliance,
Kevin
10-10-2014, 03:38 PM
#12
Melting Slicks


I hope I'm not taking over this thread but has DUB or anyone else here tried setting their VPA a a vibrator for a second to make the air bubbles rise to the top?
I got this idea when watching a friends dad make dental appliances. After mixing the "pookee" he would set the bowl on the vibrator for about one second, the air would instantly come to the top. His main concern was strength in the appliance,
Kevin
I got this idea when watching a friends dad make dental appliances. After mixing the "pookee" he would set the bowl on the vibrator for about one second, the air would instantly come to the top. His main concern was strength in the appliance,
Kevin
Last edited by Dave Tracy; 10-10-2014 at 03:41 PM.
10-10-2014, 05:55 PM
#13
Race Director
The problem with the air bubbles is the way you are mixing it and not applying it correctly. If you are trying to apply a really thick layer (1/4"-1/2"" ...you better know how to mix this stuff. I have gotten over 30 years of practice...so I know it will work If you mix it correctly...and apply it correctly...and then go back for that 'one last' swipe...you can drag air into it and ruin it. You can not mix it by stirring it with the spreader...well you can...but only 5-7 times....then stop....Then you have to use the spreader and pick it up and drag it across your NON-POROUS, RIGID mixing board...and do this VERY QUICKLY..and do it A LOT...until you have the color consistent...and I even do it a few times when I am applying it. AND I AM REALLY MASHING it while dragging it to force out the air. AND I am doing this VERY fast.
The reason I can write this is because I can apply a thick layer...when cured ...grind it all the way down and not have any bubbles that would even make me have any concern.
REMEMBER...just because you took the time to THOROUGHLY mix it initially. It needs to be kept mixed....and the lid on it when it is not being used (sealed)....and stay out of the sun...and a clean paint stick being used EACH TIME you go in to pull some out to mix....instead of a paint stick that has a huge glob of it stuck to it...and you go and scrape that off an wonder why your viscosity is not the same. Using it when it is a room temp is best...so if it is really cold....you can not expect professional results....HECK...I would not expect them...so that is why it is used when it is at a good temp and it can flow.
AND...if you find yourself at the bottom of the can and it is thick...then it was not being mixed periodically.
DUB
10-11-2014, 10:07 AM
#14
Drifting

i use a 6 in murco knife to spread with . i also keep a concrete trowel handy for final swipe if it is a large area. those little bondo spreaders suck. like dub was saying the neater you apply it the less work you'll do. the old days of cheese graders is long gone.