When you click on links to various merchants on this site and make a purchase, this can result in this site earning a commission. Affiliate programs and affiliations include, but are not limited to, the eBay Partner Network.
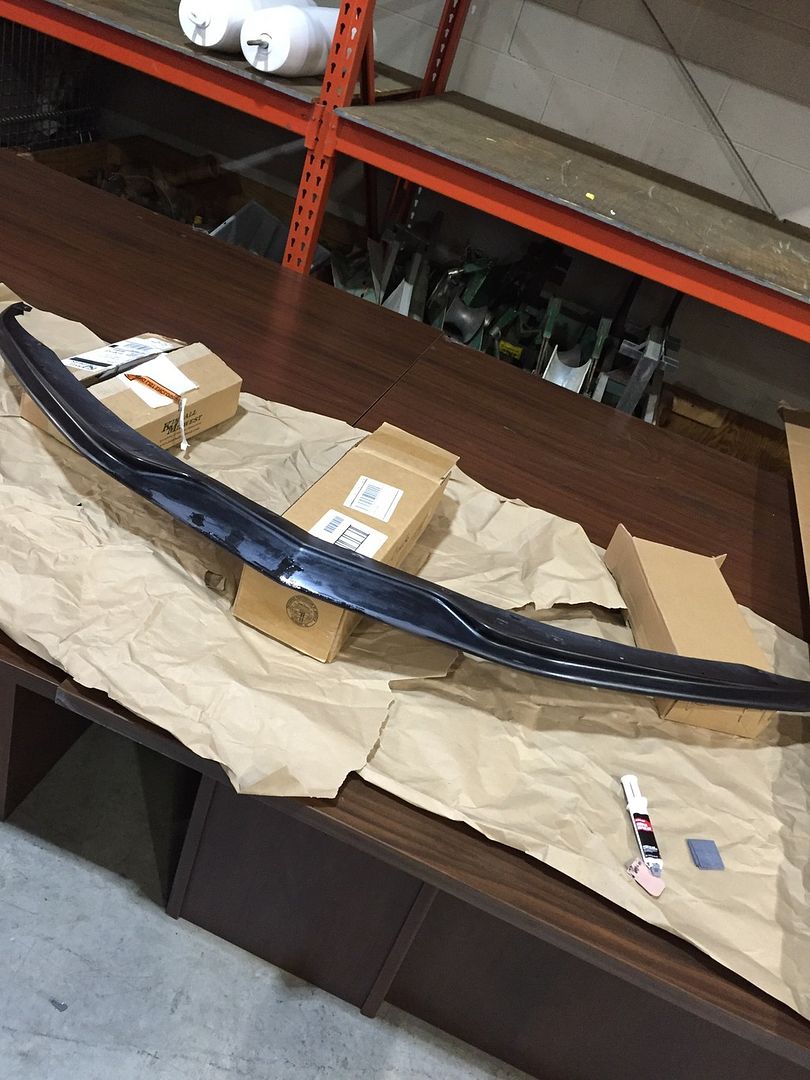
Well the inevitable finally happened...I curbed my painted stage 1 Z06 front splitter on my Stingray. Put some pretty good gashes in it too... So here's the process I'm using to fix it. Any suggestions are welcome.
I removed the splitter and sanded it back down the best I could to get the clear coat back off and to smooth out as much as I could. Side note: I originally used the pop rivets provided to install the splitter, however I will be following the suggestions of other members and reinstalling the splitter using the scrivet style fasteners. Pop rivets are not that hard to get out, USUALLY, however being against the plastic material that they are on, the pop rivets just spin when you try to drill them out! Note taken!
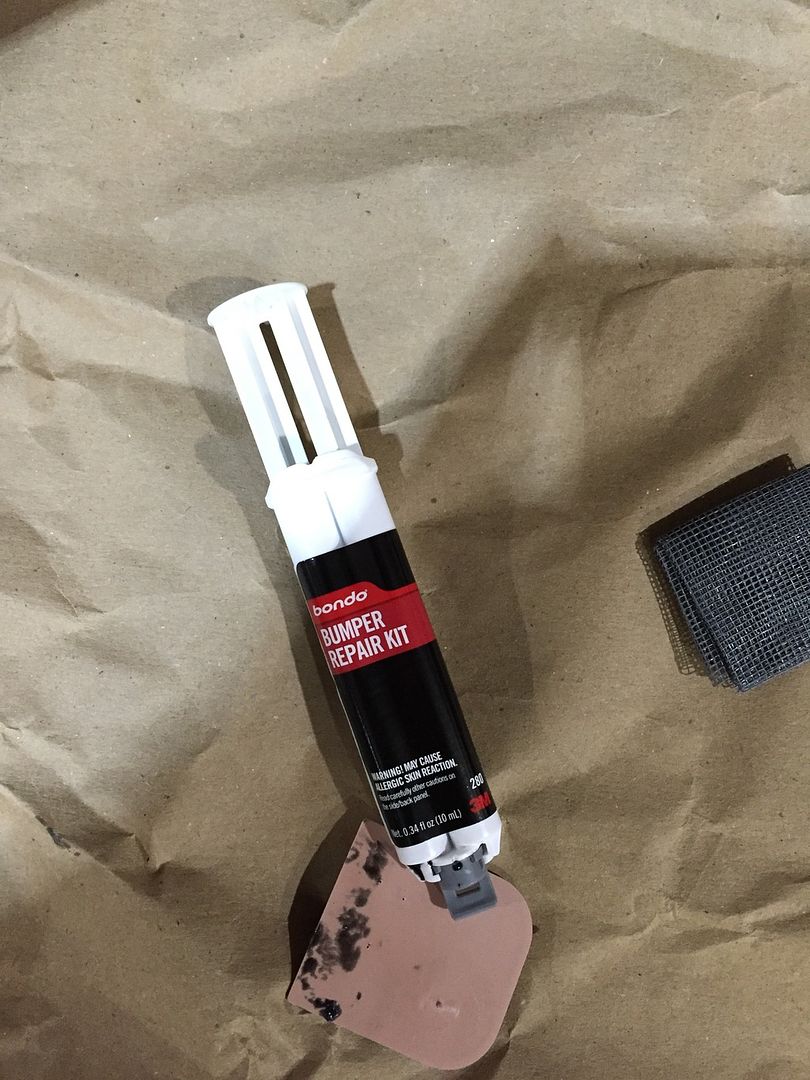
Next I wiped it down with acetone then added a light/quick coat of adhesion promoter once again, figured it couldn't hurt. Then I used Bondo's "Bumper Repair Kit" (pictured below) to further fill in the minor road rash left on the bumper.
I'm currently waiting for the bondo to cure so I can sand it down to smooth. Then I plan on adding another coat of primer, followed by a few coats of Automotive Touchup 501Q (Carbon Flash), then clear, then wetsand with 3000 followed by 105 polish and finishing with 205 polish.
All in all it really isn't all that hard to do this, for those of you who are afraid of painting them due to curb damage. Plus the learning experience from a DIY is fantastic! And IMO, the splitter looks WAY better painted. I'm doing all this because I have a car show this weekend so she's got to be looking good! As inexpensive as the splitters are, I may even buy a spare one and get it all painted up and ready so that if this happens again, I can just throw the spare on while I refinish the other! Plus the painting materials don't really cost that much either!
Nice, thanks for the tips! I painted mine too because I think it looks better that way. I'll be curious to see how it comes out, but I'm guessing you won't be able to tell.
If I ever damage my stage 1 splitter, I will just replace it... That is part of the advantage of the plastic splitter, it does not cost much to replace...
Also, I would recommend using bumper cover screws (with u-nuts inside the bumper) for some added strength over the plastic rivets...
Well the inevitable finally happened...I curbed my painted stage 1 Z06 front splitter on my Stingray. Put some pretty good gashes in it too... So here's the process I'm using to fix it. Any suggestions are welcome.
I removed the splitter and sanded it back down the best I could to get the clear coat back off and to smooth out as much as I could. Side note: I originally used the pop rivets provided to install the splitter, however I will be following the suggestions of other members and reinstalling the splitter using the scrivet style fasteners. Pop rivets are not that hard to get out, USUALLY, however being against the plastic material that they are on, the pop rivets just spin when you try to drill them out! Note taken!
Next I wiped it down with acetone then added a light/quick coat of adhesion promoter once again, figured it couldn't hurt. Then I used Bondo's "Bumper Repair Kit" (pictured below) to further fill in the minor road rash left on the bumper.
I'm currently waiting for the bondo to cure so I can sand it down to smooth. Then I plan on adding another coat of primer, followed by a few coats of Automotive Touchup 501Q (Carbon Flash), then clear, then wetsand with 3000 followed by 105 polish and finishing with 205 polish.
All in all it really isn't all that hard to do this, for those of you who are afraid of painting them due to curb damage. Plus the learning experience from a DIY is fantastic! And IMO, the splitter looks WAY better painted. I'm doing all this because I have a car show this weekend so she's got to be looking good! As inexpensive as the splitters are, I may even buy a spare one and get it all painted up and ready so that if this happens again, I can just throw the spare on while I refinish the other! Plus the painting materials don't really cost that much either!
nice job and great plan, I would not change a thing. Once you do this you feel a lot better about the next time you have to do it!...LOL
and per my thread the other day, you can see that none of this fix would be possible if it's a carbon fiber splitter.
another tip - tape the leading edge with XPEL door edge guard for $20, prevents a few hits...invisible, naturally only after paint dries for 30 days, alcohol first. It can be done with splitter on the car:
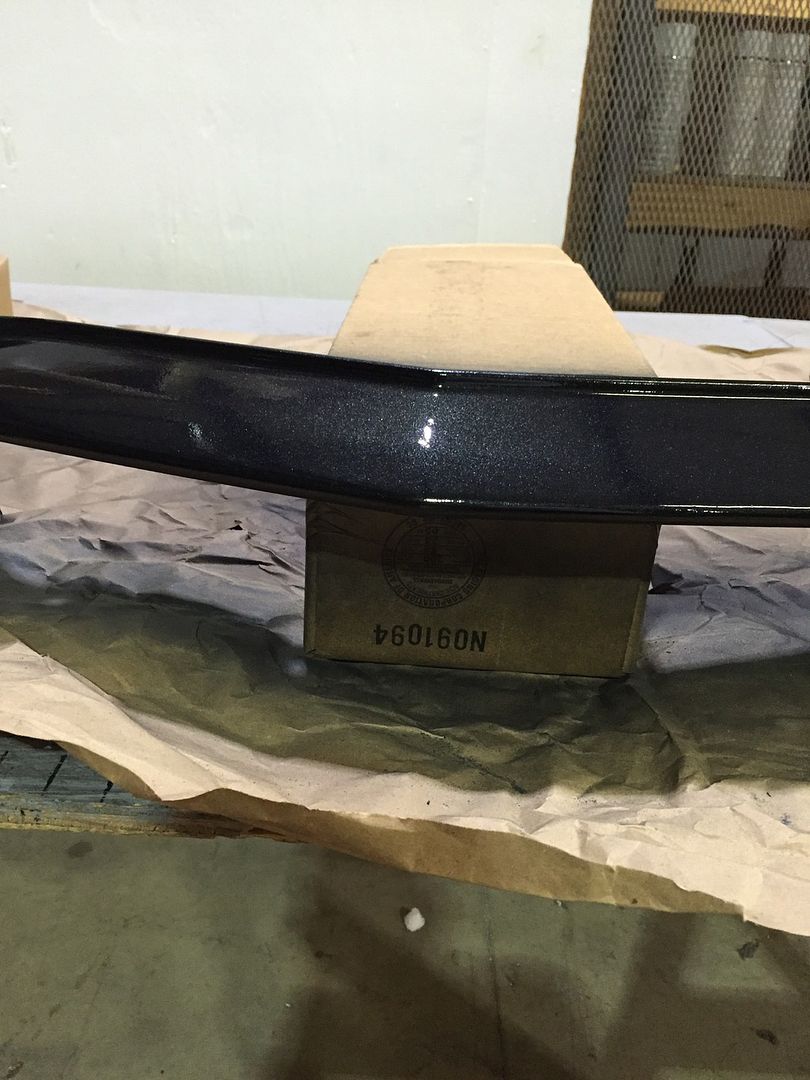
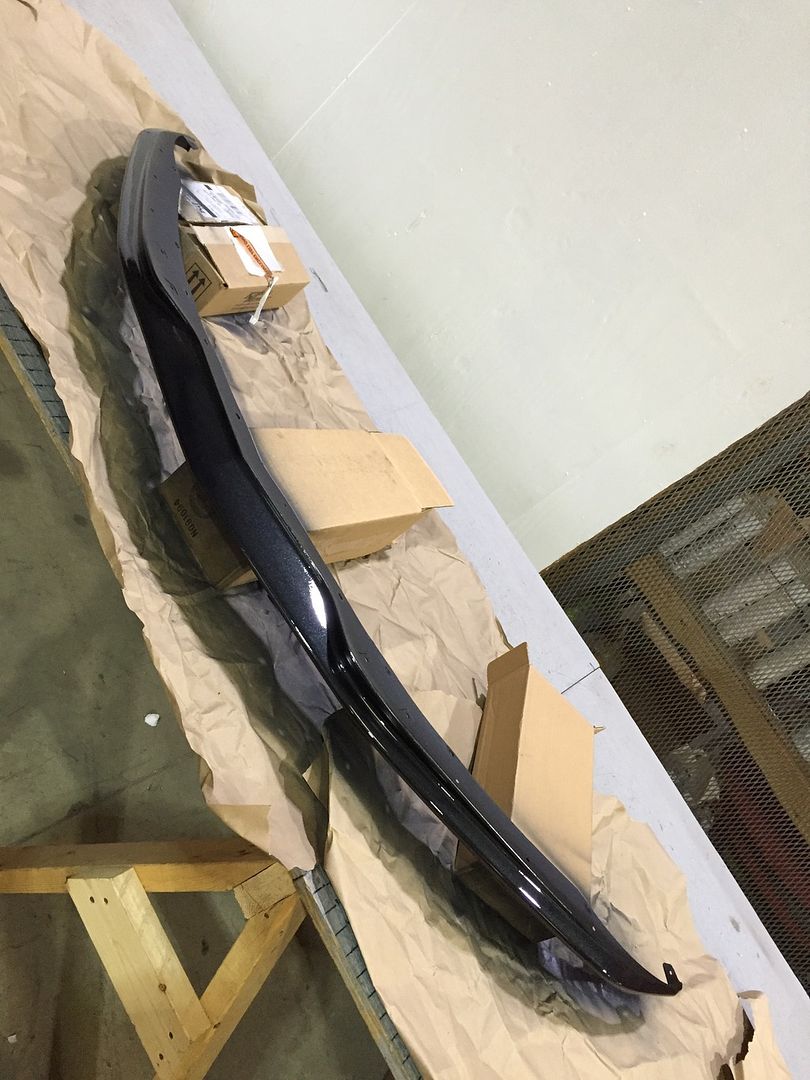
It's actually turning out nicer than I had expected considering it was gashed up pretty good on the nose and leading edge. That Bondo Bumper Repair Kit worked incredibly well!! You can't even see where the gashes were! I will say though, you better have your stuff ready to apply when you squeeze it out and mix it because it sets up FAST!! But as of now I'm almost done. Just gotta put one more coat of clear on it, let it set for 2 days, then wet sand and polish her up!! Glad I did it! Because all I have in this repair is about $10 compared to the costs of buying a new splitter for $105+!! All the paint supplies I had left over from the first time I painted it!
I'll have to look into that...this Bondo stuff was actually very easy to put on...just gotta be quick about it. As long as the damage is in a smaller concentrated area it's fine. Or atleast make sure you know where all the damaged areas are before you start to mix it. It has about 10-15 mins of working time before it starts to get too gummy so I was fine since I just had about a 6-12" area to work on. It finished very easy once it was cured!
And yes, no more than 3 coats! I actually only did 2 on it this go around, the 2nd coat fairly wet. Should be easy to wet sand and polish out come Friday!
Good job. I use the plastic splitter and I paint mine as well. I think the plain plastic splitter looks a bit cheap and its not that hard to prep and paint it. Carbon flash splitter and matching skirts add a nice bottom finish line to the form on most color Vettes. I've curbed mine twice and repaired it easily. The first time it warped a little but a heat gun applied slowly allowed the plastic to restore to its molded form. Thanks for showing how easy it is to paint and restore a curbed splitter.
Good job. I use the plastic splitter and I paint mine as well. I think the plain plastic splitter looks a bit cheap and its not that hard to prep and paint it. Carbon flash splitter and matching skirts add a nice bottom finish line to the form on most color Vettes. I've curbed mine twice and repaired it easily. The first time it warped a little but a heat gun applied slowly allowed the plastic to restore to its molded form. Thanks for showing how easy it is to paint and restore a curbed splitter.
Yeah I actually had to do the same thing! Mine was slightly warped as well. I actually lightly used a blow torch (at a distance) to heat the plastic up and it actually fell right back into place with just minor pressure.
It's actually turning out nicer than I had expected considering it was gashed up pretty good on the nose and leading edge. That Bondo Bumper Repair Kit worked incredibly well!! You can't even see where the gashes were! I will say though, you better have your stuff ready to apply when you squeeze it out and mix it because it sets up FAST!! But as of now I'm almost done. Just gotta put one more coat of clear on it, let it set for 2 days, then wet sand and polish her up!! Glad I did it! Because all I have in this repair is about $10 compared to the costs of buying a new splitter for $105+!! All the paint supplies I had left over from the first time I painted it!
Man very nice job looks like a body shop could not done any better on it.. Robert
Got my 2017 GS with black flash Mirrows, side spliter and rear spoiler. Don't know why they don't do front in black flash instead of plain black plastic. I want to paint mine to look like side splitter. What kind of sanding? What type primer? Did you spray gun or just spray can?
Thanks, hope mine look as good yours!
Sorry I'm late getting back...I haven't been on here in a while!
**In all steps...PATIENCE is key**
First I used 400 grit on the bare bumper...basically I just tried to sand it down smooth and take off that texture look it comes with. That part just takes time and elbow grease. Using a sanding block on the flatter surfaces helps. You can also step down the grit to a 600 and do a second pass to further smooth it down. Then be sure to clean the surface well. I used soapy water to wipe it down, rinse, then dry, then an alcohol wipe down to make sure the surface is ready. Then spray it with an adhesion promoter and let set for a hour or so. then spray on a layer or two of primer paint (I used a dark grey primer). Wait an hr or so between coats. After the 2nd coat dried, I used a light 800 (or maybe 1000) grit wet sand to get the primer layer very smooth. Then another wipe down with a wet rag (no alcohol this time, it will wipe the primer off). Then about 3 layers or so of the Carbon Flash paint (by the way, I used spray cans for everything), with the first layer being light and progressively "wetter" layers after that, 1 hour between coats. Then 2 good layers of Clear....let it all sit for about 2 days to cure, then 3000 grit wet sand followed by 2 stage hand polish (I use Meguires 105 then 205). I then treated it with some Blackfire Crystal sealant. This all really sounds like a lot of work, but it really isn't too bad! It's a fun learning process also, especially since you're just doing it on a $105 part!

 10-13-2015, 10:06 AM