When you click on links to various merchants on this site and make a purchase, this can result in this site earning a commission. Affiliate programs and affiliations include, but are not limited to, the eBay Partner Network.
ACS side skirts install. What method do you use for install?
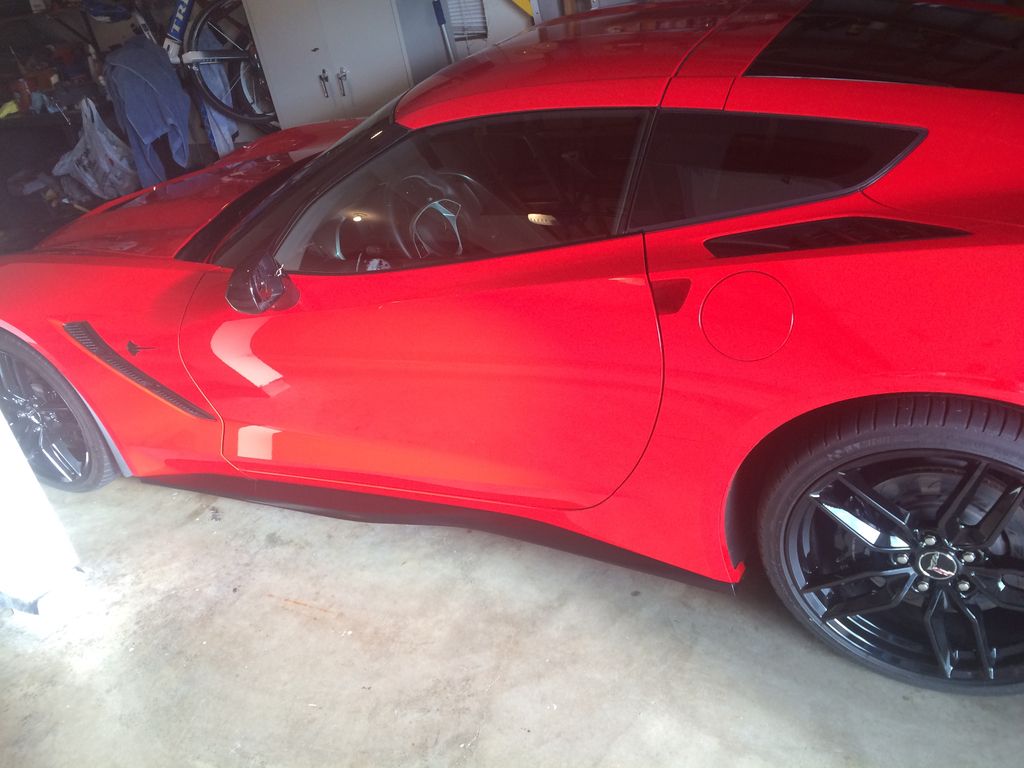
I've purchased the ACS Composite stage 2 splitter and zero 7 side skirts. I'm planning install for when my Z is delivered, but am not sure which route to go? Rivets? Scrivets? Self tapping screws? 3M automotive doublesided tape? C pressure clamps? A combination of any two?- I'm a little confused as to which way to go about this?
Does anyone one have a negative experience with one of these methods?
im not mechanically inclined and would like the simplest way, but don't want to sacrifice structural integrity.
should I have a dealer install? Are they used to this type of install?
If if I do it, I must buy a hydrolic jack, right angle drill, river tool, wheel ramps, etc?
i have a drill, but I have OCD and am afraid I'd punch through more than 1/2" and hit my transmission line.
Since I did not have the tools either, I took mine to a shop that does PPF. They had installed several sets prior and used rivets. Charged me $150.
Same here, took it to the dealer body shop, they installed per the instructions with the included rivets, $150
They had the car about 4 hours, but that included a wash and wax.
I'm planning install for when my Z is delivered, but am not sure which route to go?
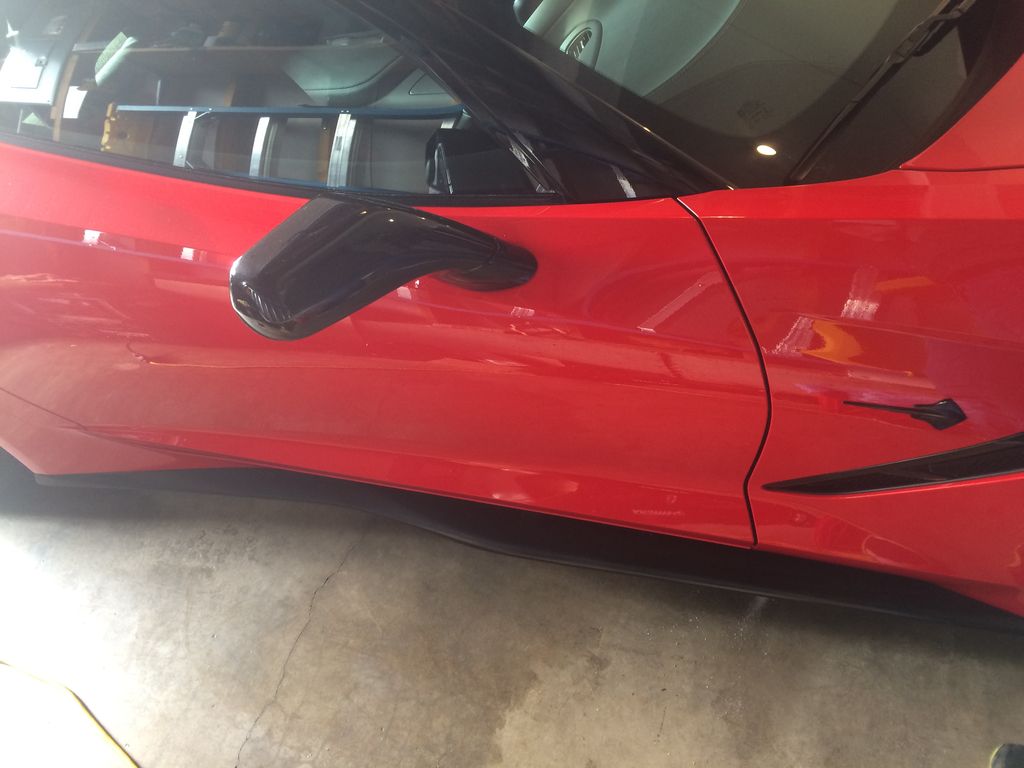
Rivets? What I used, smallest hole, use fender washer under rivet, spreads load and makes it easy if you ever need to remove-just grind off aluminum rivet head.
Scrivets? Requires a large hole and in my case not enough room behind SMC panel for back of Scrivets where my side skirts attach.
Self tapping screws? Don't want to screw into aluminum frame and will not hold in SMC panel.
3M automotive doublesided tape? Some use, not as secure as rivets and you may hit side skirts with you foot exiting. My rivets hold fine and keep a very tight fit.
C pressure clamps? Holds too far back for good tight fit of side skirts IMO.
A combination of any two?- I'm a little confused as to which way to go about this?
Does anyone one have a negative experience with one of these methods?
im not mechanically inclined and would like the simplest way, but don't want to sacrifice structural integrity. Hmm, see my PDF link below and decide.
should I have a dealer install? Are they used to this type of install?
If if I do it, I must buy a hydrolic jack, right angle drill, river tool, wheel ramps, etc? Yep, jack (consider scissor jack, cheaper and you don't have to buy jack pads or worry about jack moving into car to keep it under pad-use piece of wood to protect frame), jack stands and then I used a small straight drill.
i have a drill, but I have OCD and am afraid I'd punch through more than 1/2" and hit my transmission line. Put a small piece of metal behind the panel when you drill-see below link.
Had my ACS skirts and poverty splitter painted at a body shop. Installed them in my garage on lift using the rivets, took about 2 hours to do all three pieces.
Did all three of mine just using a 90 degree drill and a floor jack. Used the supplied rivets and it took maybe 90 min to do all three it's super easy and helps to have someone hold up the skirts as you drill and rivet.
My suggestion is to take a look at a blog post we wrote explaining your option, this will give you a good bundle of info to choose the best method to suit your needs.
I've purchased the ACS Composite stage 2 splitter and zero 7 side skirts. I'm planning install for when my Z is delivered, but am not sure which route to go? Rivets? Scrivets? Self tapping screws? 3M automotive doublesided tape? C pressure clamps? A combination of any two?- I'm a little confused as to which way to go about this?
Does anyone one have a negative experience with one of these methods?
im not mechanically inclined and would like the simplest way, but don't want to sacrifice structural integrity.
should I have a dealer install? Are they used to this type of install?
If if I do it, I must buy a hydrolic jack, right angle drill, river tool, wheel ramps, etc?
i have a drill, but I have OCD and am afraid I'd punch through more than 1/2" and hit my transmission line.
Some might get upset but I used the same system you use to hang a picture in dry wall. I drilled into the rocker panel...used silicone and pressed in the plastic thingy that the screw goes into. I used 6 stainless screws on each side. SOLID AS A ROCK.....
Backed one rear wheel of my Z up onto an inclined 2X10 board. This raised the car a few inches. Probably wasn't needed. Then, removed one of the front underside screws under the car where the side skirt front hole matches up. Supported the rear of the side skirt with a cardboard box and microfiber towel close to where it would be attached while re-connecting the front screw loosely through the skirt. Then starting from the rear, drilled each hole and pop riveted with attached rivet. Hold the skirt close to the body in place while drilling the hole. The skirt holes are pre drilled. Worked my way to the front, drilling and riveting each pre drilled hole. (don't drill near the very front holes near the metal box that is under the car rocker on the passenger side.) Then tightened the front screw.
When you drill each hole through the pre drilled skirt hole, it is not necessary to push very hard as the drill goes easily through the body as paper. This is by far the easiest install to do yourself. Took all of 20 minutes a side. Took more time to unwrap the side skirt from shipping foam then to do the install.
Charlie
Well, I ordered a set of Race Ramps (RR-56-2) and am going do the install with rivets myself. Reading and looking at videos, the install seems easy enough. Now if the damn carrier would hurry up and pick up my car!
Well, I ordered a set of Race Ramps (RR-56-2) and am going do the install with rivets myself. Reading and looking at videos, the install seems easy enough. Now if the damn carrier would hurry up and pick up my car!
How hard is the splitter install? Just as easy?
Yes its easy, You have to drill a few rivets out of the OEM splitter. Tell the dealer not to install the splitter no rivets to drill
Well, I ordered a set of Race Ramps (RR-56-2) and am going do the install with rivets myself. Reading and looking at videos, the install seems easy enough. Now if the damn carrier would hurry up and pick up my car!
How hard is the splitter install? Just as easy?
Provided in post 5 a PDF of my splitter install. It's 10 pages -like a picture book! I make those for folks like myself who don't do this for a living and there may be some things you'll find useful. Better to look at the pics than for me to just say it's easy!
Over a year ago, I purchased the side skirts, primed and painted them, and then they sat in the storage shed. Since then, I've run several HPDEs, and started noticing more and more nicks--preventable with the side skirts.
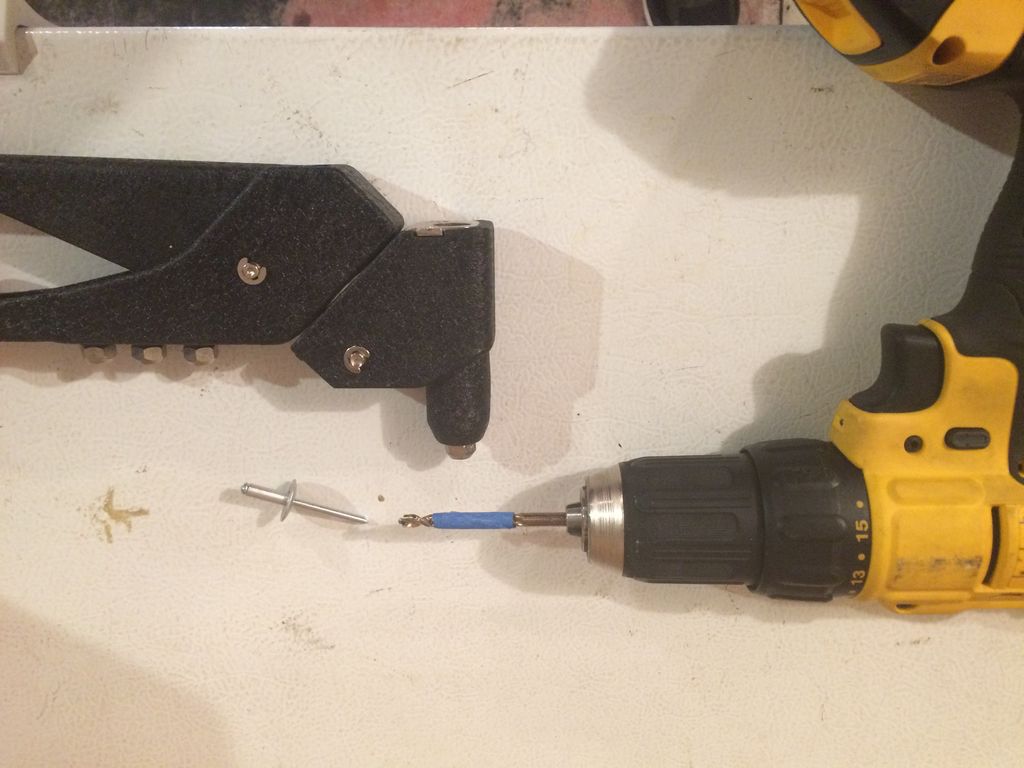
I have forgotten the brand, but they came with aluminum rivets. The sum of my knowledge and experience about rivets and riveting came from watching a Utube video, and squeezing a rivet gun once.
Here's how I took the plunge, beginning with the tools: a 3/16" drill bit, rivet gun, 7mm socket, and a drill motor.
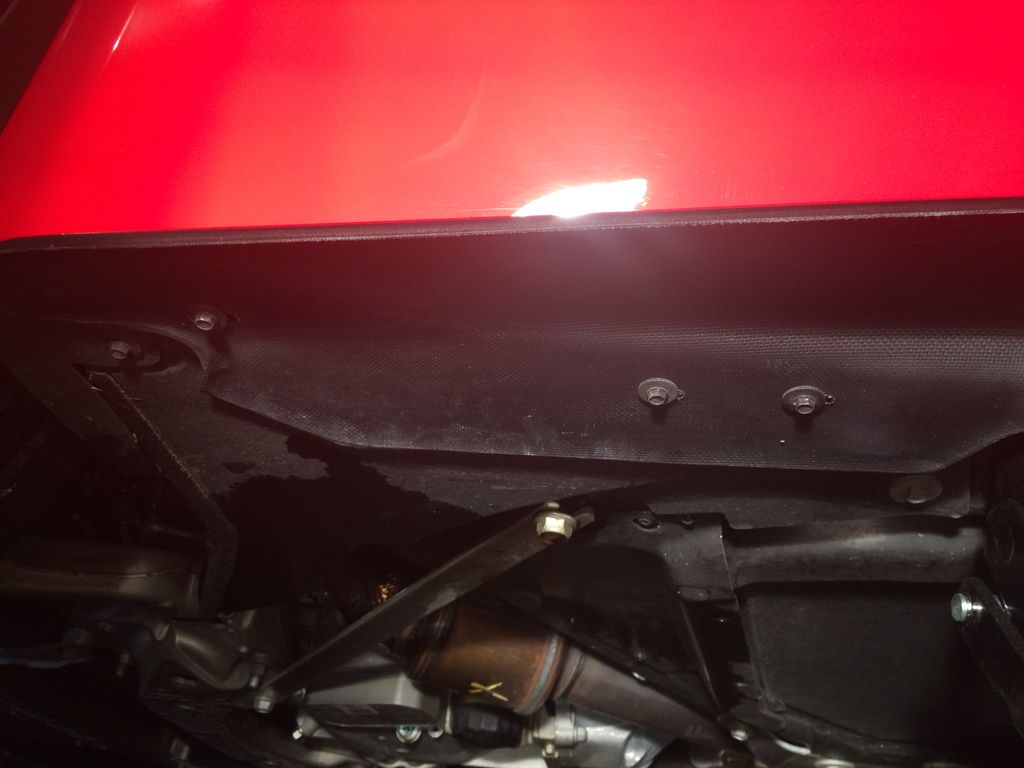
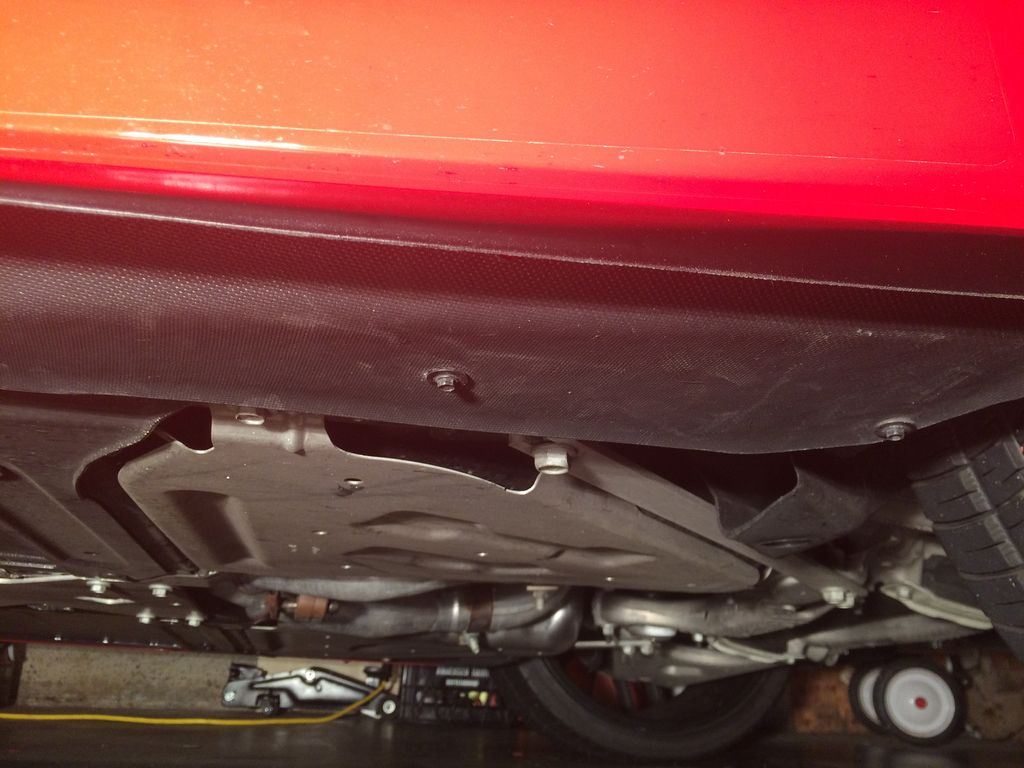
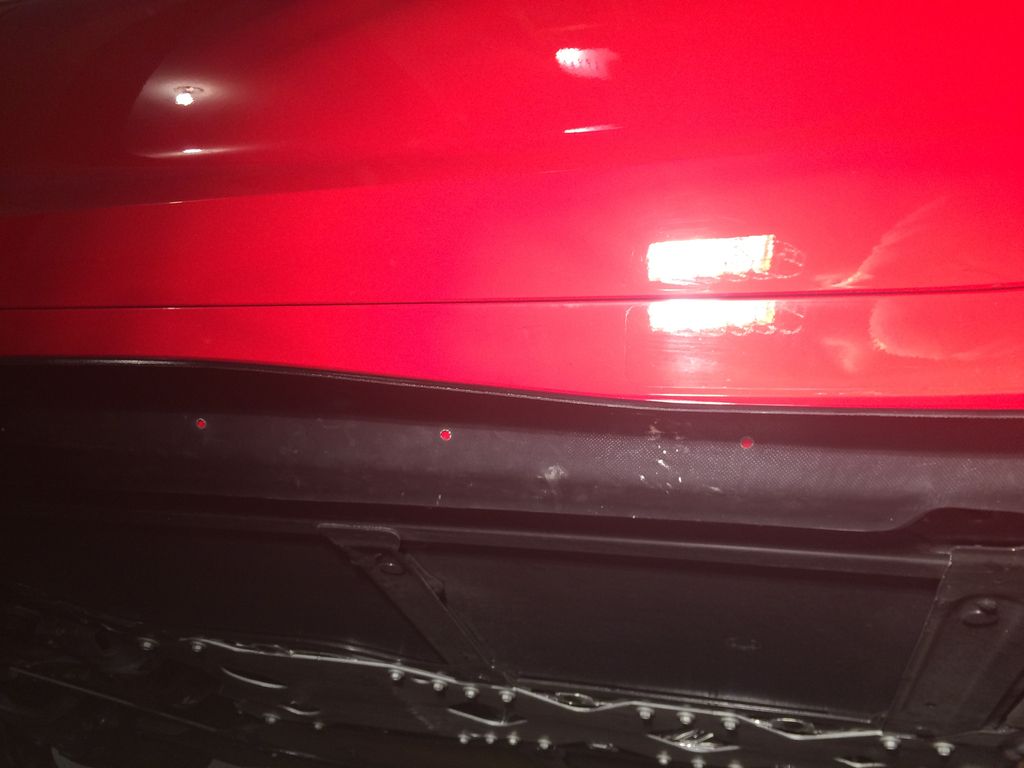
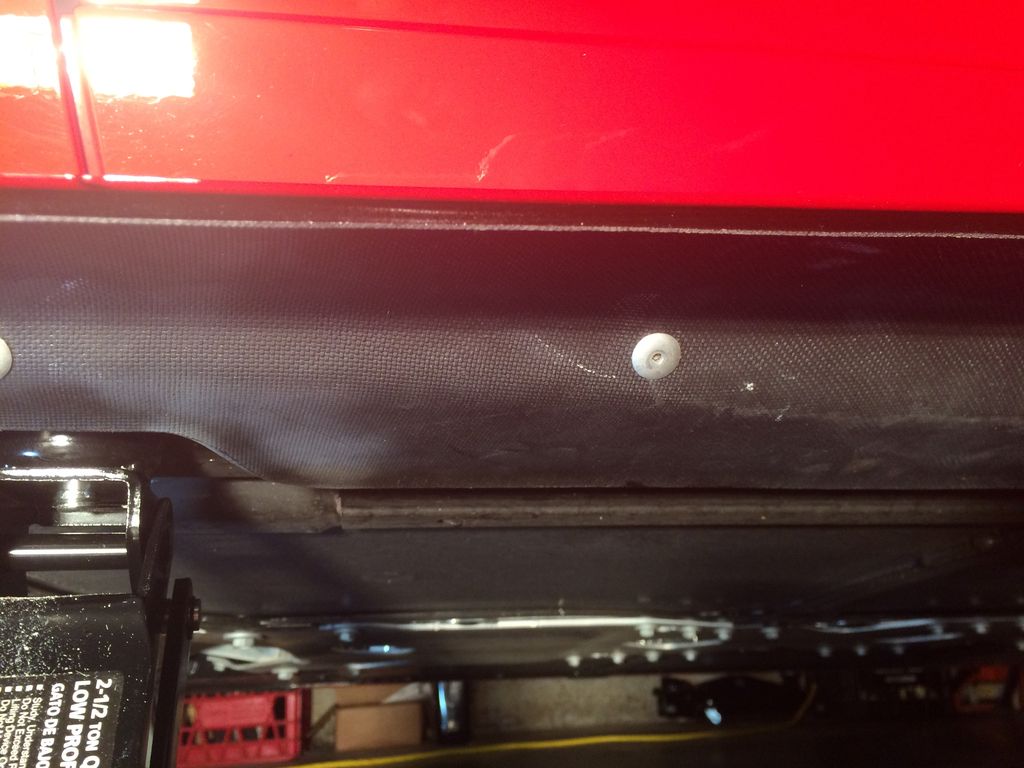
There are five, 7mm screws that match the pre-drilled holes on the flat portion of the skirts. A shot of the front three, followed by a view of the rear two.
The five 7mm screws were not tightened to ensure the skirt could be fitted flush with the body.
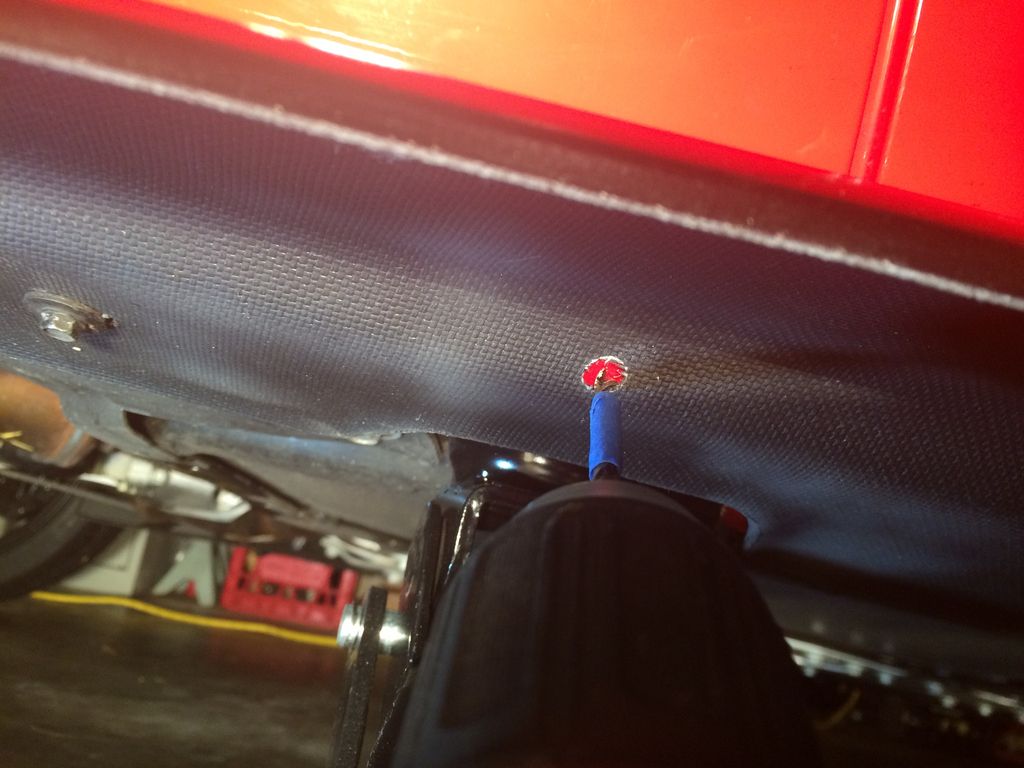
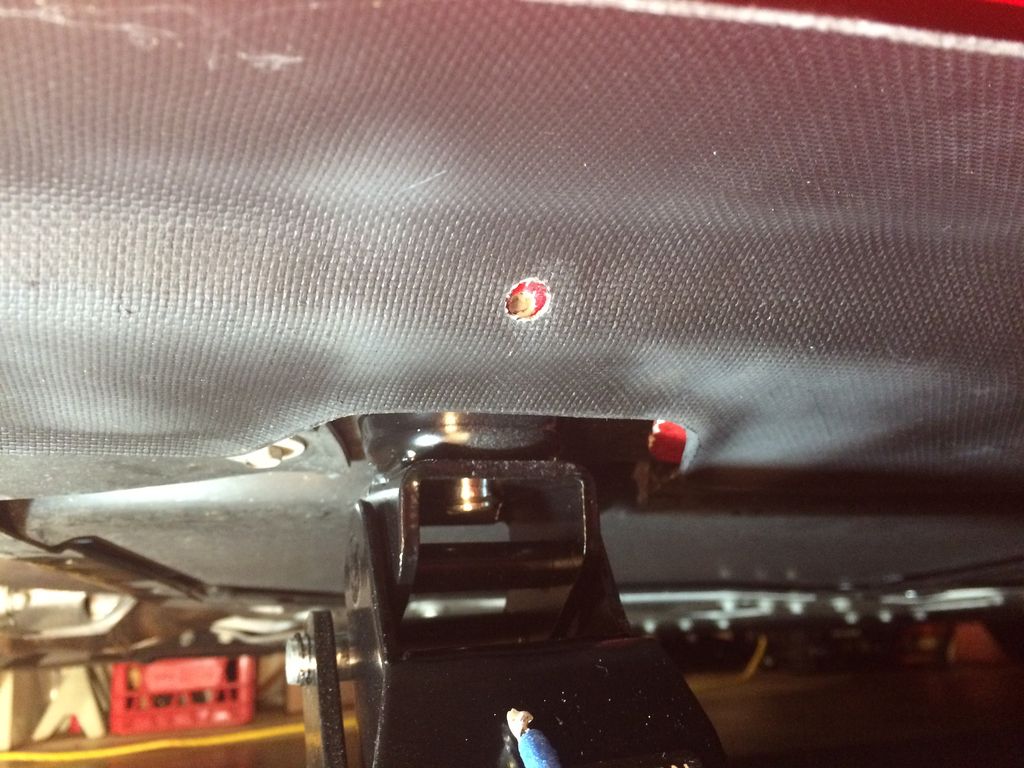
In one of the posts, someone mentioned a warning about being careful while drilling close to the transmission lines-not to drill too deep. I wrapped a pieced of painter's tape about 5/8" from the tip of the drill bit. (Now that the project is done, that step was unnecessary.)
If you numbered the rivet holes from 1-7 beginning with the front of the vehicle, holes #3, 4 and 5 can only drilled so far before hitting something solid. Holes #3, 4, and 5...
With the holes drilled, the next step was to attach all seven rivets per skirt. Admittedly, I am not Mr. Flex Crunch, but I frequent the gym and lift weights. Holy Cow, I squeezed with all my might to pop the rivets. Each rivet took 8-10 squeezes to snap the tail off of the rivet.
After all the rivets where attached, the skirts felt extremely secure for subsequent HPDEs.

 10-25-2016, 04:29 AM