[C1] 1960 Corvette Dash Speaker Grille Bezel Screw Length?
#1
So I just received the Antique Auto Radio for my wife's 1960 Corvette that I ordered on August 14th, yes, there is a long delay/wait for these. I had hoped it would make it for her birthday in the middle of September, but that ship sailed a while ago so now it will be a gift from Santa under our Christmas tree. I also ordered with it and received long ago the 140 watt stereo speaker for the dash based on feedback and comments from threads on this site so thanks for those pointers to the best speaker option.
I've built a wooden speaker box to surround the speaker and make the sound reflect up from below the dash as it ideally should but have not added a mounting flange to my speaker box yet as I'm not sure how long the studs/screws of the dash speaker grille bezel will protrude below the dash and/or speaker. If there is enough length, I can use 1/8" or 1/4" luan plywood for the mounting flange. If stud length will be an issue, I could use some sheet metal mounting tabs which would only be as thick as 16 or 18 gauge sheet metal.
So my question is, have any of you that have replaced the dash speaker in a 1960 (or perhaps 59-62 are the same) measured the length of the dash speaker grille bezel studs or can you tell me how much stud length will remain below the 140 watt Antique Auto Radio speaker once it's up in place?
I'm also curious if the studs are a standard thread size or were speed nuts used to cut their own threads like a lot of the body trim and emblems used over the years?
I can't disassemble her car without getting questioned about it until after Christmas morning, but I'd like to get as much finished on the speaker box as I can before Christmas day.
Thanks in advance for any help or assistance any of you can provide .
.
I've built a wooden speaker box to surround the speaker and make the sound reflect up from below the dash as it ideally should but have not added a mounting flange to my speaker box yet as I'm not sure how long the studs/screws of the dash speaker grille bezel will protrude below the dash and/or speaker. If there is enough length, I can use 1/8" or 1/4" luan plywood for the mounting flange. If stud length will be an issue, I could use some sheet metal mounting tabs which would only be as thick as 16 or 18 gauge sheet metal.
So my question is, have any of you that have replaced the dash speaker in a 1960 (or perhaps 59-62 are the same) measured the length of the dash speaker grille bezel studs or can you tell me how much stud length will remain below the 140 watt Antique Auto Radio speaker once it's up in place?
I'm also curious if the studs are a standard thread size or were speed nuts used to cut their own threads like a lot of the body trim and emblems used over the years?
I can't disassemble her car without getting questioned about it until after Christmas morning, but I'd like to get as much finished on the speaker box as I can before Christmas day.
Thanks in advance for any help or assistance any of you can provide
 .
.
#2
Le Mans Master


So I just received the Antique Auto Radio for my wife's 1960 Corvette that I ordered on August 14th, yes, there is a long delay/wait for these. I had hoped it would make it for her birthday in the middle of September, but that ship sailed a while ago so now it will be a gift from Santa under our Christmas tree. I also ordered with it and received long ago the 140 watt stereo speaker for the dash based on feedback and comments from threads on this site so thanks for those pointers to the best speaker option.
I've built a wooden speaker box to surround the speaker and make the sound reflect up from below the dash as it ideally should but have not added a mounting flange to my speaker box yet as I'm not sure how long the studs/screws of the dash speaker grille bezel will protrude below the dash and/or speaker. If there is enough length, I can use 1/8" or 1/4" luan plywood for the mounting flange. If stud length will be an issue, I could use some sheet metal mounting tabs which would only be as thick as 16 or 18 gauge sheet metal.
So my question is, have any of you that have replaced the dash speaker in a 1960 (or perhaps 59-62 are the same) measured the length of the dash speaker grille bezel studs or can you tell me how much stud length will remain below the 140 watt Antique Auto Radio speaker once it's up in place?
I'm also curious if the studs are a standard thread size or were speed nuts used to cut their own threads like a lot of the body trim and emblems used over the years?
I can't disassemble her car without getting questioned about it until after Christmas morning, but I'd like to get as much finished on the speaker box as I can before Christmas day.
Thanks in advance for any help or assistance any of you can provide .
.
I've built a wooden speaker box to surround the speaker and make the sound reflect up from below the dash as it ideally should but have not added a mounting flange to my speaker box yet as I'm not sure how long the studs/screws of the dash speaker grille bezel will protrude below the dash and/or speaker. If there is enough length, I can use 1/8" or 1/4" luan plywood for the mounting flange. If stud length will be an issue, I could use some sheet metal mounting tabs which would only be as thick as 16 or 18 gauge sheet metal.
So my question is, have any of you that have replaced the dash speaker in a 1960 (or perhaps 59-62 are the same) measured the length of the dash speaker grille bezel studs or can you tell me how much stud length will remain below the 140 watt Antique Auto Radio speaker once it's up in place?
I'm also curious if the studs are a standard thread size or were speed nuts used to cut their own threads like a lot of the body trim and emblems used over the years?
I can't disassemble her car without getting questioned about it until after Christmas morning, but I'd like to get as much finished on the speaker box as I can before Christmas day.
Thanks in advance for any help or assistance any of you can provide
 .
. Pilot Dan
ps if there is a problem blame the Elves, darn young whipper snappers working in metrics
 :
:
Last edited by Pilot Dan; 12-06-2016 at 10:29 PM.
The following users liked this post:
HilltopClassicCars (12-07-2016)
#3
The bezel studs are non threaded pot metal and use a speed nut to hold. As I recall with the dual cone speaker like you have, there is not much stud clearance there once you get the nut to bite (less than 1/2 inch) so either forget the box or make the mounting area as thin as possible. I used a dab of hot glue on the ends of the nuts since there was not much left on the ends with the bigger speaker.  Pilot Dan
ps if there is a problem blame the Elves, darn young whipper snappers working in metrics :
:
 Pilot Dan
ps if there is a problem blame the Elves, darn young whipper snappers working in metrics
 :
:
#4
Team Owner


If you order through some of the vendors or off eBay they sometimes have the radios in stock....I got my '63 radio in less than a week, but that horse has left the barn apparently.
I've run the dash speaker on a C1, C2 and a Chevelle and never felt the need for an enclosure but its your car. In any event, here is a pic of the '61 bezel that might help. Those studs are not that long so you are prob creating a problem for yourself with the boom box approach... Depending on how heavy your box is the speed nuts might, or might not, hold it.
I'm just sayin'..
One consideration is the oblong base of the speed stud...when I installed my new dash pad I actually cut out a small hole for that oval base to sit down in to give me some extra stud length (hence its being measured with dividers in the pic). Gave me just a little more length to get the speed nuts to 'bite'...
Last edited by Frankie the Fink; 12-07-2016 at 08:01 AM.
The following users liked this post:
HilltopClassicCars (12-07-2016)
The following users liked this post:
HilltopClassicCars (12-07-2016)
#6
If you order through some of the vendors or off eBay they sometimes have the radios in stock....I got my '63 radio in less than a week, but that horse has left the barn apparently.
I've run the dash speaker on a C1, C2 and a Chevelle and never felt the need for an enclosure but its your car. In any event, here is a pic of the '61 bezel that might help. Those studs are not that long so you are prob creating a problem for yourself with the boom box approach... Depending on how heavy your box is the speed nuts might, or might not, hold it.
I'm just sayin'..
One consideration is the oblong base of the speed stud...when I installed my new dash pad I actually cut out a small hole for that oval base to sit down in to give me some extra stud length (hence its being measured with dividers in the pic). Gave me just a little more length to get the speed nuts to 'bite'...
I've run the dash speaker on a C1, C2 and a Chevelle and never felt the need for an enclosure but its your car. In any event, here is a pic of the '61 bezel that might help. Those studs are not that long so you are prob creating a problem for yourself with the boom box approach... Depending on how heavy your box is the speed nuts might, or might not, hold it.
I'm just sayin'..
One consideration is the oblong base of the speed stud...when I installed my new dash pad I actually cut out a small hole for that oval base to sit down in to give me some extra stud length (hence its being measured with dividers in the pic). Gave me just a little more length to get the speed nuts to 'bite'...
As I mentioned in my previous reply I'm not a fan of speed nuts on pot metal studs so I'll be changing over to standard thread nuts in one manner or another. Perhaps the studs could just be threaded to a smaller diameter with a die, or maybe shorten the stud and silver solder a short section of brass tubing on with a standard thread machine screw silver soldered on the other end of the brass tubing. There are special alloy solders that can be used with pot metal that could make that modification easier. The stud that exists above the oblong base could be cut off and then a hole drilled and tapped for a machine thread as well. If none of those work out, the bezel could be drilled through and tapped with a long machine screw threaded down from the top and countersunk into the bezel then body worked over and painted so there is no evidence of the modification from the top.
I'm fairly confident at least one of my ideas above should work out fine, I'll update this thread once I determine what I feel the best course of action to be and complete the installation. Thanks again guys!

#7
Team Owner


A few final comments...be dang careful with the speaker grill studs, once they are broken off its a PITA to fix them up. Next, there is a LOT, a whole LOT going on under an original C1 dash. Like the cowl vent linkage, the Rube Goldberg windshield wiper cables/pulleys, etc.. If your enclosure interferes with any of that then you have a whole different set of problems...
The following users liked this post:
HilltopClassicCars (12-07-2016)
#8
A few final comments...be dang careful with the speaker grill studs, once they are broken off its a PITA to fix them up. Next, there is a LOT, a whole LOT going on under an original C1 dash. Like the cowl vent linkage, the Rube Goldberg windshield wiper cables/pulleys, etc.. If your enclosure interferes with any of that then you have a whole different set of problems...
The original Rube Goldberg windshield wiper cables/pulleys, etc. have previously been replaced with an aftermarket Rain Gear system (http://www.raingearwipers.com/produc...let-corvettes/) by a previous owner (it's a very nice system and this one has the optional wiper delay as well) so that hurdle doesn't exist for me.

I spent plenty of time on my back already looking up at the underside of the dash rewiring when we first took possession of the car and from what I can see, the cowl vent linkage won't be an issue and the speaker enclosure I built should clear everything else. Proof will of course come when I do the actual install. Thanks again and stay tuned...

#9
Safety Car


I always modify the speaker grill, and install 6/32 or 8/32 threaded rod. Cut the studs off, and leave the boss. Carefully drill the boss with the correct sized bit. You need to go as deep as you can without going through the topside. If you do, you can fill with epoxy, and refinish. If you choose not to go all the way through, then using a BOTTOM tap, thread the hole. Then grind the taper completely off of another tap (super bottom tap), and get some thread all the way to the bottom of the hole. Use a little epoxy or Loctite, and install the threaded rod (you can use some long screws for this, an clean the heads. You can make the studs as long as you like.
The following users liked this post:
HilltopClassicCars (12-08-2016)
#10
I always modify the speaker grill, and install 6/32 or 8/32 threaded rod. Cut the studs off, and leave the boss. Carefully drill the boss with the correct sized bit. You need to go as deep as you can without going through the topside. If you do, you can fill with epoxy, and refinish. If you choose not to go all the way through, then using a BOTTOM tap, thread the hole. Then grind the taper completely off of another tap (super bottom tap), and get some thread all the way to the bottom of the hole. Use a little epoxy or Loctite, and install the threaded rod (you can use some long screws for this, an clean the heads. You can make the studs as long as you like.

#11
Team Owner


I've always managed to get the Custom Autosound 140W speakers on to the stock grill somehow. Now that damned, blingy Retrosound speaker (highly overrated BTW) has so much cardboard around the edge you have to butcher it up to install it. Folks buy it because its shallow for A/C cars - DON'T DO IT !!
Kicking sound is about moving air mass via cone area and a strong magnet...pick the winner in the attached picture.....
I know, I know...the loser is chrome, and, has fake flames.
Life is full of tough choices...
Kicking sound is about moving air mass via cone area and a strong magnet...pick the winner in the attached picture.....
I know, I know...the loser is chrome, and, has fake flames.
Life is full of tough choices...
Last edited by Frankie the Fink; 12-08-2016 at 09:13 AM.
The following users liked this post:
HilltopClassicCars (12-08-2016)
#12
I've always managed to get the Custom Autosound 140W speakers on to the stock grill somehow. Now that damned, blingy Retrosound speaker (highly overrated BTW) has so much cardboard around the edge you have to butcher it up to install it. Folks buy it because its shallow for A/C cars - DON'T DO IT !!
Kicking sound is about moving air mass via cone area and a strong magnet...pick the winner in the attached picture.....
I know, I know...the loser is chrome, and, has fake flames.
Life is full of tough choices...
Kicking sound is about moving air mass via cone area and a strong magnet...pick the winner in the attached picture.....
I know, I know...the loser is chrome, and, has fake flames.
Life is full of tough choices...
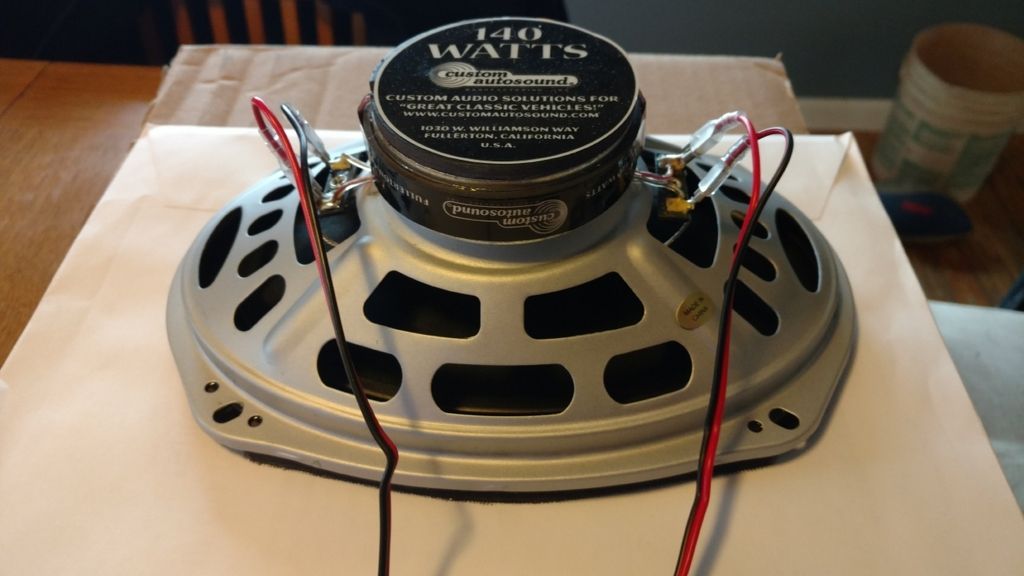
Here is the back of the Custom Autosound 140W speaker I received ordered on August 14th, 2016 with the gasket & black fabric;
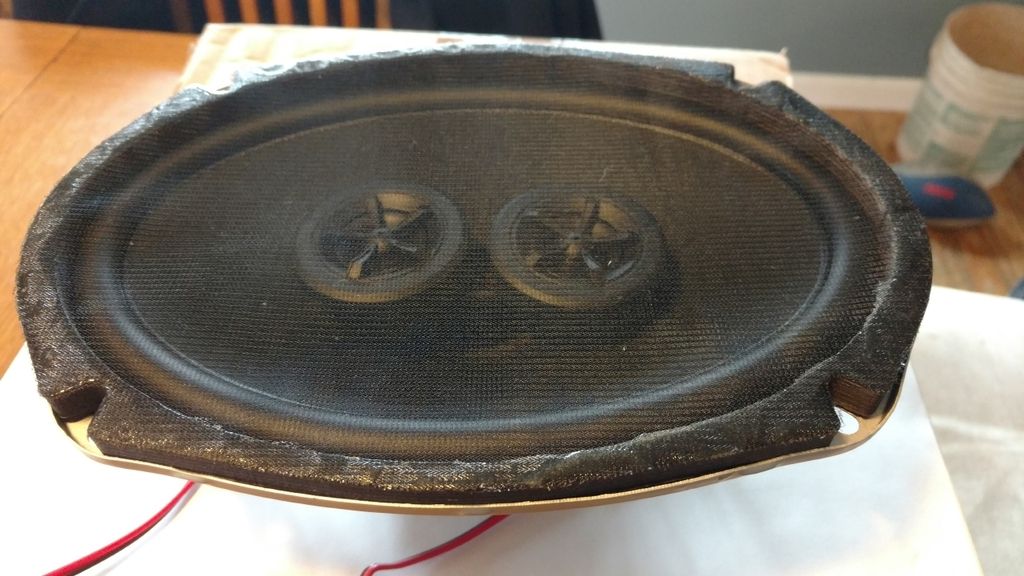
Here is the front of the Custom Autosound 140W speaker I received ordered on August 14th, 2016 with the gasket & black fabric.
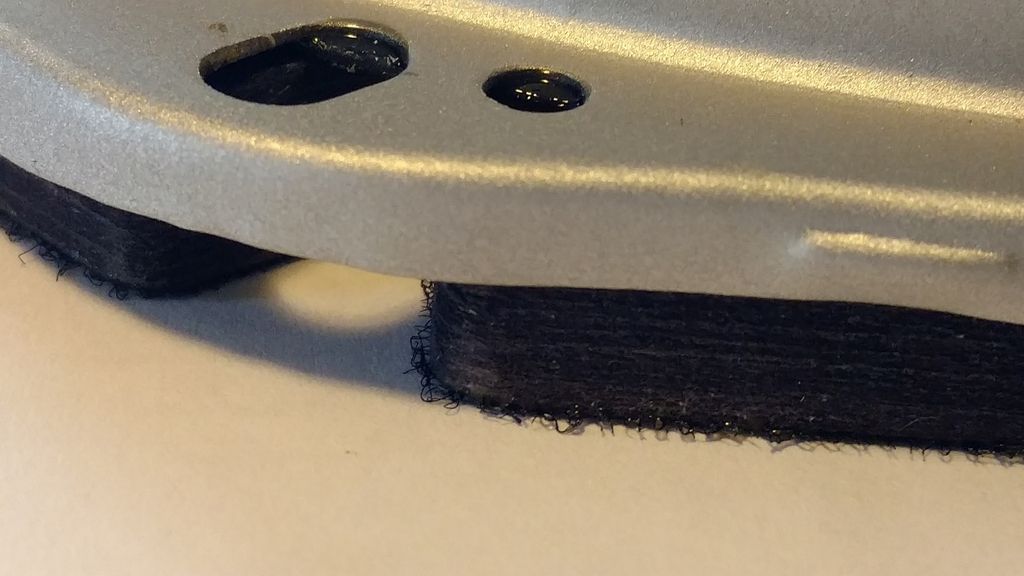
A closeup of the gasket material which is glued very well to the speaker frame;
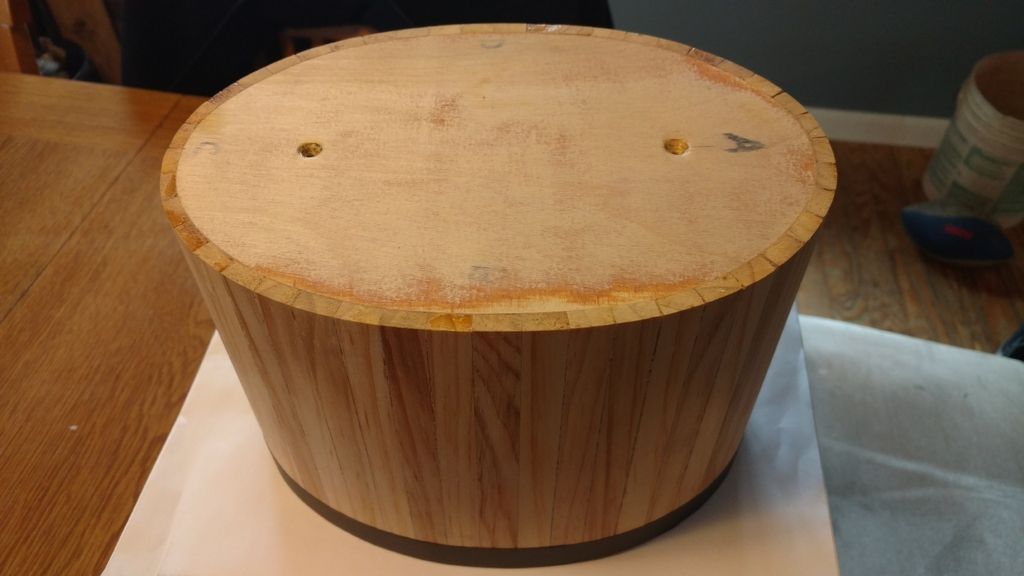
My custom fabricated speaker enclosure from the back side;
My custom fabricated speaker enclosure from the top side;
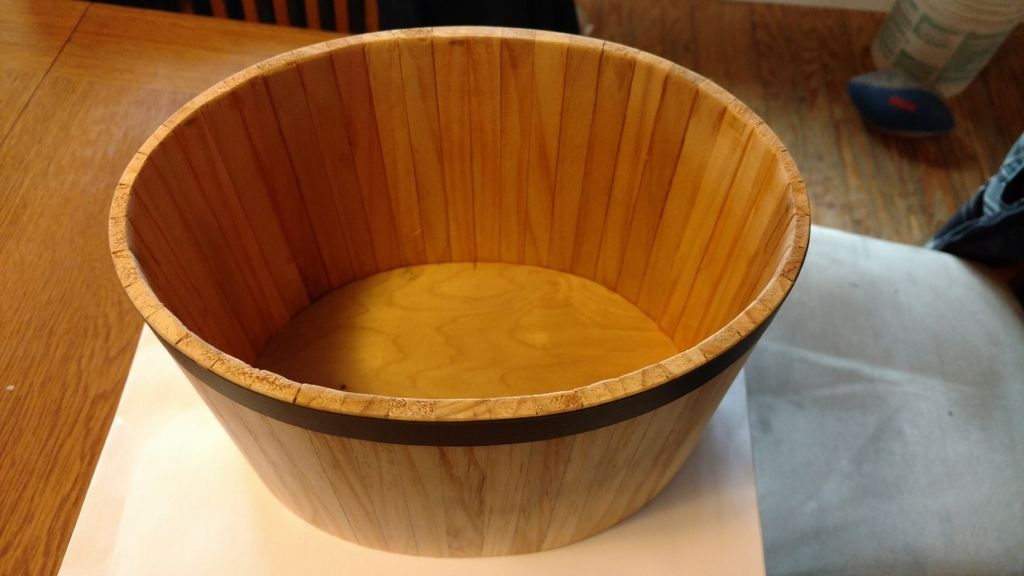
My custom fabricated speaker enclosure with the speaker in place from the top side;
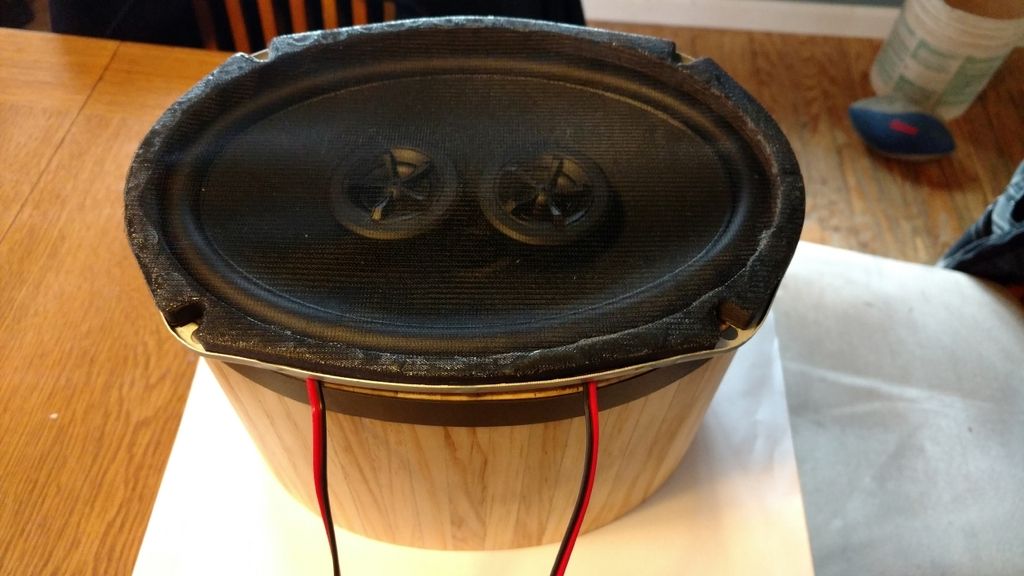
My custom fabricated speaker enclosure with the speaker in place from the back side;
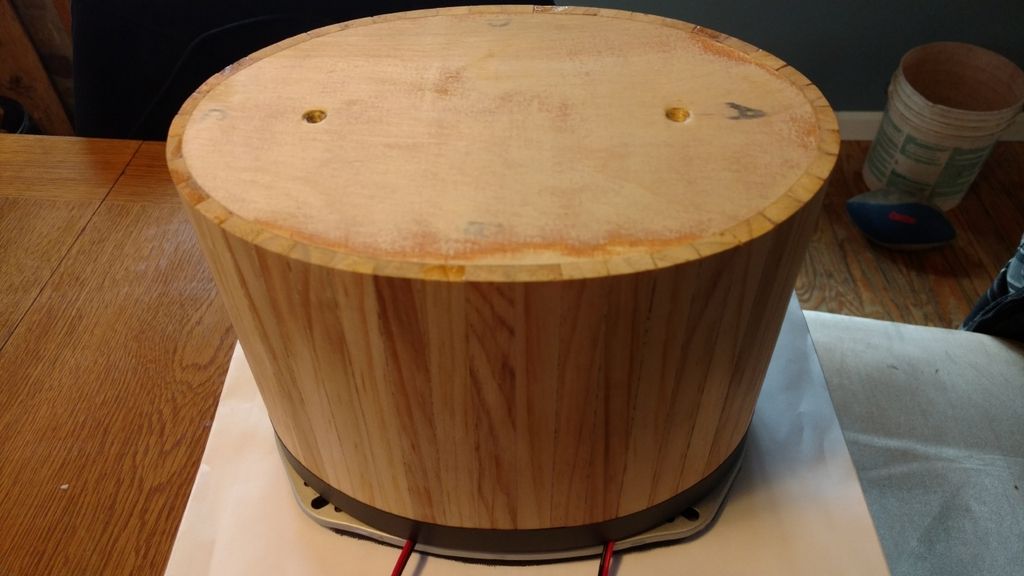
The speaker enclosure mounting flange before final outer shape is cut on it. Final depth/trimming of enclosure will take place one I begin the installation so I can make it the maximum depth possible, I'll then glue the flange onto the enclosure. I may add a couple of small reflex ports to the enclosure as well, still trying to decide which way to go on that decision;
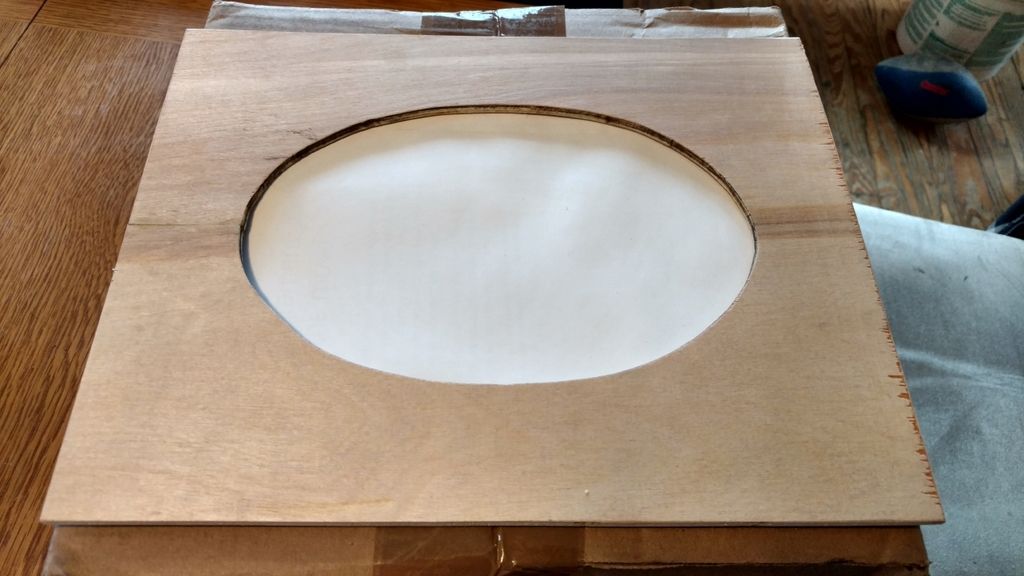
Last edited by HilltopClassicCars; 12-08-2016 at 01:07 PM.
#13
Team Owner


Sounds like Mike C's advise is cogent (as always)!!
I agree, I don't recall those speakers having so much 'meat' around the rim...
Have to say, you are certainly going the 'extra mile' for improved sound...with off road pipes, wind noise and dual quads roaring my '61's radio sound was only ever "acceptable" even on a good day at speed!
I agree, I don't recall those speakers having so much 'meat' around the rim...
Have to say, you are certainly going the 'extra mile' for improved sound...with off road pipes, wind noise and dual quads roaring my '61's radio sound was only ever "acceptable" even on a good day at speed!
Last edited by Frankie the Fink; 12-08-2016 at 02:45 PM.
#14
Le Mans Master


I always modify the speaker grill, and install 6/32 or 8/32 threaded rod. Cut the studs off, and leave the boss. Carefully drill the boss with the correct sized bit. You need to go as deep as you can without going through the topside. If you do, you can fill with epoxy, and refinish. If you choose not to go all the way through, then using a BOTTOM tap, thread the hole. Then grind the taper completely off of another tap (super bottom tap), and get some thread all the way to the bottom of the hole. Use a little epoxy or Loctite, and install the threaded rod (you can use some long screws for this, an clean the heads. You can make the studs as long as you like.

#15
Sounds like Mike C's advise is cogent (as always)!!
I agree, I don't recall those speakers having so much 'meat' around the rim...
Have to say, you are certainly going the 'extra mile' for improved sound...with off road pipes, wind noise and dual quads roaring my '61's radio sound was only ever "acceptable" even on a good day at speed!
I agree, I don't recall those speakers having so much 'meat' around the rim...
Have to say, you are certainly going the 'extra mile' for improved sound...with off road pipes, wind noise and dual quads roaring my '61's radio sound was only ever "acceptable" even on a good day at speed!

Yes I've been known to go an extra mile (or five
 ) on many projects (for better or worse
  ) but only when I really feel there is a true payoff. Her car has a fairly quiet but throaty exhaust note and the exhaust is probably as loud with the top down as the wind noise while cruising around 40 mph. I can't stand distorted sound so just turning the volume up won't do for me, distorted volume just annoys me. With the amount of effort to install the speaker and stereo and the fact that she and her Corvette will have such a nice stereo, it ought to have a real nice speaker setup as well, and for me that includes a speaker enclosure.
I've already fabricated a couple of rear speaker enclosures that set in the soft top well just outside of the soft top, each one has two small Bose speaker elements inside and they do add some extra sound as well. The four Bose speaker elements were left over from an old Bose surround system that failed and was too expensive to repair so I scavenged the speakers and put them to good use. I try to re-use/re-purpose as many things as I can rather than just toss stuff out.

Last edited by HilltopClassicCars; 12-08-2016 at 03:28 PM.
#16
Team Owner


Sound suggestions are solicited a lot on here for C1s. When you get the rig together you should post pics and enlighten us all!
#17

I put together a post with detailed photos which can be found here -> https://www.corvetteforum.com/forums...post1593945403


