When you click on links to various merchants on this site and make a purchase, this can result in this site earning a commission. Affiliate programs and affiliations include, but are not limited to, the eBay Partner Network.
I bought it because it fits my AFR 195 heads very good, and EZ-EFI 1.0 system. (and because it's made in USA)
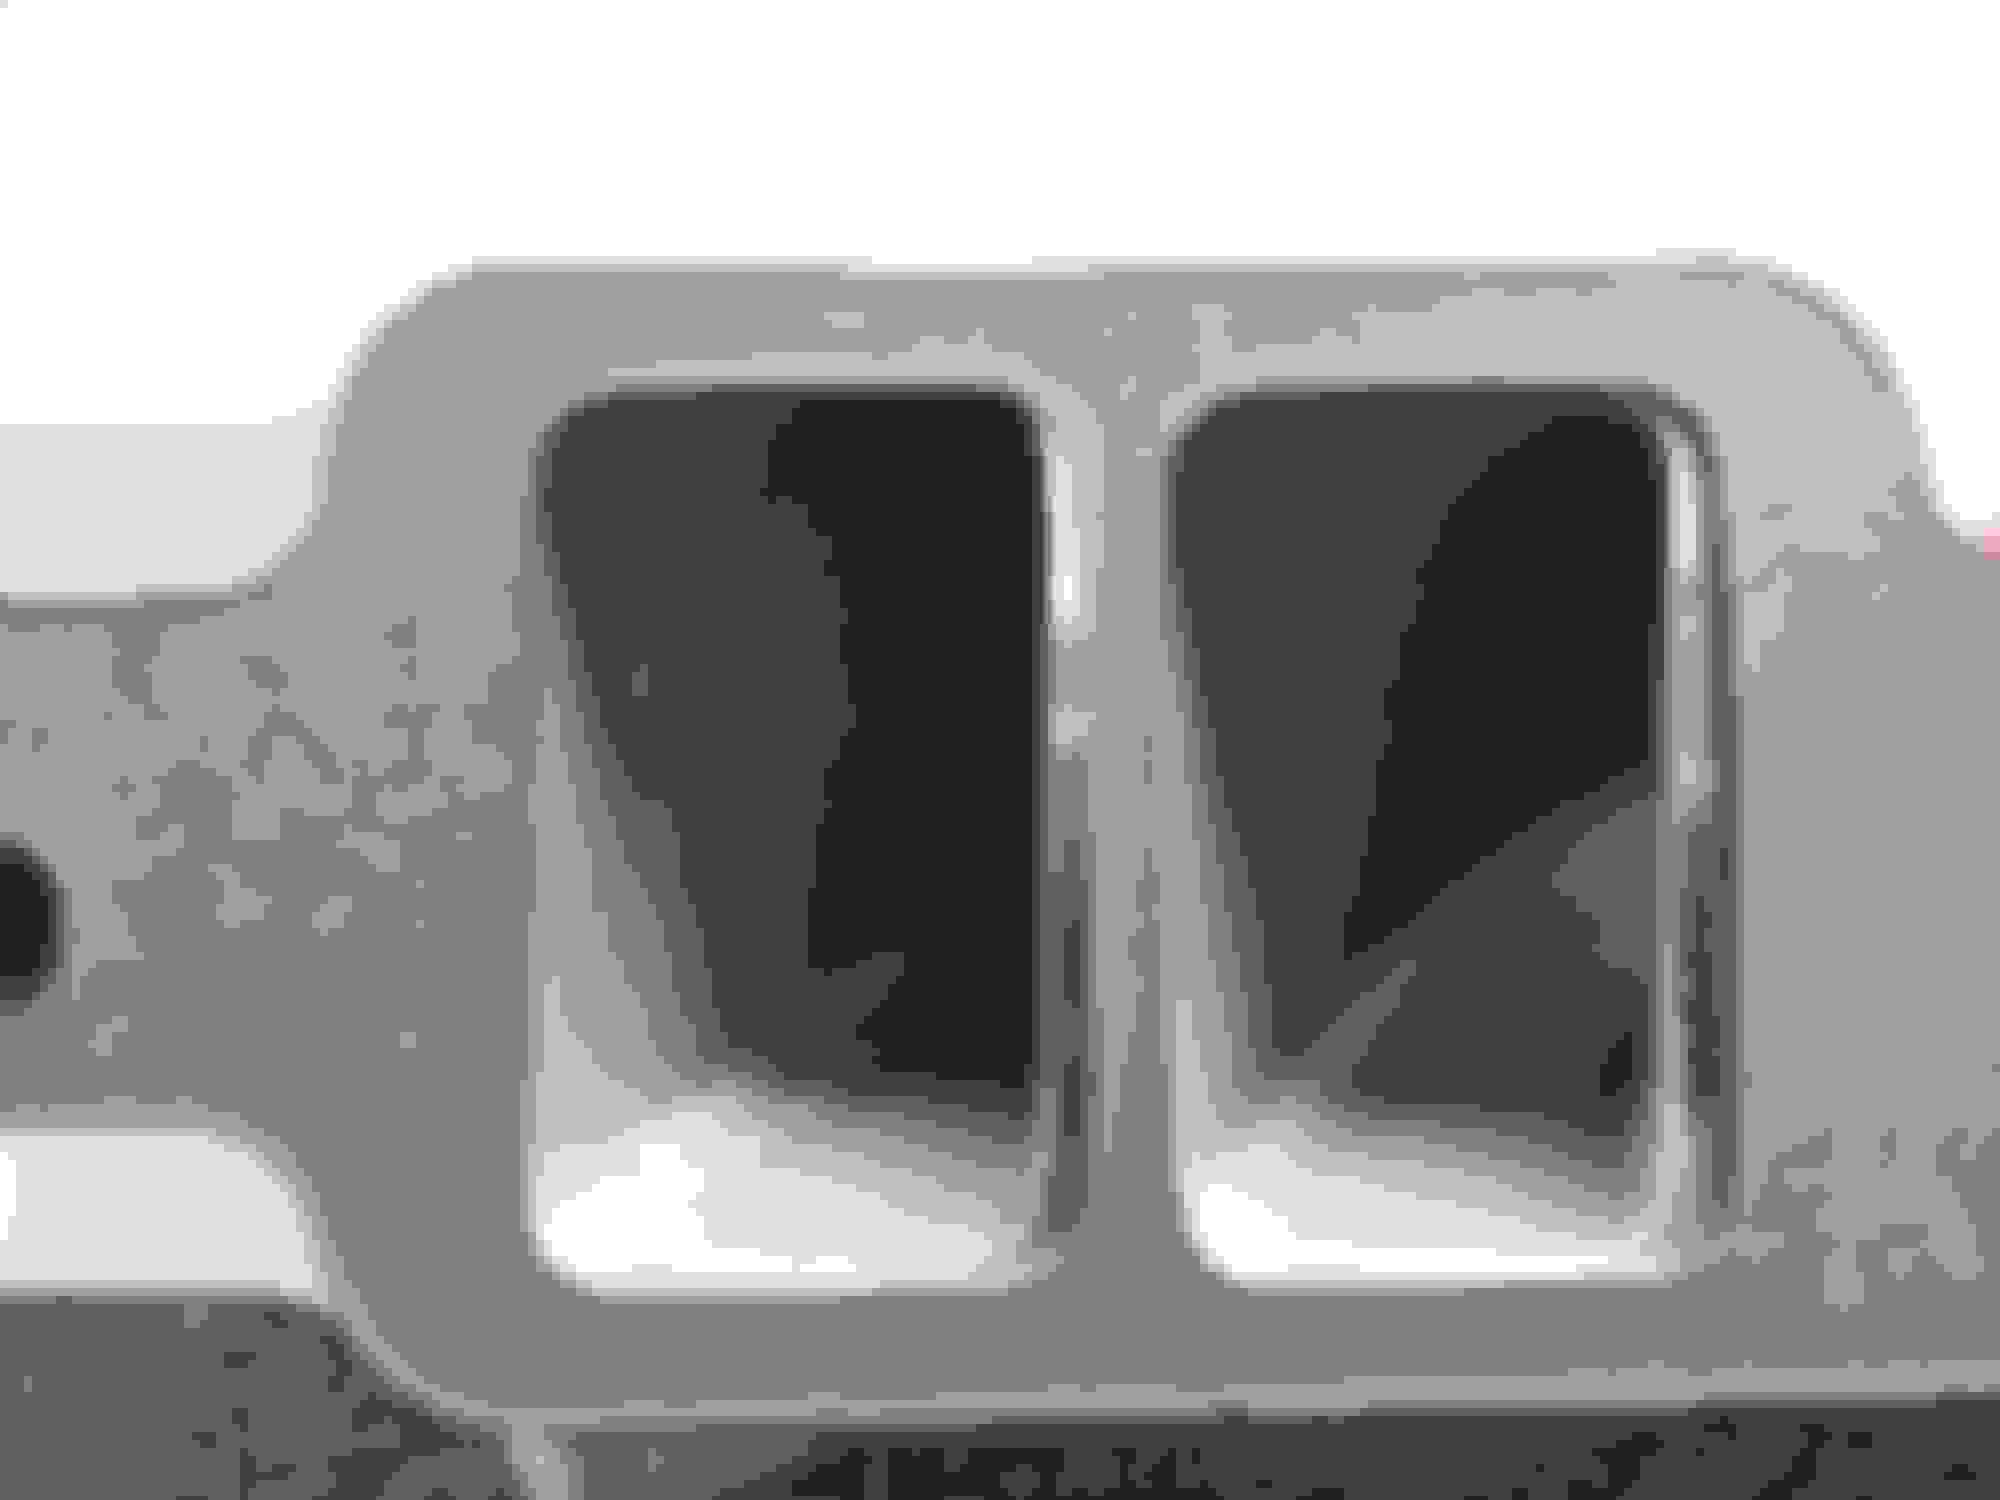
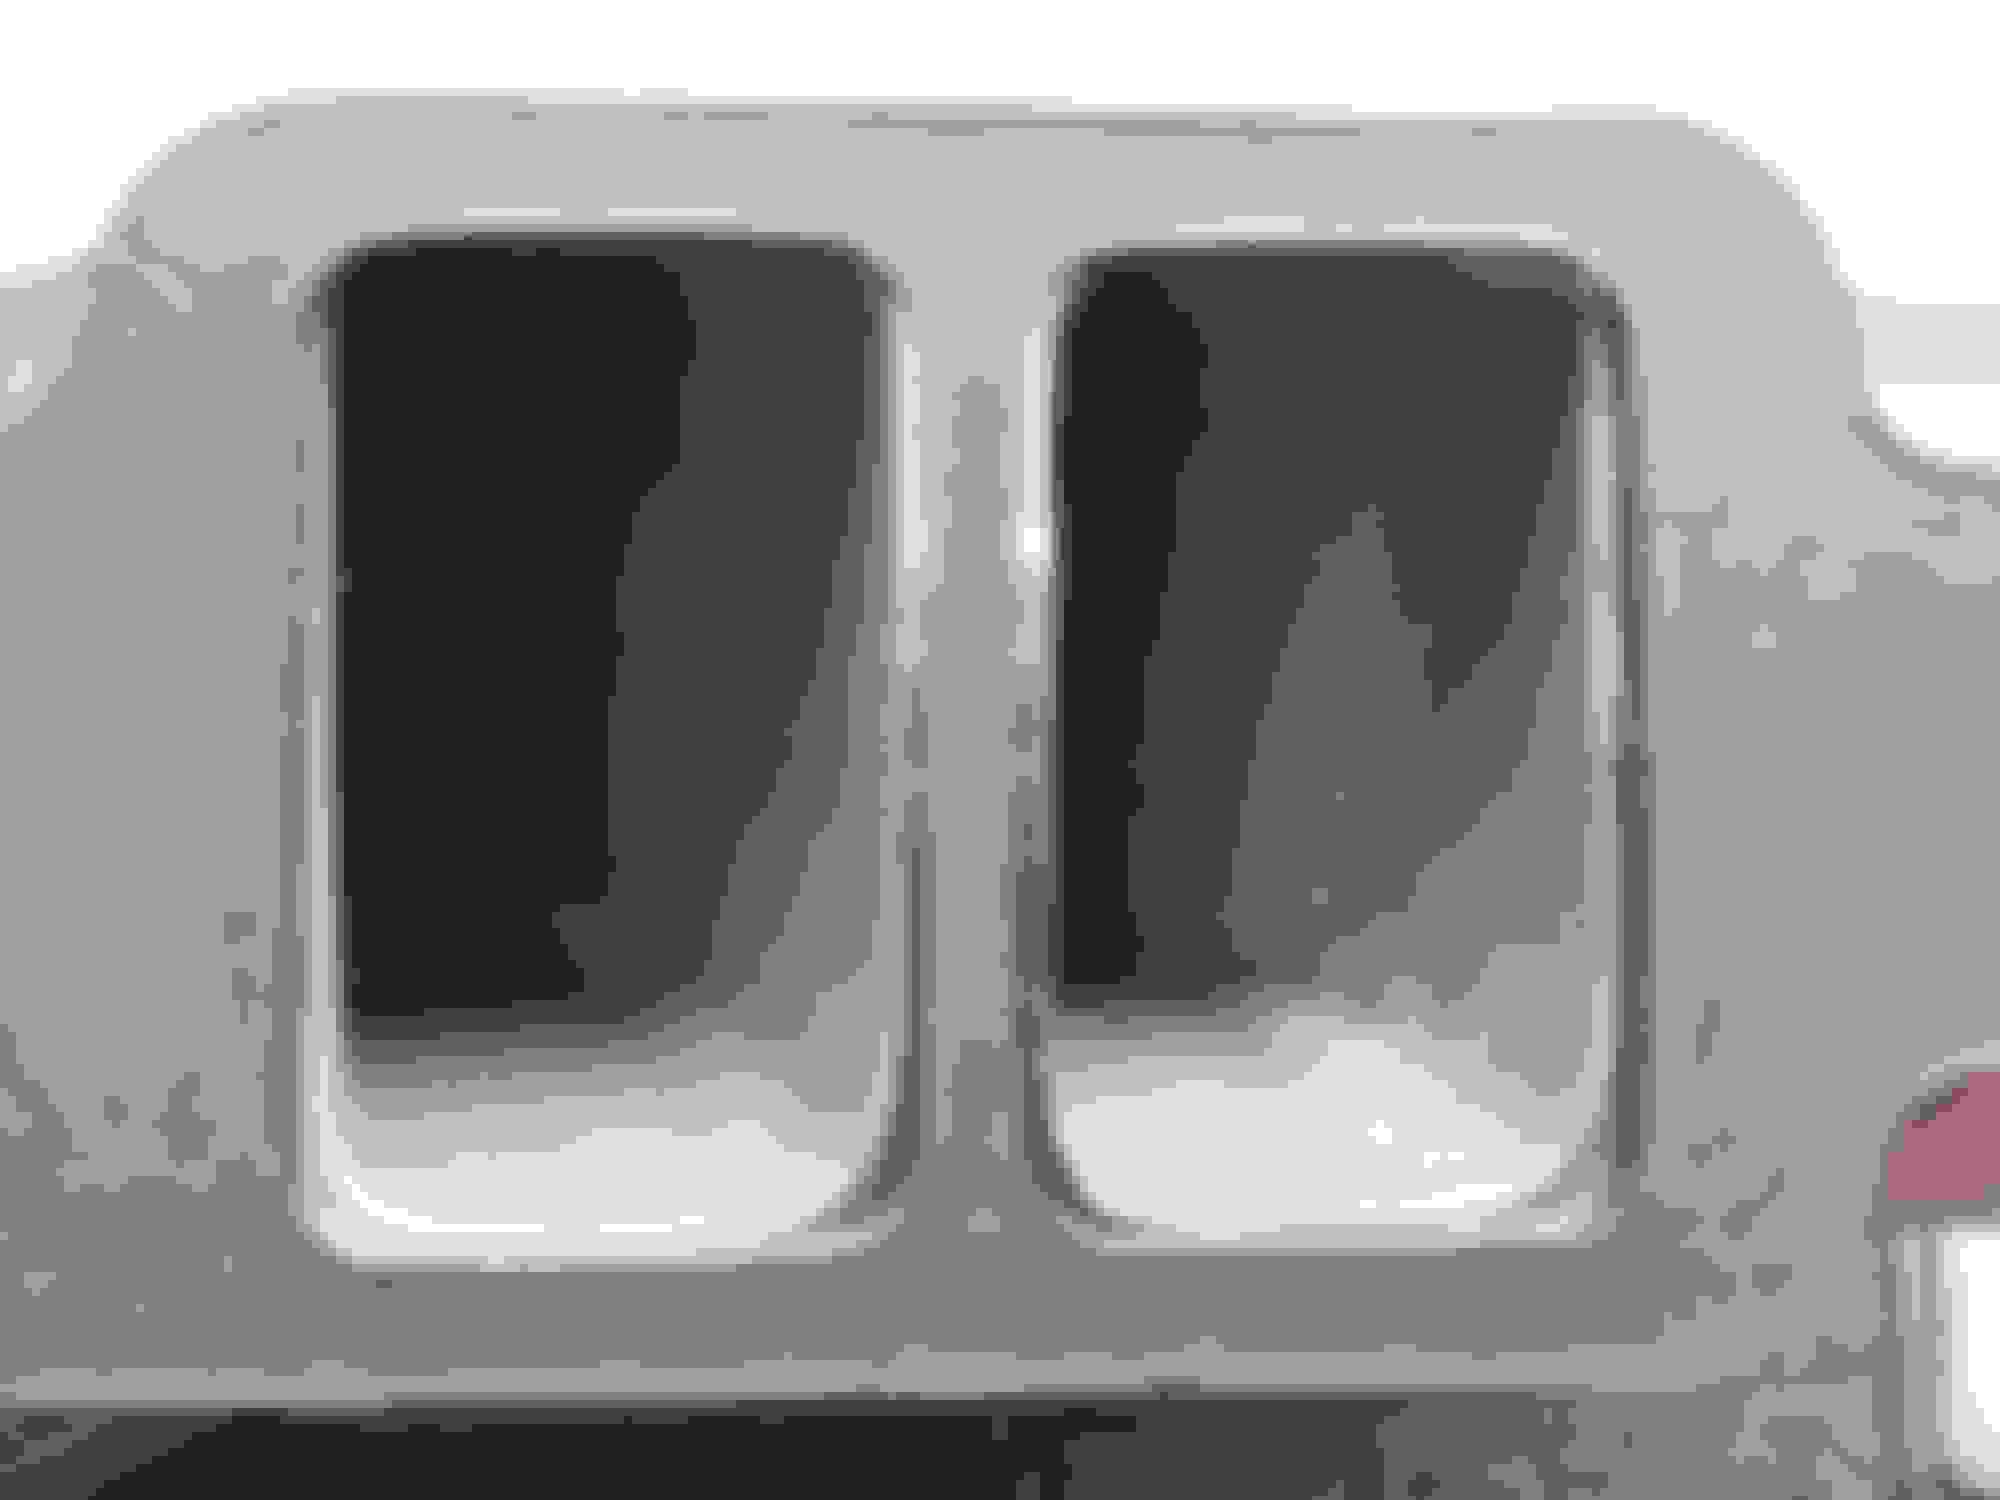
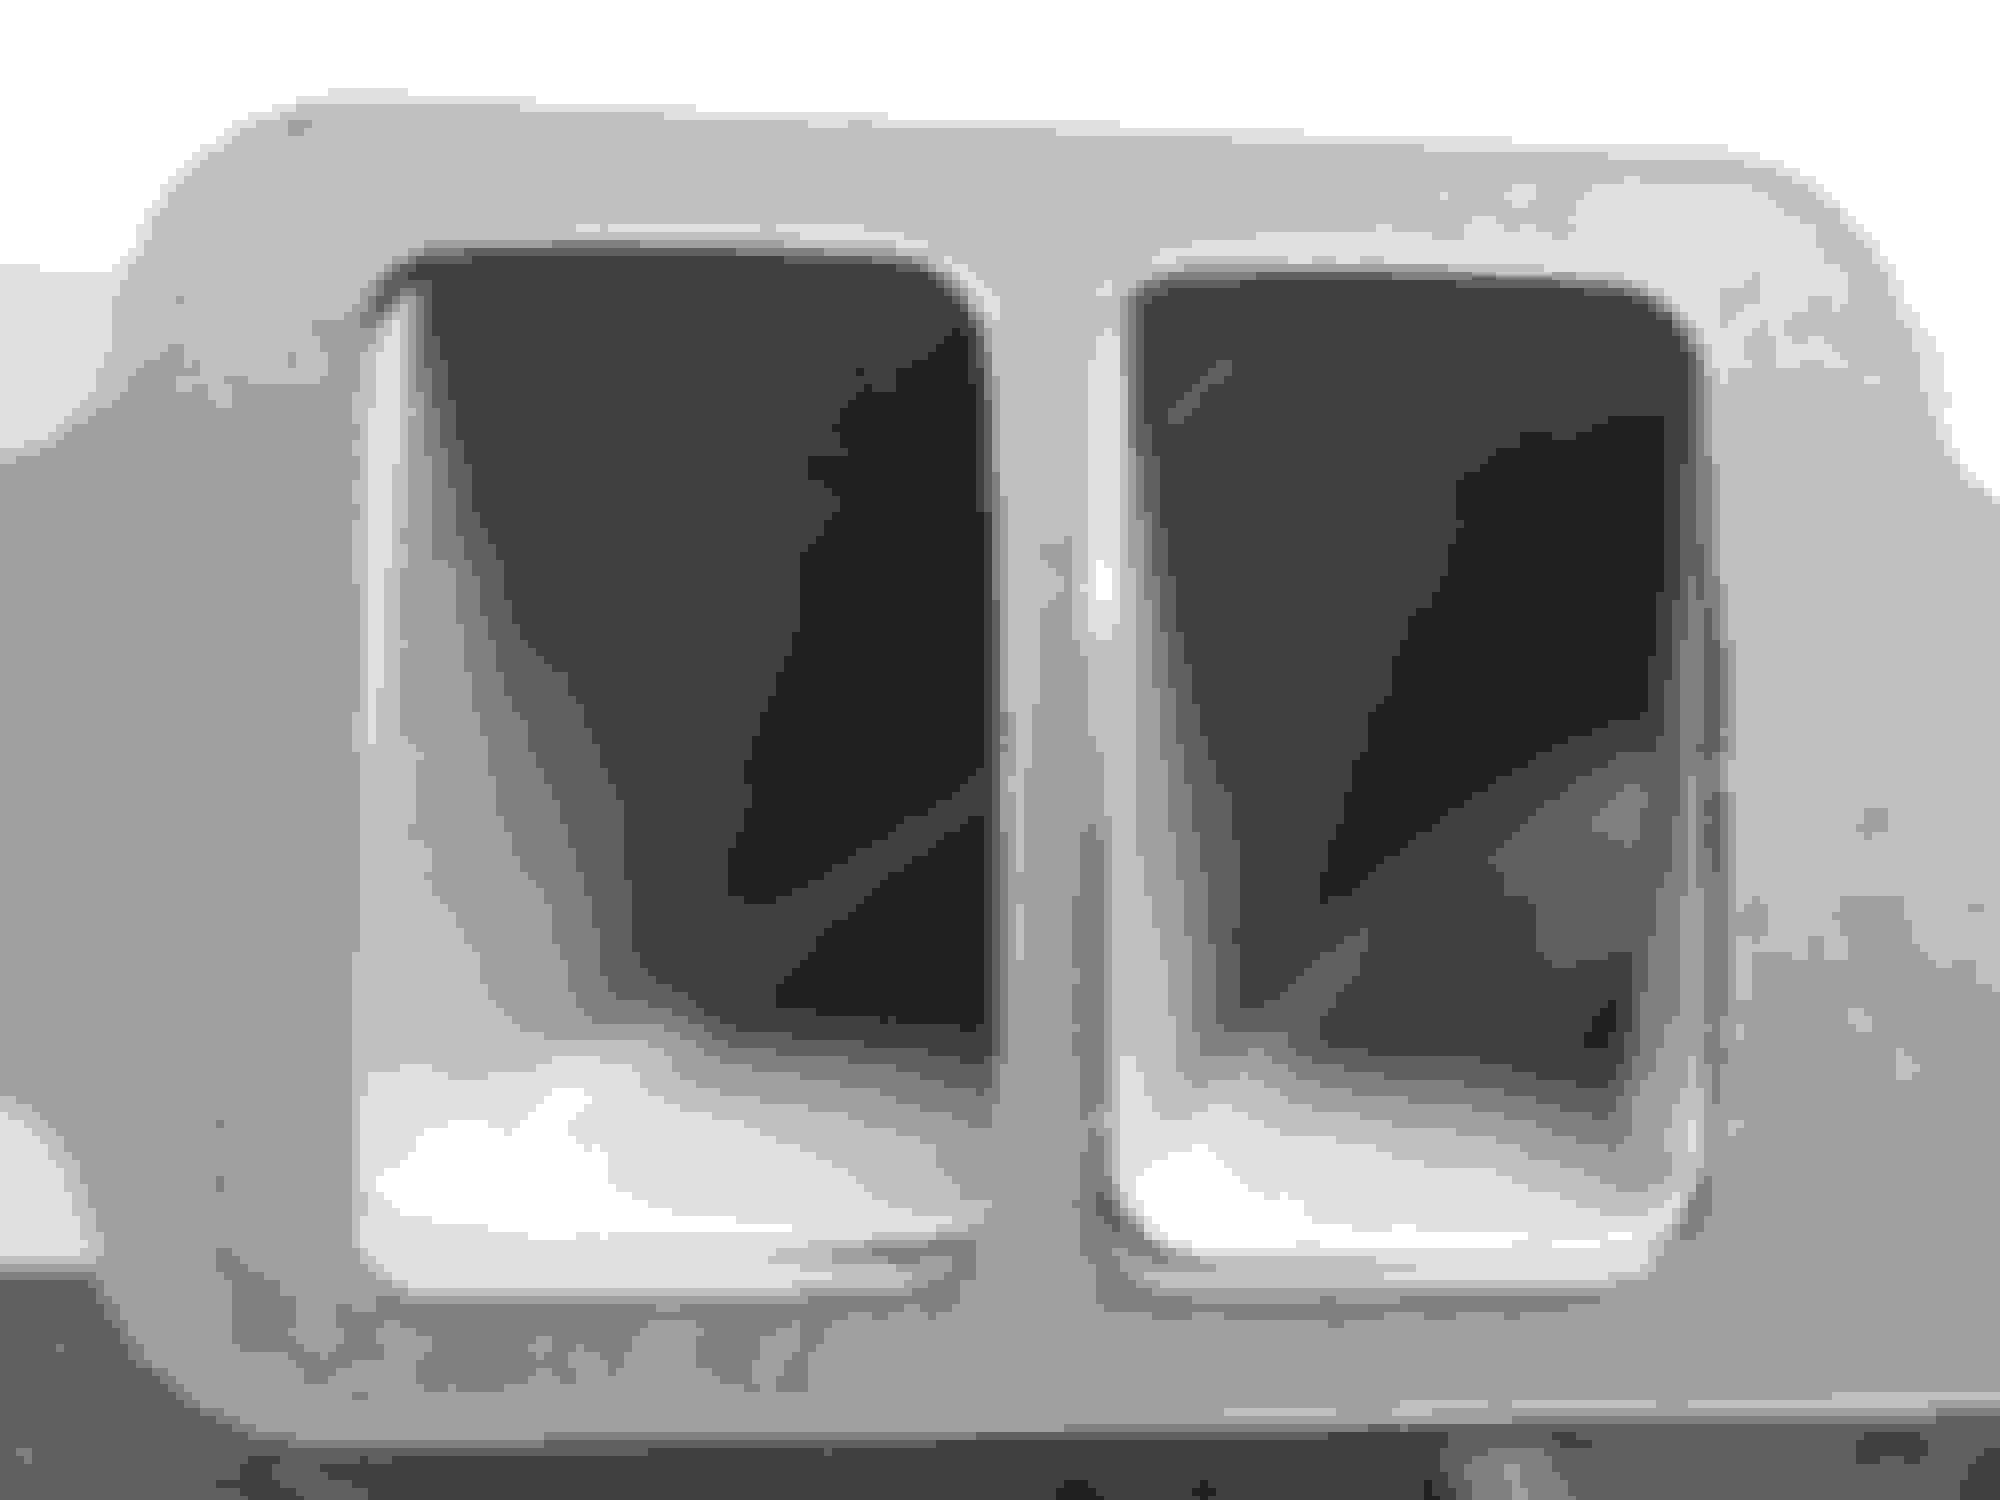
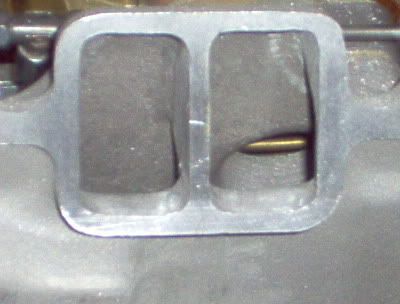
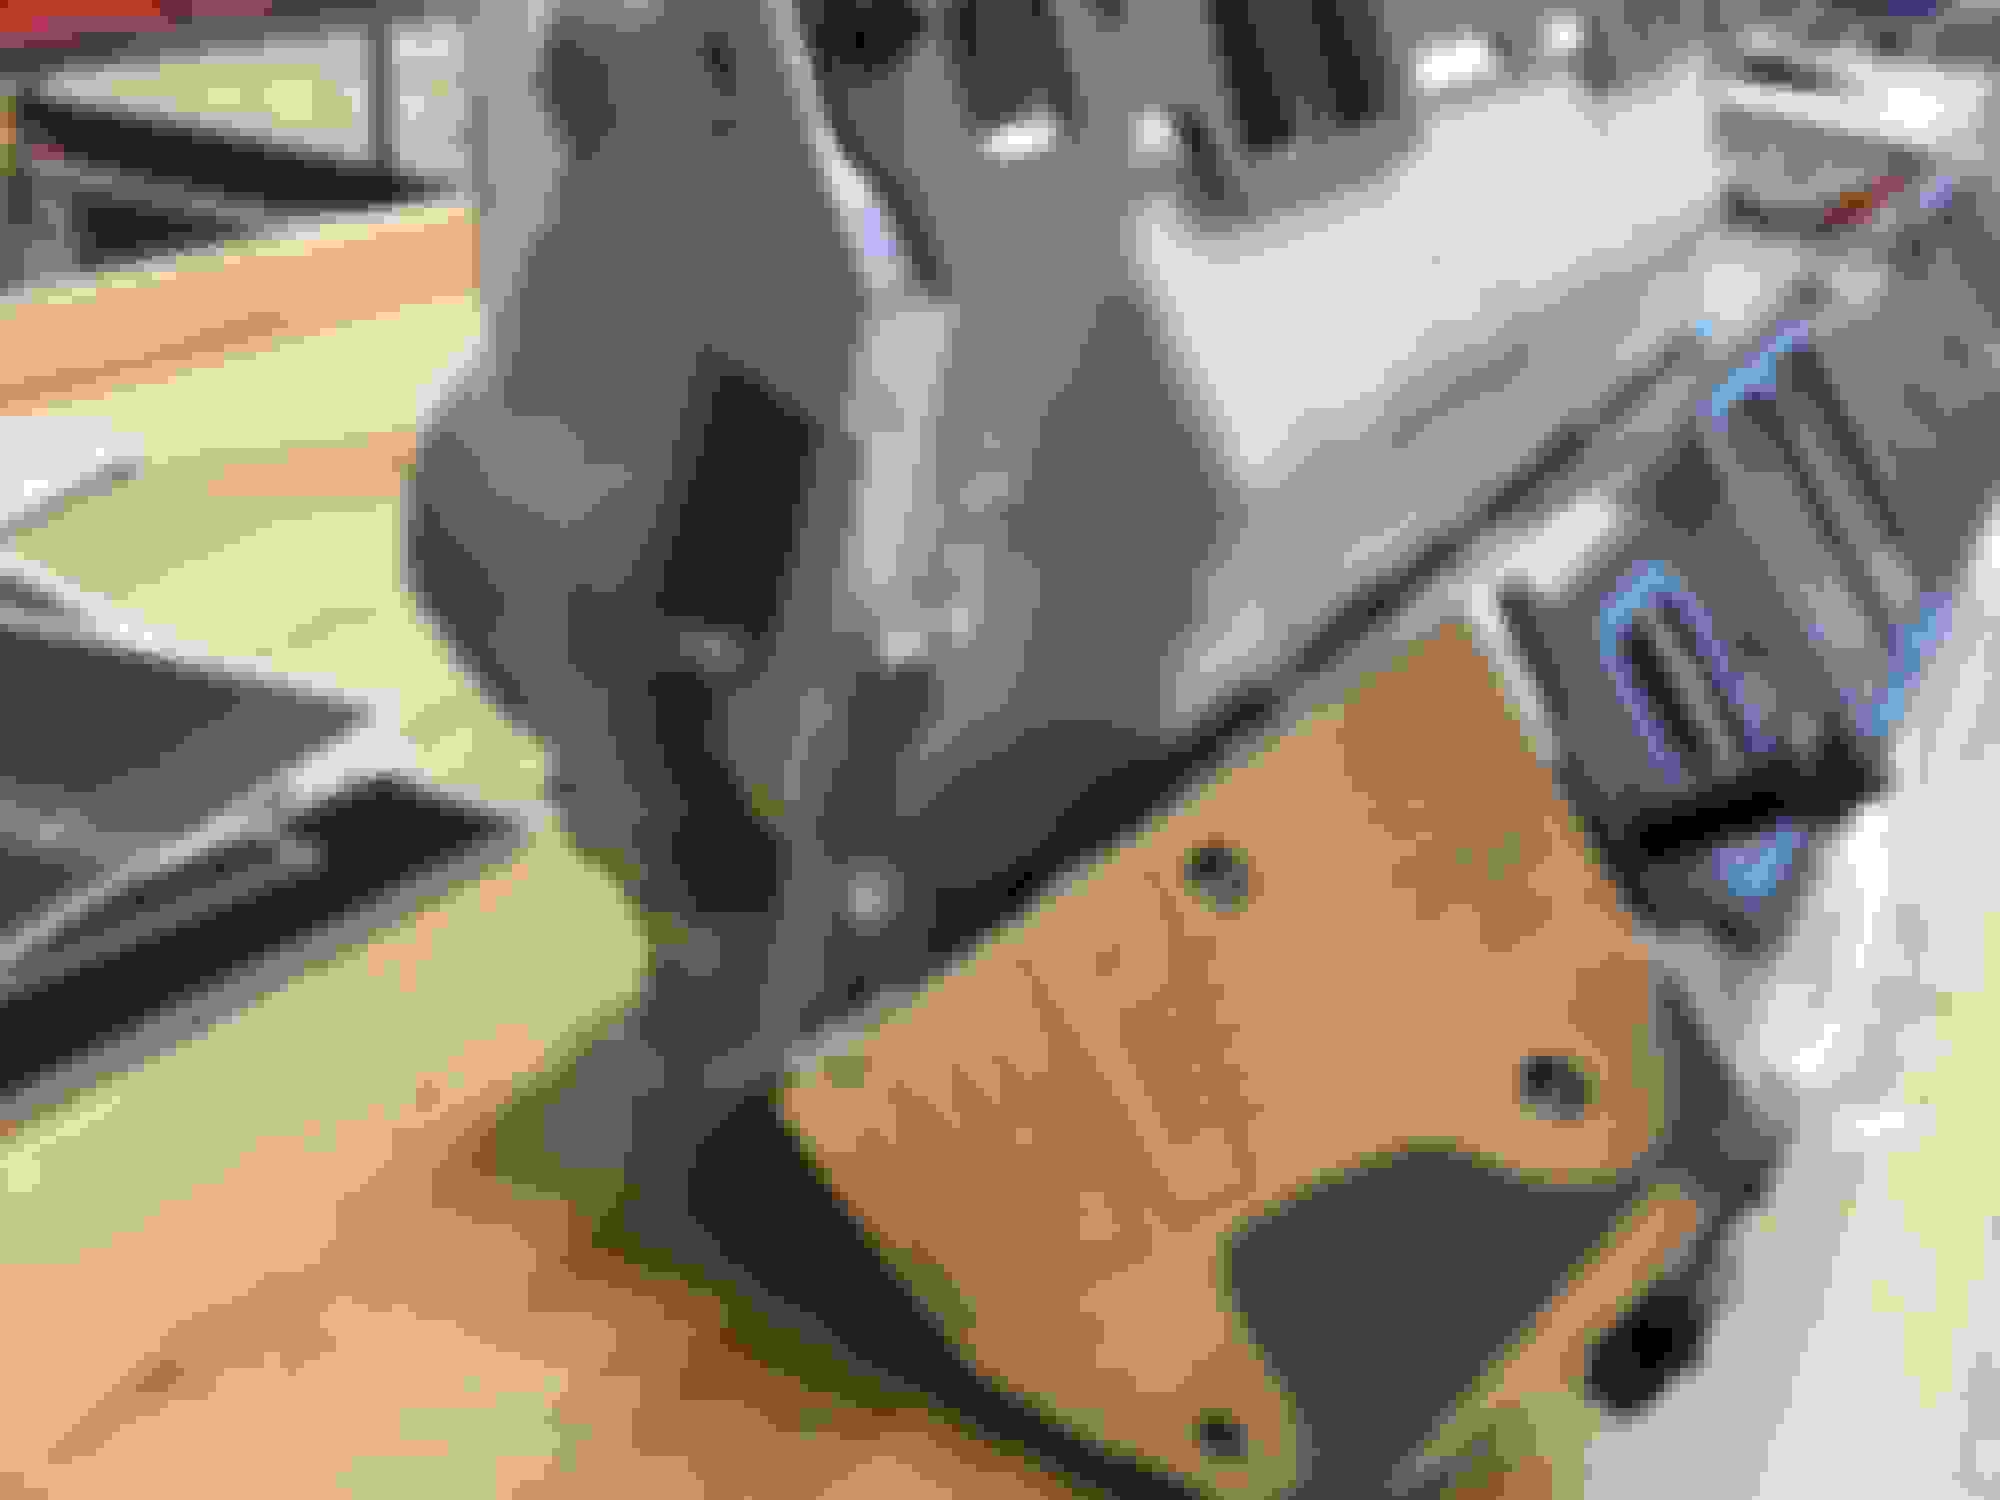
When it put a 1205 intake gasket on the intake, it looks like the below.
One side looks ok, as I see it, the other has a very bad fit.
I know that Holley sell this intake on Ebay also, with a discount because, as they tell "the runner are slightly off" I didn't buy that, because I would like to have a good flow from my heads to the intake.
In the specifications of the 7530 does it ask for the 1205 or the larger 1206 gaskets. What does the afr head require
You make a template of the head or with the intake valves removed bolt the heads and intake together on the bench scribe the intake for minor port matching
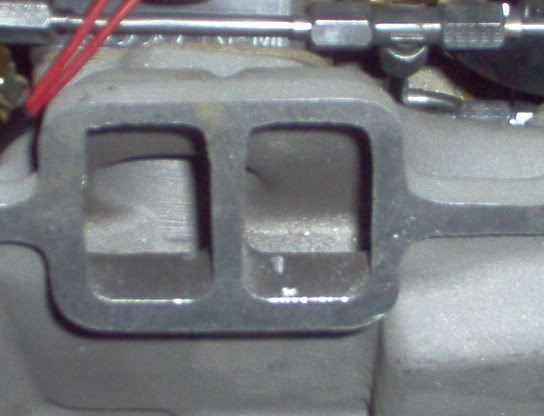
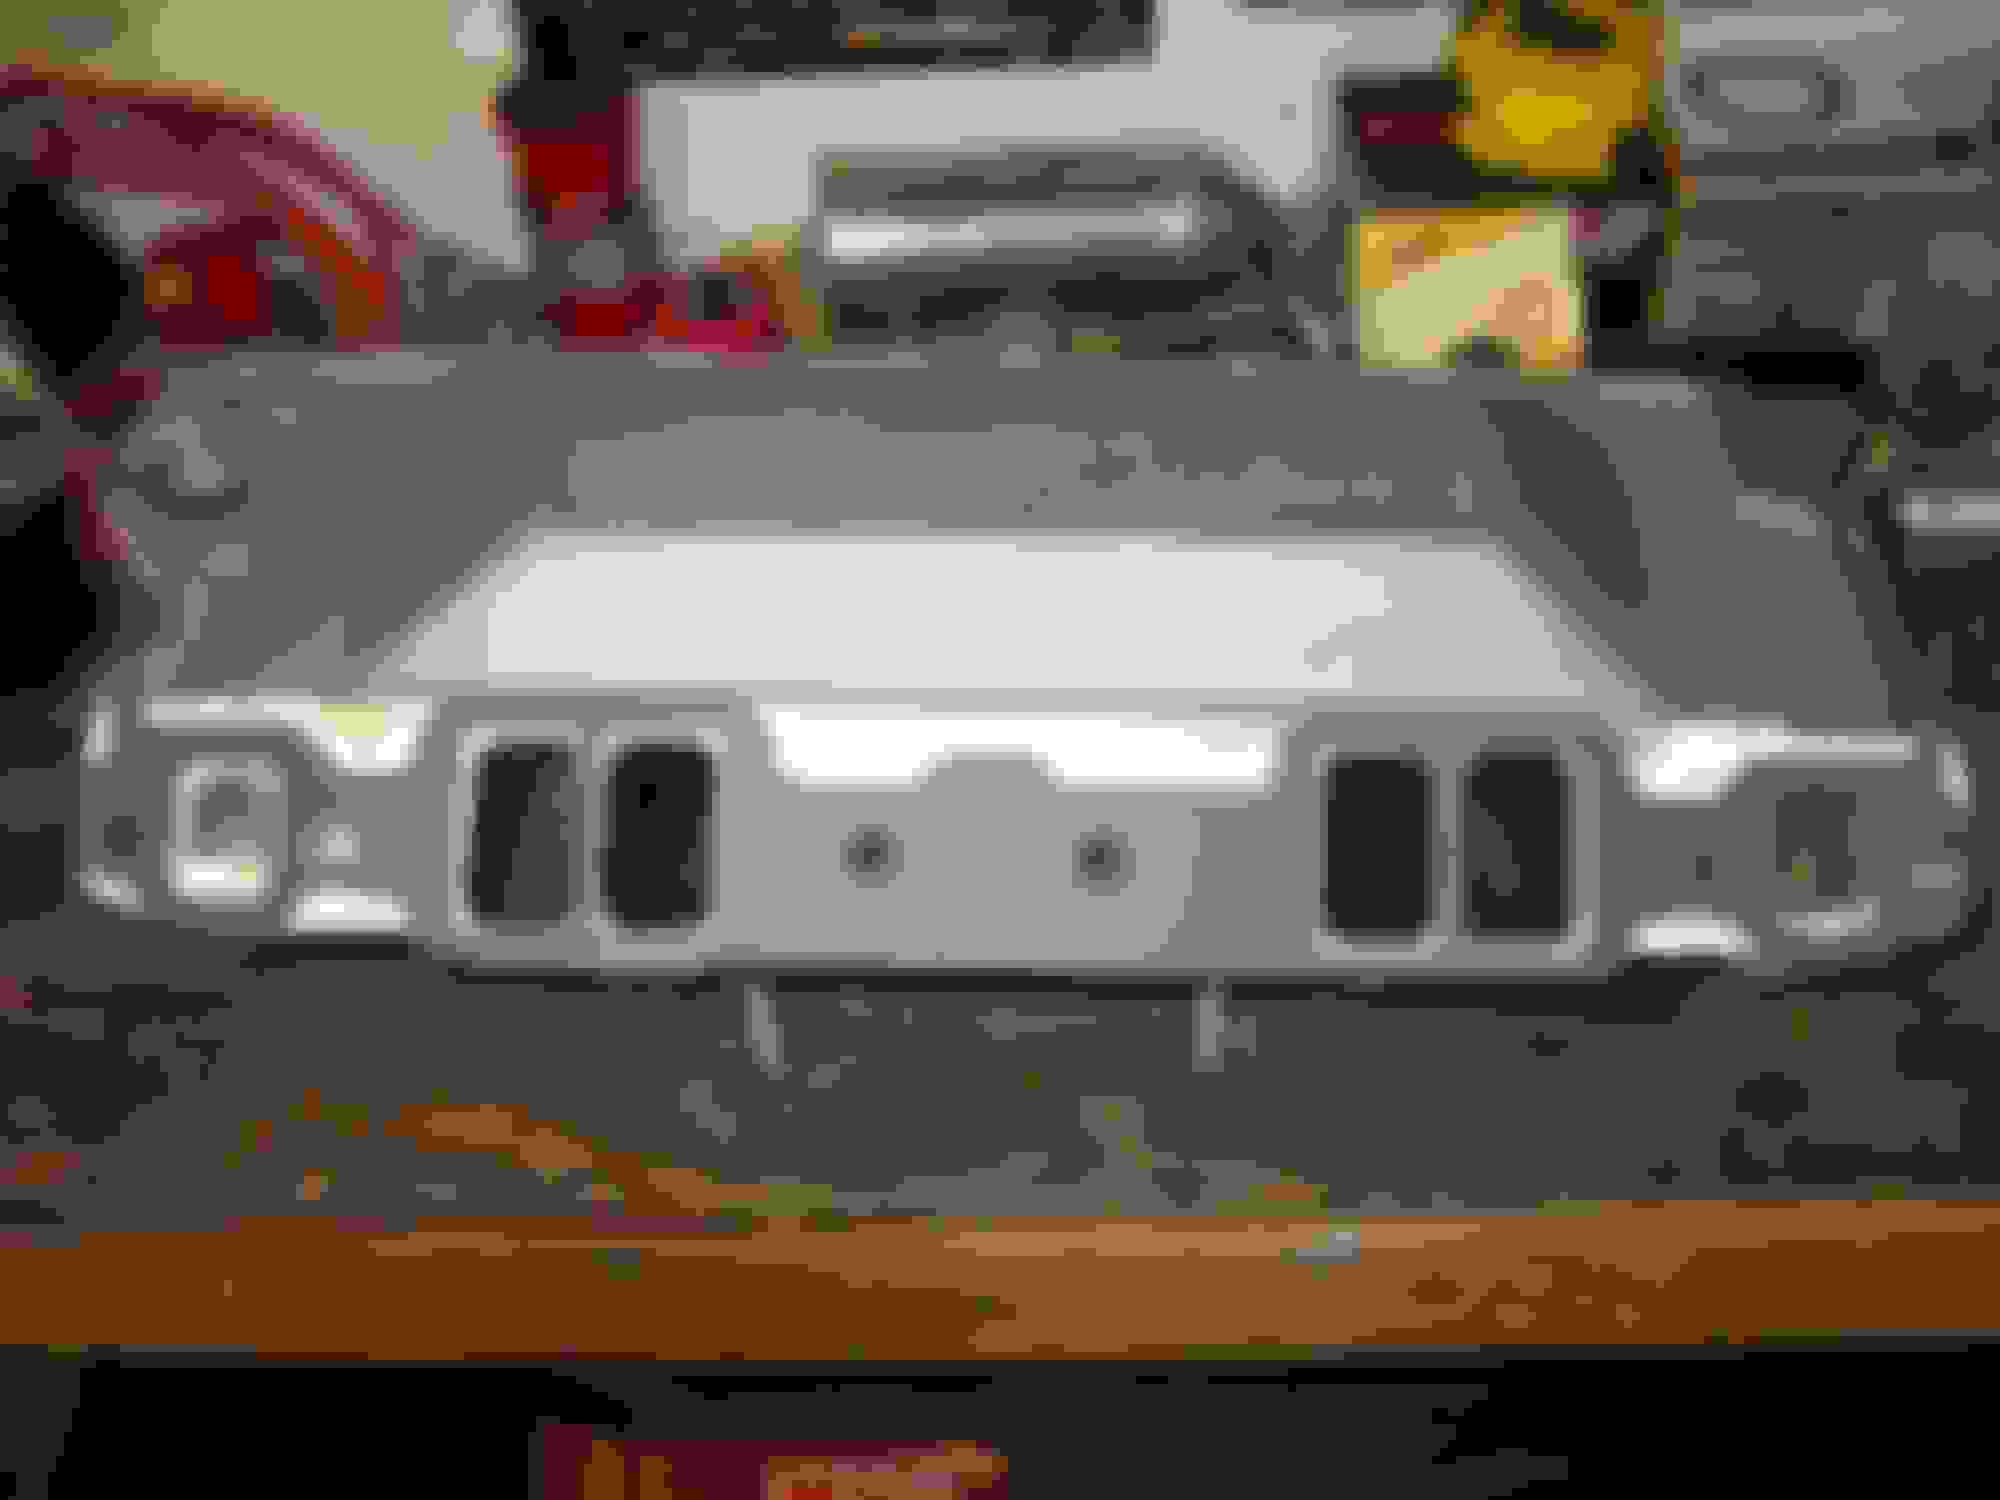
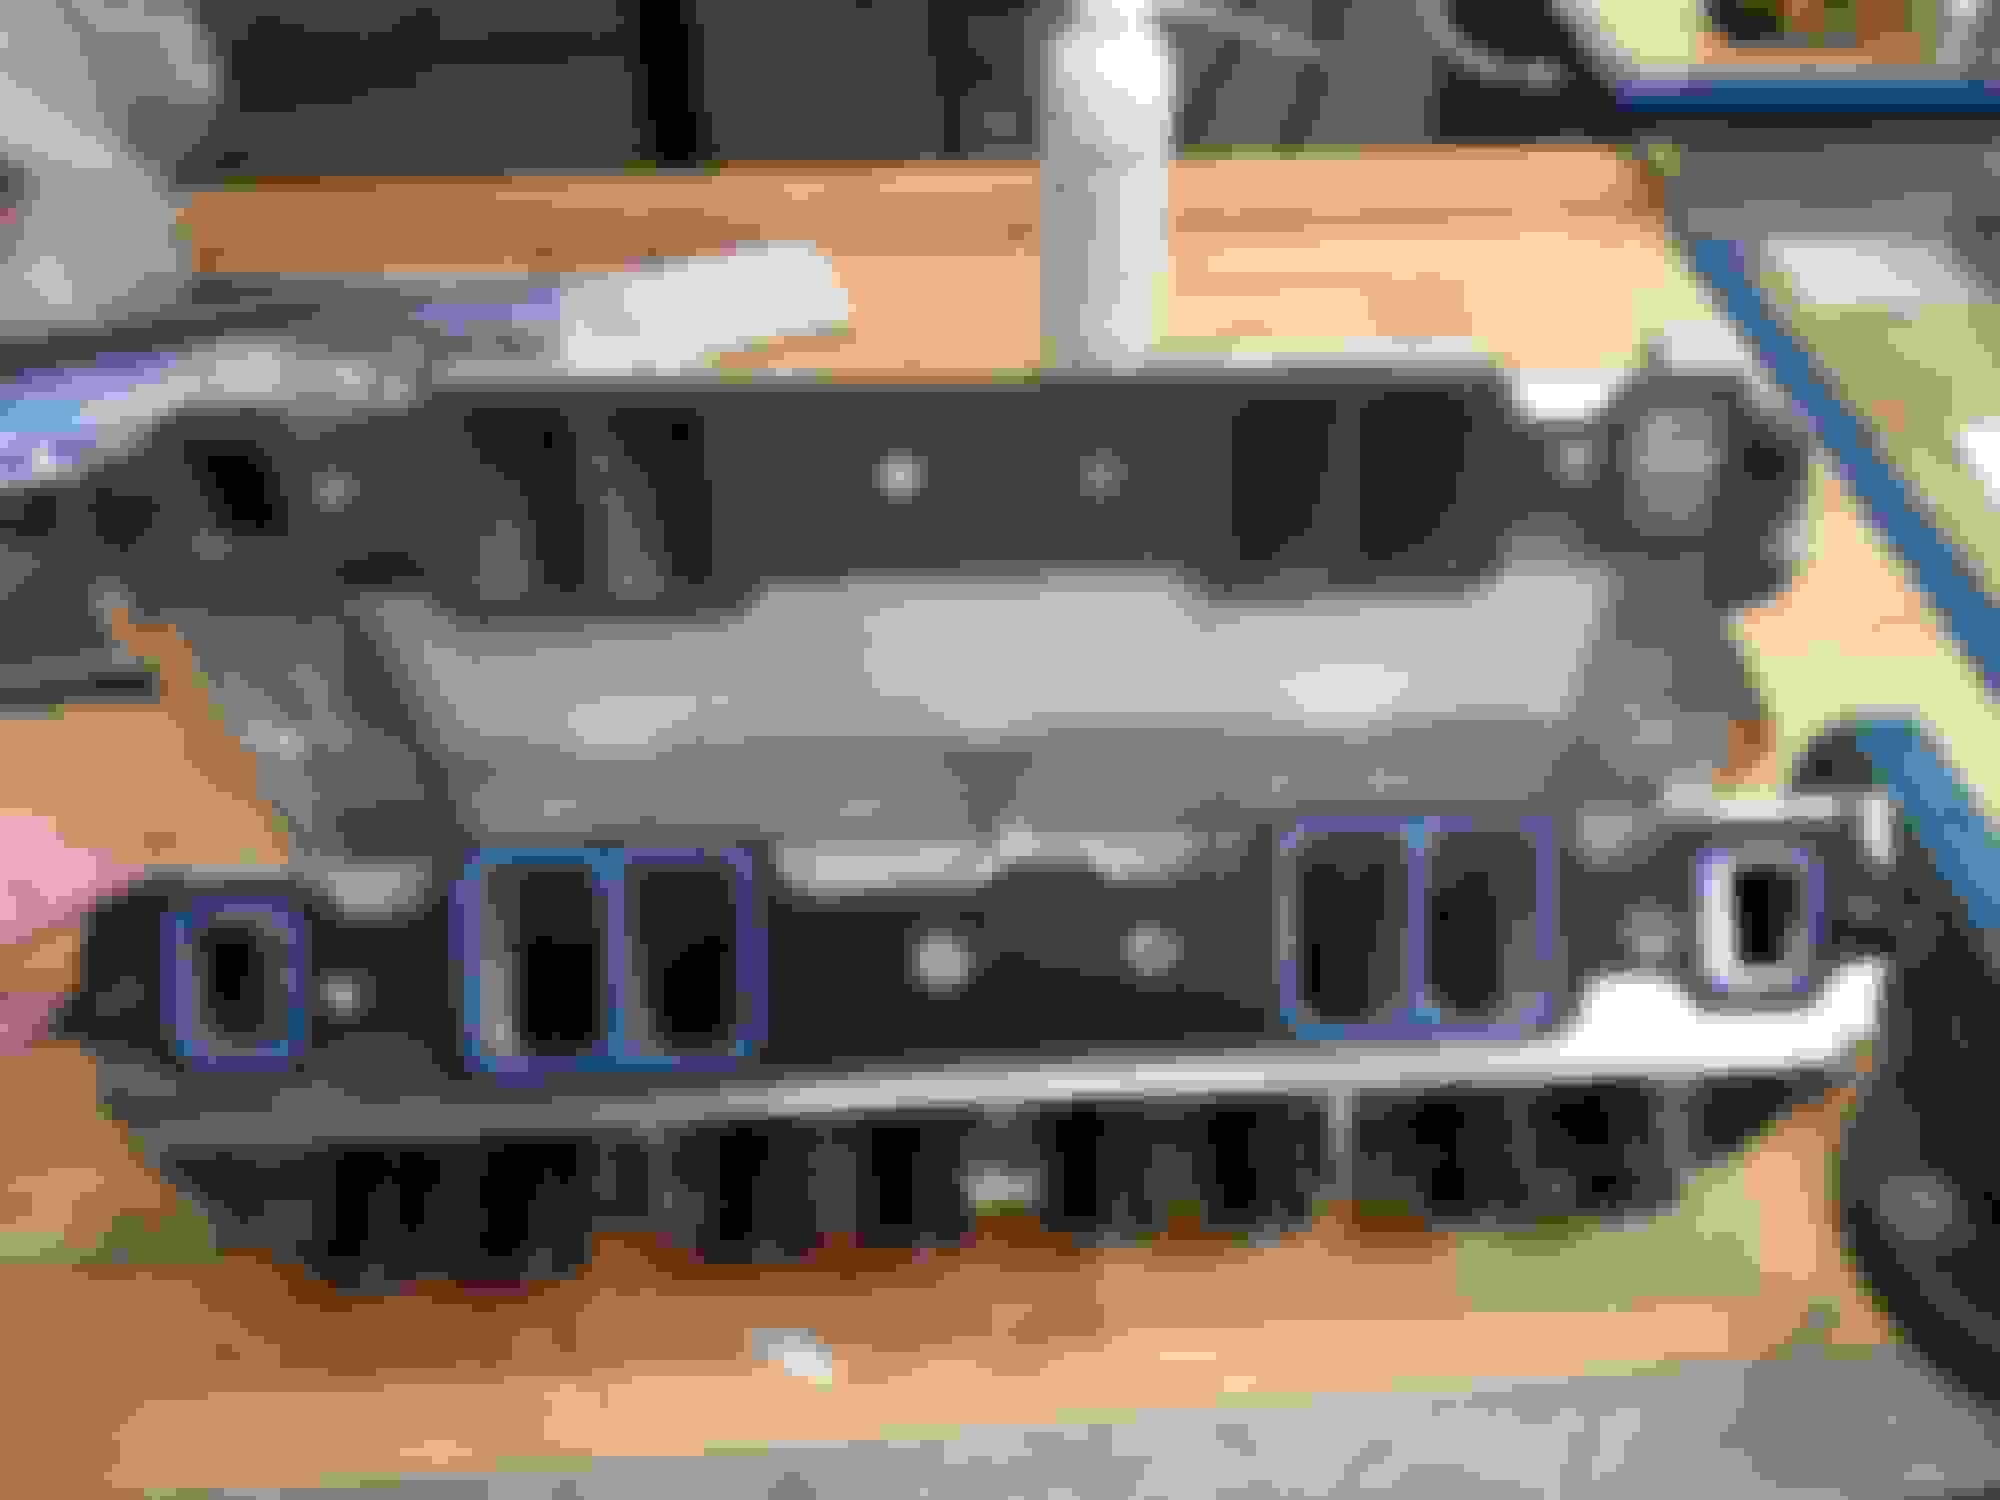
Use cardboard and make a template of the head ports and make a hole for each end bolt. Use the template on the intake and end bolt holes to align it, mark with black permanent marker and port match the intake. Here are some before and after photos.
If you're intake is a good match for your heads then I recommend you cut your own gasket. Use a template as described previously here and transfer the outline to the gasket material.
Summit has good pricing or at least better pricing than the local parts stores here. If you can't buy locally and need some help with shipping from the states just let me know. And I'm sure others here would be willing to help also.
Don't port the heads!. If you follow my post above you will likely need very little material removed from the intake in select spots. If the gasket fits the head with no overlap anywhere don't worry about a little mismatch or overlap with the intake and gasket as long as it looks like it will seal ok.
Here's a copy of a post put up a few years ago, it still holds true today!
The ONLY effective way to a true "Port-Match".
1-Have heads pre-mounted on block to be used, with both head gaskets in place.
2-Use 2 pieces of masking tape or 2 spots of silicone and position intake gaskets in place.
3-At this point make sure the intake gaskets (marked R/L) fit the head ports the way you want them.
4-Lay the intake in place with 4 corner bolts, at this time you'll know if bolt location is OK.
5-Snug the bolts down, and using a 1/8" drill, drill 4 holes (1 at each corner) through the intake making sure where you drill you will hit the gasket (don't drill where there is no gasket below).
6-Let the drill tip go right through the gasket and stop on the head. Remove the intake and lay the gaskets on the respective sides as templates, (we use 1/8" "cleco" buttons to mount the gaskets back on the intake sides) and you can use (2) 1/8" drill bits for alignment. With the gaskets mounted on the intake, simply scribe out the ports on the intake and "grind away".
By using this method we can literally leave a perfect "overhang" (reversion-wall) on the intake runner of .020"/.030" or we can make it "straight-wall" deal, no "overhang"!!
In simpler terms, the head port is slightly larger than the intake port. It's your choice to line up the port perfectly or leave the "overhang".The entire procedure takes about 20/30 minutes to achieve and guarantees a "perfect" fit on the final ***'y. This procedure can be done on assembled long blocks that have been running and getting an intake change.
We run the intake port "inside" the head port for anti-reversion only on street engines and not on the �track only" units due to the higher VE of race prepared engines.
Thanks, Gary in N.Y.
P.S. There is no other accurate way (that I'm aware of after 38+ years of engine building) to get "perfect" port alignment, period!
Thanks, Gary in N.Y.
P.S. We still use this same method today on EVERY build when "chasing HP", it is just "dead" accurate! Here's a couple shots.
Last edited by GOSFAST; 02-04-2017 at 06:23 PM.
Reason: Add photos
Here's a copy of a post put up a few years ago, it still holds true today!
The ONLY effective way to a true "Port-Match".
1-Have heads pre-mounted on block to be used, with both head gaskets in place.
2-Use 2 pieces of masking tape or 2 spots of silicone and position intake gaskets in place.
3-At this point make sure the intake gaskets (marked R/L) fit the head ports the way you want them.
4-Lay the intake in place with 4 corner bolts, at this time you'll know if bolt location is OK.
5-Snug the bolts down, and using a 1/8" drill, drill 4 holes (1 at each corner) through the intake making sure where you drill you will hit the gasket (don't drill where there is no gasket below).
6-Let the drill tip go right through the gasket and stop on the head. Remove the intake and lay the gaskets on the respective sides as templates, (we use 1/8" "cleco" buttons to mount the gaskets back on the intake sides) and you can use (2) 1/8" drill bits for alignment. With the gaskets mounted on the intake, simply scribe out the ports on the intake and "grind away".
By using this method we can literally leave a perfect "overhang" (reversion-wall) on the intake runner of .020"/.030" or we can make it "straight-wall" deal, no "overhang"!!
In simpler terms, the head port is slightly larger than the intake port. It's your choice to line up the port perfectly or leave the "overhang".The entire procedure takes about 20/30 minutes to achieve and guarantees a "perfect" fit on the final ***'y. This procedure can be done on assembled long blocks that have been running and getting an intake change.
We run the intake port "inside" the head port for anti-reversion only on street engines and not on the �track only" units due to the higher VE of race prepared engines.
Thanks, Gary in N.Y.
P.S. There is no other accurate way (that I'm aware of after 38+ years of engine building) to get "perfect" port alignment, period!
Thanks, Gary in N.Y.
P.S. We still use this same method today on EVERY build when "chasing HP", it is just "dead" accurate! Here's a couple shots.
So you port match the intake to the gasket??? I have never seen an intake gasket that perfectly matched the head ports so do you port the CNC machined heads to match the gaskets also? This is right off AFR website on the AFR 195 eliminator heads page. (The exact heads the OP has.)
"Intake Gasket, Fel-Pro #1205
AFR #6810 Important: Do not port match your intake manifold to Fel-Pro gasket as it does not precisely fit AFR heads."
This directly contradicts the advise you just gave???
Use cardboard and make a template of the head ports and make a hole for each end bolt. Use the template on the intake and end bolt holes to align it, mark with black permanent marker and port match the intake. Here are some before and after photos.
Thanks Kevin, I will do that.
When I bought my set of AFR 195 heads, I bought 2 sets, one for me, and one for a friend. That set it not installed yet, so I think I will borrow them, bring them to work, with my intake, so I can make a good match. And make a template.
Originally Posted by cardo0
If you're intake is a good match for your heads then I recommend you cut your own gasket. Use a template as described previously here and transfer the outline to the gasket material. Summit has good pricing or at least better pricing than the local parts stores here. If you can't buy locally and need some help with shipping from the states just let me know. And I'm sure others here would be willing to help also.
Let us know what you need c3dk.
Hi cardo0,
Thx for checking in :- )
I will make the template, and see "where I end" and if my 1205 or the 1206 set I have in stock, can't be used, then I will do as you tell.
And thx for your kind off, maybe I will contact you regarding this /or something else :- ))
Originally Posted by 63mako
Don't port the heads!. If you follow my post above you will likely need very little material removed from the intake in select spots. If the gasket fits the head with no overlap anywhere don't worry about a little mismatch or overlap with the intake and gasket as long as it looks like it will seal ok.
I never will Kevin, I will NEVER grind in my AFR parts ! :- )
I will only make a gasket match in the intake, and see if I have to cut a bit in the gasket also.
BTW.
2 questions more.
I need my temp. sensor for the EZ-EFI 1.0, I assume it can cut it here ?? (also what is the thread size??)
What is the thread for, do I just need to plug it? (also what it the thread size)
I have looked at my team G and FP1205 seems to fit almost perfect on both sides.
Temp sender... why not put it in one of the heads?, i have mine there and it seems to work perfect and head was drill and taped for it.
Tread size under carb pad is 3/8 NPT, i will use it as vacuum source for headlights / wiperdoor etc..
Hilsner fra Elektrikeren
Hi there in Copenhagen :- )
Sure regarding temp. sensor it would be easy, thx :- )
Ah.......of cause, first time working with a single plane intake, where else to put it :- )))
So no plug, I need it again thx.
You didn't have to port match your intake, or cut in the gasket?
So you port match the intake to the gasket??? I have never seen an intake gasket that perfectly matched the head ports so do you port the CNC machined heads to match the gaskets also? This is right off AFR website on the AFR 195 eliminator heads page. (The exact heads the OP has.)
"Intake Gasket, Fel-Pro #1205
AFR #6810 Important: Do not port match your intake manifold to Fel-Pro gasket as it does not precisely fit AFR heads."
This directly contradicts the advise you just gave???
3-At this point make sure the intake gaskets (marked R/L) fit the head ports the way you want them.
Hi "63", the #3 above here clears that up, before ever getting to the intake the gaskets (whatever gasket/number chosen) that have been dedicated to the build MUST be OK on the heads first! This is the starting point.
Too add, generally speaking, it wouldn't be necessary to touch the (intake) head ports at all if they OK as shipped, CNC'd or otherwise.
When the gasket has been deemed OK for the heads then you continue with the manifold.
This is important here, occasionally there is simply not enough material cast into the manifold runners themselves (or simply put, they may be in the wrong location) to get the gaskets in a comfortable position. It's for this reason we like the intakes to be quite a bit smaller at the entry ports, very easy fix here for this issue! And I would also say on occasion we've had to weld many intakes to "move" the ports laterally as much as .125", again, not a real big deal! Normally it's only on one side of the intakes.
Thanks, Gary in N.Y.
P.S. One more item I would touch on, over here we aren't very big fans of the entire AFR line, we've built a number of units with them (usually customer requested/supplied) and have never been impressed with any dyno numbers. A year or two back we gave the guy's out there a good "tip" to make an improvement on all the BBC 23* heads, we talked seriously about it and I believe due to the cost of an extra machining procedure they avoided the change, even after admitting to us it was a good call! We consider (Pro-Topline) now RHS, Brodix, Edelbrock, really "good" heads. There are some others also! One of our most recent SBC highest HP builds was with an "All-Pro" top end, definitely not a "budget" build though.
That turtle won't hurt anything but I don't expect much for improvements on a street motor below 5,000 RPM. It may reduce some puddling though as the fuel that drops out air charge/suspension will run further down the runner.
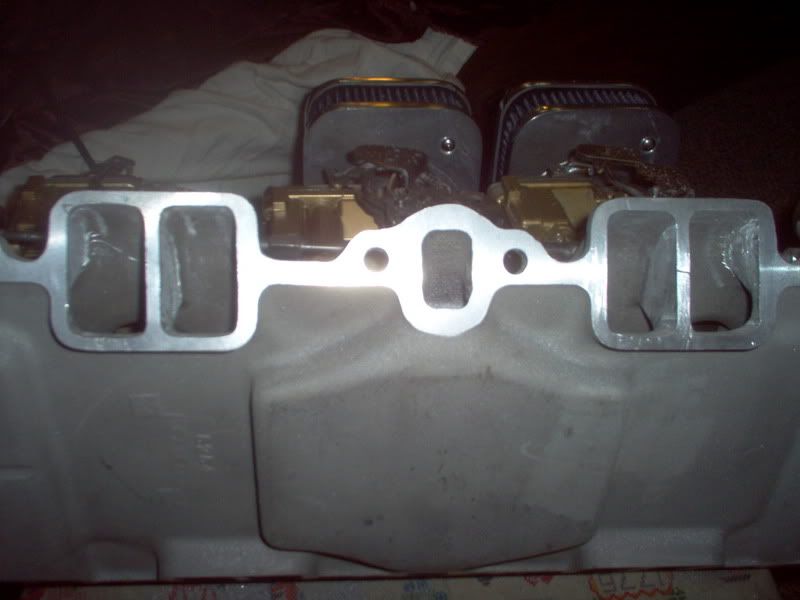
Years ago on a different engine, I had the intake off for some other work and I decided to check the FP1205 gasket fit to the Performer RPM Air Gap intake, and I was a bit surprised:
I ended up porting the intake to match the gasket, leaving the intake runners slightly smaller than the gasket.
FWIW, the FP1205 gasket did fit the AFR195 heads I had almost perfectly.
If theres a little room around the gaskets dont worry about it
Welcome to overseas castings many are like that
have a new holley 300-25 and 110 i bought from Holleyperformance on ebay (good deals there)some ports look great some dont. Double ck your bolt holes. not as much metal cast in either but they still work good (team G).
My usa made Weiand is noticeably heaveier.
x2 on not messing the the AFR heads no real power to be gained by the port matching deal. Put em on and have fun.
You didn't have to port match your intake, or cut in the gasket?
I have not yet pulled my dual plane intake so no at the moment i have done nothing and i also have a Victor Jr. so i still have to find out which one to use

 02-04-2017, 04:37 AM