When you click on links to various merchants on this site and make a purchase, this can result in this site earning a commission. Affiliate programs and affiliations include, but are not limited to, the eBay Partner Network.
And I thought I was almost the only one to be so foolish as to attempt this. I also saw that Lars did a supercharged one, but both of us used Vortec super chargers. Now I'm down to the last issue, the hood doesn't close. So it's either lower the engine or raise the body. I need another 1/4" of clearance. T
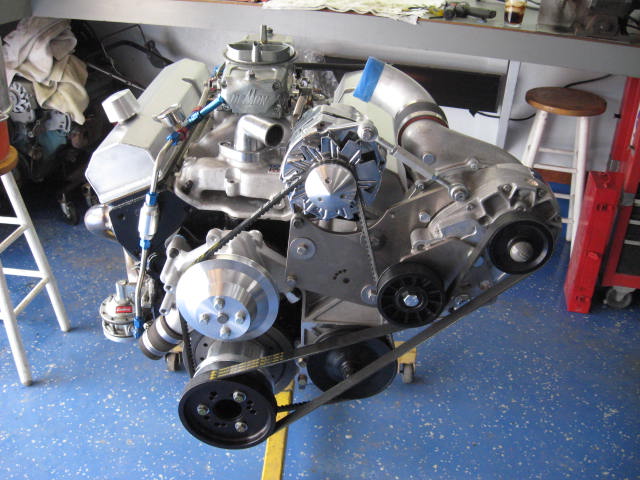
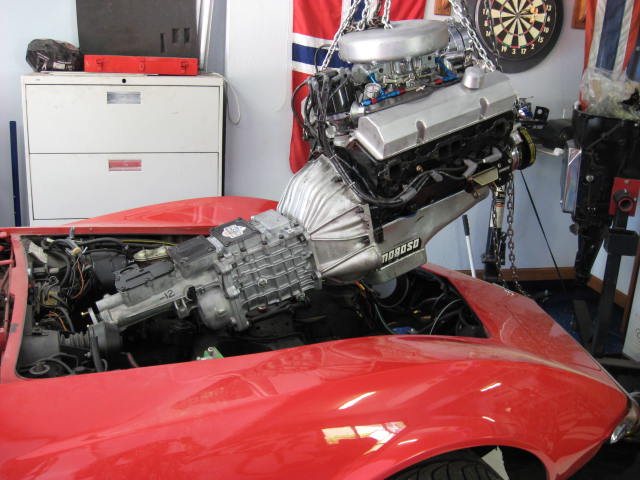
Getting everything fit up with the engine on the engine stand. The �kit� parts ended up just being used as a �suggestion.� Everything had to be altered or custom made in order to get the height profile low enough to fit in the Vette engine compartment. I think they make the brackets to fit the system into a pickup truck engine compartment... they sure aren't designed to go into a Vette:
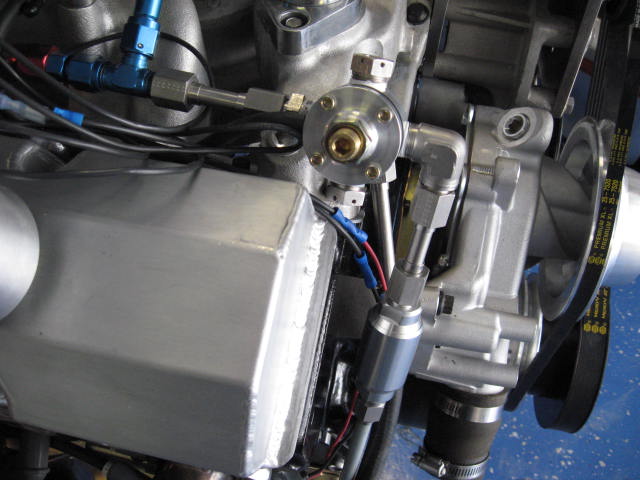
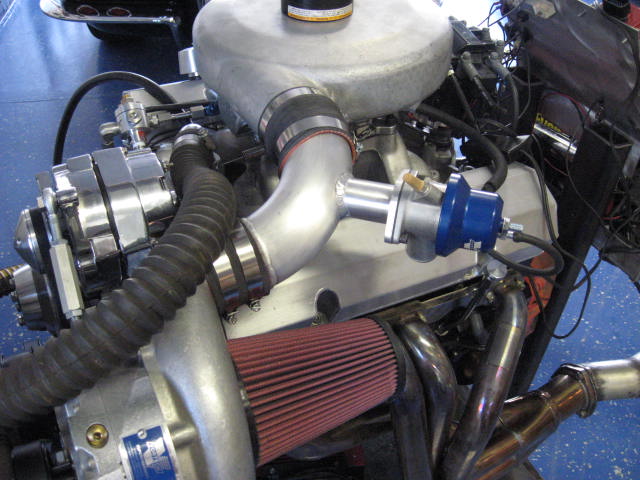
Lots of custom fabrication with boost-controlled fuel pressure and pop-off valve mounting. The fuel filter shown in this photo was used only to do an initial test run on the engine - actual fuel filter used in the car is shown in the photo below of the fuel pump and system. Engine is here seen set up on my test run stand just to verify overall operation and timing before going on the dyno:
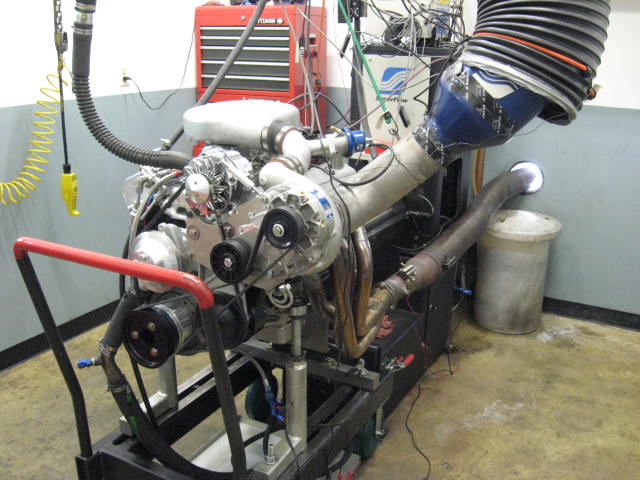
Tuning and setup was done on the dyno. 700 hp was easy to achieve:
Tremec 5-speed conversion was done at the same time:
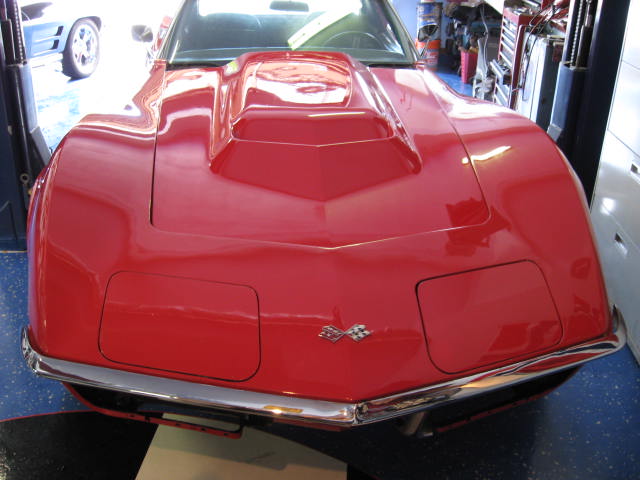
I cut the stock small block hood and changed it to an L88 style in order to get it all to fit under a �stock� looking hood:
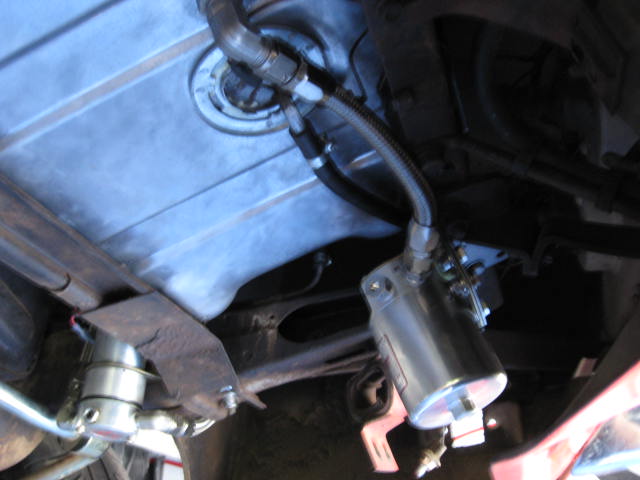
High volume high pressure fuel delivery system had to be fabricated and installed. Dyno testing showed that the size of the fuel supply and return line is critical to proper performance:
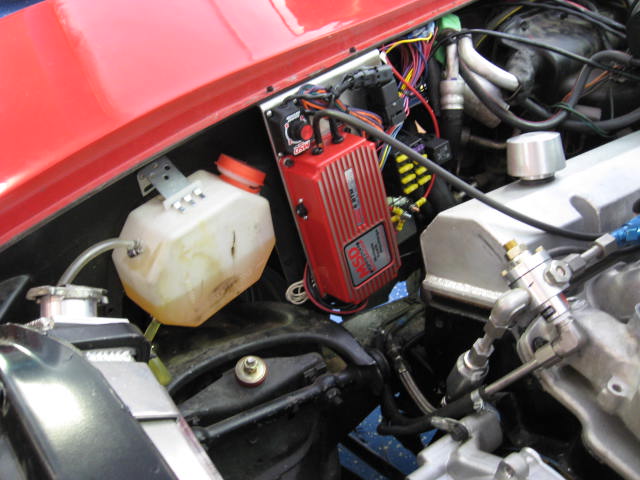
Electronic control panel fabricated to control timing retard and the electric high pressure fuel pump system:
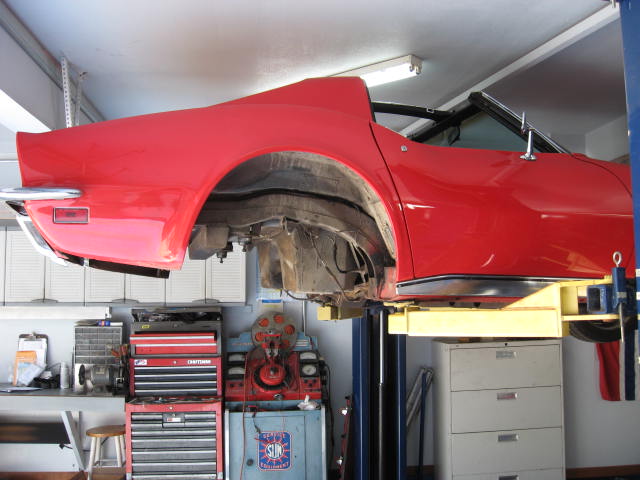
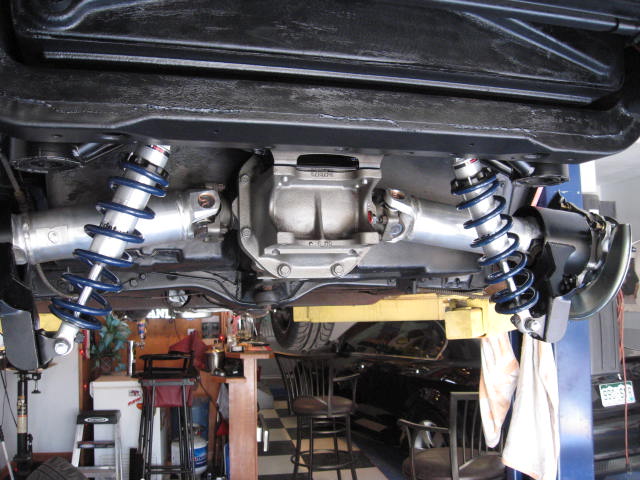
A little work was then done to the rear end to accommodate the power:
RideTec rear suspension installed so the power could be put to the ground with wider tires:
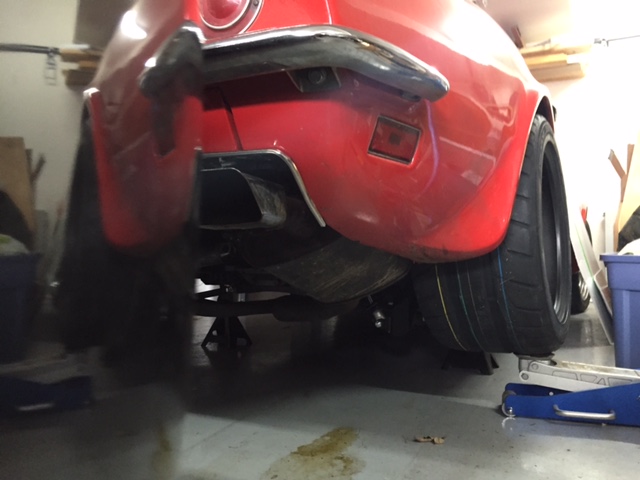
Massive rubber to get the car to hook up:
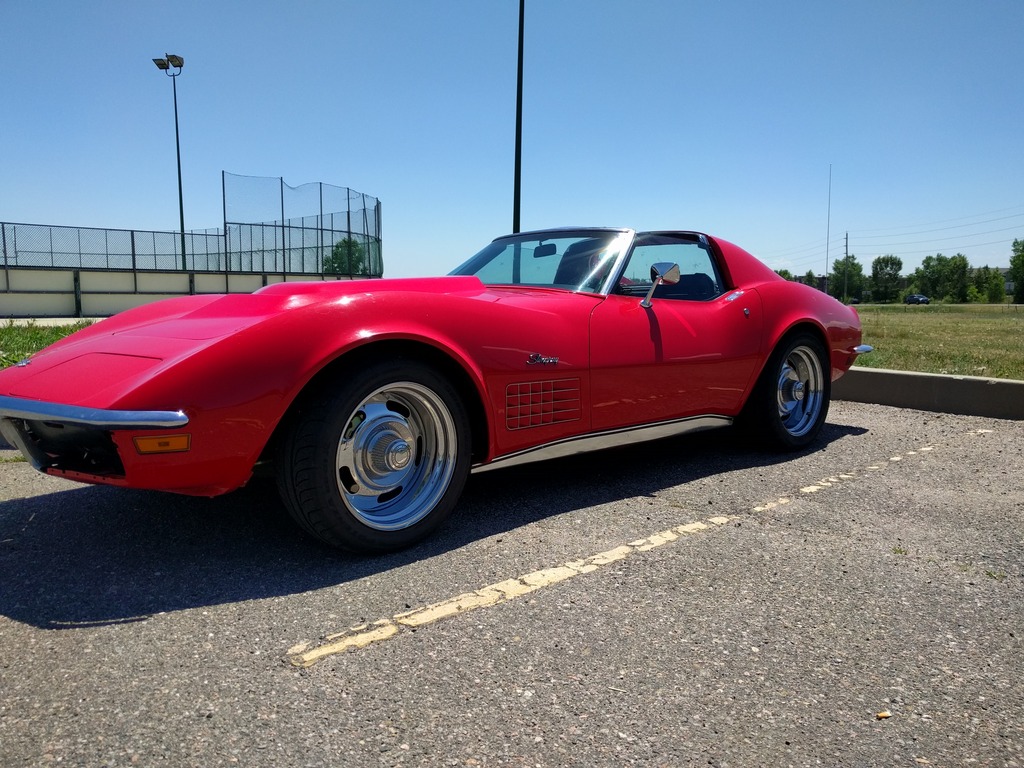
Wheels were sent out to be cut and widened to accommodate the huge rubber. If you don't know what you're looking at, they appear to be stock. Completed �package� looks very innocent: Don't try running this Vette at a light unless you're packing something serious...
Bottom line: There's a lot more to installing a ProCharger or Vortec than there appears to be on the surface... In retrospect, building and modifying the mounting brackets and accessory brackets was a minor part of the effort. If you want to do a complete "system" that works right, it's a bunch of work. Cost ended up being about double what was initially anticipated.
And I thought I was almost the only one to be so foolish as to attempt this. I also saw that Lars did a supercharged one, but both of us used Vortec super chargers. Now I'm down to the last issue, the hood doesn't close. So it's either lower the engine or raise the body. I need another 1/4" of clearance. T
how about solid body mounts to move the body up. If the old body mounts are used and crushed, you will be able to find at least a 1/2 inch...just my 2 cents
Iam right in the middle of fitting a procharger d1sc, fair bit of work, interms of pulleys and brackets, i got the sbc general kit, so fitting as we speak, let me know any detailed questions you need answered
how about solid body mounts to move the body up. If the old body mounts are used and crushed, you will be able to find at least a 1/2 inch...just my 2 cents
I like 2 cents worth, just received a new body mount kit. T
So there is 5 of us now.
To corvettedave383
Do you have any pictures and suggestions on your alternator mount?
Do you have power steering? Did you go with a remote reservoir power steering pump?
Looks like the hood will close?
I have been pondering a procharger on my 79 corvette for a few years. I have a few questions that maybe ya can answer.
Where does the hood hit, is it posable for this to work with a stock 79 hood?
I had concerns with the larger crank pully clearing the cross member, does it clear or did the crossmember have to be modified? Not a big deal but the frame is powder coated so would like to avoid messing with frame modifications at this point. (will never powder coat a frame again!)
I have A/C and want to keep it! So I was thinking about going to a sanden A/C compressor, keeping it on the passenger side and placing the alternator more around the centerline of the engine. Around the same place that GM installed the air pumps. Any thoughts on this set up with the procharger?
mac79vette, the cross member does need to be modified.
Blownmouse, you are right, got the body mounts in on the passenger side yesterday and the body came up a good half inch. Now to do the driver side and put the car back together.
About 5 years age I repainted the rockers and frame rails, In order to access the #1 body mount the rockers and splash shields need to be removed. The frame rail was full of mouse nesting. How do mice climb up jack stands? T
And I thought I was almost the only one to be so foolish as to attempt this. I also saw that Lars did a supercharged one, but both of us used Vortec super chargers. Now I'm down to the last issue, the hood doesn't close. So it's either lower the engine or raise the body. I need another 1/4" of clearance. T
I was looking seriously at doing that on my '68 BB powered car. Took detailed measurements for an install with the blower head on the driver side - I reckoned that using a tubular 'A' arm might have just allowed the blower to be mounted slightly lower, clearing the underside of the hood with the lowest part of the blower casing sitting in between the 'A' arm sides - couldn't be 100% sure of clearance on full suspension deflection though. Decided against it for two reasons - BB's get hot enough anyway without adding get another heat source under the hood - and where to mount the intercooler and intake/outlet pipes without cutting something away.
mac79vette, the cross member does need to be modified.
Blownmouse, you are right, got the body mounts in on the passenger side yesterday and the body came up a good half inch. Now to do the driver side and put the car back together.
About 5 years age I repainted the rockers and frame rails, In order to access the #1 body mount the rockers and splash shields need to be removed. The frame rail was full of mouse nesting. How do mice climb up jack stands? T
That�s awesome !! glad to hear it was an �easy� solution.
Mouse motors attract Mice.. Rat motors attract ??
To corvettedave383
Do you have any pictures and suggestions on your alternator mount?
Do you have power steering? Did you go with a remote reservoir power steering pump?
Looks like the hood will close?
Thanks
my alt is mounted on other side of block, just in front of passenger cylinder head, theres kits out there to put it in that posistion
yes gm type 2 pump with remote reservoir, fitting that as we speak
hood doesnt close, very close, cut of hood latch thing, will move to other side of car, but still not enough, not sure want to do about hood issue yet, ive got new poly engine mounts , so thats still not enough, may end up making hole in hood and putting in scoop etc, not sure
if you buy the sbc kit for the procharger, comes with mounting bracket for the type 2 steering pump and pulley for it and pulleys for water pump and alt
will get some more pics
Last edited by corvettedave383; 03-08-2017 at 03:57 PM.
I have been pondering a procharger on my 79 corvette for a few years. I have a few questions that maybe ya can answer.
Where does the hood hit, is it posable for this to work with a stock 79 hood?
I had concerns with the larger crank pully clearing the cross member, does it clear or did the crossmember have to be modified? Not a big deal but the frame is powder coated so would like to avoid messing with frame modifications at this point. (will never powder coat a frame again!)
I have A/C and want to keep it! So I was thinking about going to a sanden A/C compressor, keeping it on the passenger side and placing the alternator more around the centerline of the engine. Around the same place that GM installed the air pumps. Any thoughts on this set up with the procharger?
100% you were have to modified the front cross member, not a hugh amount, buts needs doing, then you need to plate it out and weld up, just finished doing
I was looking seriously at doing that on my '68 BB powered car. Took detailed measurements for an install with the blower head on the driver side - I reckoned that using a tubular 'A' arm might have just allowed the blower to be mounted slightly lower, clearing the underside of the hood with the lowest part of the blower casing sitting in between the 'A' arm sides - couldn't be 100% sure of clearance on full suspension deflection though. Decided against it for two reasons - BB's get hot enough anyway without adding get another heat source under the hood - and where to mount the intercooler and intake/outlet pipes without cutting something away.
plenty of room just infront of radiator, but pipes will need to come underneath the rad tho

 02-23-2017, 08:16 PM