C6 C7 Corvette: How to Replace Front Brake Pads
When you own a fast, strong car like the Corvette, it needs to have top notch brakes.
This article applies to the Corvette C6 (2005-2013) and C7 (2014-2015).
Brake pad life depends on driving conditions, driving habits, and pad composition. Although not all brake pads have wear indicators, OEM C6 and C7 pads do have built-in wear indicators that will produce a high pitch noise when pads are worn. Some driving and weather conditions can cause brake squeal, which doesn't necessarily mean that something is wrong, but frequent brake noise means that your pads need to be replaced.
Front pads will wear sooner than rear pads, given that they account for 60% to 70% of braking responsibility. Brake pads should always be replaced as complete axle sets.

Materials Needed
- Jack and jack stands
- C-clamp or caliper reset tool
- 18mm and 15mm wrench and/or socket
- Brake cleaner, lube and brake fluid
Step 1 – Remove the tires
With the wheels still resting on the ground, giving you resistance, loosen all lug nuts slightly. Jack up the car and support both sides with jack stands. Remove lug nuts and wheels.

(Related Article: How to Jack Up Your Corvette - Corvetteforum.com)
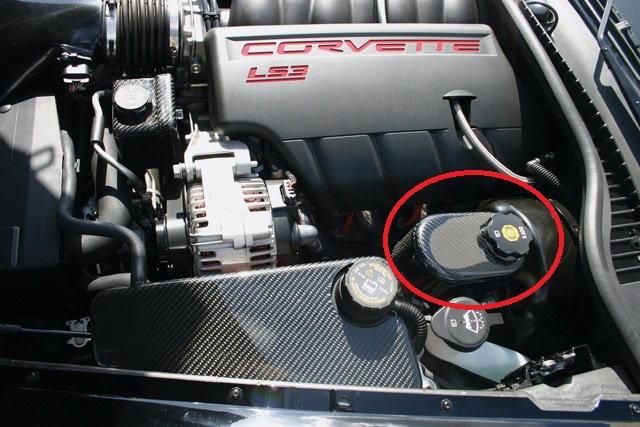
Step 2 – Check the fluid in the master cylinder
Caliper decompression is necessary and it will force brake fluid back into the master cylinder. Account for this by either removing some fluid (if necessary) or securing shop rags around the master cylinder for potential overflow. Leave the cover off the master cylinder so that you will not be working against the pressure of a closed system.
Step 3 – Loosen the caliper bolts
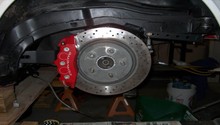
The caliper is mounted to the carrier via two 22mm bolts on the backside of the hub. These are large bolts and on there quite tight (70 ft./lb.) so a larger ratchet, or breaker bar would be a good idea here. Remove these two bolts and you should be able to wiggle the caliper off the rotor. Mind your brake lines, and don't pull too hard! With the caliper free, there is nothing securing the rotor to the hub, so if it feels like it's going to slide off, just remove it and set it aside for now.
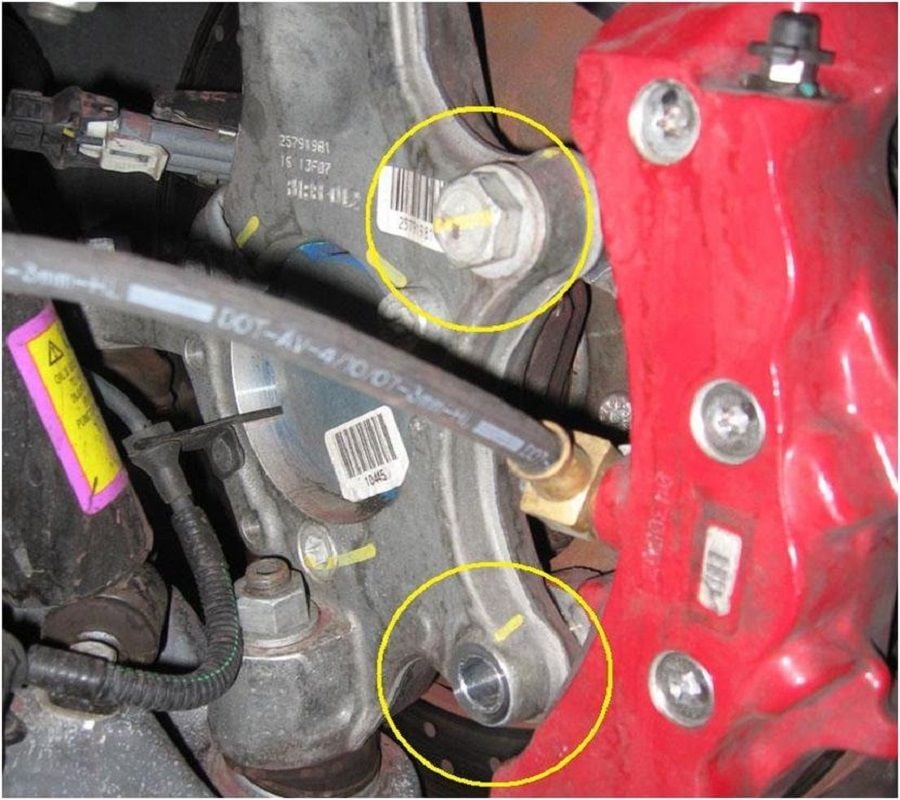
Figure 3. Location of caliper bolts on backside of hub. 
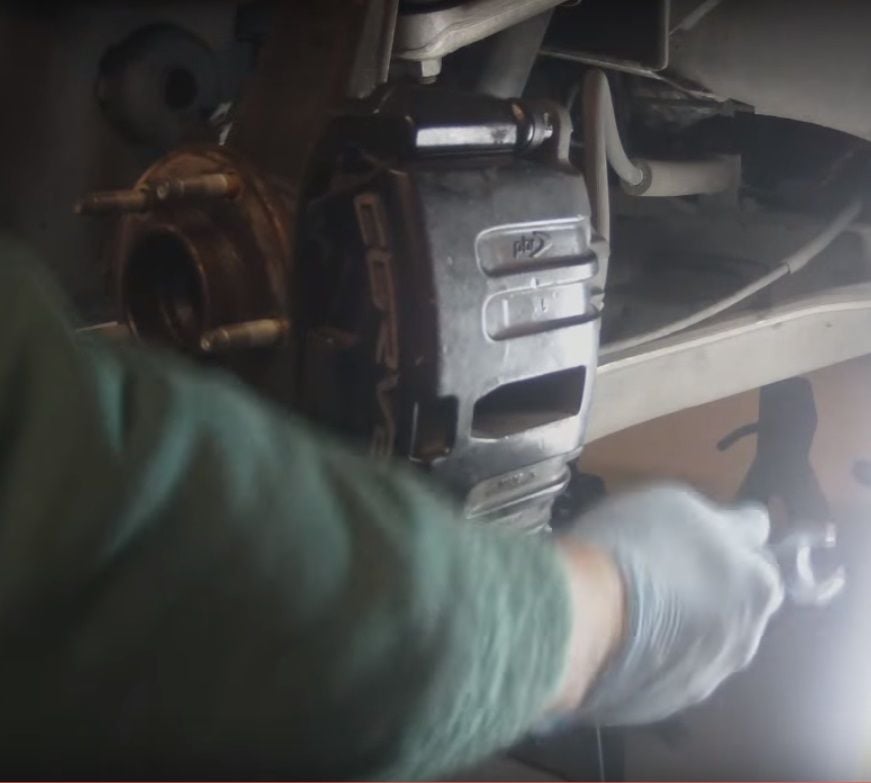
Figure 4. Wiggle caliper off rotor, mind your brake lines!
Step 4 – Compress the pistons
The standard C6 calipers utilize a two-piston design, with both pistons being on the hub-side of the caliper, as opposed to one piston on each side. This is a bit less efficient for extreme performance situation, but it is easy to service! The brake pads should now be free to be removed. Remove the outer pad, and leave the inside pad intact. As brake pads wear, the brake caliper pistons extend further out to keep pressure against the pads the rotors. New pads are much thicker, and will not all fit in the caliper along with the rotor without compressing those pistons. Use a C-clamp and press against the inside brake pad and the outside of the caliper. Exerting this pressure on the pad will compress the pistons simultaneously, as opposed to trying to compress one at a time, which could damage the calipers if done incorrectly. Tighten the clamp slowly until the two pistons are compressed just short of all the way in. Compressing the pistons will allow more room for the new, thick pads to fit around the rotor.

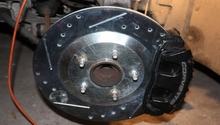
Figure 5. Remove the outer brake pad. 
Figure 6. Use a C-clamp against the inside pad to compress the caliper pistons.
Warning
Do not let the caliper hang and create tension on the brake line. This could damage the brake line and cause premature failure. Either secure the caliper using wire or rope to hang without tension, or rest it on a box/crate placed under the car.
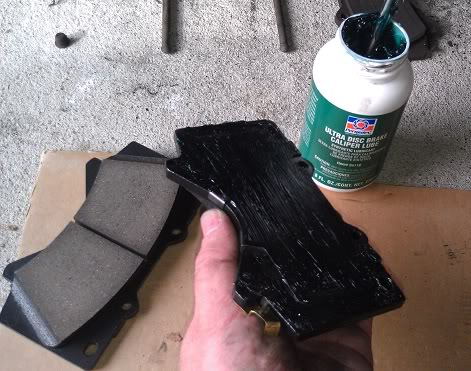
Step 5 – Clean and apply lube
At this point, inspect all brake parts and use brake cleaner to clean the system of brake dust and debris. Before installing the new the pads, apply brake lube (dry film) to the the backing plate of the new pads.
Warning
Do not allow lubricant to contact the rotor or face of the pads. This is important as friction creates stopping power and lubricant will decrease friction. Also, do not overdo it as excess lubricant may drip onto those parts.
Step 6 – Install the new pads and place the caliper in place
Make sure that the friction side of the new pads faces the rotor, both inboard and outboard. Make sure to position the pad wear sensor, located on the inboard pad, so that it is in the trailing position as the brake pad wears and moves forward toward the rotor.
Slide the caliper, with pads around the rotor. If you didn't compress the pistons enough, this will prove difficult. If you need to further compress the pistons, utilize the same C-clamp method and then try again. With the caliper secured around the rotor, reconnect the two large caliper-carrier bolts to approximately 70 ft./lbs., or "pretty snug," and you should be done.
Step 7 – Repeat this procedure on the other side
Repeat the process for the other side completing axle set. Check the master cylinder as the fluid level may have changed. As brake pads wear, the brake fluid level may appear lower, as the caliper pistons are pushed further out. Fresh brake pads keep the pistons from traveling as far, which tends to push the brake fluid back into the reservoir, raising the level.
Step 8 – Bleed the brakes (optional)
Although pad replacement does not necessarily require that you bleed the brakes, opening the master cylinder and decompressing the pistons may have introduced air into the system. With the wheels off, it is easy and recommended. Begin with the highest bleeder valve as most air will be at the top of the caliper.

[Related Article - How to Bleed Brake Fluid - CorvetteForum.com]
Step 9 – Re-install the wheels and set the brakes
Mount wheels and lower the car to the ground and tighten all lug nuts.
With the ignition in the off position, slowly depress the brake pedal about 2/3 of its full movement and release. Wait 10 to 15 seconds and repeat until the pedal feels firm. Upon start, take all necessary precautions, drive in reverse and apply the brake pedal firmly. Your brakes will now seat, accounting for the thickness of the new pads.
Featured Video: How to Change Disc Brake Pads on a C6 Corvette
Related Discussion
-
How to Remove/Replace Front Brake Pads - Corvetteforum.com