C6/C7 Corvette: How to Replace Rear Brake Pads
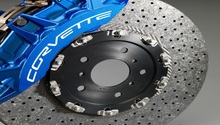
When you own a strong car like the Corvette, you need strong brakes. Here's how to replace the rear brake pads yourself.
This article applies to the C6 Corvette (2005-2013), and C7 Corvette (2014-2015).
A brake pad's life depends on driving conditions, driving habits, and pad composition. Not all brake pads have wear indicators, but the OEM C6 and C7 pads do have built-in wear indicators, which will create a high pitch noise to indicate the pads are worn. Some driving conditions and weather can cause brake squeal; however, this doesn't necessarily mean that something is wrong, but frequent brake noise means that your pads need to be replaced.
Front pads will wear sooner than rear pads because they account for 60% to 70% of the braking responsibility, but you cannot discount the importance of maximum rear wheel braking. If you have already replaced front brake pads, it shouldn't be long before you start thinking about replacing your rear brake pads as well. Brake pads should always be replaced as complete axle sets.

Materials Needed
- Jack and jack stands
- C-clamp or caliper reset tool
- 18mm and 15mm wrench and/or socket
- Brake cleaner, lube and fluid
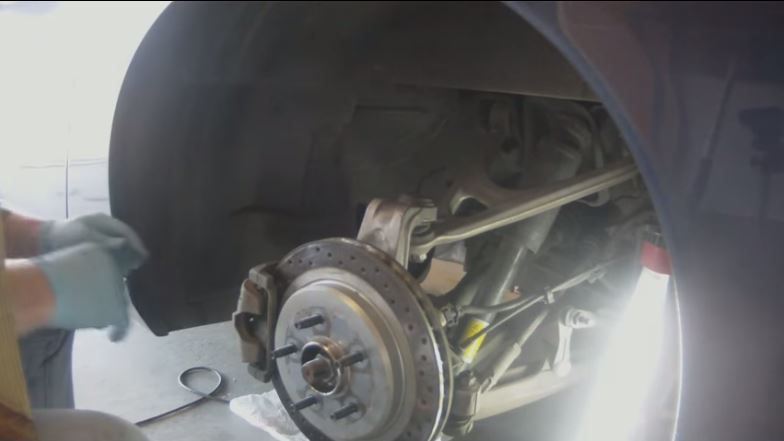
Step 1 – Chock the front tires and jack up the back
With the wheels still resting on the ground and giving you resistance, loosen all lug nuts slightly. Then raise the rear end and support both sides with jack stands. Now you can remove lug nuts and wheels.
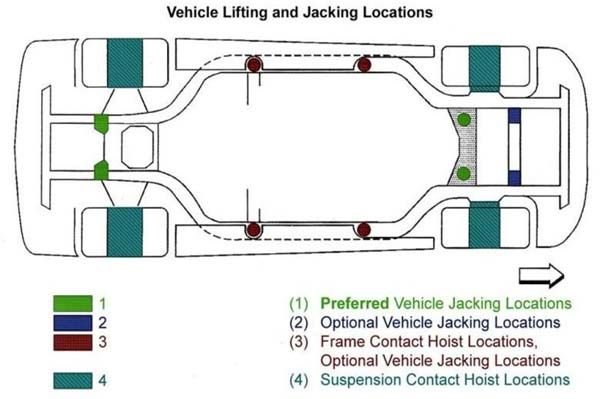
(Related Article: How to Jack Up Your Vette - CorvetteForum.com)
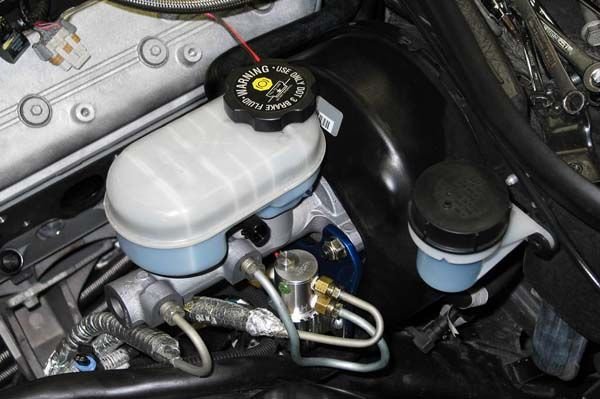
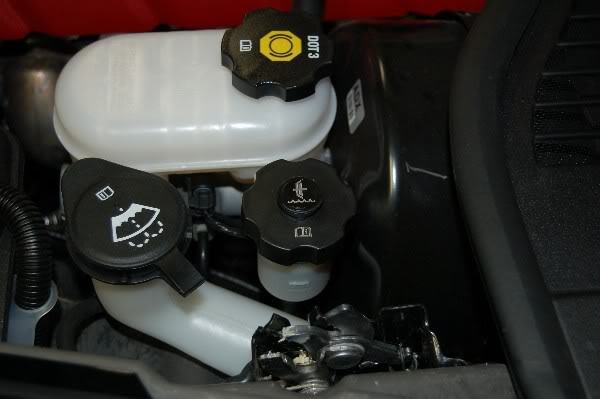
Step 2 – Check the fluid in the master cylinder
Caliper decompression is necessary and it will force brake fluid back into the master cylinder, so either remove some fluid (if necessary) or secure shop rags around the master cylinder for potential overflow. Leave the cover off the master cylinder, so that you will not be working against the pressure of a closed system.
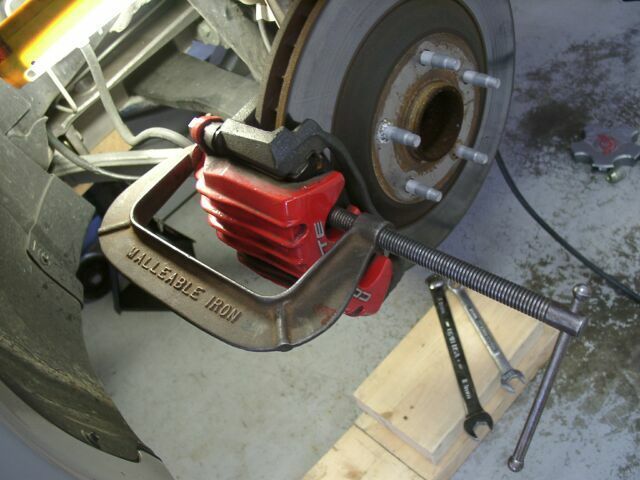
Step 3 – Loosen bolts and compress pistons
Using 15mm and 18mm wrenches or sockets, loosen the caliper guide pin bolts located on the inboard side of the caliper.
Since the caliper position adjusts as the pads wear, they will need to be decompressed to allow for the space necessary for the new thicker pad.
- To compress pistons before removing caliper, place a large C-clamp over the caliper body and center it, so that the force is evenly distributed. Use an old pad or wood block, so you don't damage the caliper and it will help distribute the force. Slowly tighten the clamp, so that the pistons are pressed back into the caliper bores. Once the pads are free from the rotor, completely remove the guide pin bolts and remove the caliper. You may find that you can remove the old pads without removing the caliper, but it is suggested removing the caliper to inspect all parts and prepare for proper re-installation.
- To decompress the pistons after removing the caliper, completely remove the guide pin bolts. Pivot the caliper to remove it from the rotor. Use a brake reset tool to decompress the caliper piston into the caliper bores. This tool is easy to use and is adjustable for all caliper/piston sizes and made so that you will not damage the caliper.
Pro Tips
- Do not let the caliper hang because it creates tension on the brake line. You can either secure the caliper using a wire or rope to hang without tension or rest it on a box/crate under the car.
- A brake reset tool is free to rent for a day at most major auto stores like Autozone.
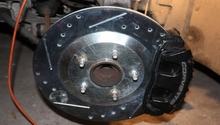
Step 4 – Remove the old pads
Remove spring or retainer and the old pads from the caliper by simply pulling them out. Make note of the location of the pads in regards to the retainer.
Pro Tip
Taking a picture with your cell phone is a great way to document components and their positions to insure proper re-installation.
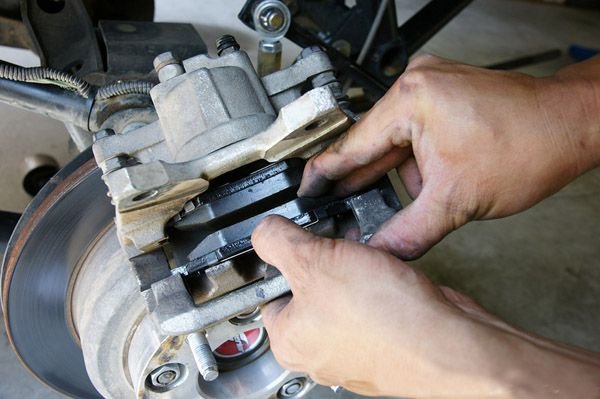
Step 5 – Install the new pads and retainer
At this point, inspect all brake parts and use brake cleaner to clean the system of dust or debris. Before installing the new the pads, apply brake lube (dry film) to the the backing plate of the new pads.
Mount the new retainer and pads to the caliper. Make sure that the friction side of the new pads faces the rotor (both inboard and outboard). Make sure to position the pad wear sensor, located on the inboard pad, so that it is in the trailing position as the brake pad wears and moves forward toward the rotor.
Pro Tip
Do not allow lubricant to contact the rotor or face of the pads. This is important as friction creates stopping power and lubricant will decrease friction. Also, do not overdo it as excess lubricant may drip onto those parts.
Step 6 – Install the caliper in place
Guide the caliper assembly over the rotor. At this point, you may find that you have to decompress the caliper piston further to allow for the thicker new pads. Do this using the C-clamp method (taking precaution not to damage the caliper) or use the reset tool. Attach the brake caliper guide pin bolts and tighten.

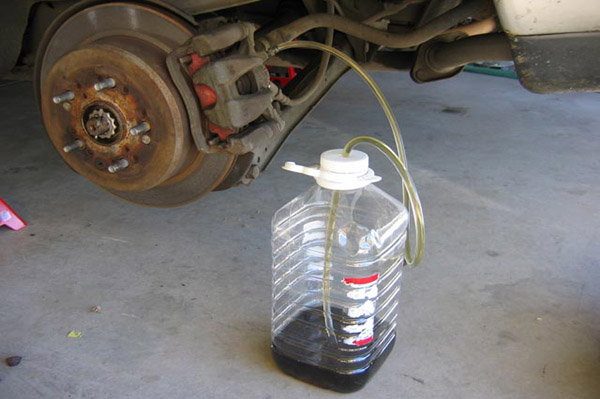
Step 7 – Bleed the brakes (optional)
Although pad replacement does not require to bleed the brakes, opening the master cylinder and decompressing the pistons may have introduced air into the system. Air in the braking system could affect the brakes' performance and the pedal feel. To bleed the brakes, it is recommended and easier to do with the wheels off. Begin with the highest bleeder valve because most of the air will be at the top of the caliper.
Step 8 – Fill with brake fluid
Fill the brake reservoir with brake fluid until the maximum. Check the master cylinder and fill to the correct level if necessary.
Step 9 – Set the brakes
Mount the wheels, lower the car to the ground, and tighten all lug nuts.
With the ignition in the off position, slowly depress the brake pedal about 2/3 of its full movement and release. Wait 10 to 15 seconds and repeat until the pedal feels firm. Upon starting, carefully drive in reverse and apply the brake pedal firmly. Your brakes will now set, accounting for the thickness of the new pads.
Featured Video: C6 Corvette Rear Brake Service
Related Discussion
- How to Remove/Replace Rear Brake Pads - CorvetteForum.com