C6 Corvette: How to Repair Loose Gas Cap Code
Warning lights are never fun. The "check gas cap" light can be especially annoying if you know the gas cap is closed tightly. This article will help you diagnose and fix one of the most common causes for this problem.
This article applies to the Corvette C6 (2005-2013).
So, you do as you're told: stop and check the gas cap. It looks and feels nice and tight, but the light still shines, so you replace the gas cap just in case. The light still shines on. It could be something different than the gas cap, like the fuel vent solenoid, which is part of your Corvette's emission-control system. If you have the proper equipment that enables you to work under the car safely, this is an easy part to change out. However, keep in mind that the warranty on many emission system parts often goes well beyond the basic new car warranty. Check with your dealer to be sure.

Materials Needed
- OBD code reader
- Needle-nose pliers
Step 1 – Use a code reader
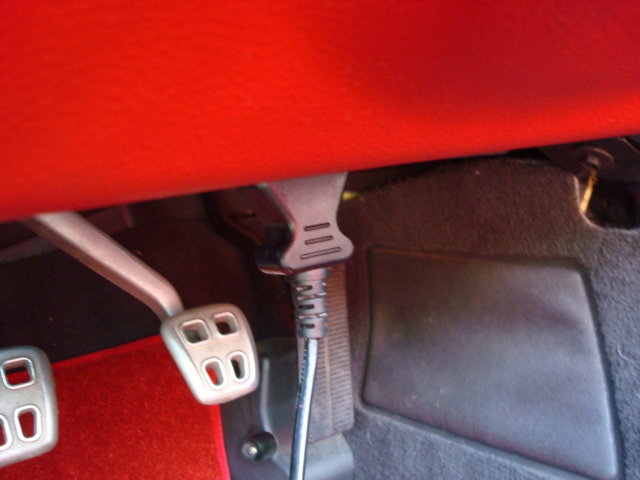
Start by making sure this is the part that's causing the problem. Plug your OBD code reader into the jack under the dash on the driver's side (Figure 1). If you don't have a code reader, they're about $50 at any auto parts store, or you might be able to borrow one from Autozone.
Following the instructions that came with the tool, read the codes. A P0449 code indicates a problem in the evaporative emission-control system fuel vent valve/solenoid circuit—the part that's going to be replaced. You may also see a P0455 code that indicates a leak in the evaporating emission-control system, almost certainly the result of a faulty fuel vent valve solenoid.
Step 2 – Buy the part
Purchase a new fuel vent solenoid from your local Chevy dealer for about $25.
Pro Tip
Pick up a new wiring harness for the fuel vent solenoid while you’re at the dealer. GM made two versions of the part, with differently shaped power connections. The wiring harness costs about $30, and if you don’t need it to make everything fit, you can take it back.
Step 3 – Raise the car
Jack up the rear of the car and put jack stands in place.

Step 4 – Remove the right rear tire and locate the fuel vent solenoid
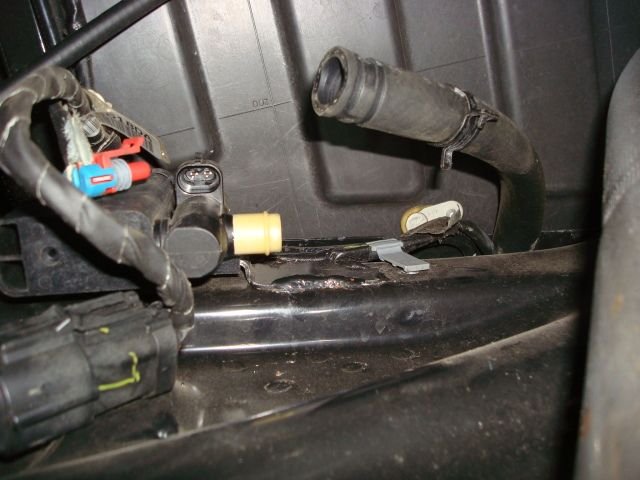
Remove the right rear tire to give yourself some room to slide under the car and access the part. The fuel vent solenoid is located on the passenger side, near the top of the gas tank and above the exhaust pipe, where it curves up and over the rear axle, just behind the passenger-side muffler.

Step 5 – Remove the vent hose
Using your pliers, open the spring clamp and remove the vent hose from the solenoid assembly.

Step 6 – Unplug the wires
Unplug the wiring harness from the solenoid.
Step 7 – Remove the solenoid
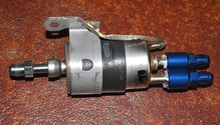
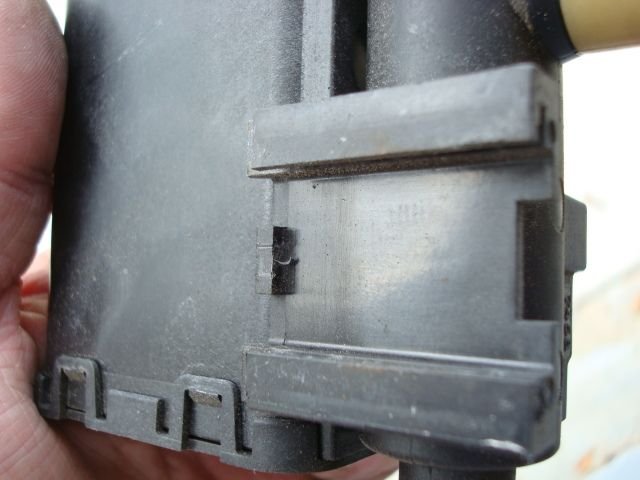
Lift or pull up on the side of the solenoid assembly toward the front of the car to detach it from the bracket that holds it in place, and slide it toward the rear of the car to remove. You may have to do a bit of wiggling to work it free of the bracket. Figure 6 shows the back of the solenoid so you can see how it attaches to the bracket.
Step 8 – Install the new solenoid
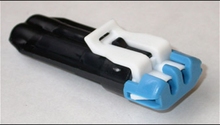
Install the new vent solenoid by placing it on the bracket and sliding it toward the front of the car until you hear it click into place. Plug the wiring harness back into the solenoid and reconnect the vent hose (Figure 7). As mentioned in the "Pro Tip" above, there are two versions of the solenoid with slight differences in the shape of the power connection (Figure 8), so you may have the replace the wiring harness as well.
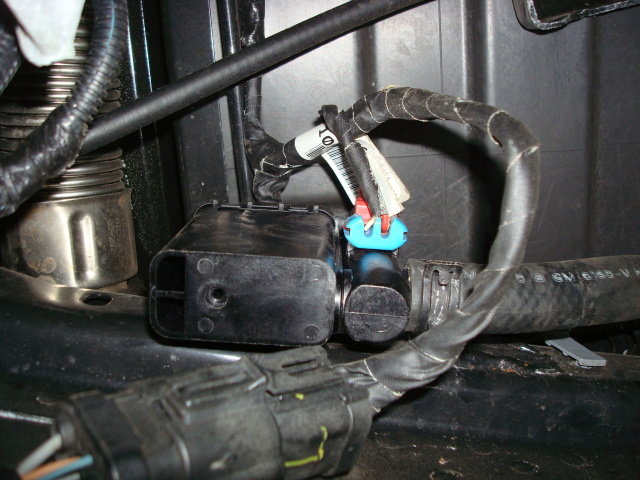
Figure 7. New solenoid assembly in place with wiring and vent hose reconnected. 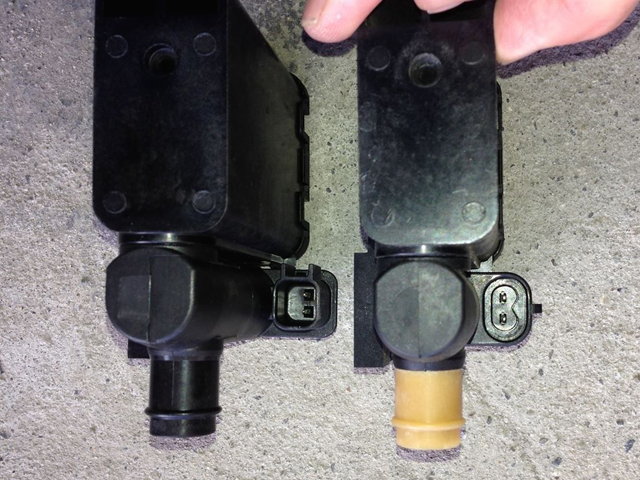
Figure 8. Two different solenoid versions.
Step 9 – Read the codes again
Now, plug the code reader in and see what comes up. If you do get a code, hit "erase" and try again. You should get a "0 codes" reading; the next time you start the car, you won't see any warning light telling you to check the gas cap.

Related Discussion
- DIY Fix for Loose Gas Cap Indicator - Corvetteforum.com