C6 Corvette: How to Replace Side Mirrors
Replacing a broken side mirror can restore the looks and safety of your Vette. It's a relatively easy repair to do yourself.
This article applies to the C6 Corvette (2005-2013).
The side mirrors on the Corvette are a big part of its slick look. More importantly, they are essential for safety. The way the driver sits in the Corvette makes it hard to see what's on either side, and the mirrors offer much needed visibility while driving. The side mirrors on a C6 Corvette can be replaced in about an hour. This is an easy repair that a beginner can complete with the right tools.

Materials Needed
- Ratchet with extension or ratcheting screwdriver
- Metric sockets and socket wrench
- T-30 Torx wrench
- Regular blade screwdriver
- Phillip screwdriver
- Small pry bar (flat, bladed, plastic pry tool)
- Gopher wire
- Electrical tape
- Wire crimper and stripper
- Needle nose pliers
- Multimeter or wire tester
- Sturdy gloves
- Safety glasses or goggles
- Utility knife
- Suction cup
- Hair dryer
- Masking tape
- Flashlight
- Cardboard
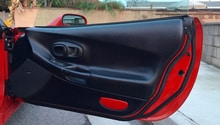
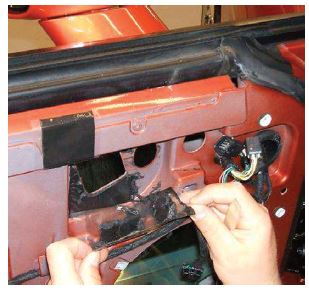
Step 1 – Remove the door panel
Open the door. Remove the small tab behind the door handle by prying it out with the flat blade screwdriver. Use the Torx wrench to remove the screws from the door.

Using a pry bar or screwdriver, disengage the door opening control (passenger side only).

Using the slots around the perimeter of the door panel, go around the entire panel by prying it loose with a pry bar.

Disconnect any wires that are behind the door by unplugging the connectors. A small screwdriver may be needed to free the tabs that hold the plugs. Slide the panel forward in order to free it from the tabs that are holding it.
Pro Tip
Use a piece of cardboard behind the pry bar when prying the panel loose from the door. This will save the paint and keep it from getting scratched or nicked.
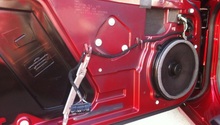
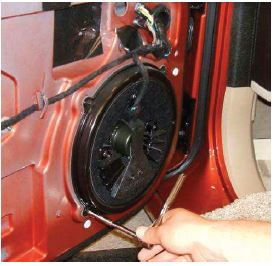
Step 2 – Remove the speaker from the door
Unbolt the speaker and unplug the wiring.
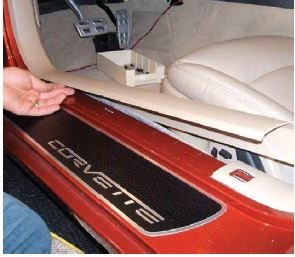
Step 3 – Remove the kick panel
Remove the kick panel to gain access to the mirror wiring. The kick panel just snaps in. Pry it loose with a pry bar or your fingers.
Step 4 – Remove the plastic water shield
Peel back the water shield.
Step 5 – Remove the mirror
Unbolt the mirror from inside the door panel.
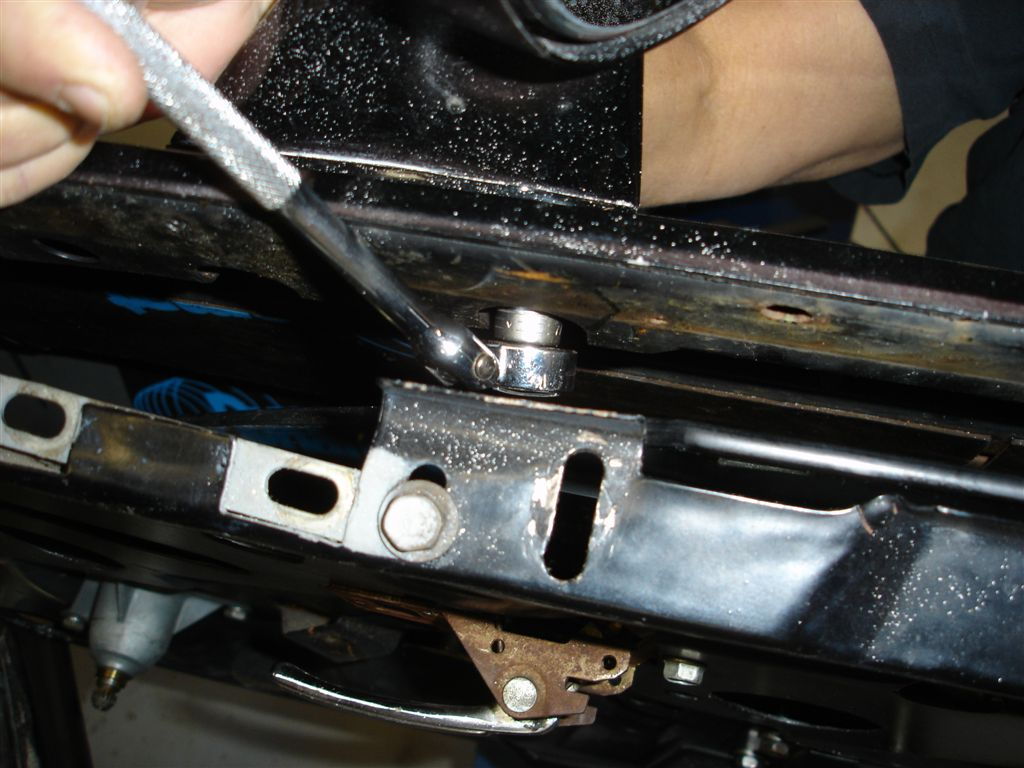
Figure 7a. Close up- unbolting the mirror. 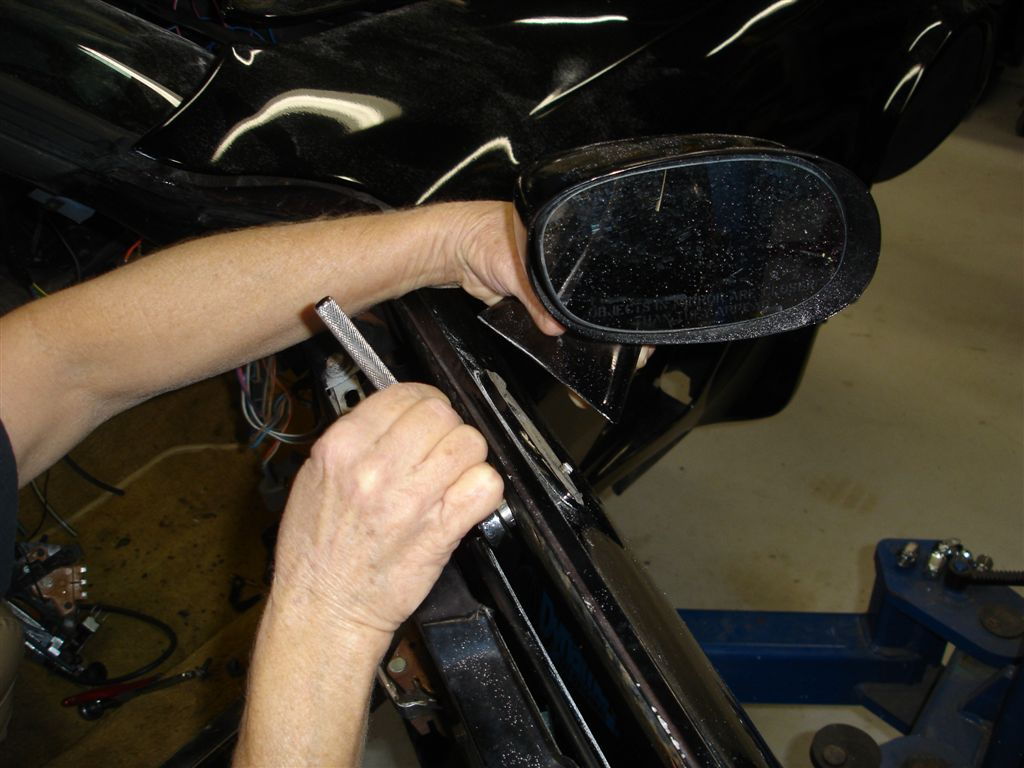
Figure 7b. Removing the mirror.
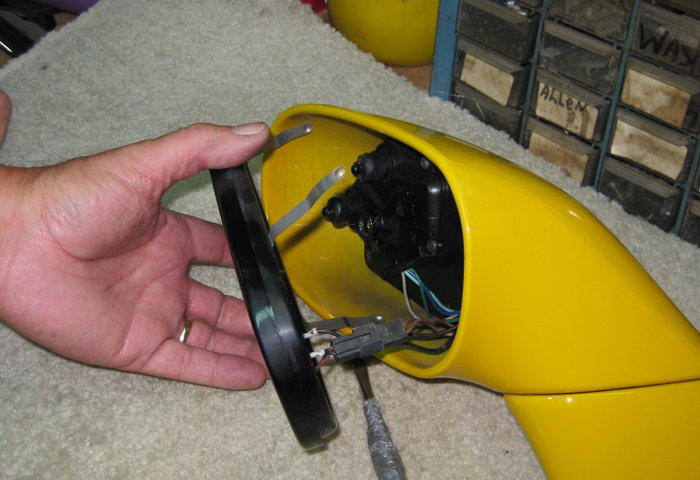
Step 6 – Remove the mirror glass
Pry the mirror glass loose. The heating/wiring element needs to be unclipped from the mirror first. Refasten this harness into the new glass. Use the suction cup to place the new mirror glass in the housing.
Step 7 – Install the new mirror
Installation is the reverse of dis-assembly. Bolt the new mirror in, replace the plastic shield, replace the kick panel, and replace the door panel.
Related Sites
- Installation Instructions for C5/C6 with Heated Mirror and LED Signal Light - MaMotorWorks.com
- Corvette Heated Outside Mirror - CorvetteMods.com
- Carbon Fiber Corvette Replacement Side Mirrors - WestCoastCorvette.com