Corvette: How to Install Intake Manifold
Upgrading your exhaust can add several horses, but if you really want to load your stables, try upgrading your intake manifold. It's easier than you might think.
This article applies to the C5 Corvette (1997-2004), C6 Corvette (2005-2013), and C7 Corvette (2014-2015).
No matter how screaming your Vette is, there is always room for more, isn't there? Upgrading your exhaust system and adding headers will beef up your ride a nice bit, but they will also lighten your wallet by a considerable amount. If you are searching for the best bang for your buck, it is hard to argue against upgrading the intake manifold. The task may sound daunting and complex, but if you break it down into stages and take your time, this job can be done relatively easy in just a few hours. A professional won't come cheap, at least not if you want a quality job done right, but you can do this job yourself and save a lot of money for an end result that is sure to make you proud. The only difficulty you'll run into is when the job is done and you feel those extra 30 horses stirring to life, you'll be itching to start your next modification and feed the disease.

Materials Needed
- Flat head screwdriver or door panel removal tool
- Special fuel line disconnect tool
- Shop rags
- Small rubber stopper or plug
- Masking tape or zip-ties
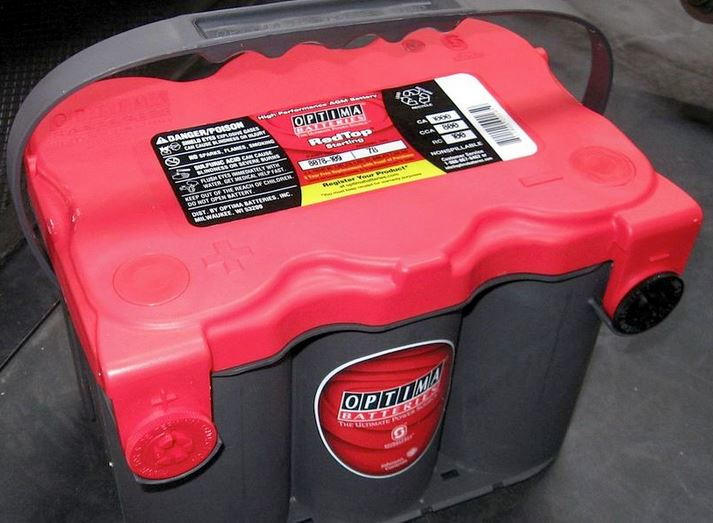
Step 1 – Disconnect the battery
Remove the negative (black) battery terminal before starting this job.
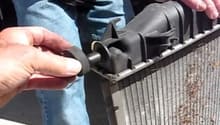
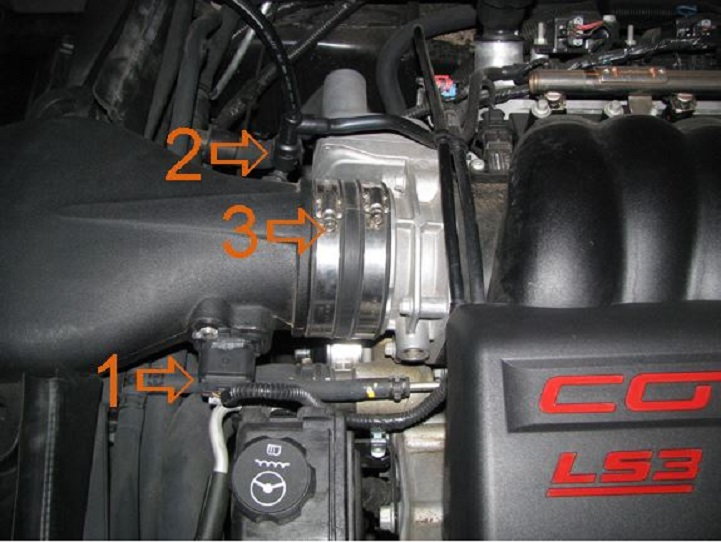
Step 2 – Remove intake tube with the mass air flow sensor
Disconnect the quick release harness at the mass flow air sensor, pull off the small hose connection, and loosen the big hose clamps.
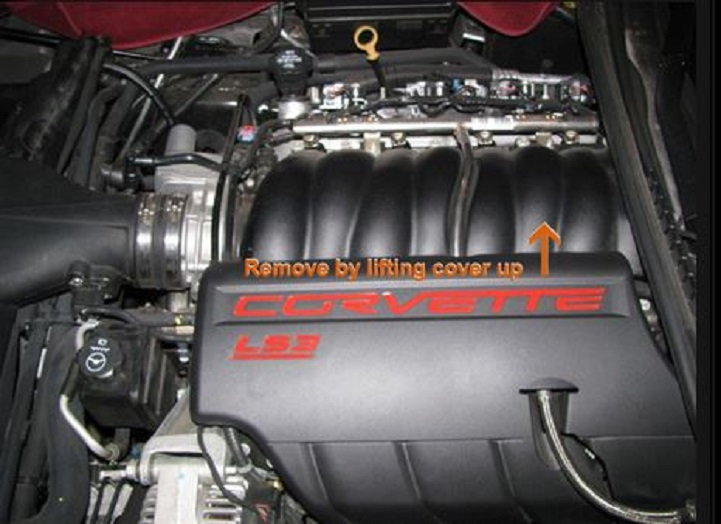
Step 3 – Remove fuel injector covers
The covers are connected to the fuel rails on top and it is only held in place by a couple of rubber connectors at the bottom. Pull up on the cover with firm pressure without yanking it out. With a little force, it should pop right up and out.
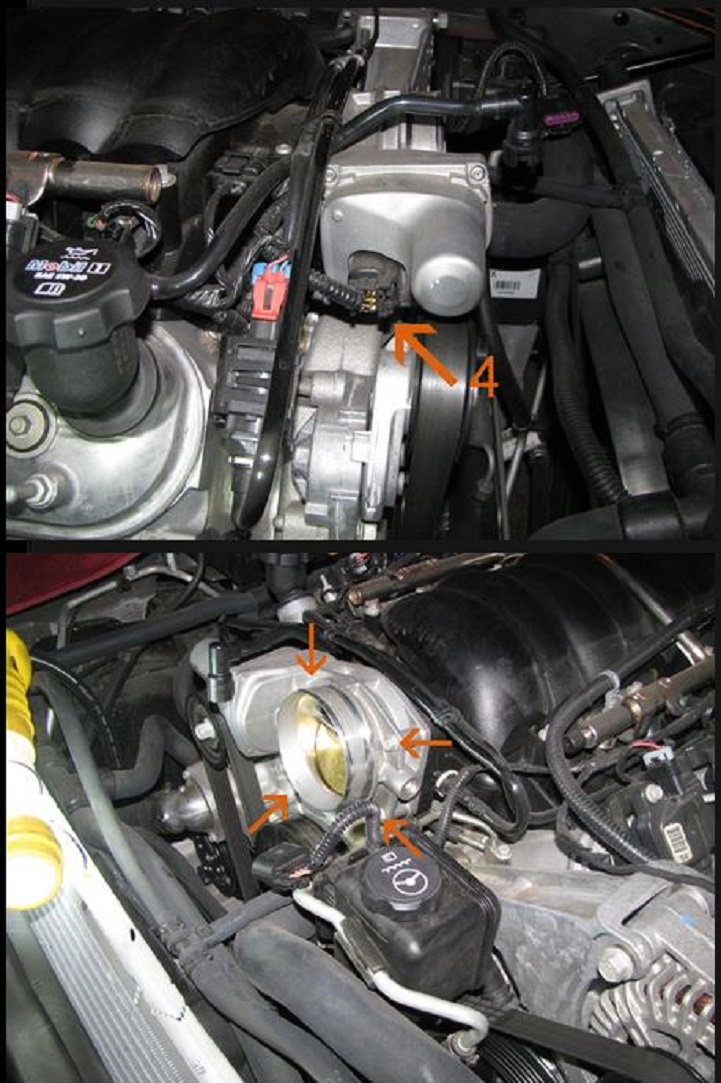
Step 4 – Remove the throttle body
Disconnect the electrical quick connect tab and set the harness to the side. Remove the four bolts that connect the face of the throttle body to the intake manifold.
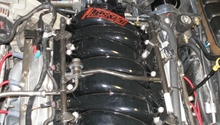
Step 5 – Disconnect the connections on the manifold
There are seven hose connections to the intake manifold: five on the front and two on the rear. Most of these are connected by white plastic pressure clips. Just push in on the white tabs simultaneously as you pull the hoses away from the manifold. One of the connections on the front is the MAP sensor, which is a quick-disconnect wiring harness that is very easy to remove.

Figure 5. Disconnect the five connections including the MAP sensor from the front of the manifold. 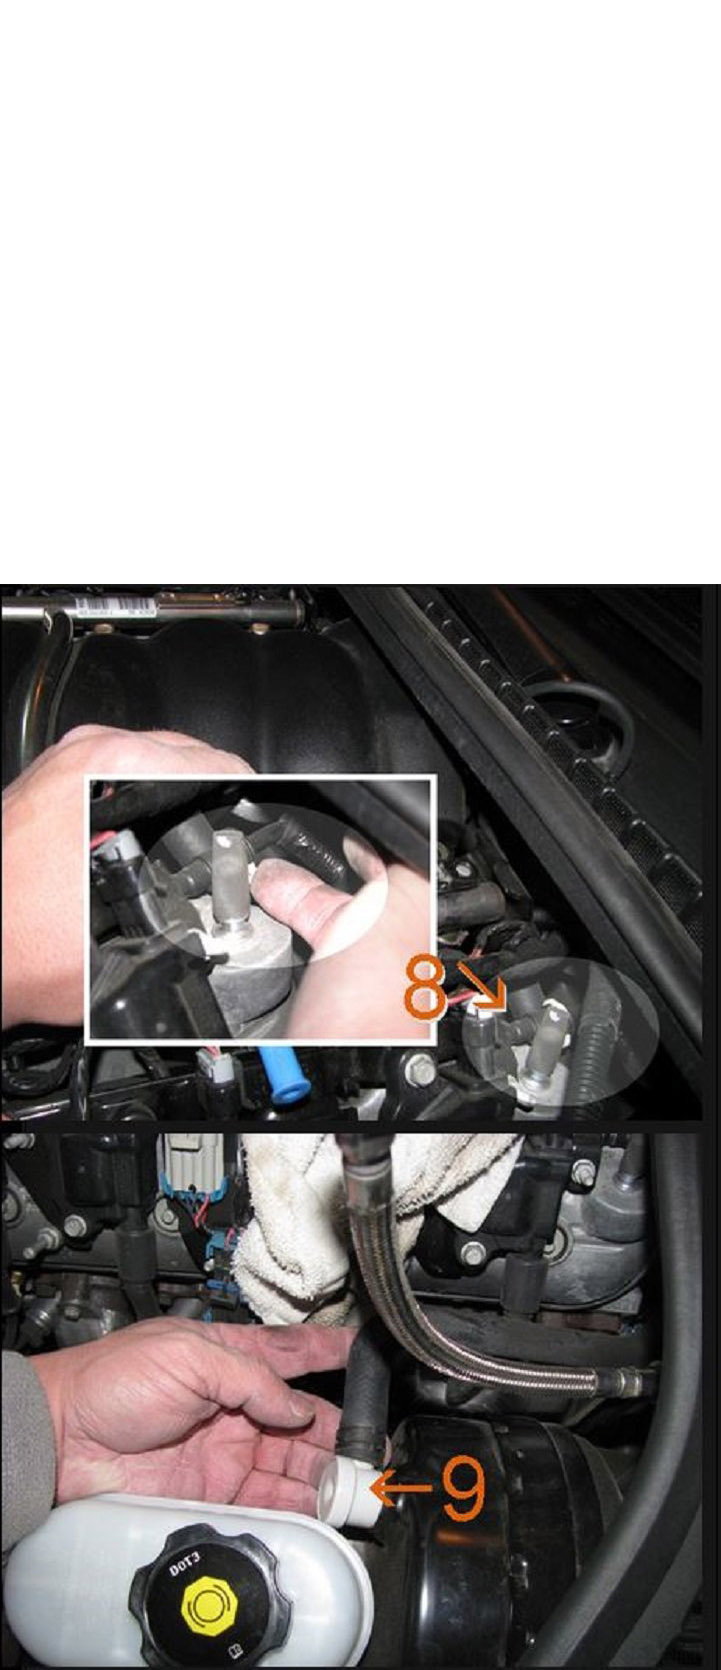
Figure 6. Disconnect the two connections from the back of the manifold.
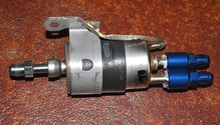
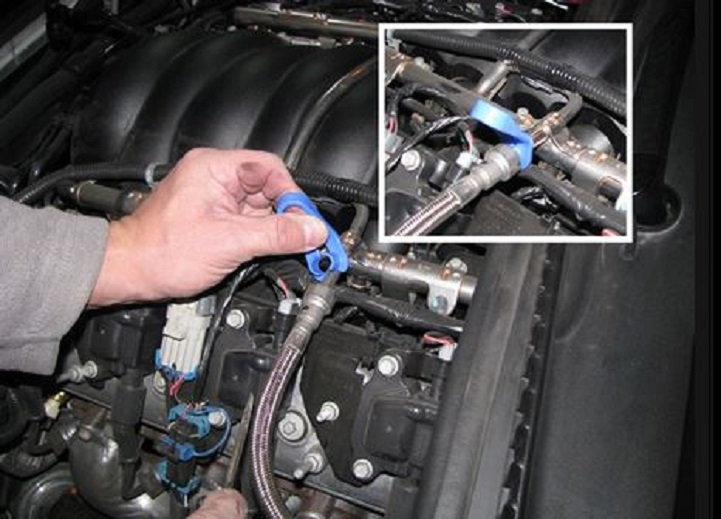
Step 6 – Disconnect the main fuel line
You will need your shop rags and the special fuel line disconnect tool for this next task. A small rubber stopper is also helpful. Find the location where the fuel line attaches to the fuel rail and remove the metal retaining clip. Place the special tool over the fuel line and pull it back towards your body. It will release the connector in the main line and pull it apart from the rail. Quickly take your shop rag and wrap it around the line. There will be some fuel line pressure released and some fuel will leak. Use the rubber stopper or plug and put it in the opening at the fuel rail to prevent any more fuel from leaking.
Step 7 – Disconnect wiring from the fuel rails
Using either a flat head screwdriver or a door panel removal tool, disconnect the wires from the fuel rails. Be careful when doing this, so you don't break any clips.

Step 8 – Disconnect the fuel injectors
The electrical connectors on each fuel injector is a simple wiring harness quick-disconnect clip. Disconnect each of these.

Step 9 – Remove the manifold bolts from heads and rails
This is the trickiest part of this whole project. Just take your time and have lots of patience. There are ten various-sized bolts that hold the manifold onto the heads as well as the fuel rails. The last two bolts are at the rear of the manifold and closest to the firewall, but cannot be removed until the manifold is pulled forward. These last two are 8mm. Use your masking tape or zip-ties to loosen these bolts and hold them up in place. Before removing the other eight bolts, because they are various sizes, be sure to note their location as well as the bracket they go with, and then remove them.

Step 10 – Remove the intake manifold and fuel rail assembly
Take extra care when removing the manifold and fuel rail assembly. Gently lift up and slightly pull it forward. At the back of the manifold, you will need to feed the brake booster hose around and over the top of the oil sending unit and its wiring harness. Be very cautious while doing this. The brake booster cable can damage the harness or the sending unit, which is a costly replacement.
Once the assembly is off, remove the fuel rail from the intake manifold by pulling up, so the injectors pop out of their seats. Finally, remove the brake booster hose, the MAP sensor, and all of the gaskets around each opening. These can be reused.

Step 11 – Install your new manifold
Reverse the steps to install the new manifold. Depending upon the brand, you will need to make sure you follow their installation instructions in regard to the torque settings as well as the order of tightening down the manifold bolts to the headers and the fuel rails. Be sure to use some motor oil to lube up the O-Rings when replacing the fuel injectors. Also, follow the manufacturer's recommended torque settings on the throttle body bolts. Double check all your connections and overall work. Then take your car for a spin.
Related Discussion, Site and Videos
- LS2 Fast 102 Install - CorvetteForum.com
- Intake Manifold Removal - PeakSpeedShop.com
- LSXr Install and Dyno Test - YouTube.com
- Intake Manifolds Explained - YouTube.com