Corvette: Why is my Vette Clunking?
Are you hearing some really bad sounds from your suspension? There may be an easy fix for that.
This article applies to the C5, C6 and C7 Corvette (1997-current).
Is a distinct, audible "ker-chunk" noise coming from the rear end of your Vette? Sometimes this noise manifests itself from the front end as well. Is the noise coming only at low speeds, in turns, going over bumps or pot holes? Is the noise happening on straight shots at various speeds? There are a myriad of reasons why you might be getting this noise, and some have very simple solutions that you can fix in a matter of minutes in your own garage. Here are five common issues that will cause the clunking systems you are experiencing.

Materials Needed
- Various sockets (with extensions) and ratchet
- Permatex
- Torque wrench
- Jack and jack stands (if necessary)
Step 1 – Check the sway bar end links
They might be loose.
The sway bar end links are probably the most common culprits to cause a clunking noise. If the noise is only happening while traversing over bumps or potholes, this is your most likely cause. Double check that they are snugged really tight, and try to tighten a little further. If the noise continues or happens while turning, continue to Step 2.
Step 2 – Check the axle nuts
The axle nuts can get loose, or may not have been torqued down properly.
The axle nuts are torque-conditioned which means they are good for only one use. They are only a few dollars each to replace, so you might want to just grab enough to replace them along with some Hi-Temp Permatex Red thread-locking agent. You don't even have to take off your wheels to check them:
- Pull the center cap in order to access the nuts from either side.
- Use a 33 mm socket and see if you can tighten them (if you can, you must replace them).
- Remove the old nuts, apply Permatex to the threads and torque down the new nuts to 140 lbs.
- Let it sit overnight so that the Permatex is dry before you test drive it.

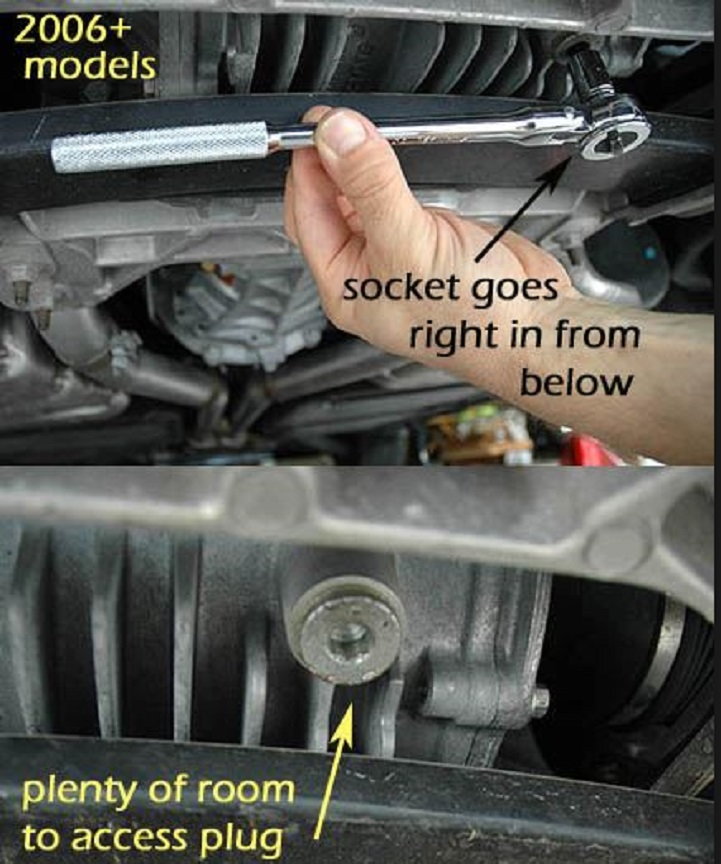
Step 3 – Check the rear differential fluid
Low differential fluid, or fluid without the proper friction modifiers, will cause a clunking and some grinding noises.
If the fluid in the differential is low, or is not the latest and greatest (with enhanced friction modifiers), the clutch pack in the differential can slip, causing a clunking or a grinding noise. Drain the differential fluid and add the latest oil on the market available. Amsoil is one popular choice among Corvette owners. The differential should hold a little over 2 quarts. After replacing, test drive making sharp left and right turns in a parking lot. The noise should have all but disappeared.
Step 4 – Check wheel bearings and half shafts
Bad wheel bearings will have a clicking sound that increases with speed, so on the highway it's hard to detect. Poorly greased or bad half shaft joints will clunk at slow speeds and in a turn.
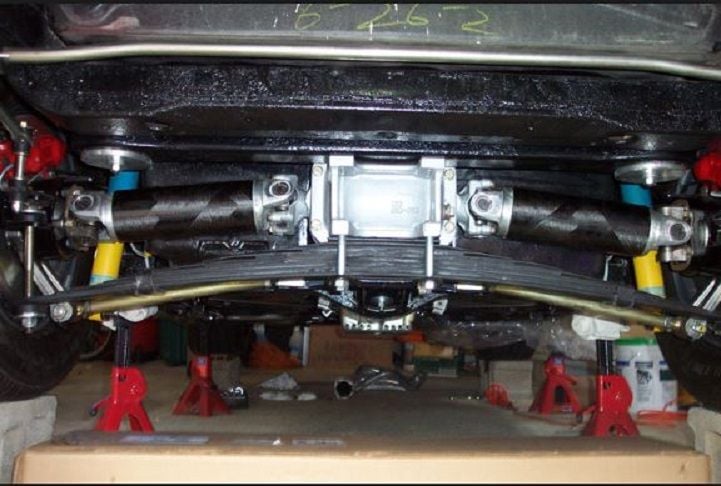
Put your Vette on jacks, grab the top and bottom of the rear wheels at the 3 and 9 o'clock positions and give them a good shaking to see if there is movement. If there is movement that you can see, your bearings are bad. These are sealed units and cannot be re-built. They will have to be replaced. OEM replacements are recommended here. If the bearings are good, check the half shaft joints. These are relatively cheap and both should be replaced. If you do have to replace the bearings, go ahead and replace these joints as well.
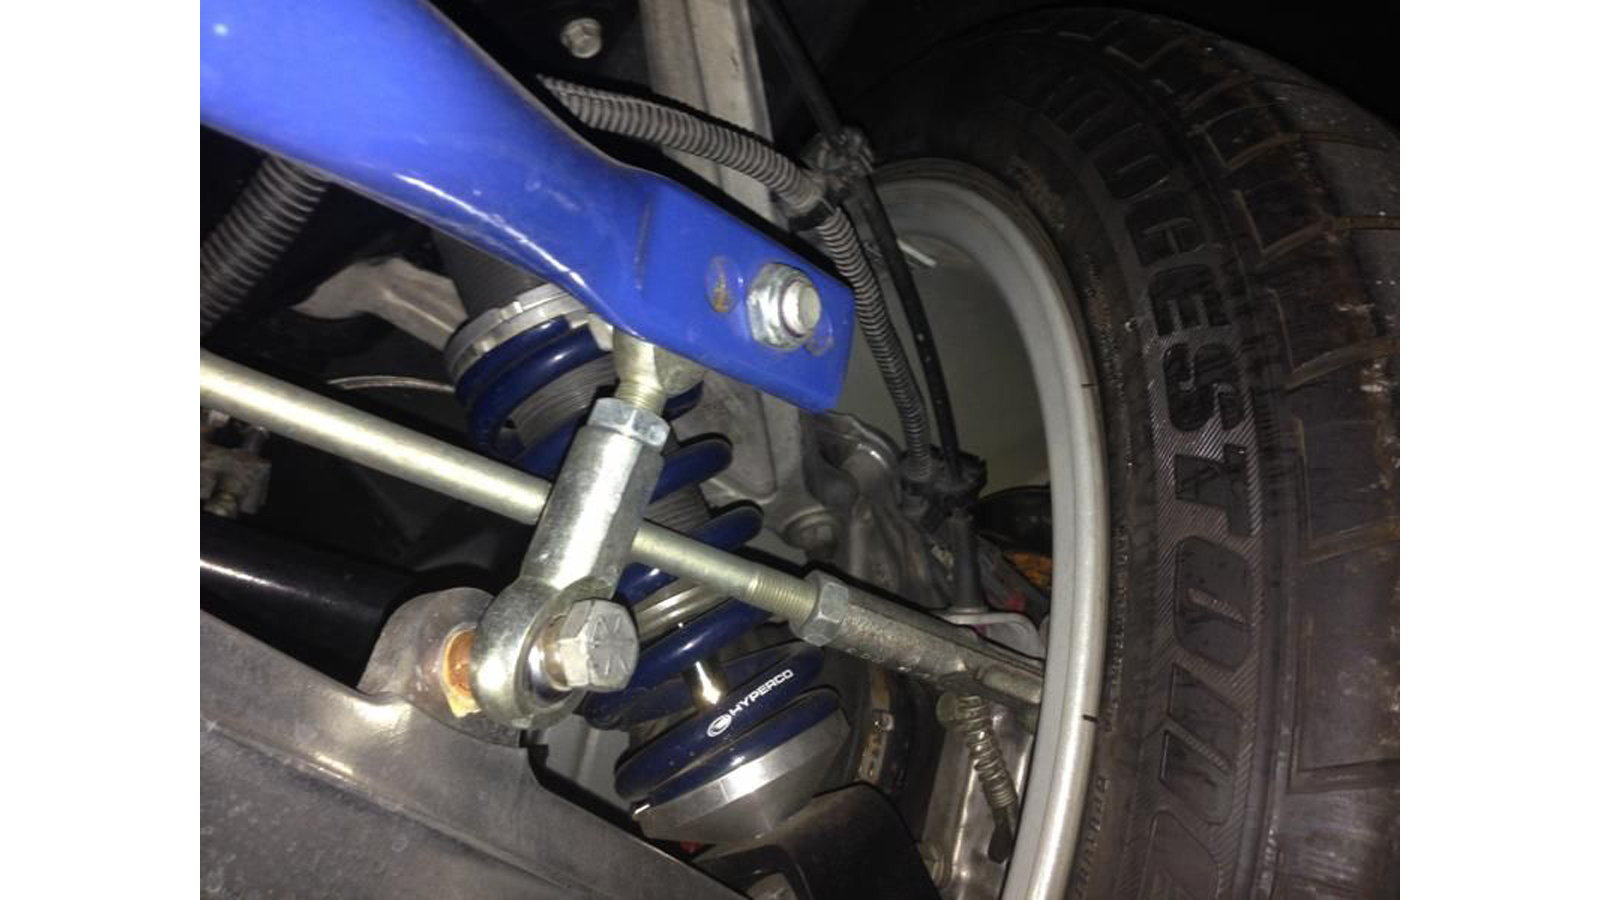
Step 5 – Inspect the suspension bushings
If the clunking noise is accompanied by a squeak when driven over anything less than a perfectly smooth road, your suspension bushings may be worn. This is more noticeable when the front sway bar bushings are worn. This is a relatively easy fix as well. The bushings can look a lot worse than they actually are. Inspect closely for metal-on-metal wear anywhere that the bushings should be protecting.

Related Discussions
- Horrible Noise - CorvetteForum.com
- Noise from Rear End - CorvetteForum.com
- Got a Head Scratcher: Clunking Noise from Rear End - CorvetteForum.com
- Suspension Clunk, End Links, Bushings Shot - CorvetteForum.com
- First C6 Owner with a Rear End Problem - CorvetteForum.com
- Do I Have a Bad Half Shaft? - CorvetteForum.com
- Rear Wheel Bearings Symptoms - CorvetteForum.com
- Bad Squeak, Front Sway Bar Bushings Bad - CorvetteForum.com