
C4 Avic install (lots of pics)
 06-12-2011, 12:27 AM
#1
Le Mans Master

Thread Starter

I was thinking about upgrading the stereo in my 1993 but I’m a complete novice when it comes to audio. As I did my research and ultimately the installation I took the following pictures and write up to document the process. Hope it helps someone! I had put up a post or two asking some audio questions, did a fair amount of reading and called on some members the vette community that I knew had audio knowledge. This research got me to a basic understanding of what I wanted to accomplish. In putting my questions out there a forum member offered me an Avic D3 for free. Thanks TIM!
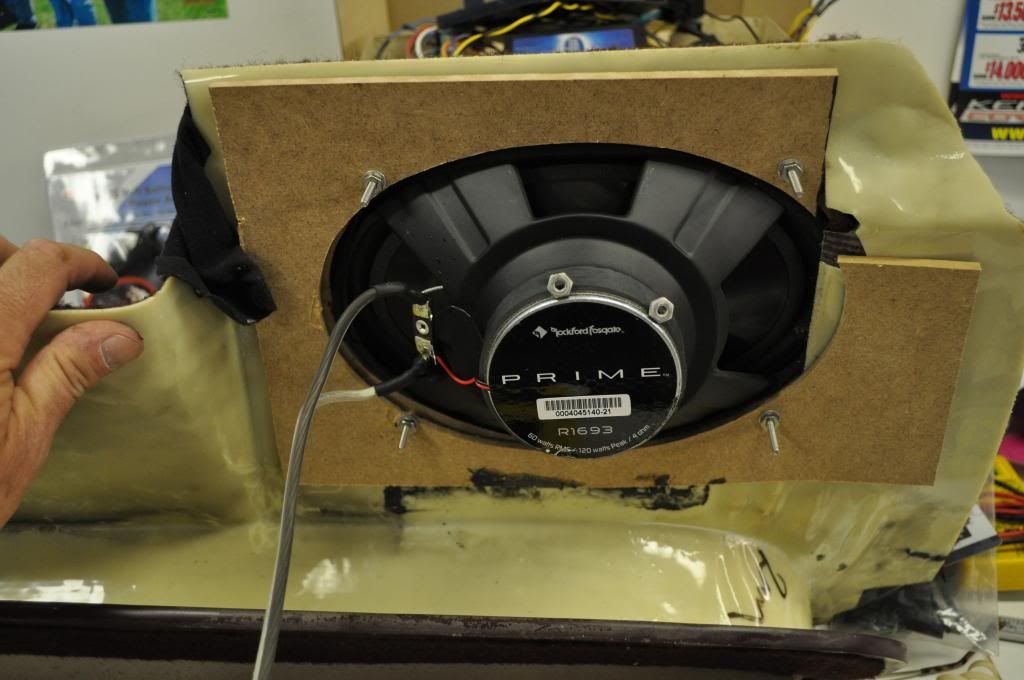
So I have a nice head unit, I decided to do 6X9 3 way speakers up front and 2 8” subs in the back. From looking at pictures of other C4 installations using 5.5” speakers, researching measurements of some 6X9s and taking apart the front speaker area to take measurements I felt I could make that work. Also my thoughts were the 3 way would give me mid and tweeter. I used the Rockford Forsgate RF R1693. Others had done 8” subs but I still checked the rear areas to make the 8” JBL GTO804 subs fit. I came across a free Alpine MRV100M for the subs. I used a Rockford Forsgate Prime R 150-2 to power the 6X9s.
Here’s the start, always disconnect the battery!
[
Original console area, I had an XM set up and a 12 disc CD changers both connected via FM modulators.
Original right side front Bose speaker.
Original left side front Bose speaker.
[
Original Bose right side rear speaker.
Original Bose left side rear speaker and 12 disc changer.
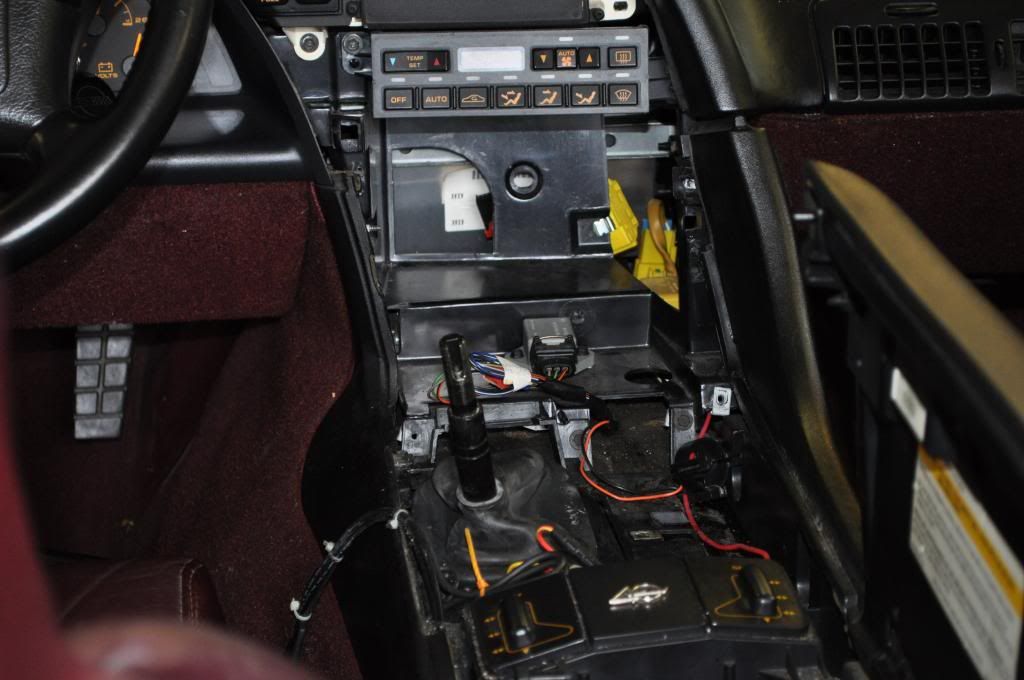
Console bezel removed.
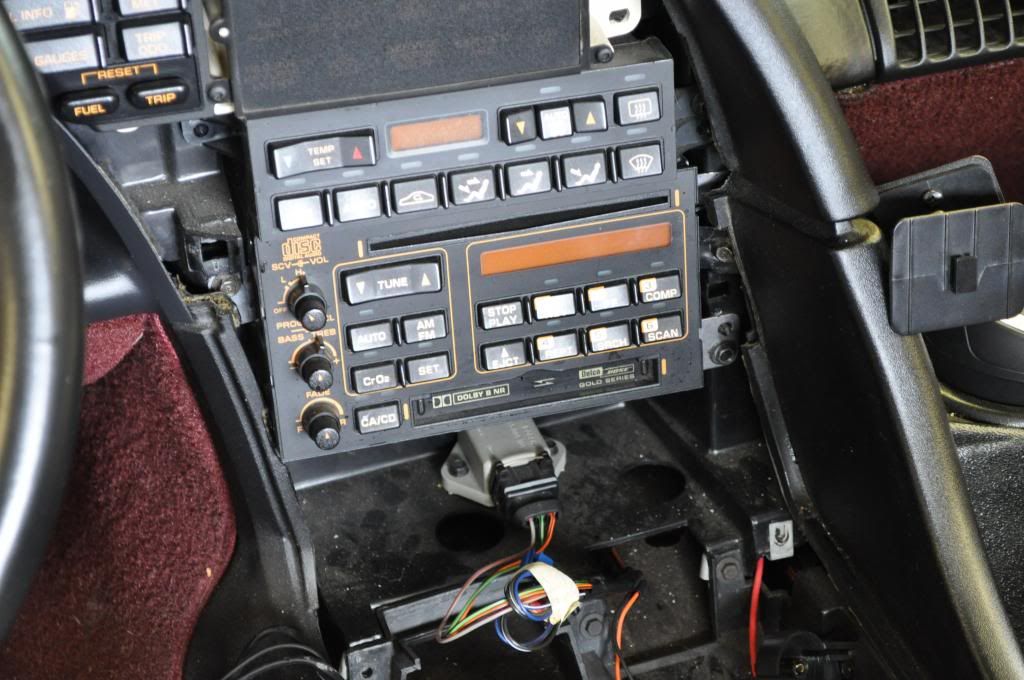
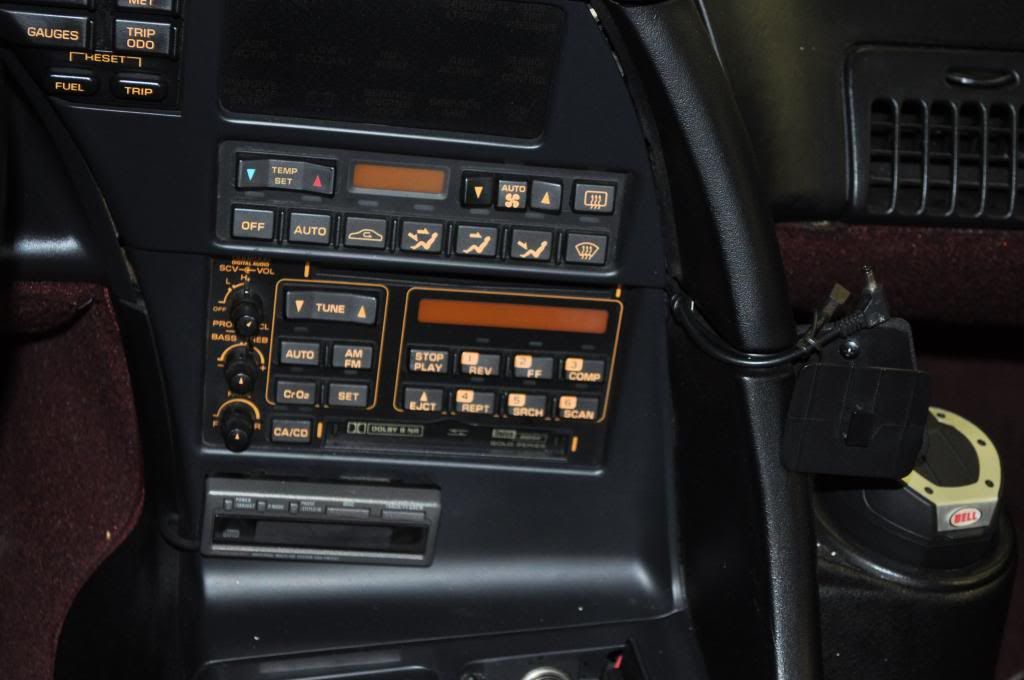
Bose head unit removed.
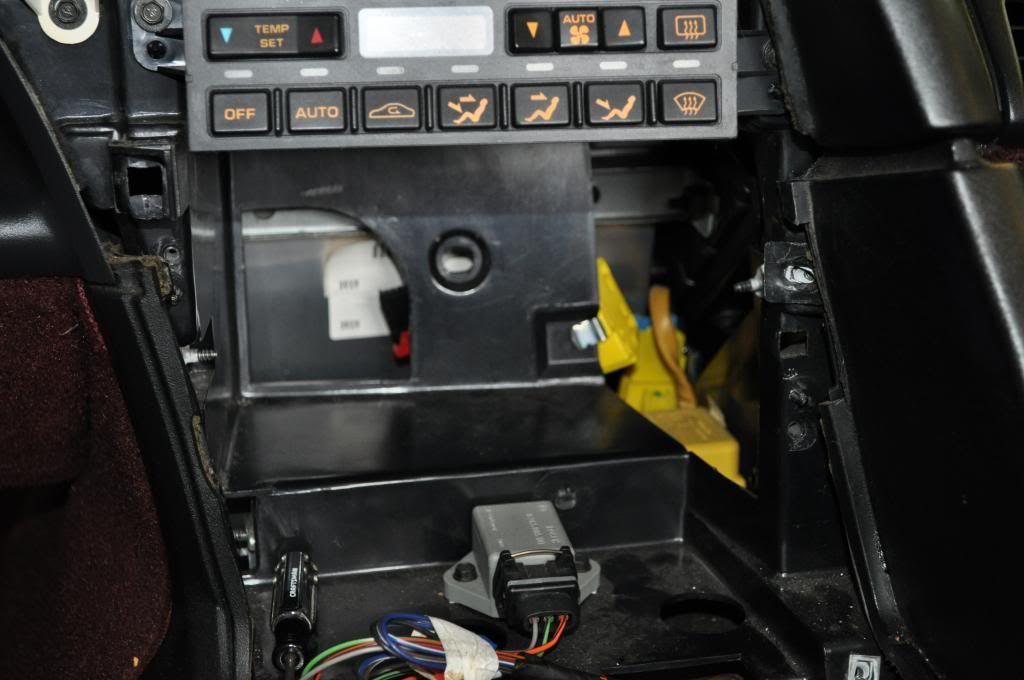
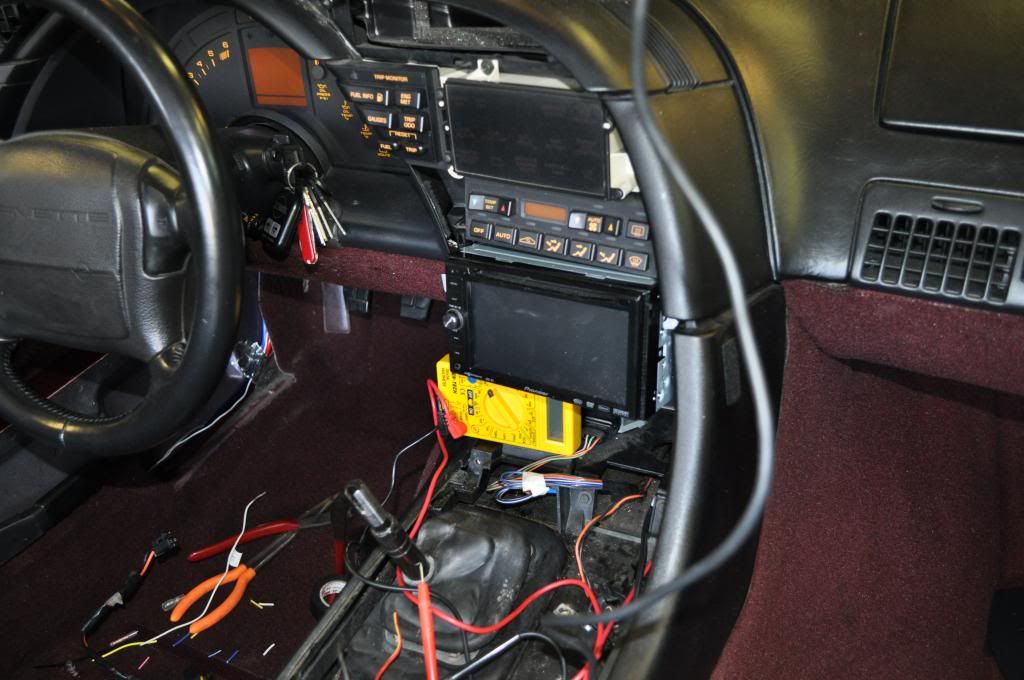
First fitment of the Avic. Sits too far out, some of the internal plastic needs to be removed.
The piece that needs to be removed.
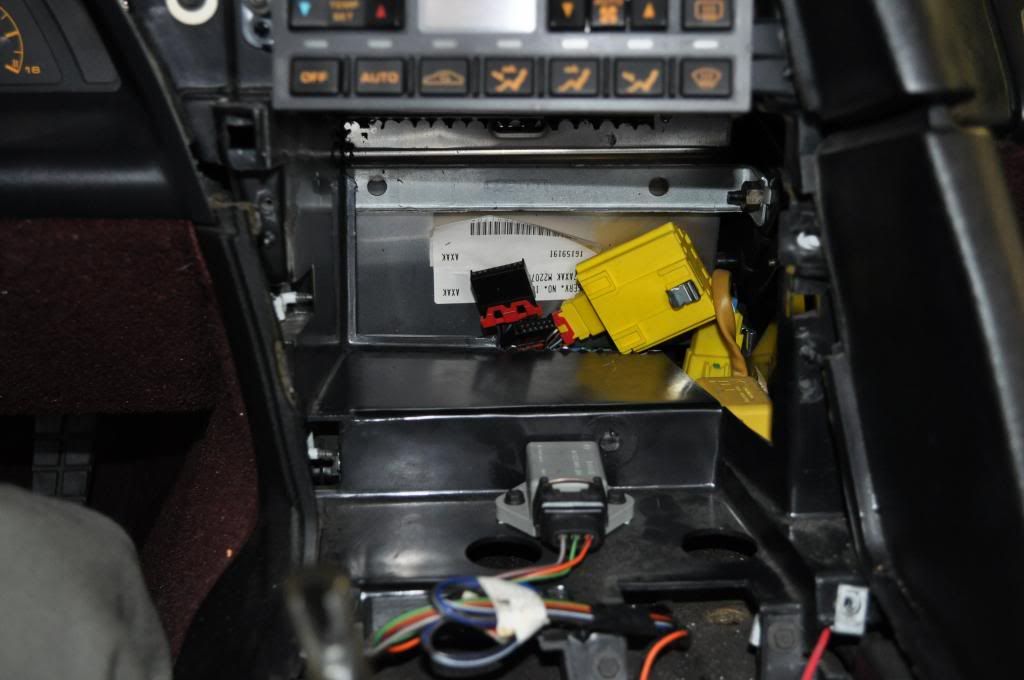
Piece of plastic is removed, I used a drill to drill holes along the edges. Be careful there are a lot of wires around that area!
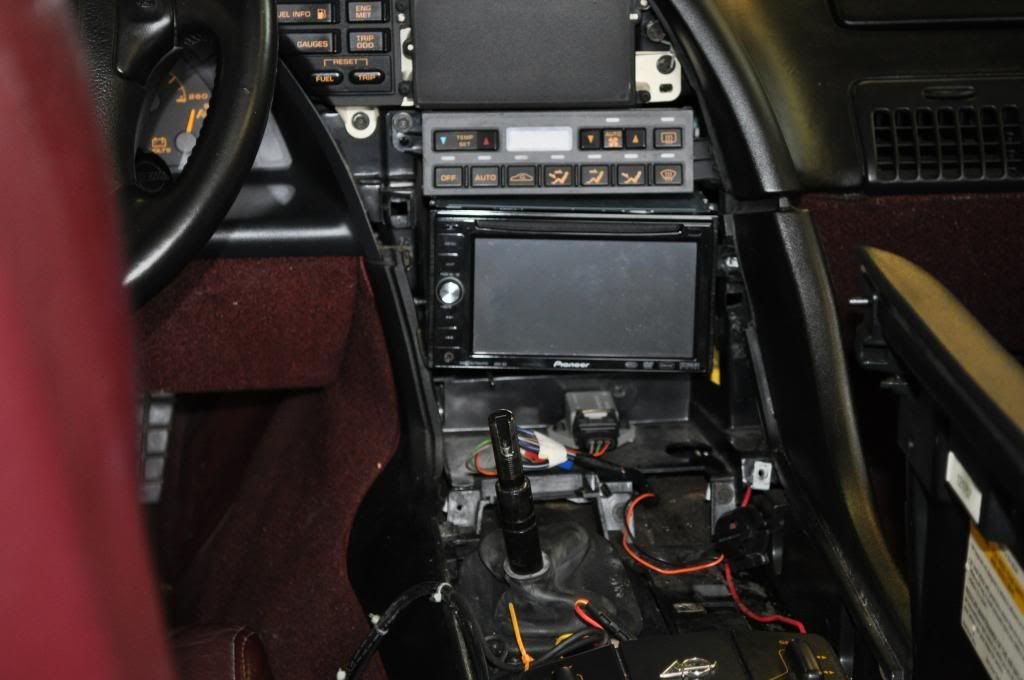
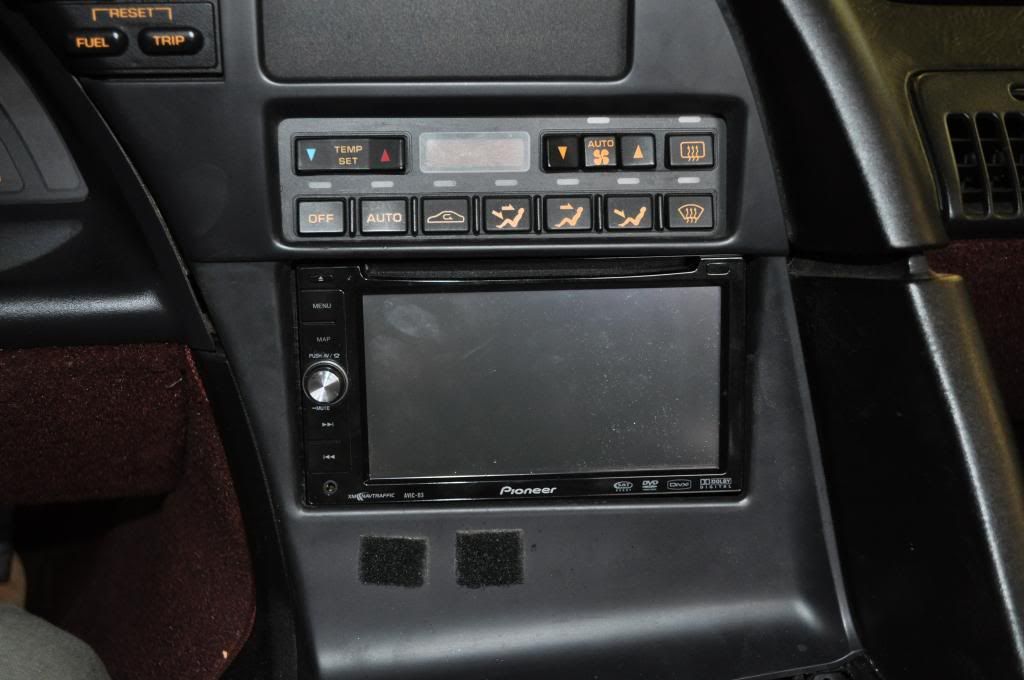
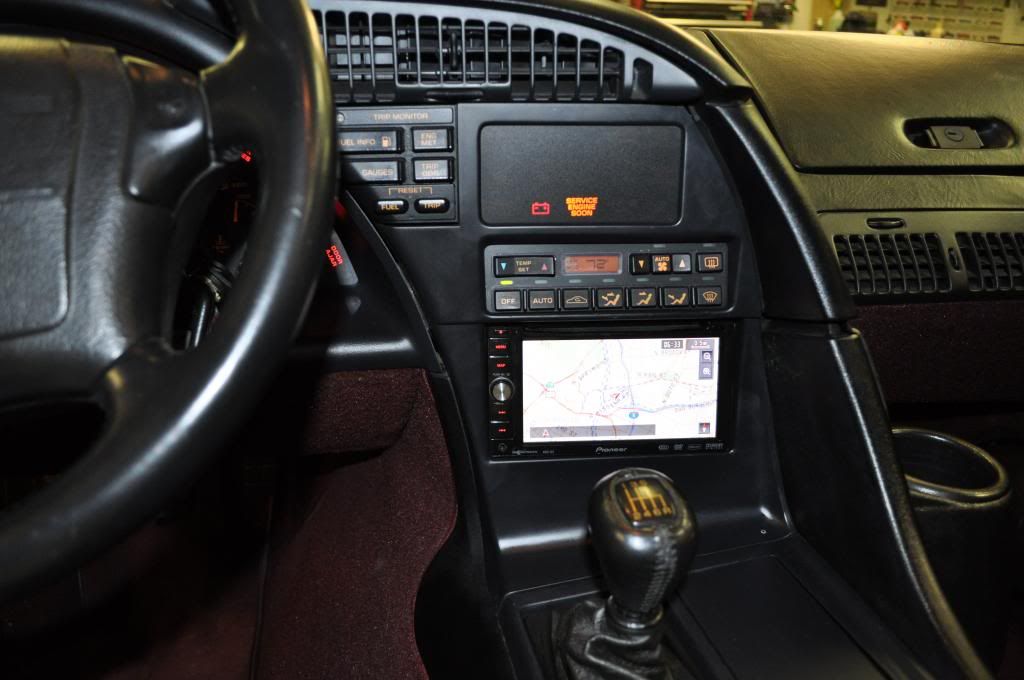
Test fit with the bezel looks like it was made to fit! Now the trick is to mount the unit in the dash and have it line up this good!

I have it mocked in and mounted in the dash and the bezel lines up perfect! But I have no wires behind there yet. I wanted to make sure it would at least fit before doing all the wiring.
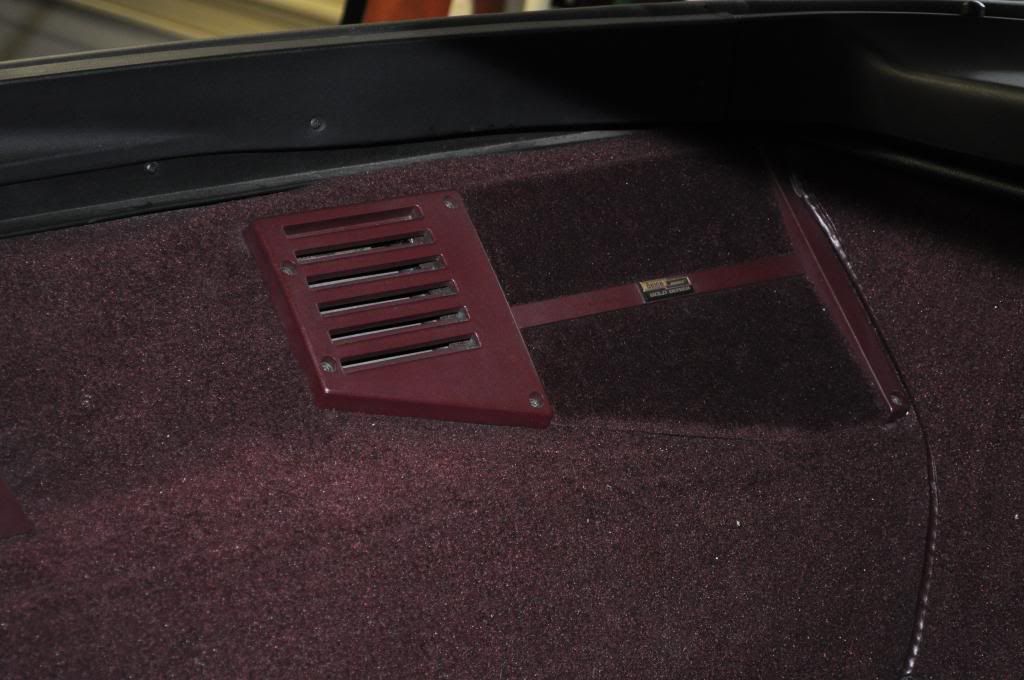
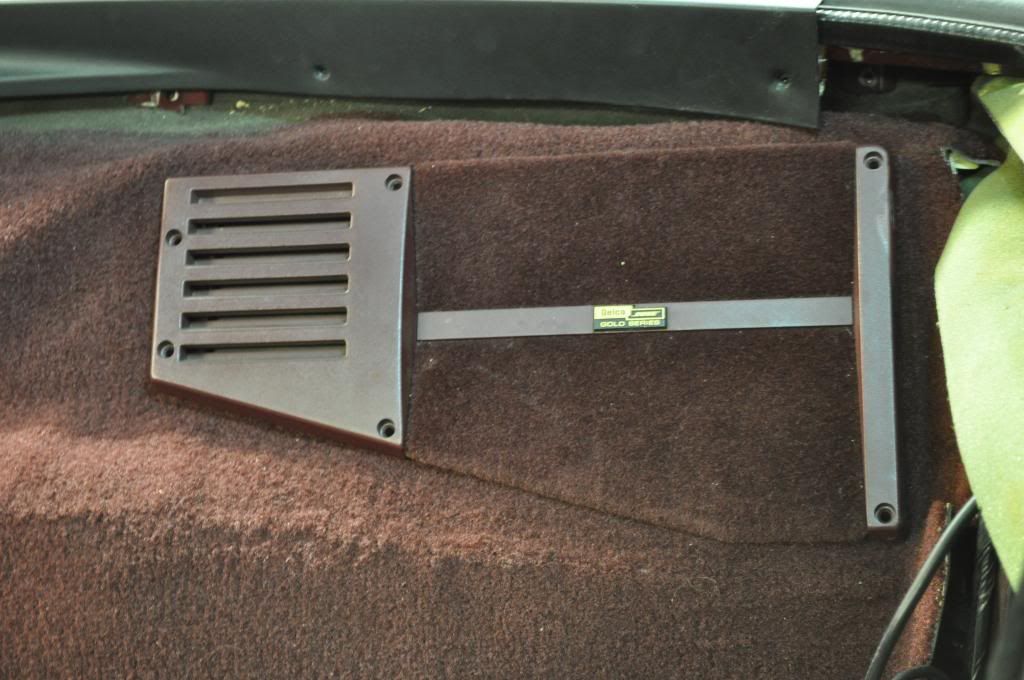
Rear Bose w/o the grille.
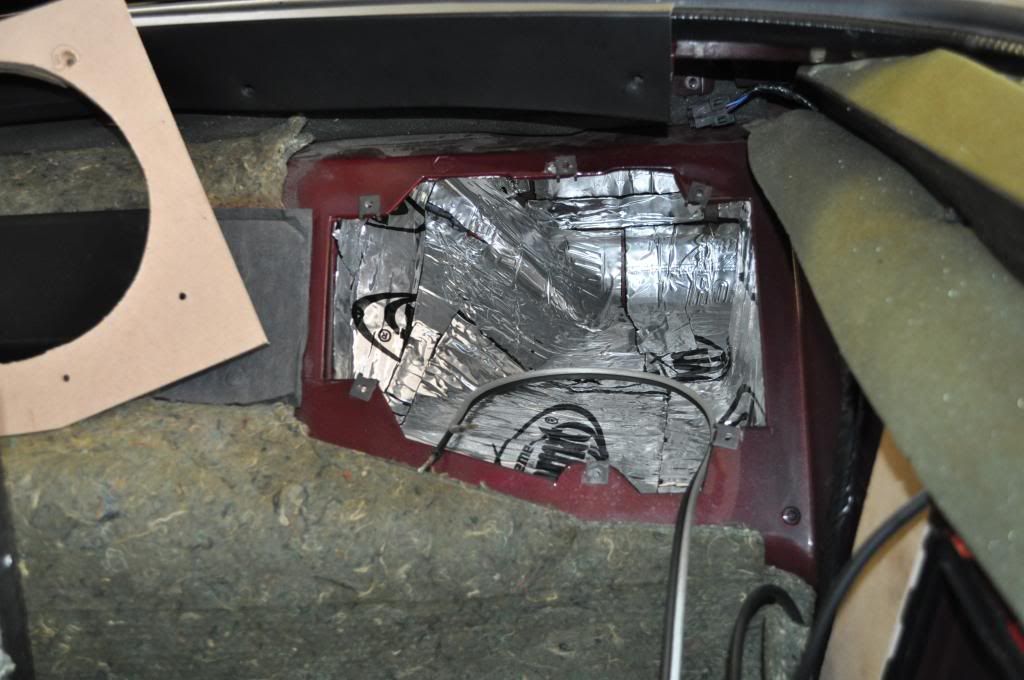
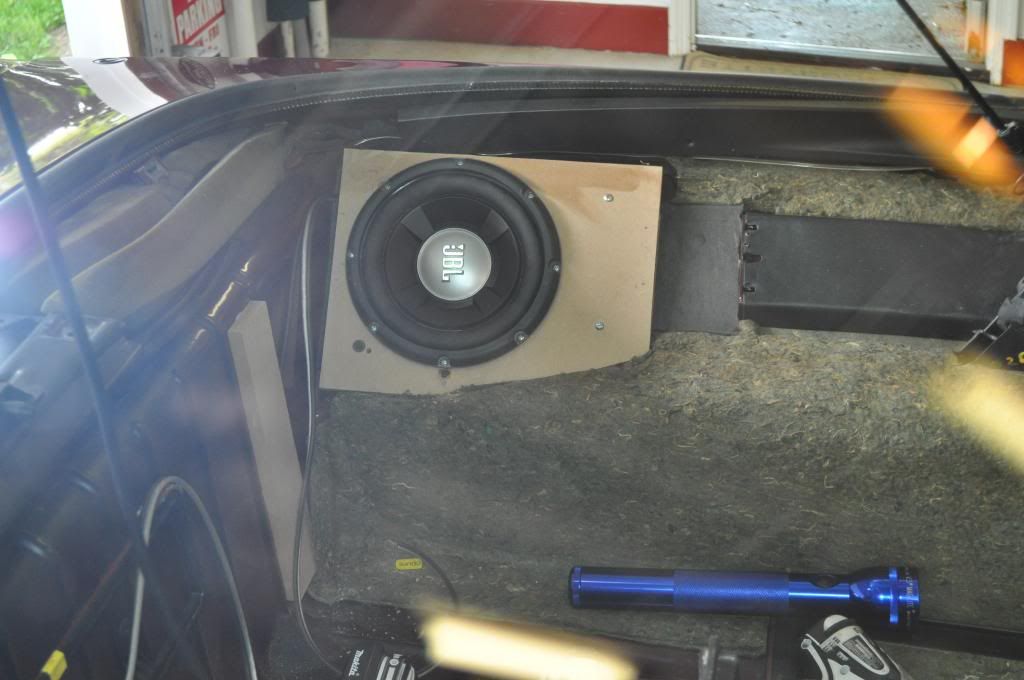
Body cavity the subs will sit in.
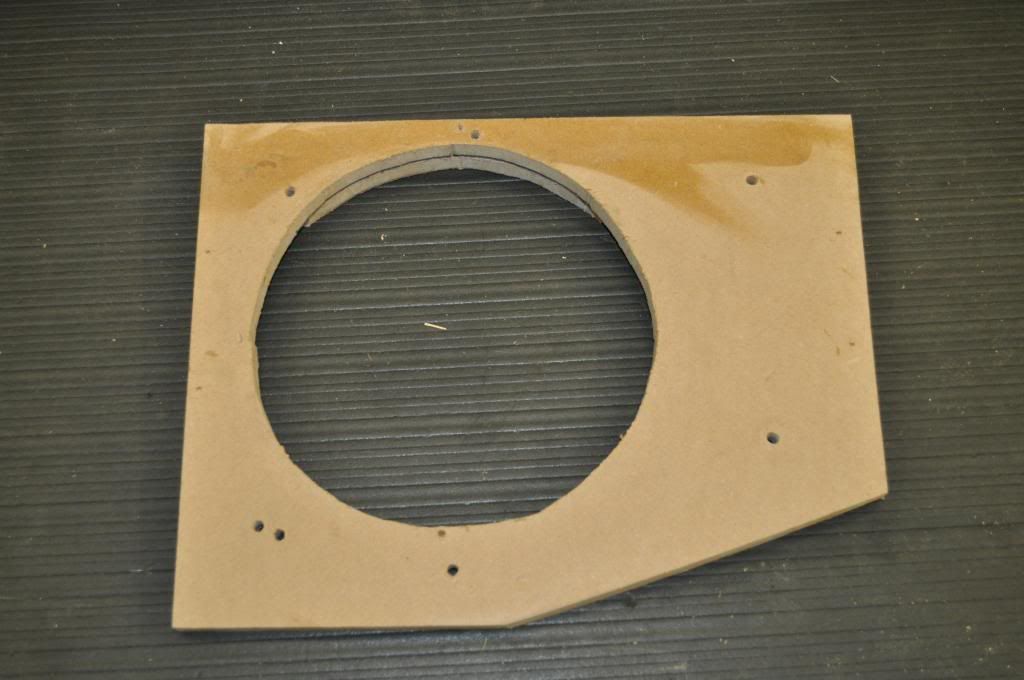
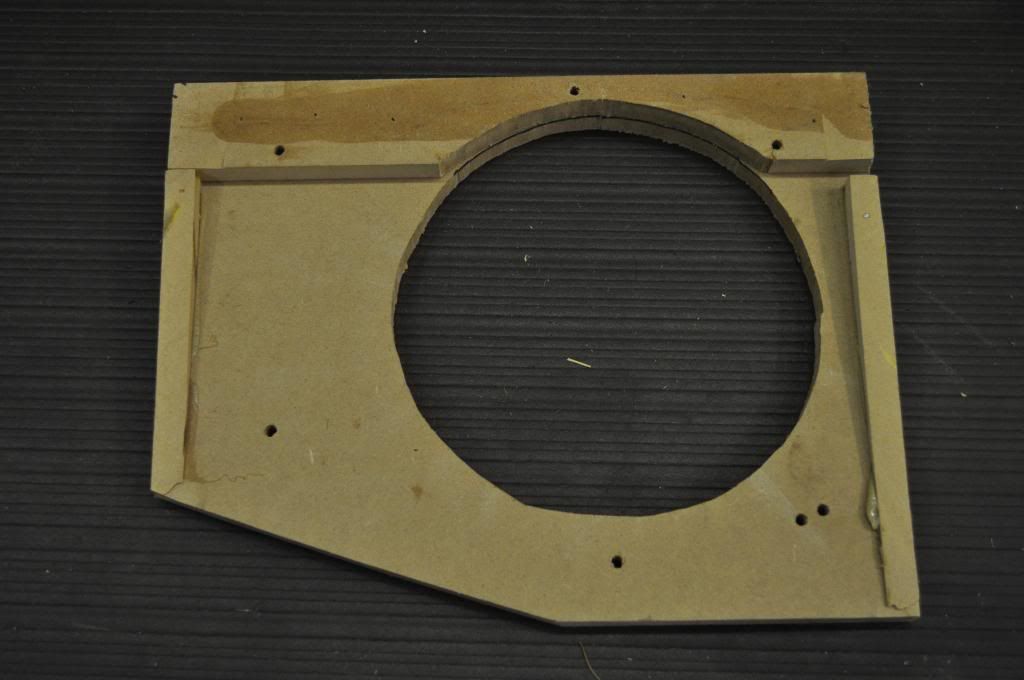
First mock up of the rear subs, I cut some �” MDF to test the subs fit. The bottom of the sub was touching the car body so this mock up will need some more work.
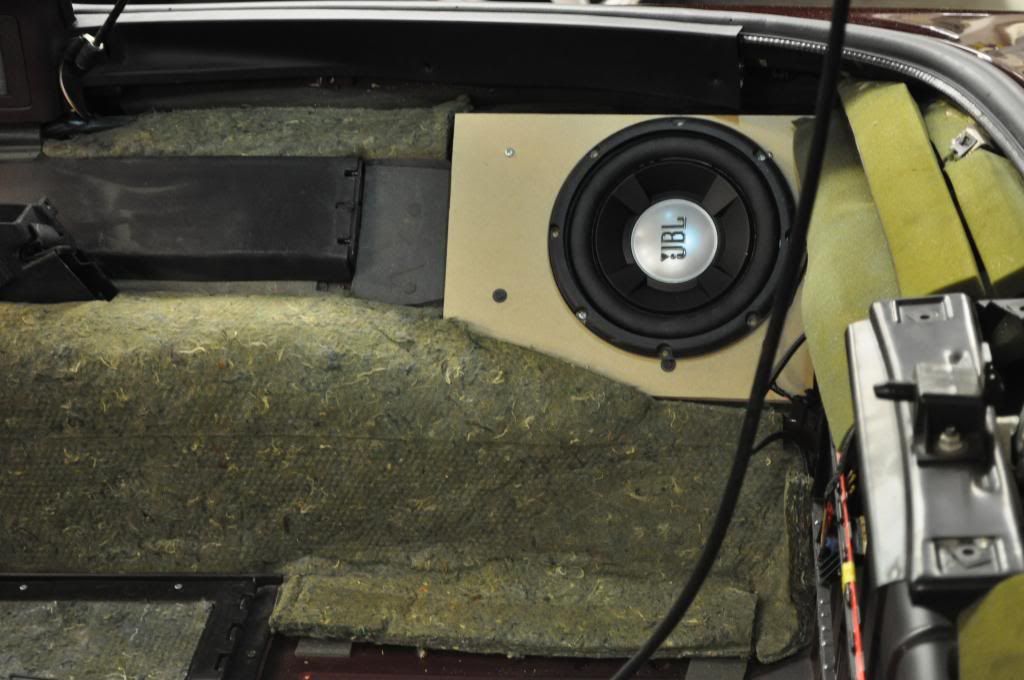
Stock Bose cover over the mocked up sub. I’m trying to make this work as I’d like the rears to look stock.
Adding a layer of �” MDF on the top changes the mounting angle enough to keep the sub bottom off of the body.
[
Sub cavity done up with sound deadener.
Left ready for sub install.
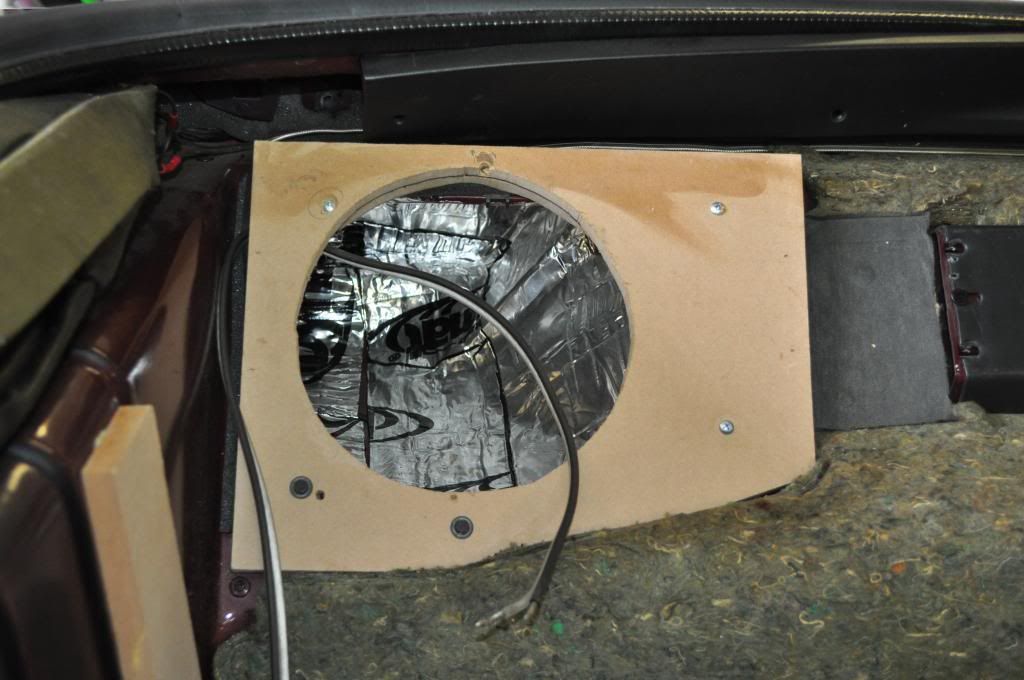
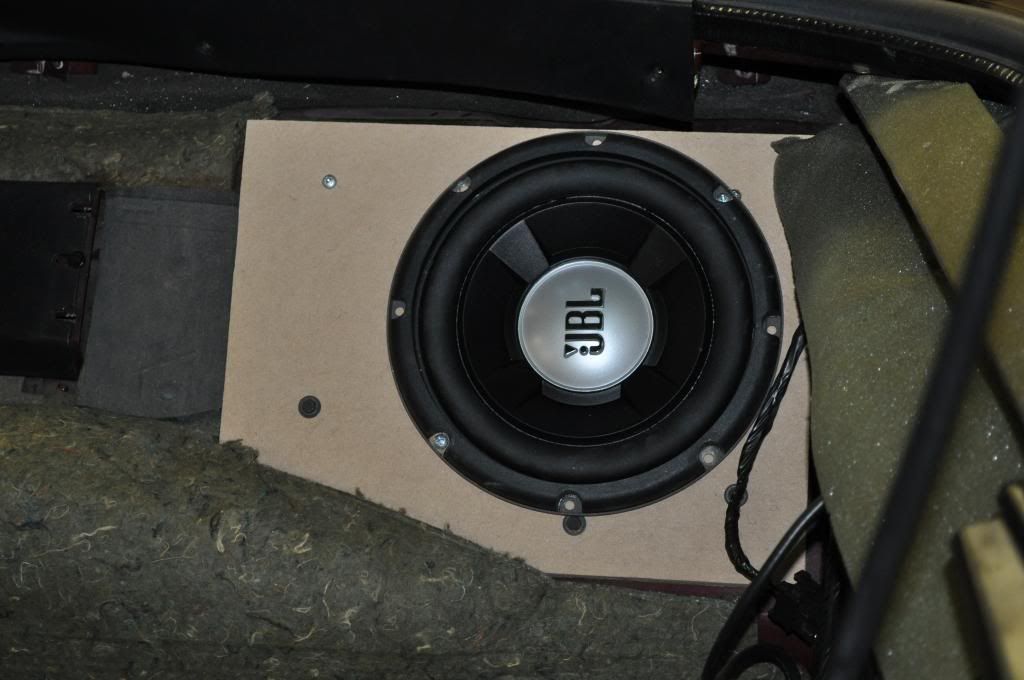
Left sub installed.
Right sub installed.
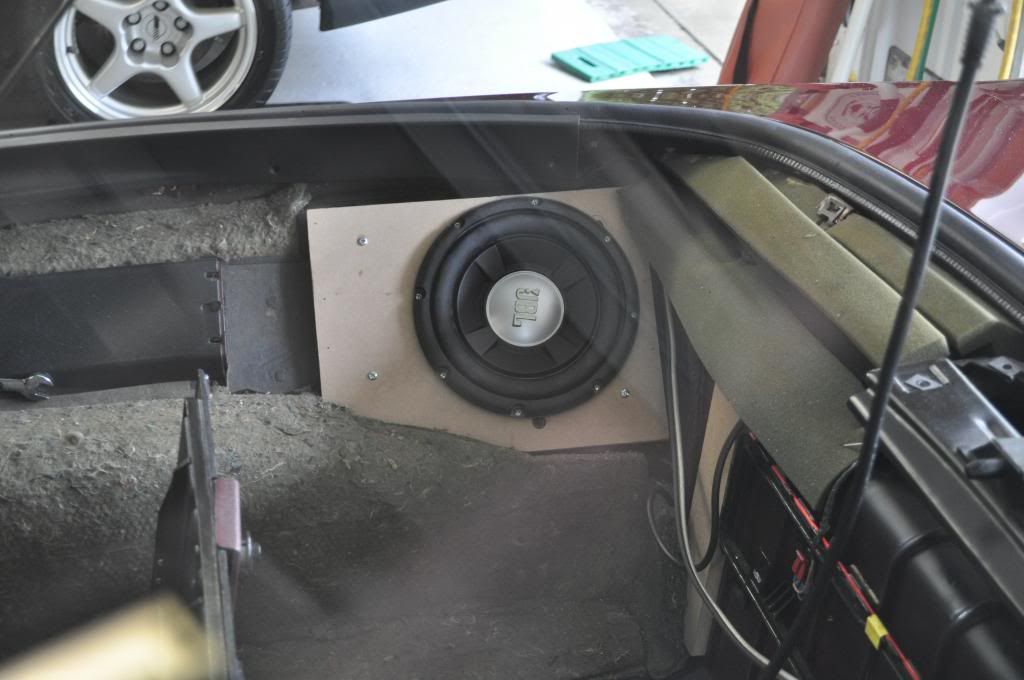
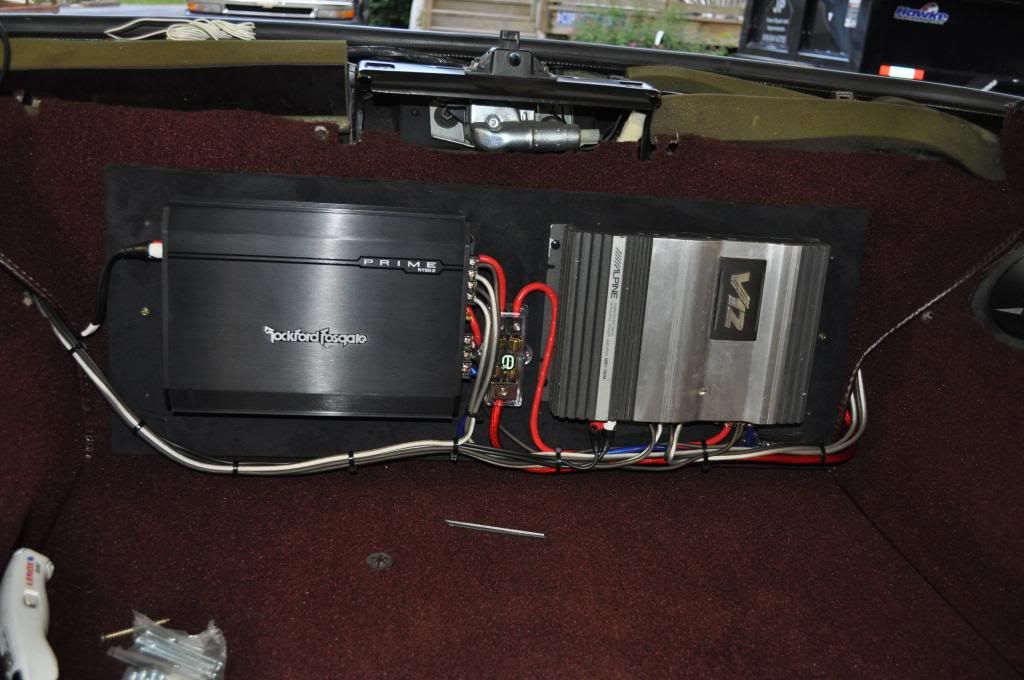
You can see on the left side (right in pic) how I angled the MDF to change the sub’s mount angle a litte. Also you can see the 2 MDF strips in the back wall to mount the amp board. I glued these to the rear wall with PL polyurethane adhesive.
Bare Bose in the front.

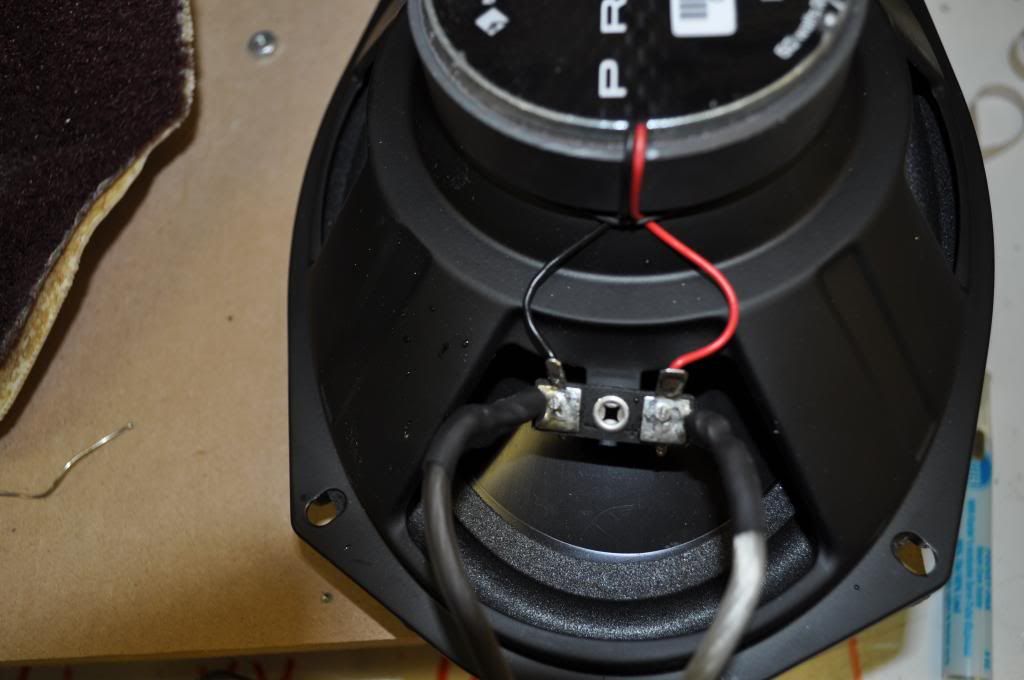
Wire connections on the 6X9s.
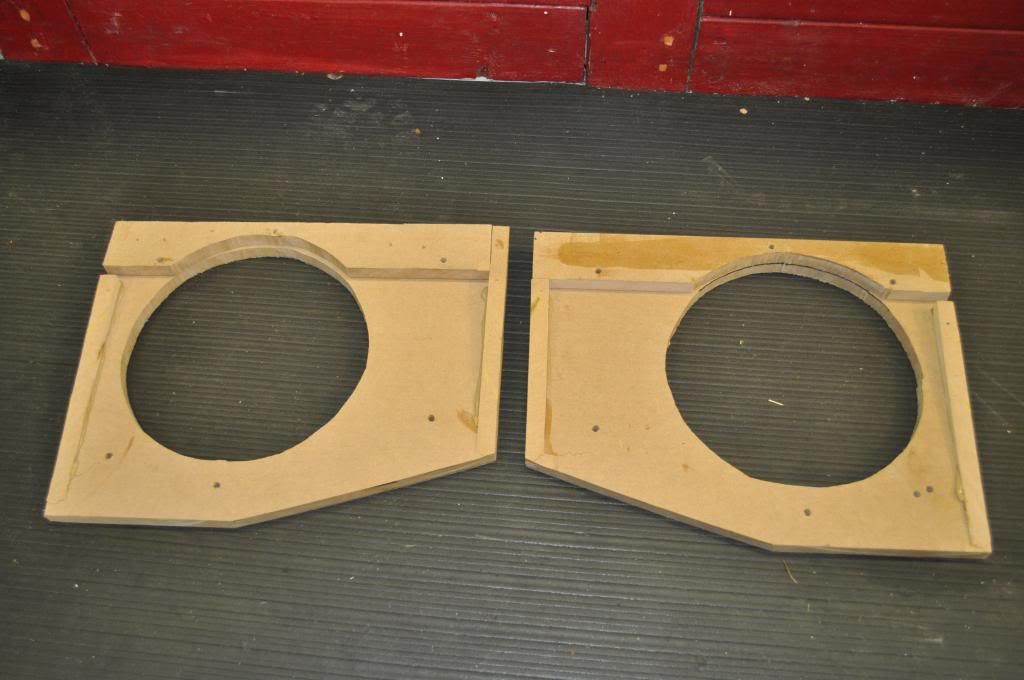
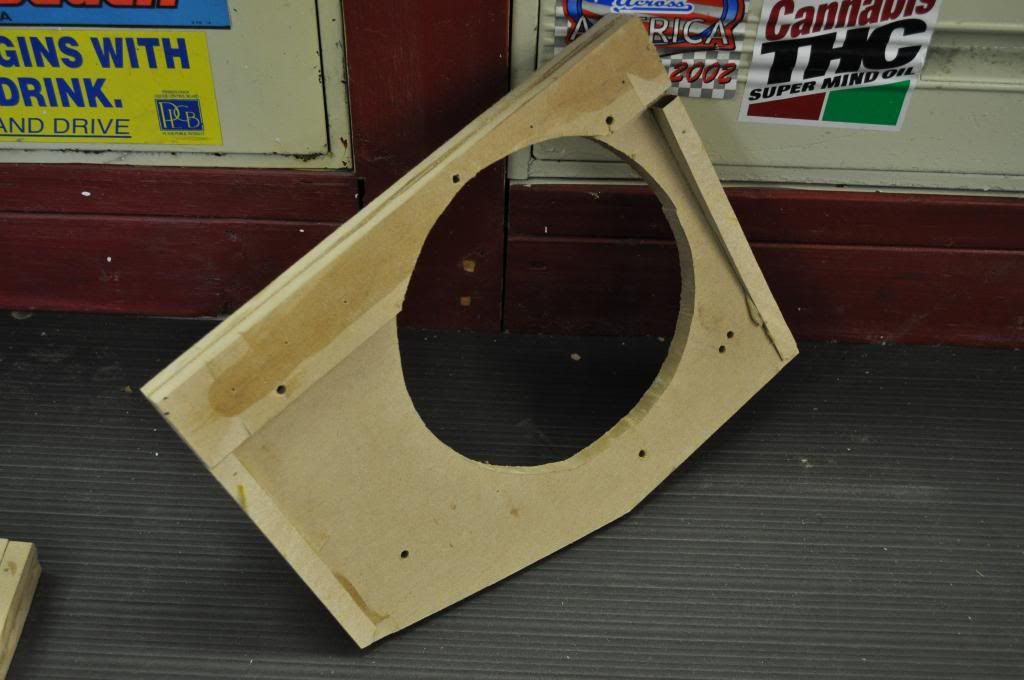
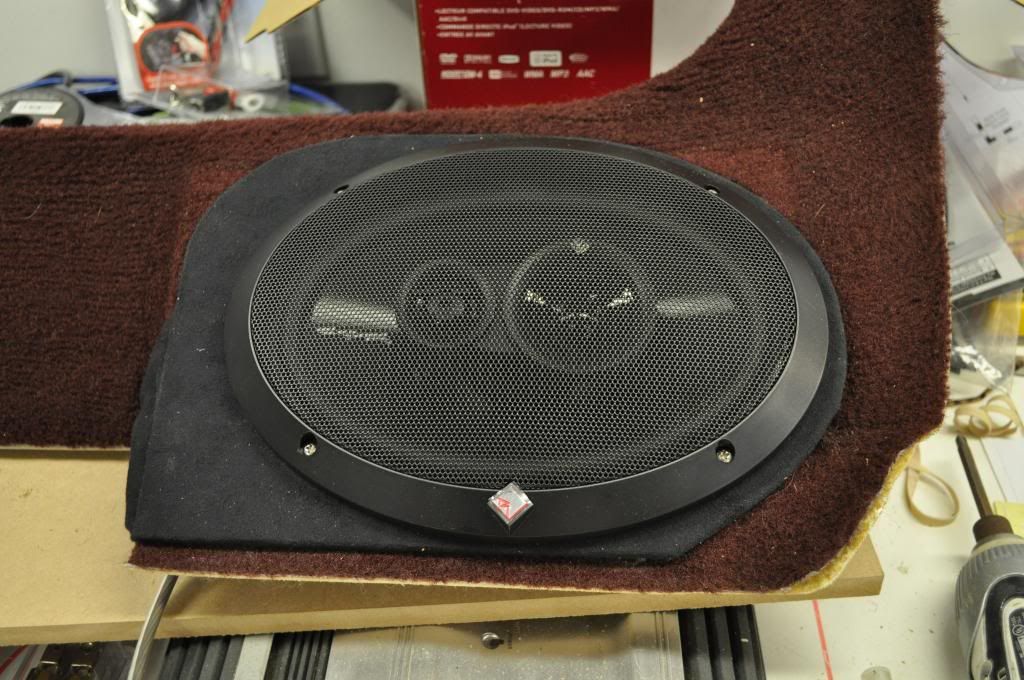
I wanted to mount the 6X9s so the stock Bose grille would cover. When I mocked that up the 6X9 was sitting too far in and the magnet was sticking to the metal frame rail at the mounting location. I had to move the 6X9 out far enough so it was not too close to the metal frame rail. I was able to set this up so nothing was cut up too much and it could be returned to stock easily. Here is what I came up with using �” MDF and piece for the each side. They only stick out an extra 1/2" from stock.
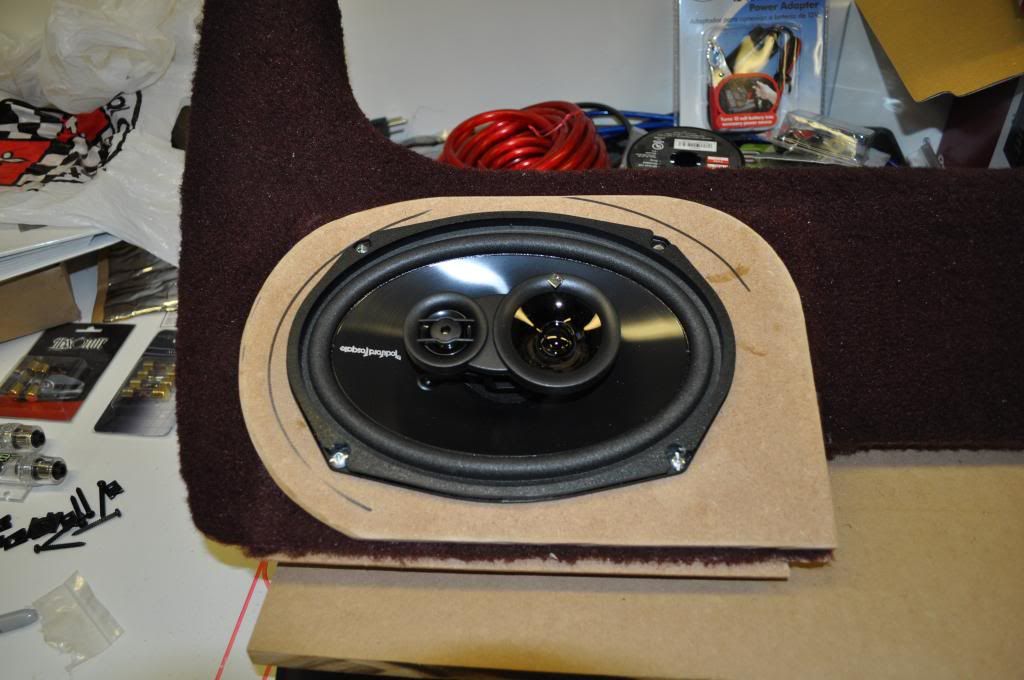
I covered the outer MDF with a black fabric which matches the black grille that came with the 6x9s.
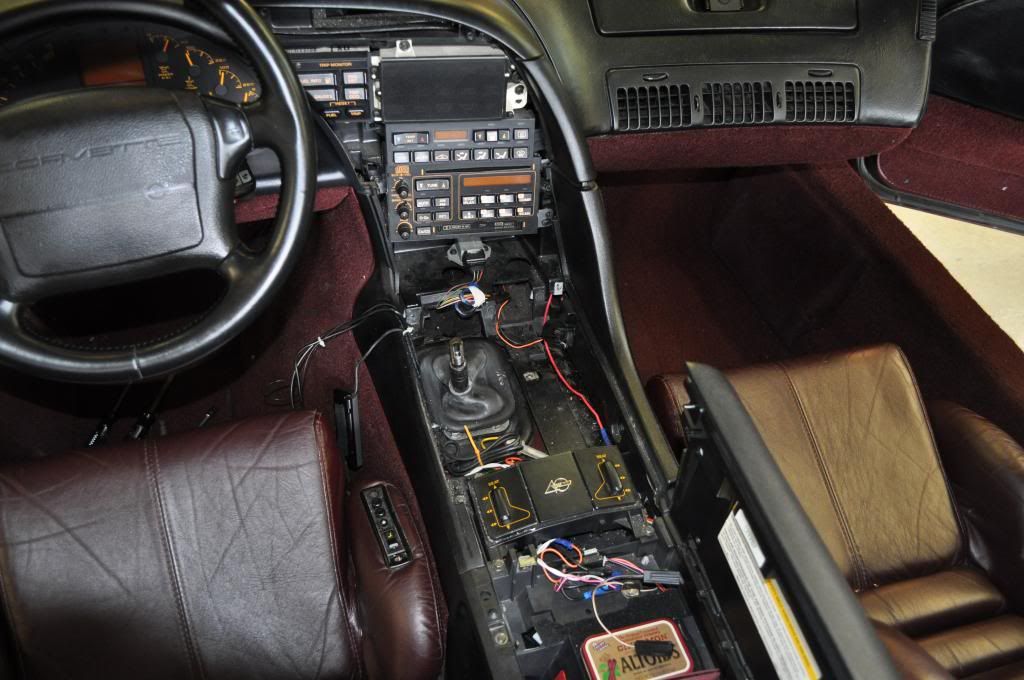
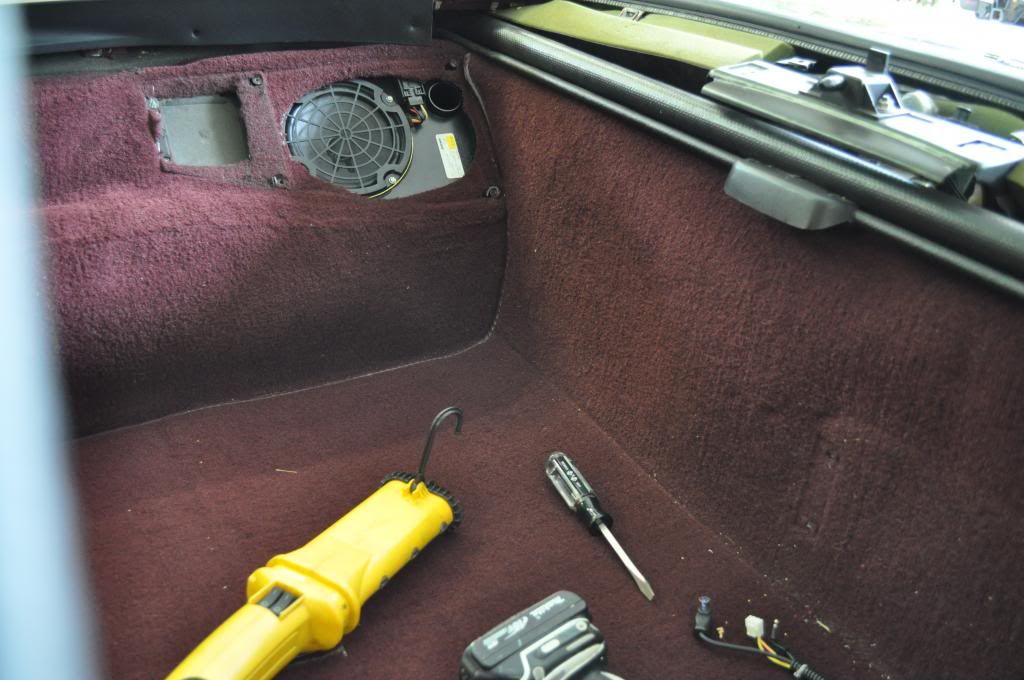
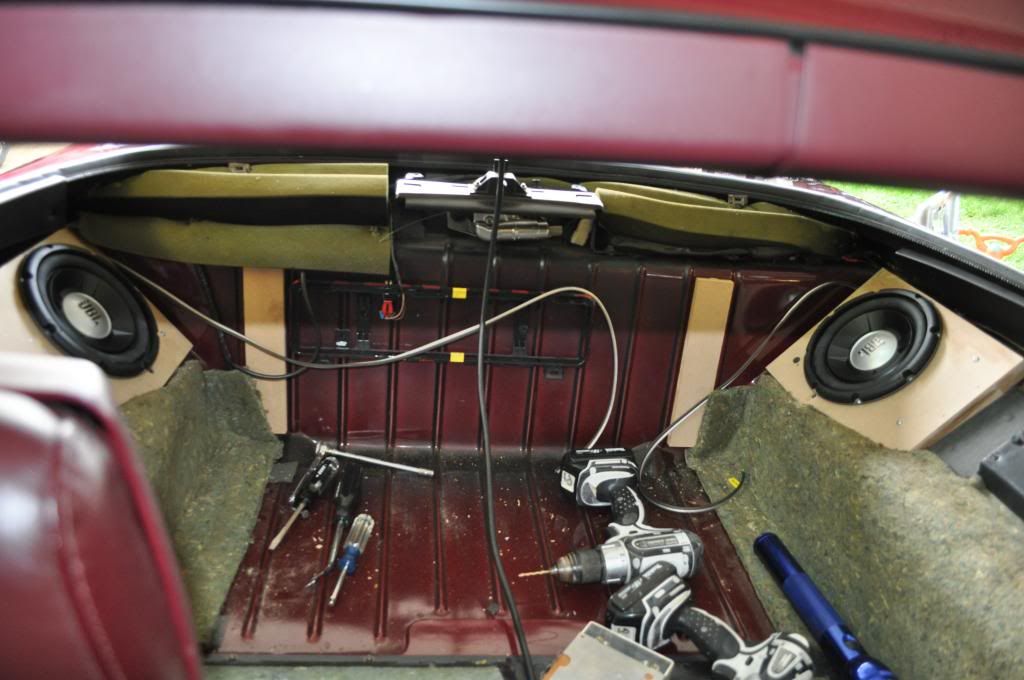
Now that the speakers are installed and the head unit mocked in it’s time to rum some wiring. I removed the drivers seat.
[
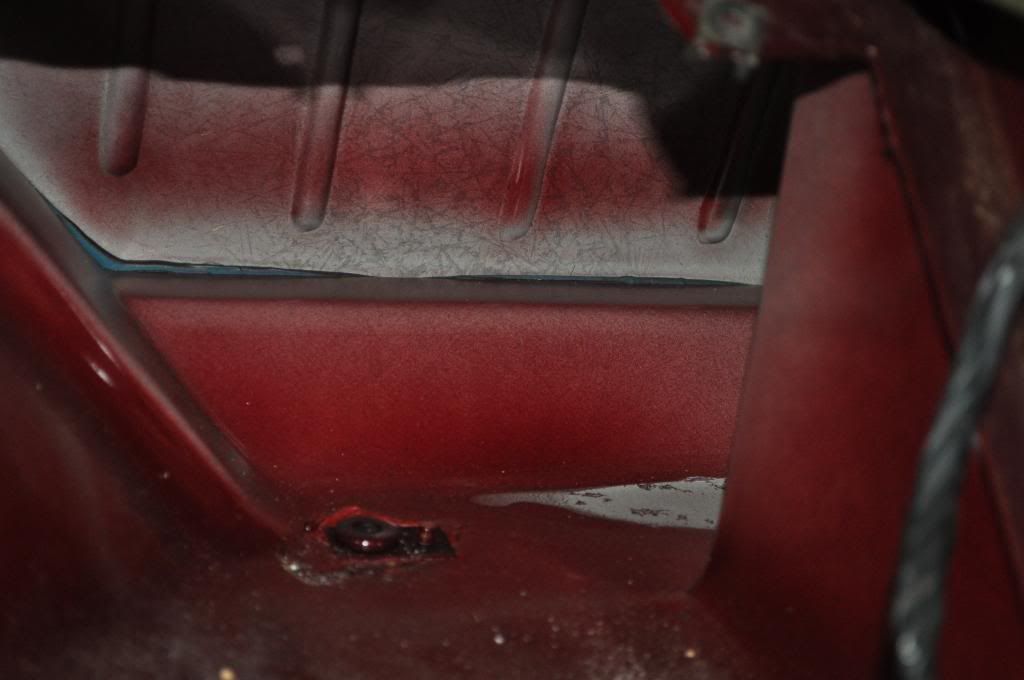
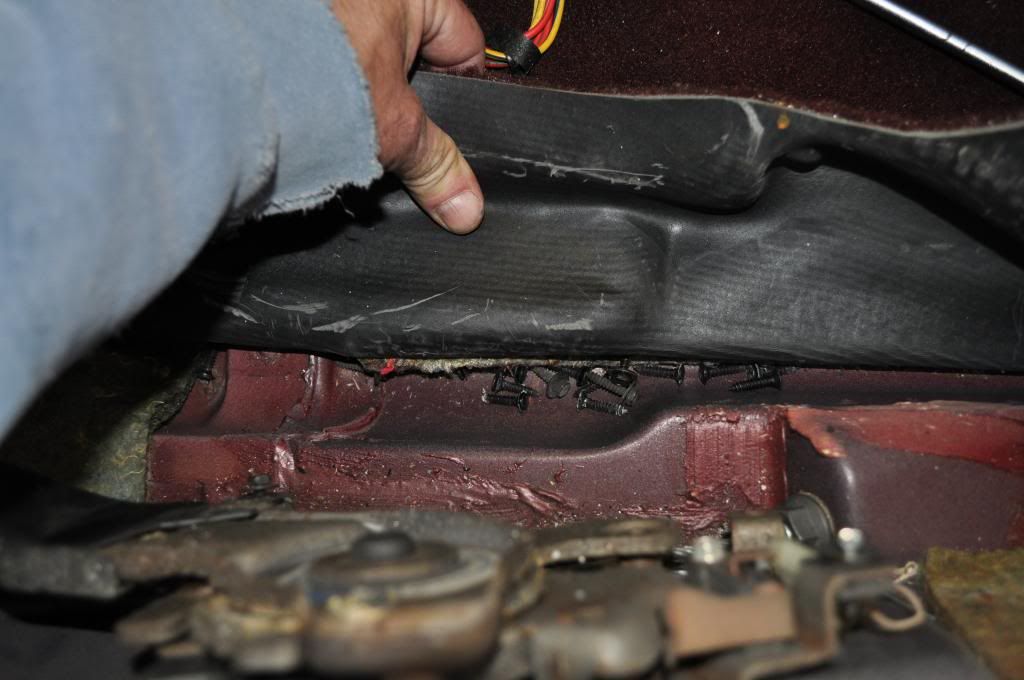
Nice surprise here, some interior screws and bolts under the carper that must have been left there at Bowling Green!
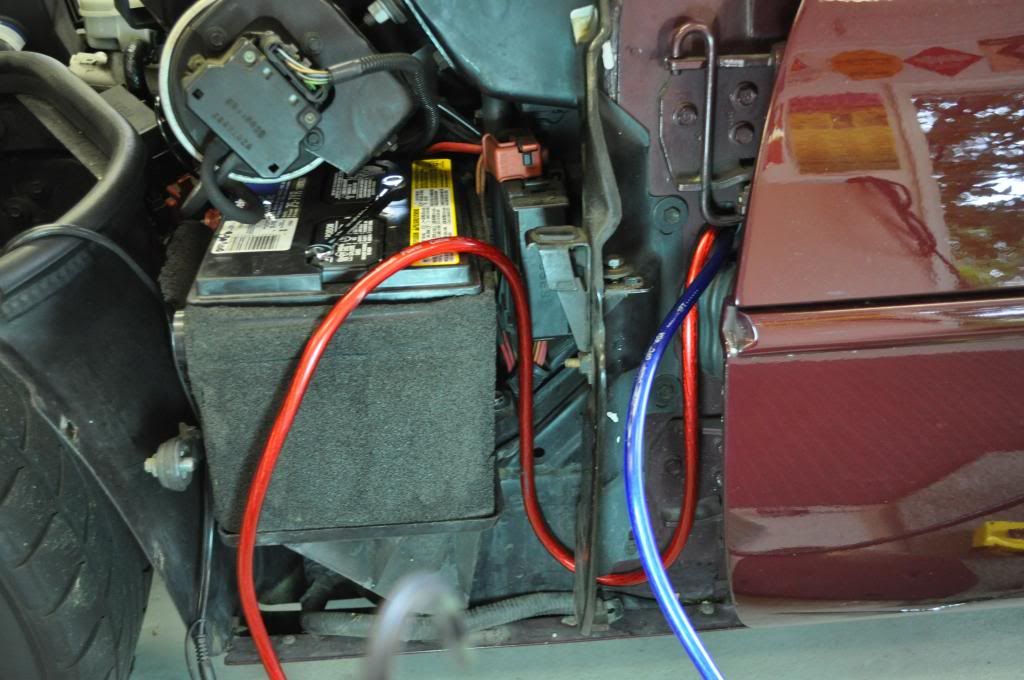
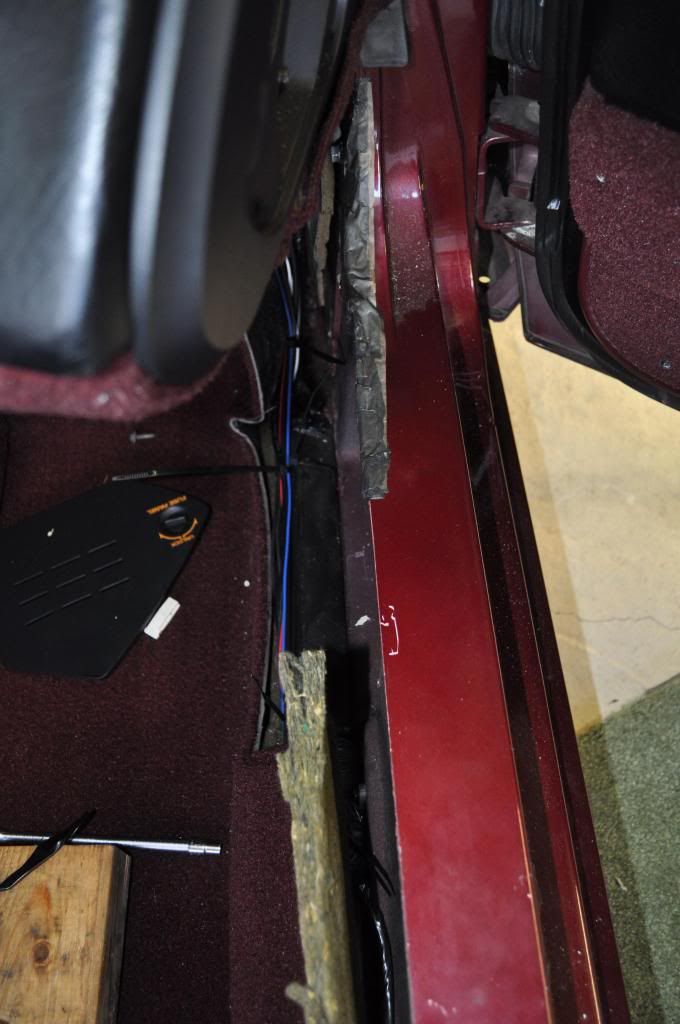
Here’s the power line run in the rear. I ran a ground all the way to the battery.

Power line up the frame rail.
Power line out the door post to the battery.
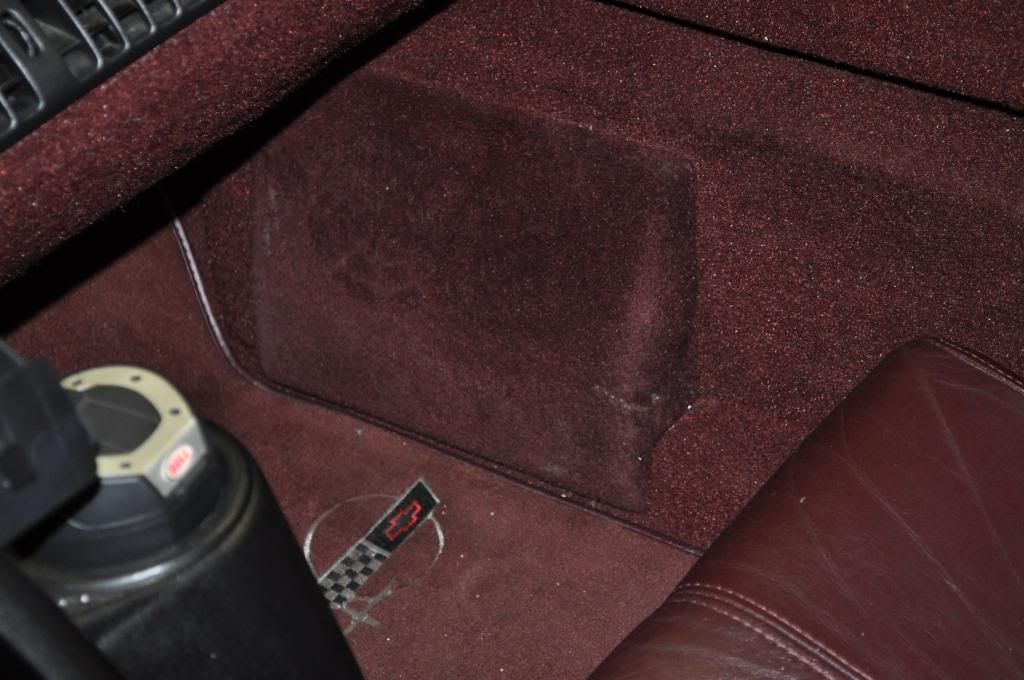
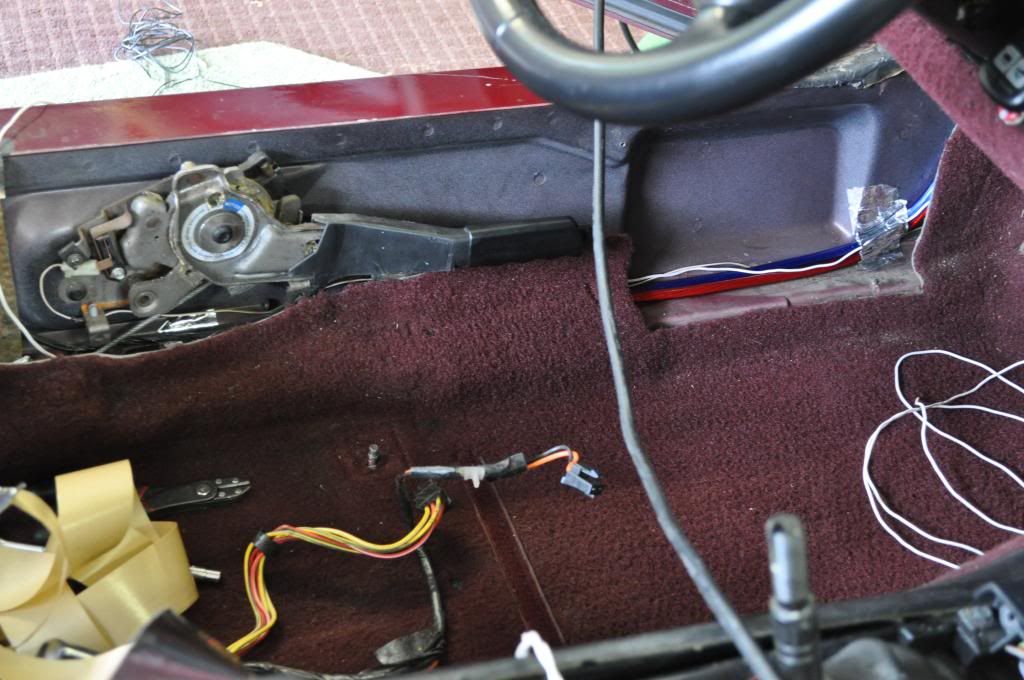
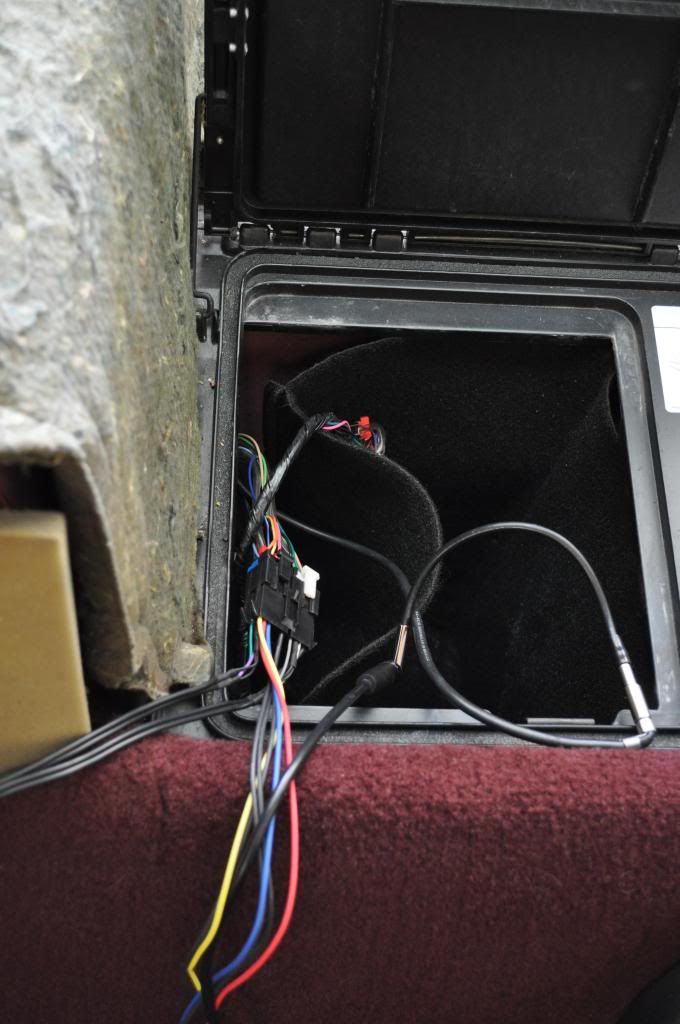
I bought a Metra kit to tap the power, ground, antenna output and antenna signal at the storage bin behind the pass seat.
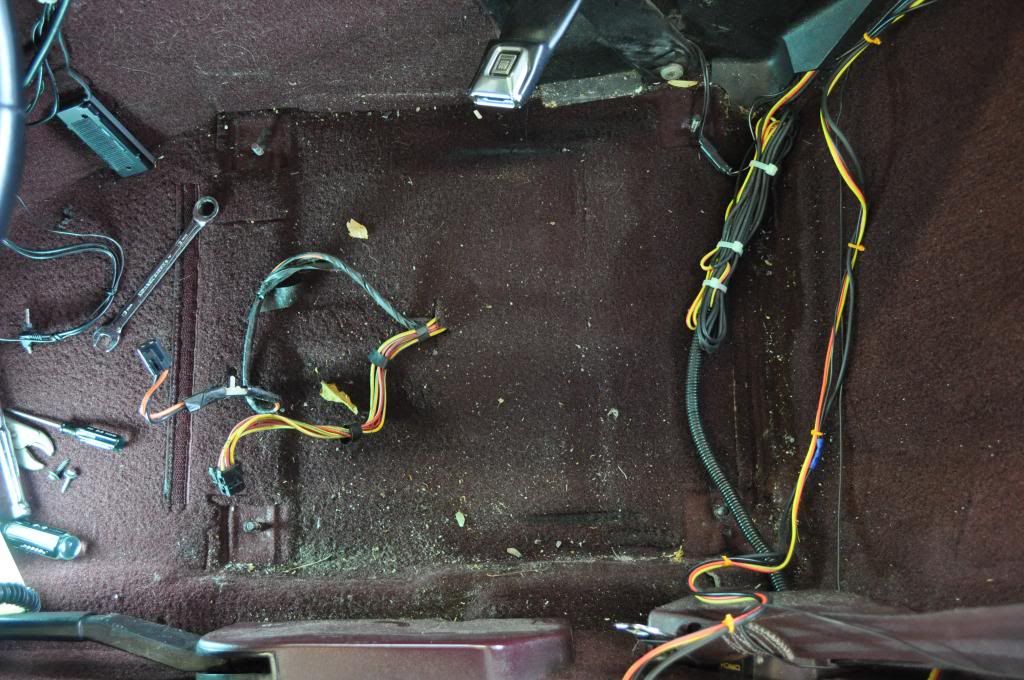
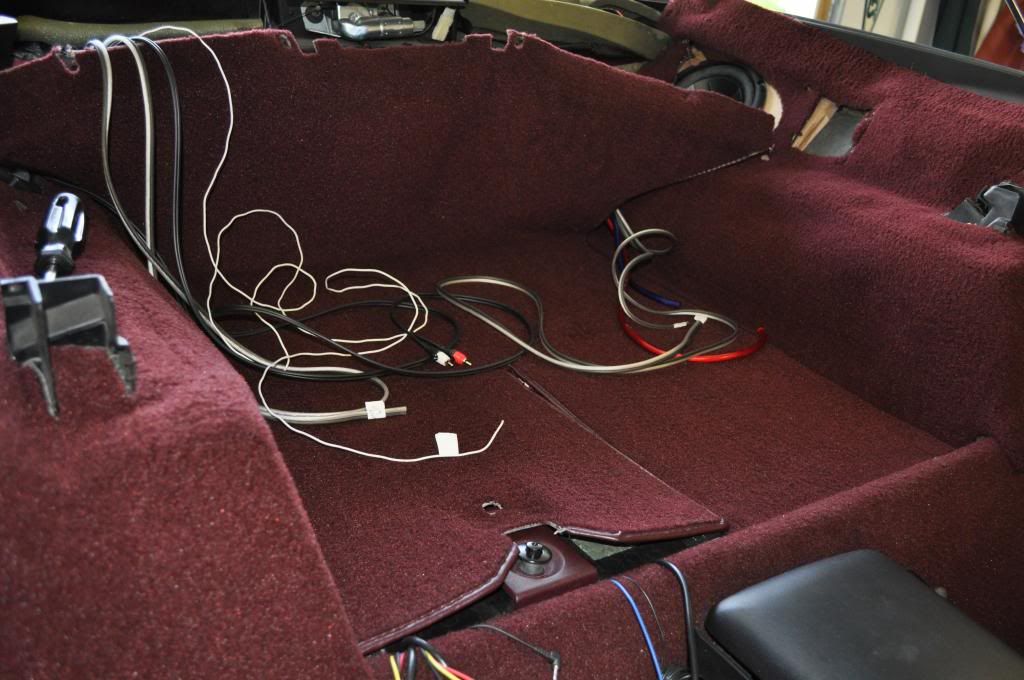
Running the speaker wires, RCA wires to the rear.

As you saw previously I ran the 4 guage power wire up the left side of the car and all other wires ran down the right side frame rail into the back. Note: the front left speaker runs down the left side but I kept it way from the power wire as much as possible.
Kind of hard to tell here but the head unit is secure. I used strapping and bent pieces 90 degrees connecting in side to the head unit and the other side to the stock mounting holes.
Start wiring the amps.
Almost done wiring the amps.
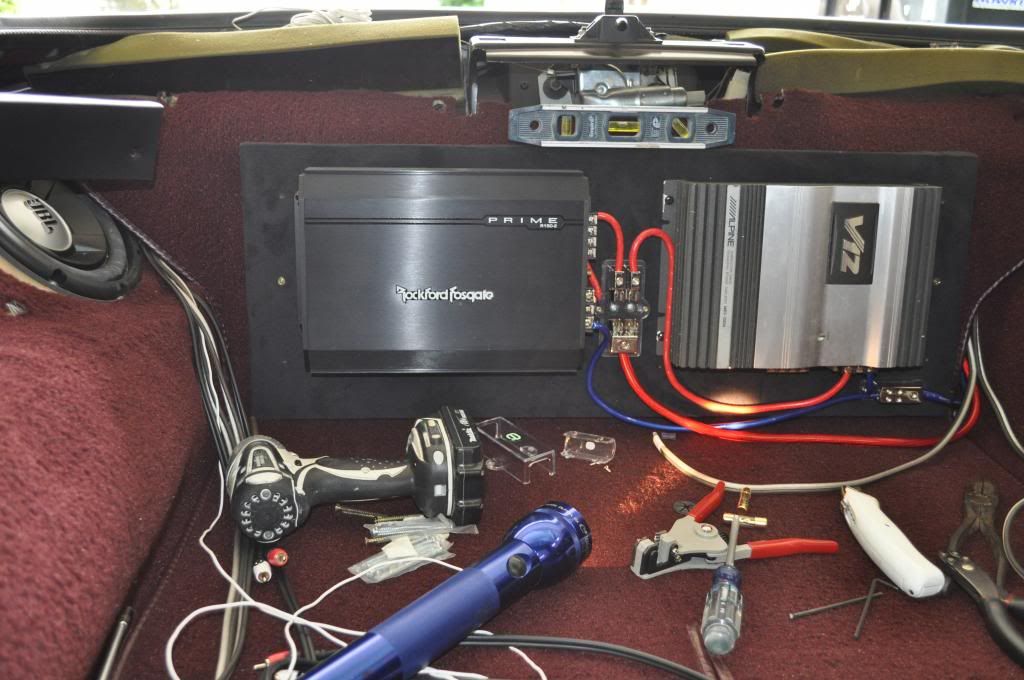
Amps wired.
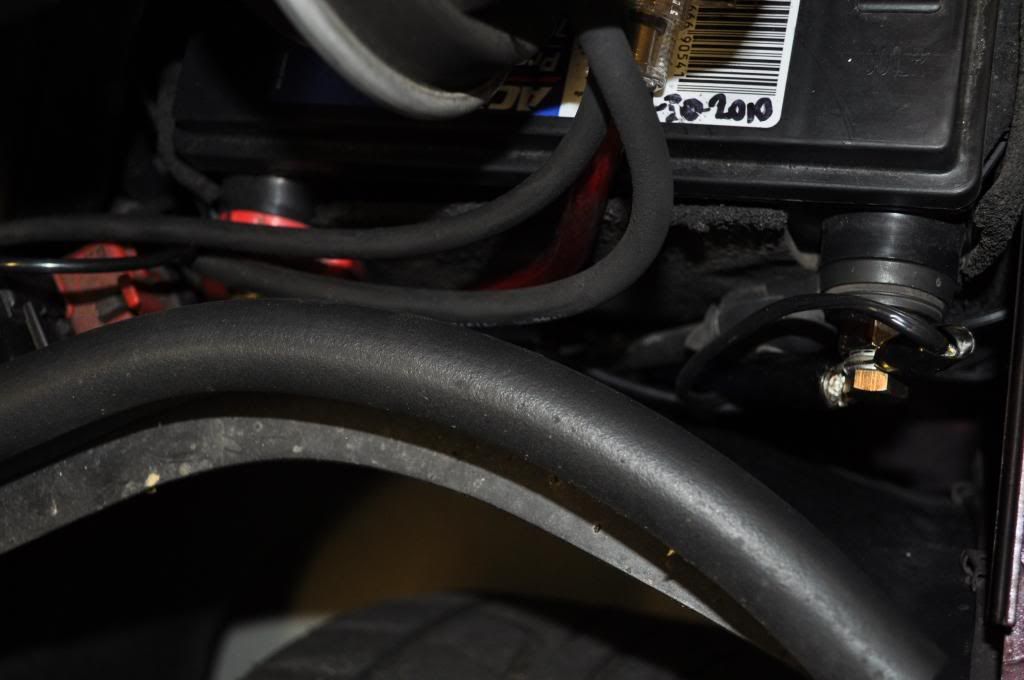
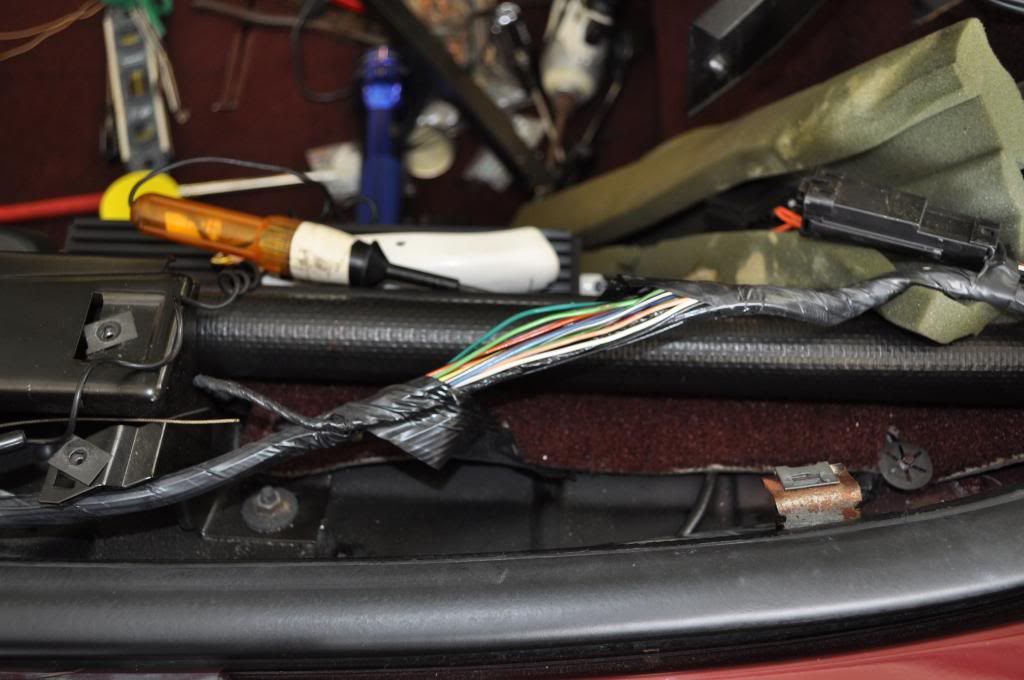
One of the connections for this unit was to the reverse lights. Using the manual I thought I had it located where it comes inside the car along the rear. I was thinking it was this light green wire but I was wrong!
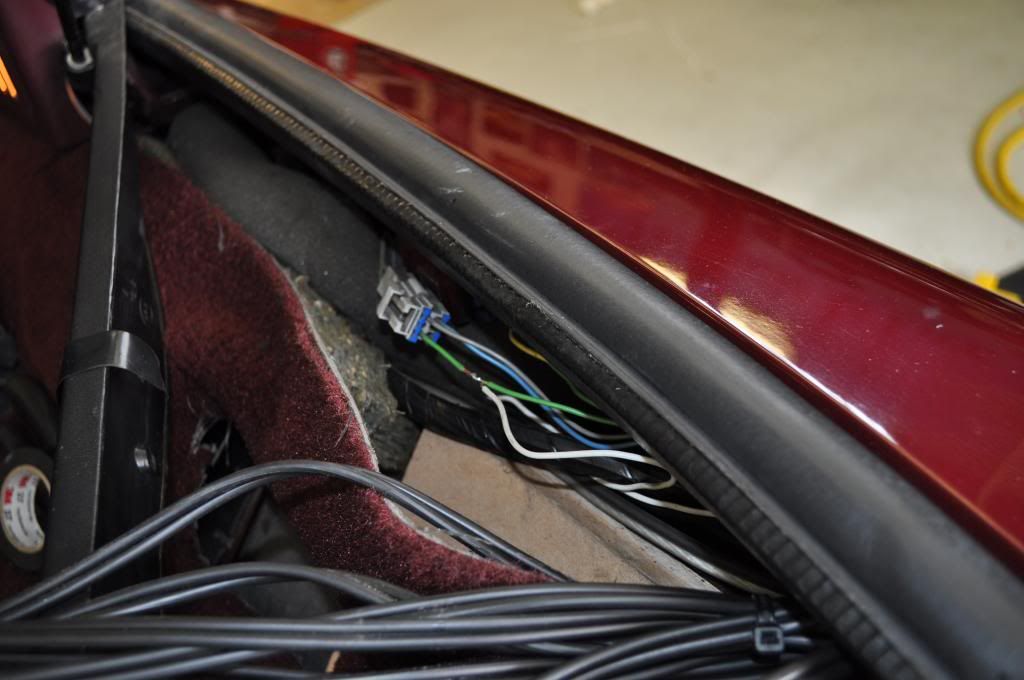
It came up over here on the side.
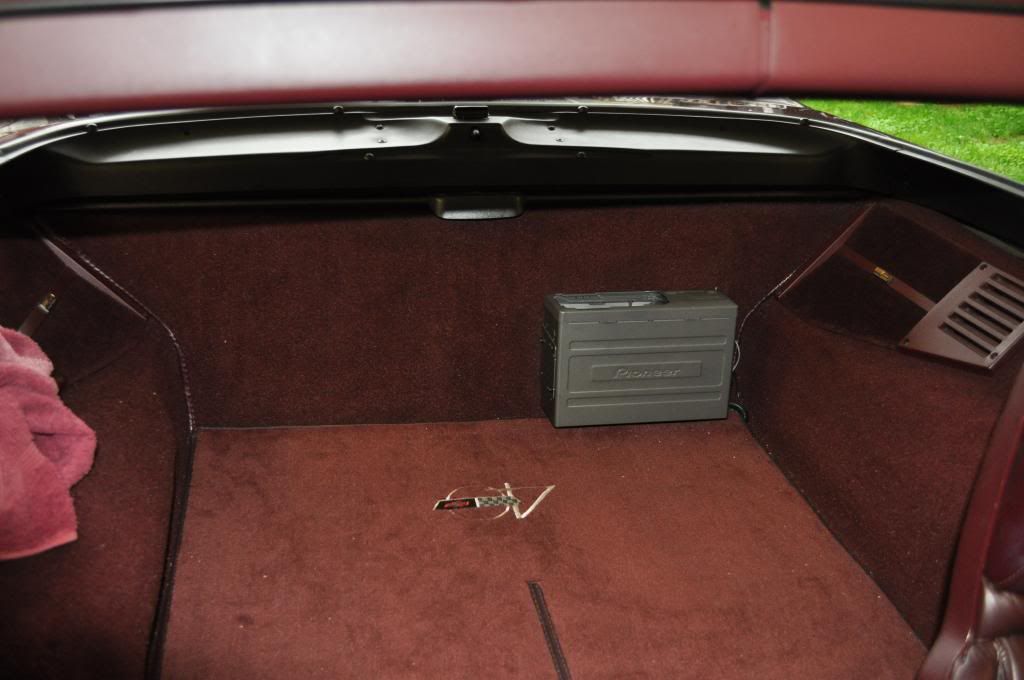
Finished shots.
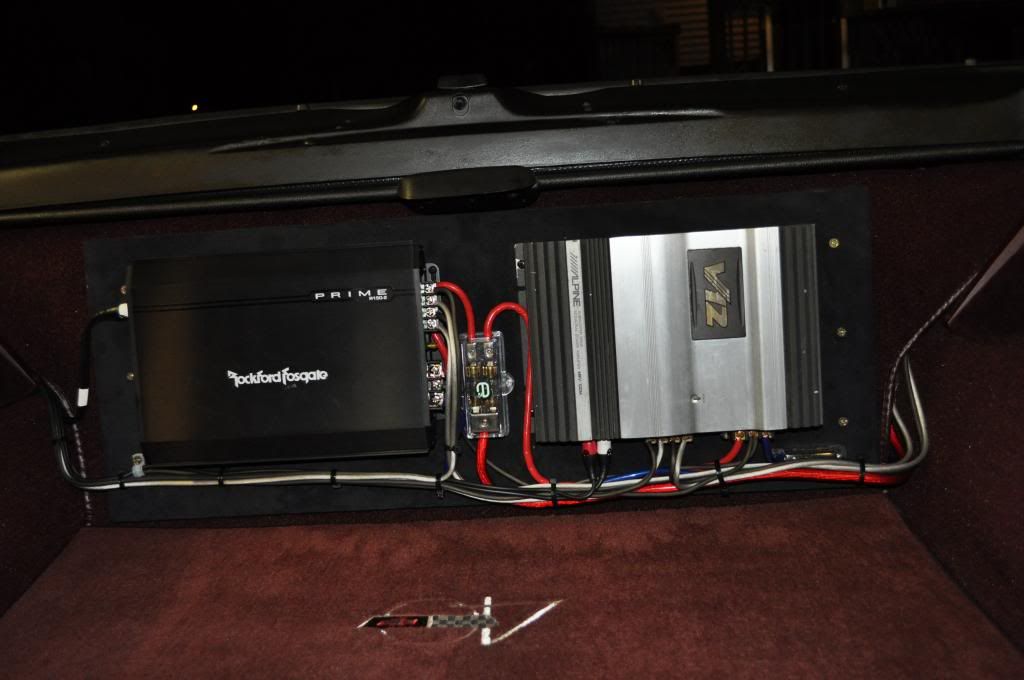
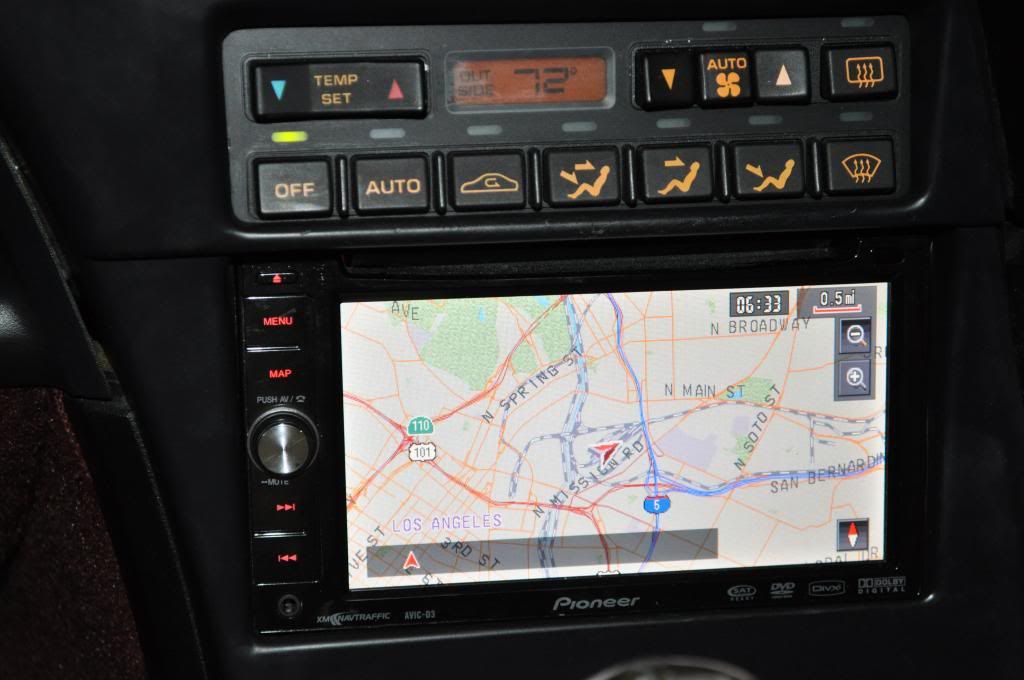
In the end it was all well worth it. I figure I have about 60 hours into this project. I paid about $350.00 for the amps and speakers and about another $300.00 for 12 gauge speaker wire, 4 gauge power wire, RCA wires, fuse holders, wire connectors, sound deadener, MDF and misc. things. The sound it great, major improvement over stock. The nav is cool. I also have the blue tooth add on which works great too. The system also has an ipod hook up. I will probably add XM soon, I’ll have to remove the head unit to run a data wire so at that time I’ll also do the parking brake hack.
So I have a nice head unit, I decided to do 6X9 3 way speakers up front and 2 8” subs in the back. From looking at pictures of other C4 installations using 5.5” speakers, researching measurements of some 6X9s and taking apart the front speaker area to take measurements I felt I could make that work. Also my thoughts were the 3 way would give me mid and tweeter. I used the Rockford Forsgate RF R1693. Others had done 8” subs but I still checked the rear areas to make the 8” JBL GTO804 subs fit. I came across a free Alpine MRV100M for the subs. I used a Rockford Forsgate Prime R 150-2 to power the 6X9s.
Here’s the start, always disconnect the battery!
[
Original console area, I had an XM set up and a 12 disc CD changers both connected via FM modulators.
Original right side front Bose speaker.
Original left side front Bose speaker.
[
Original Bose right side rear speaker.
Original Bose left side rear speaker and 12 disc changer.
Console bezel removed.
Bose head unit removed.
First fitment of the Avic. Sits too far out, some of the internal plastic needs to be removed.
The piece that needs to be removed.
Piece of plastic is removed, I used a drill to drill holes along the edges. Be careful there are a lot of wires around that area!
Test fit with the bezel looks like it was made to fit! Now the trick is to mount the unit in the dash and have it line up this good!
I have it mocked in and mounted in the dash and the bezel lines up perfect! But I have no wires behind there yet. I wanted to make sure it would at least fit before doing all the wiring.
Rear Bose w/o the grille.
Body cavity the subs will sit in.
First mock up of the rear subs, I cut some �” MDF to test the subs fit. The bottom of the sub was touching the car body so this mock up will need some more work.
Stock Bose cover over the mocked up sub. I’m trying to make this work as I’d like the rears to look stock.
Adding a layer of �” MDF on the top changes the mounting angle enough to keep the sub bottom off of the body.
[
Sub cavity done up with sound deadener.
Left ready for sub install.
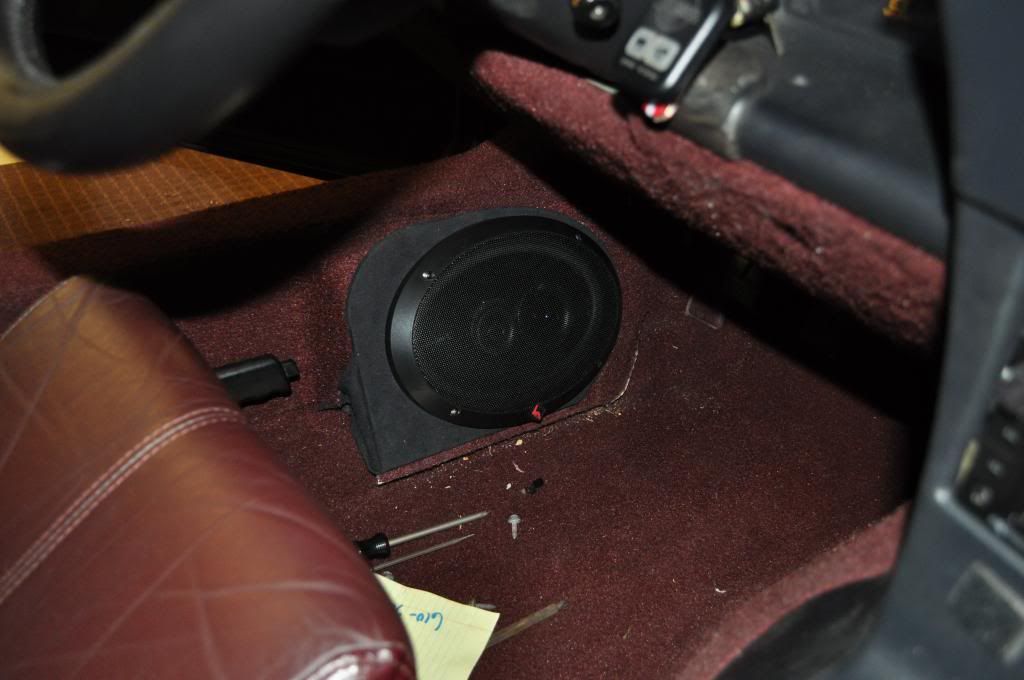
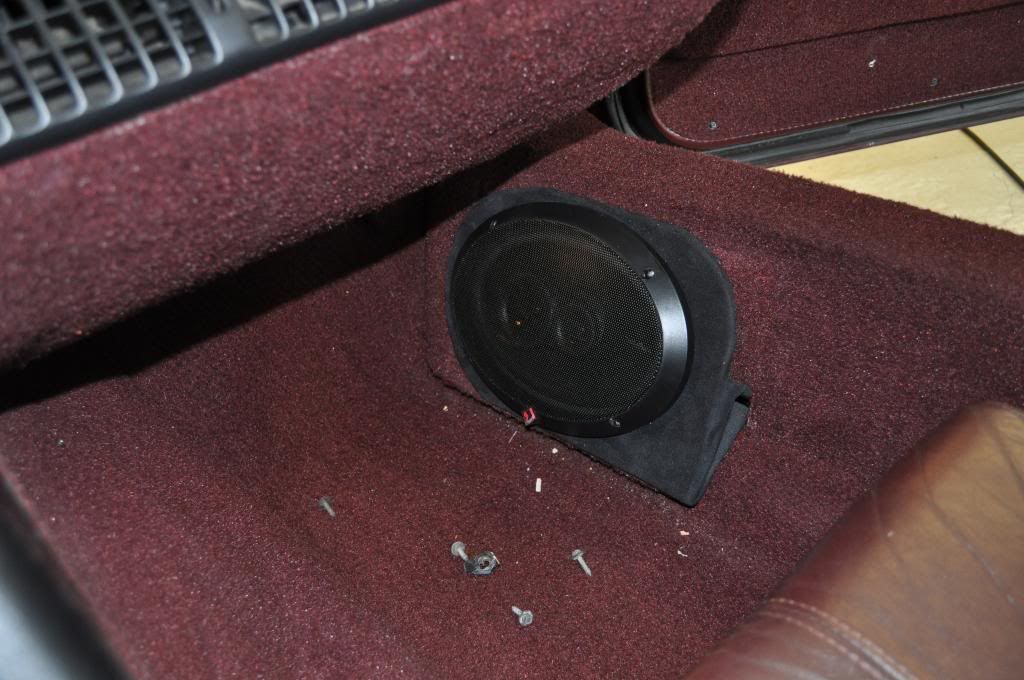
Left sub installed.
Right sub installed.
You can see on the left side (right in pic) how I angled the MDF to change the sub’s mount angle a litte. Also you can see the 2 MDF strips in the back wall to mount the amp board. I glued these to the rear wall with PL polyurethane adhesive.
Bare Bose in the front.
Wire connections on the 6X9s.
I wanted to mount the 6X9s so the stock Bose grille would cover. When I mocked that up the 6X9 was sitting too far in and the magnet was sticking to the metal frame rail at the mounting location. I had to move the 6X9 out far enough so it was not too close to the metal frame rail. I was able to set this up so nothing was cut up too much and it could be returned to stock easily. Here is what I came up with using �” MDF and piece for the each side. They only stick out an extra 1/2" from stock.
I covered the outer MDF with a black fabric which matches the black grille that came with the 6x9s.
Now that the speakers are installed and the head unit mocked in it’s time to rum some wiring. I removed the drivers seat.
[
Nice surprise here, some interior screws and bolts under the carper that must have been left there at Bowling Green!
Here’s the power line run in the rear. I ran a ground all the way to the battery.
Power line up the frame rail.
Power line out the door post to the battery.
I bought a Metra kit to tap the power, ground, antenna output and antenna signal at the storage bin behind the pass seat.
Running the speaker wires, RCA wires to the rear.
As you saw previously I ran the 4 guage power wire up the left side of the car and all other wires ran down the right side frame rail into the back. Note: the front left speaker runs down the left side but I kept it way from the power wire as much as possible.
Kind of hard to tell here but the head unit is secure. I used strapping and bent pieces 90 degrees connecting in side to the head unit and the other side to the stock mounting holes.
Start wiring the amps.
Almost done wiring the amps.
Amps wired.
One of the connections for this unit was to the reverse lights. Using the manual I thought I had it located where it comes inside the car along the rear. I was thinking it was this light green wire but I was wrong!
It came up over here on the side.
Finished shots.
In the end it was all well worth it. I figure I have about 60 hours into this project. I paid about $350.00 for the amps and speakers and about another $300.00 for 12 gauge speaker wire, 4 gauge power wire, RCA wires, fuse holders, wire connectors, sound deadener, MDF and misc. things. The sound it great, major improvement over stock. The nav is cool. I also have the blue tooth add on which works great too. The system also has an ipod hook up. I will probably add XM soon, I’ll have to remove the head unit to run a data wire so at that time I’ll also do the parking brake hack.
Last edited by Rex Ruby; 01-12-2013 at 12:17 AM.


 06-12-2011, 10:15 AM
#5
Le Mans Master


Very nice instal John! I've done our C5 and C6Z myself, but admittedly didn't know anything about the mysteries of a C4 install. I'm sure your posting will instigate other C4 owners to take the plunge and do an after market audio install of their own. Looking forward to hearing your system and comparing Avic D3 knowledge (they're old but a great head unit, and good source). Rock on my friend! 
Ps. Now you'll have to do Jeanie's C5,LOL!
Ps. Now you'll have to do Jeanie's C5,LOL!

 06-13-2011, 02:27 PM
#7
Le Mans Master

WOW John, that is some great work!!
Was Ruby feeling threatened by the C5 in the garage now and needed some electronic reassurance that you still loved her?
Was Ruby feeling threatened by the C5 in the garage now and needed some electronic reassurance that you still loved her?
06-13-2011, 07:36 PM
#9
Le Mans Master
Thread Starter
 06-13-2011, 09:39 PM
#10
Le Mans Master

That really is great work. C4's are not easy stereo installs by a long margin. A good buddy of mine had a couple before I knew him and when he helped my do my '06 he was amazed how much easier it was.
 06-14-2011, 05:24 AM
#12
Burning Brakes

I'm going to be doing my upgrade soon also. I just have to get wiring, head unit, and subs/amp. I am planning on putting in 8's also. How do they sound? I'm doing 5.25 components up front instead of 6x9s.
I tried to find a picture online that I have saved, but another member did an install and he hid his amps under the carpet behind the storage bins. He built a surround for them so they could still cool off, but it kept a hidden look. Are you planning to keep your amps mounted like that?
I tried to find a picture online that I have saved, but another member did an install and he hid his amps under the carpet behind the storage bins. He built a surround for them so they could still cool off, but it kept a hidden look. Are you planning to keep your amps mounted like that?
06-14-2011, 08:02 AM
#13
Le Mans Master
Thread Starter

I'm going to be doing my upgrade soon also. I just have to get wiring, head unit, and subs/amp. I am planning on putting in 8's also. How do they sound? I'm doing 5.25 components up front instead of 6x9s.
I tried to find a picture online that I have saved, but another member did an install and he hid his amps under the carpet behind the storage bins. He built a surround for them so they could still cool off, but it kept a hidden look. Are you planning to keep your amps mounted like that?
I tried to find a picture online that I have saved, but another member did an install and he hid his amps under the carpet behind the storage bins. He built a surround for them so they could still cool off, but it kept a hidden look. Are you planning to keep your amps mounted like that?
06-14-2011, 11:29 PM
#14
1994 Admiral Blue ZZZZZR1
John
Wow great job!
Please post up on the ZR1netregistry!
David
Wow great job!
Please post up on the ZR1netregistry!
David
06-22-2011, 09:18 AM
#16
Race Director

Very nice job, you gave me some ideas,,, I have 8" subs in the rear already but I would love to put the 6x9 down low like you did,,,,
do all C4's have the same space to mount the 6x9's down there?
do all C4's have the same space to mount the 6x9's down there?
07-22-2011, 09:35 AM
#17
4th Gear


Member Since: Jul 2011
Posts: 4
Likes: 0
Received 0 Likes
on
0 Posts
This is perfect, excellent job. I've been looking all over the internet for something like this but with no luck. I'm getting ready to redo my sound system all Alpine SPR-69's in the rear and SPS-406's in the front. I'll post my job up when I'm finished.
Thanks for all the help!
Thanks for all the help!
 07-22-2011, 02:32 PM
#19
Le Mans Master
Thread Starter
This is perfect, excellent job. I've been looking all over the internet for something like this but with no luck. I'm getting ready to redo my sound system all Alpine SPR-69's in the rear and SPS-406's in the front. I'll post my job up when I'm finished.
Thanks for all the help!
Thanks for all the help!
07-22-2011, 09:53 PM
#20
Race Director
Rex I really enjoyed looking at all the pics. Not just because you did an excellent install but because I've never seen the inside of a C4 before. It's amazing to see how much the interior has changed from then to now. Thanks for posting.