When you click on links to various merchants on this site and make a purchase, this can result in this site earning a commission. Affiliate programs and affiliations include, but are not limited to, the eBay Partner Network.
I don't post a lot here, so I'll give a very brief back story on my car and my intentions with it, and why I went this route. If you don't care, skip this paragraph. I decided I wanted to sink a little less money into my car hobby and do a little more playing at driving events, so I picked up a higher mile 2003 Z06 with a blown motor. It's going to be a 70% street car, 30% track car, so I wanted some gauges even though it's naturally aspirated. I did some googling and searching on here, but couldn't find much information about installing the triple gauge bezel, but from the few pictures I saw, it looked great. So I called up Dennis, who is extremely friendly and helpful, and he got me squared away. And BTW, with as busy as he is, he was always willing to take plenty of time on the phone and not make me feel rushed during our convo. That said, the fabrication end of this stuff is very hard to explain on the phone, so this had a fair bit of "wing it" going on. I'm attaching the pictures to the thread rather than linking them and integrating them into the post, I've found dozens of useful threads in the C5 section with dead picture links, so I'm hoping this will avoid that. EDIT... After fighting the forum trying to get pictures uploaded, F that. Photobucket it is.
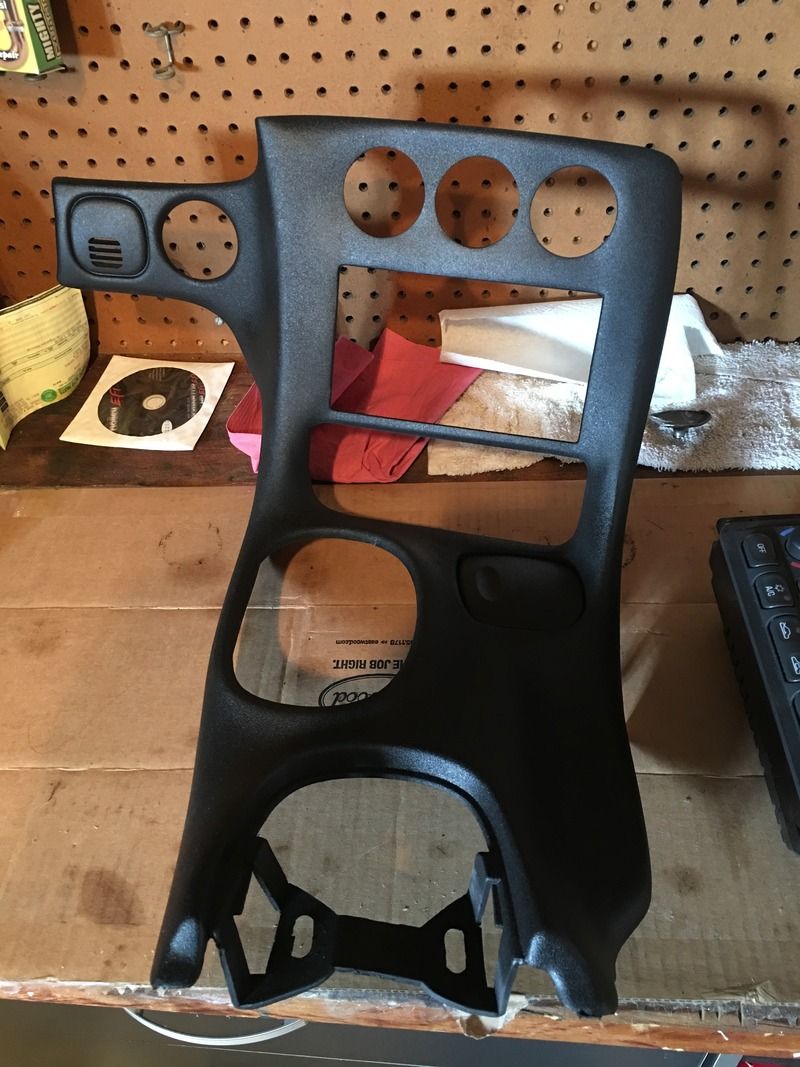
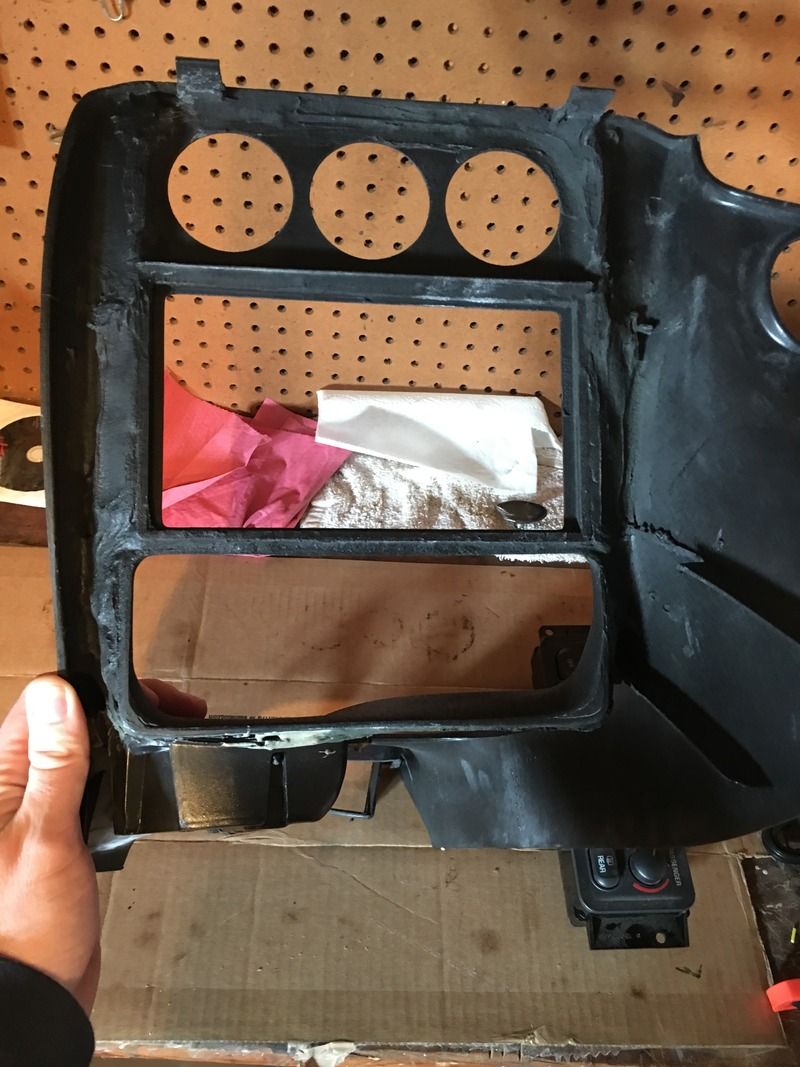
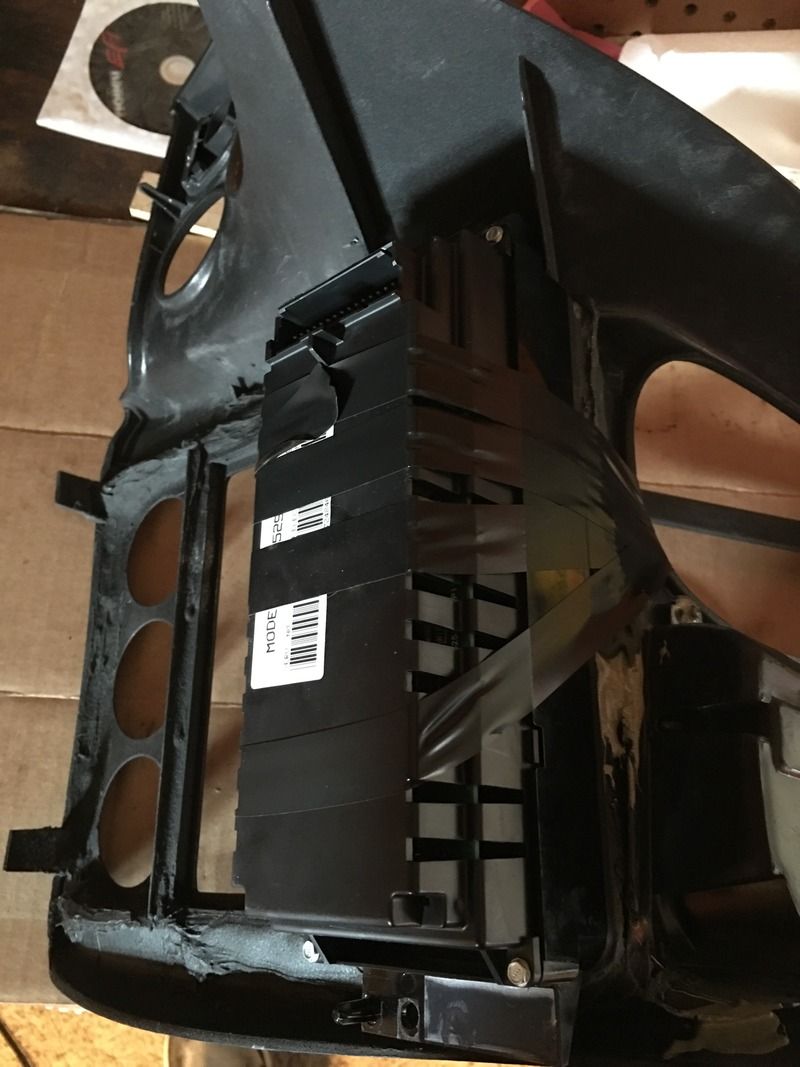
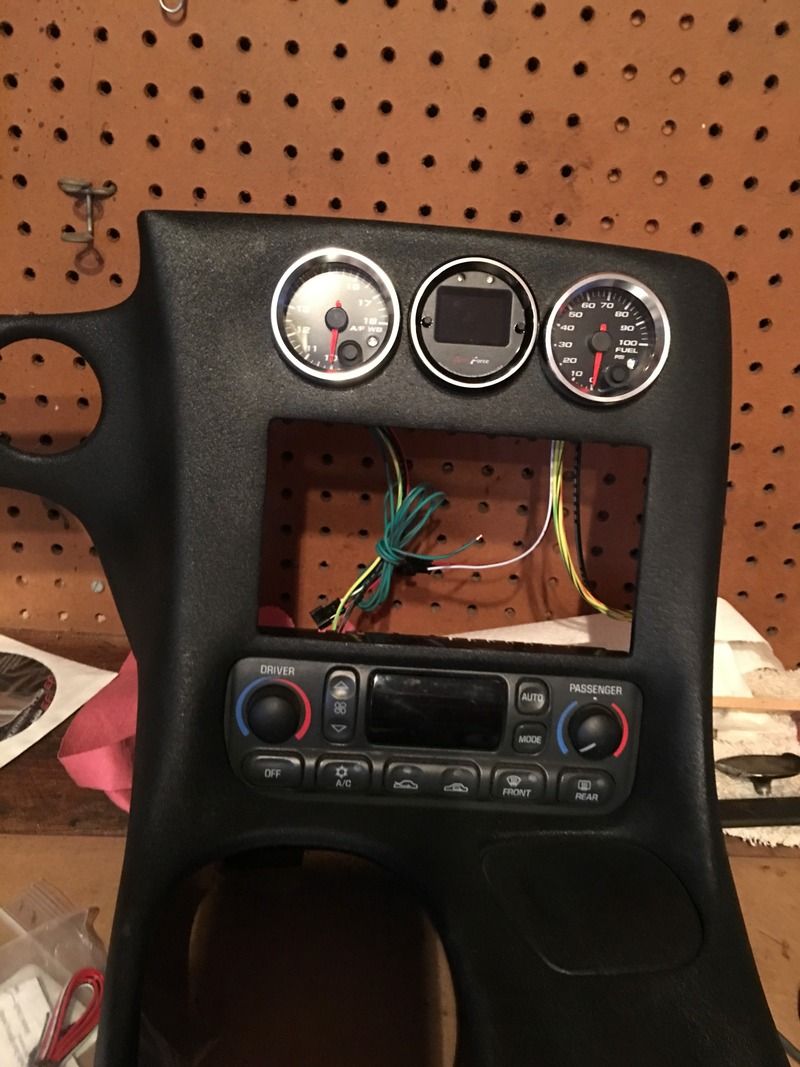
I picked up the rock in a box package from Dennis and upgraded to the 3 gauge bezel. After removing my stock stuff it was pretty apparent some work was going to be involved. Couple pictures of the bezel as it arrived:
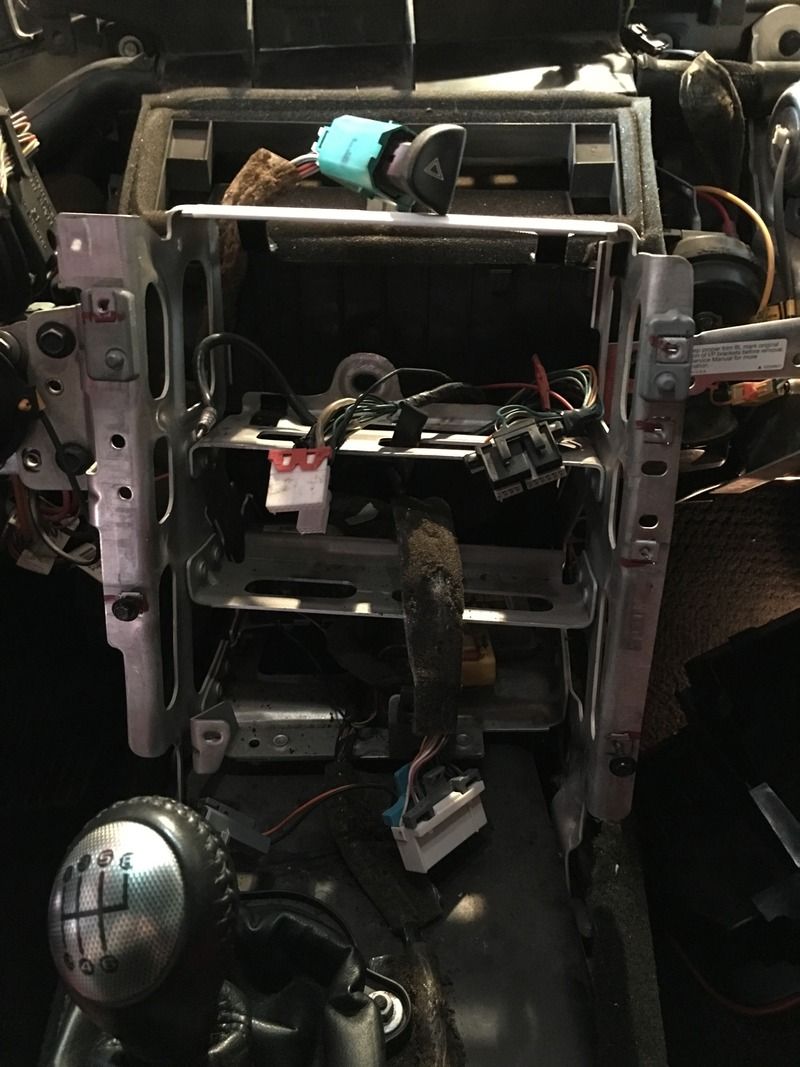
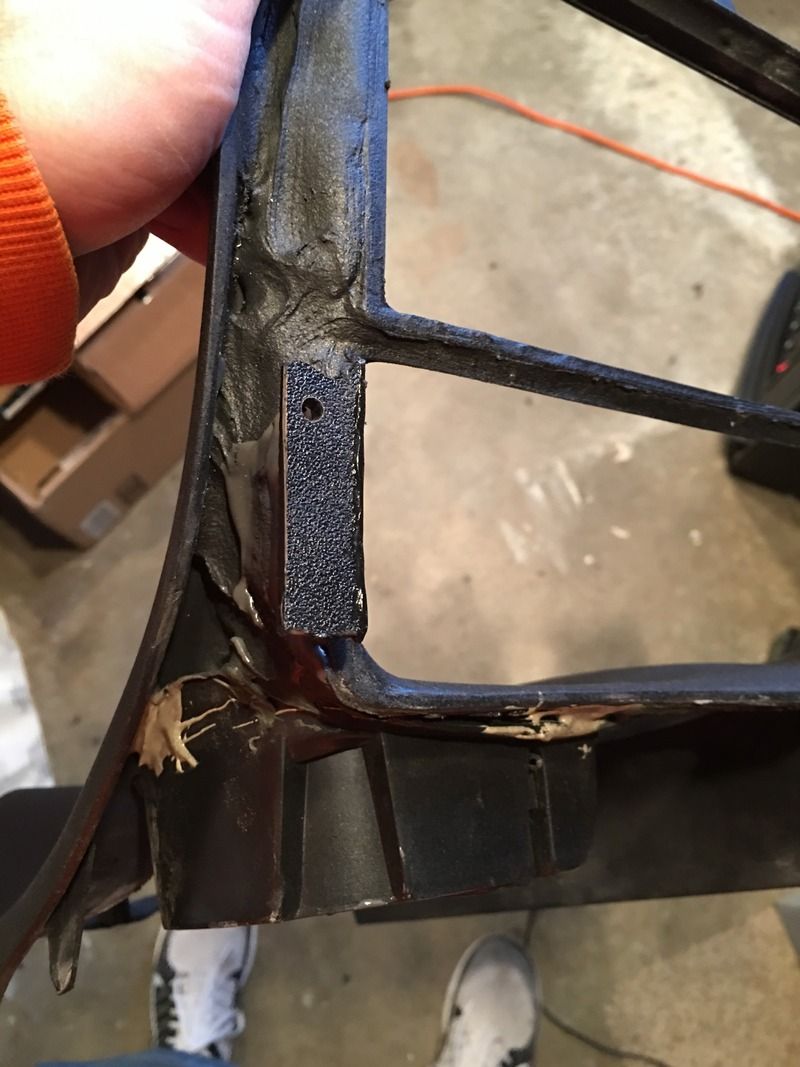
1.) You must cut out the two shelves. I used an air tool to grind off the rivet heads, Dennis mentioned using a sawzall to cut between the shelf and the sides of the "center stack." Attached below is a picture before removing the shelves.
2.) You must remove the brace that held the cigarette lighter and ash tray in place. I realized I didn't take a picture of this, but there are two rivets that hold it in place. I just ground those off and it popped right out.
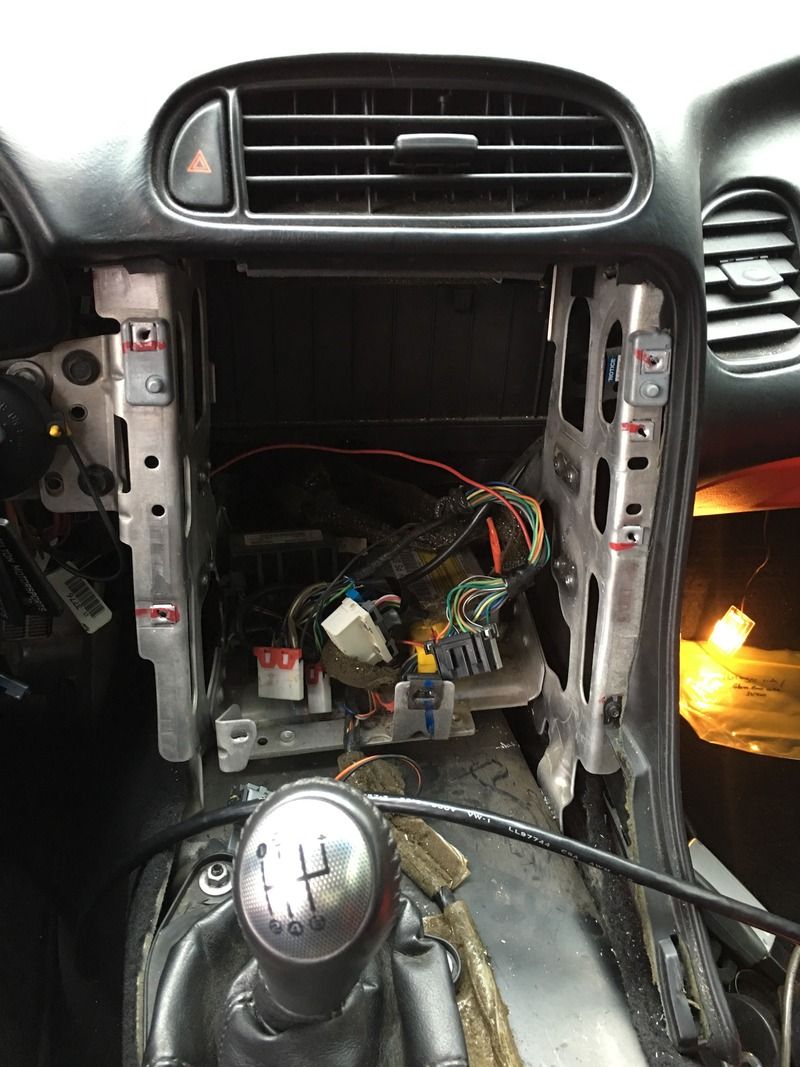
3.) You must make two cuts on each side of the center stack to make room for the mounting tabs on the HVAC controls while it sits in its new location. Note that you must also trim off the dash screw tab, as it's in the way as well. Attached below are two pictures, one of each side with the cuts made.
Before:
After:
Before:
After:
That's all for the trimming portion.
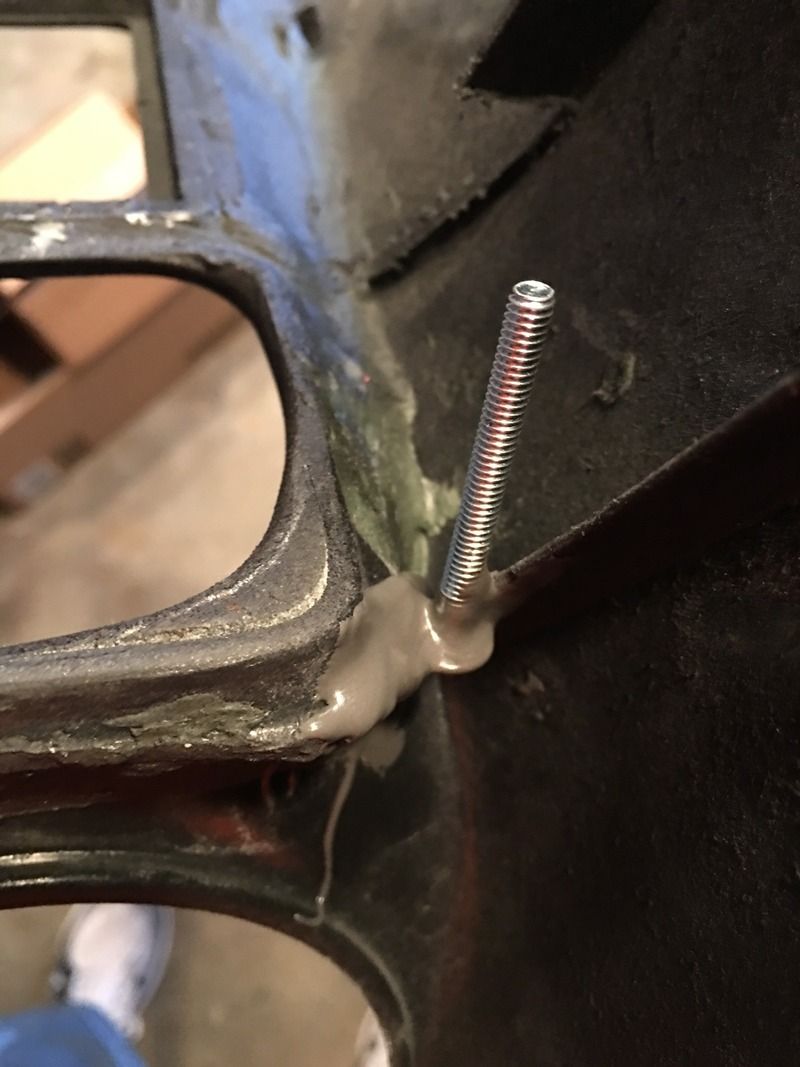
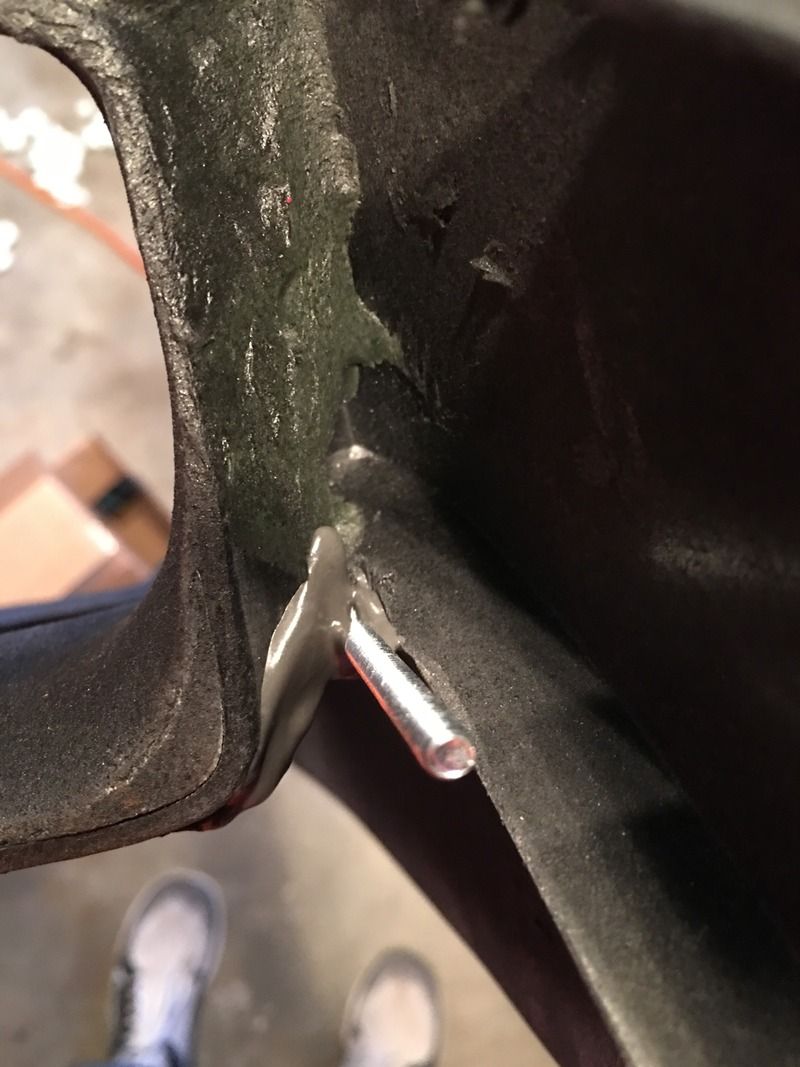
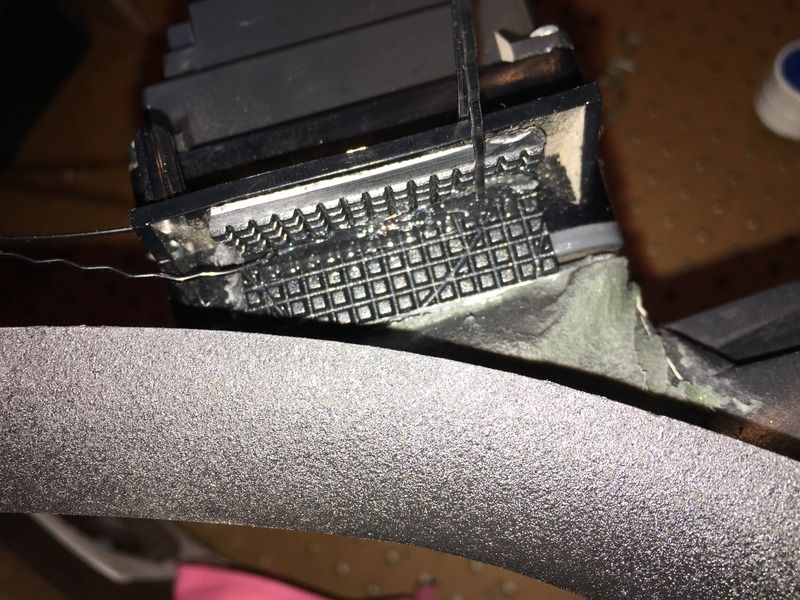
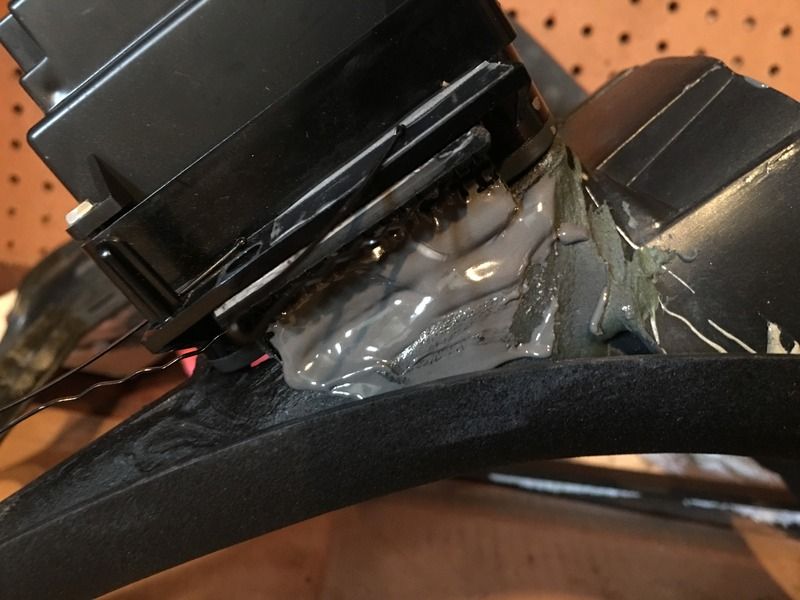
4.) You must attach two studs to the new 3 gauge bezel to mount the HVAC module to it rather than the car. Dennis recommended I use JB Weld, which I did, but you have to make sure you prep the surface still. His epoxy work had texture and I thought that would be sufficient for mine to bite into, but it wasn't. So rough it up with some 60 grit first. The way I located where to mount my studs was by electrical taping it in place to the bezel, then I set my tab or stud in place and applied the epoxy. Note that I decided to trim an angle into this piece later on, it gave a little more clearance from the dash piece along the side as I was sliding it into the dash. I let it sit overnight and while I went to work the next day. I've got several pictures of this process below.
HVAC module taped in place:
Driver's side stud epoxied in place:
I had a little 90* ABS piece from an old CarPC project that I trimmed to work. Grabbed one of the 5000 bobby pins laying around my house to hold it in place.
Added epoxy, note this is what didn't hold due to lack of prep work:
That's all for the extra fabrication work for the bezel.
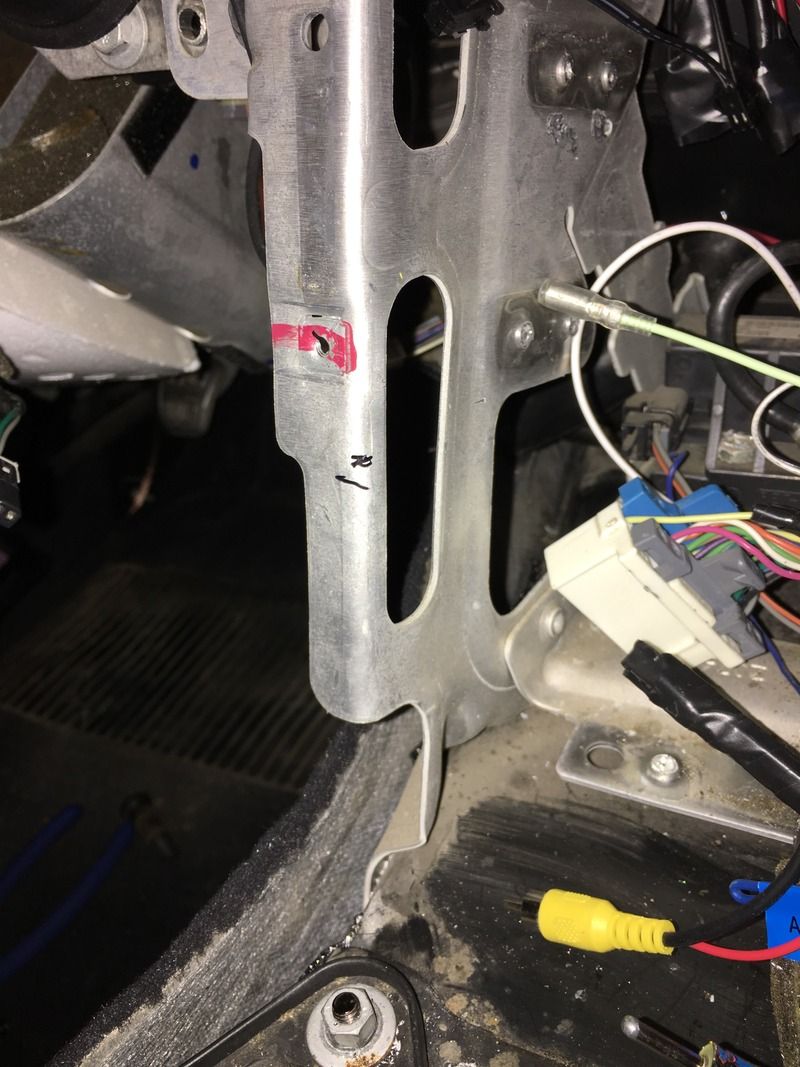
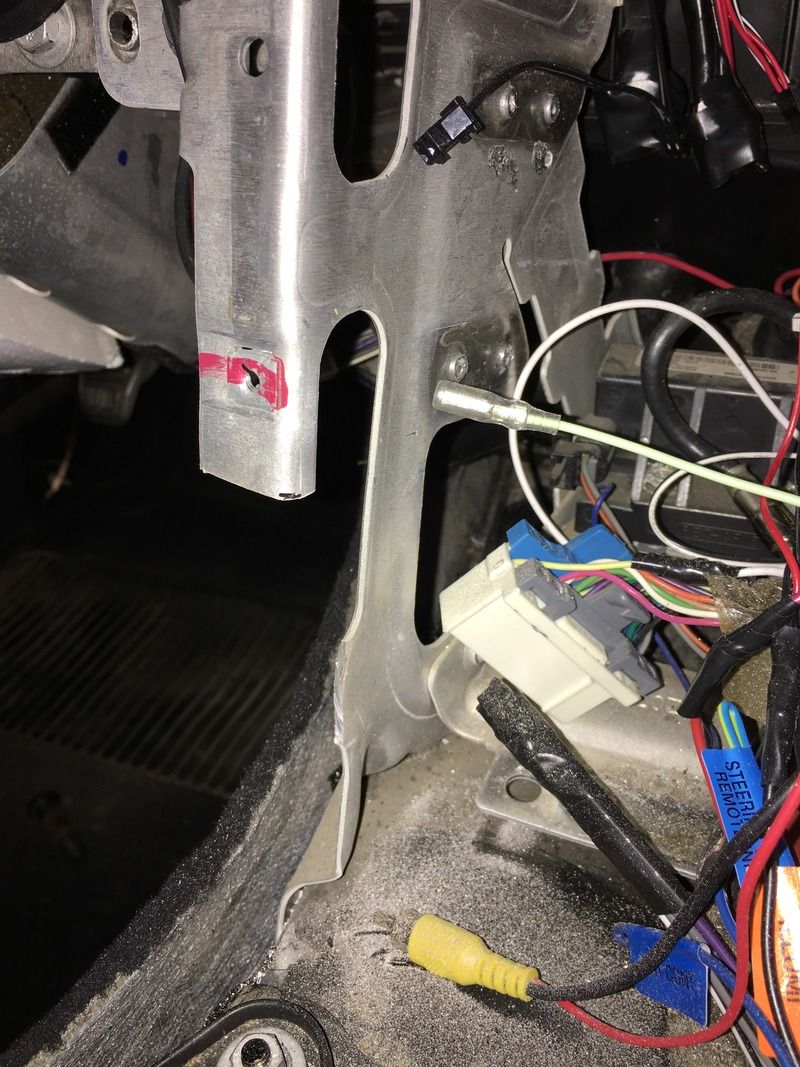
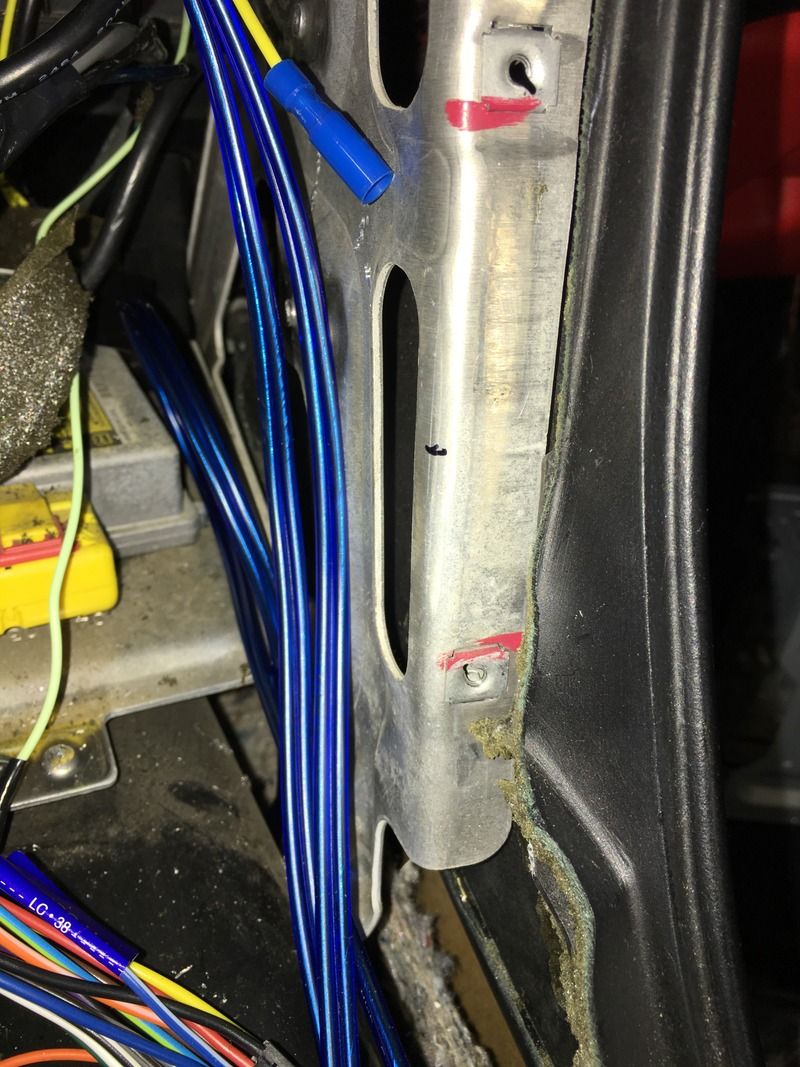
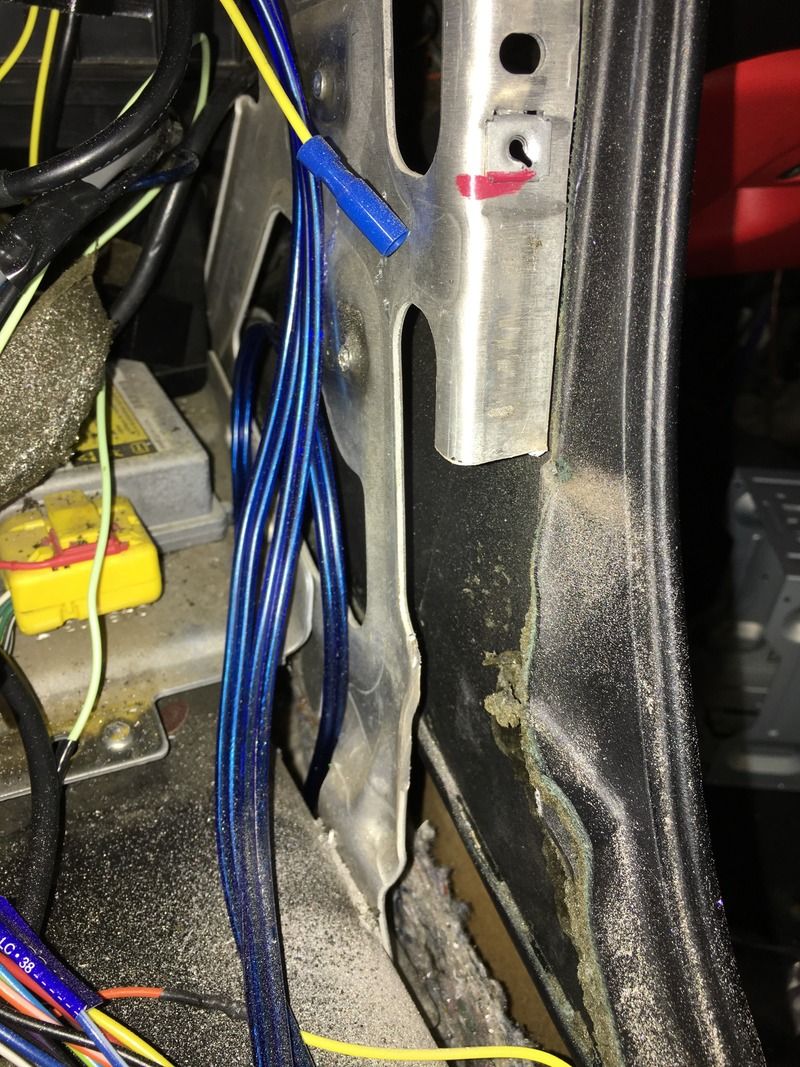
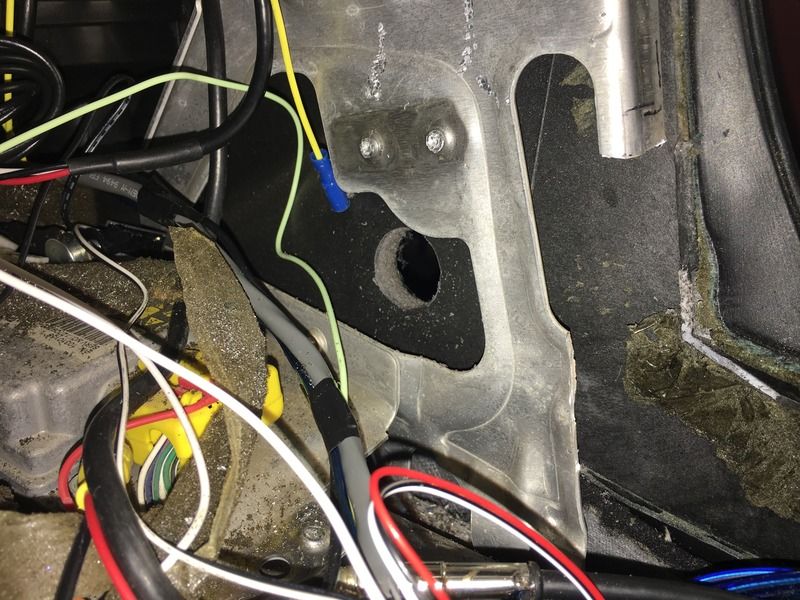
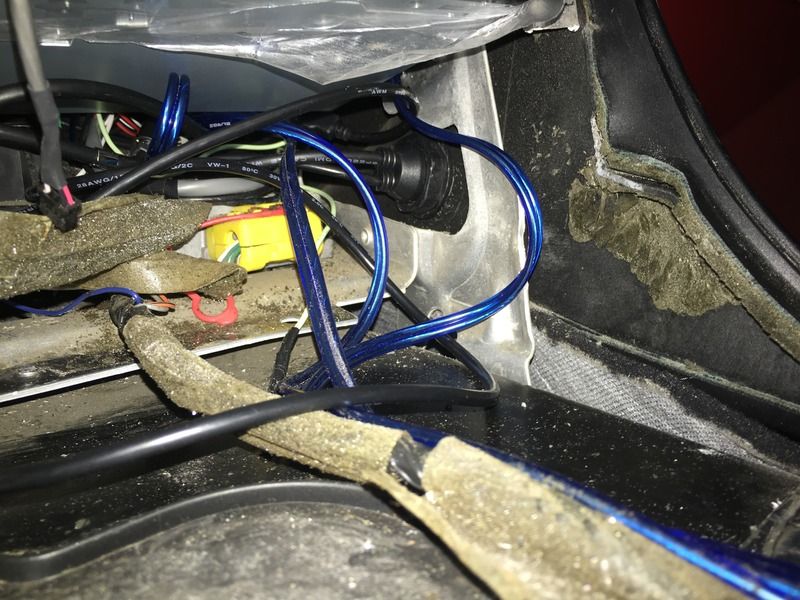
On the wiring end, I tried to keep things simple. I tucked the factory wire harness back behind the airbag modules, and extended the 3 wire bundle up from the passenger footwell. I then wired up the radio, and tapped my gauge accessory power and ground into those wires where I wired them into the radio harness. I tapped the gauge and radio illumination wires into the cream colored wire on the end of the HVAC bundle. I've had no issues with powering my gauges off the same circuit, but note that they are low draw gauges. They're speedhut gauges which according to their data sheet say less than .1 amp draw.
That said, aligning the radio is a pain in the ***! Dennis includes two L brackets for the radio which attach with one screw. There are three locations the L bracket can be attached to the side of the radio, and there is one hole on the front that you run a self tapping screw through into the mounting flange on the side of the center stack. To align this, I removed the HVAC module and held the radio in place (with my hand through the HVAC slot) and slid the bezel into place. I then tried to slide the bezel out of the way enough for me to mark the L brackets with a marker. Problem is, you can't slide the bezel out of the way enough to do that with your hand through the HVAC slot. So my solution was to use a little pressure on the front of the radio to try and hold it still while I slide the bezel out a little further. Issue is, if the L bracket isn't tight enough to the radio, the bracket slides rear ward in the long slot in the L bracket. So you tighten it up a little more to remedy this, and it strips the screw hole on the radio. Fortunately there's two more holes to use. I got it done on the second attempt, and the alignment was just fine. There isn't much room for error here though.
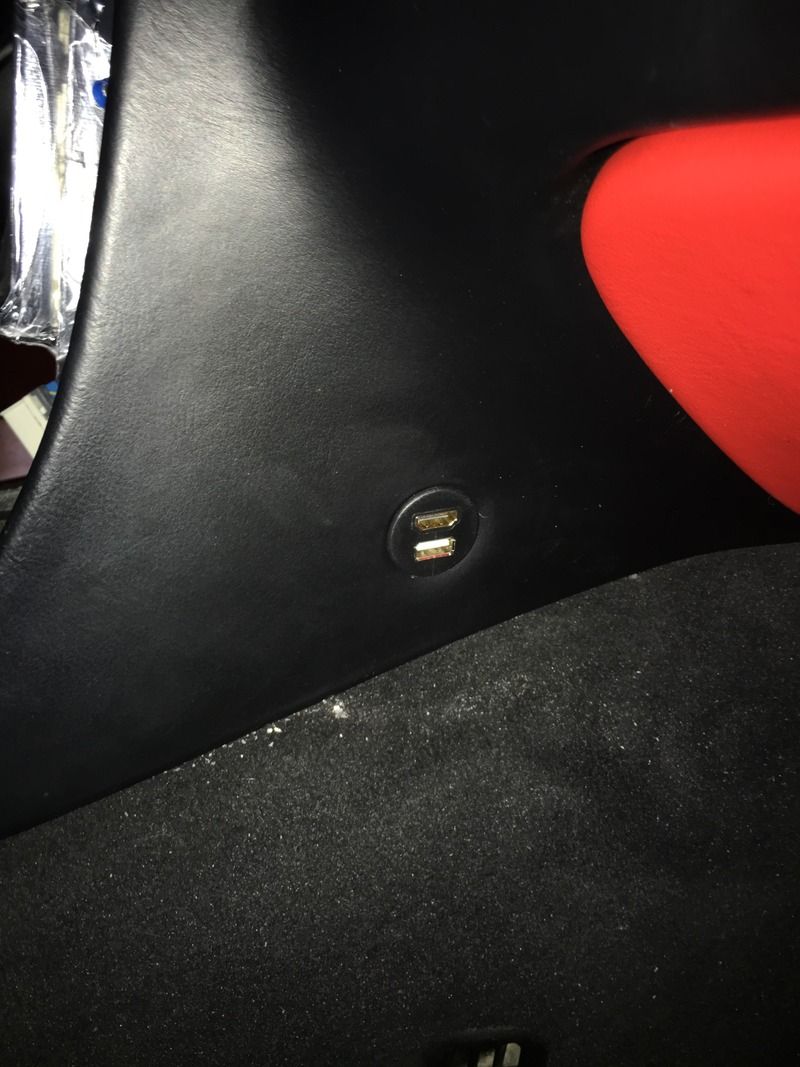
I opted to add a Rerii (think that's how it's spelled) cigarette lighter adapter from Amazon so I could access my USB and HDMI plugs on the radio easier. I didn't want to lose my constant power cigarette lighter plug in the console, so I added it on the side. I'm happy with it.
Used this:
To do this, drilling in from the outside (just didn't take a pic from outside):
Fit like prom night:
I'm going to be changing my shifter boot, so this is as complete of a pic as I have right now, but I'm happy with it. Just took a little more work than I was expecting.
I have wondered what went into the back work of getting everything to line up.
I have been working on mine as well, (similar to yours) and after trying an idea I had, (It worked I just did not trust the materials and did not like the look) I had to rebuild most of my console back, and then come back around to getting everything to fit again which involved a lot of fun like putting my console in the oven. Then hitting it with a torch.
I do a little every day as it takes time to dry and I am multi tasking, and lets be honest, working with plastic just SUCKS!
Anyways I liked seeing how you did the pins etc... Thanks for taking the time to do so. Looks good.
Last edited by bill mcdonald; 03-26-2016 at 03:53 AM.
St. Jude Donor '05-'06-'07-'08-'09-'10-'11-'12-'13-'14-'15-'16-'17-'18-'19-'20-'21-'22-'23-'24
NCM Sinkhole Donor
Very talented, and it looks so professional. Nice write up and pictures of how you accomplished it.
Enjoy the fruits of your labor, others that see it will be jealous.
Bill McDonald, sounds like you've already got it covered, but I've got a broken bezel that was on my car when I got it. If you're trying to rebuild it to factory I'll offer this one up as a sacrificial lamb if you want to patch parts in. What are you using to rebuild it? Epoxy or actual plastic work?
Bill McDonald, sounds like you've already got it covered, but I've got a broken bezel that was on my car when I got it. If you're trying to rebuild it to factory I'll offer this one up as a sacrificial lamb if you want to patch parts in. What are you using to rebuild it? Epoxy or actual plastic work?
I am rebuilding with melted ABS plastic.
I tried bondo and that actually cost me more problems then anything.
I did mine with a used broken bezel 12 years ago.
It cracked after 10 years, so I pulled it and decided to mount my gauges in the console like you have sort of.
I wanted to try something different so I cut the front wide open. After getting almost complete, I ditched the idea and went back to the stock look. I also went back and forth over mounting the gauges on top, or where the AC controller was. Top won.
After doing this it started breaking up. The top cracked and would bend. So I cut it out. rebuilt it with ABS pipe. All alignment tabs broke off, including the top ones to the dash.
This is in the middle of me getting back to where I wanted to be. All stuff is just stacked on top of the AC controller. Nothing is mounted so I can massage the bezel to fit the bracket behind. Ac controller can slide back and forth as well as tilt a little bit which changes everything above it.
I lay on a layer of plastic with a paint brush every day, Let it dry and then sand it down. Slowly building it back up.
This was the middle point. The top beam cracked over and over so I cut it out and used a piece of ABS pipe and a little metal to build it up to not break anymore.
I have the original bezel still. I thought about just using it, but I am almost there.
I was curious if you were actually using plastic, I've done some work with it in the past with CarPC's, but I don't have the time to do all that anymore. Looks like you're getting close like you said, nice job!
Awesome write up OP. I got into my install this weekend and quickly found myself in a pickle. I posted another thread on the Audio/Electronics forum before i scanned down the page and saw your thread.
One quick note: I didnt have to cut out the cage to make the HVAC controls fit. mine was as simple as zip-tying it to the bezel (like your electrical tape), putting the bezel in place and marking where the HVAC control sat. I then drilled new holes in the cage and mounted the HVAC controls to the cage. I didnt have to mount mine to the bezel or cut any of the cage for it to fit.
Unfortunately for me, I didnt have an air chisel to get the rivets out. I had to drill them, and to get to them to drill them required removing the dash pad. It wasnt that hard now that I know how.
Now the stereo is a different issue. And thats where i am stuck. I am looking for a mounting bracket that I can modify and mount to the cage and hopefully get it aligned right.
I opted to add a Rerii (think that's how it's spelled) cigarette lighter adapter from Amazon so I could access my USB and HDMI plugs on the radio easier. I didn't want to lose my constant power cigarette lighter plug in the console, so I added it on the side. I'm happy with it.
Do you have any more information on this? Is this just the USB charger? Or does the USB connect to the stereo. I couldnt find the Rerii adapter on amazon.
Now the stereo is a different issue. And thats where i am stuck. I am looking for a mounting bracket that I can modify and mount to the cage and hopefully get it aligned right.
The stereo you are installing, Did it come with any mounting hardware?
When I mounted it the first time, I made some sheet metal brackets and fit them to those brackets. I even used 4 tiny screws per side.
Could you make something like this, in 2 pieces, and use bolts or whatever to shim it, to get it aligned, then build another one based on that, what, you created?
I have not got to deal with mine yet, but it will be different for sure.
Last edited by bill mcdonald; 04-05-2016 at 01:32 AM.
Yes, all of that would work. Granted, my head unit didnt come with anything like that. But I can probably find materials around the house to build something.
But I am going back and forth with Dennis and trying to find out what I need. He is really busy right now and hard to communicate with, but apparently they sell some sort of bracket that fits my needs. Will report back when I get an answer from him.
I still havent gotten an answer from Dennis, but it looks like he sells the Metra 99-3045 on his website. I ordered one of them and will see if it has the adjustability that I need to get the head unit mounted.
^
I don't see those brackets working out well for you
I could see how you would want these brackets.
They look similar to what I made.
2 pieces. His allow for aligning. I made sure mine was right before I drilled.
^
I don't see those brackets working out well for you
I could see how you would want these brackets.
They look similar to what I made.
2 pieces. His allow for aligning. I made sure mine was right before I drilled.
I agree, but Dennis said they would NOT work. I still dont have an answer from him on what will actually work.

 03-25-2016, 10:22 AM


 Very talented, and it looks so professional. Nice write up and pictures of how you accomplished it.


