
Dry sump plumbing?
 03-03-2010, 12:43 AM
#41
Melting Slicks


As far as the question about the hose the Pro-lite does have its advantages, easier to work with, more flexible (which concerns me a little using the large diameter steel braid in the short line running from the pan to the tank) and less expensive. As my experience was that the hose didn't have a good clean path past the sharp edged protrusions on the block, through the p/s lines and near pulleys, ect. Also if I picked up a piece of metal debris with the RF tire could it go flying through and cut one of the two lines going from the pan to the sump? that's like the equivalent of a big jugular vein hanging down there

I will probably change to solid motor mounts soon to eliminate some of the problems that could be caused by movement of the engine and oil lines in relationship to the rest of the car.
 03-03-2010, 08:09 AM
#42
Burning Brakes


For Tank mount; Fabbed bracket that you cant see out of 1" angle and welded to frame. Good idea to remove ECU as you will be welding right next to it. This is a ARE 3 gal tank, tight fit but it will go with some relieving of the firewall flange.
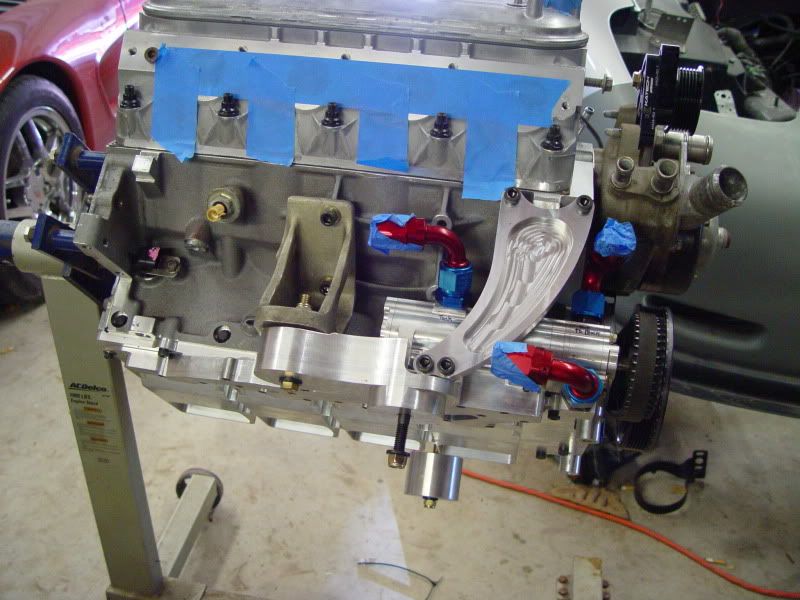
This is the mount we had to build to clear the Dailey pump.
Integral scavenge passages. No plumbing on suction side!
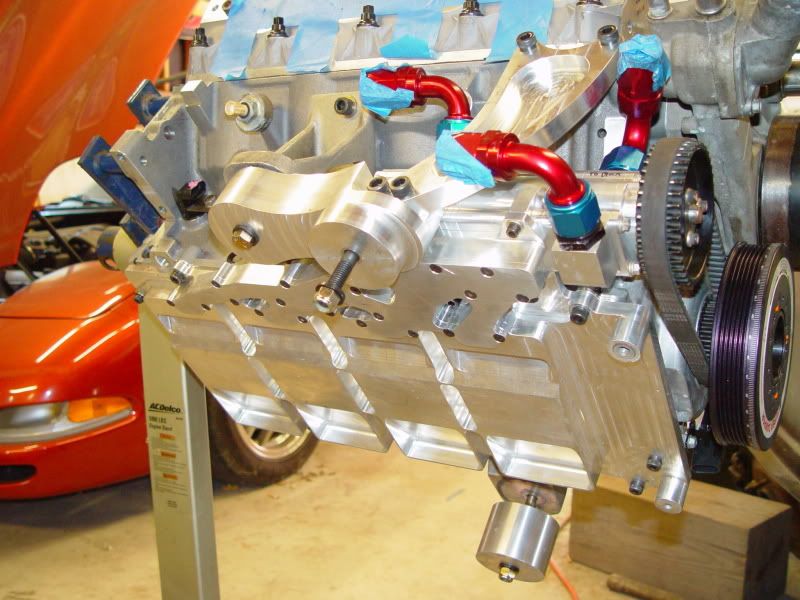
This is the mount we had to build to clear the Dailey pump.
Integral scavenge passages. No plumbing on suction side!
03-03-2010, 09:10 AM
#43
Drifting


Thread Starter
 That is a sweet pan/pump combo. Nice setup!
Thanks for the photos, did you have to move the PCM? or remove the bracket the battery try sits on? My tank is not here yet so its hard to visualize what needs to be done.
03-03-2010, 10:19 AM
#44
Burning Brakes
Got a great deal on used pan, new they are out of my realm.. Dailey said he has some used pans.. Yes must cut off battery tray bracket. And no did not relocate PCM but remove it when you weld next to it!
03-03-2010, 04:05 PM
#45
Advanced


Member Since: Aug 2004
Posts: 99
Likes: 0
Received 0 Likes
on
0 Posts

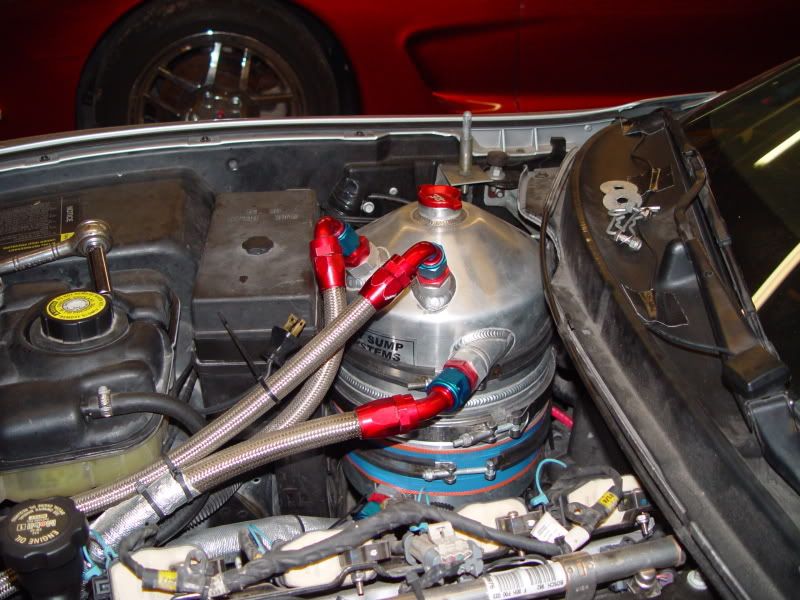
Looking at your tank installs, I don't see a breather. Is that what the third hose on the tank is for ? In my experience a big high flowing breather setup is essential when using a multi-stage dry sump pump, they push a lot of air into the tank. (On the Z06 they seem to get away with a fairly standard PCV setup because, I assume, the oil pump is more of a stock based unit that is just pumping oil from the pan vs a multi-stage setup where there is more scavenging. In other words the Z06 tank just has a vent line to the valve covers and a vent source line from the filtered air inlet, and the PCV pulls through the valve covers and out the manifold valley into the throttle. )
Just wondering what you're doing for tank breathing, especially for the guy who has the tank in the trunk. Is a single -12 line really big enough especially if it travels a long ways ?
Just wondering what you're doing for tank breathing, especially for the guy who has the tank in the trunk. Is a single -12 line really big enough especially if it travels a long ways ?
03-03-2010, 05:24 PM
#46
Former Vendor
Looking at your tank installs, I don't see a breather. Is that what the third hose on the tank is for ? In my experience a big high flowing breather setup is essential when using a multi-stage dry sump pump, they push a lot of air into the tank. (On the Z06 they seem to get away with a fairly standard PCV setup because, I assume, the oil pump is more of a stock based unit that is just pumping oil from the pan vs a multi-stage setup where there is more scavenging. In other words the Z06 tank just has a vent line to the valve covers and a vent source line from the filtered air inlet, and the PCV pulls through the valve covers and out the manifold valley into the throttle. )
Just wondering what you're doing for tank breathing, especially for the guy who has the tank in the trunk. Is a single -12 line really big enough especially if it travels a long ways ?
Just wondering what you're doing for tank breathing, especially for the guy who has the tank in the trunk. Is a single -12 line really big enough especially if it travels a long ways ?
 Not really but you get the point.
Randy
 03-06-2010, 12:13 PM
#49
Former Vendor
03-06-2010, 01:22 PM
#50
Melting Slicks
Hope it helps.
I used the LS7 pan from Gary @ A.R.E. and a custom tank from Peterson..ther are down the street from us in Commerce city.
They can build you anything you like and they have a showroom that you can buy fittings over the counter.
They have a large assortment of fittings from Earls and frangolia. If they are unused and you have your ales receipt, you can return them.
good luck!
03-06-2010, 06:15 PM
#51
03-07-2010, 01:40 PM
#52
Next question guys...
I've got 2002 C5 Z06 and will be installing the 3gal (15"x9") tank where the battery went. Did anyone need to relocate the ECM. I've got the fender off and there doesn't seem to be many choices if necessary.
Thanks,
Chuck
I've got 2002 C5 Z06 and will be installing the 3gal (15"x9") tank where the battery went. Did anyone need to relocate the ECM. I've got the fender off and there doesn't seem to be many choices if necessary.
Thanks,
Chuck
03-07-2010, 09:52 PM
#53
Drifting
Thread Starter
JVetthead, the photos of the tank rock! But I can't really make out the bracket you made. Any other photos or tips on it? I assume it comes up from the frame for a bit so you can attach the ARE brackets that go around the tank. But, where? Just above the PCM? Did you weld one of the flat sides or the two edges? Just a straight piece of angle iron or some other pieces of steel?
Hit an issue, I could only get two of the scavenge lines inside of the stock motor mount, and I don't see how to get the thrid with them. Anyway, I routed the line outside the motor mount, but when I put the sub-frame back on it hits the 90 fitting coming off the pump. I guess I can try a 120 and see if it clears but it will be close, anyway it looks like I'll be re-aranging the scavenge lines.
03-08-2010, 09:36 AM
#54
Burning Brakes
I cut the bat bracket off with a sawzall and ground the sharp edges. I did not get pics of the tank bracket but it comes off the frame horisontal (sp) and then vertical to the mounts L shaped. If you are running stock style hood you will prolly have to relieve the hood inner reinforcment. The 2 fittings on top of the tank in pics are contacting my CF hood so you should use a 90* fitting on tank and a straight or angled hose end to help there. I just have not done that yet. I think you can get a o-ring to -10 90*
Joe
Joe
 03-08-2010, 10:01 AM
#57
Melting Slicks
03-08-2010, 01:45 PM
#58
Burning Brakes
heh.. Its a tight fit in every direction... I glued thick sheet rubber gaskit material on the frame rail where the bottom of tank rest. That will prevent chafing thru tank. Do this anywhere tank contacts metal or any sharp edge...
03-13-2010, 11:15 AM
#59
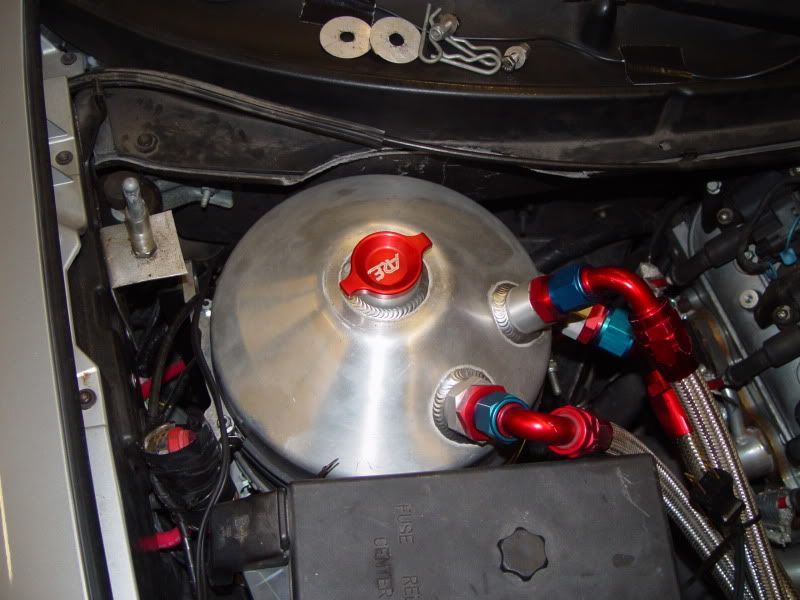
So this is how i wanted to mount my remote filter

or this...
But on my C5 Z06 the line/hose from the pwr steering pump to the rack is in the way. I'm sure i could get another line but it looks like more trouble than its worth if i can just go with this option...
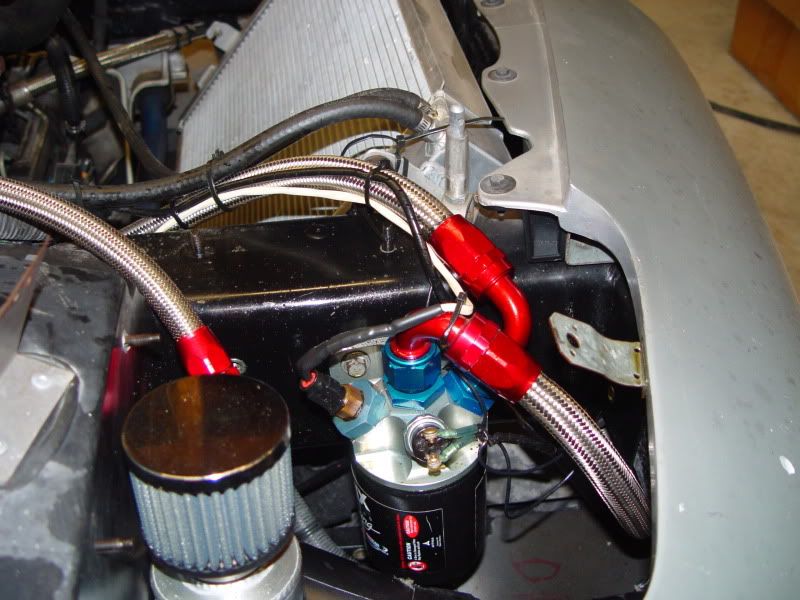
The C6Z must have more room is this area than the C5...thoughts from others???
I don't have headlights so this option be would be simple. The first option just looks more tasteful
or this...
But on my C5 Z06 the line/hose from the pwr steering pump to the rack is in the way. I'm sure i could get another line but it looks like more trouble than its worth if i can just go with this option...
The C6Z must have more room is this area than the C5...thoughts from others???
I don't have headlights so this option be would be simple. The first option just looks more tasteful

